Powering a Android Device From Wall Adapter (And Making It Think Its Charging in Software)
by iJustMakeHere in Circuits > Reuse
5923 Views, 19 Favorites, 0 Comments
Powering a Android Device From Wall Adapter (And Making It Think Its Charging in Software)

I would like to share how I powered my old MiPad2 using a DC wall adapter and made it think it is charging in software! My primary motivation for sharing this is the fact that I haven't found any materials covering this and I am a huge fan of upcycling old smartphones and tablets
Disclaimer - Making this project can potentially destroy/brick your device and I'm not responsible for that.
Note: I highly recommend you watching the GreatScott's video on this topic since this project is similar but lets you keep using the device's USB port and In my opinion, looks cleaner.
Backstory:
For a long time, I had an old MiPad2 laying around without actually using it primarily because it undervolted one of its battery cells causing it to not hold charge for very long so it was practically unusable as a tablet.
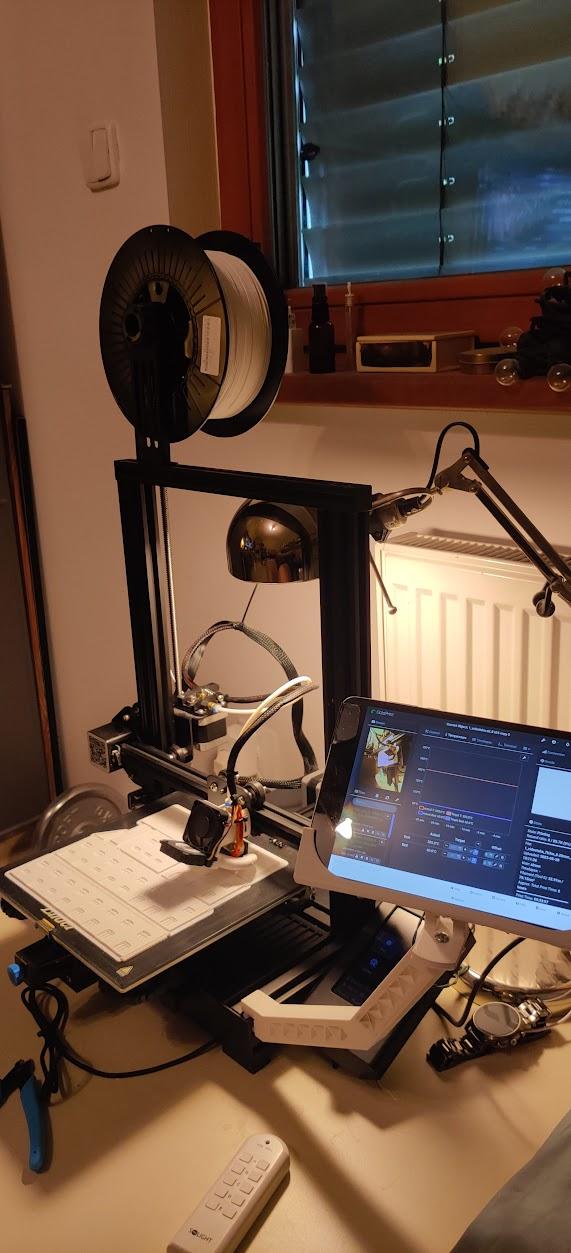
I've played around with the idea of using it as a heads-up display for my calendar or something like that but then I found the Octo4a project by feelfreelinux and I really liked the idea so I knew my Ender3v2 3D printer is about to get an upgrade.
After a lot of pain trying to figure out how to charge the tablet while using it as an OTG host, I've found out that many devices simply don't support this. To make matters worse I also found that this is not a software limitation so i wouldnt be able to fix this with root.
So I've decided that since the battery in my tablet is dead anyway I can just drill a hole to the back of it and power it from the wall similar to what GreatScott did in his video but I had to solve the problem that Android OS doesn't really check the battery voltage to figure out its percentage meaning that the device would think it's discharging even though its connected to the power supply I had to somehow trick it to think its charging without it actually charging in software.
Supplies
AndroidDevice - MiPad2
WallAdapter - ended up using 12V 1.5A I had laying around
- This adapter must be able to provide enough power this will depend on your device for my MiPad2 I needed to be able to provide 10W continually with 15W spikes without the adapter heating up
- USB adapter didn't cut it for me (It might be possible to use USB C power delivery breakout board but I didn't had any lying around)
- Selecting weak DC Wall adapter will cause the device to not turn/ bootloop or randomly shut down.
Adjustable DC-DC power supply (DC/DC PSU) - used this one
- Same as the adapter it must be able to handle the required power
- Must be able to adapt the voltage of the power supply to your device requirements I was stepping it down to 4.2V which gave me about 60% charge reading.
Capacitor - ended up using 50V 1000uF (keep in mind this is probably overkill)
Cables, soldering iron, solder
Multimeter
Lab bench power supply - is nice to have so that you can test your power requirements easily.
Disassamle Your Device
Search the internet for a tutorial on how to disassemble your device. There is a high chance that you will find a good tutorial on Ifixit.
Once you have access to your battery, unplug its connector and remove the battery using pull tabs if they are there if not I would recommend dropping a few drops of isopropyl alcohol around the battery perimeter which softens the adhesive. Then carefully pry the battery from the adhesive making sure to not bend it or puncture it using a plastic pick.
Please, do this outside and be careful doing this, breaking or puncturing the battery may cause it to burn or explode and put out toxic fumes.
Retrieving the Battery Protection Curcuit With the Battery Connector
Unwrap the battery like shown in this part of the GreatScott's video and measure the voltage on the battery terminals to find positive and negative pads and mark them. Then desolder the battery terminal from the battery and dispose of the battery in the local recycling center ( lipos in trash cans cause many fires in landfills and we don't want that ).
In my case, the battery wasn't soldered but rather spot-welded onto the battery protection circuit so I had to cut the battery terminals as close to the circuit as possible. My device had two separate cells so I just soldered positive to positive and negative to negative to trick the battery protection circuit making it think both cells are connected and working.
Then solder long enough and thick enough wires to the battery protection circuit and create a hole for the cables in the device chassis.
Connect the DC-DC Powersuply to the Adapter and Measure


Turn the charge regulator and constant current regulator potentiometers on your power supply to the max and solder the DC/DC PSU input to your DC wall adapter leads minding their polarity.
Measure the output of the DC/DC PSU and turn the voltage regulator potentiometer until you get voltage in the operating range of your device's battery.
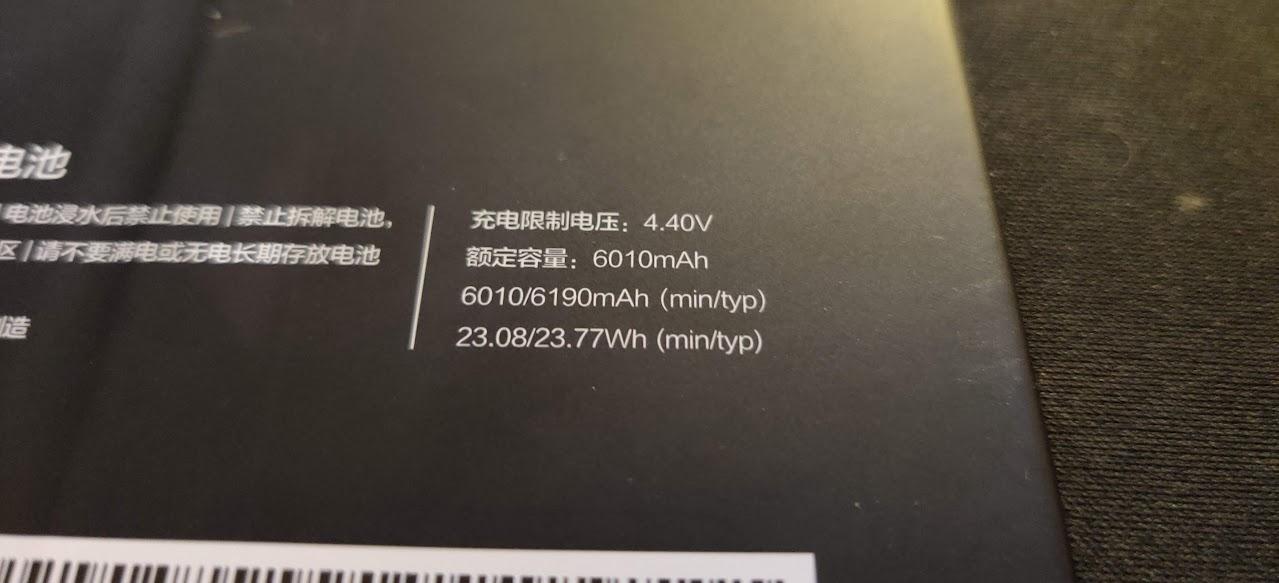
For me, the battery operating range was 3.5V - 4.4V so I went with 4.2V.
Note that this will depend on your device the battery range is usually printed on the battery.
Connect the Battery Connetor, Secure the Cables Inside the Device and Close the Device
Some devices won't work without the back cover, so secure the cables inside the device, I used electrical tape to tape them down in the battery compartment and lead the cables through the cable hole you've created.
Connect the Capacitor Paralel to the DC/DC Powersupply Output

Solder the capacitor in parallel to the DC/DC PSU output mind the polarity.
The capacitor helps even out DC/DC PSU output which is not perfect it caused my device to boot loop.
Measure the Device Power Consumption
I would strongly recommend measuring how many Amperes is your device pulling before using this adapter. Selecting a weak adapter can cause your device to boot loop or randomly shut down. I would also check if the adapter is not getting hot. If it is, use a stronger adapter. Many of these adapters are not particularly high quality they might catch fire if overloaded for a long time. I would really strongly recommend using overpowered adapter rather than a underpowered one.
Device Works!... But the "battery" Is Discharging... :(

Test your device, it should work now. Try running some benchmarks to find if the device doesn't randomly shut down due to a weak power supply. If you don't mind having to turn on your device manually from time to time you can end here.
But if you mind it, or you need this device for 'critical applications' like me, this discharging isn't an option... For me, octo4a controls my 3D printer, and if it turns off while printing the print is ruined... and that is simply UNACCEPTABLE!
Software Preparation

Note: I work on Windows so i will use a windows console and probably shortcuts
Download SDK Platform Tools from here. Once downloaded, unzip them. Open the folder and inside you should see the platform-tools folder. Go into platform-tools folder.
Hold shift and click inside the folder and click on Open PowerShell window here.
Once it's opened you can test if adb works by pluging in your device and typing:
adb devices
this should bring up a list of connected devices.
The Easy - Temporary Way (No Root)


This is a way to temporarily trick the device to think it's charging, but this will only work until your device doesn't reboot. Then the device will discharge again until you don't repeat this step.
The upside of this approach is, that you do not need a root on your device which can be scary for many people.
To do this, you enter the following commands into your the opened console:
adb shell dumpsys battery set level 42
- This command sets your battery level to 42 percent, you can set it to whatever you want.
adb shell dumpsys battery set status 2
- Sets battery status to charging
adb shell dumpsys battery set ac 1
- This command makes the device think it's plugged in.
adb shell dumpsys battery set usb 1
- This command makes the device think it's plugged into USB.
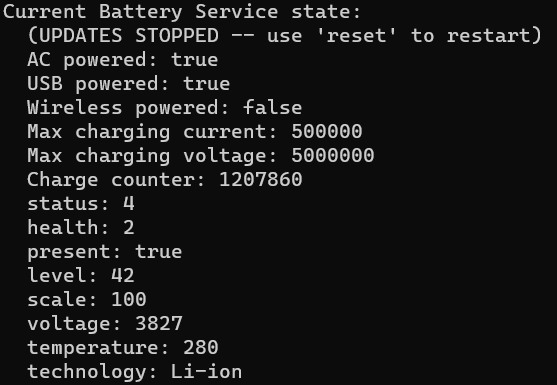
There is no response to these commands in the console, but you can validate it via typing:
adb shell dumpsys battery
The response should look something like the picture. The important part is that AC powered is true, USB powered is true, and the level is set to the number you've picked (42 for me).
Now when you unplug your device and look at the battery it should say it's charging even though it's unplugged.
That's it, if you do not mind doing this every time your device restarts you are done! :)
But remember, your device will restart every time there is a power outage or even a short surge in the grid.
If you want to revert this you just type:
adb shell dumpsys battery reset
The Root - Permanent Way
For the root way, you will need to root your device using Magisk (it might work using other ways of root as well but I've used Magisk), I won't go into detail on how to do it but you should be able to do it googling "how to root *insert_your_device_name* using magisk" the links below are the ones I've used might be helpful for you as well.
How to install TWRP Recovery on MiPad2
Xiaomi Mi Pad 2 TWRP Recovery and How to Root Guide
Download Latest Magisk zip v25.2 and Magisk Manager 8.0.7 and Root your phone
Creating a Bash Startup Script
The main feature that enabled me to achieve this is the ability of Magisk to run startup scripts. Basically, the idea is that we run the commands from step 9 each time the device boots so that it always thinks its charging and has enough battery to run continually.
the startup_scripts.sh looks like this :
#!/bin/sh

# to make sure we aren't running in an early stage of the boot process
sleep 30

# Set battery level to 42
su -c "dumpsys battery set level 42"


# Set charging status to true
su -c "dumpsys battery set status 2"


# Set usb status to true
su -c "dumpsys battery set usb 1"


# Set ac status to true
su -c "dumpsys battery set ac 1"
You need to create a new text file on your computer and paste this in, then you need to copy this code into it and then rename its extension name (.txt) to .sh. I've named my script startup_scripts.sh so that's what I'm gonna call it in the next steps...
Moving the Script to the Device and Setting Its Permissions
Now all that's left is to move the script we just created to the required folder.
The Magisk tool runs scripts inside the data/adb/service.d folder and runs them on startup automatically. The only issue is that we don't have permission to move files there from the console using adb push so we need to copy it sdcard folder first then move it to the desired location.
You need to copy the startup_scripts.sh to the platform-tools folder and then open the console again and type:
adb push startup_scripts.sh /sdcard/
this moves your startup_scripts.sh into the sdcard folder in the device.
adb shell su
opens super-user terminal inside the device.
mv /sdcard/startup_scripts.sh /data/adb/service.d/
moves the script from the sdcard to the desired location /data/adb/service.d/
chmod 755 /data/adb/service.d/startup_scripts.sh
sets the required permissions to our script
Note: from what I've read on the internet for some people the chmod 755 command return "Bad mode" if that's the case i would try
chmod +x /data/adb/service.d/startup_scripts.sh
Now close the terminal and enjoy your new now batteryless tablet :).
Bonus: Adb Over Wifi Allways On?
I've also found a cool app which lets you have adb over wifi always on on specified network and i thought its worth mentioning. Its called WiFi ADB - Debug Over Air. In the settings you can set trusted wifi SSIDs and you can connect to it by running adb connect {ip.address.of.the.device}:5555