Procedural Lava Shader in Blender
by qwertyboss in Design > Digital Graphics
882 Views, 6 Favorites, 0 Comments
Procedural Lava Shader in Blender


In this Instructable, I'm going to be showing you how to make a procedural lava shader in Blender. While it may seem pretty insignificant and unappealing, I have used it to render a lava-texture wallpaper for my phone! If you would like to do the same, Read on!
Supplies

To make this texture the only thing you will need is to have Blender 3D installed on your computer. As Blender is pretty resource-heavy, a capable computer will make the process quicker, but it is not inherently necessary to make the texture.
Setting Up the Sphere


Upon opening Blender, you will be greeted with the scene shown in the first picture. Start by clicking on all of the objects and deleting them to start with a clean slate
To make our lives easier during the process of shading, add a sphere to the scene by executing the shortcut "Shift-a", and clicking on mesh, then UV sphere.
You may notice that our sphere is faceted, which is not desirable. We can change this by selecting edit mode in the top left corner, left-clicking on the sphere, and subdividing, followed by clicking on the small menu and maxing "smoothness" to 1.
Now go back to "object mode" in the top left, right-click on the sphere, and select "shade smooth".
Congrats, you now have a smooth sphere!
Setting Up the Shader


You will now want to head over to the "shader" tab, where all of the shaders are created. Next, click on the top right dropdown menu next to the small spheres, and change the World to "studio light". you will also want to decrease the world opacity to 0, and strength to 1.
Now click on the "new" button under the viewport, and we are ready to start making the Shader!
Lava Shader


You will now want to add the following nodes to the area, not connecting any of them yet: Texture coordinate, mapping, noise texture, emission, mix shader, bump, and color ramp (Principled BSDF and Material output were automatically inserted when making new texture).
You will now want to connect the nodes as shown in the picture attached. You may notice that we are not seeing anything yet, but don't worry, we're almost there. While hovering over the sphere, type "z" on your keyboard, and then press 8. This will change the viewport to render view so we can see the shader.
Now, it's just a matter of changing values, making it look like actual lava. I would start by changing the emission shader to a red-orange and increasing the power to 10. Next, go ahead and shift the left slider of the color ramp node near the middle, so as to get a better balance between the molten lava and obsidian.
Now, try playing around with the noise texture attributes until you get something that you like. I think that something along the lines of 4 scale, 15 detail, and 0.4 roughness works pretty well, but it all comes down to personal preference.
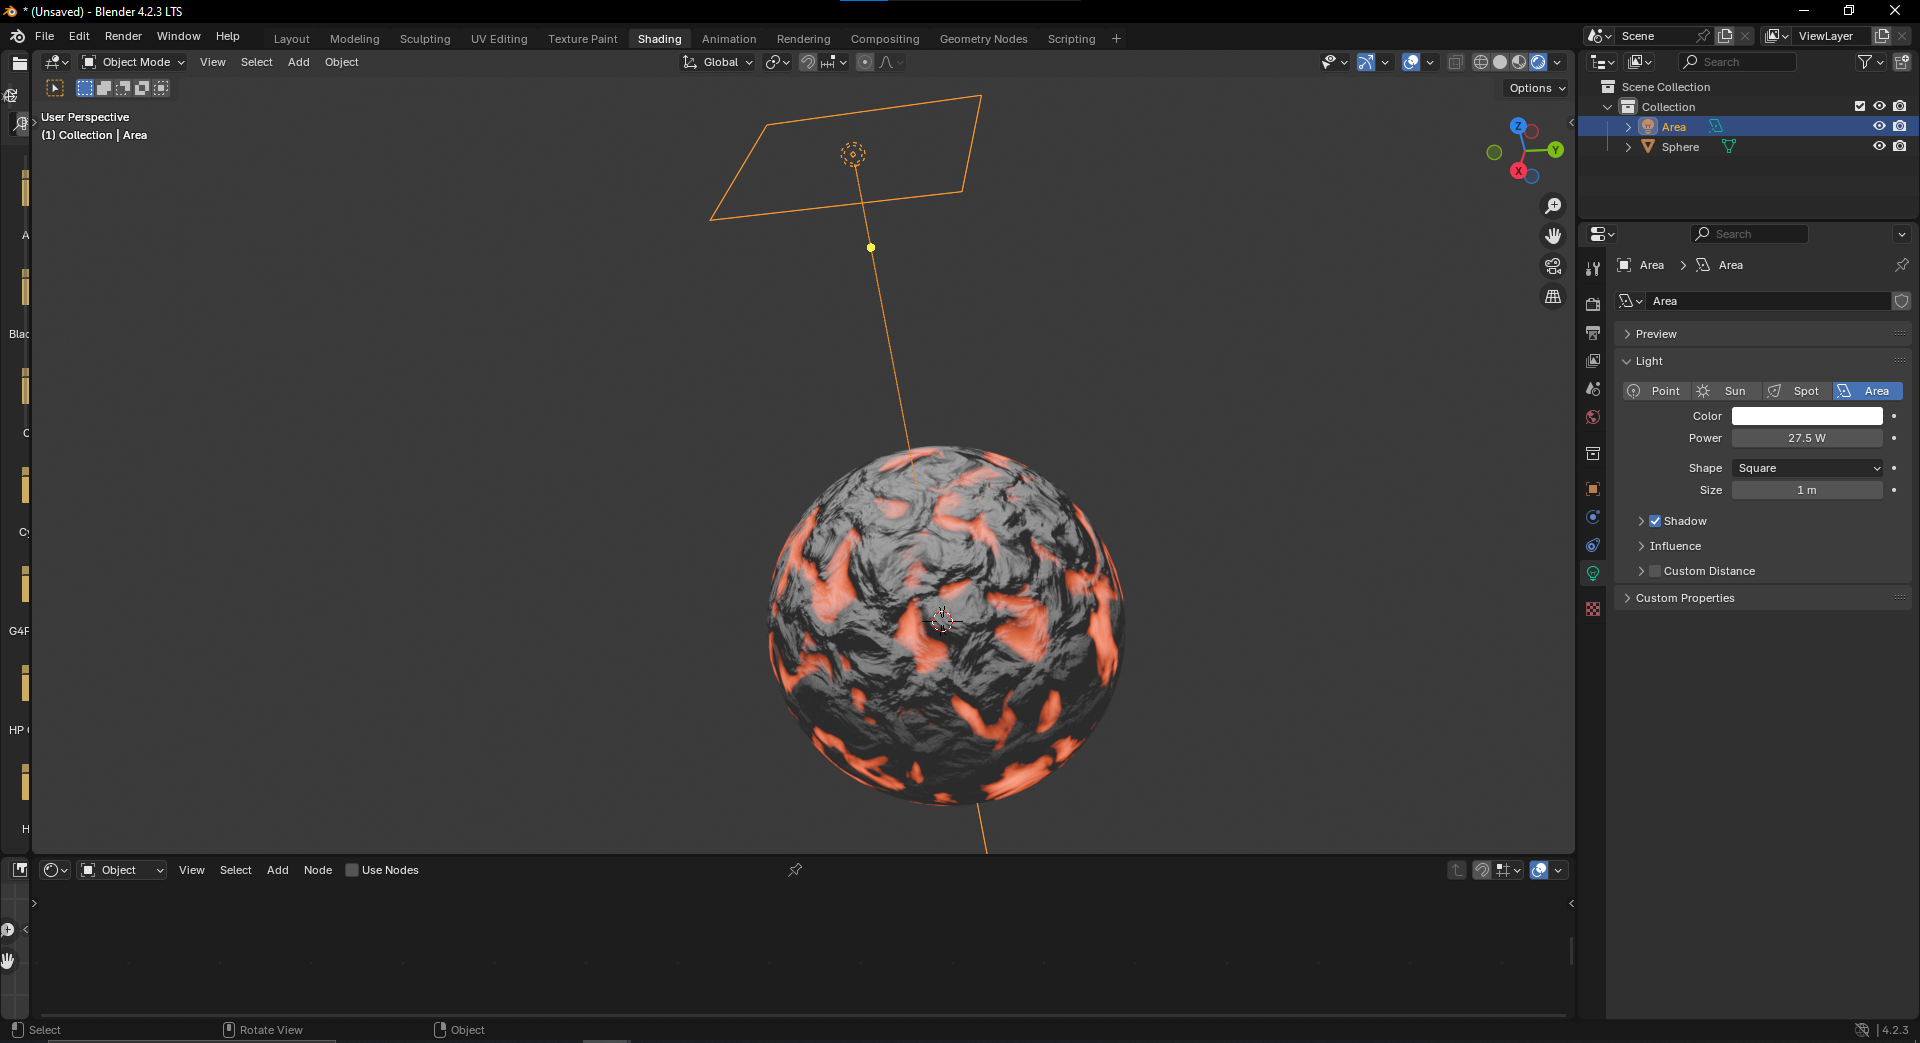
Since you can't see the physical texture, maximize the viewport, add an area light, and move it so that it is on top of the sphere. You can change the power of this light in the right menu.
That's it!
You are free to change any of these parameters to your liking, and since there is a texture coordinate and mapping node in there, the texture will transfer over to anything you want to assign it to.
(Optional) - Wallpaper


While you can do anything with the above shader, I assume that you want to do something with this beautiful texture, so I'll be doing a quick tutorial on how to go from this texture to something you can use as your background.
Make sure you save your progress by pressing "ctrl s"
We'll now go back to the layout tab, and delete our sphere. In it's place, we'll put a plane by pressing "shift a", mesh, then plane. we can make this bigger by pressing "s" and moving our cursor.
Next, change the area light to a sunlight, changing the strength to taste. I chose a strength of about 0.4. Now that the size of the object has changed, feel free to change the scale of your shader with the noise node.
Now, add a camera to the mix, making sure to set all of the rotation axes to 0 degrees. increase the camera's height, and change it to orthographic.
Now, go to scene settings, change the render engine to cycles, and set the max render samples to 200.
Next, go to scene settings and change the resolution to whatever your device requires.
Finally, save one last time, and press F12 to render!
You will now be left with a wallpaper that you can save to your computer and use for whatever you like!
In case you don't want to actually go through the whole process, I have attached a sample render for what it could look like.