Programming Motorola XTS 2500
by ChaseKirk in Circuits > Mobile
11182 Views, 5 Favorites, 0 Comments
Programming Motorola XTS 2500

In this instruction will cover how to program a Motorola XTS 2500 walkie talkie. This Information is needed in order to properly program these radios. They are widely used with law enforcement, firefighters, and other services requiring the use of walkie talkies. These radios are also part of basic radio programming and are a great introduction to radio operations.
Disclaimer:
- Always power off a radio when either making a connection to or unhooking it from a programming computer.
- Never key up the radio without an antenna.
- Be aware of local FCC guidance for YOUR local area
- Use Radio Etiquette
Supplies

Required Equipment, and Software.
Motorola XTS 2500 walkie talkie
Laptop/ computer with Motorola ASTRO 25 portable CPS software version R20.01.00
Programing Cable RKN4105A (Should be included with radio upon purchase)
Established set of frequencies that you can use per FCC guidance
Prying tool for dust cover (flat blade screw driver will work)
Dust Cover Removal


To remove the dust cover off the radio, use a pry tool to remove it. Pry from the bottom and it should pop off very easily. Make sure to reapply the dust cover after programming. They are literally indestructible so don’t worry about breaking them.
Plugging in Radio to the Computer


Plug the usb cable into the usb port on the laptop. Then, attach the other end to the radio. The easiest way is to hook the connector on the top of the radio and then rock the bottom into place. It should snap on. Once complete power on the radio
Open Astro 25 Portable CPS Software

Icon should look like what is circled in the pictured above.
Getting to the Code Plug


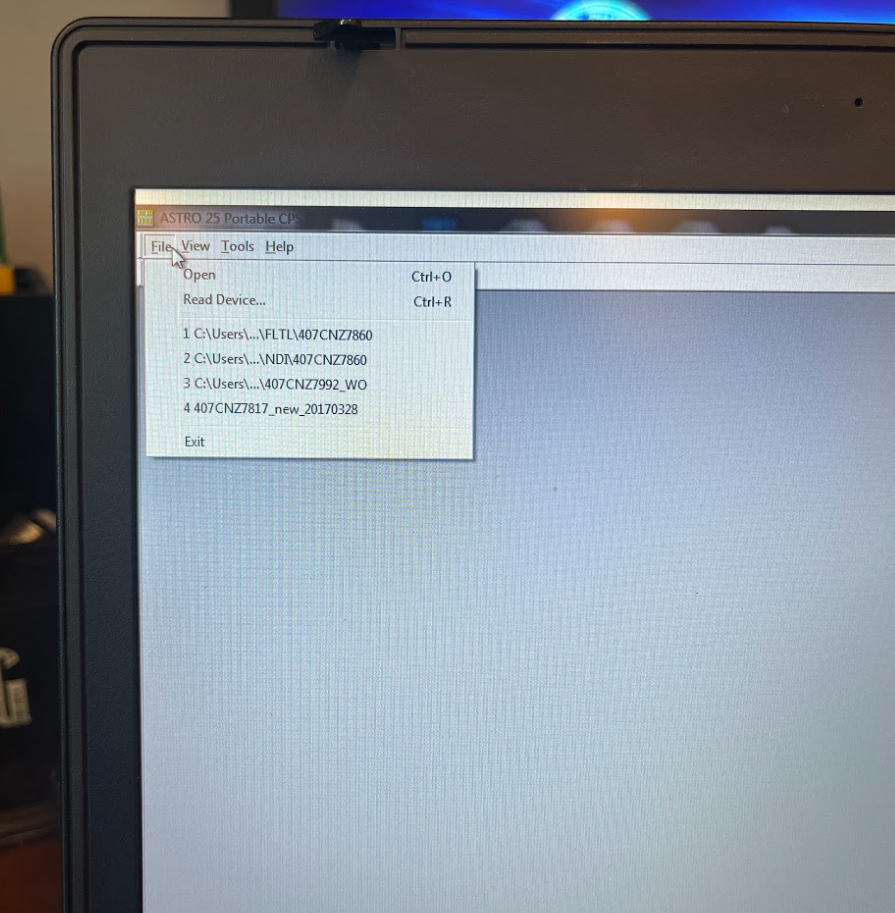
Open the program “ASTRO 25 Portable CPS”
Then click "File"
Then select "Read Device"
Then elect “USB” from the drop down
Finally select "OK"
The code plug should pop up.
If you get an error:
• Make sure the radio is on
• Squeeze the connector against the radio with a firm grip
• Clean the contacts on the radio with a pencil eraser. *DO NOT USE WATER OR ANY SOLUTION ON THE CONTACTS, YOU WILL FRY THE RADIO*
Try to read the radio again, if it still doesn’t work, try another radio…
Inside the Code Plug

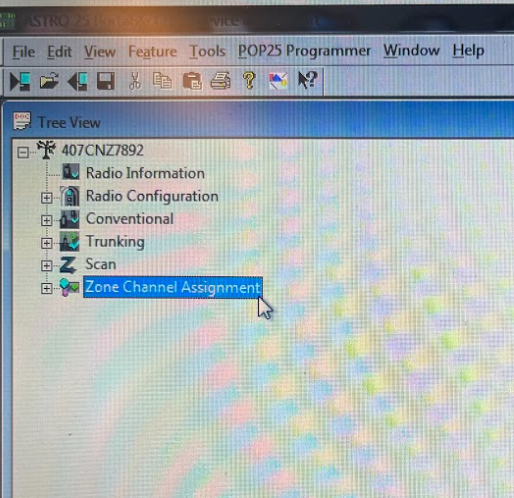
Once the Code Plug is open, click the plus sign next to “Zone Channel Assignment”.
Inside Zone Chanel Assignment

Then, double click “Zone Channel Assignment - 1”.
Channels Tab


Then, click on the “Channels” tab. You will see a couple channels.
Select which channel you want.
Then, scroll to the right until you see the “Receive Frequency” column.
Then, enter a frequency. Make sure the frequency you entered is kept in the box after you click off the box.
Then, scroll to the right more until you find the “Transmit Frequency” tab.
Then, enter the same frequency as you did for the “Receive Frequency”. Hint: The transmit and receive frequencies should be exactly the same, unless there is a repeater being utilized.
Then, scroll to the right more until you find the “Tx Opt Transmit Dev” and “Tx Opt Transmit Dev T/A”.
Both of those should be “2.5kHz”
Then, scroll to the right and you will see “Tx Opt Channel Spacing”. That should be 12.5 kHz.
Then, scroll to the right until you find “Tx Network ID” and “Rx Network ID”. Both should be 293
Then, select close in the bottom left of the window.
(I can't show the frequencies I am using for security reasons, but they should be very easy to see)
Writing the Code Plug


Select “File” in the top left.
Then, select “Write Device”
Then, select “USB”
Then, select “OK”.
*You should hear some beeps and weird noises.*
Then, a pop up should say “Write Successful”
Then, Select “OK”
You can disconnect the radio and connect the next radio.
Placing the Dust Cover Back On
Make sure to reapply the dust cover after programming. To do so, place the top of the dust cover on the radio
Then rock the bottom into place. You should hear a snap.
They are literally indestructible so don’t worry about breaking them.