QuickNote: Your Smart Voice Notebook
by its_vaani in Circuits > Gadgets
237 Views, 4 Favorites, 0 Comments
QuickNote: Your Smart Voice Notebook
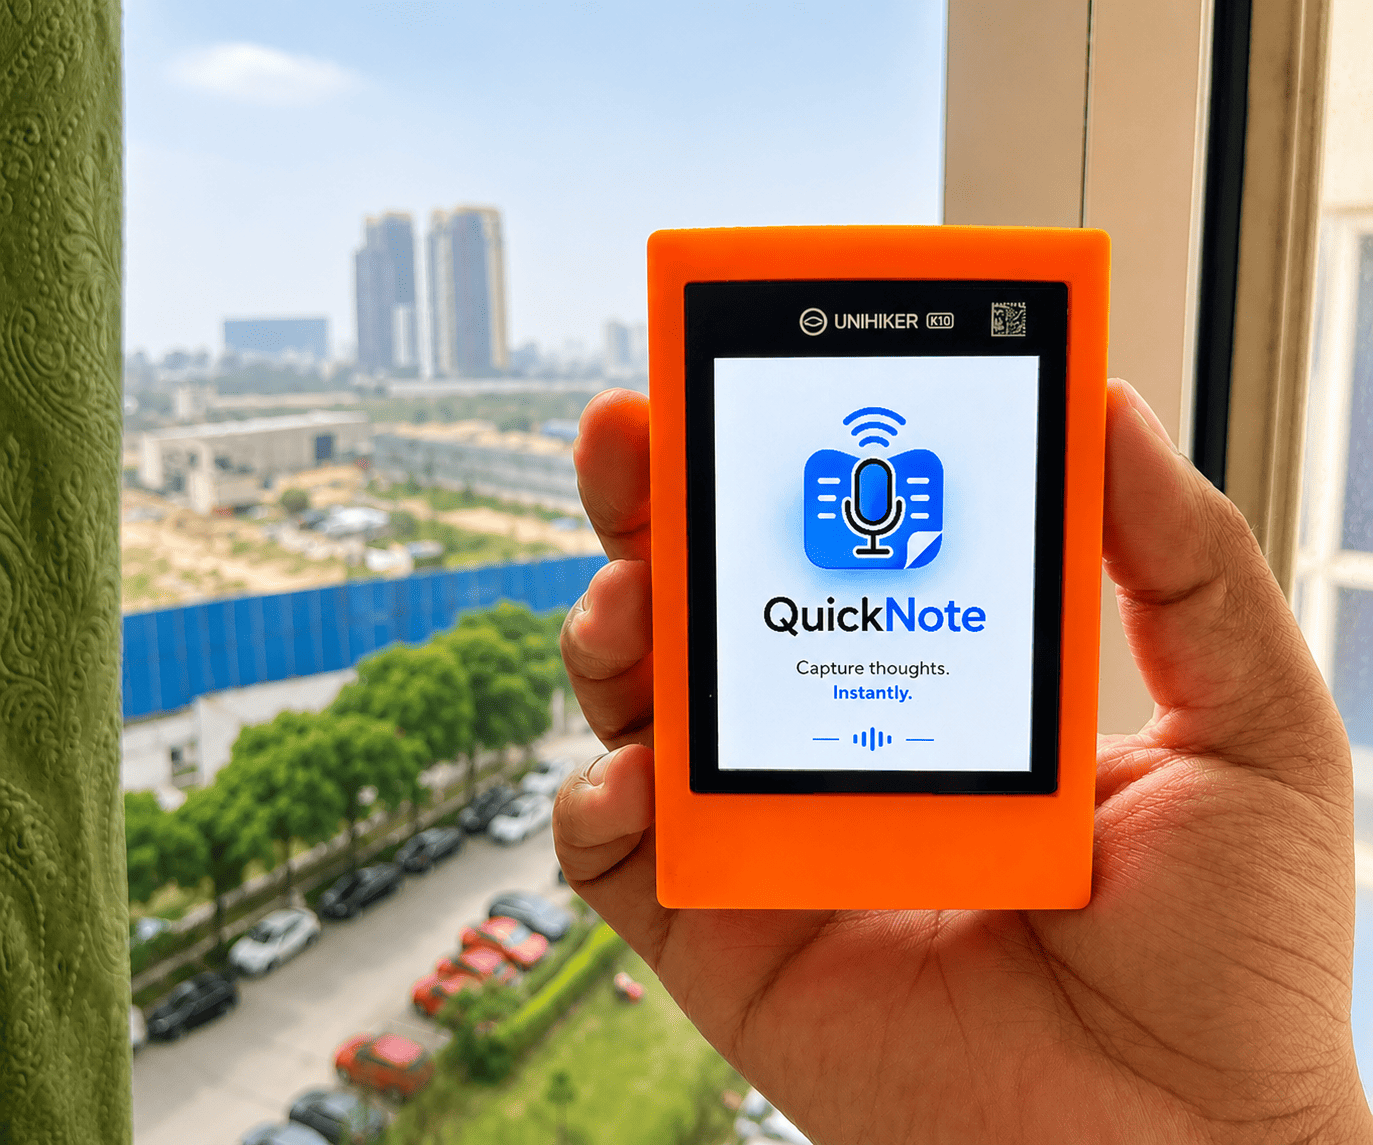
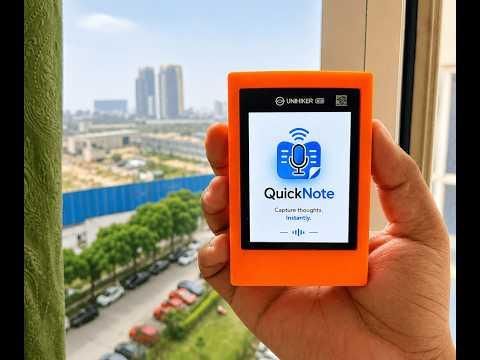
QuickNote is a portable AI-powered voice note device designed to help users capture ideas the moment they occur. Whether you're working, driving, studying, shopping, or simply away from your phone, important thoughts often disappear before you have a chance to write them down. While smartphones offer voice recording and note-taking apps, unlocking the phone, opening an application, and organizing notes can interrupt the moment and discourage quick capture.
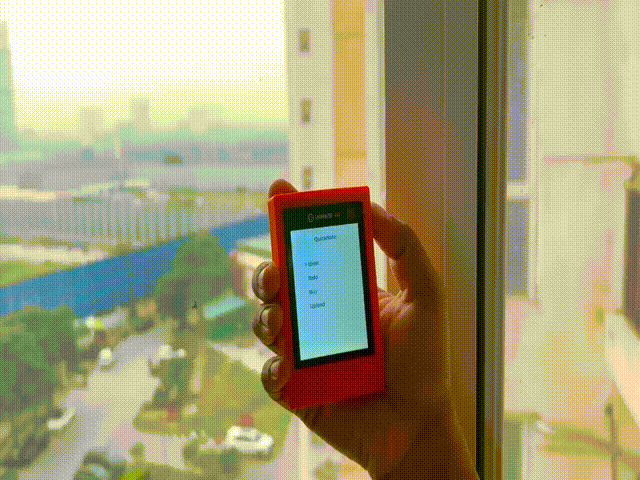
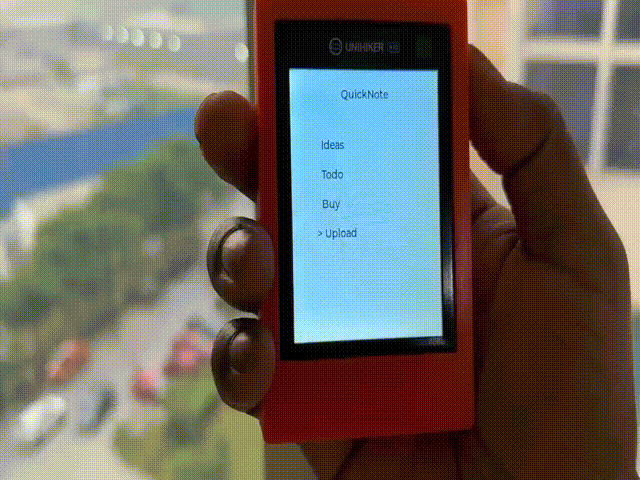
QuickNote solves this problem by providing a dedicated one-touch voice recording experience. Users can instantly record a voice note, categorize it into predefined tags such as Ideas, To-Do, or Buy, and save it locally on the device. With a single upload action, the recorded audio is automatically transcribed using AI speech recognition and stored alongside the original recording. At any time, users can browse their categorized notes, replay the original voice recording, and read the generated transcript simultaneously, making it easy to recall the exact context of each thought.
The device is powered by a 950 mAh rechargeable Li-ion battery, providing an estimated 5–6 hours of continuous operation under typical mixed usage, including voice recording, menu navigation, audio playback, and occasional Wi-Fi-based AI transcription.
Supplies
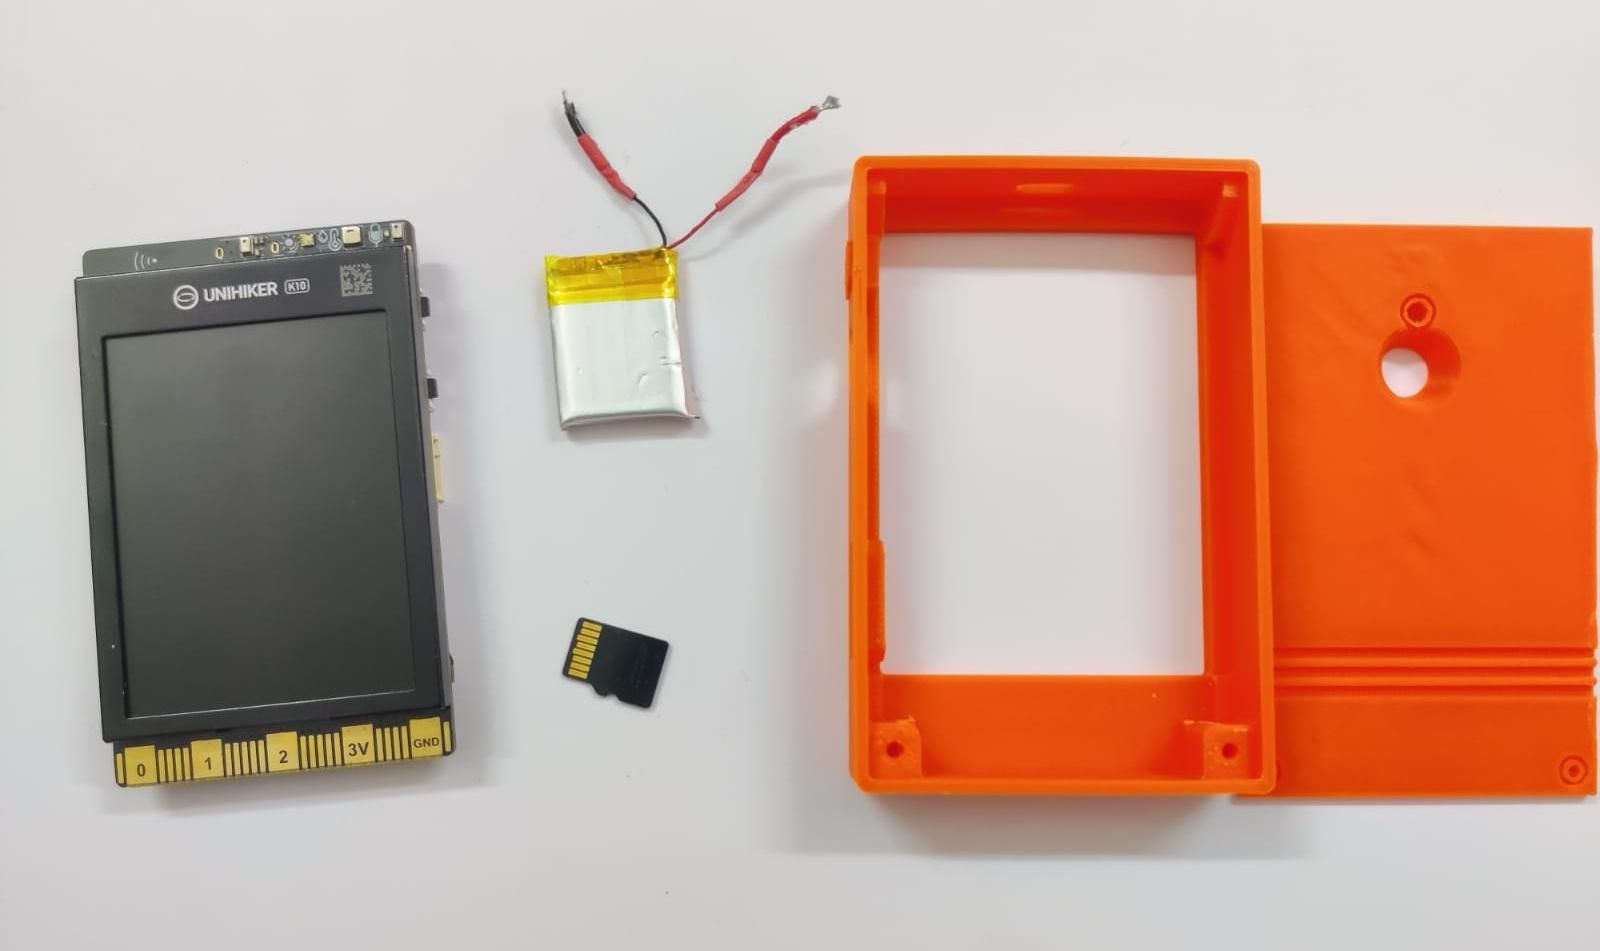
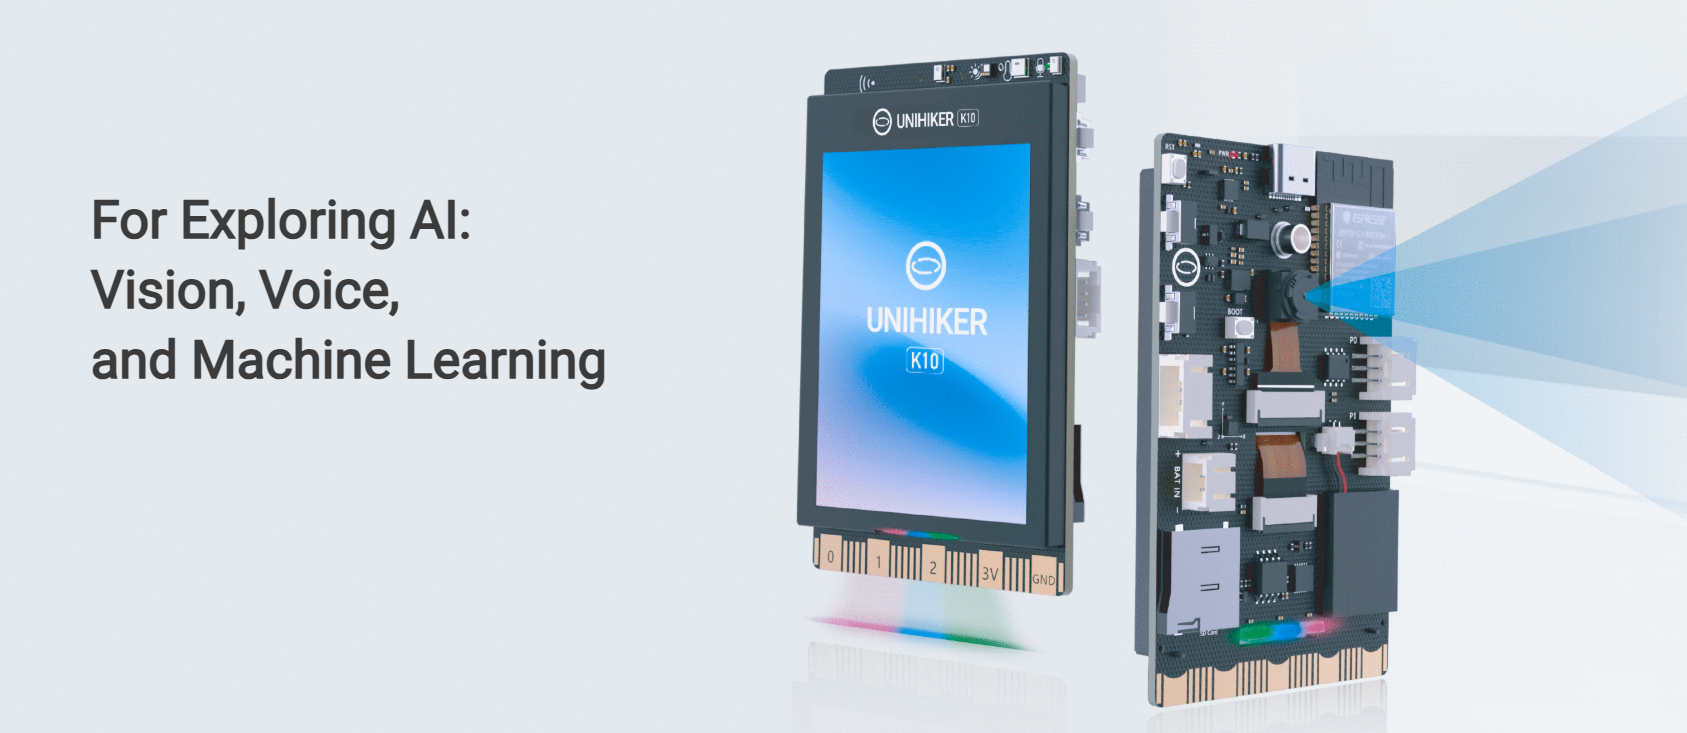
- UNIHIKER K10 Development Board: Main controller featuring ESP32-S3, 2.8-inch LCD, microphone, speaker, Wi-Fi, and programmable buttons. Handles recording, user interface, file management, and AI communication.
- MicroSD Card: Stores recorded WAV audio files and generated text transcripts.
- 3D Printed Enclosure: Provides a compact, portable, and protective housing for the device.
- USB Type-C Cable: Used for powering the device and uploading firmware.
Features
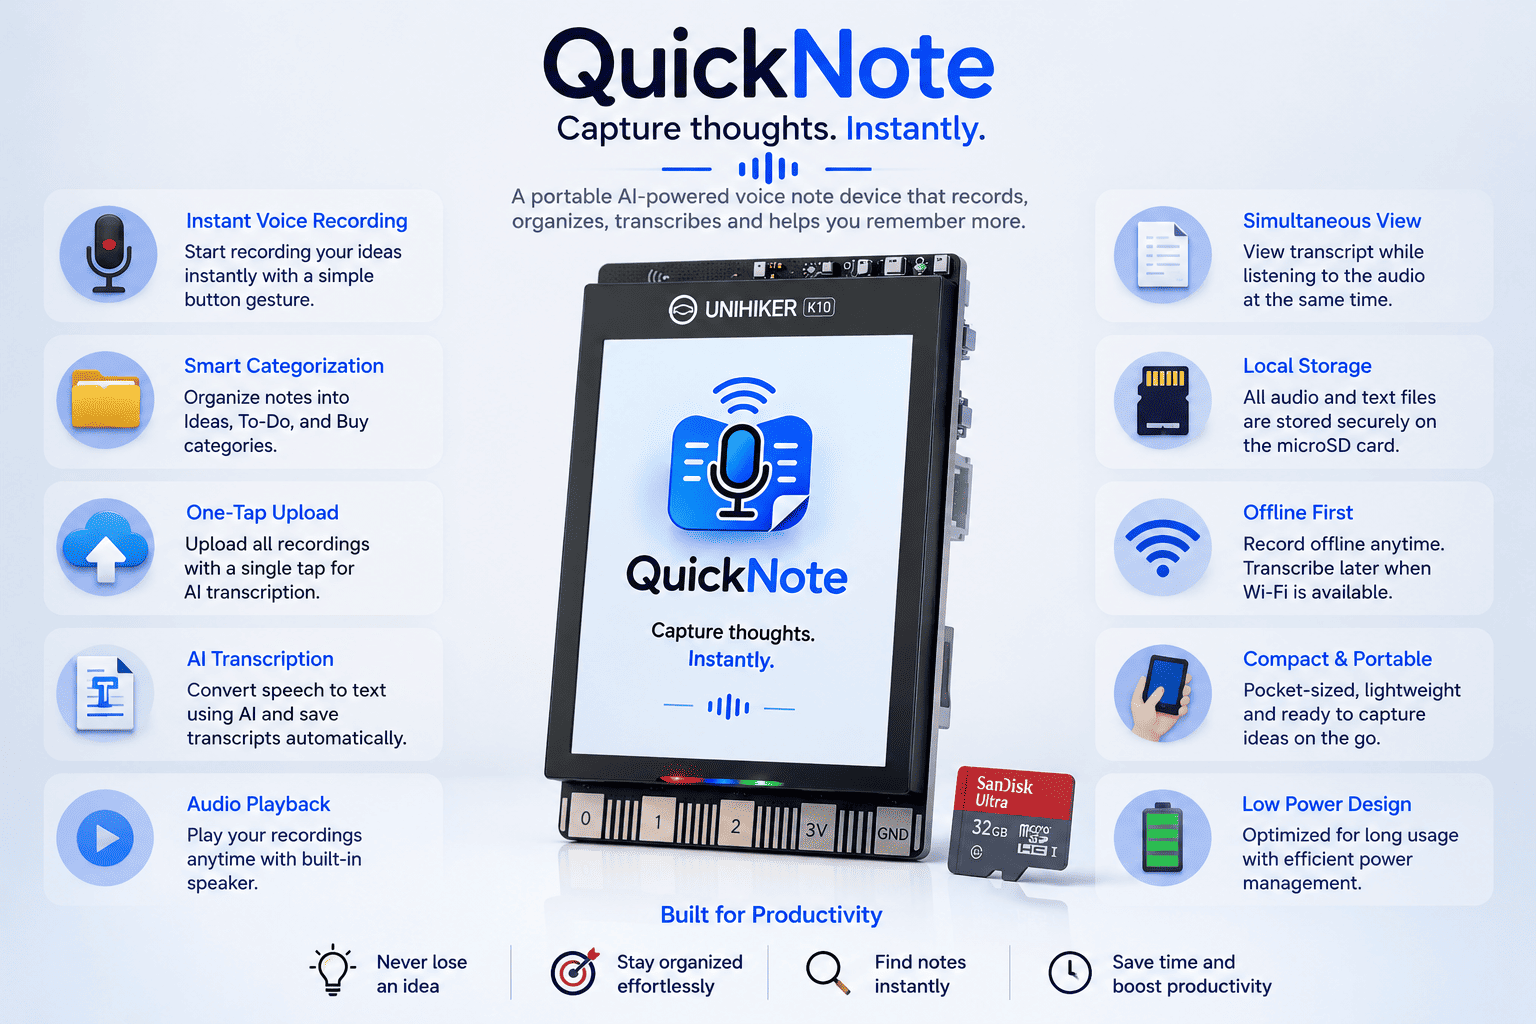
1. Instant Voice Recording: QuickNote allows users to start recording instantly using a simple button gesture, ensuring that important ideas can be captured within seconds without navigating through menus.
2. Smart Note Categorization: After recording, users can assign each voice note to predefined categories such as Ideas, To-Do, or Buy, making notes well organized and easy to retrieve later.
3. AI-Powered Speech Transcription: Recorded audio files can be uploaded for automatic speech-to-text conversion using AI, generating accurate text transcripts that are stored alongside the original recordings.
4. Local Audio & Transcript Storage: Both the original WAV audio files and generated TXT transcript files are securely stored on the MicroSD card, allowing offline access without requiring cloud storage.
5. Organized File Browser: Users can browse recordings category-wise through a simple menu interface, making it easy to locate previously saved notes.
6. Simultaneous Audio Playback & Transcript Display: Selecting a saved recording automatically plays the original audio while displaying the corresponding transcript on the screen, providing a rich note-review experience.
7. Compact Standalone Device: Unlike smartphone-based note-taking applications, QuickNote is a dedicated handheld device designed specifically for capturing ideas quickly without distractions.
8. Portable and Low-Power Design: Built around the UNIHIKER K10 development board and enclosed in a compact 3D-printed case, QuickNote is lightweight, portable, and suitable for everyday use.
Enclosure 3D Design
.jpeg)
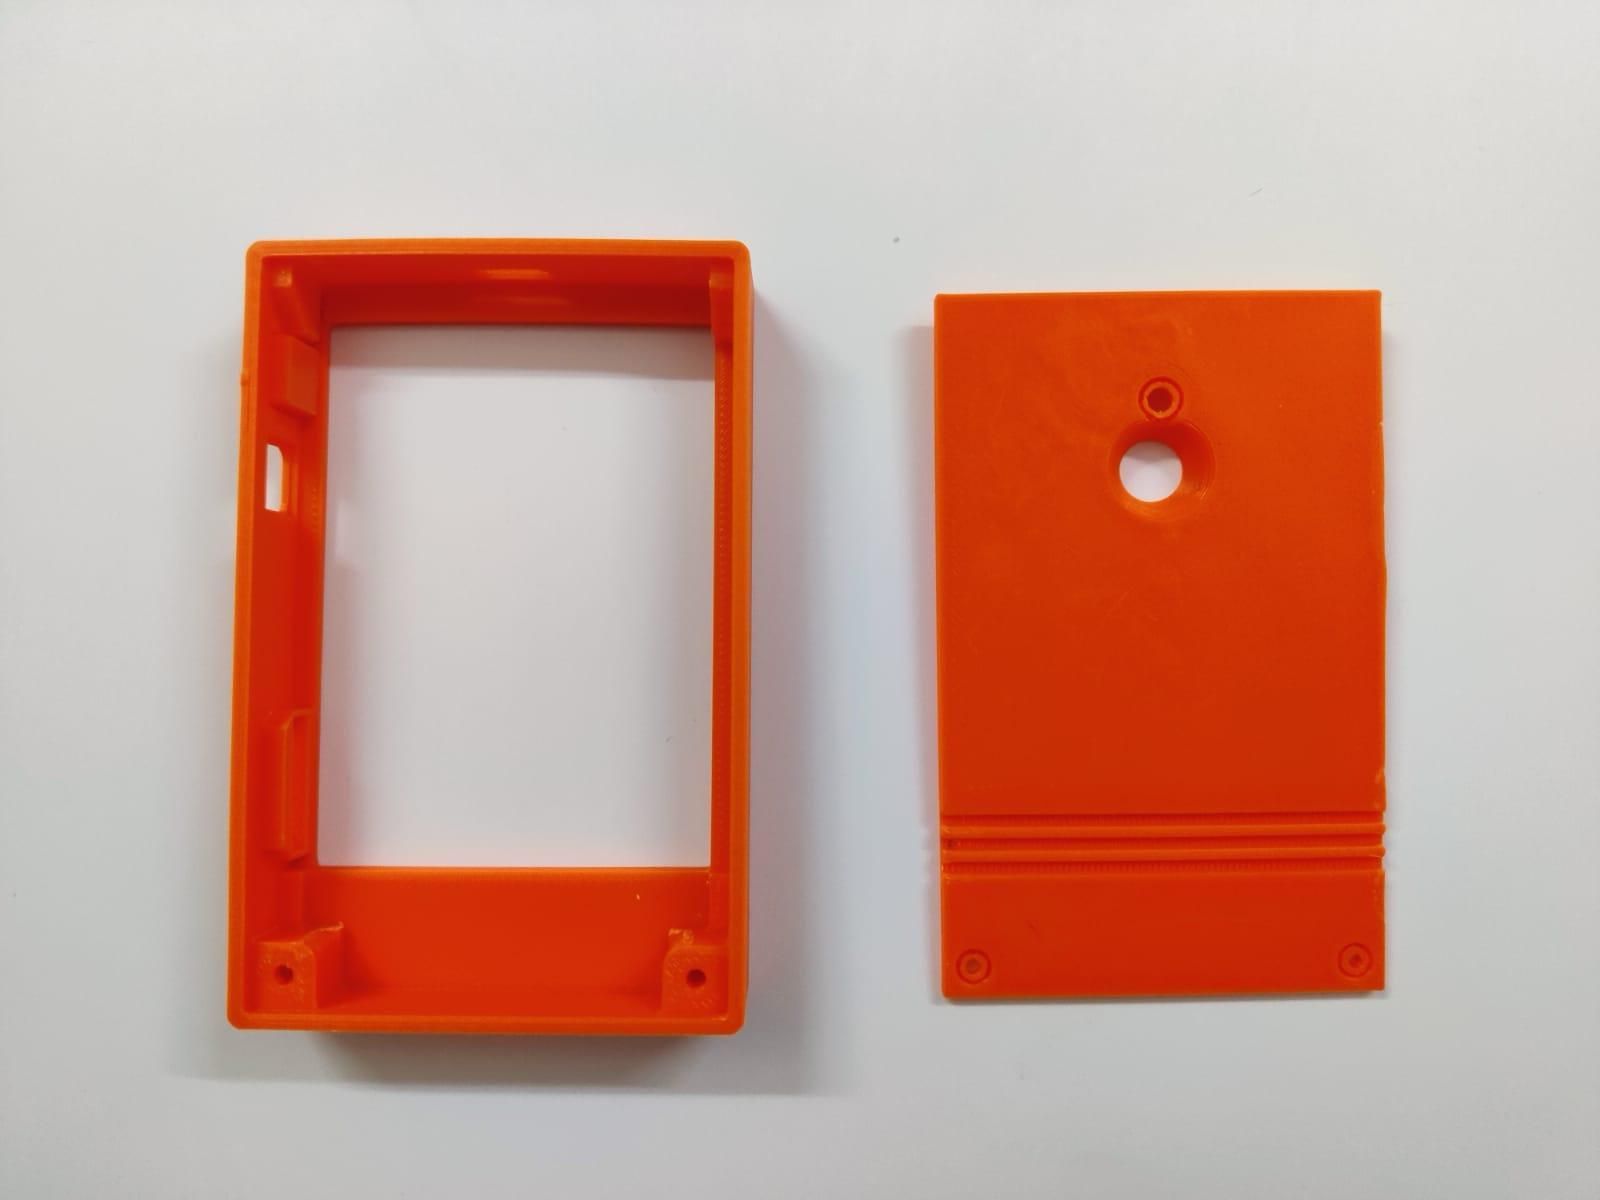
A custom 3D-printed enclosure was designed to provide a compact, ergonomic, and protective housing for the QuickNote device. The enclosure is specifically designed around the dimensions of the UNIHIKER K10 Development Board, ensuring secure mounting while maintaining access to all essential interfaces.
The enclosure consists of three individual 3D-printable components:
- Top Cover
- Back Plate with Screws
- Buttons
You can check the 3D models attached below.
Device Assembly
.jpeg)
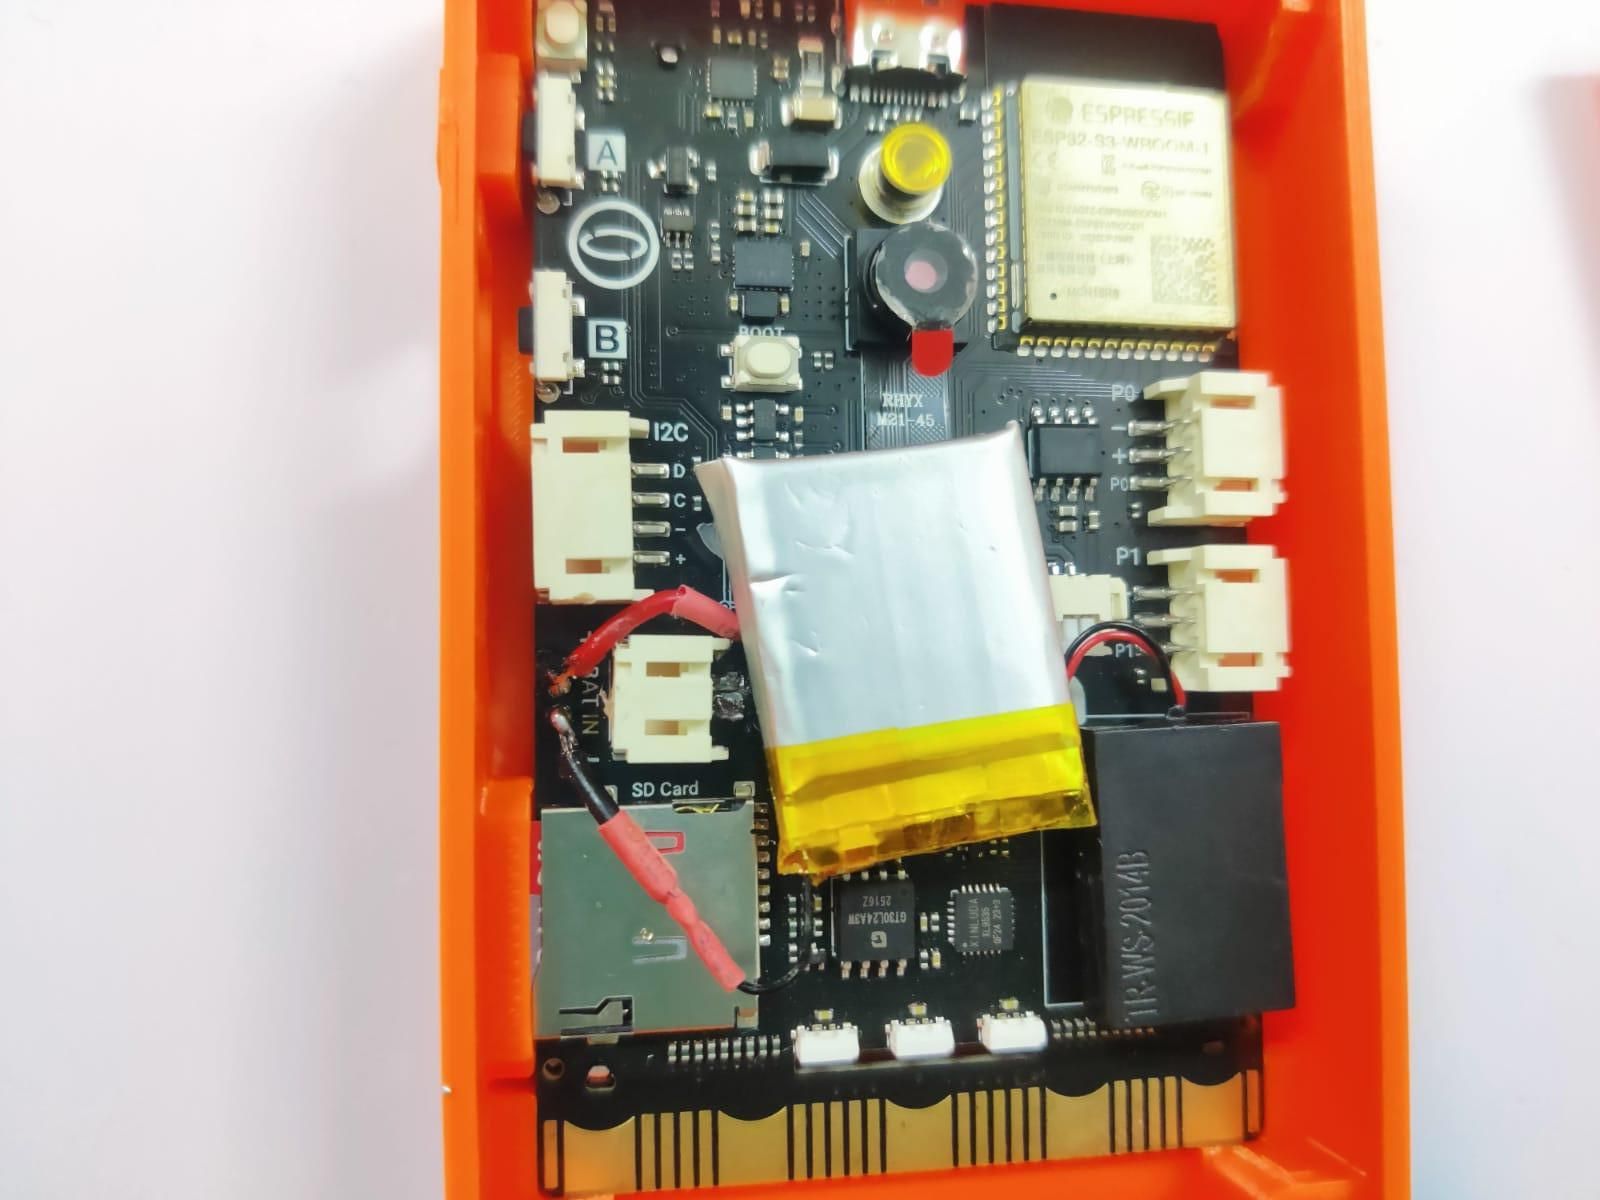
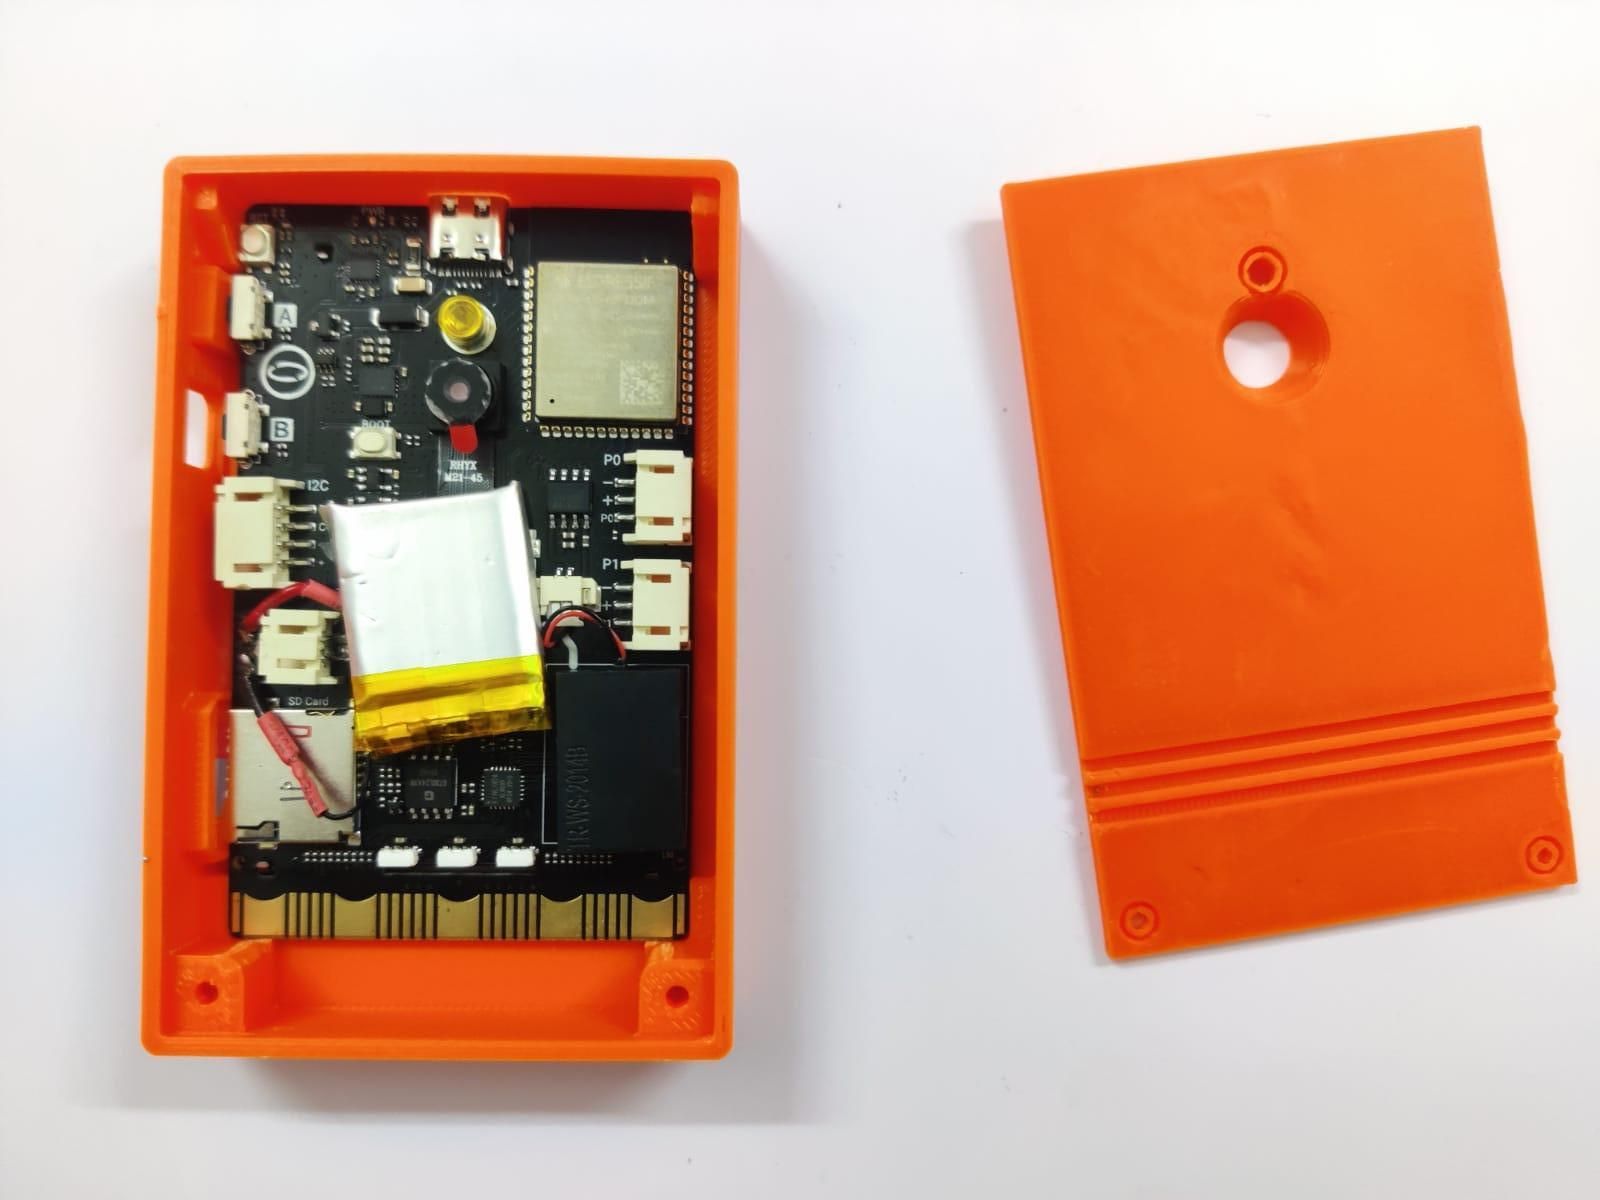
- Carefully align the UNIHIKER K10 with the enclosure and gently snap-fit it into the mounting slots. Ensure the display, USB Type-C port, speaker, microphone, and MicroSD card remain accessible.
- Solder the Li-ion battery leads to the battery terminals on the UNIHIKER K10:
- Red wire → BAT+ (+)
- Black wire → BAT− (−)
- Position the battery inside the enclosure and route the wires neatly to prevent pinching when closing the enclosure.
- Insert the 3D-printed button into its slot and ensure it aligns properly with the onboard programmable button for smooth operation.
- Assemble the Top Cover and Bottom Cover until the snap-fit locks securely into place.
Code Architecture
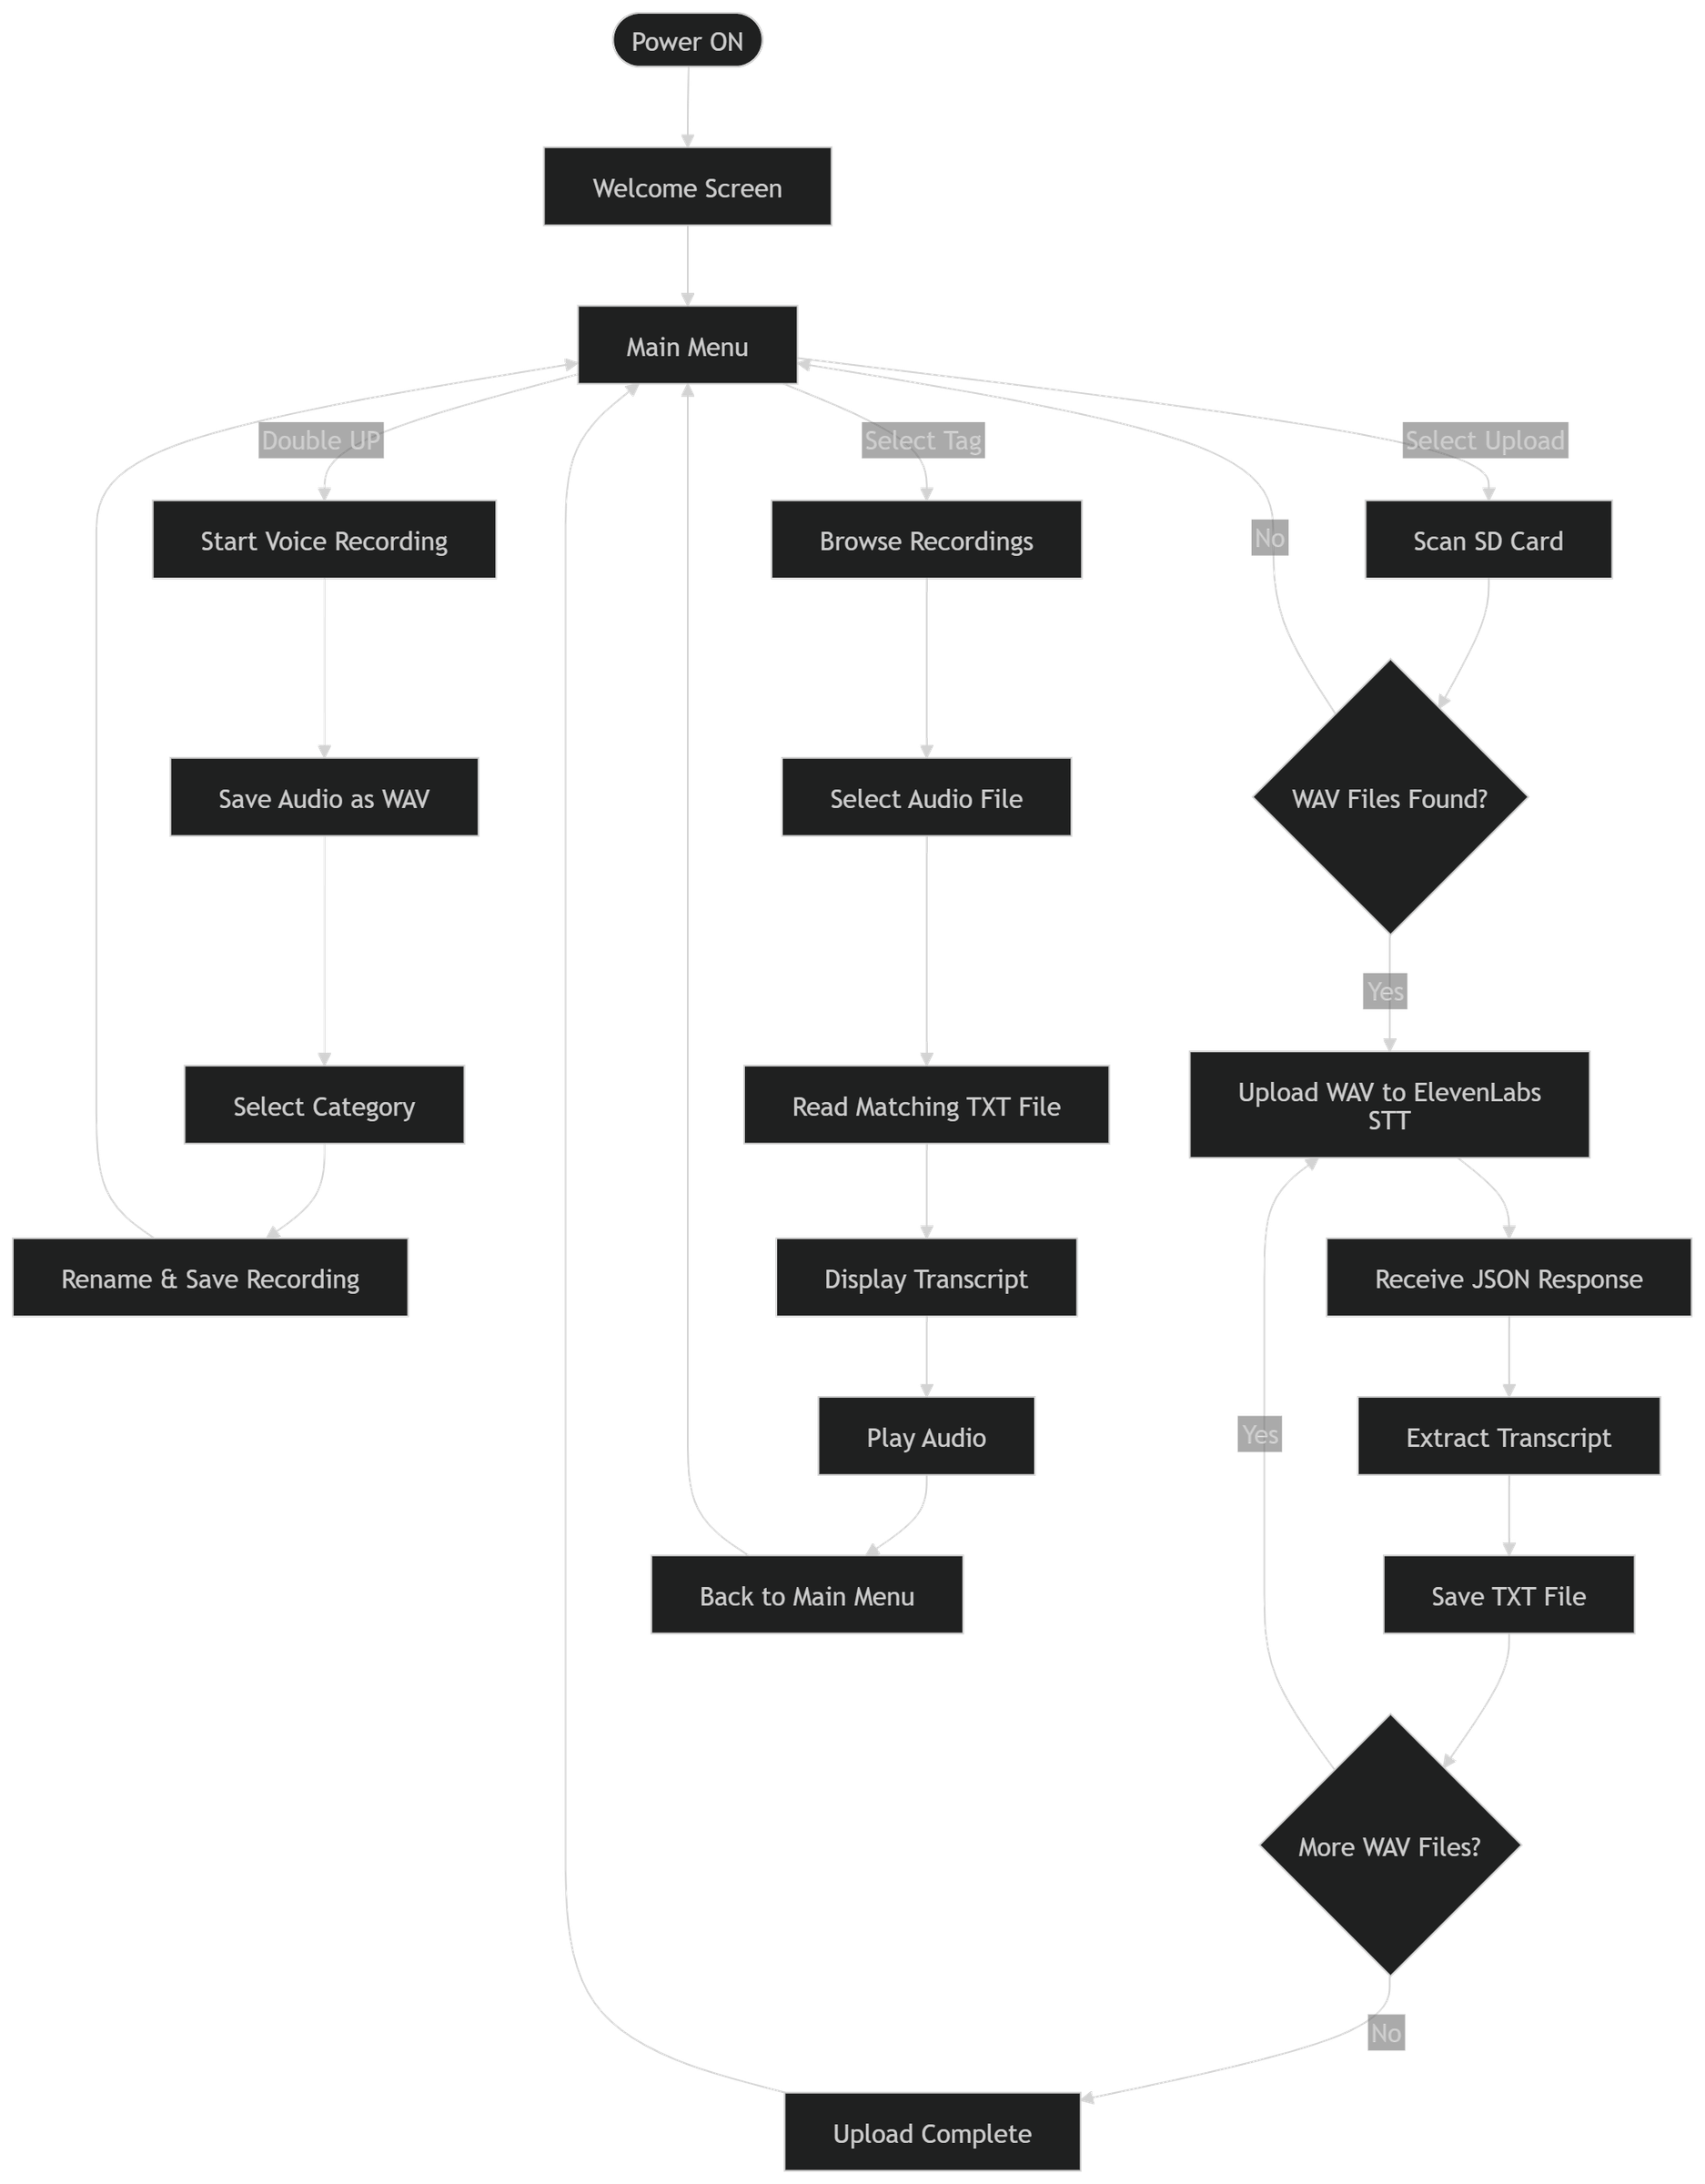
The Code for QuickNote was developed using the Arduino IDE and follows a modular state-machine architecture.
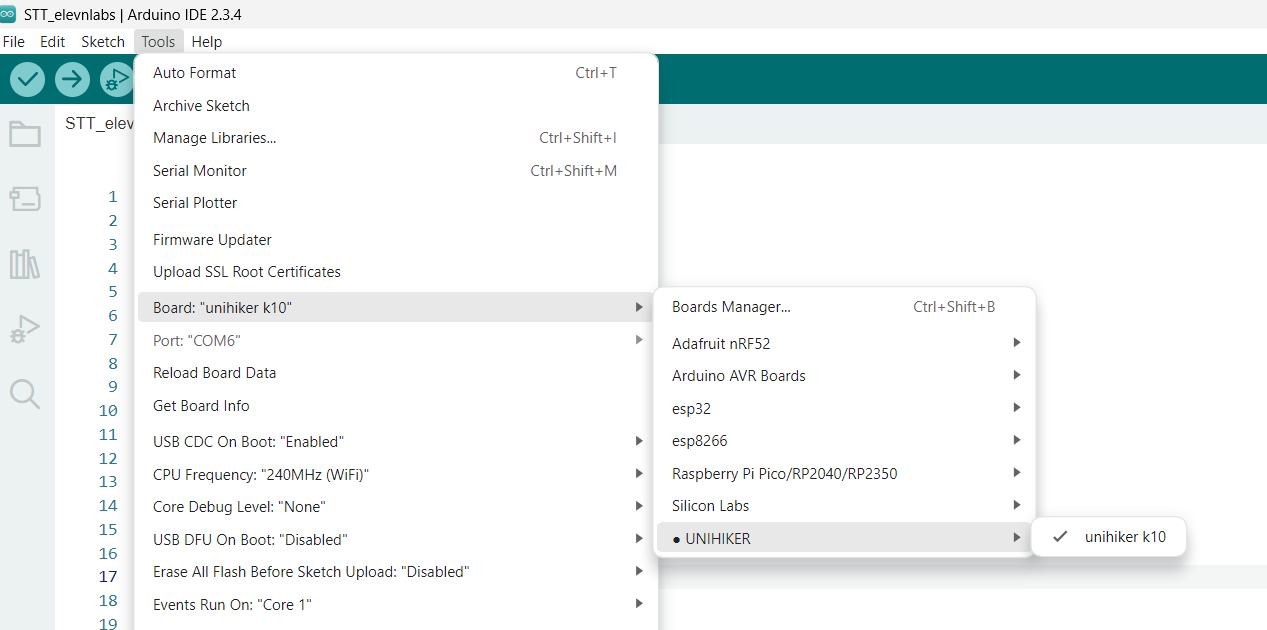
Install Arduino IDE BSP
- BSP URL: https://downloadcd.dfrobot.com.cn/UNIHIKER/package_unihiker_index.json
- Open "File->Preference" in Arduino IDE
- Open "Tools->Board->Boards Manager"
- Serach unihiker and install the SDK
- UNIHIKER K10 will appear in your Arduino IDE
- Enable Tools->USB CDC on Boot before uploading Arduino code. Then you can view data in the Serial Monitor.
For more Getting Started tutorials for Unihiker K10, check out the official link.
Following Arduino Libraries are used to make the device functional:
WiFi.h -- Connects the device to a Wi-Fi network.
WiFiClientSecure.h -- Provides secure HTTPS communication with the ElevenLabs API.
HTTPClient.h -- Sends HTTP POST requests for speech-to-text transcription.
ArduinoJson.h -- Parses the JSON response received from the ElevenLabs API.
UNIHIKER K10 Library -- Controls the display, buttons, microphone, speaker, and onboard peripherals.
The firmware is divided into the following modules:
User Interface Module
- Welcome screen
- Main menu
- Recording screen
- Tag selection screen
- Upload progress screen
- File browser
- Transcript display screen
Button Manager: Unihiker K10 has 2 user buttons, we have used Single click and Double click combinations.
- UP -- Previous item
- DOWN -- Next item
- Double UP -- Record (Main Menu) / Back (Other Screens)
- Double DOWN -- Select / Open / Save
Audio Recording Module:
- Recording audio from the onboard microphone.
- Saving recordings as WAV files.
- Managing recording duration.
- Creating temporary recordings before categorization.
File Management Module: Handles all MicroSD card operations including:
- Creating WAV files
- Creating TXT transcript files
- Reading transcripts
- Renaming recordings after tag selection
- Browsing categorized recordings
AI Speech-to-Text Module: Uploads recorded WAV files to the ElevenLabs Speech-to-Text API and receives the generated transcript in JSON format.
Audio Playback Module: Reads the selected WAV file from the MicroSD card and plays it through the onboard speaker while simultaneously displaying its transcript.
ElevenLabs Speech-to-Text Setup
QuickNote uses the ElevenLabs Speech-to-Text API to convert recorded audio into text.
Before using the API:
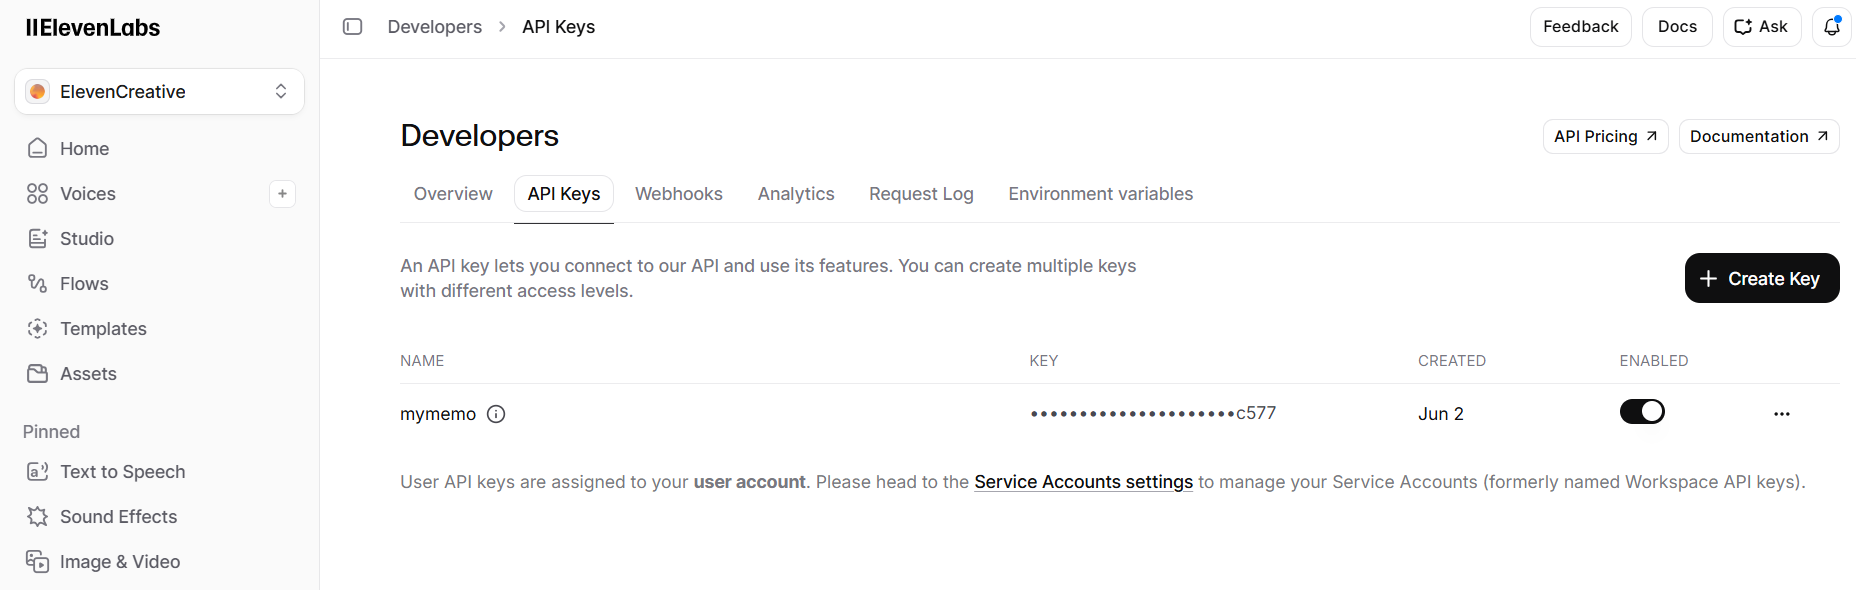
- Create an ElevenLabs account.
- Generate an API Key from the Developer dashboard.
- Store the API Key in the firmware.
- Connect the device to a Wi-Fi network.
Example configuration:
The API key is included in the HTTPS request header for authentication.
HTTP Request: The firmware establishes a secure HTTPS connection and uploads the WAV audio file using the ElevenLabs Speech-to-Text endpoint.
The request includes:
- HTTPS POST request
- API authentication header
- WAV audio file
- Multipart form-data body
After processing, the API returns a JSON response containing the generated transcript.
JSON Parsing: The response from the API is parsed using the ArduinoJson library.
Important fields extracted include:
- Detected language
- Transcribed text
- Audio duration
The transcribed text is then saved locally as a TXT file with the same filename as the corresponding WAV recording.
Full Arduino Code is attached below.
Downloads
Working
- Power On the Device: Power on the QuickNote device using the onboard power button. After booting, a welcome screen is displayed, followed by the main menu.
- Record a Voice Note: From the main menu, double-press the UP button to start voice recording. Speak clearly into the built-in microphone. Once the recording is complete, the audio is temporarily saved in WAV format.
- Categorize the Recording: After recording, a category selection screen appears. Navigate using the UP and DOWN buttons and select one of the predefined categories (Ideas, To-Do, or Buy) by double-pressing the DOWN button. The recording is then renamed and stored on the MicroSD card.
- Upload for AI Transcription: Select the Upload option from the main menu. The device scans all recorded WAV files and uploads each file to the ElevenLabs Speech-to-Text API over a secure Wi-Fi connection. The generated transcript is received in JSON format, extracted, and saved as a corresponding TXT file on the MicroSD card.
- Browse Saved Notes: Select a category from the main menu to view all recordings belonging to that category. The recordings are displayed as a list of saved WAV files.
- View Transcript and Playback Audio: Select a recording from the list by double-pressing the DOWN button. The device automatically opens the note details screen, displays the saved transcript from the corresponding TXT file, and simultaneously plays the original audio recording through the onboard speaker.
- Return to the Main Menu: Double-press the UP button at any time while viewing a note to stop playback and return to the main menu, allowing the user to record new notes or browse additional recordings.
Conclusion
QuickNote successfully demonstrates a compact and intelligent voice note system that combines embedded hardware with AI-powered speech recognition to provide a fast and organized note-taking experience. By integrating instant voice recording, category-based organization, local MicroSD storage, and cloud-based speech-to-text transcription, the device enables users to capture and retrieve important information with minimal effort.
The simultaneous display of the transcript alongside audio playback further enhances usability by allowing users to quickly review their notes without listening to the entire recording. Its standalone operation, intuitive interface, and portable design make QuickNote a practical solution for students, professionals, researchers, and anyone who frequently needs to capture ideas on the go.