ROOTS : Self-Watering Seed Starter
by MANWO in Outside > Backyard
122 Views, 0 Favorites, 0 Comments
ROOTS : Self-Watering Seed Starter
.gif)
The first few days of a plant's life are the most important. During this stage, seeds and young seedlings require consistent moisture to develop healthy roots and grow successfully. However, traditional top watering often creates more problems than solutions. A strong stream of water can wash tiny seeds out of place, disturb the soil, or even damage delicate sprouts before they have a chance to establish themselves.
That challenge inspired ROOTS.
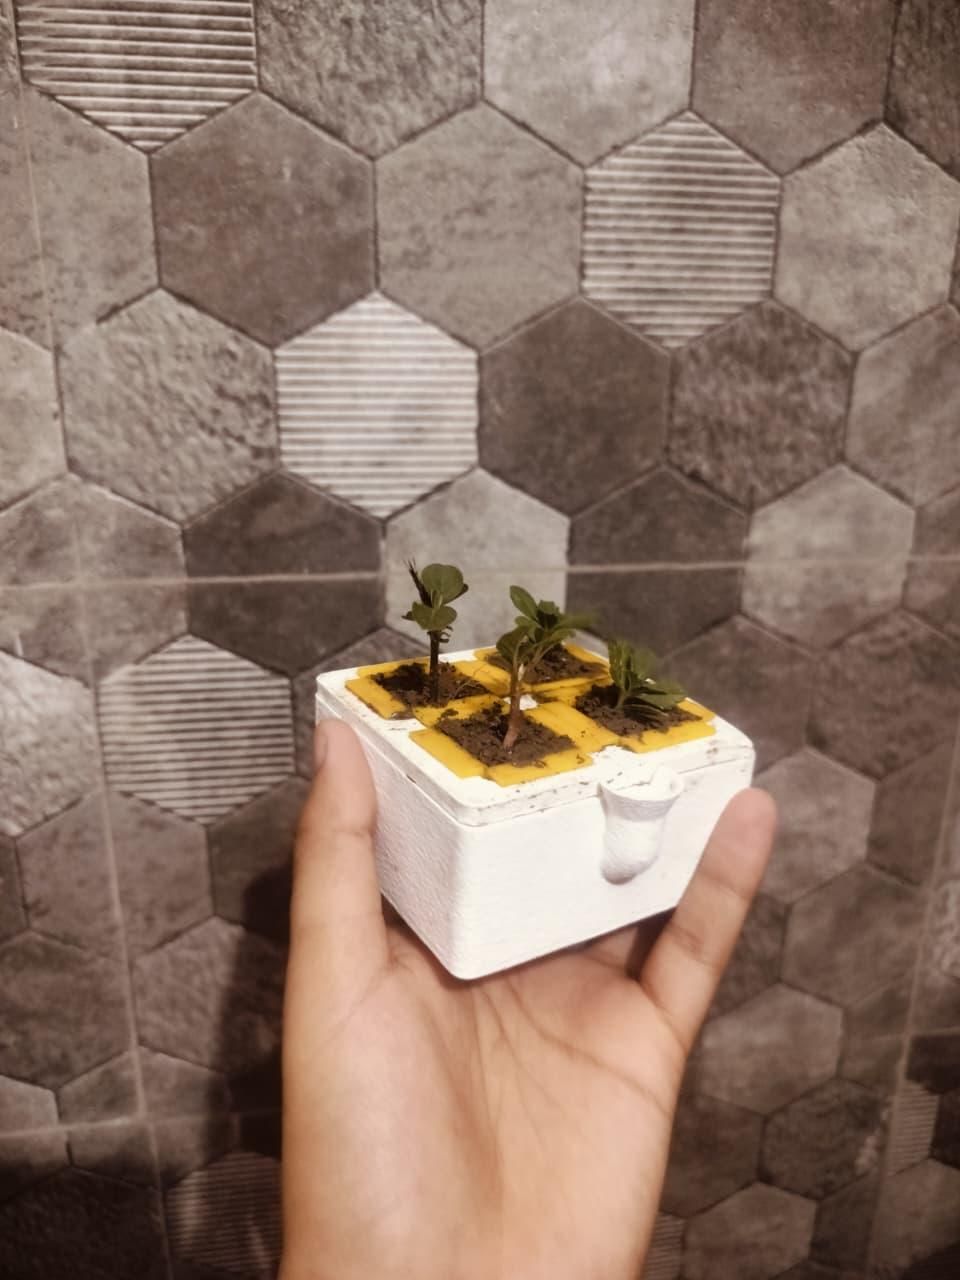
ROOTS is a self-watering seed starter designed to provide seedlings with the ideal growing environment from the very beginning. Instead of watering from above, the system stores water in a reservoir beneath the pots. Through a 21-hole honeycomb base, moisture naturally travels upward by capillary action, allowing the soil to absorb only the amount of water it needs. This keeps the growing medium evenly moist while encouraging healthy root development and protecting fragile seedlings from unnecessary disturbance.
The system features four individual seed starter pots, allowing you to germinate up to four different plants simultaneously. Once the seedlings have developed strong roots and several true leaves, they can be easily transplanted into larger pots or directly into your garden.
Beyond improving plant care, I also wanted a design that was practical to manufacture. Every component is optimized for support-free 3D printing, uses minimal filament, assembles in minutes without glue or hardware, and can be stored compactly when not in use. A built-in refill funnel makes adding water quick and convenient without disturbing the seedlings.
Whether you're starting herbs on a kitchen windowsill, growing vegetables for your backyard, or preparing flowers for the next season, ROOTS offers a reusable, low-maintenance, and efficient solution that helps every seed get the best possible start.
Let's start building! 🌱
Supplies
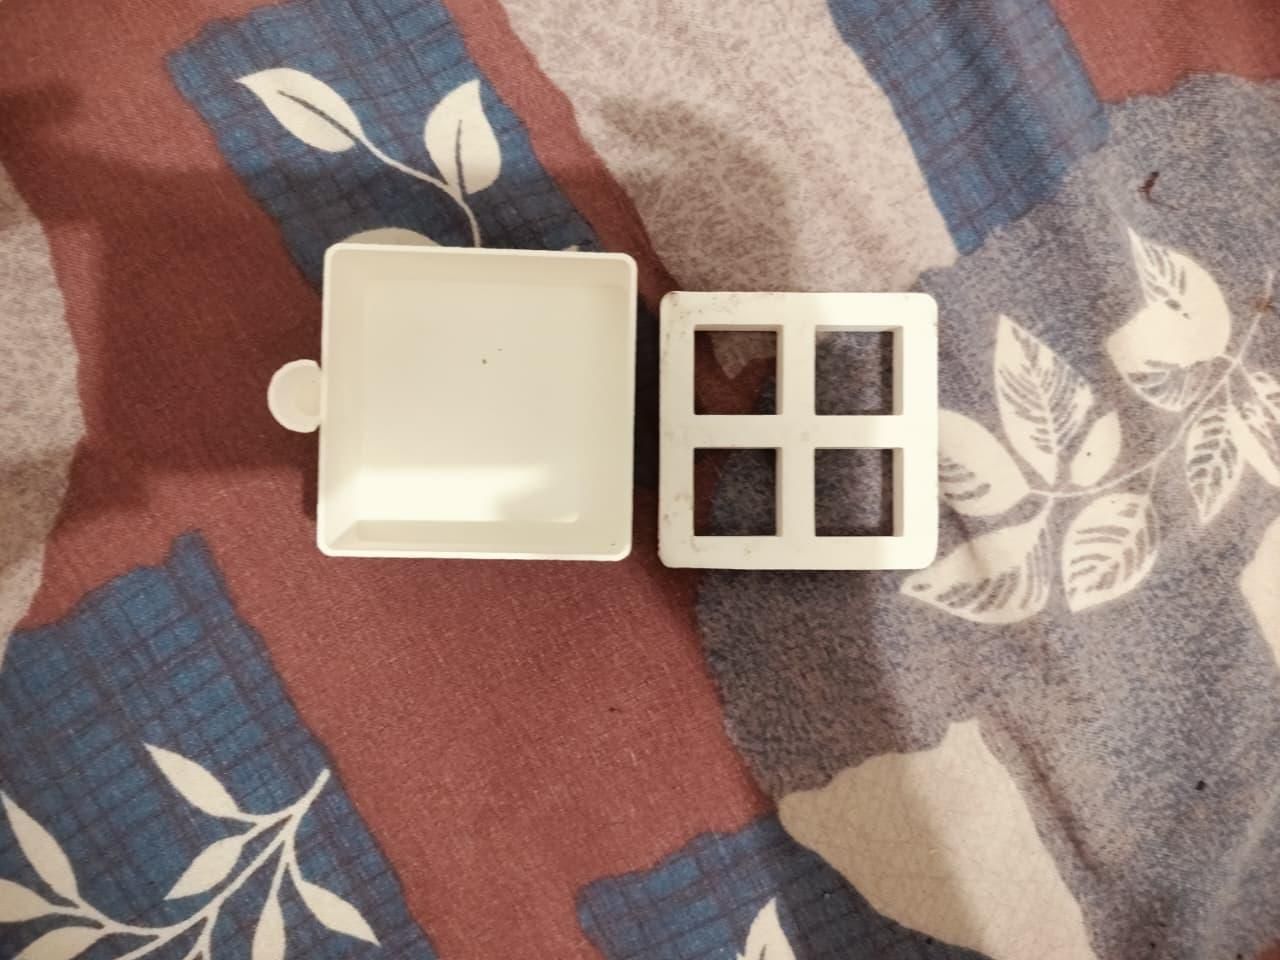
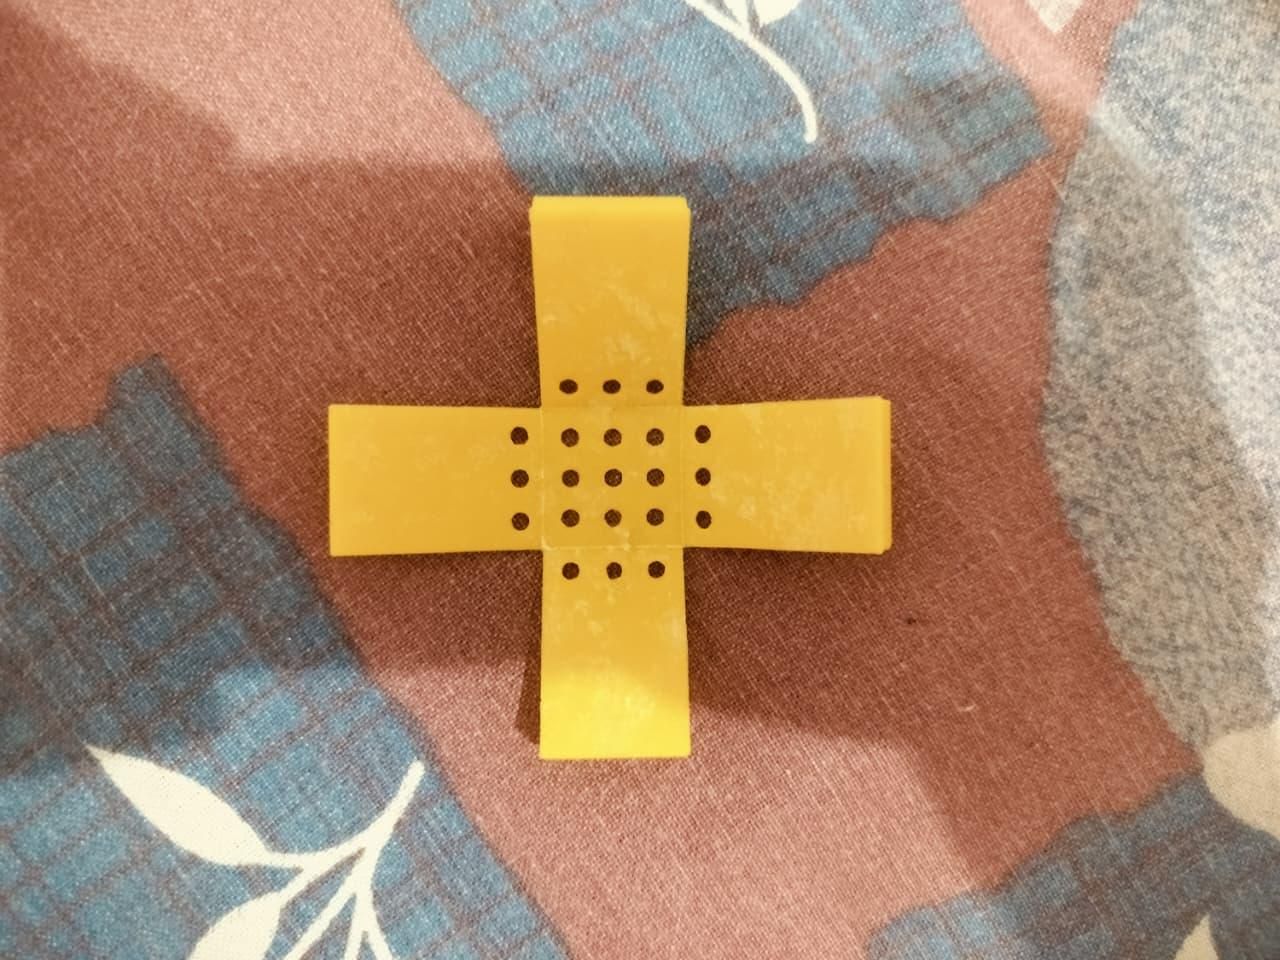
3D Printed Parts
- 4 × Seed Starter Pots
- 1 × Water Reservoir
- 1 × Pot Holder Tray
- 1 × Integrated Water Funnel
Tools
- 3D Printer (I used a Bambu Lab A1)
- Flush Cutters or Deburring Tool (optional, for cleanup)
- Small Funnel (optional, if not using the printed funnel)
Materials
- PLA Filament (recommended)
- Approximately 80g (replace with your actual filament usage from Bambu Studio)
- Potting Soil or Seed Starting Mix
- Seeds of your choice
- Water
Understanding How the ROOTS System Works
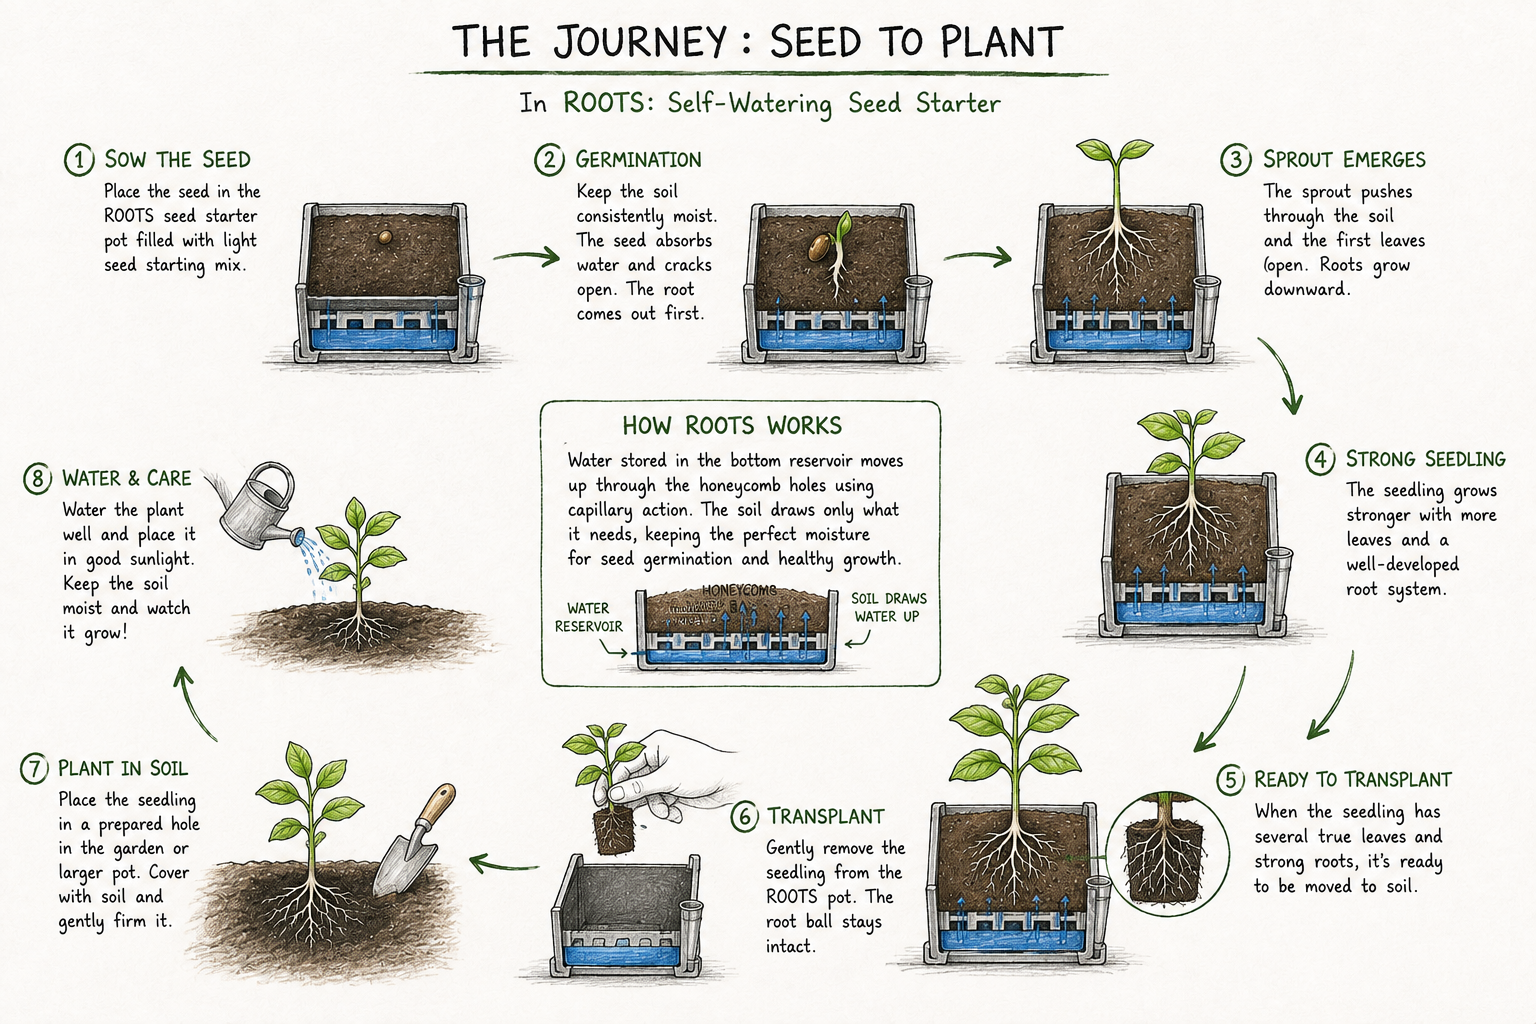
Every healthy plant begins with healthy roots.
The goal of the ROOTS System is simple: provide young seedlings with a constant supply of moisture without exposing them to the force of traditional top watering. During germination, seeds need consistently moist soil to activate growth, but pouring water directly onto the surface can wash away small seeds, disturb the growing medium, or damage delicate sprouts.
The ROOTS System solves this by using passive capillary watering.
Instead of watering from above, water is stored in a reservoir beneath each seed starter. The base of every pot features a carefully designed 21-hole honeycomb pattern that sits just above the water. As the soil begins to dry, it naturally draws moisture upward through these openings using capillary action. This process keeps the soil evenly moist while allowing the roots to absorb only the amount of water they need.
The result is a stable environment that encourages strong root development, improves germination, and significantly reduces the chances of overwatering or underwatering.
Once the seedlings have developed a healthy root system and several true leaves, they can be gently transplanted into a larger pot or directly into the garden. By this stage, the plant is strong enough to continue growing on its own.
The diagram below illustrates the complete journey—from sowing the seed to germination, healthy root development, and finally transplanting into the soil.
3D Printing the Parts
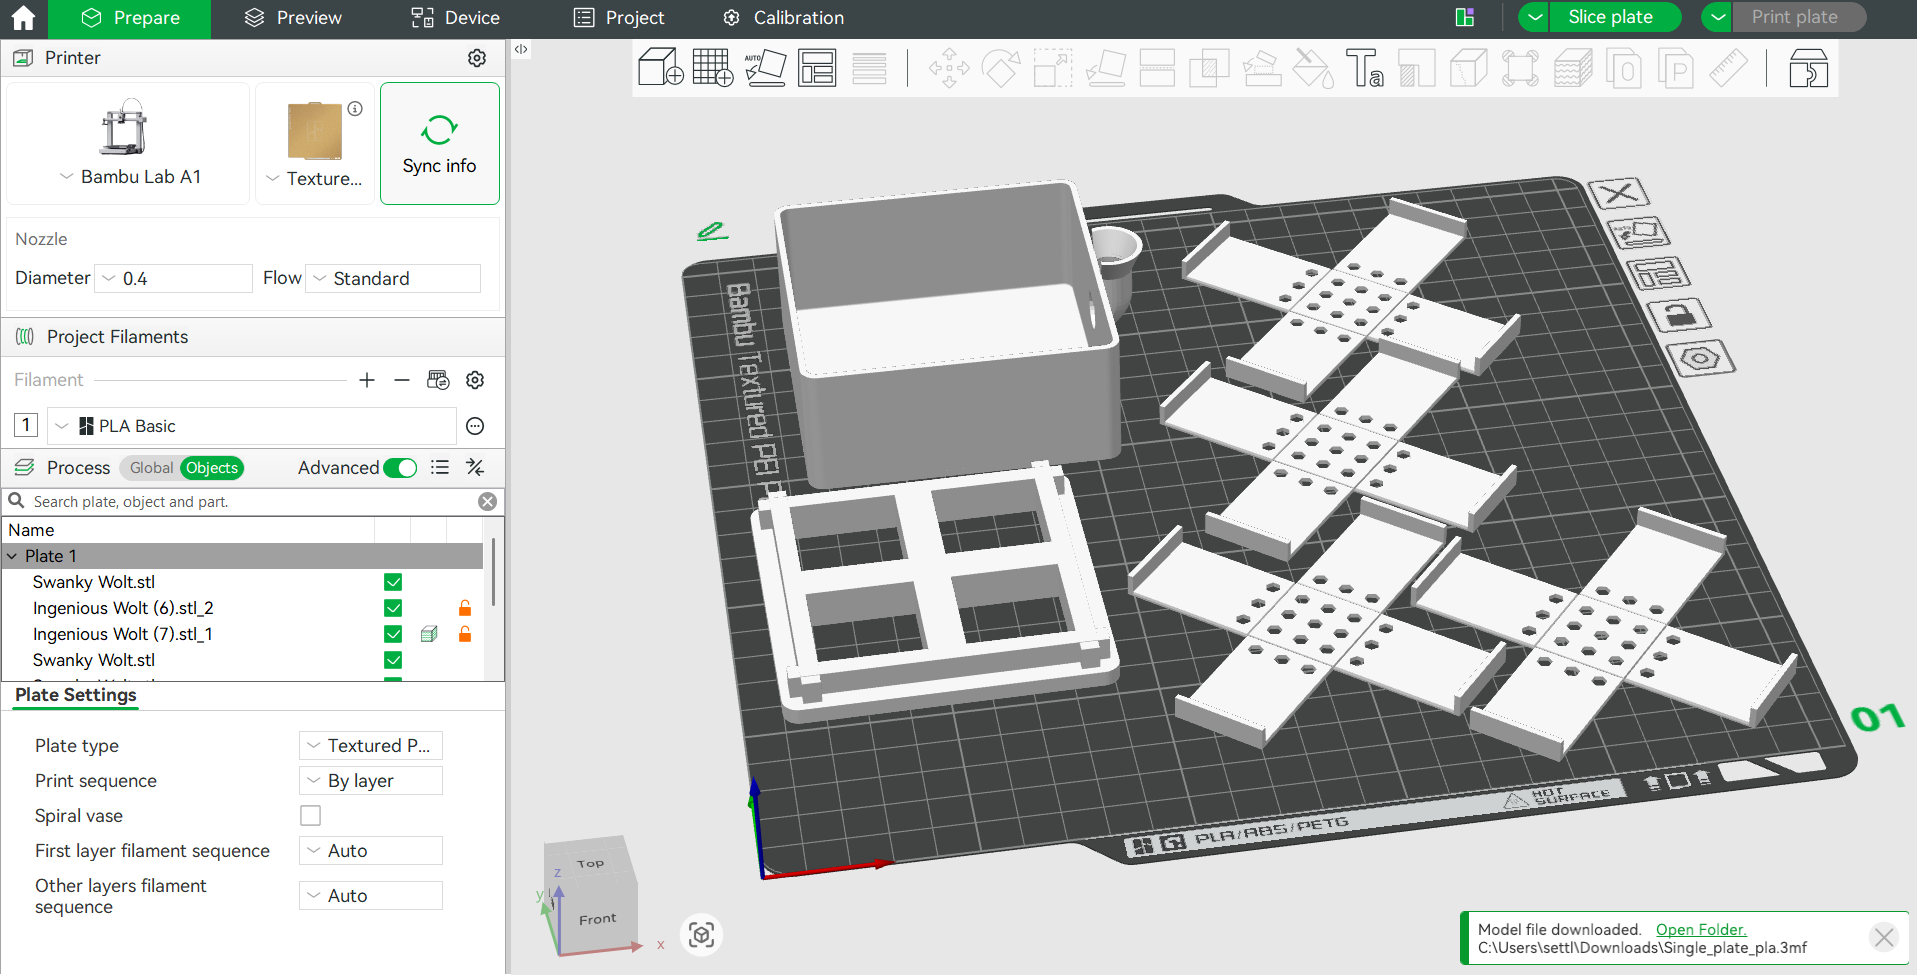
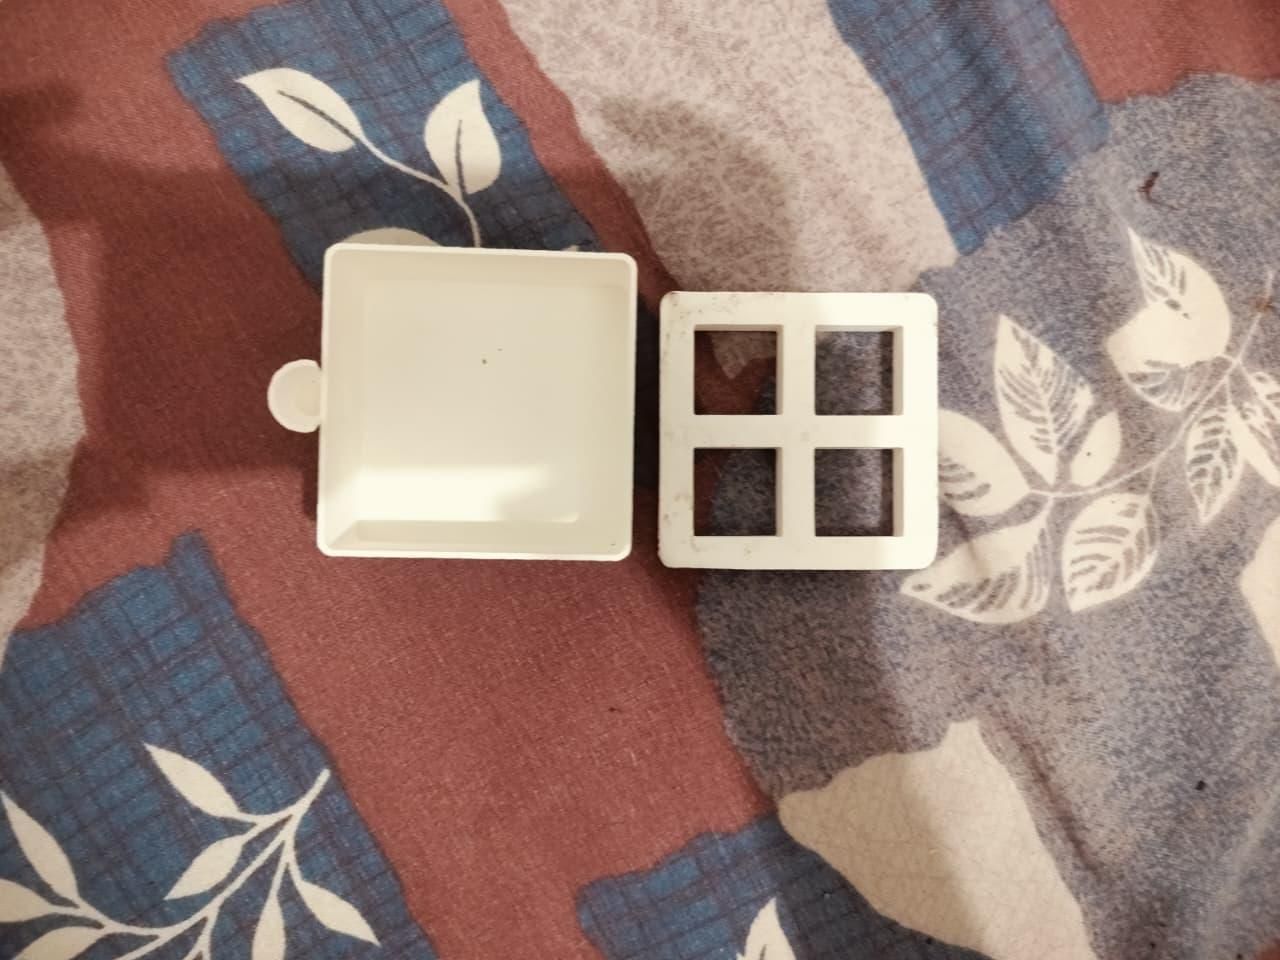
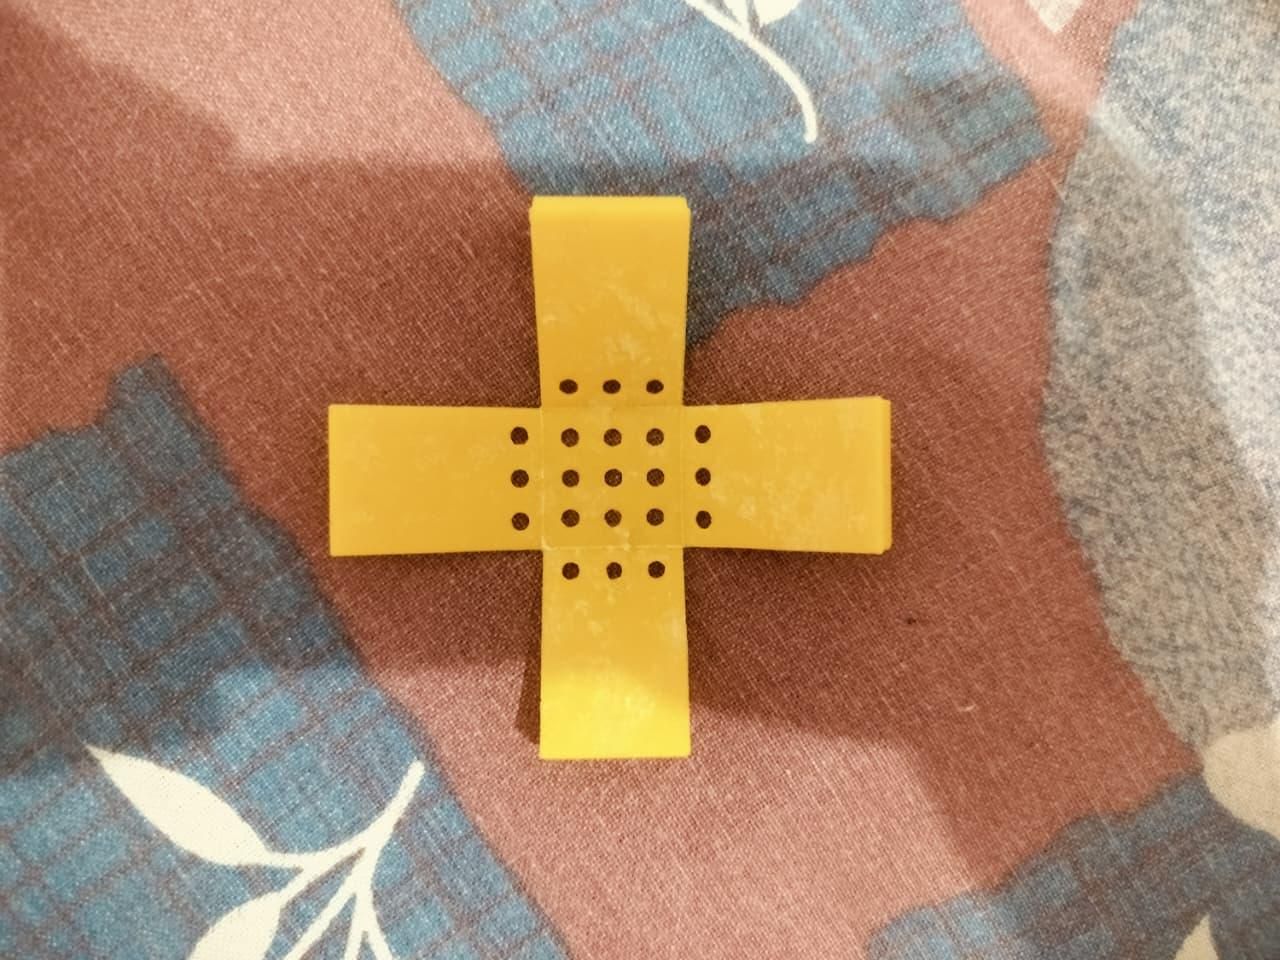
With the design complete, it's time to bring the ROOTS System to life. Every component has been carefully designed for support-free 3D printing, making the project easy to print on almost any FDM 3D printer. The seed starter pots are printed as a single flat piece, reducing print time and material usage while ensuring a clean surface finish. Once printed, they can be folded into their final shape in just a few seconds.
You can download all the required STL files from the attachments below this step. Simply download the files, import them into your preferred slicer, apply the recommended print settings, and start printing.
For this project, I used a Bambu Lab A1 with PLA filament, but any well-calibrated FDM printer should produce excellent results.
Recommended Print Settings
- 3D Printer: Any FDM 3D Printer
- Filament: PLA (Recommended)
- Nozzle Size: 0.4 mm
- Layer Height: 0.20 mm
- Wall Count: 3 Walls
- Infill: 15–20%
- Supports: Not Required
- Brim/Raft: Not Required
- Nozzle Temperature: 200–210°C
- Build Plate Temperature: 60°C
- Cooling Fan: 100% after the first few layers
Parts to Print
- 4 × Seed Starter Pots
- 1 × Water Reservoir
- 1 × Holder Tray
- 1 × Water Funnel (if printed separately)
Before Removing the Parts
Allow the prints to cool completely before removing them from the build plate. This helps prevent warping and makes removal much easier. Once removed, inspect each part and trim away any small strings or printing artifacts using flush cutters or a hobby knife.
Make sure all 21 honeycomb openings are clear, as these are responsible for allowing water to travel into the soil through capillary action.
💡 Printing Tips
- Print all parts in the same orientation as provided in the STL files.
- Use a well-calibrated printer for clean honeycomb openings.
- If your printer has bed adhesion issues, apply a thin layer of glue stick.
- Avoid printing too fast to achieve cleaner surfaces and more accurate fold lines.
- If using PETG instead of PLA, reduce the cooling fan speed slightly for better layer bonding.
- Clean the build plate before every print for reliable first-layer adhesion.
- Gently flex the fold lines a few times before assembly to make folding easier.
Once all the parts are printed and cleaned, you're ready to assemble the ROOTS System in the next step.
Assembling the ROOTS System
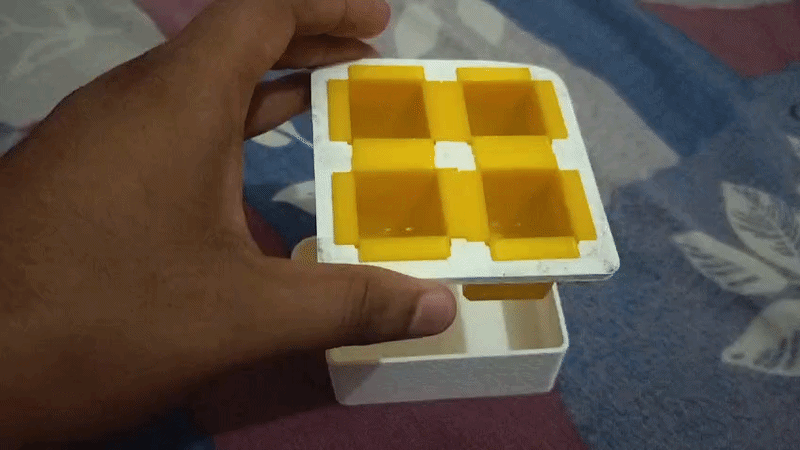
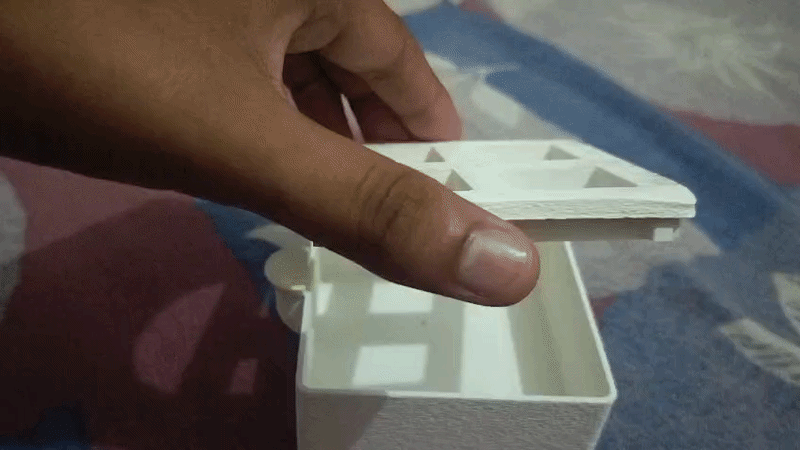
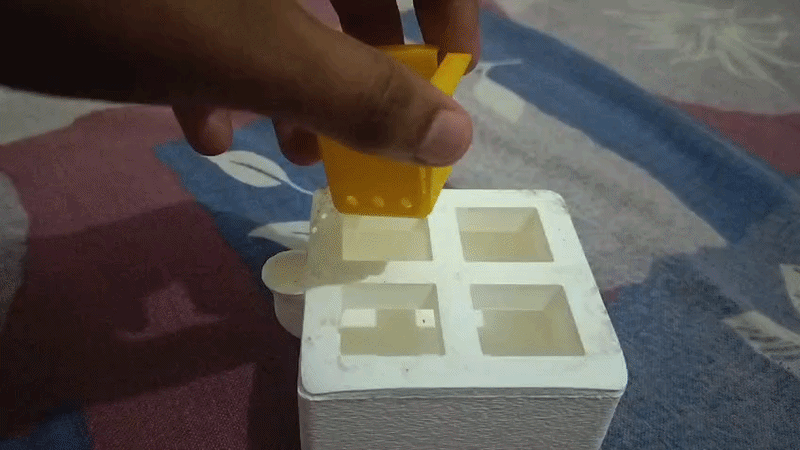
With all the parts printed, it's time to assemble the ROOTS System. The entire assembly process is quick and requires no glue, screws, or additional hardware. Every component has been designed to fit together precisely, allowing you to assemble the system in just a few minutes.
Assembly
- Place the water reservoir on a flat and stable surface.
- Position the holder tray securely on top of the reservoir.
- Fold each seed starter pot along the pre-designed hinge lines until it forms a square pot.
- Insert the four folded pots into the openings of the holder tray.
- Install the refill funnel into its dedicated opening on the side of the reservoir.
- Check that every pot sits securely and is properly aligned.
- Ensure the honeycomb base remains unobstructed so water can wick freely into the soil.
- Your ROOTS System is now fully assembled and ready for planting.
💡 Tips
- Fold the hinge lines gently during the first assembly to avoid unnecessary stress.
- Remove any small strings or print artifacts before assembling the parts.
- Make sure the holder tray sits level on the reservoir.
- Test the fit of each pot before filling it with soil.
- Add a small amount of water to the reservoir to confirm everything is seated correctly.
- Avoid forcing any parts together; they are designed to fit snugly without excessive pressure.
Once assembled, the ROOTS System is ready for the next step—adding the seed-starting mix, sowing the seeds, and filling the reservoir with water.
Add the Soil & Plant the Seeds
With the ROOTS System fully assembled, it's time to prepare it for germination. The system features four individual seed starter pots, allowing you to germinate up to four different seeds at the same time. This makes it perfect for growing multiple plant varieties or increasing your germination success.
Fill each seed starter pot with a lightweight seed-starting mix, leaving a small gap below the rim. Gently tap the pot to settle the soil, but avoid pressing it down too firmly. Loose, airy soil allows the roots to grow freely and improves water absorption through capillary action.
Next, place one seed in the center of each pot. The seed should be positioned just below the top layer of soil—not too deep. A good rule of thumb is to cover the seed with only a thin layer of soil, just enough to hide it from view. Planting the seed too deeply can slow germination or prevent it from sprouting altogether.
Once all four pots are planted, they're ready for their first watering from the reservoir in the next step.
Planting Instructions
- Fill all four seed starter pots with a seed-starting mix.
- Leave about 5–10 mm of space below the rim.
- Lightly level the soil without compacting it.
- Place one seed in the center of each pot.
- Cover the seed with a thin layer of soil—just below the surface.
- Do not bury the seed too deeply.
- Repeat the process for all four pots.
💡 Tips
- The four pots let you germinate four different seeds or four seeds of the same variety simultaneously.
- Use a light, well-draining seed-starting mix for the best germination results.
- Most vegetable and herb seeds germinate best when planted just below the soil surface.
- Avoid pressing the soil too firmly, as seedlings need loose soil for healthy root growth.
- Label each pot if you're planting different varieties.
Watering the ROOTS System
.gif)
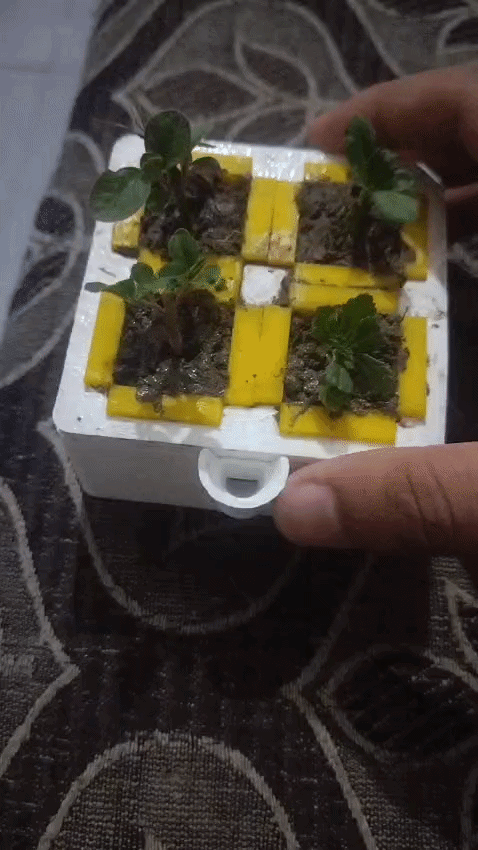
With the seeds planted, it's time to activate the ROOTS System. Before the self-watering mechanism takes over, the soil needs a small amount of moisture to begin the capillary wicking process.
Using a spray bottle or a watering can with a gentle shower setting, lightly sprinkle water over each of the four seed starter pots. This initial watering helps settle the soil around the seeds and provides the moisture needed for germination. Be careful not to pour too much water, as excessive watering may disturb the seeds or push them deeper into the soil.
Once the top layer of soil is evenly moist, fill the water reservoir through the built-in refill funnel. As the reservoir fills, the ROOTS System begins working automatically. Water is drawn upward through the honeycomb base by capillary action, allowing the soil to absorb only the moisture it needs. This creates a consistently moist environment that encourages healthy germination while eliminating the need for frequent top watering.
In my testing, a full reservoir lasted approximately 3–4 days before needing to be refilled. The exact duration will depend on your local temperature, humidity, sunlight, and the type of plants you are growing. Simply check the water level every few days and refill the reservoir through the funnel whenever it starts running low.
Watering Instructions
- Lightly sprinkle water over each of the four seed starter pots.
- Moisten the top layer of soil without soaking it.
- Fill the water reservoir through the built-in refill funnel.
- Allow the ROOTS System to begin watering the soil automatically.
- Check the reservoir every few days and refill it when necessary.
💡 Tips
- Use a spray bottle for the initial watering to avoid disturbing the seeds.
- Avoid heavy top watering after the first day; let the self-watering system do the work.
- Check the water level every 3–4 days or sooner during hot and dry weather.
- Water consumption will vary depending on temperature, humidity, sunlight, and plant type.
- If the top layer of soil appears completely dry during germination, lightly mist the surface while allowing the reservoir to continue supplying moisture from below.
Now all that's left to do is wait for nature to take over. Within a few days, the seeds will begin to germinate, and the ROOTS System will continue providing the consistent moisture needed to develop strong, healthy seedlings. 🌱
Time to Transplant
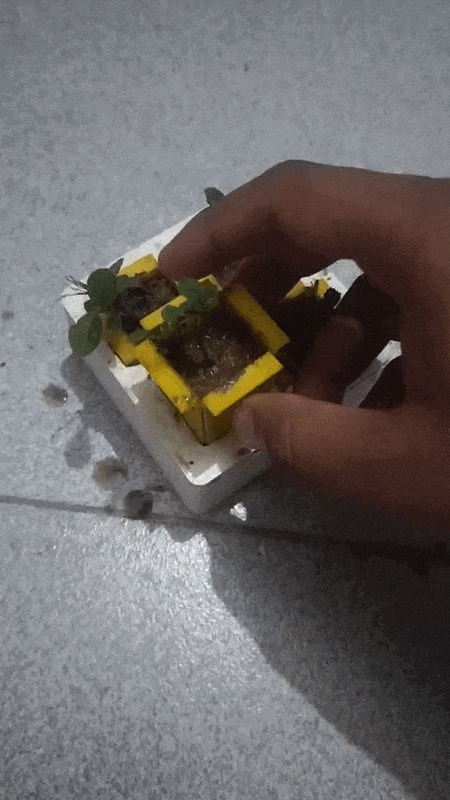
After a few days, your seeds will begin to germinate and develop into healthy seedlings. Once they have formed a strong root system and produced 2–4 true leaves, they are ready to be transplanted into a larger pot, raised bed, or directly into your garden or backyard.
Carefully lift each seed starter pot out of the holder tray and gently remove the seedling. Try to hold the plant by its leaves rather than the stem, as the stem is delicate and can be easily damaged. If the roots have grown through the honeycomb openings, gently loosen the soil around them before lifting the seedling.
Dig a small hole in your garden or planting container that is slightly larger than the root ball. Place the seedling into the hole, cover the roots with soil, and gently press the surrounding soil to provide support. Finally, water the transplanted seedling lightly to help it settle into its new environment.
With the hard work of germination complete, your plant is now ready to continue its journey outdoors, where it can grow into a healthy and productive plant.
Transplanting Guide
- Wait until the seedlings have developed 2–4 true leaves.
- Remove each seed starter pot from the holder tray.
- Gently lift the seedling while holding it by the leaves, not the stem.
- Dig a hole slightly larger than the root ball.
- Place the seedling into the soil and cover the roots.
- Lightly press the soil around the base of the plant.
- Water the transplanted seedling immediately.
💡 Tips
- Transplant during the early morning or late evening to reduce transplant shock.
- Water the soil before transplanting if it feels dry.
- Handle the roots gently and avoid disturbing them as much as possible.
- Leave enough spacing between plants according to the seed variety.
- Keep newly transplanted seedlings out of intense sunlight for the first day if possible.
🌱 Congratulations! Your seedlings have successfully completed their journey from seed to plant using the ROOTS System. Now it's time to let nature take over and watch them thrive in your garden or backyard.