Rainbow Ripple Crochet Wall Art Flower
by sharlzndollz in Craft > Fiber Arts
61 Views, 1 Favorites, 0 Comments
Rainbow Ripple Crochet Wall Art Flower
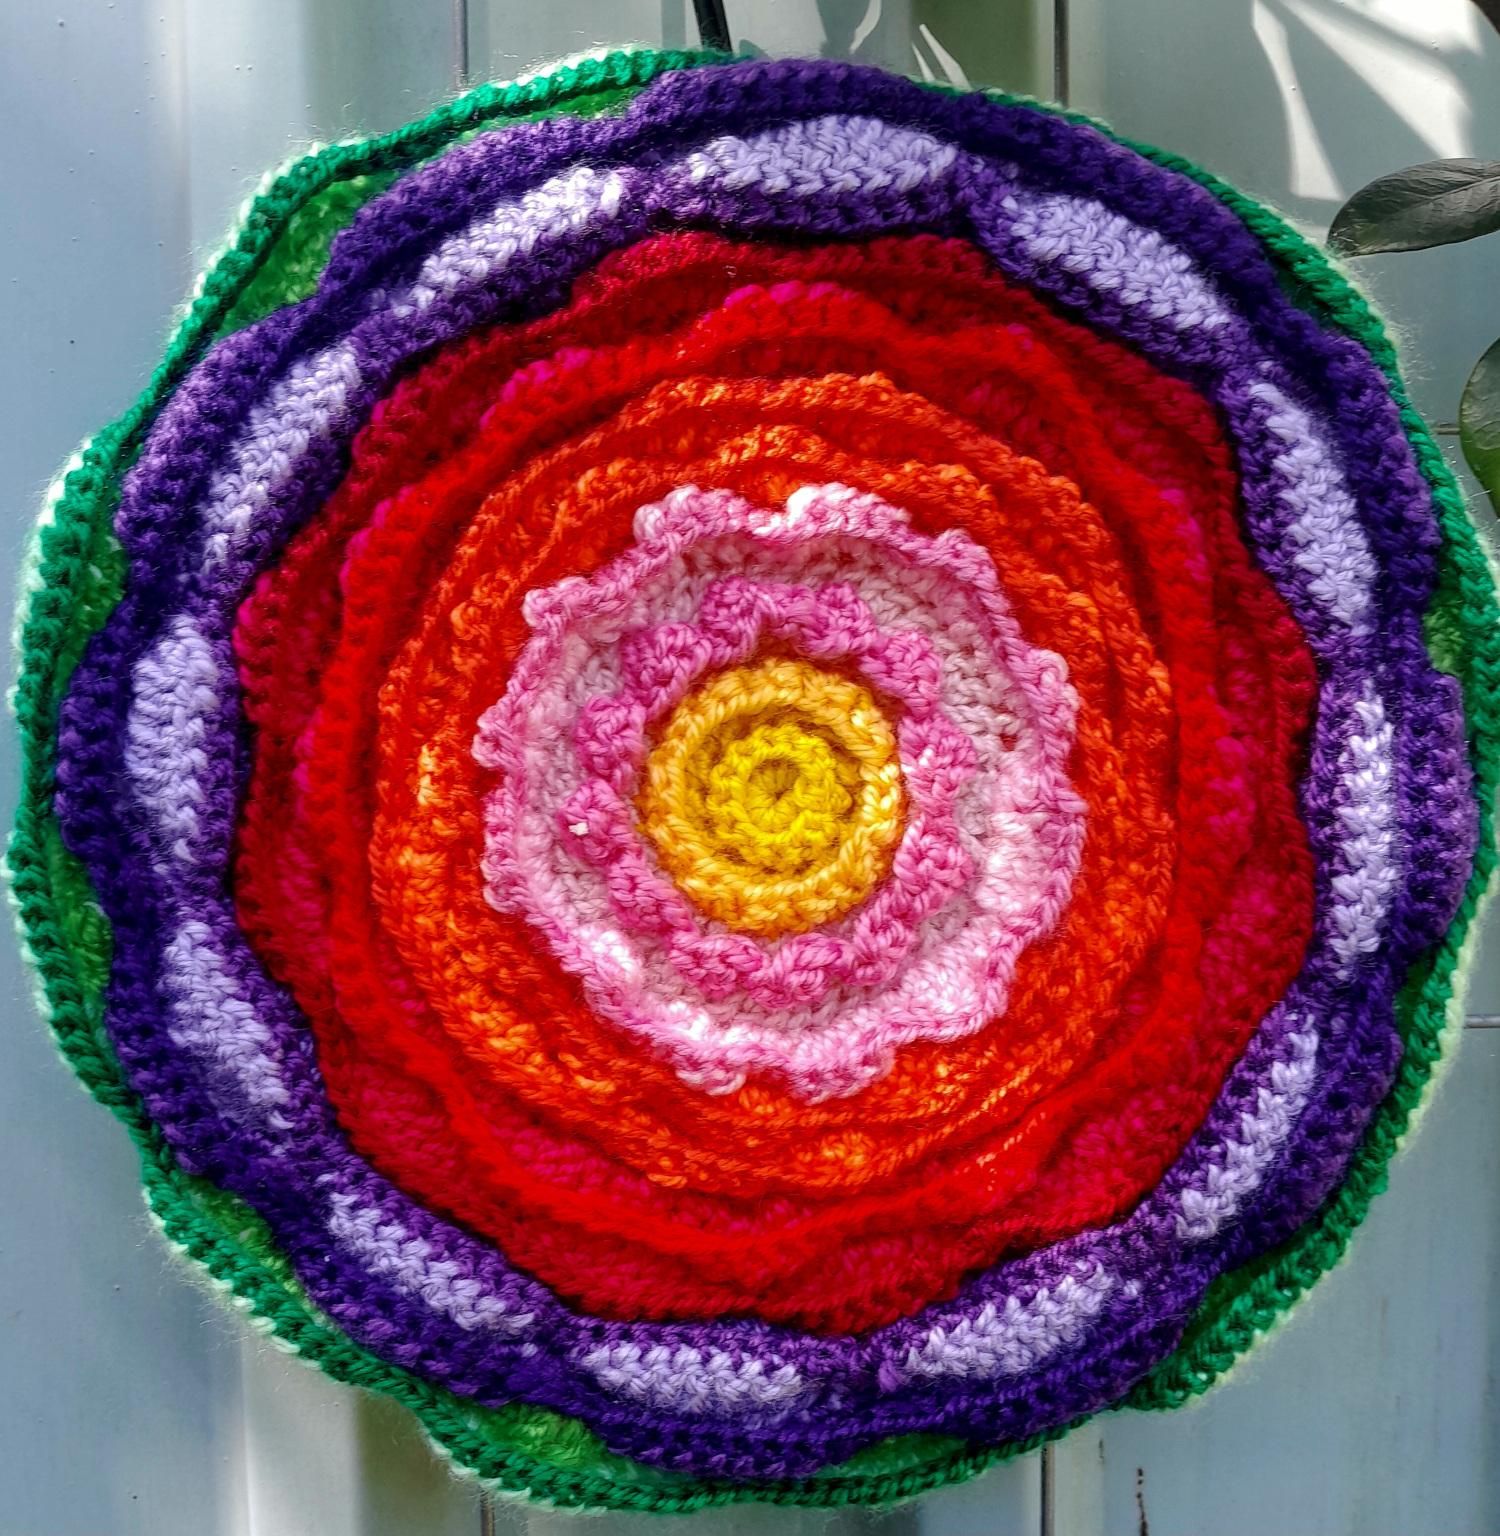
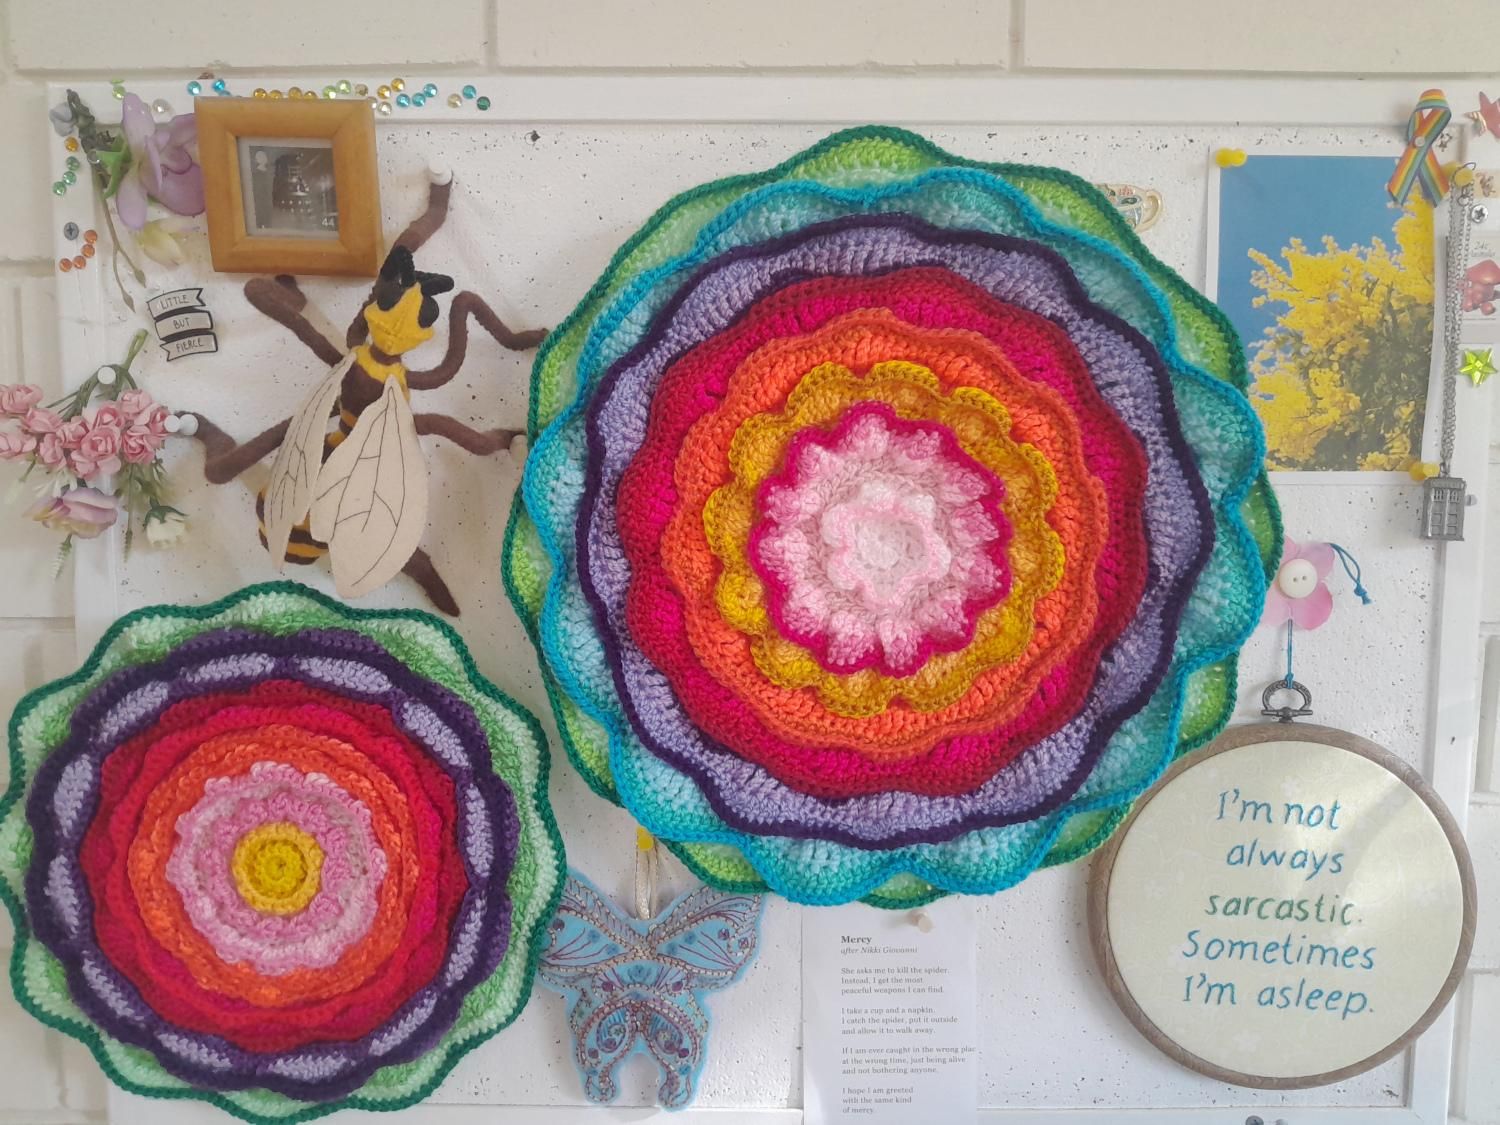
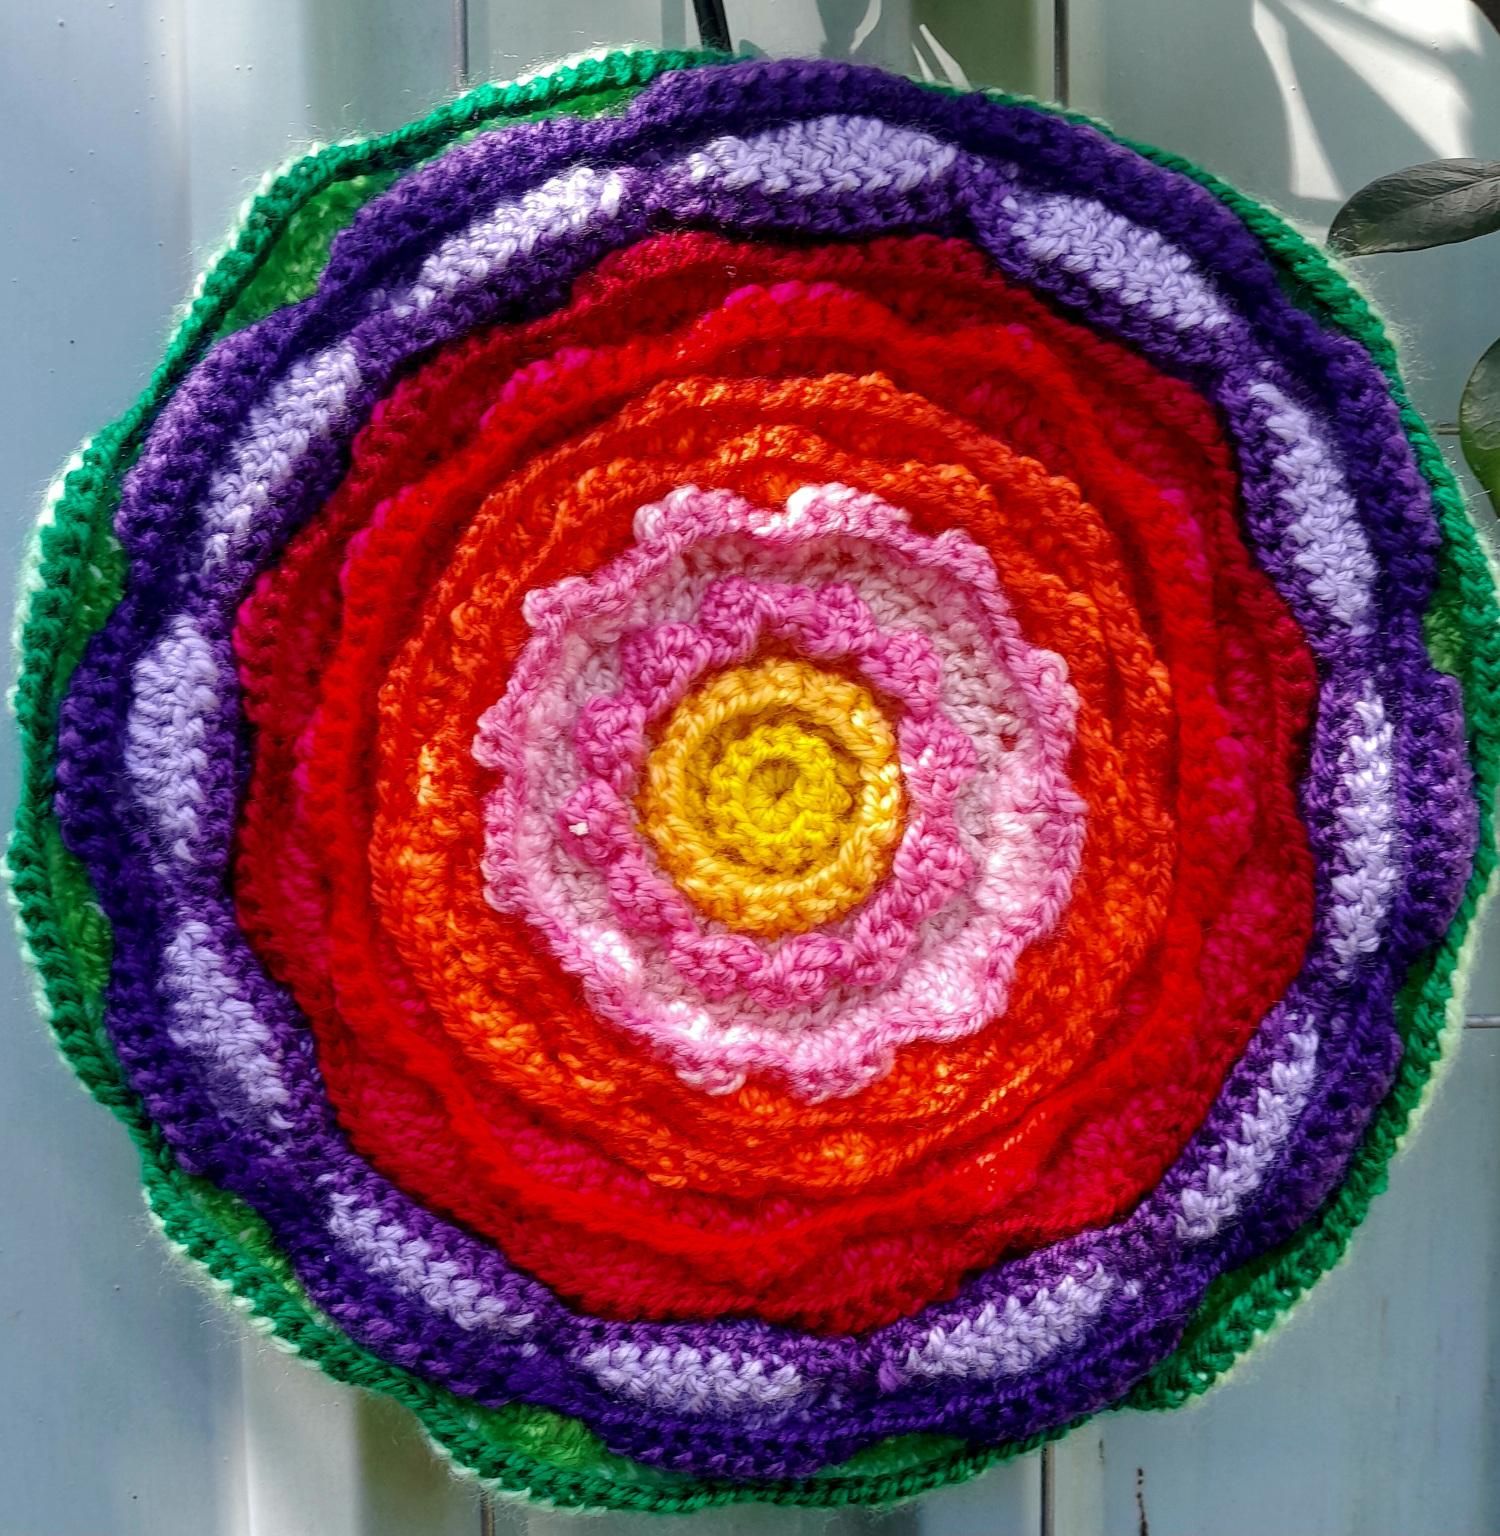
Fancy some crochet wall art and in a flower design that will last the test of time? This project is for you! The results are eye catching and I have had mine mounted on my corkboard for about a year now, with no sign of wilting… so much easier than the regular garden variety. This Instructable assumes you know and understand basic crochet and in US terms. If your a newbie to crochet, this would not be a great project to start on, but if you love to crochet and want to try out thread painting, this pattern will move you in the right direction. I have included the instructions for the smaller of the 2 flowers shown. The larger flower is just constructed with more rows. Give it a go after trying the smaller version.
Supplies
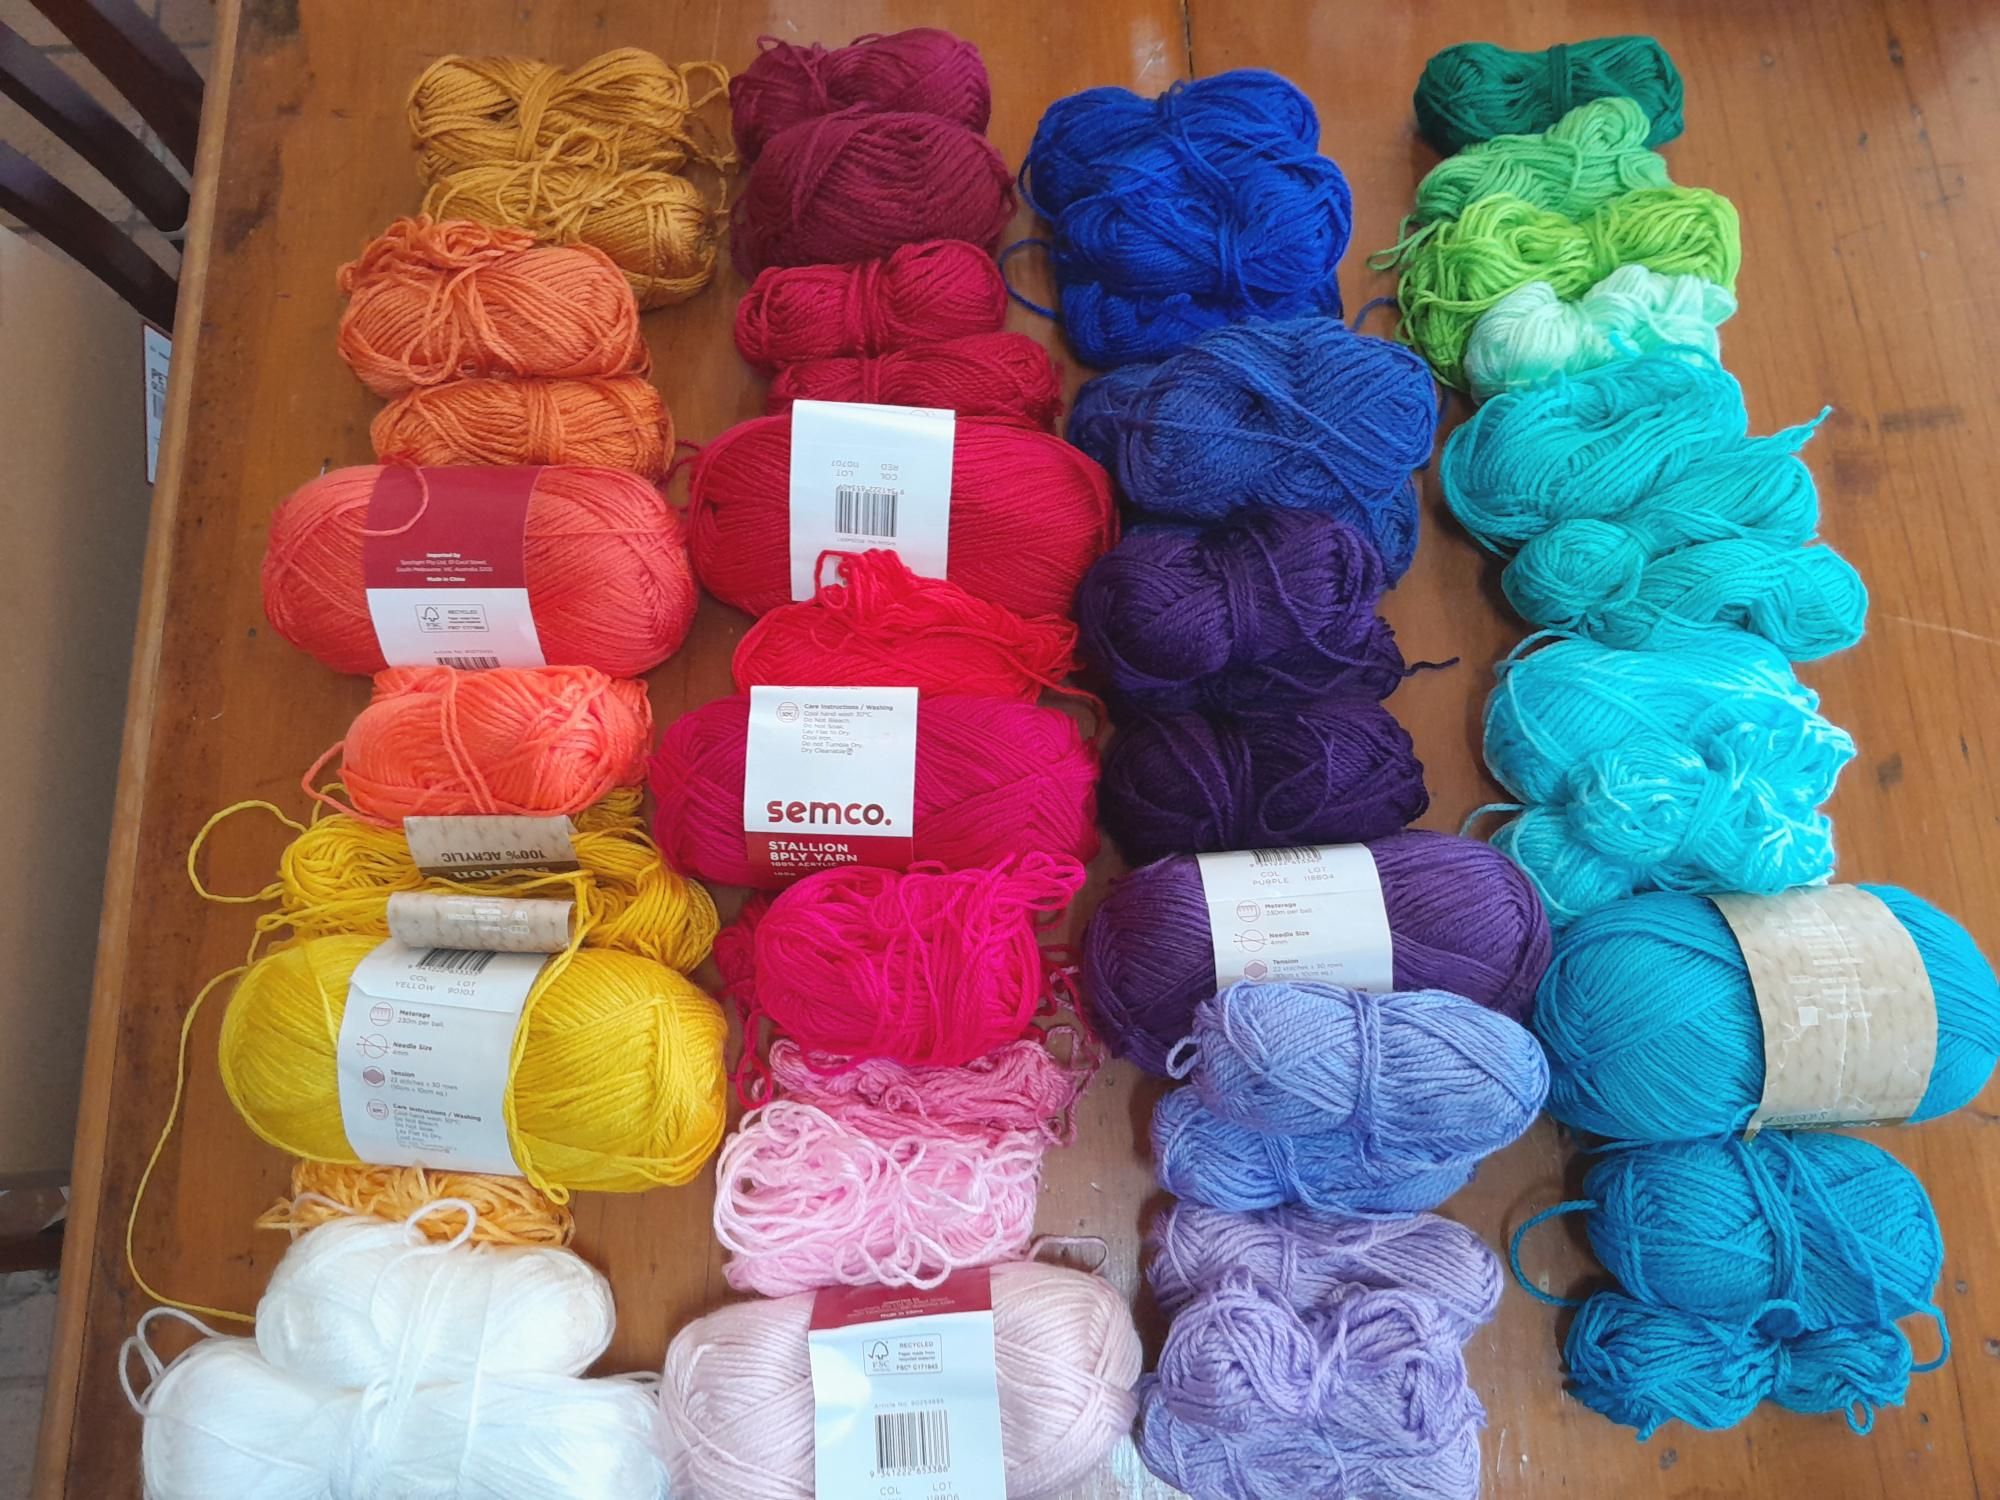
Materials required
- 3.5mm crochet hook
- 750g fun pack bag of acrylic yarn on lots of colours (8 ply) weight plus any additional Semco Stallion brights your have. Colour is the key. The Stallion and fun pack yarns also are shiny which adds to the “pop” of the project.
- Darning needle for sewing in ends
- scissors
- Stitch markers (optional)
- PVA glue and brush
- 8 inch (20.3cm) round canvas
This pattern uses US terms:
Abbreviations
Ch = chain
SC = single crochet
DC = double crochet
HDC = half double crochet
TC = Treble crochet
SS = slip stitch
BLO = Back loop only
FLO = Front loop only
About the Pattern
This project is worked in 2 parts. Part one makes the base of the flower. All rows are worked Back Loop Only (BLO).
Part two is worked from outer edge into the middle on the remaining front loops from the base, i.e. FLO.
It's worked in fun pack colours and Semco Stallion yarn on a 3.5mm hook
Hint: I like to count each row in the following way. I call the stitch where there is 2 DC ‘A’&’B’, then I count the stitches between. Each set of stitches between will be 2 less than the row number, e.g. row 10 is “2DC AB”, eight single DC, repeat.
Base Layer Construction

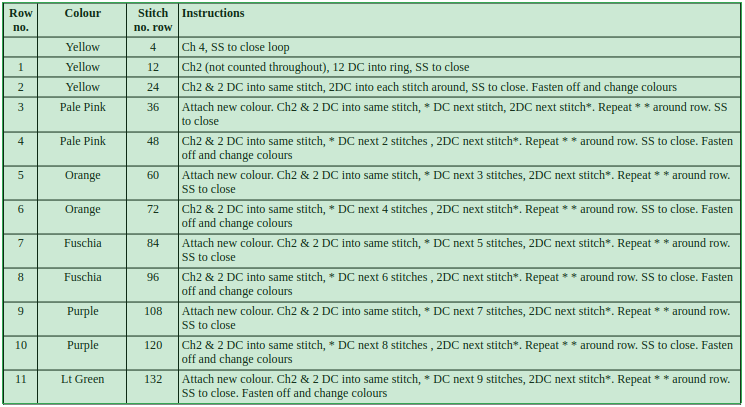
The base layer is worked as a basic circle. It's worked in the BLO only. The chart of the stitches is attached.
The Flower Petals Upper Layer


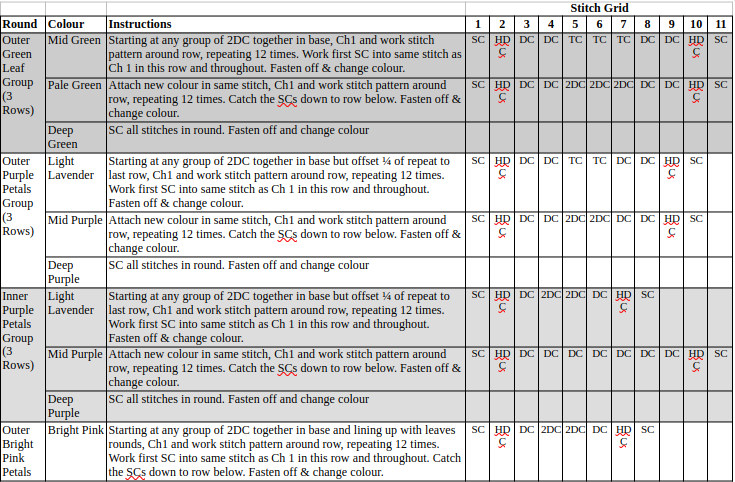
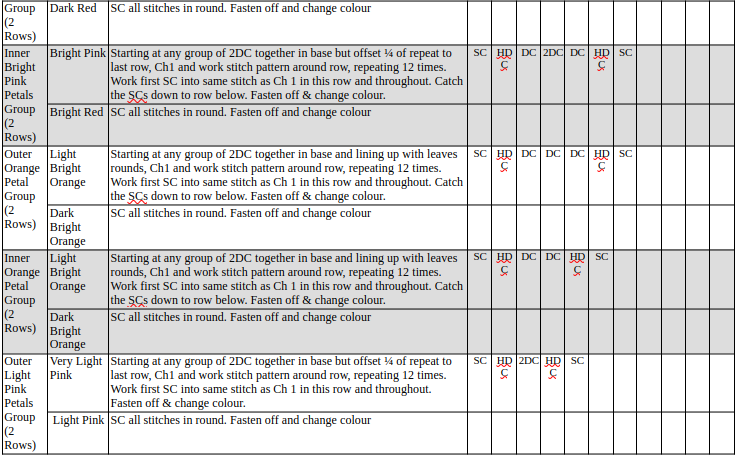
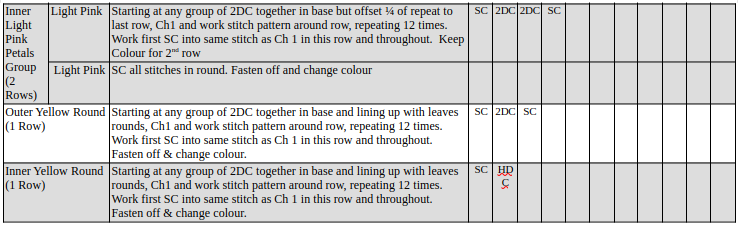
All petal/leaf rounds are worked from outside in starting at the edge of row 11, back to centre. Initial round of each section are worked into the FLO of base rows except the outer edge. Pattern of stitches in each round is divided into 12 groups of stitches. Some rounds are offset ¼ of repeat to the previous round. Rounds are worked from outside in because some rounds are caught down onto the round behind them (See picture – yes I’m a leftie!)
The chart of the petals is attached.
Making Up

Line up flower to ensure it matches canvas size. If not, block flower. Protect your work surface, then apply a generous amount of PVA glue to canvas surface using brush and position flower on top. Allow to fully dry before moving. The flower when dry can be hung from any angle and is sturdy and resilient.
The instructions given are for the smaller of my wall art flowers. The larger size is just more rows. It would be a good challenge with your new skills, to create your own!