Random Servo Position With Micro:bit and Paper Playground
2181 Views, 16 Favorites, 0 Comments
Random Servo Position With Micro:bit and Paper Playground


This Instructable will show you how to create a random spinner dial using a 180-servo, micro:bit, and a Paper Playground program. Paper Playground is an open-source system that enables you to design tangible, multimodal experiences using your computer's web browser, a webcam, and printed pieces of paper. [This particular example does not require a webcam and printer]. Get up and running with Paper Playground here. The main website for Paper Playground is here.
This project is a beginner's companion to the Instructable "Micro:bit and Paper Playground Integration for Enhanced Digital-Tangible Experiences."
The Paper Playground project was developed by the Craft Tech Lab and PhET Interactive Simulations at the University of Colorado, Boulder, funded by National Science Foundation Award #2119303.
Supplies
- Paper Playground system installed on your computer running in a Web Bluetooth-enabled browser (such as Chrome).
- MakeCode
- BBC micro:bit v2 or later.
- Cable for connecting the micro:bit to the laptop.
- 180 micro servo motor. It is possible to use larger servos, but it is necessary to supply an external power source. There are details about extending servo functionality here. Be sure to use a 180 servo, not a continuous one.
- Alligator clips and jumper wires for attaching the servo to the micro:bit. We like these alligator clips with pigtails to minimize the number of clips and jumper wires. A more common solution is to use regular alligator clips with male/male jumper wires.
- A servo horn (little plastic piece that attaches to the servo). Most servos come with a pack of various shapes. A stiff piece of cardboard or a little stick glued to the servo can work as well.
- A paper spinner, decorated and divided to suit your purposes.
- [Optional] Webcam and color printer.
Paper Playground Set-Up

The first thing to do is to set up the Paper Playground system. It may seem complex, but you'll just need the basics to get your servo up and running. Follow the step-by-step instructions here.
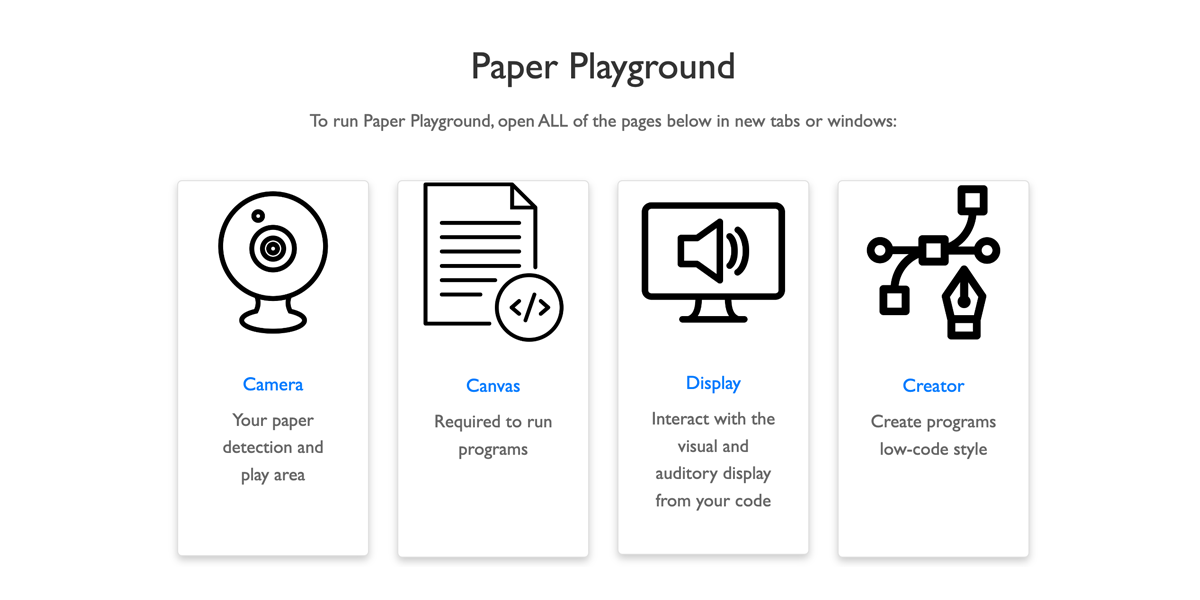
If all goes well, you'll see the screen above in your web browser. Click each link to open it in a new tab/window.
It is important to note that you do not need a webcam for this particular example. You can use a "virtual" paper program on-screen instead of an actual piece of paper with program dots.
We'll first list the bare-bones set-up directions, and then we will circle back to what's really going on in the "Under the Hood" steps.
Load the Project in Paper Playground

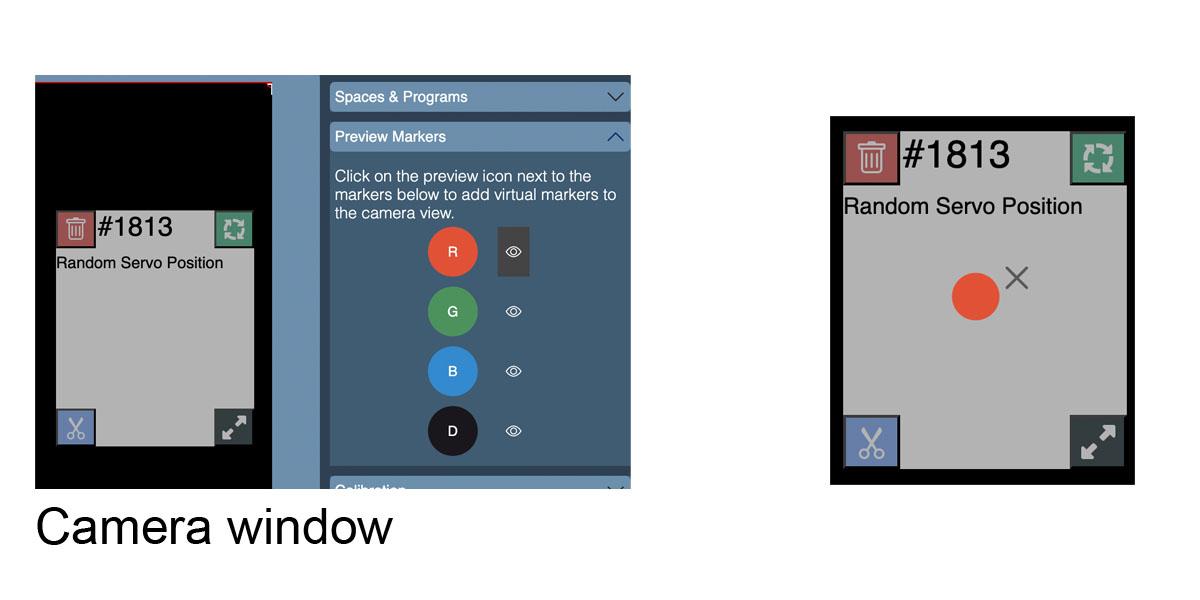
Create a new empty project, and then load the file below. Caution: Loading the file will erase any other programs in your Creator project space, so it is important to start a new empty project. You will see program #1813 in the Creator window, as shown on the right in the figure above. Click on the "Send to Playground" button.
Switch to the Camera window. Click on the eye icon next to the program in the list that appears on the right under Programs. You'll see a rectangle with the program name and number appear on screen.
Downloads
Hook Up the Servo and the Micro:bit

If you are new to servos and the micro:bit, refer to our introductory Instructable here.
This set-up will only power a micro servo (the smallest size). If you want to use a larger servo, you will need an additional power source using a breakout board. We have Instructables for WaveShare, Moto:bit, and Hummingbird.
It is helpful to attach a servo "horn" to your servo in order to have a surface to affix the pointer. A variety of servo horns usually come packaged with servos, often in the shapes of propellers or circles. If you don't have a servo horn, a piece of stiff cardboard can work.
Make a Dial and a Pointer
Cut out a semi-circle and divide it into sections. Make an arrow to attach to the shaft of the micro:bit. In our example, we've divided the semi-circle into the four Hogwarts houses, to create a micro:bit Sorting Hat.
Downloads
Use MakeCode to Calibrate the Dial and the Servo
We want to align the dial and the micro:bit. In order to do that, we want to see where the arm of the servo sits when the servo is set to 0 degrees (or 180 degrees).
Import the file below into MakeCode.
Before downloading to the micro:bit, click on the gear icon and choose the Project Settings option. Be sure that "No Pairing Required: Anyone can connect via Bluetooth" is selected and click the save button. (The micro:bit will need that setting later in order to communicate with Paper Playground).
The simple MakeCode program moves the servo to 0 degrees when you press button A, and 180 when you press button B. Use those positions to align your paper dial and arrow.
Downloads
Add the MakeCode Bridge Program to the Micro:bit
Once your paper dial is attached to the servo, drag the file below to your micro:bit (or import and download it using MakeCode). This is the file that enables the micro:bit to talk to Paper Playground by Bluetooth.
Downloads
Connect the Micro:bit Via Bluetooth to Paper Playground
Click the blue "Connect to BLE" button on the right side of the screen. You will see a list of available devices appear. Select your micro:bit. You should then see a confirmation message appear in the Console window that looks something like:
Connected to bluetooth device, BBC micro:bit [name of micro:bit]
Run the Program!

On the right side of the Camera window, click the Preview Markers option. Click the eye icon next to R, and you'll see a red marker appear. The servo should move to a different random position each time you drag the marker onto the program.
Under the Hood: What's in the Paper Program?

Paper Playground is conceptually based on the model-view-controller method of thinking of software. If you have never seen this idea before, take a look at Mozilla's quick explanation here.
What are we doing in Paper Playground? We have a single program (#1813), which we have named "Random Servo Position".
This program has a model component called randomRedMarkerOn. Clicking on the pencil icon shows us that this model component is a Boolean (true or false variable) that is true if there is a red marker sitting on top of the program, and false otherwise.
randomRedMarkerController is what controls randomRedMarkerOn. When a red marker is moved onto the program paper, this controller switches randomRedMarkerOn to "true". When the marker moves off the program, randomRedMarkerOn automatically reverts to "false".
Under the Hood: How Do We Talk to the Micro:bit?

This controller sends messages via Bluetooth to the micro:bit. Select the Bluetooth Services as shown on the screen.
We wrote some javascript custom code (shown on the right). Here's a general explanation:
(Line 5) Create a variable called myRandomNumber. This uses a built-in javascript function called Math.random, which returns a floating point number from 0 to 1. We do some math to parameterize that random number into an integer from 0 to 180, so that we can send that number to the 180 servo.
(Line 10) If the red marker is on the program, we create a string with the word “angle:” and the value of the random number. We then send that string using Bluetooth services to the micro:bit. uART is one way to send and receive information over Bluetooth.
The micro:bit then receives the string and executes MakeCode that we previously downloaded.
Under the Hood: What's in the MakeCode Program?

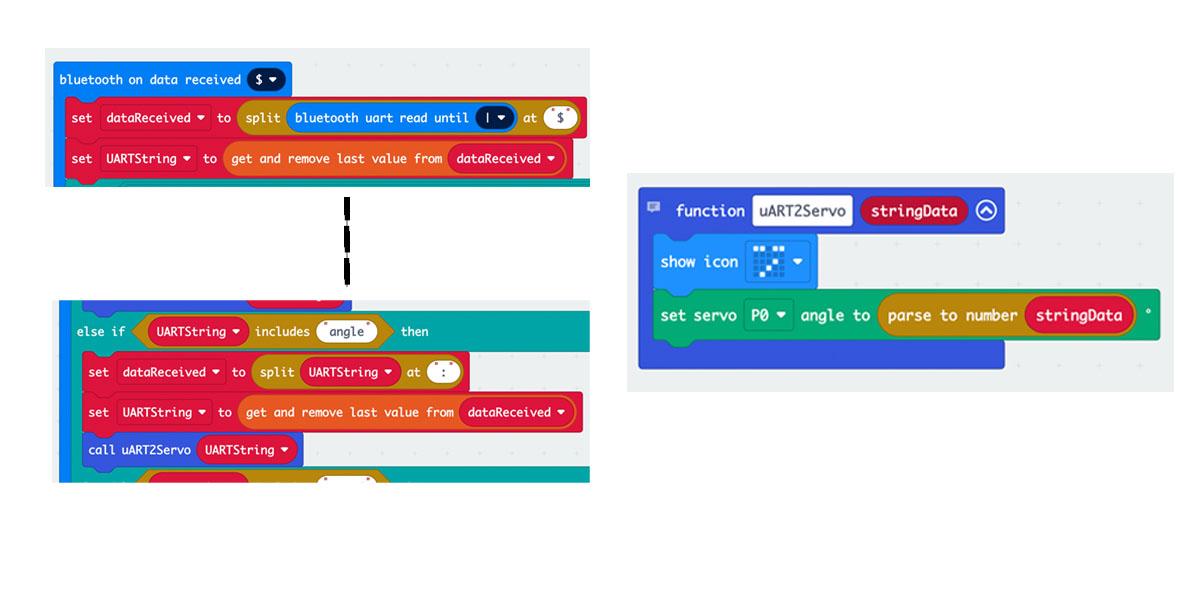
Once we send our string from Paper Playground to the micro:bit, we do some processing using the MakeCode program we downloaded to the micro:bit in Step 6.
Recall that we generated a random number using javascript in Paper Playground.
An in-depth discussion of Bluetooth in MakeCode is outside the scope of this Instructable, but the general idea shown above is that Paper Playground sends MakeCode a string containing the word "angle". When MakeCode sees that word, it then extracts the number after it (in the form of a string), and calls the function uART2Servo (shown on the right). uART2Servo takes that stringData, converts it into a number, and sets the angle of the servo connected to Pin 0 (P0).
Here are some resources for learning about bluetooth on the micro:bit/MakeCode.
Optional: Use a Webcam and Paper
To use an actual sheet of paper for the program as shown in the video, print the program attached here, as well as a paper marker. Make a paper marker by printing the program at approximately 125% size and cutting out the circle of the appropriate color.
More details about setting up a Paper Playground webcam are here.
Downloads
Ideas
Here are other activities for extending this project:
- Create a full-circle random dial by changing the equation in the custom code (Step 10) to choose a random number between -180 and 180.
- Attach a second motor to P1 or multiple motors using a motor shield/breakout.
- Think up a game that uses randomly generated servo positions.
Other Paper Playground Projects
Check out our micro:bit Note Sequencer with Paper Playground to create a musical note player.