Raspberry Pi Configured for a Maker Fair
by steve.m.graves in Circuits > Raspberry Pi
1832 Views, 6 Favorites, 0 Comments
Raspberry Pi Configured for a Maker Fair
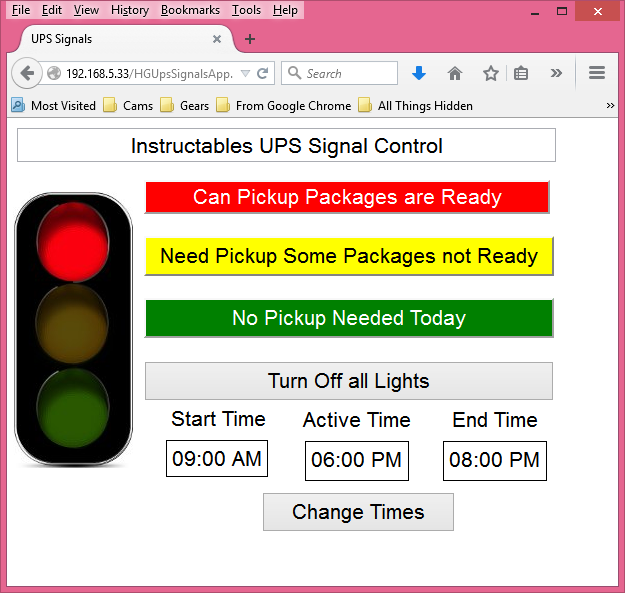

I use the Raspberry Pi a lot in projects that I am showing at various Maker Fairs. I setup the Raspberry Pi's web server as the front end of an interface that can control various things. The web server can be accessed through any browser, including browsers on smart phones and tablets. No need to write an app. One can write code for a browser. The code will run on an iPhone or Android device.
Note: the one step Instructable is to take the attached image and use it in a B+ model Pi. The image was created by following the steps in this Instructable.
This Instructable can also be used as a reference on how to be a good WiFi neighbor at a Maker Fair. You can send the link of this Instructable to your Maker Fair administrator to demonstrate that you know how to limit your Tx power and how to avoid the Maker Fair's WiFi channels.
Frankly, this setup has not been easy. There are a lot of tutorials out there on making a Raspberry Pi into an Access Point. None of them address several issues that I found. A race condition with the DHCP client. Power management for the WiFi. (Power management will arbitrarily shut down the WiFi). And properly starting hostapd (another race condition). I can't guarantee that this setup is bullet proof. In fact, I expect that many WiFi adaptors are going to present a new set of problems (my adaptor is based on the Ralink RT5370 chip set). This Instructable gives you the benefit of hours of troubleshooting and Googling. I was not happy with a setup that worked some of the time or even most of the time. My setup is now reliable. I hope yours will be, too.
Above I am showing my UPS Traffic Light. The web server allows me or my employees to set the state of the light through the network. The light signals our UPS man how our shipments stand without him getting out of his truck. Sometimes we can save him the walk to our office. It is particularly nice for him when it is raining.
This is one use for the traffic light. Of course, it is just cool to control a traffic light from your phone or tablet, for whatever reason.
I want to allow people to control the traffic light at a Maker Fair. To do that they must have a network connection to the Raspberry Pi. The Maker Fair may have a wireless network and it might seem that joining that network would be the way to go. But I think it is better to create your own network. Under your own control. It means your setup is the same every time. Your set up does not depend on the Maker Fair infrastructure and you don't expose the Maker Fair network to your users.
The Maker Fair will be much more tolerant of your WiFi if it is a good neighbor. When there are a lot of WiFis they will interfere with each other. You can be a good neighbor by limiting your tx power and range. You really only want a few feet of range. I will include a simple web page that you can use to control your WiFi. You will be able to reduce the Tx Power and change the channel.
In this Instructable I will show you how to install and configure software to make your Raspberry Pi a Wifi hot spot. I will show you how to determine the best settings for the WiFi to be a good neighbor. In addition to making your Pi a hotspot, I will show you how to install and configure a DNS (Domain Name System) server. The DNS server should make all URLs go to your web server. Unfortunately, some phones may not play by our rules. So lastly, for those cases, I will show you how to make a QR code to allow them get connected to your server without typing in the URL.
Downloads
Networking 101
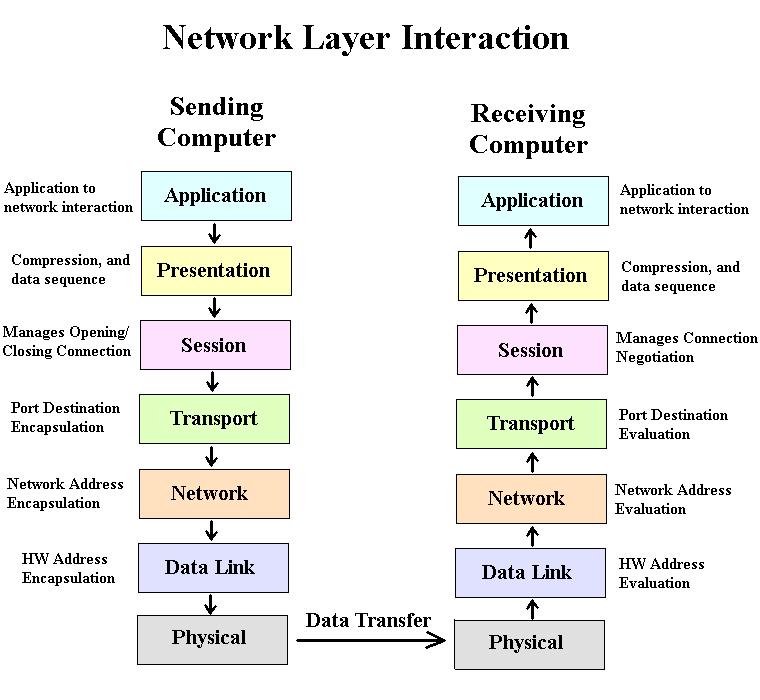
We are creating an Internet access point that does not connect to the Internet. And we want all http connections to go to our web server. Setting up the wireless, a host access point, a DHCP server and a DNS server are all things we need to do.
My Instructables are about educating as well, I want you to understand why we are doing what we are doing. So, I would like to give you a little more background here.
In a former life, I designed networking equipment. Because of that I tend to approach things in layers.
https://en.wikipedia.org/wiki/OSI_model
Let's discuss the physical layer for WiFi. WiFi is a spread spectrum technology. It does not use a single frequency. It uses a range of frequencies. However, there are 14 (or so) "channels" (all 14 channels are not available in all cases) in which WiFi operates. Each channel is a range of frequencies within the broader range of frequencies set aside for WiFi. We will be using a WiFi analyzer for an android phone to look at how these channels are being used and what channel will be best for our Pi. (Apple does not allow things like WiFi Analyzers to run on un-jail-broken iPhones and iPads)
Above the physical layer, WiFi has a couple of modes; Ad-hoc and Infrastructure. Ad-hoc is a peer to peer mode. Everyone is equal. But phones and tablets are not normally set for that mode, they are in infrastructure mode. In infrastructure mode a device can be a Client or an Access Point. Phones and tablets act as clients looking for Access Points. So, our Raspberry Pi will be in infrastructure mode acting as an Access Point.
Typically Access Points create a local network and connect the device (phone or tablet) to the Internet. Even though we aren't connecting to the Internet, we need to create the local network. Access Points do that with a DHCP (Dynamic Host Control Protocol) server. The client (phone or tablet) broadcasts a request for and gets an IP address for the local network from the server. It also gets other information about the network. One bit of information it gets is the address of the DNS server. We will set our DHCP server to return our DNS server address in the DHCP response. What a DNS server does is take the human readable URL in a request and returns the IP address for that URL. When you type, "google.com" in your browser, your machine first sends a request with the URL to the DNS server to get the IP address of "google.com". Then the connection is made to that IP address. We are going make make our DNS server return our IP address for all URLs. Then getting connected to our demo can be very easy for our users.
As an aside, I mentioned that some phones might not play by these rules. A given phone might not do the DNS lookup on the WiFi, it might go to the DNS through the cell connection. If it does this in our example above, it will get Google's real IP address instead of ours. This is where the QR code option comes in.
(Network layer image from http://www.comptechdoc.org/independent/networking/protocol/layers.jpg)
Get Connected and Do a Dist-upgrade
.png)
.png)
I show you how to get connected to your Pi in steps 1 to 3 in my Instructable
Adding Webmin to manage a Raspberry Pi
You don't need to install Webmin to continue, but it will make a number of things easier. I am not going to show the equivalent command line for every Webmin operation. If you know Linux well, you will know what they are. For example, one can do a dist-upgrade from the System- Software Packages screen with one click. To do the same in command mode one must know and type the following
sudo apt-get update
sudo apt-get dist-upgrade
This step is recommended on a new install.
Install Software
.png)
There are four pieces of software for our system that we will need: hostapd, dnsmasq, mini-httpd and qrencode. We need to make sure they are installed on our Pi. In the SSH terminal, one can type the following to install the programs we will be using. Or we can also do them in Webmin Software Packages.
sudo apt-get install hostapd dnsmasq mini-httpd qrencode
BTW, when your Pi is fully setup it won't be able to get to the Internet. Even when you have the wired connection that goes to the Internet. If, for example, you want to install something from the repository, you will need to pull the WiFi adaptor and shutdown the Dnsmasq process.
Configure the WiFi

If you buy a WiFi USB adaptor from your Raspberry Pi vendor (i.e. Adafruit), it should plug and play. The drivers are already in the Pi.
We want our Pi to be the center of a local network. It needs to define the network. The first step is giving the Pi a static IP address. There are several private IP address pools. One commonly used pool is 192.168.x.x. This pool is often used for routers. These pools are usually setup with netmasks of 255.255.255.0. That means the subnet uses the last byte for its addresses. A common router setup has a subnet of 192.168.1.x. We want to avoid the common subnets. This is particularly useful if our Pi is on a wired network at the same time (more on this later). I have chosen to make the static IP for my Pi 192.168.53.1 and the subnet 192,168.53.x.
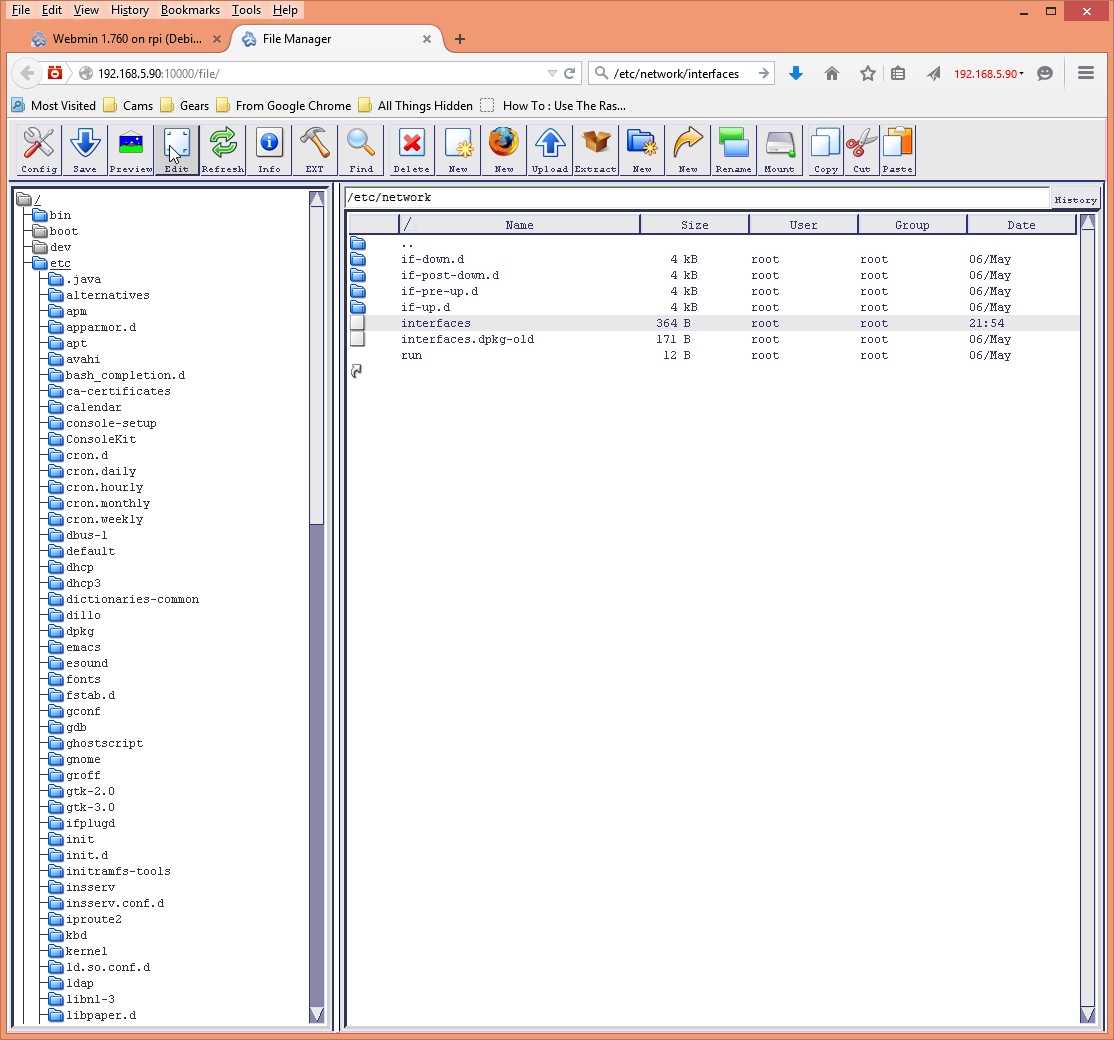
The file /etc/network/interfaces is where we configure the wlan0 for a static IP address. The following lines are for configuring the eth0 and wlan0 interfaces. Note we are doing an open (unencrypted) network. The WPA configuration is commented out.
auto lo
iface lo inet loopback

auto eth0
allow-hotplug eth0
iface eth0 inet dhcp

auto wlan0
allow-hotplug wlan0
iface wlan0 inet static
  address 192.168.53.1
  netmask 255.255.255.0
  gateway 192.168.53.1
  hostapd /etc/hostapd/hostapd.conf
#wpa-conf /etc/wpa_supplicant/wpa_supplicant.conf

#auto wlan1
#allow-hotplug wlan1
#iface wlan1 inet manual
#wpa-conf /etc/wpa_supplicant/wpa_supplicant.conf
Here are a couple of gotchas that don't show up in other tutorials. It is critical that you change the iface eth0 entry to dhcp. If you don't, the DHCP client will still try to get an IP address for wlan0. If there are no dhcp entries in the file the DHCP client is started on all interfaces. Since there is no DHCP server (except ours) on the wlan, the DHCP client will (sometimes) assign a bogus IP address to the wlan0 interface. And the hostapd entry above is the proper way to start hostapd on a Debian system. Every tutorial I read started hostapd as a daemon in an initscript. The result of starting as a daemon is a race condition where the static IP address would not always get assigned.
You can use the Webmin file manager to edit this file or use nano
sudo nano /etc/network/interfaces
Back to the discussion about the wired network. If you followed my instructions, you are using the wired network now to access the Pi. The wired network could very well be on a 192.168.x.x network. That is why we are trying to use an obscure 192.168.x.x subnet. BTW, I leave the wired network configured in the standard DHCP configuration. Then I can always plug in an ethernet cable from my local network to access the Pi. Even if the WLAN is down.
Configure Hostapd
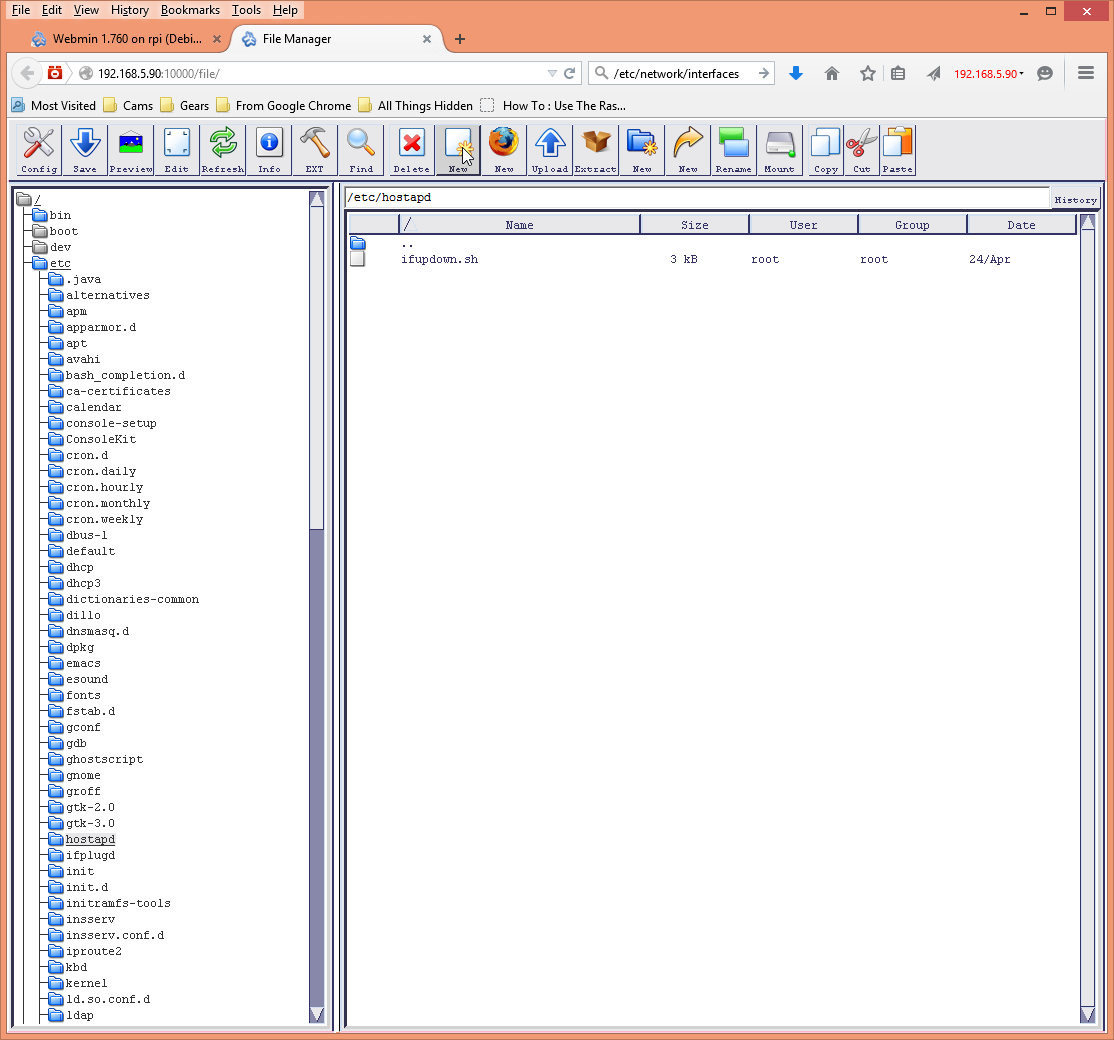
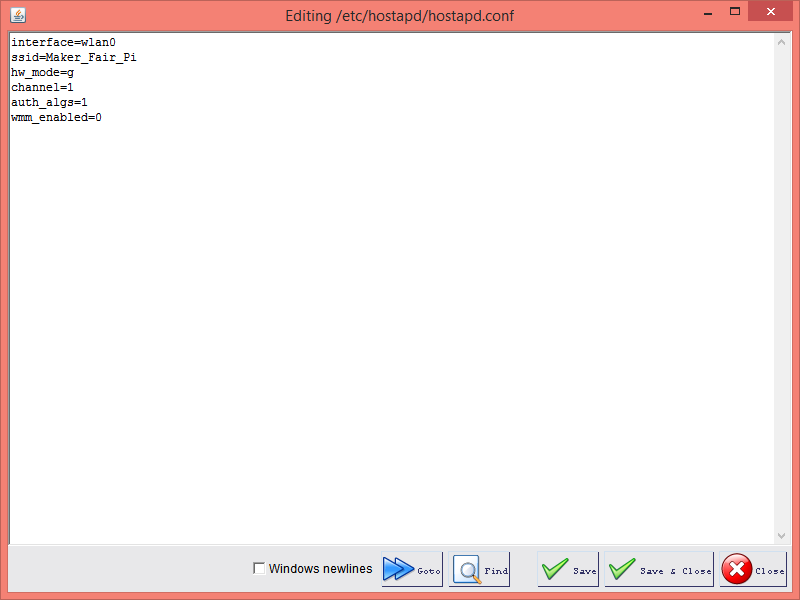
The file /etc/hostapd/hostapd.conf is used to configure hostapd. We will need to create it and put in the configuration below.
interface=wlan0
ssid=Maker_Fair_Pi
hw_mode=g
channel=6
auth_algs=1
wmm_enabled=0
Configure Dnsmasq


The reason I chose Dnsmasq is that it is a simpler program that serves the functions of both a DHCP server and a DNS server. The configuration file is at /etc/dnsmasq.conf. The file has a lot of instructions it in. Delete everything and add the lines below.
interface=wlan0
no-resolv
no-poll
address=/#/192.168.53.1
# Start,Stop,Mask,Lease
dhcp-range=interface:wlan0,192.168.53.10,192.168.53.250,1h
# Gateway
dhcp-option=3,192.168.53.1
# DNS
dhcp-option=6,192.168.53.1
# Domain Name
dhcp-option=15,upslight.com
# IP Forward (no)
dhcp-option=19,0
# Source Routing
dhcp-option=20,0

dhcp-authoritative
Turn Off Power Management on WiFi
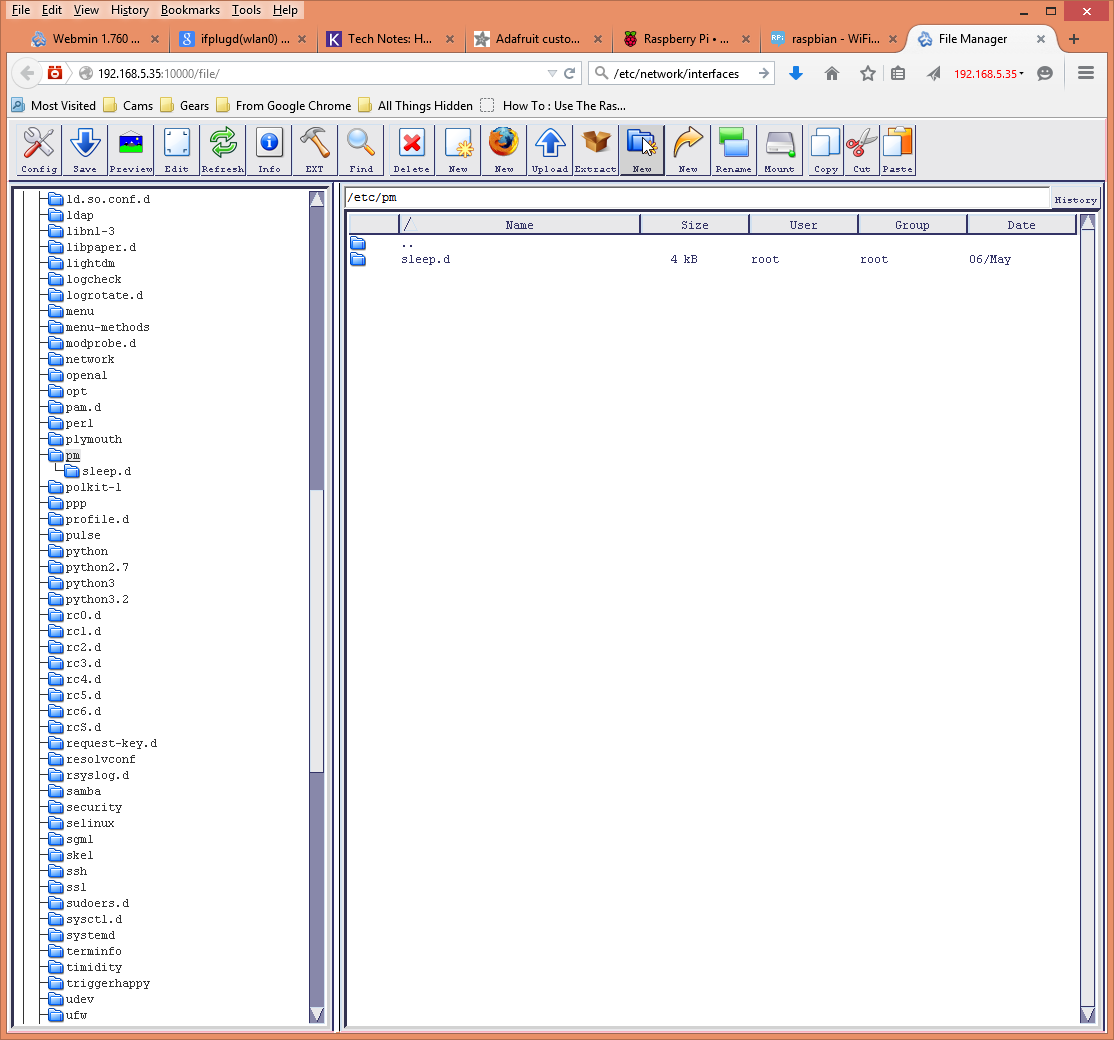

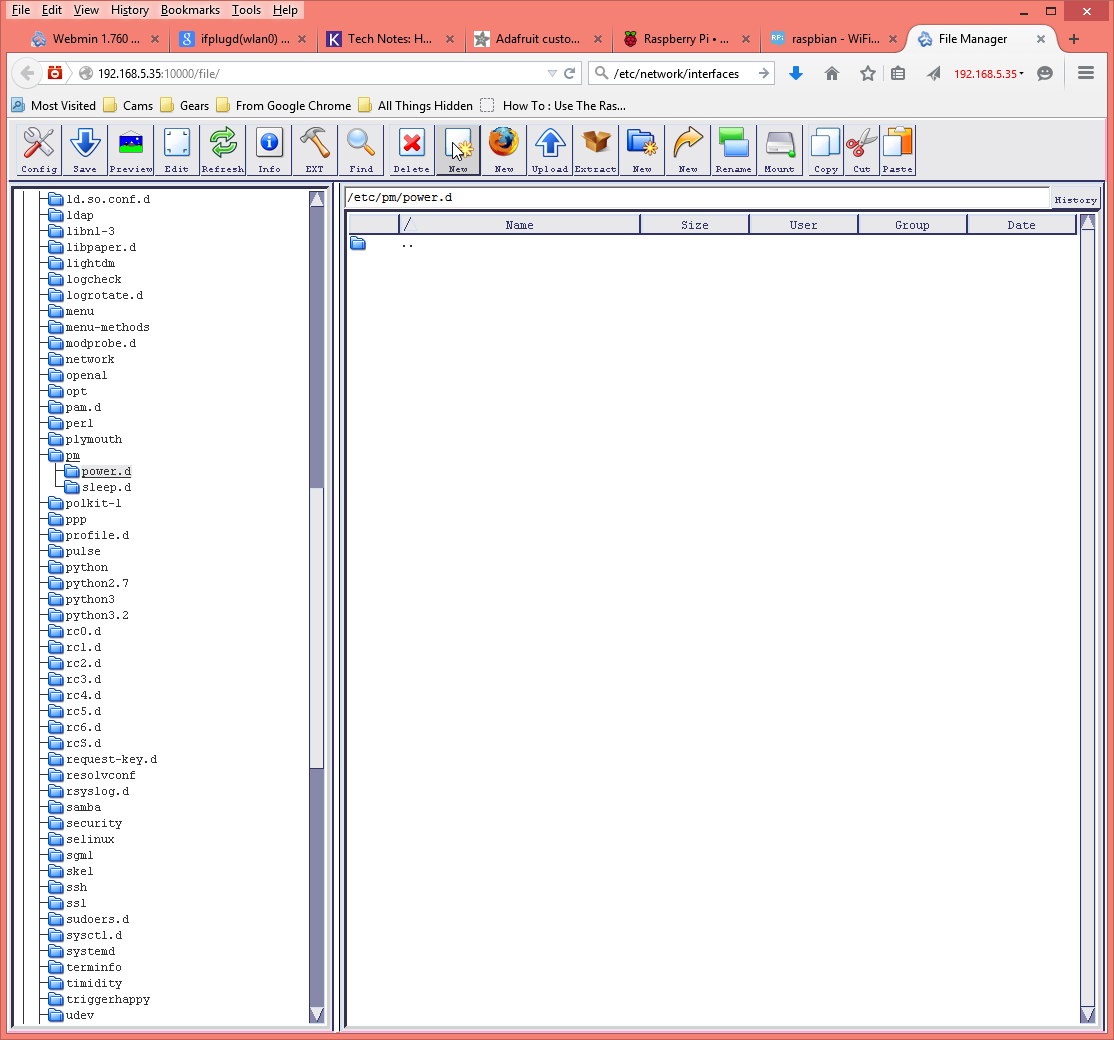

I don't know why power management doesn't work yet for WiFi USB adaptors, but apparently it doesn't. I was having a flaky connections. Based on the log files and Google I found the problem was the Linux Power Management. Power Management for the WiFI must be turned off to have reliable connections.
A new folder must be created at /etc/pm/power.d. And a new file at /etc/pm/power.d/wireless. In the /etc/pm/power.d/wireless file put the following.
#!/bin/sh
/sbin/iwconfig wlan0 power off
Configure the Web Server
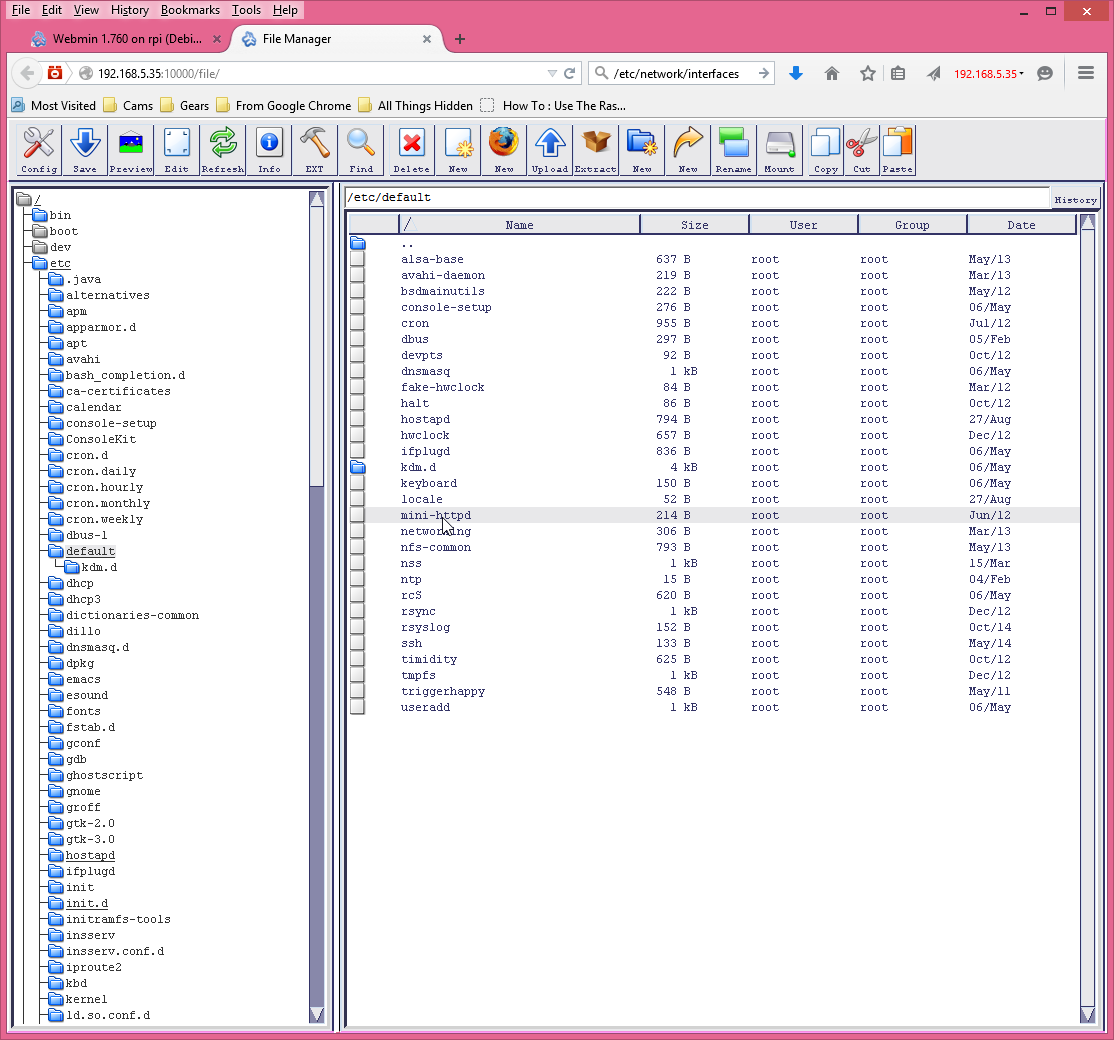


The purpose of this setup is to make a web server available that can demonstrate using the Pi to control something. We have something to control as part of the setup. That is our WiFi parameters. We will be doing a site survey and will want to make adjustments to the WiFi. A web page to do that will be perfect. This web page can be placed in an obscure directory on the actual project. For now we will make it the primary page.
The web server I like to use is mini-http. It is small and serves our purpose well. To make it run we need to change a flag in the file /etc/default/mini-httpd from START=0 to START=1.
I am using the defaults for the web server, except for host binding. The default is for an internal binding. We want our server to be available externally. We need to edit /etc/mini-http. We put a # on the line.showing which host to bind to.
#host=localhost
We also need a privileged user for the web server to do the operations we want. Change the user to root..
user=root
Before anybody gets up in arms about security. Get a grip, it is just a Raspberry Pi that is not even connected to the Internet. Don't be paralyzed by paranoia.
Install Web Page
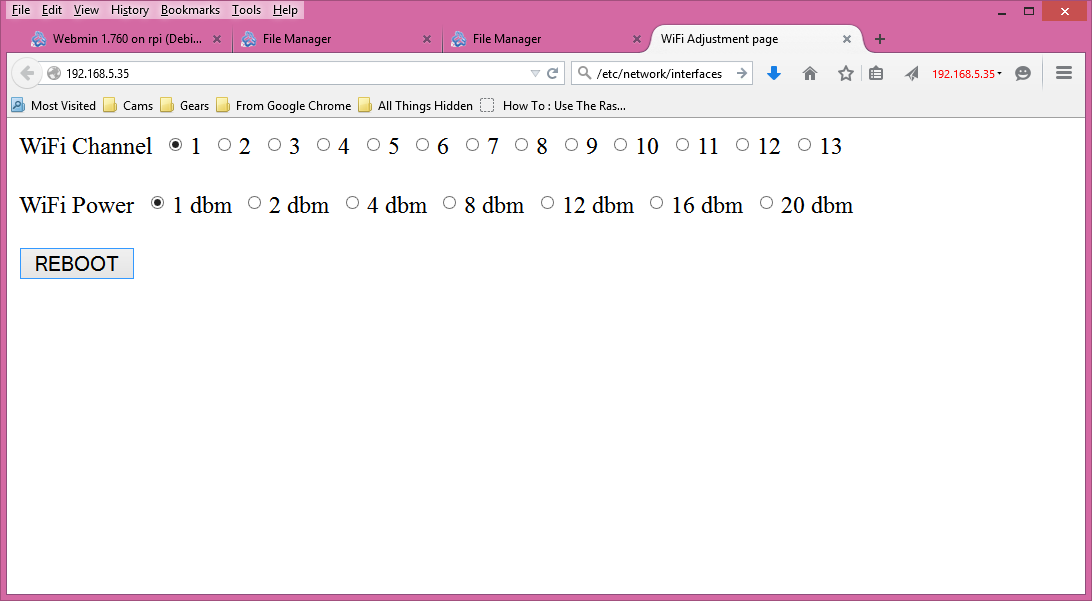



I have created a very rudimentary web page to control the Pi and the WiFi. It allows us to choose a channel for our AP, set the TX power and reboot the Pi if needed. If you look at the bash script called "wifiadj" you will see how it is easy to set up web page controls to invoke various commands on the Pi.
I have attached a zip file. Unzip and install the files (and cgi-bin directory) in /usr/share/mini-httpd/html/. Mini-httpd's default web page location. Make sure you set wifiadj file in the cgi-bin to be executable. Zip files lose that information.
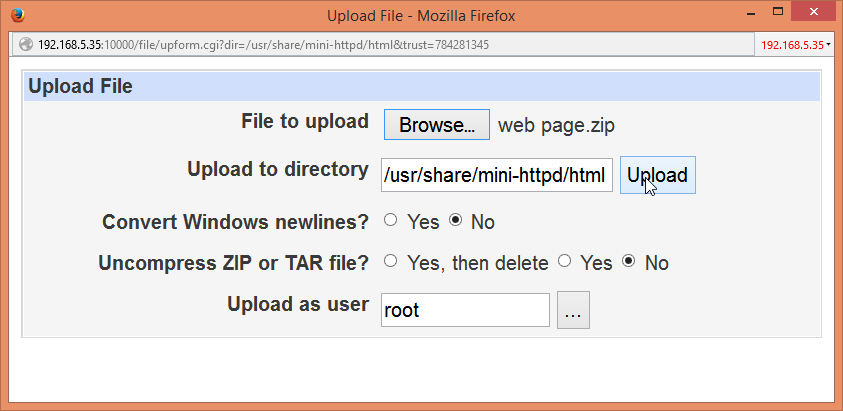
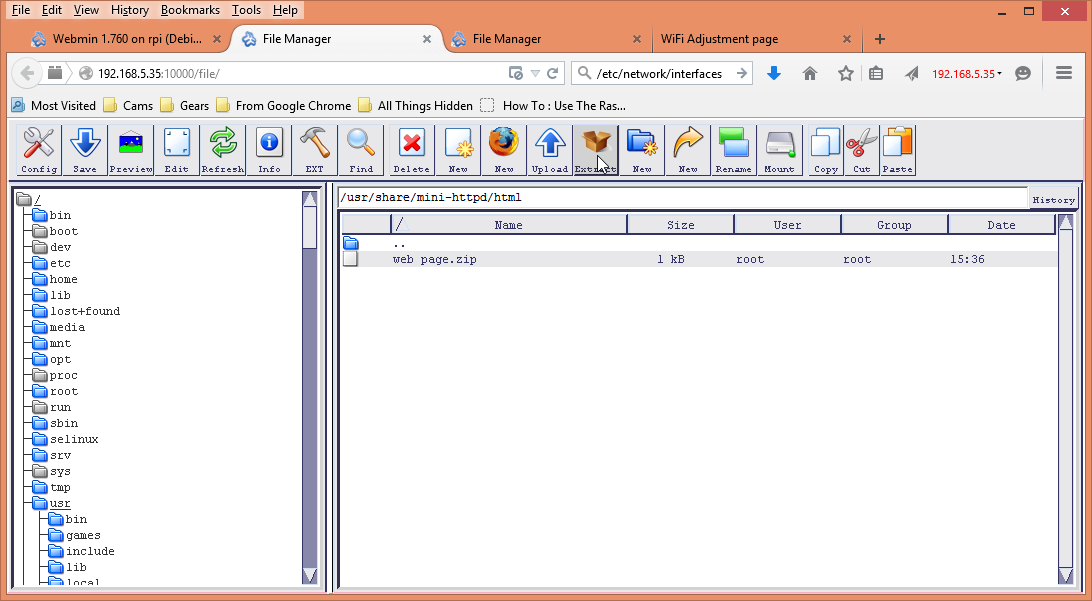
In Webmin, you can use the file manager. Go to the /usr/share/mini-httpd/html/ directory. Click the Upload button. Browse for the downloaded "web page.zip" file. Click on Upload. Then choose the uploaded zip file and click on the Extract button. Choose yes in the pop up. Then go into the cgi-bin directory. Choose the wifiadj file and click the Info button. Check the Exec boxes and click Save. Your web page is ready.
Reboot the Pi to get everything started correctly.
Downloads
Generate a QR Code

There is an application for the Pi on the repository for creating QR codes. it is called "qrencode" and it is very easy to use. We installed it with the other software. To generate a code, run the command below.
qrencode -o qrweb.png http://192.168.53.1
The output file "qrweb.png" will have the image for the QR code of the URL "http://192.168.53.1" which is the URL for our web server. Print this code on a sign by your project with instructions. A QR Code app on a phone or tablet will open the browser at this URL.
Do a Site Survey


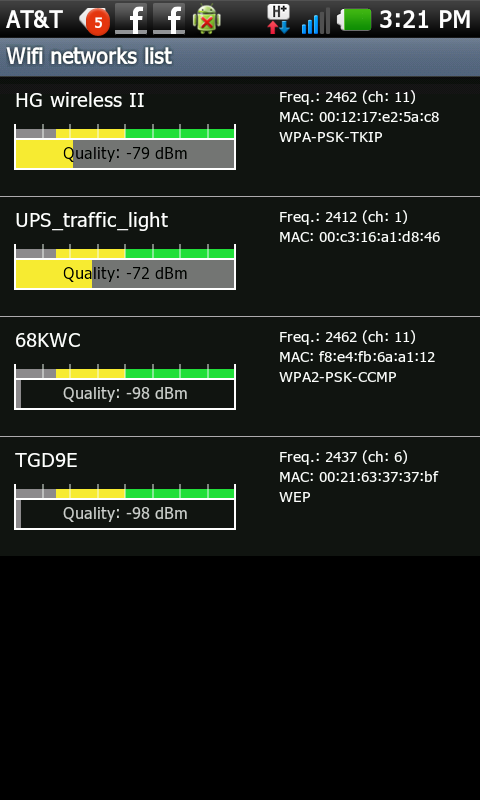
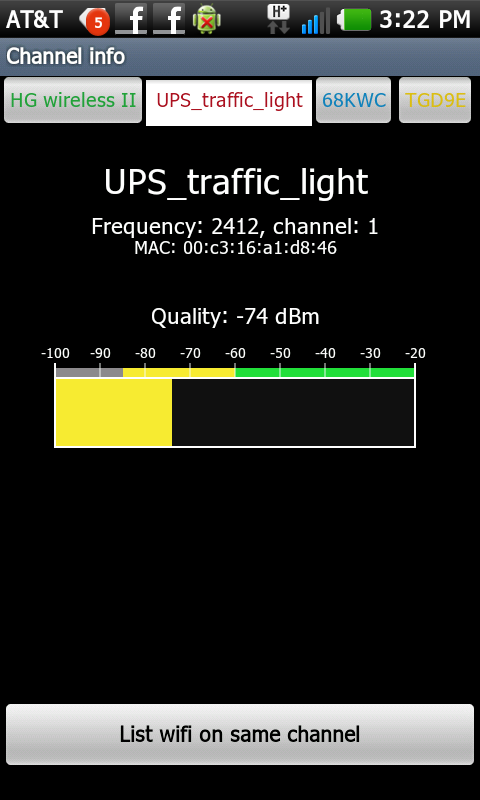
There are some handy apps for Android called WiFi Analyzers. Sorry iPhone users, Apple says these apps should not be run on your phone. Of course, you can jailbreak your phone and decide for yourself!
I use one of these apps to do a site survey when setting up my projects. There are several screens on the app. If you slide your finger across the screen you will move from screen to screen. While the screen that shows the spectrum is interesting, the one that gives recommendations for channels to use is the most useful. You look for the channel with the tallest green bar and or the bar farthest away from the yellow or red bars. No green bars? You are in a busy WiFi area! Multiple APs can operate on the same channel, but it will slow down throughput. You can choose the channel with the tallest yellow bar then. If you have all red bars, then WiFi is going to be slow no matter what you do. Don't try and crank up the TX power, that is a wasted effort that only makes matters worse. Your transmitter is only one end of the communication. The phones and tablets are the other end, they aren't going to increase their tx power and they will be swamped by the excess power to which you are adding.
You can use the web page we created to select the channel you will operate on. It changes the conf file for hostapd and restarts the interface. It works most of the time. I was still having some occasional problems. Setting the channel is seldom done. If it fails, power cycle and all will be fine.
Now you can set the Tx Power. I usually set it to 1 dbm. That is plenty for line of sight communication. 1 dbm probably won't go through walls, but then we don't want it to. In this environment, we want to operate at the lowest power possible. Setting Tx power from the web page is not immediate, but it usually takes effect pretty quickly. Good news, no reboot is needed. In fact, a reboot resets the power to the default 20 dbm.
Test Your Handiwork

If you were using the web page through your phone in the previous step, you have already done some testing. There are a couple of other tests to do. First, connect to the Pi with WiFi. Then go to any URL other than yours. In fact, any URL that is not an IP address should work. Even bogus ones. Our DNS server doesn't care, it will return the address of the Pi. So when you go any URL, you should get the web server on the Pi.
The other test is the QR code. Use a QR code app and scan our code. You should get a browser on our web page.
In reality, the web page will be something like my UPS traffic light. The WiFi page is at an obscure directory below the main web page.
Now you can make a web page controlled project and enjoy seeing users interact with your project at the next Maker Fair.