RemoteXY Editor – How to Control DC Motor With Smartphone and Bluetooth With RemoteXY Application and Arduino
by ahmedebeed555 in Circuits > Arduino
4068 Views, 7 Favorites, 0 Comments
RemoteXY Editor – How to Control DC Motor With Smartphone and Bluetooth With RemoteXY Application and Arduino

In this post, we’re learning how to control DC Motor Speed with Smartphone via Bluetooth without writing Android code or Arduino sketch. Instead, RemoteXY app does both jobs for you.
How does it work?
Smartphone Interface
You can use the free RemoteXY editor from the website RemoteXY.com to design a stylish smartphone interface that can control your Arduino circuit. With all the switches, pushbuttons and sliders that make your application work smoothly.
Arduino infrastructure
We’ll see how you can choose the core details of your Arduino circuit and communication method.
Arduino Sketch and code
Then finally, the RemoteXY Editor automatically generates the Arduino code for you.
Then all you need to do is to upload the sketch to your Arduino board and then run the RemoteXY app on your smartphone and get started.
You don’t have to connect to internet to connect your smartphone and Arduino circuit with Bluetooth.
RemoteXY Editor generates Arduino sketch with all needed code and also data of the interface such as buttons and sliders.
The RemoteXY library seamlessly sends the interface and configurations data from Arduino board to your smartphone RemoteXY app and then the Smartphone App interprets the interface offline without the need to connect to internet.
Supplies
Arduino Pro Mini Board Amazon UK , Amazon DE , Banggood
Here, I used Arduino Pro Mini to make the circuit smaller to use in other applications
However, You can use any Arduino board and you can choose it from the RemoteXY editor as we’ll see.
USB to TTL converter Amazon UK , Amazon DE , Banggood
Since Arduino Pro Mini has no USB port, you need this program Arduino Pro Mini from your computer.
Bluetooth Module HC-06 Amazon UK , Amazon DE , Banggood
2N2222 NPN transistor
We’ll use this transistor as a switch to control the DC motor with Arduino.
3 volt DC Motor Amazon UK , Amazon DE , Banggood
3.7 V battery Amazon UK , Amazon DE , Banggood
Some wires
RemoteXY Editor


Open RemoteXY.com, create a new account if you don’t have one and Login.
Create a new project and name it.
First, from configuration tab on the right, choose
Connection --- Bluetooth
Device – Arduino Pro Mini
Module – HC-06
IDE --- Arduino IDE
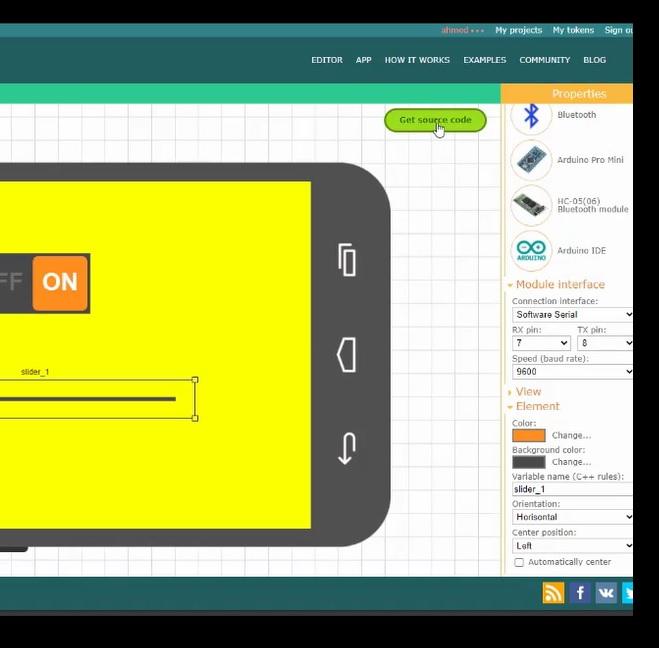
Open Module interface tab on the right, choose
Connection interface ---- Software Serial
RX Pin ---- Pin 7
TX Pin ---- Pin 8
Baud Rate 9600
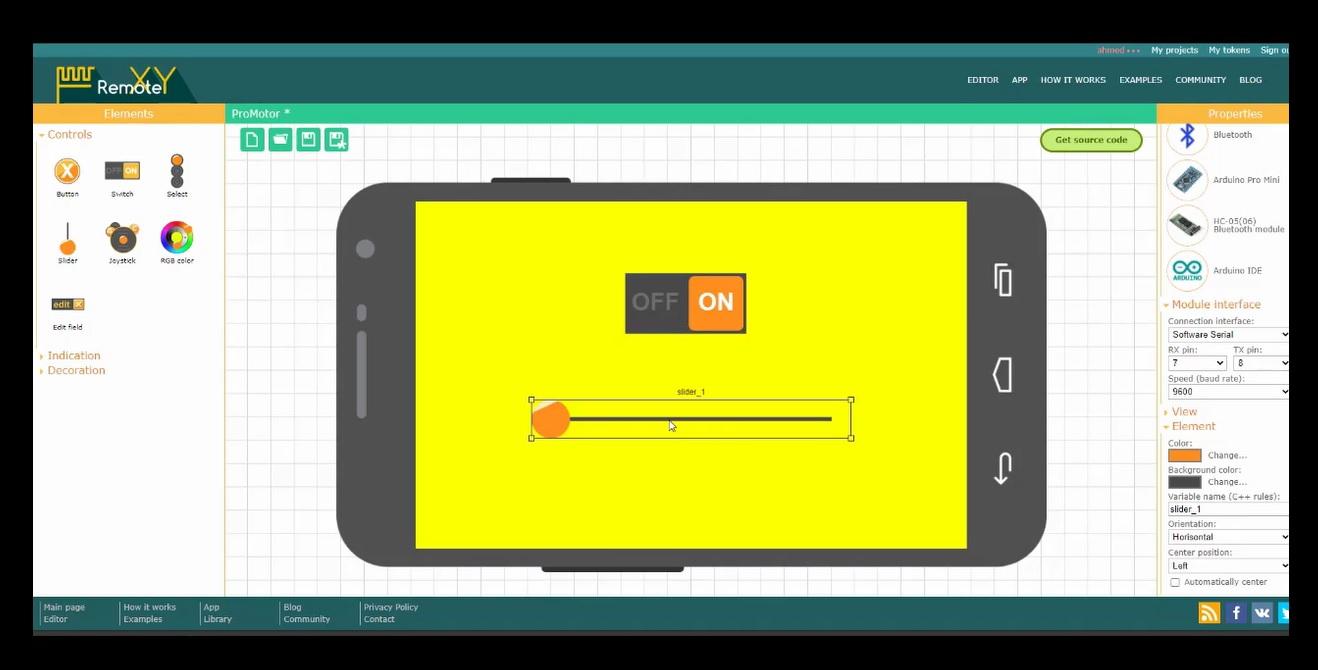
Design the Smartphone interface
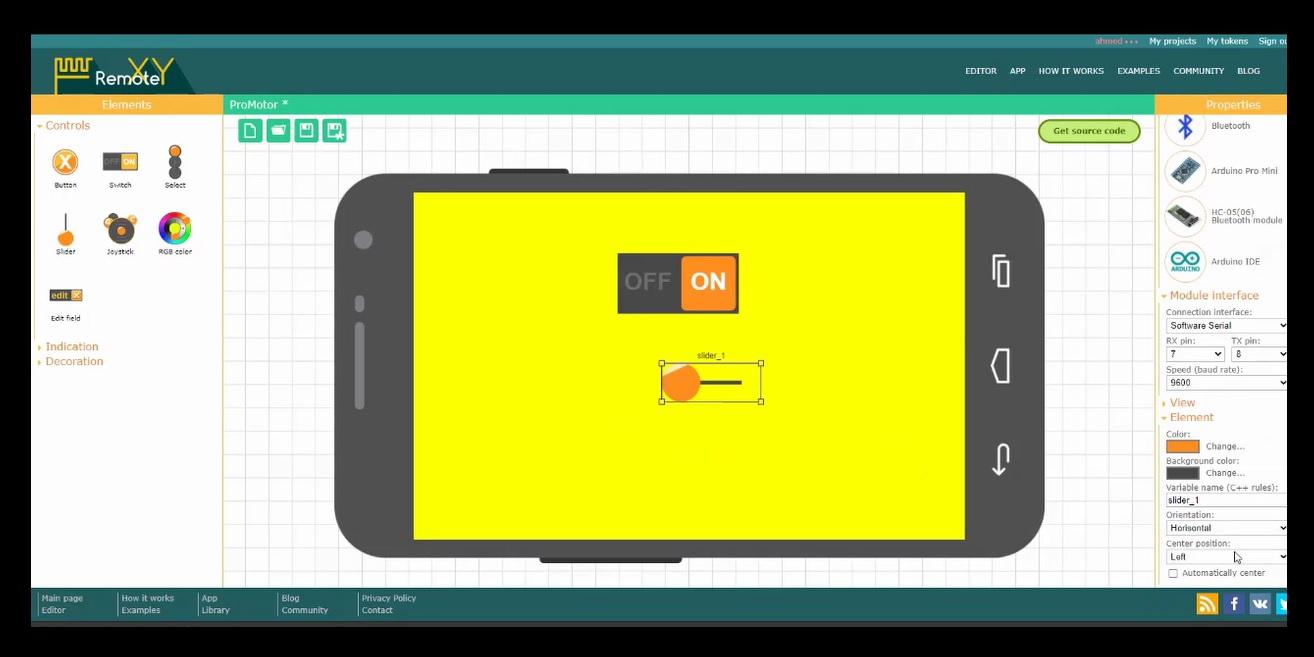
From the left toolbox choose
ON/OFF Switch and place it on the blank phone screen
Slider and place it on the phone screen
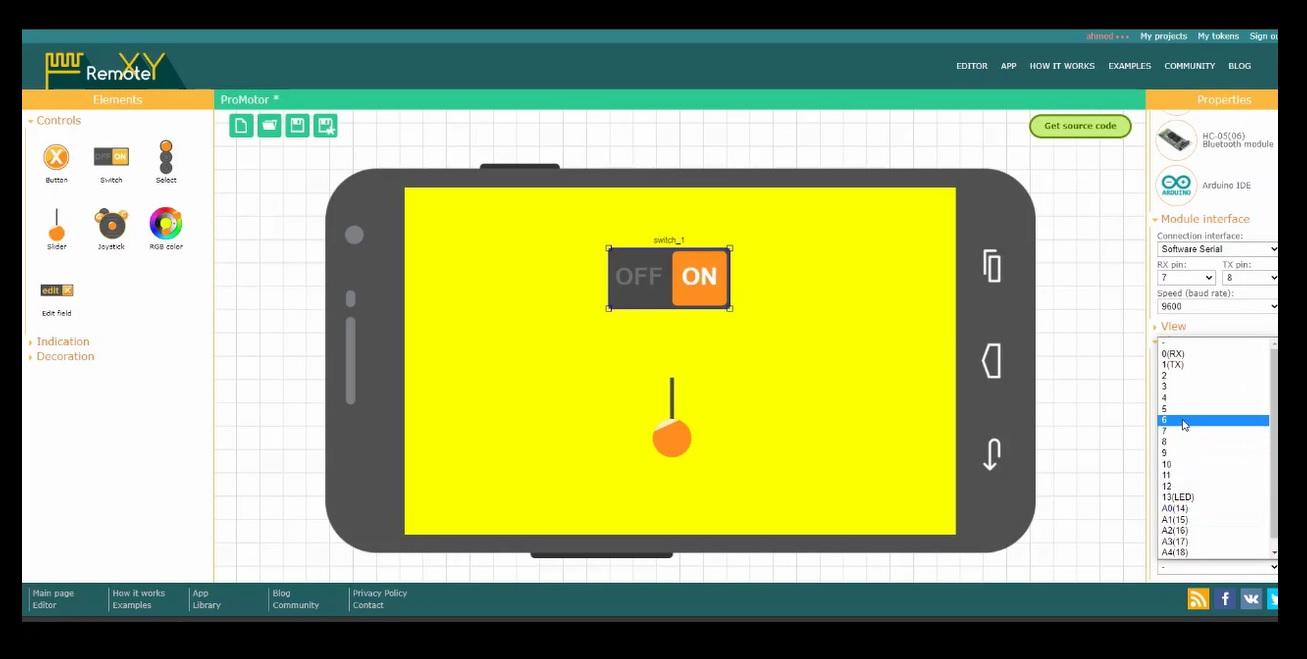
From the right side choose the element tab choose Switch
Snap to PIN ---- PIN 6
You can also choose to change switch caption ON/OFF and color from here.
From the right side choose the element tab choose Slider
Orientation --- Horizontal
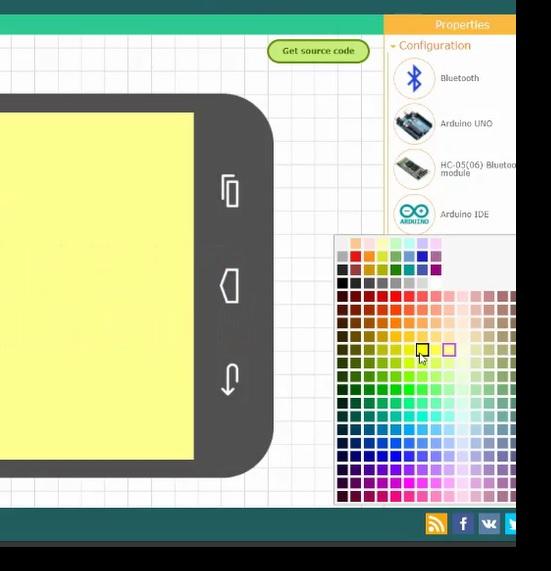
From the View tab on the left side choose Background color.
Place the controls on the place you want to become final and resize them.
Save the project.
Get Arduino Code

Click the Green button on the right side Get Source Code
You get the generated Arduino code on the screen.
You can see the Arduino code on the screen and you can either choose to select and copy it or you can click Download Code
Click Download Library to get the RemoteXY.h library
Download RemoteXY App from App Store if you have iPhone or from Google Play Store if you have an Android Smartphone.
Arduino IDE and Upload Code

Open Arduino IDE and paste the code you copied into a new
sketch or open the downloaded code.
That’s all the code we need to control the motor ON and OFF from the smartphone with Arduino and Bluetooth circuit.
The ON/OFF switch is connected to PIN 6 which controls the NPN transistor which runs as a switch to deliver power to the DC motor.
To use the slider as a speed control we need to connect it to PIN 6 that controls the NPN transistor.
The speed control is done with PWM Pulse Width Modulation function (Known As Analog Write in Arduino)
We need to add two lines of code to connect the RemoteXY slider to PIN 6. We add them to the loop function.
Here they are
int MotorSpeed = RemoteXY.slider_1 * 2.5 ;
analogWrite(6, MotorSpeed);
In the first line of code, we define the MotorSpeed variable we read from the slider inside the RemoteXY interface.
The slider in the interface reads values from 0 to 100. So we need to scale that value to be compatible with the analogWrite() function in Arduino. The analogWrite() function outputs values from 0 to 255 which outputs 0 to 5 volts according to the value between the parenthesis ().
That’s why we need to scale it by multiplying it to 2.5.
In the second line of code we output the MotorSpeed directly to PIN 6 connected to the NPN transistor and the DC Motor.
Here is how the loop function looks like.
Save the code and Compile it to check that it’s correct with no errors.
Downloads
Assemble Arduino Circuit
Connect the circuit as in the images.
Here is another post that describes how to program Arduino Pro Mini in more details.
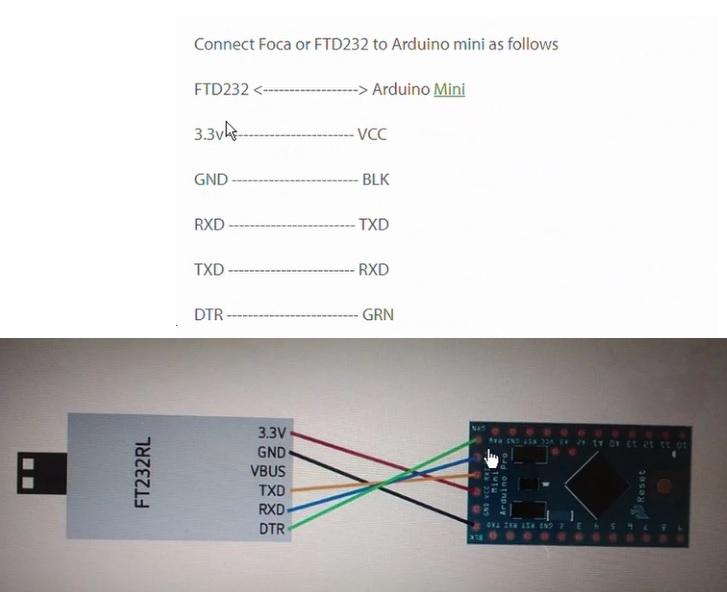
First, we need to connect Arduino to USB-to-Serial Converter to program the software. Normally, you don’t need this step if you use Arduino UNO or any other Arduino board that has a built in USB port.
USB-to-Serial ----------- Arduino Mini
3.3 v ----------------------- VCC
GND ---------------------- BLK
RXD ---------------------- TXD
TXD ---------------------- RXD
DTR ---------------------- GRN
Caution:
Make sure that you power Arduino Pro Mini with 3.3 V
Upload the sketch to Arduino Pro Mini
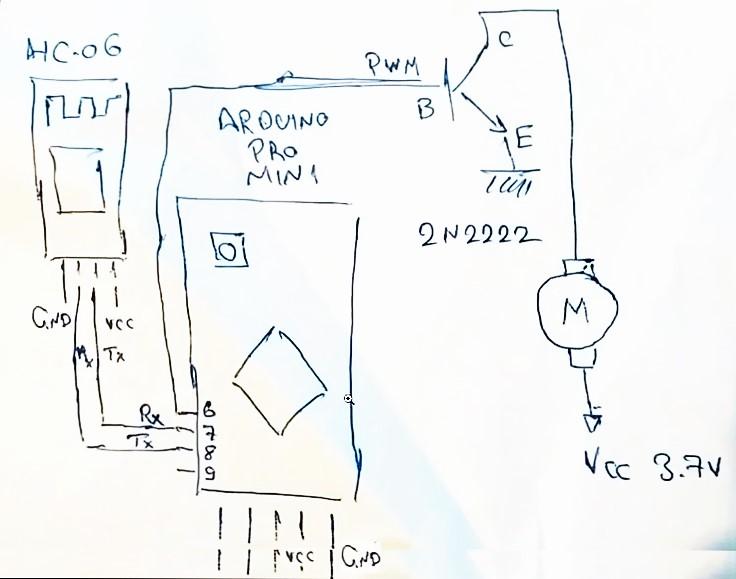
Then we connect the final circuit to Bluetooth module and the motor
HC-06 -------------------- Arduino Pro Mini
VCC -------------------- VCC
GND -------------------- GND
RXD -------------------- PIN 8
TXD -------------------- PIN 7
Connect the 2N2222 NPN transistor to Arduino Pro Mini
Collector ------------------- Motor Power Supply
Base -------------------- PIN 6
Emitter -------------------- GND
Run the Final Project


Connect the circuit to the battery and power the circuit.
Run the smartphone RemoteXY application.
Connect Bluetooth and start controlling the motor ON/OFF and the motor speed with the Slider.