Repair & Improve - Multi Purposes Wall Unit:
by steve-gibbs5 in Workshop > Repair
4303 Views, 34 Favorites, 0 Comments
Repair & Improve - Multi Purposes Wall Unit:


Hello dear reader.
In this Instructable, we will be having some fun repairing and restoring a wall unit in my studio apartment. This is not about building, but rather making repairs and improvements to an existing wall unit that could be carried over to anything similar that needs fixing, or made better for your wants and needs. I will include simple repair instructions and tips to hopefully help you make repairs to anything you have that may need fixing while describing what I did to design, fix and complete my upgraded utility wall unit as an example.
I first laid claim to my studio apartment (a modest annex tacked onto the side of my friend's house), I was aware that it was less ‘move in ready’ and more ‘please send help’ Happily I was prepared and able to perform surgery on my new digs before moving day which meant I could sketch out the perfect layout rather than fling furniture about like a panicked game of Tetris. But the star patient was a hulking wall unit built by my friend's son... a noble construct, but now slightly wobbly and looking a bit sorry for itself. It featured three segments… a shelving section… a fold out bed section with extra shelves… and a useful but smallish wardrobe. Handsome? Absolutely. Faultless? About as dependable as a politician's promise. Repairs and a major redesign was therefore the name of the game as the wall unit would be the apartment's main focus point, after all.
The Plan: (or ‘The Head Scratcher’)
- First thing was to take precise measurements and reimagine the unit. Not merely to squeeze things in, but to make it into a practical companion with easy retrieval, ease of use spacious and aesthetically pleasing, then draw up a plan.
- Next, dismantle of the old beast. Strip it down to its dignified skeleton, leaving only the outer frame standing like the last survivor of a furniture battlefield.
- Then begin the resurrection. Repair what must be fixed, improve what dares to be better, and quietly judge anything that’s warped out of shape.
- Remember to enjoy the process… this is craftsmanship, not a tax audit. Revel in the sawdust and sprinters.
- And lastly, strive for peace, order and mutual respect with the newly upgraded furniture companion. May we live together in perfect harmony, or at the very least a few fewer creaks and wobbles.
The Repairs: (aka ‘The Medical Chart’)
- Loose dividers: Both section dividers had sneaked free of their wall plugs from the back wall and ceiling. Re-anchoring was mandatory If the unit and I were to stay on speaking terms.
- MIA sliding mirrored doors: The original large and heavy mirrored doors of the unit were already removed when their runners adopted a carefree lifestyle… basically they did what they wanted, not what they should as they were either broken or loose. The doors were replaced with some curtains, but that wasn't for me. So I was either to repair the runners and sliding doors or replace the whole door system, preferably without breaking the laws of physics, or my back in the process.
- Shelf misery: Some of the shelves sagged like overcooked spaghetti while others rattled because of the divider panels mentioned above, refused to hold still. Depth issues meant large, mocking gaps at the back where things would fall through. A full reshuffle, reinforcement, and a few supplementary shelves would restore harmony.
- Desk in distress: A rescued desk (destined for landfill) I got from a friend arrived with malfunctioning draw runners, and a draw unit frame flopper than an inflatable tube guy. Aim: repair the broken runners, fit a new backing panel, and generally coax it into acting like proper furniture and not a bouncy castle. But I did also decide to go a step further, as seen in the upgrades list below.
- Lamp limbo: I had a stylish LED table lamp that was in a frozen state of animation as the in-line On/Off switch had broken and the lamp wouldn't switch on. Plan: amputate its faulty rocker switch, rewire it, and control it with the a smart switch. Manual operation restored with a remote control twist.
- Fire with no flame: The electric fires heating worked, but it's gentle faux flame had gone dark. A quick light-therapy session was in order to both repair and improve its warming glow.
- Warped, bases: Lower wood panels in the unit smaller sections of the unit were either cracked and bowed from years of weight-lifting without central supports. Solution: add new battens, install fresh boards, insulate, and tell gravity to behave.
The Upgrades: (because ‘good enough’ is never enough)
- Re-shuffle the trinity: Keep three main sections but reshuffle and reuse them as an entertainment/fire place section… a mini office with upper storage section… and a slightly wider wardrobe. A Swiss army knife of furniture if you will.
- Bye-bye sliders, hello bi-folds: Sliding doors or curtains were no longer suited the new design, so some elegant bi-fold doors will grace the wardrobe and upper storage section.
- Shelf proliferation: Repair the old shelves, add new ones, and breathe order into every nook.
- Desk-to-wall fusion: Cannibalize the rescued desk, attach it to the wall unit, and give the desk top a nifty sliding feature. Voila’, a snug office area and desk to compose all of my future Instructables on.
- T&G trim therapy: Dress the front edges in reclaimed tongue-and-groove timber (also handy for extra shelving), adding a dash of rustic charm.
- Mood lighting extravaganza: Beyond fixing the electric fire glow, I had a plan to install a programmable RGB LED strip along the back of the fire to dazzle guests with some additional back lighting.
- Grand paint finale: Finish with a pristine coat of paint and ambient light so the whole ensemble feels less ‘patched up Frankenstein’s monster’ and more of a ‘bespoke and contemporary’ feature.
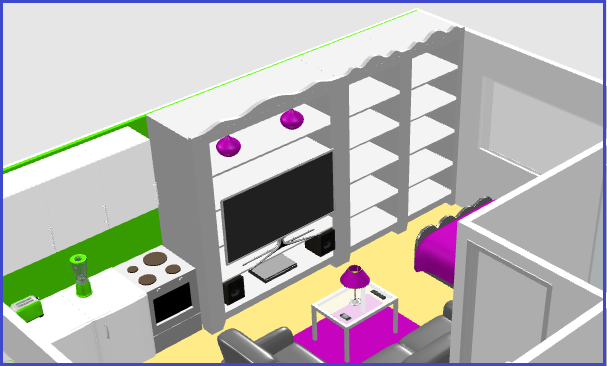
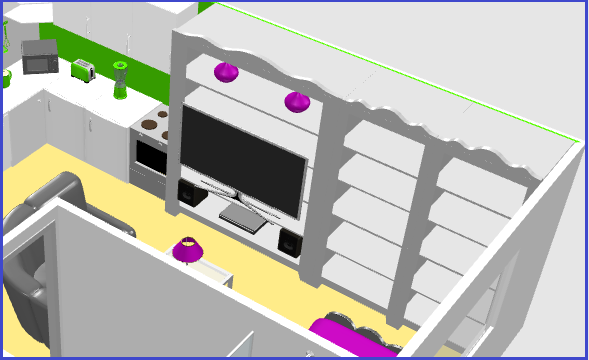
So, armed with a tape measure and new project optimism, I stalked every square inch of the apartment, especially the wall unit area, then drafted plans in Sweet Home 3D—a delightful bit of software for wannabe and current architects. After a flurry of digital sketches, the final design emerged: the same shallow footprint with reinforced bones, yet large enough to incorporate what I needed, all the features I craved, and zero wasted space… a non-negotiable point to studio apartment life.
As I mentioned earlier, this Instructable isn’t about birthing an entirely new unit, it’s about repairing and revitalizing an existing one while showing that repairs and sensible upgrades can resurrect almost anything. I’ll sprinkle in some straightforward tips throughout, so you can patch up your own beleaguered furniture and other things with minimal drama (or at least amusing drama). And to keep things fun, I also took some time using MS Paint to knock up some 'hopefully' amusing repair and build tip cartoons which you will find at the beginning of each step, because there's no reason that repairing, designing and building our stuff shouldn't be fun right? There is a serious side to these little doodles though, as the tips and advice may well be obvious to some, but hopefully may be of help to others.
Right then, sleeves up… let’s begin.
Supplies


Tools I used:
- Pencil.
- Ruler
- Tape measure
- Jigsaw
- Hand held circular saw
- Power driver (I used two drivers, one for drilling and the other for screws for convenience)
- Tack/nail gun
- Spirit level
- Pair of pliers
- Wood clamps
- Paint brush
- Paint roller and tray
- White silk wood paint
- Grey silk wood paint
- Selection of screws, wall plugs
- Wood and masonry filler
- Wire cutters and shrink tubing
- Soldering iron
Materials Used:
- Sweet Home 3D software for designing
- Reused OSB (Orientated Strand Board) sheets
- Reused 12mm Plywood sheets
- Leftover tongue and groove (T&G) timber lengths from a previous project
- Various timber batten lengths
- 5mm sheets for hardboard
- Some lengths of CLS (Canadian Lumbar Standard) timber
- Aluminum cupboard/draw handles
- A white unused roller bling
- 3mm sheets of white HIPS (High Impact Polystyrene) sheets (gloss finish one side and matt finish on the other)
- A roll of red self adhesive vinyl striping
- An old desk in need of repair
- Govee TV dynamic back lighting kit
- LED table lamp needing repair
- LED RGB lighting strip rescued from a previous project
- Some smart plugs
- Two bi-folding door fixing kits
List of the following Steps:
- Step 1: The Design: Plans made for redesigning the unit.
- Step 2: The Disassembly: Taking apart the old unit and listing repairs.
- Step 3: Rebuild the Unit's Base: Building and strengthening the bottom of the unit.
- Step 4: Reintegrating the Divider Panels: Placement, repairs, improvements to the dividing upright panels.
- Step 5: Installing the Shelving: Repairs, improvements and adding additional shelves.
- Step 6: Making Bi-Folding Doors: Building and installing two sets of bi-fold doors.
- Step 7: Repairing and Improving the Desk: Repairs, improvements and integrating an office desk.
- Step 8: Repair of the Table Lamp: Rewiring and fitting an office light using a broken table lamp.
- Step 9: Repainting: Giving the unit a much needed paint job.
- Step 10: Repairing and Improving the Electric Fire: Repairing and making additions to an electric fire.
- Step 11: Finishing Touches: Some final jobs to complete the wall unit.
- Step 12: The Conclusion: The end and sign off to this Instructable project.
Build time:
- About a week in total give or take a day or so.
The Design:


Before any repairs and improvements can be carried out, a design plan was needed. This is how I did it.
Design (or re-design in my case):
1.) I started by completely clearing out the wall unit, then with my trusty tape measure and notepad app on my phone, I measured and took notes of all of the aspects of the unit... width, length, height, frame sizes, shelves etc. I also took some photos because there's nothing quite like before and after shoots, and useful to visualize the unit while designing it in my old apartment. I also took notes of all of the repairs I noticed.
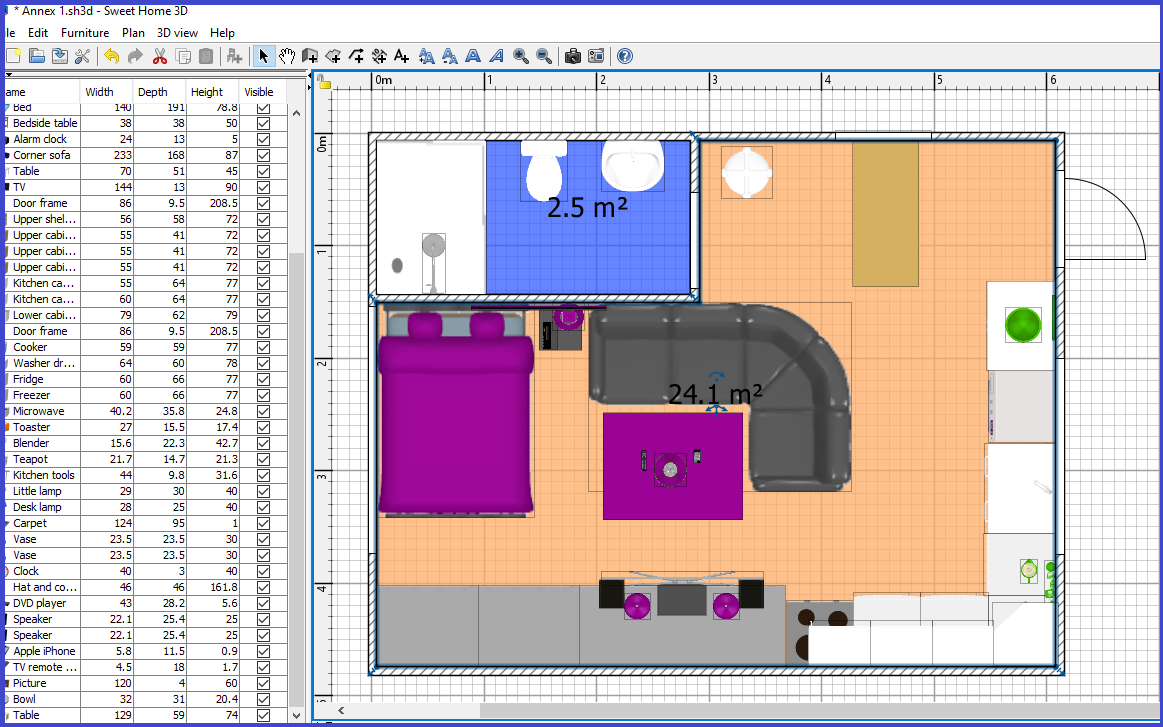
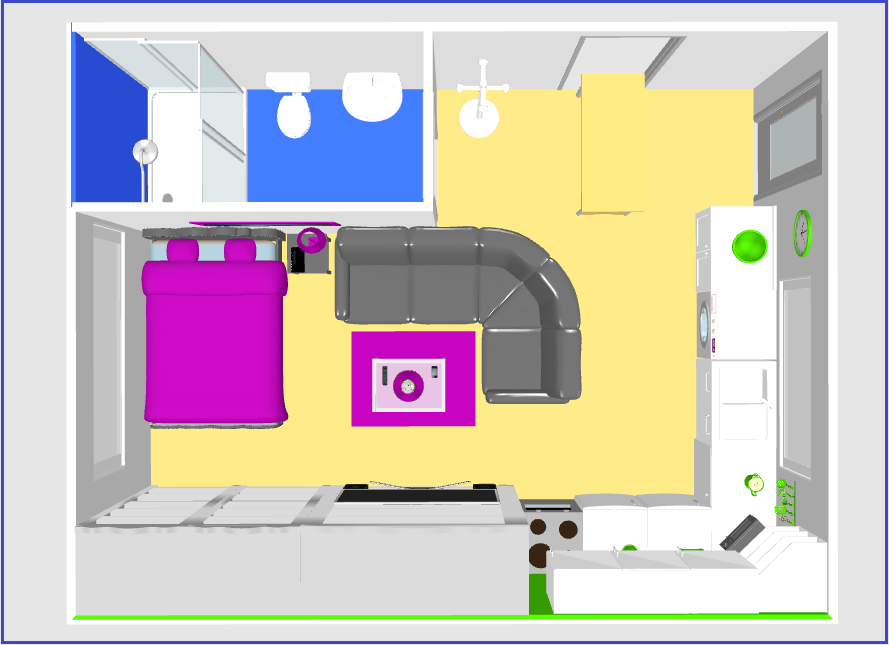
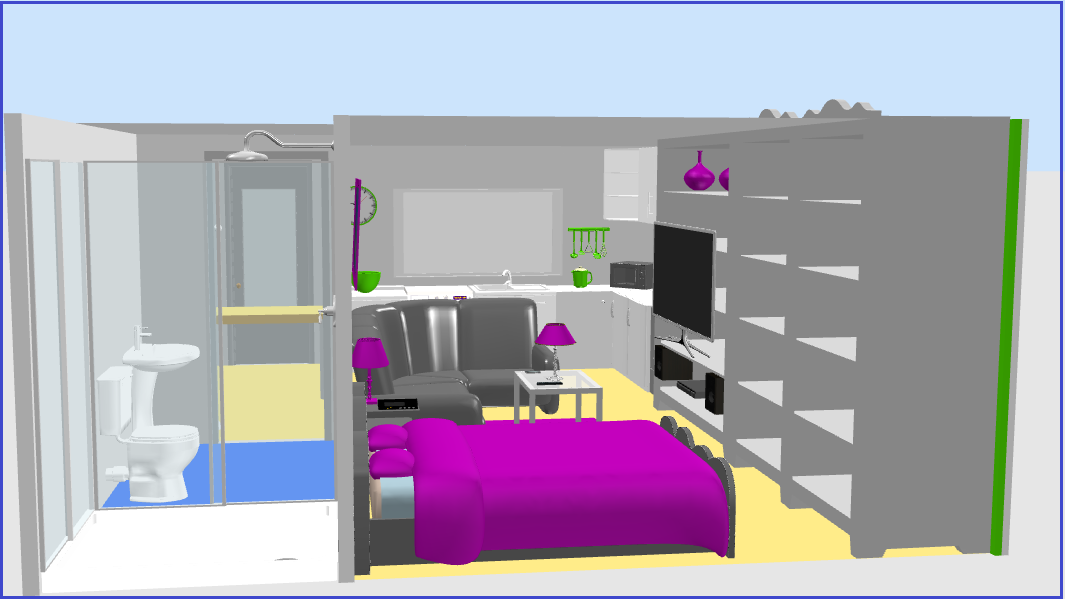
2.) I drew up some ideas on a paper note pad, and when I was happy with a design I made a proper design diagram using the Sweet Home 3D design software. It has a handy drawing canvas grid with full scale measurements so I used this with the measurements I had taken from the unit taking into account the size of extra timber I might need to purchase and the items to go on the unit such as the TV, electric fire etc. (As you can see in the pictures, I actually designed the whole apartment with the software and using the 3D view which you can move around to see all angles, was very helpful to visualize the apartment and the wall unit specifically).
3.) With the digital design of my new centerpiece, I took my laptop to my new apartment and remeasured the wall unit again to double check that all of the numbers matched to what I previously took down, and matched the design measurements on the digital plans, making any necessary adjustments to the final design plans. Job done.
Top Tips:
As well as taking notes and drawings when planning, take photos if you can too. Not just cool for before and after shots, but also for a good visual reference guide for redesigning, repairs and reassembly. Also good for your next wonderful Instructable project too.
With larger redesigns and improvements, I find it a good practice to make an ongoing list of repairs that may need doing during disassembly and cleaning. It's a bit frustrating when putting something back together then coming to an abrupt stop when you run into a repair that's need that you may have missed on initial inspection. Getting any repairs out of the way first, where possible, makes for a true blank canvas and won't interrupt your assembly flow.
I am all for the off the cuff, do it in your head, make it up as you go along etc. way of doing things, and there are times that way of working is great. But getting it down on paper (or a screen) first is a great way of getting any final ideas down before building and improves the chances of not missing a vital step during your build... or making repairs for that matter.
When making your design, keep in mind of thigs that you will be adding later. As a couple of examples, get the measurements of a TV you're going to use, including any stands your TV may have and keep in mind accessing the connection ports on back of the TV. Also include the measurements of coat hanger lengths for the wardrobe making sure they will fit well with a little room to spare making sure you can close any cupboard doors without any obstructions.
The Disassembly:


Disassemble:
1.) Time to take this bad boy apart. First thing was to clear all of the clutter and box it up for it's rightful owner to collect. Then remove the curtains and curtain track, then remove the folding bed frame fixed to the floor as I had no need for it, and managed to gift it to someone else on a freebie website.
2.) Next was to remove all of the shelving and base panels as well as all of the supporting battens attached to the divider panels holding the shelves up, putting to one side any of the wood I could reuse and adding to my list of repairs anything else I found needing some TLC.
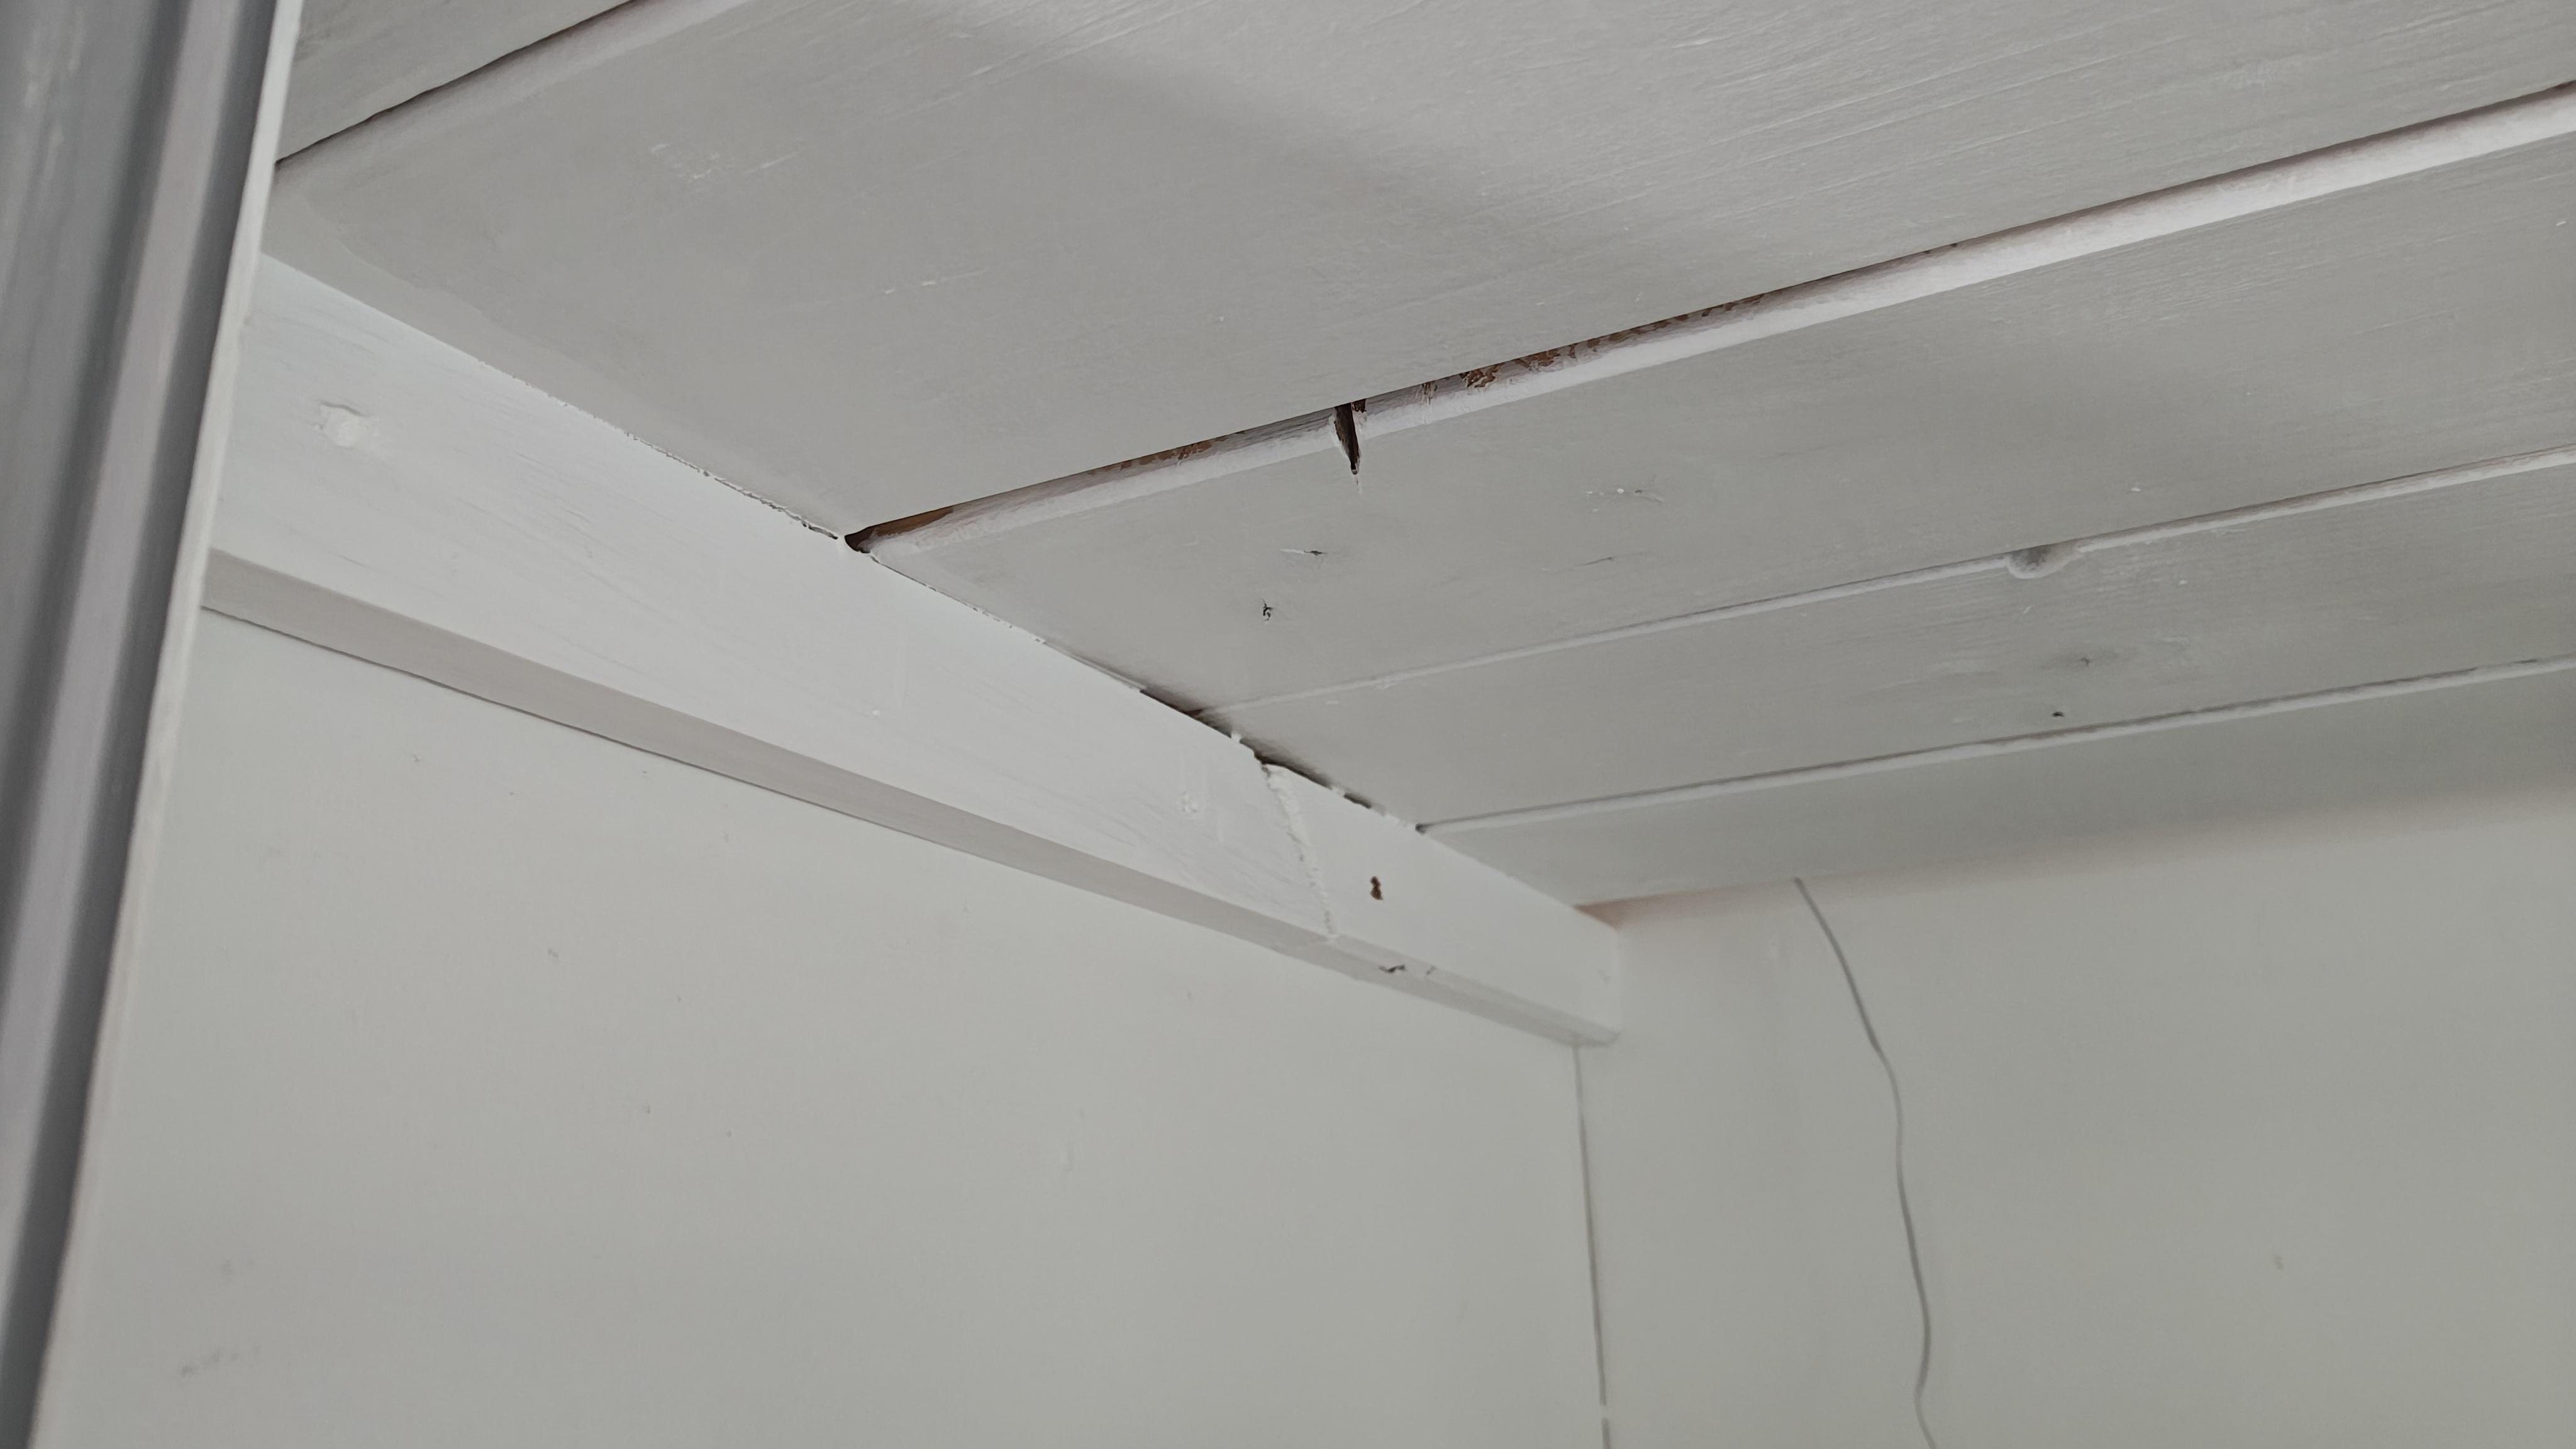
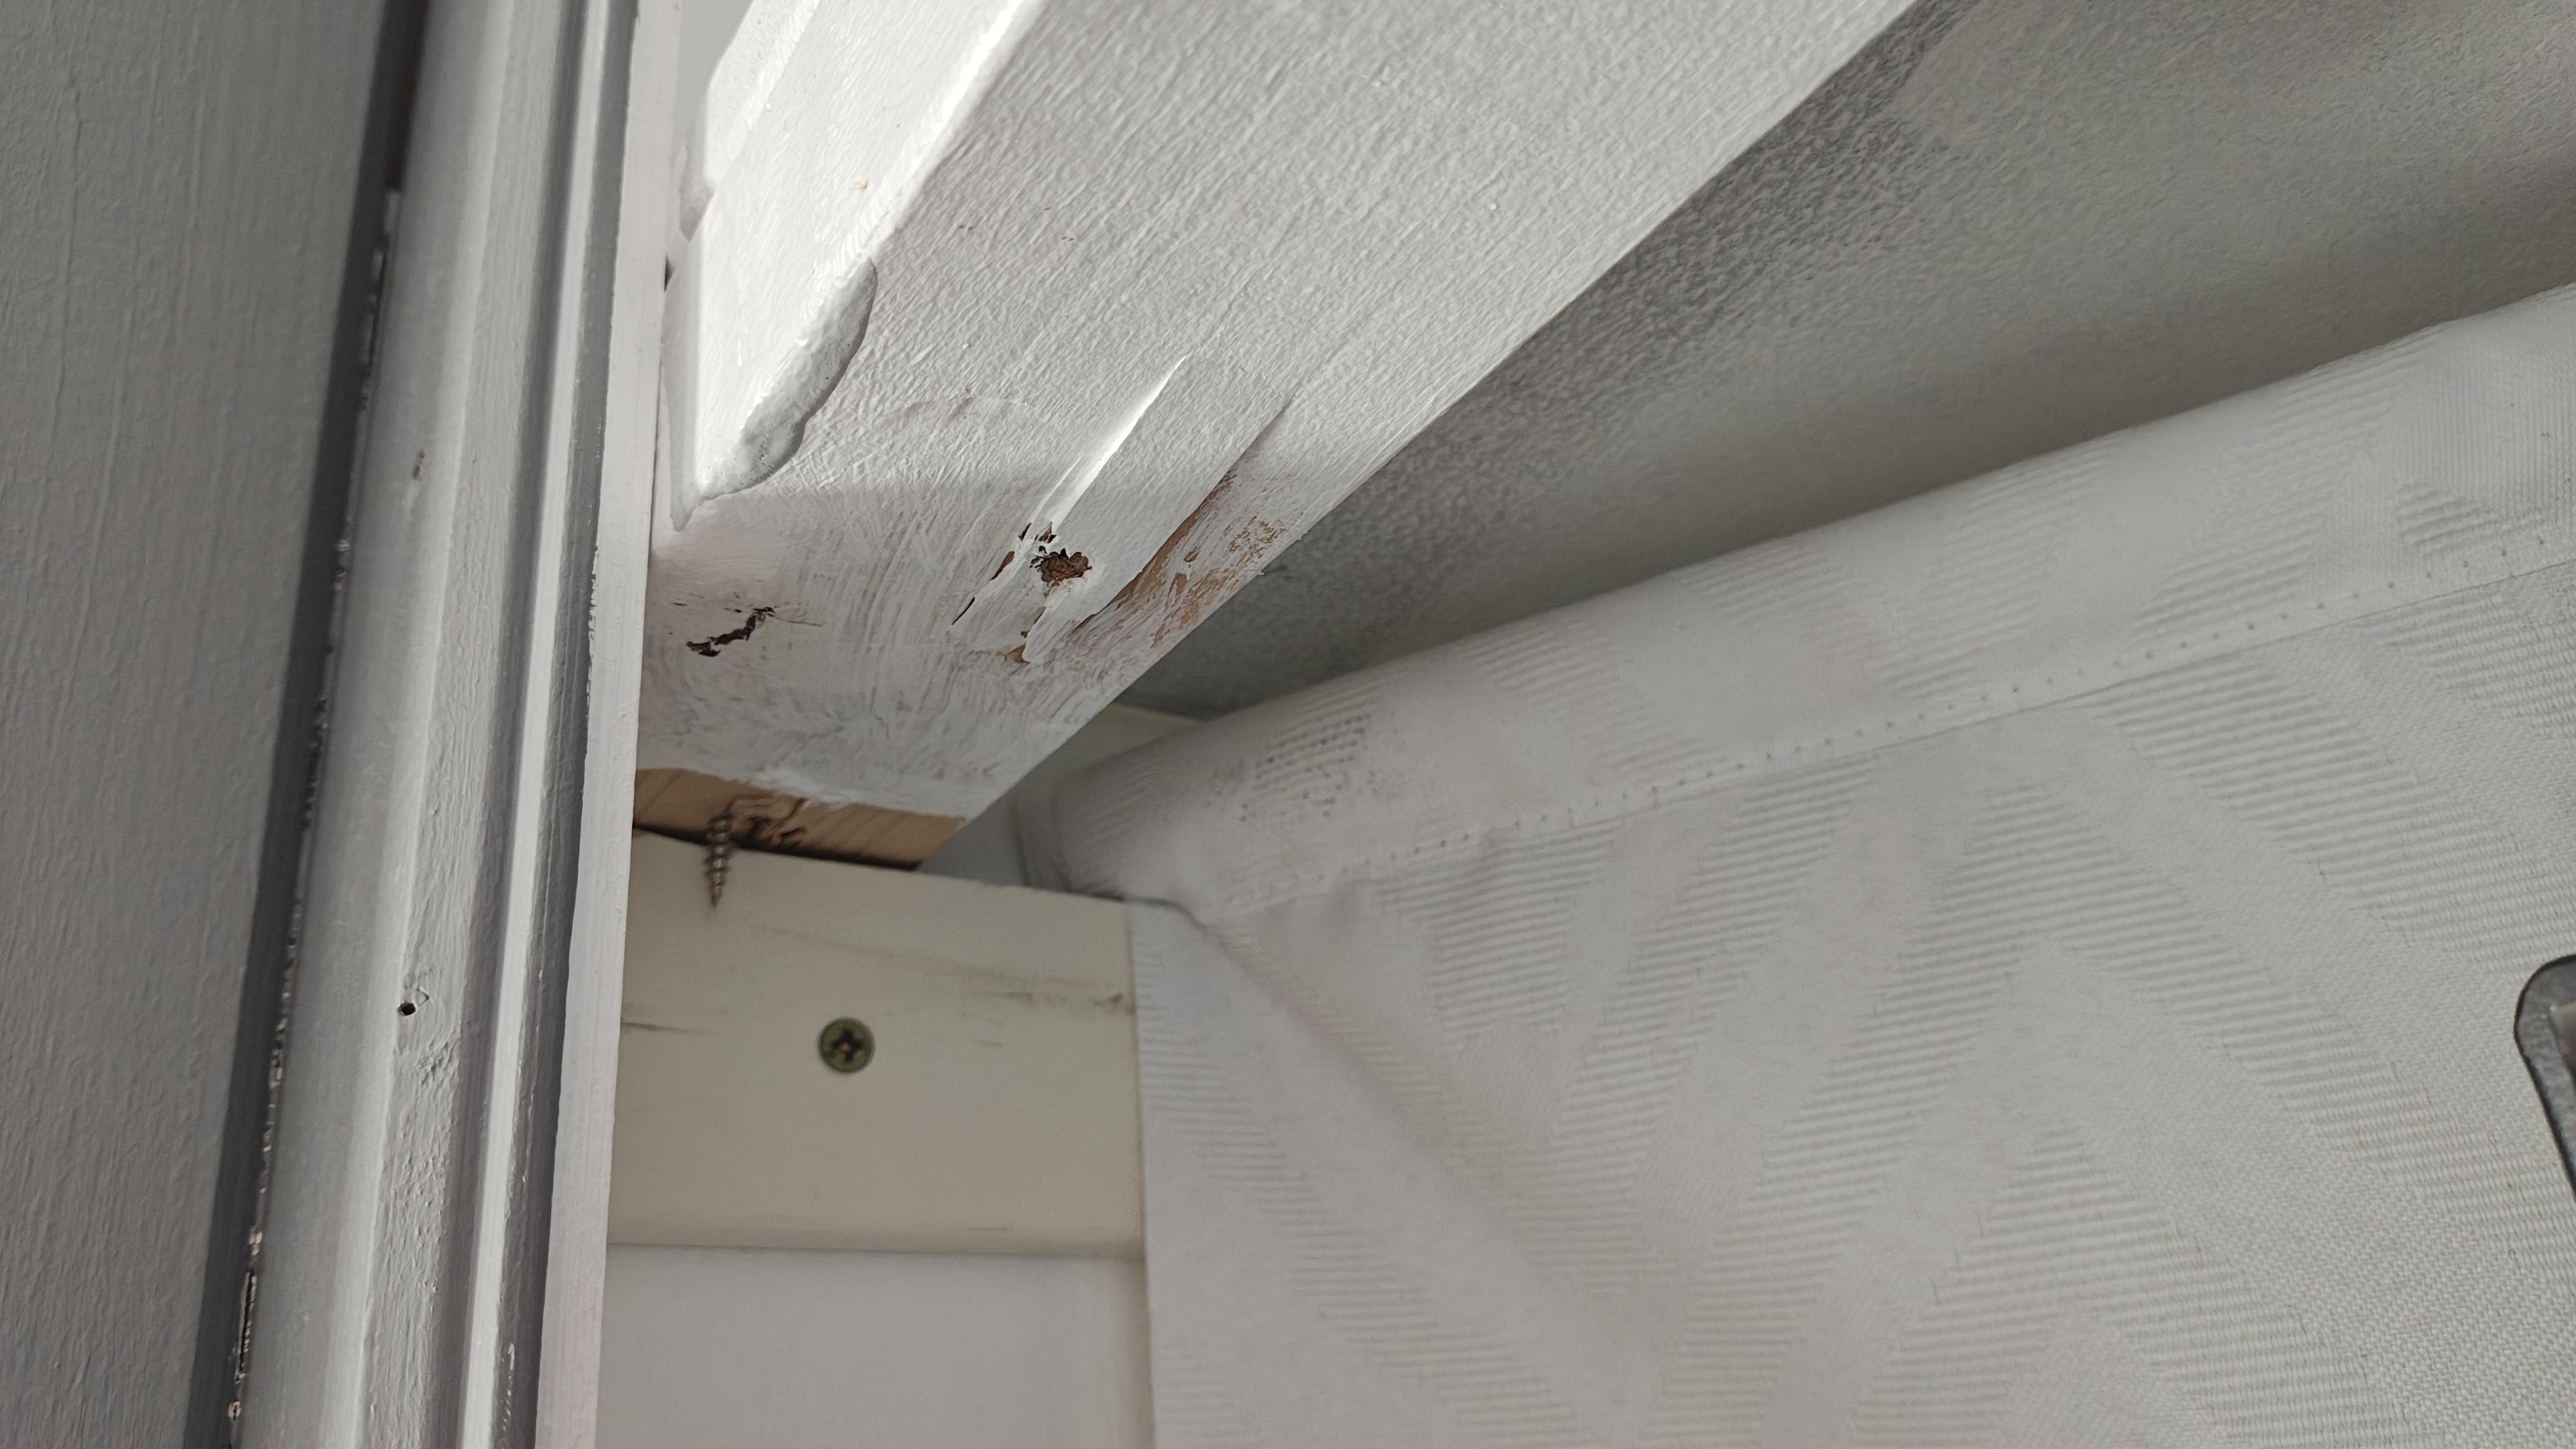
3.) The following job was to remove the coat rail in the wardrobe then the two upright divider panels, which wasn't a tough job as they were coming away from the back wall and ceiling anyway. Removing the screws from the wall was easy enough, a cordless driver set in reverse, pulsing the trigger to first loosen the screws, then remove them completely. The ceiling screws were a different matter.
The ceiling was plasterboard and unfortunately simply undoing the screws through the supporting wood batten holding the divider panels were also twisting the rawl plugs (to small or wrong rawl plugs used for the initial job, evident by the screws not fully screwed in and very wobbly divider panels). Luckily the bottom screws can out okay so it was just a matter of pulling and twisting the panels out, pulling the screws with the attached rawl plugs out of the plasterboard.
4.) Then the final job of this step give the empty shell a very good clean (not just all of the dust debris from disassembly, but the apartment stood unused for about 4 years so the whole place needed ta good scrubbin' to an inch if it's life).
A clean and blank canvas ready to get busy with.
Top Tip:
Don't underestimate the cleaning process. It can be a pain in the 'you know what' when you come across a lump of muck, a loose screw, a small stone, or years of mushed up dirt wedged into a corner of something when trying to reassemble or rebuild something finding it doesn't go together like it should because that little irritant is holding you back.
Rebuild the Unit's Base:


The boards that made the wall unit base were bowing, warped and cracked as there were no foundation supports originally put in, but this could easily be rescued with some new board and a batten support frame.
1.) Using the height of the outer frame of the wall unit, a purchase of some timber battens of the same height along with some fresh 12mm MDF sheets.
2.) The inside of the base was measured and lengths of battens were cut to size, and laid into the base.
3.) Then some smaller batten lengths were cut and laid width ways (about 30cm apart) in between the batten lengths and screwed together.
4.) I found some insulation leftovers on a freebie website someone was giving away. I used this to insert it in between the battens.
5.) The MDF sheets were measured and cut, wood glue applied to the tops of the batten supports, then the MDF was fitted into place on top of the battens adding weight on top of the sheets until the glue dried.
And that was pretty much it. A nice, strong base that didn't move, was now insulated, and strong enough to support anything thrown at it (within reason).
The leftover boards that formed the original base were trimmed, cleaned and put to one side for reuse.
Reintegrating the Divider Panels:


The divider panels were not just to separate the different sections, they also act a supports for all of the shelving. But before these could be put back into their new positions, a couple or repairs were needed which were to fill the old drilled holes in the back wall and ceiling, and to make the unit's base stronger. The back wall holes had rawl plugs still in them which needed to be removed and, as I mentioned earlier, the rawl plugs that were in the plasterboard ceiling were already pulled out, still attached to the divider panels supporting battens.
The Repairs:
1.) First thing was to remove the screws and plugs from the divider panels supporting battens. A pair of pliers gripping the plug and a handheld screwdriver to unscrew the screw did the job.
2.) Then the plugs in the wall needed to be removed. Screwing in a screw about half way into the plug, then with the pair of pliers gripping the screw, a firm tug successfully pulled the screw and plug out of the wall, together.
3.) Now time to fill the holes with some filler...
- Scrape out any loose debris, make the hole slightly wider to make a better surface for the filler to grip to, and vacuum out any remaining dust.
- Using a filling knife (or something with a thin, flat and smooth surface), put a small amount of filler into the hole. Push the filler in and smooth it down. Keep adding small blobs of filler, smoothing it as you go, until the hole is filled and you have a very slightly raised bump. Let it completely dry.
- Sand down the filler and keep checking until it is flat with the wall. If you take too much filler off, add a little more filler and sand smooth and flat again.
- Use the same process for plasterboard ceiling drill holes. For larger holes you would have to repair differently such as filling the hole with a cut off piece of plasterboard, some pieces of wood and some filler to hide the join.
4.) When all of your holes are filled and sanded, give your working area a good clean up.
The Improvements:
Now was time to refit the divider panels into their new homes. As mentioned above, the panels already had pre-drilled mounting battens screwed to the edges.
1.) Using you design measurements, use the measuring tape and a pencil to mark out where the divider panels will now live.
2.) Offer up one of the panels to it's new position using a spirit level to make sure the panel is straight and level, then use the drill with a small drill bit to mark the back wall and ceiling through the pre-drilled holes in the mounting battens. When drilling, all you really want to do it mark the wall, not actually drill a hole at this point. With all holes done, remove the panel and if necessary, go over the drill marks with a pencil to make them more visible.
3.) Next was to drill the new wall/ceiling holes and insert new rawl plugs.
- Choose your desired size screws, appropriate sized rawl plugs and masonry drill bit. The plug and drill bit are usually the same diameter, and the screw about a millimeter or two smaller.
- Hold the rawl plug next to the drill bit (from the tip, upwards), and stick a piece of masking tape to the drill bit, slightly higher than the plug. This will be your helpful guide to see where you need to stop drilling.
- Mark where the hole is to be drilled, and tape a small bag to the wall just under the mark to catch the drilled out dust.
- Set your drill to it's hammer function (if it has one) if your drilling into a brick wall. Then, holding your drill steady and keeping it square to the wall, drill your hole down to the tape guide.
- Now you can insert the rawl plug which should be a tight fit and you should only need to use your finger, although a final light tap with a hammer will help make the end of the plug flush with the wall.
- A similar procedure can be followed with plasterboard, but instead of a masonry drill bit, use a multi surface bit. There are also special plasterboard plugs that you can use as well.
4.) Now offer the panel up into position again and screw the mounting battens to the wall and ceiling. Now the same process can be done with the second divider panel.
Top Tips:
When sanding something down, use the 'sanding ladder' technique which is to use a rougher low number grade sand paper first, then use finer higher number grade papers, then a very fine grade paper for a smooth finish.
Before drilling any wall or ceiling holes, use the correct detector to make sure that there are no pipes or cables behind where you intend to drill. A cable, pipe, stud multi-detector is a good piece of kit to have in your tool collection.
Holding your drill steady and keeping it square to the wall will help to avoid wonky holes which could weaken the rawl plug grip. Don't over stretch when drilling and use a step ladder instead.
Brick and plaster dust can be a pain to clean up after drilling as it seems to want to stick to everything. But using some masking tape and a small disposable bag like a sandwich bag can help collect that pesky brick and plaster dust. Tape the bag to the wall directly under your drill mark, keeping the bag open as much as possible, and this should collect the majority of the dust making for an easier clean up. It works great on walls, but unfortunately it is less effective with ceilings.
Installing the Shelving:


With the divider panels in place, now was the time to add the all important shelves. This was using some of the original shelves and some additional T&G timber lengths of 38mm x 63mm CLS timber lengths.
The Repairs:
1.) First thing was to clean up the old shelves I was going to reuse. Once they were cut to size, they were sanded down and wiped clean to remove the old paint and grime.
2.) Next was to soften the front edges. This was done with a rough grit sand paper going up and down the full length of the shelves, then finishing off with a fine grit paper for a nice smooth finish.
3.) The only other repair, of sorts, was to loose the bowing effect that the larger shelves had formed. Two lengths of CLS (per shelf) timber were cut to the length of the shelf. Then turning the shelf up side down and laying the edge of it on the widest side of one of the CLS lengths.
4.) I put my weight on the centre of the board pushing the bowed part of the shelf down to the CLS, then drilled and screwed in a wood screw in the center first, then working outwards to each end doing the same. A nice straight shelf that would hold a lot more weight, while not sagging in the center anymore.
The Improvements:
1.) Starting with the lager shelves (there were two), I used the measurements from my design plans, measured, marked then screwed the old supporting battens to the wall units end and dividing panels at their new heights, to support the shelves.
2.) With the battens securely in place, the lower large shelf was put into place resting on the supporting battens, then drilled/screwed together. The same was done with the next shelf up.
3.) As I had no more shelving the same large size as the other two, I used some of the T&G lengths for the top shelf. These were cut to length and put in place resting on the battens then screwed in place.
4.) With the rest of the T&G, I did the same process adding a base shelf and two upper shelves for the storage area above the desk area.
5.) Although not shelving, but still something that holds something, was to fit the coat rail for the wardrobe. I couldn't use the old one as it was not too short having made the new wardrobe area larger, so a used an old curtain rail I took from the front door (luckily same diameter), cut a length to size using a metal cutting blade on my jigsaw. I refitted the rail holder (the other one was still in place as there was no need to remove it) with the new rail in place and screwed it to the divider panel making sure it was level with my spirit level.
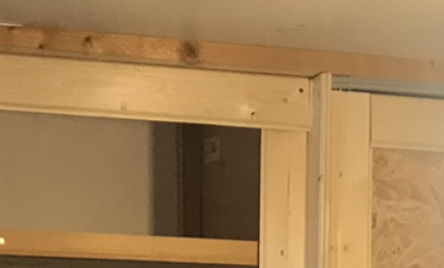
6.) Finally, I used some of the T&G to make some decorative framing around the entertainment/fire place section and desk area. This was simply a case of cutting to length, screwing to the units outer framework and shelving edges. The T&G was fitted with the tongue side edge facing inwards towards the shelving areas and the apartment.
With the unit now taking its new shape and being nice and sturdy, the next task was to make some new bi-folding doors... a first for me.
Top Tip:
I made the shelves to have a small gap at the back, just size enough to drop power cables etc. through. It's something to keep in mind if you intend to have electrical devices on your shelves, dropping the cables/plugs through the gaps, and tidy up or hide those ugly wires with cable management products like cable clips or wire trunking conduit.
Making Bi-Folding Doors:


I've seen 'em, I've used 'em, but I have never made any bi-fold doors before. Because of the location of the wardrobe section and where my bed was going to go, I had little space to have a large single door or indeed two smaller outer opening doors. And because of the new larger wardrobe size and the new office area, trying to repair the original sliding doors was out of the question. So bi-fold was the way to go to give maximum opening area while saving space. And as the apartment was still pretty much empty, I had lots of free floor space to work... result, as it was pouring rain outside.
The Repairs:
1.) Well actually, there were none on this step. This was a complete scratch build sub-project.
The Improvements:
Building the doors. I started With the wardrobe doors, the the office space ones... same thing, just smaller.
1.) Using some OSB sheets, I cut them to size with a hand held circular saw two full length panels, making them about 3cm shorter than the units outer frame to take into account the size of the slide rails and pinions from the bi-fold door fixing kit.
2.) Once cut, I laid the two OSB panels on the floor, then measures and cut four lengths of T&G (two for each door).
3.) Then, with the tongue facing inwards, I laid the T&G on the floor and put the OSB on top making sure the outer edges were flush along the length of the door panels, then wood glued and screwed together.
4.) The same was done going across the width of the doors across the bottoms, tops and three short lengths in between, making four square sections per door.
The folding door kit I used has an aluminum runner, hinges, an upper pivot pin with a long shaft (for the top of the door), a lower pivot pin with a short shaft (for the bottom of the door), another door runner pin for the top of the door that keeps the doors within the runner, two fixing plates and a door knob (I used my own in the end), and a pack of screws and instructions. I will refer to the two parts of the wardrobe bi-fold doors as door A and B.
5.) Drill a hole through the top edge corner of door A, and another hole equally located in the bottom edge corner. Drill a further hole through the top edge corner of door B, opposite corner from door A, which is for the door runner pin. The holes should be about 3cm or so from the side edge and dead center of the door widths. The holes should be just slightly smaller than the pivot pins for a firm push fit or light tap with a hammer.
6.) Turn the doors over on the floor or your work surface, making sure the pivot pins are still in the same locations, then push the two doors together. Now drill and screw in the door hinges... top, middle, bottom, making sure the hinge shafts are equally centered between the two doors.
7.) Now the fixing plates need to be fitted. These were fitted to the bottom of the top door frame and equally located on the bottom top door frame, or in my case the top and bottom outer wall unit frame. These are where the pivot pins sit and located to the side of where the door opens (think of it similar to standard door hinges). Then holes were drilled into the unit frame, the same size as the pivot pin shafts.
8.) Next, measure and cut to size the aluminum runner, then drill and screw the runner to the bottom side of the top outer unit frame next to the top fixing plate.
9.) The doors could now be fitted by lifting the door half way open and slotting the top pivot pin into the fixing plate, and door runner pin into the runner. Then move the bottom of the door and slot in the bottom pivot pin by dropping it into place. The longer shaft on the top pivot pin enables you to push the doors up as far as they can go, and then drop down slightly when fitting the lower pin into its fixing plate. At that point, the door knob could be screwed in and doors ready to use. Then I followed the whole process again for making the smaller office area doors.
Job done... but wait, there's more!
10.) After a couple of days and while pleased with the doors, I was thinking I could make them look a little better. This was a simple case of removing the door knobs, the measuring, cutting then fitting some 3mm hardboard over the front of the doors for a flat, smooth finish. The hardboard was fitted by leaving the doors closed, then holding the cut boards up and tacking in with a nail/tack gun. This made for a more modern, contemporary look when painted that I was very pleased with. Worth the extra little effort. A finishing touch was to add some new aluminum door handles.
Now I was done. Time for a desk...
Top Tips:
If you don't have lightening speed, super strength or elastic arm superpowers etc.. get a friendly helper to help you fit larger bi-folding doors into place to make life easier... and safer.
The hardboard I used was smooth on one side (the hero side), and rough on the back (the fixing side). But one thing to look for when purchasing your new boards apart from being in the best condition you can get... is the pricing labels. Look through the stock for hardboard that has any adhesive product labels stuck to the rough side, or missing altogether (just make sure at least one board has a barcode stuck to the back making for a quicker checkout). Why do I mention this? Well if you go to a store where some bright spark decided to stick the adhesive product/barcode labels on the smooth side, then this will be a nightmare to remove without damaging the shiny smooth surface. If you end up stuck with a piece of board with that sticky monster stuck to the good side, try putting some warm water on the label, let it soak a bit, then try to gently peel it off with a lot of patience (other tips are welcome in the comments).
Repairing and Improving the Desk:


Racing towards the finish line like a finely trained thoroughbred, now was the time to sort that pesky desk out.
The Repairs:
1.) First thing was to dismantle the desk by removing the desk top from the draw unit and removing the draws, then the side leg panel.
2.) Then the thin trashy broken hardboard panel was removed from the back of the draw unit and remaining nails pulled out with a pair of pliers. The old hardboard panel was not good for reuse... so away with you!!!
3.) Using part of the old unused leftover shelving, I measured, cut and nailed in the new back panel to the draw unit making it much sturdy. No more wibble wobble.
Now the draws needed some attention as two of the draw runners were broken. The draws would sit in place and still move in and out, but even with the new back panel on, the draws would still fall out with the slightest side movement.
1.) So with the draws still removed, One was put back in to the unit and took a rough measurement of the slack. By this I mean moving the draw side to side and taking a measurement from the edge of the draw and the draw unit.
2.) Now one recessed runner from each of the draw sides were removed.
3.) A piece of scrap strip wood the same width of the slack measurements I took were cut to the size of the draw recess, then laid into place.
4.) The runners were laid on top of the recessed strip wood and screwed in using some slightly longer screws to account for the added thickness of the strip wood. Then the draws were test fitted ending up with the desired results... no more stationary spillages. Hurray.
The Improvements:
1.) The draws were removed from the draw unit, and the unit housing put on the wall unit base to the side of my choosing (right hand side for me), then drilled and screwed the draw housing to the wall units divider panel and base board making it a secure and permanent feature. The draws were now put back in.
2.) A wood batten was cut and screwed to the opposite divider panel the same height of the draw unit to form the bottom runner for the sliding desk top. Then the desk top was then placed on top.
3.) Two more battens were cut and screwed to the divider panels above the desk top, just touching the desk top enough for the top to be securely held when pulled out, but not so close and tight the the top wouldn't slide.
4.) I also built a small shelving unit using the scraps left over from the old shelves and attached it to the back of the desk area. I also used up the rest of the scraps to build another small shelf unit that went under the desk against the back wall. I knew them old shelf scraps wouldn't go to waste... waste not, want not.
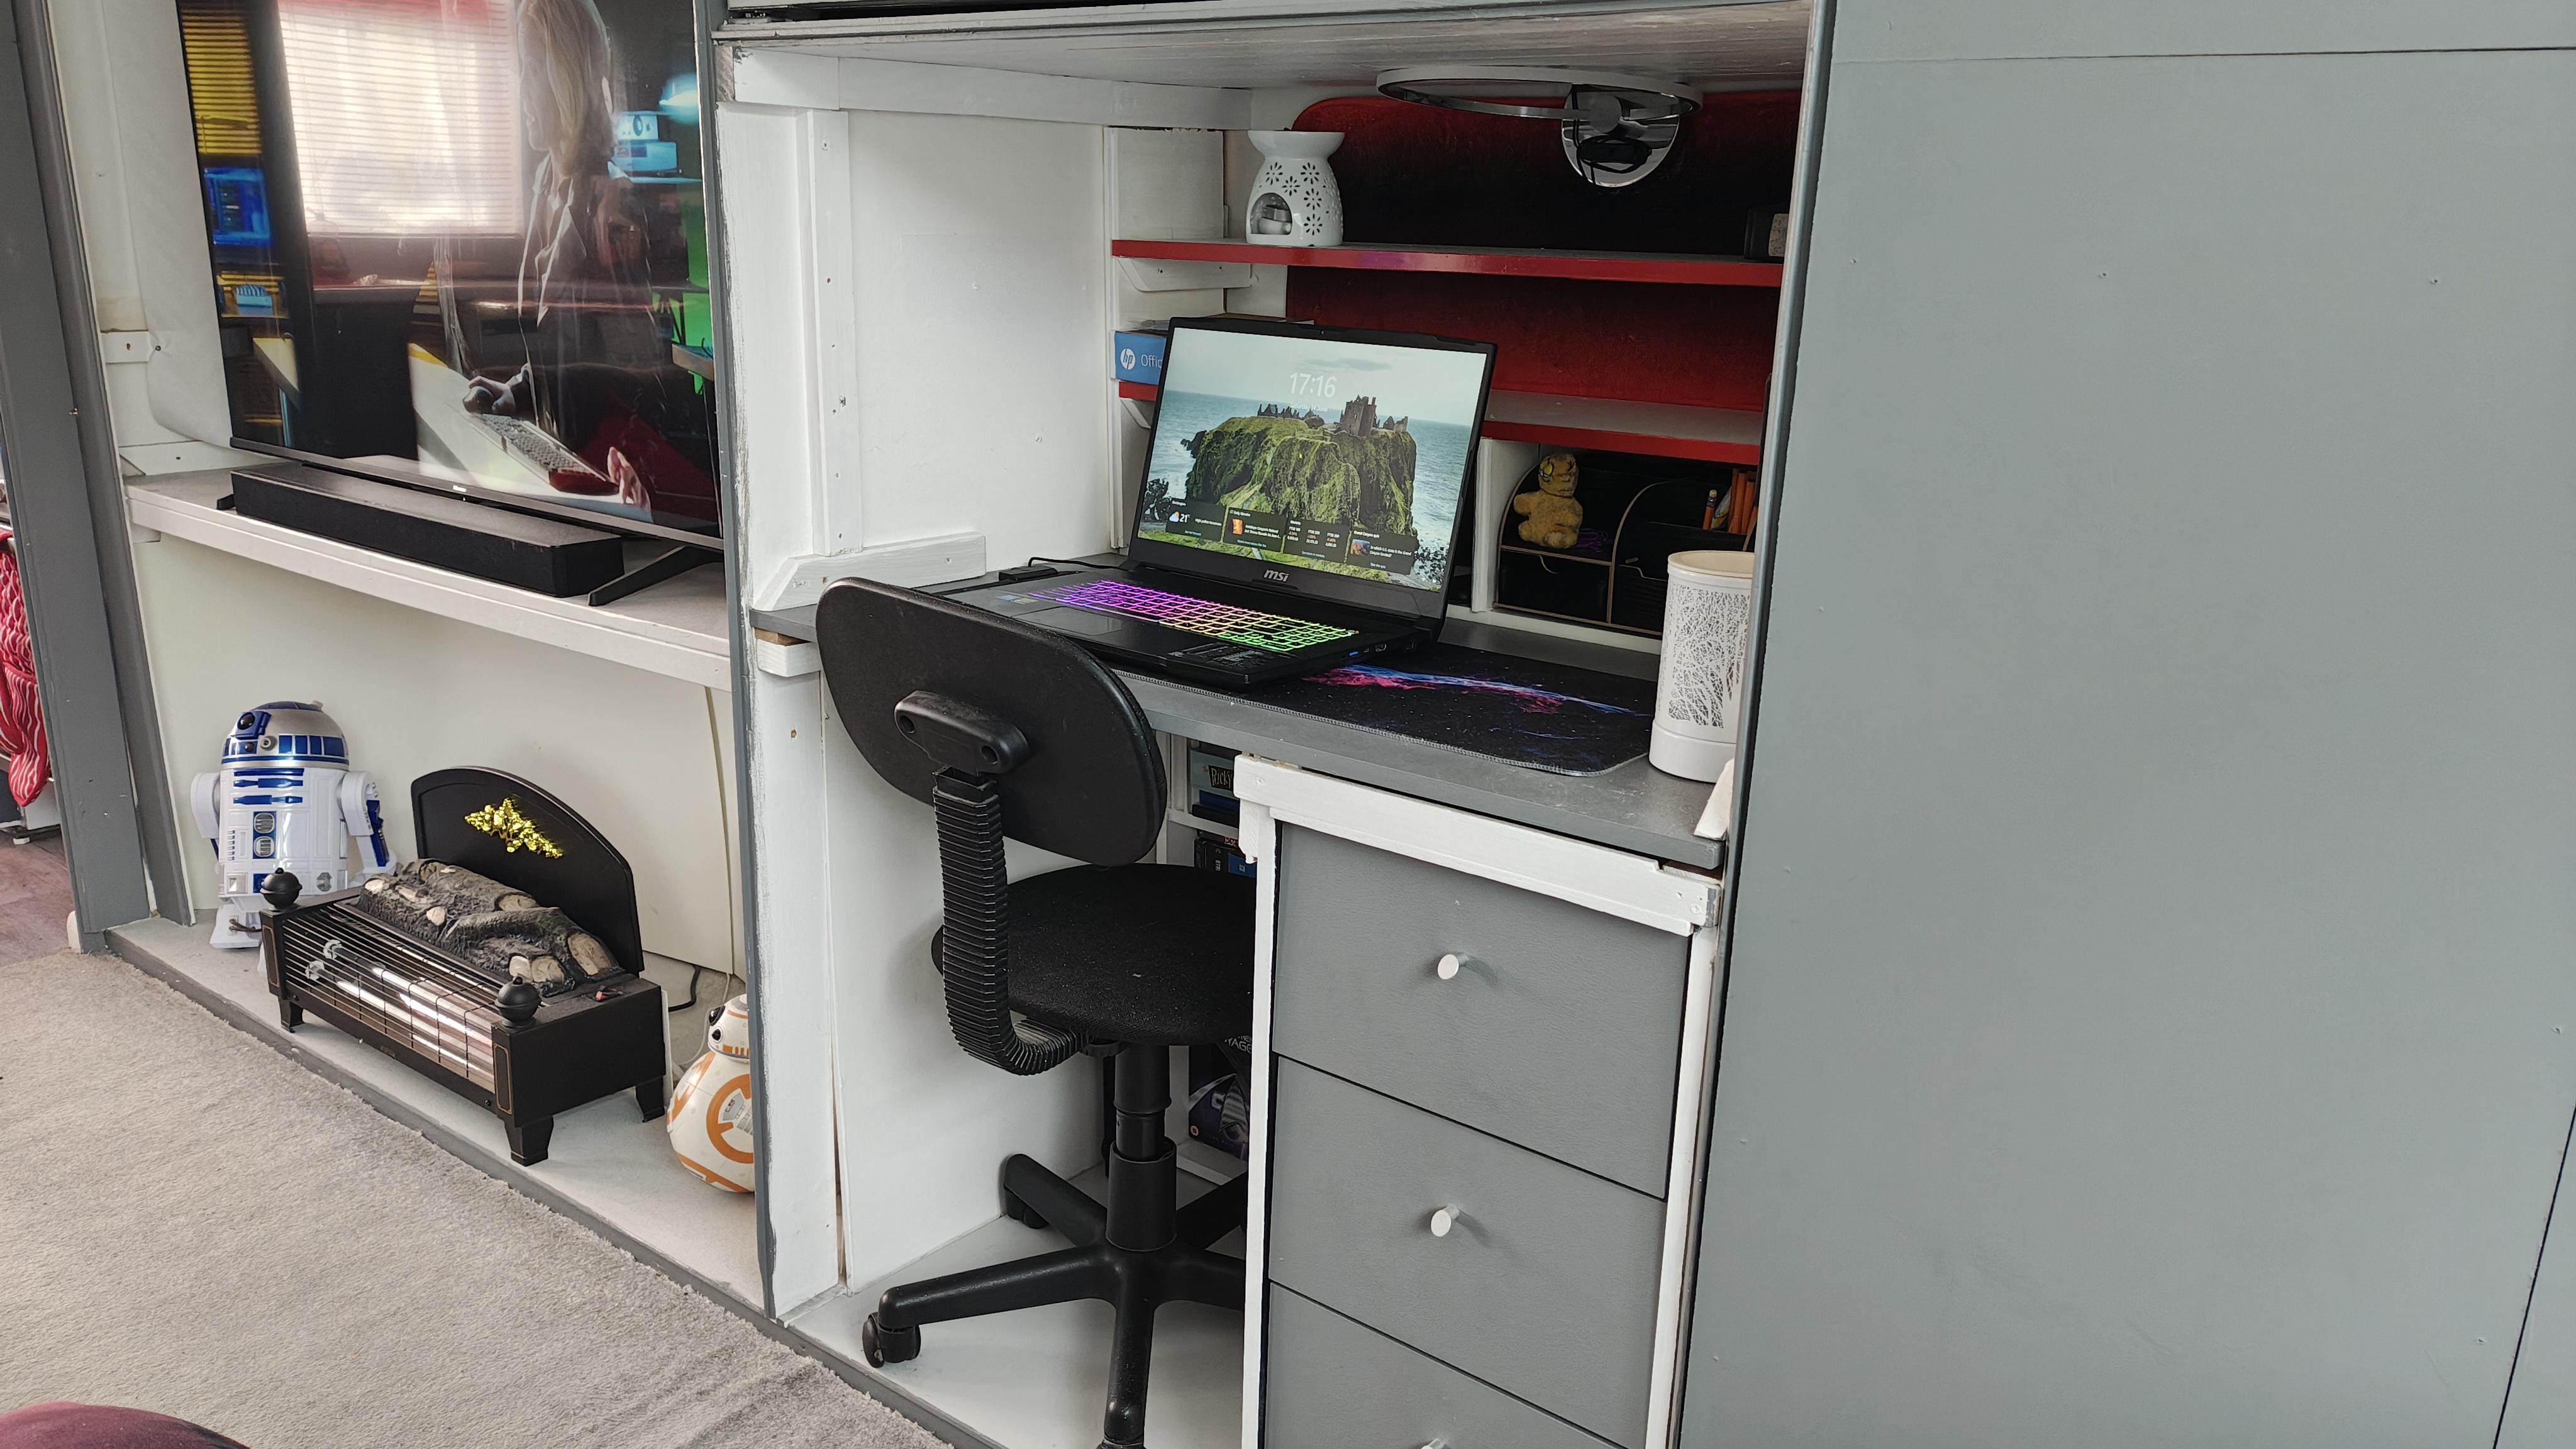
And the mini office/desk area is pretty much done... with the exception of some painting... oh, and some light. That's next.
Top Tips:
No specific tips here, just to work smart, work safe, and be imaginative and practical with your designs, and not to take shortcuts with repairs. You want them to last forever and ever, right?
Repair of the Table Lamp:


The final desk repair was for the LED desk lamp with it's now deceased On/Off switch. My table lamp has a DC to AC main plug.
The Repair:
1.) Unplugged and made safe, The rocker switch housing was unscrewed, and the damage assessed. The broken housing (looking suspiciously like someone, not me, stepped on it) and the snapped contacts I found made me decide that it would be easier and safer to cut the switch out and bypass it altogether.
2.) With my trusty wire cutters, I cut the wires before and after the switch which was disposed of, then identified the positive and negative cables ( two black wires, one with a white stripe indicating it was the positive), then cut the wires in a staggered formation (see Top Tips), and stripped the wire coating.
3.) The bare wire ends were tinned with solder by applying flux liquid then heating the wires and solder to cover the bare ends.
4.) After sliding over a larger length of shrink tubing over both wires, smaller shrink tubes were slid over the individual wires, the tinned wire ends soldered together, then the small tubes slid over the soldered joins and heated with the soldering iron to shrink the tubes. Finally the larger tube was slid over both the smaller tubes and heated to shrink making for better protection and a neater looking cable.
The Improvement:
1.) After plugging the light in to test it, I plugged in the lamp plug to a smart switch ready to plug the light in to the wall socket when the desk was finished. The smart switch had a manual On/Off button I could use while sitting at the desk, but I could also control it by using the smart plugs app on my phone, computer or smart speaker. The lamp was put to one side for now so the whole wall unit could be painted.
Top Tips:
I mentioned earlier about "staggering" the table lamp wires. What I meant by this was this... with the two cable ends ready to be joined, the two wires (positive and negative) on each cable end were cut at different lengths. On one cable end the positive was slightly longer than the negative, and on the other cable end, the negative wire was slightly longer than the positive. Joining the wires/cable this way can reduce the unlikely but possible chance of a short circuit if the shrink tubing somehow got damaged, and it also makes it easier to slide the larger shrink tube to slide over the other smaller ones which makes the end result look neater without any unsightly bulges along the cable.
Two wire cables found on DC to AC mains plugs (sometimes AC plug cables too) which are the same colour mostly have a marker to tell apart the live/positive wire from the ground/negative wire. The live/positive cable will normally have writing or a coloured stripe running along the length of the wire. Yet there are some unscrupulous cable makers saving pennies and not mark the positive wires making it a 50/50 guess as to which wire is which... not good for electronics. In both cases, and to be absolutely sure you don't release the mystical blue smoke (the death of all electronics), and to keep yourself safe too, a multimeter is your best friend. Cutting and stripping the power end of the wires, safely separating them, applying power and touching the meters probes to the wires will tell you which is which. A negative (-) symbol next to the voltage reading will indicate that the meters red probe is connected to the negative wire (wired in reverse). A voltage reading without the negative symbol means it is connected correctly and the red probe is connected to the live/positive wire. When you have found your positive wire, kill the power and mark it with some tape or slide a length of red shrink tubing over it for easy ID.
For a cable that has not been cut and no markings, there are electrical reading meters that detects a live current through a wire without cutting the wires or the cable, and you simply touch the probe end of the meter on to the wire covering.
Repainting:


No repairs here, just improvements. Before adding the hardboard to the bi-folding doors, I painted the wall unit white along with some leftover silver/grey paint around the edges and recessed door panels. I ended up adding the hardboard panels to the doors and decided to go for a darker grey paint which had a more modern, contemporary look. Here's how I did my colouring-in puzzle.
1.) Give the whole wall unit a wipe down with a damp cloth, a sweep and a vacuum. Then I removed the desk draws and desk top.
2.) Then starting with the inside of the unit, I painted the following areas with three coats of silk white paint...
- The back wall
- Shelves
- Battens
- ceiling
- Divider panels
- base
- desk draw housing
- Office shelving
The silk finish would have a nice subtle shiny finish giving it a clean look, and also reflect the lighting I would add.
3.) When the last coat of white paint was dry, I painted the following areas which a dark grey silk paint...
- The wall unit outer frame
- The T&G paneling
- Desk draws (fronts only)
- Desk top
- Bi-fold doors
4.) Not strictly painting, but colourful none the less. I used some red self adhesive vinyl stripes and attached them to the upper desk shelving edges. (I also did the same with my kitchen cupboards as I ended up putting the same coloured vinyl to my kitchen back splash so it tied the whole apartment colour scheme together.)
Job done, almost. At the time of writing this, I still have one outstanding job as I am waiting for a delayed delivery of some wooden profile edges which I will fit to the shelf edges of the entertainment/fire place section to make them look prettier. I will paint these with the same dark grey paint. But for now, with the newly improved utility wall unit finished, it was time to add the finishing touches... starting with the fire place.
Repairing and Improving the Electric Fire:


A short and sweet step where I sorted out the electric fire place. The fire had a orangey red bayonet fitting light bulb, a metal rod with shiny metal fins that would rotate from the heat of the light bulb giving a licking flame effect, and a plastic cover with faux log/coal look. There was also a metal tray running the length of the fire with a hole in the middle where the bulb would fit through. This was to reflect the heat from the bulb to help make the flame effect rod rotate and to reflect the light.
The Repair:
A simple one. Simply replace the light bulb that had blown. But I didn't swap the bulb like for like as I felt I could improve on the flame effect.
The Improvements:
The issue I had with the original flame effect was that when the flame effect rod rotated, it made it look like the flames were going sideways, I know, right. I've not seen real flames go sideways except for an outside firepit on a really windy day, or from a blowtorch. I wanted my faux flames to go, up. I had seen LED flame effect bulbs around, so managed to find and purchase one with the same operating voltage and bayonet fitting.
1.) I removed the plastic faux log/coal cover, then the metal flame effect rod and the old bulb. This was when I noticed that the hole in the metal tray was too small for the new bulb. I rested the new bulb onto the top of the hole, marked around it, removed the bulb and unscrewed the tray.
2.) With a metal cutting blade in my jigsaw, I cut out the excess metal to make the hole bigger, the refitted the tray, then successfully fitted the new LED flame effect bulb. A quick test and the effect looked much better.
3.) When I put the faux log cover back on, the flame effect looked a little dark. I removed the cover again and used the tip of a hobby knife to scrape away some of the black paint, wiped the cover clean and replaced it. It looked better, but I repeated the process a few times until I was happy. I finally replace the cover, screwed it down, and I ended up with a much brighter flame effect... with flames that finally looked and flickered like a real fire.
4.) The next job was to use some 3mm HIPS sheets I purchased to make a curved back panel in the actual fire place. This was simply done by cutting the sheets to full height of the bottom shelf/base, sliding in the sheets matt side facing out, pushing the middle back towards the upper shelf's CLS batten, then drilled and screwed in a single screw to hold the sheets in place. The matt finish side of the HIPS sheets will help with the following addition.
5.) The final improvement was to cut out a section of leftover sheet of PVC I had to match the back of the electric fire, added a couple of lengths of double sided 3M VHB tape to the panel and attach it to the back of the fire.
6.) Next was to stick a one meter length of smart RGB LED strip to the PVC panel. One the LED strip was connected to the app, I chose a flame/fire effect scene that was available on the LED strips app. Then I plugged the strip into another smart plug.
7.) Finally, the fire was put into place, the fire and LED cable fed through the join of the HIPS backing sheet, plugged in to the mains, then using the smart plug app, I created a scene so both the fire and LED backing lights would turn On and Off at the same time. A final test at night produced a nice flame effect from the front of the electric fire, and a nice gentle flickering glow reflecting off the matt side of the HIPS backing panel.
As an extra touch, I had some faux glass stones left over from an old ornament now long gone. I spread the stones on top of the metal tray near the light bulb to help spread out the flame reflection.
NOTE: For convenience, the LED RGB strip lights I used have a memory function. This function remembers the last colour or lighting effect scene that was used when the power is turned off then switched back on again. Other LED strips without this memory function will reset to a default start colour or scene, meaning you would have to open the app and set the colour or scene again every time you switch the strip lights on.
Top Tip:
I later took the fire and backlights turning On and Off to another level. My phone uses Total Launcher as my default launcher, and the Tasker app for home automation control. With Tasker and the launcher, I made a button for my phones UI so when I press the button the fire comes on, Swiping the button up would turn both the fire and LED backlight on, and swiping the button down would turn it all off. To learn how to use Tasker and Total Launcher to do home automation from your android phone or tablet, scroll down and read from step 11 of my Interactive Smart Table Instructable to find examples of how to do it.
Finishing Touches:


Now with a hulking piece of finally tuned and repaired furniture, it now needs some friends to occupy it.
1.) First thing to do was to use an old white roller blind I had from my old apartment which was still in good shape and had a flexible plastic weight in the bottom. Like the HIPS sheets I used as a curved back drop for the fire place, I did the same thing using the blind. This was simply a case of measuring and marking the blind, from the bottom up, to the same height of the TV shelf, cutting off the excess. Then pushing the blind, plastic weight at the top, into position with both ends of the blind pushing against the wall units side panels causing the blind to curve, I simply drilled and screwed in a single screw through the center of the blind weight into the upper shelf CLS support.
2.) The next job was to sort out my TV. To add a bit more of a visual effect and to brighten up the wall unit, I added an LED adaptive TV back lighting kit. This is an RGB LED light strip with a camera that fits to the top center of the TV which tracks the colour movements on the TVs screen, and replicates that through the RGB strip. That's why I installed the white roller blind... to better reflect the lighting from the RGB strip.
- With the TV face down on my bed, I stuck the RGB strip to the back of the TV.
- The TV was placed onto the shelf and the camera attached to the top of the TV.
- The camera and RGB strip were connected to the control box, and box connected to a USB port on my TV.
- The lighting system was then calibrated following the kits instructions.
- Then sit back and enjoy the lighting effects with all of my favorite movies and TV shows.
3.) Instead of using the bi-fold door knobs supplied with the fixing kit, I fitted some aluminum door handles I purchased to the wardrobe and the storage cabinet above the desk.
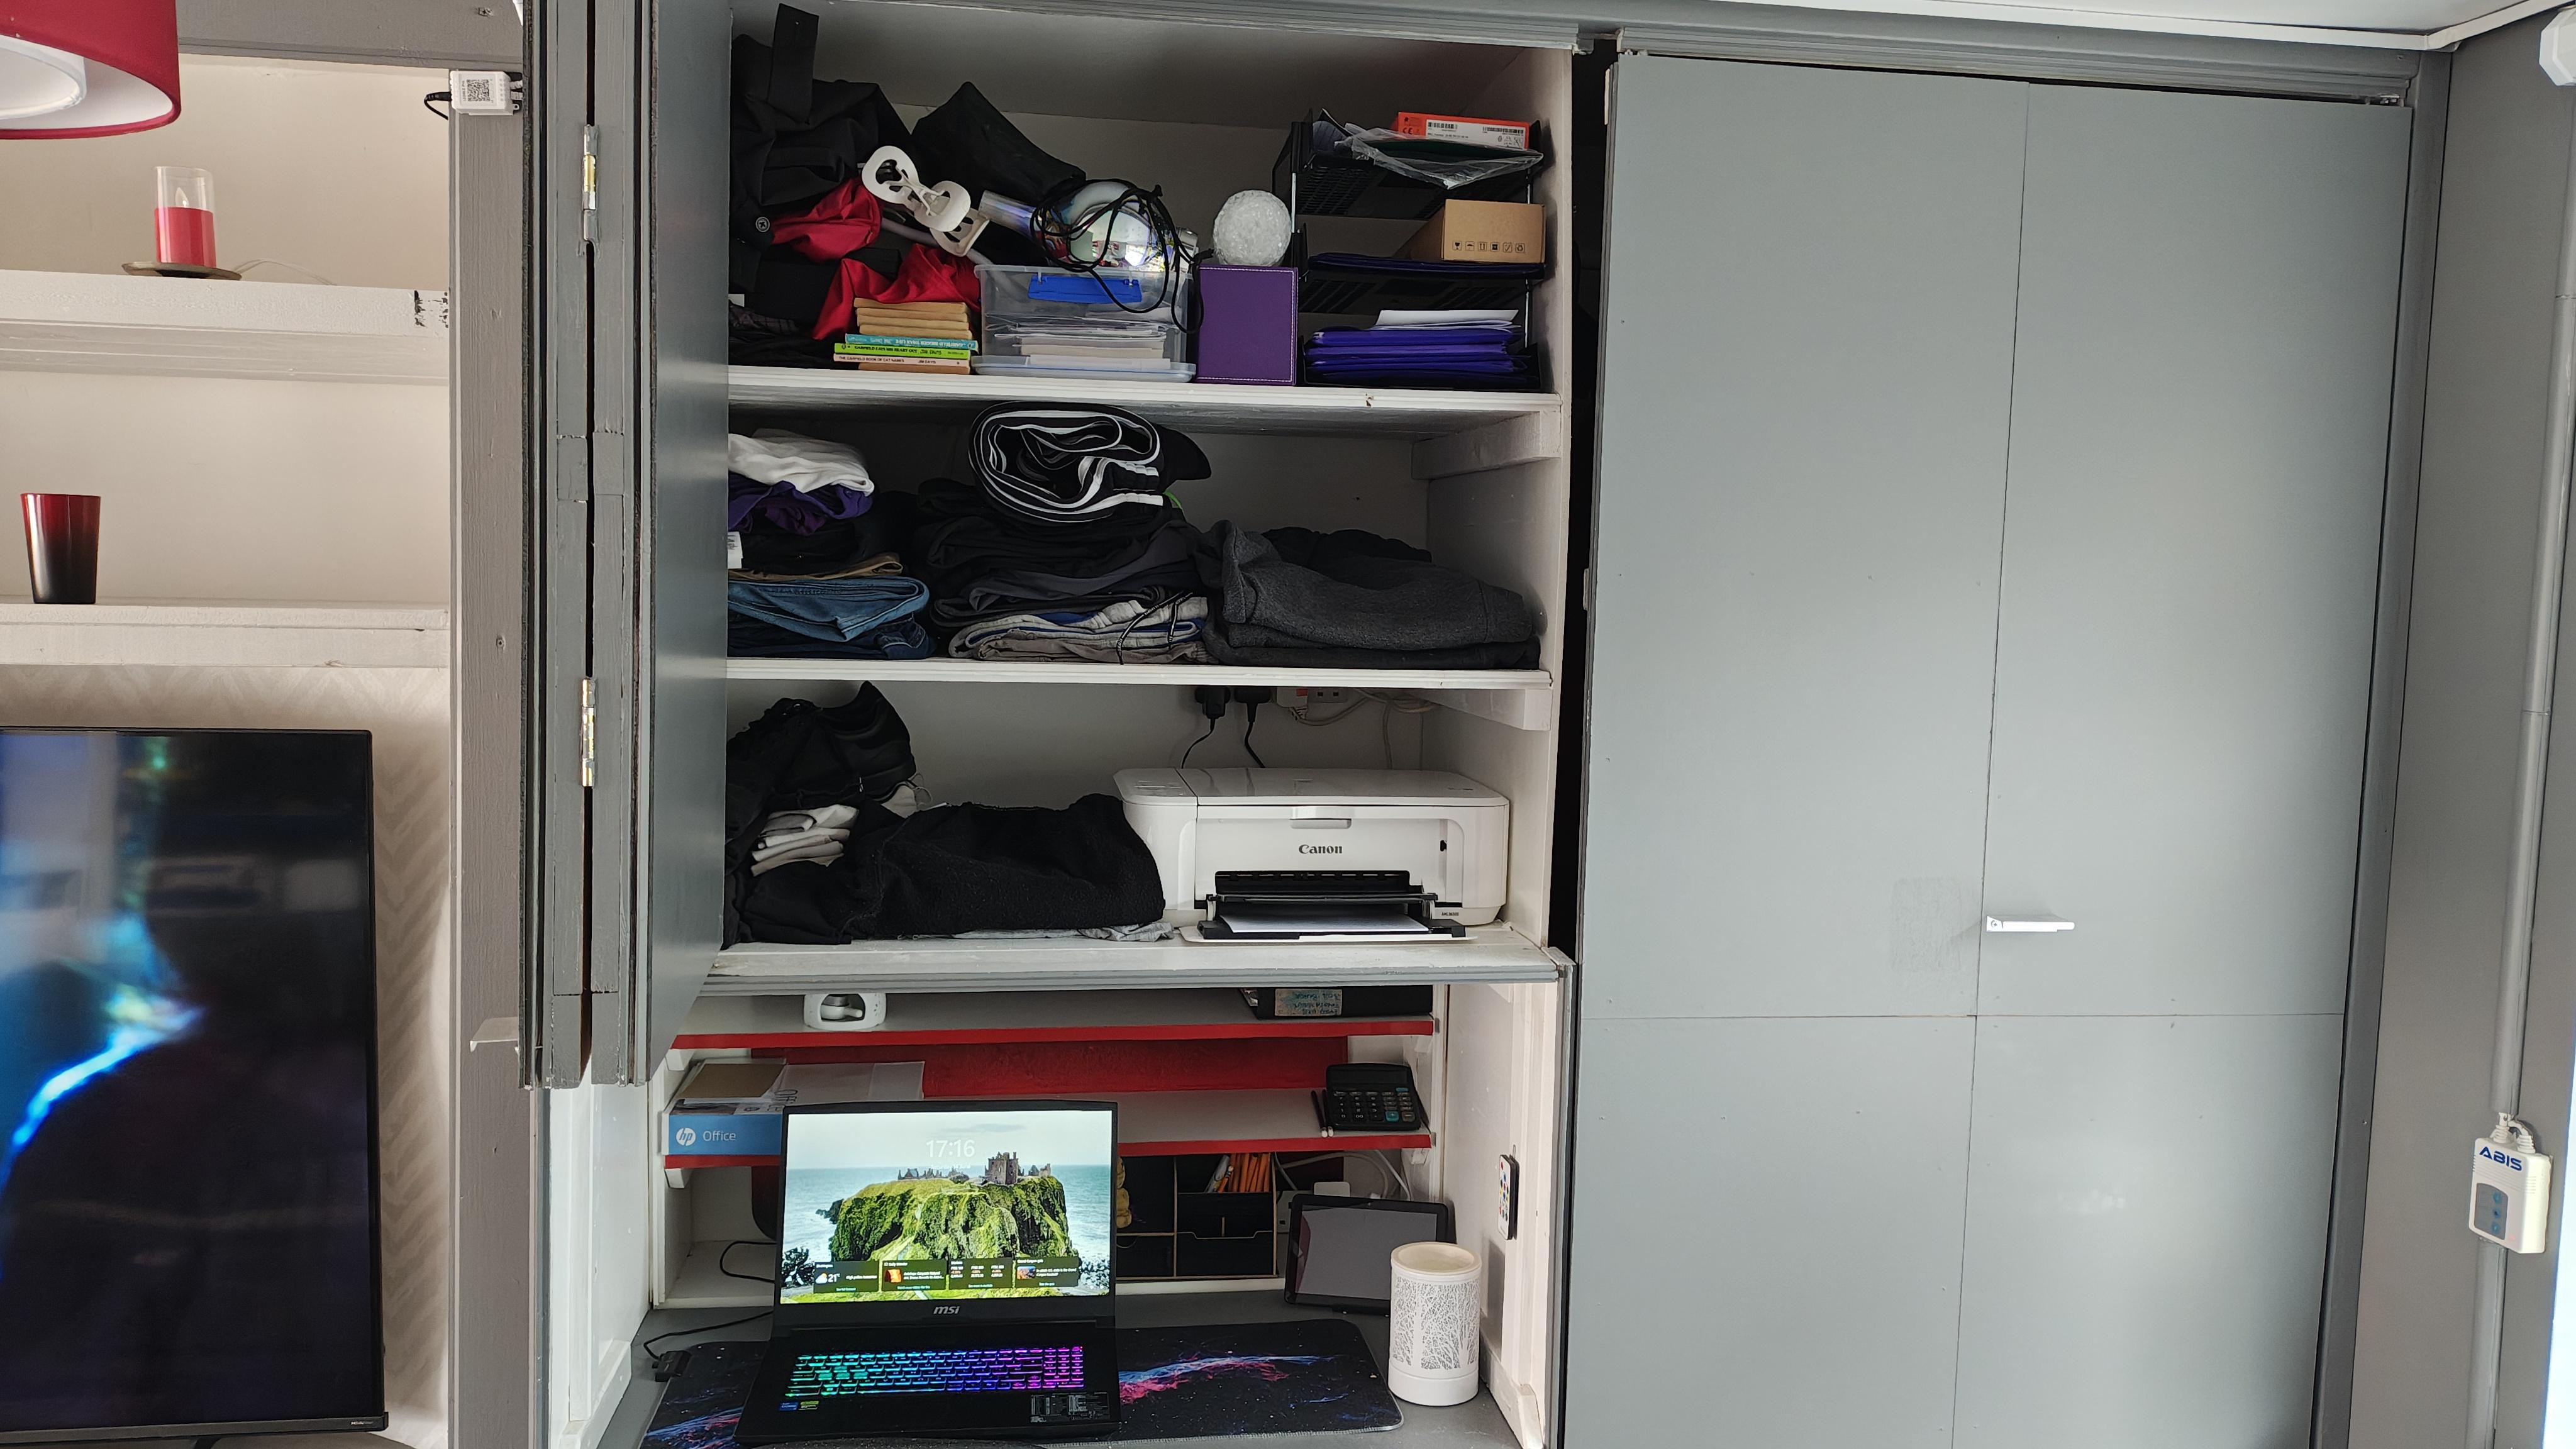
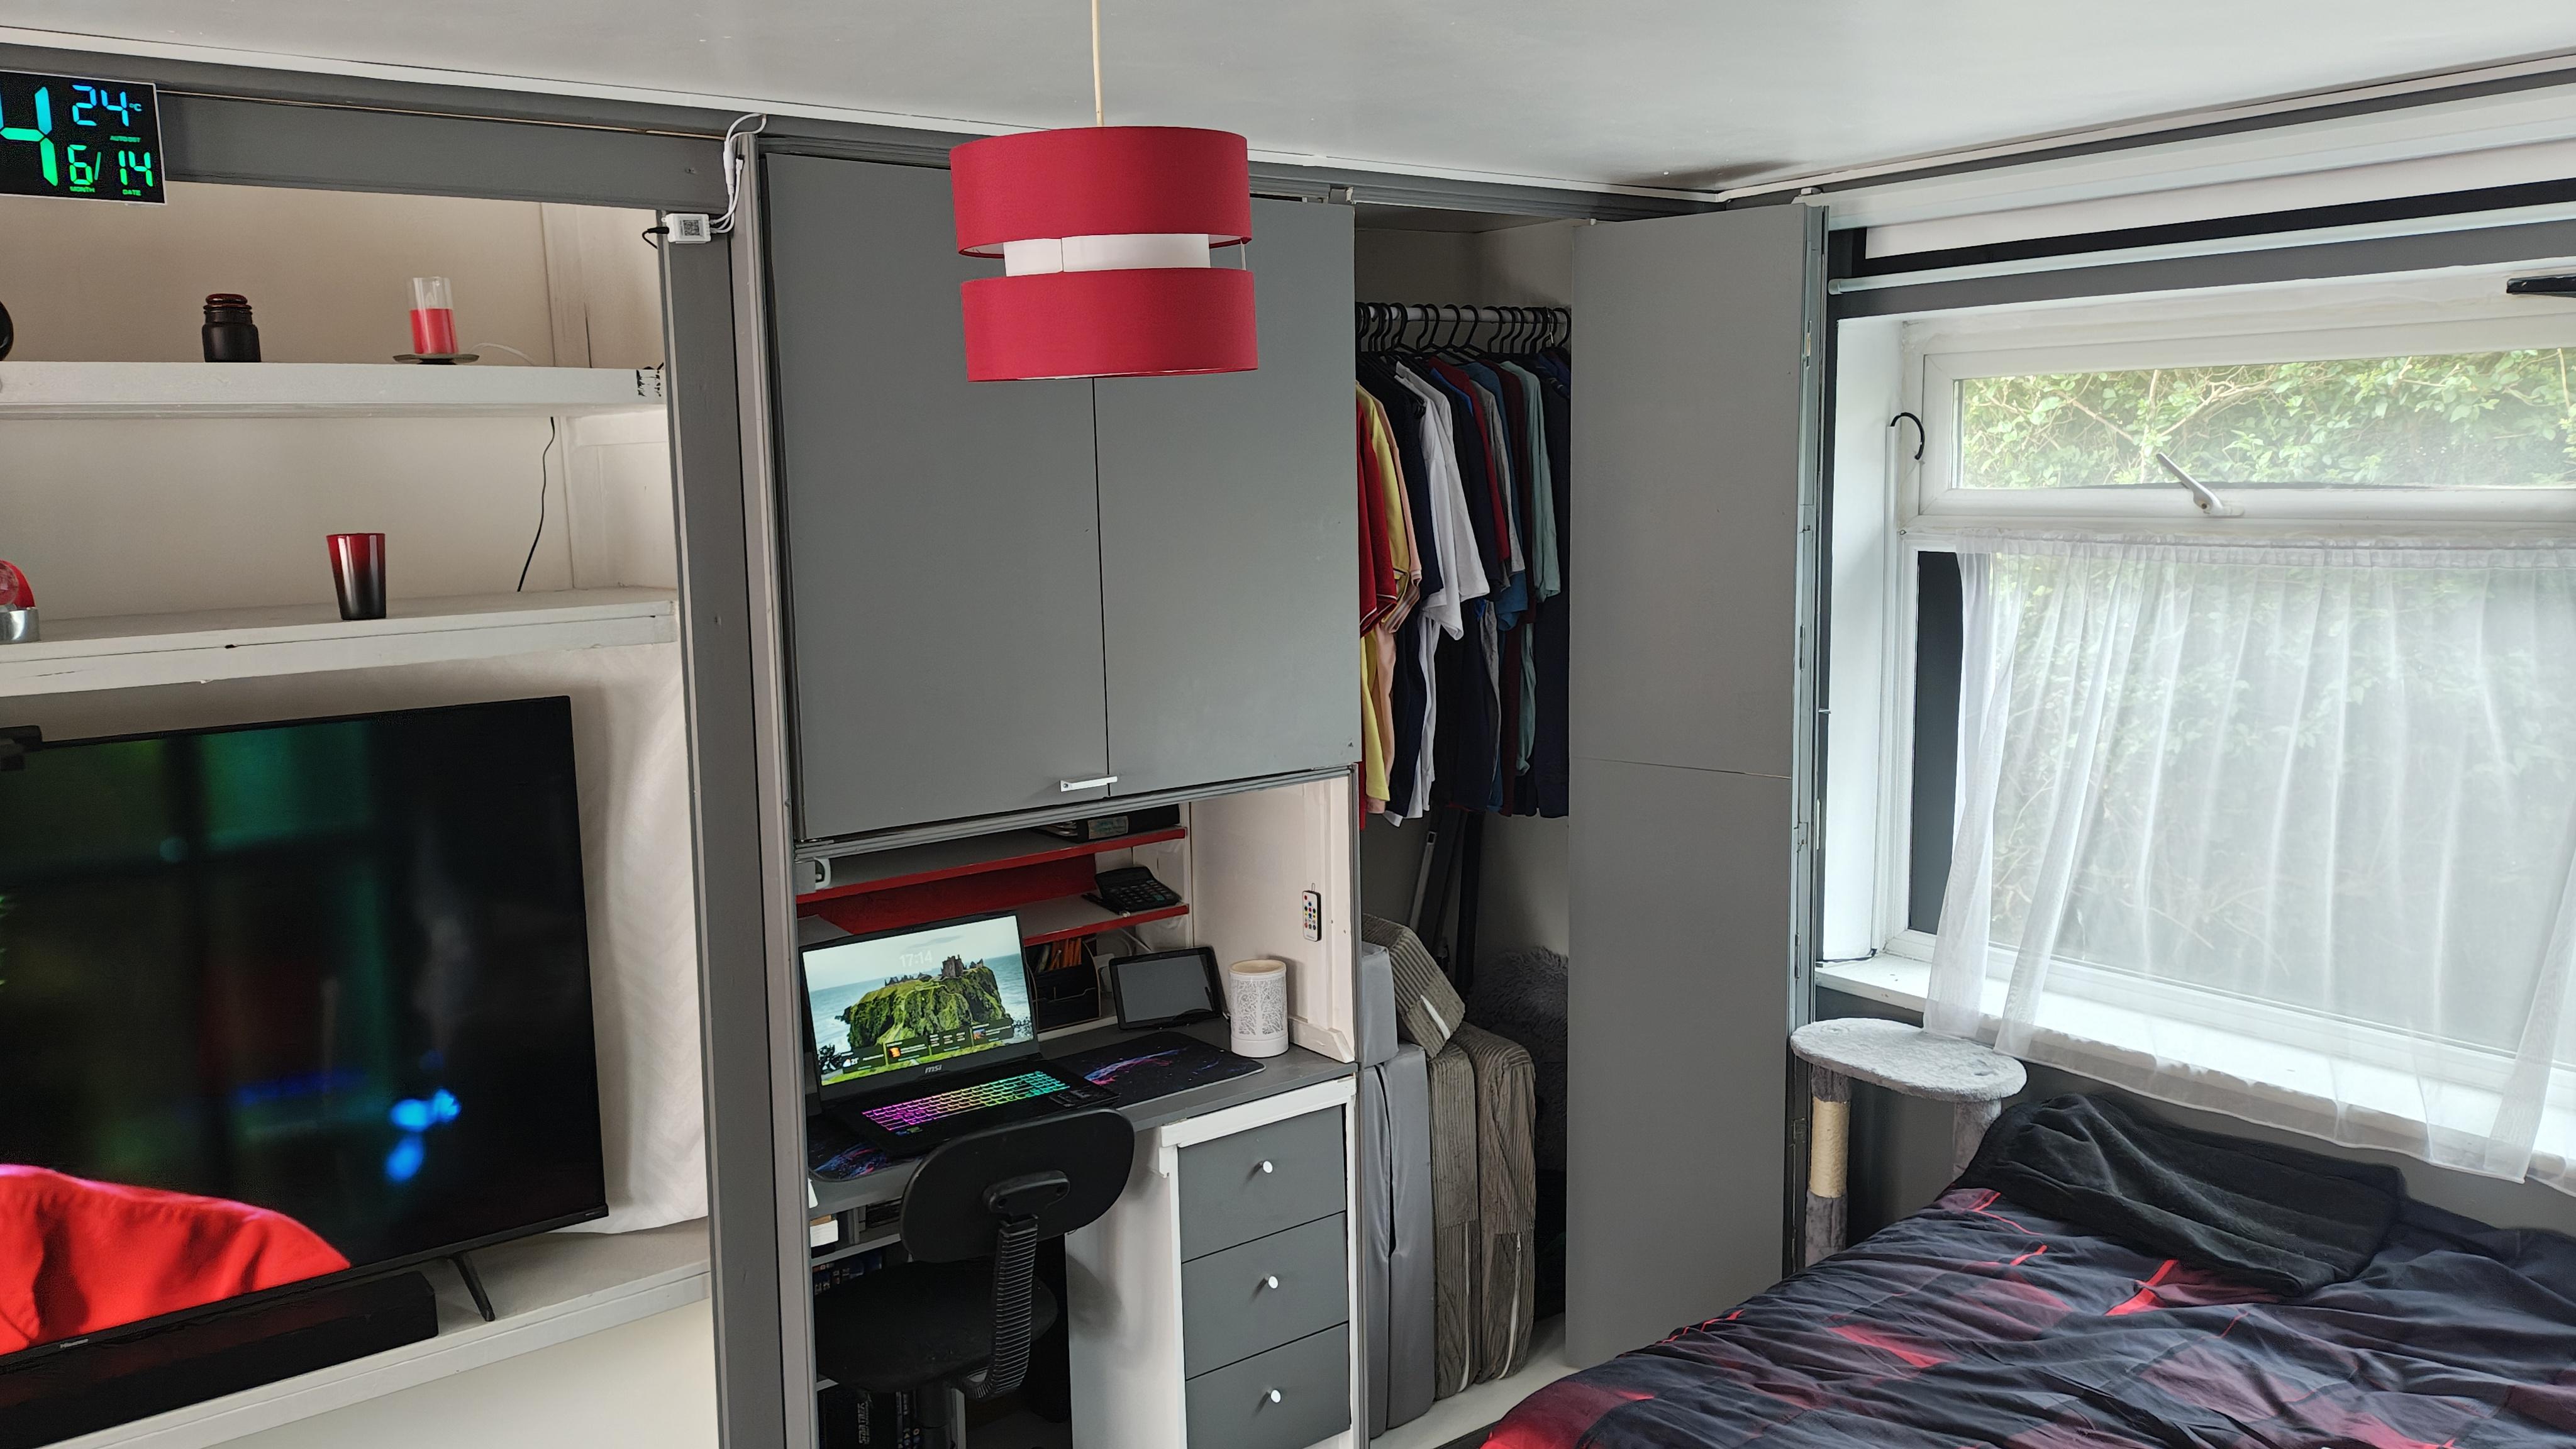
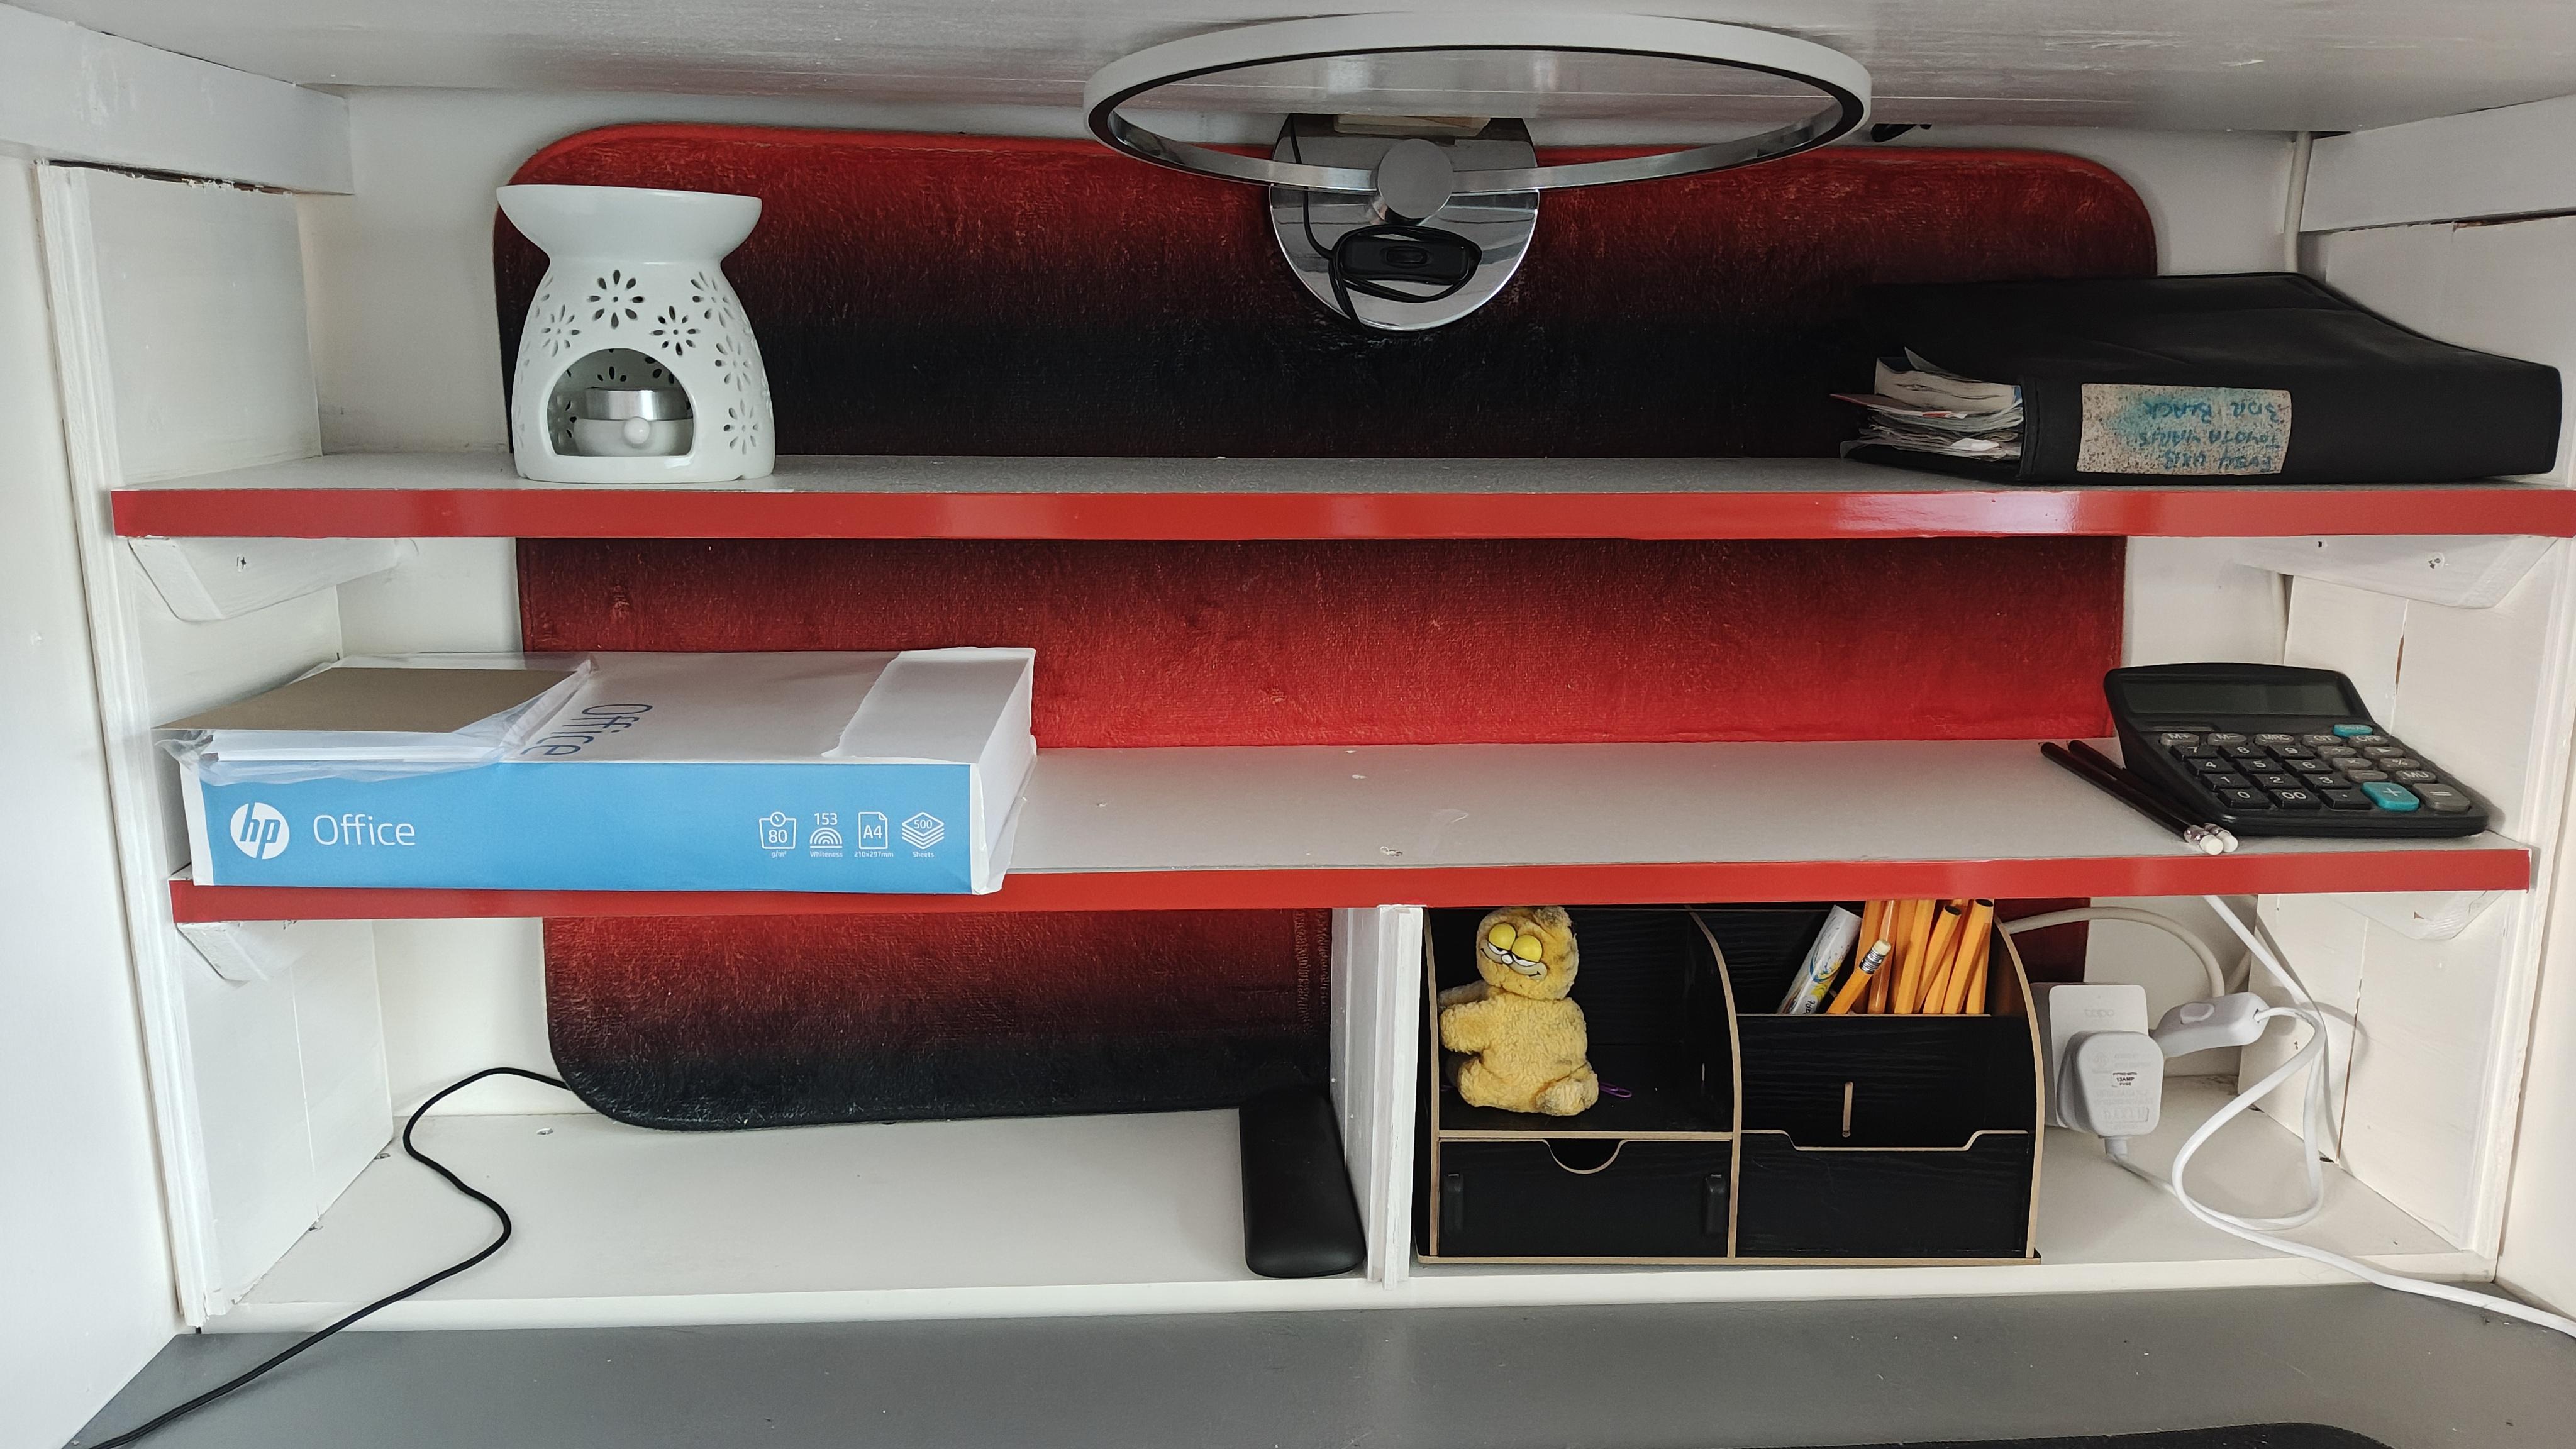
4.) I filled my wardrobe, populated my desk draws and office shelves, filled the storage area over the desk with my printer, clothing and other bits, added some ornaments to the top shelves over the TV, and fitted a clock to the top T&G frame panel over the TV/fire section.
5.) One additional job I did, although not really related to the wall unit, was to install some Cool White LED strips around the edge of the ceiling around the apartment, with a length of the strip over the top frame of the wall unit. Oh, and of course I also fitted the now repaired table lamp, attaching it to the desk area wall to give downward lighting.
A couple of little after jobs I did was to fit an unused rug to the back wall of the desk area behind the upper shelves just add a touch of red, spray painted some used frosted glass candle air fresheners to make a red and black gradient finish, and wired up some battery powered candles to a USB plug connected to... yeah you guessed it, a smart plug. I also changed one of the shelf heights on the entertainment section as I found that the TV was sitting a little high for my liking. And to completely finish off, I added a couple of robot friends because... why not.
Conclusion:


As projects go, this was an interesting one. Not particularly difficult, non expensive, didn't take too long to do, and I now have a repaired, refreshed and revitalized wall unit that is used every day, and I couldn't be happier with it.
I hope that the different repairs I mentioned are helpful to someone as these are repairs and tips that can be followed on a range of different things. And the same for design and improvements too, that's the beauty of this kind of project... known and well used techniques that can be used on so many different aspects of designing, repairing, improving and making in general.
Thank you for reading, and happy making (and repairing too).