Resonator Ukulele From Dolmade Tin and Scrap Wood
by titchtheclown in Living > Music
17387 Views, 65 Favorites, 0 Comments
Resonator Ukulele From Dolmade Tin and Scrap Wood
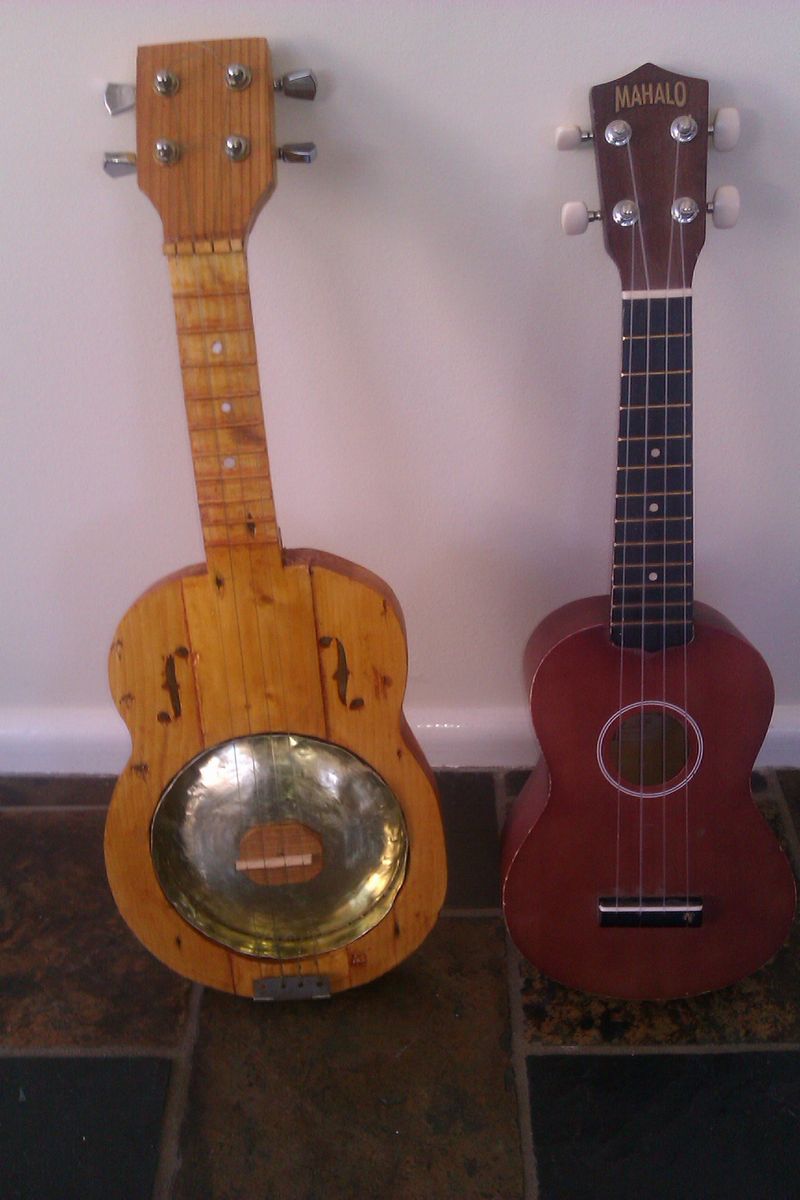
The Uke making bug is a hard biter and I have made a couple of slightly less glorious attempts to start with and thought I had better go the whole hog and build the most outrageously far out Ukulele I could think of. While I was waiting for the parts for that one to arrive I knocked out this one.
Here is a video of me playing some blues on it (can you play anything else on a resonator ukulele?)
Link here if embed code does not work.
http://youtu.be/Xk9QS_ulzBc
If you are curious about how to detune the Uke to play with a slide - I just tuned to bottom A string (in GCEA tuning ) down to a G. Then you get a C chord when the strings are strummed open (not touching any of them).
Actually you can play an awful lot more on a resonator ukulele than the blues.
Find a Tin


First find yourself a tin. In line with the resonators I saw advertised for Ukes and with some comments on forums I decided to go with what I had at my disposal (and in my shed) and an old 6 inch diameter dolmade(stuffed vine leaf) tin was being used as a handy large container for stuff. So I decided to turn it into a cone instead.
I held the tin upside down and hit it with a hammer, working my way evenly around the top till I reaches what I consider to be a cone like shape taking about 5 minutes. Then I trimmed the sides of the tin down to roughly match the height of the cone and bent the edge of the tin over on itself slightly to avoid those" Argh! - I'm bleeding from the incredibly sharp edge of the tin" moments. All you do is get your blunt nose pliers, grasp about 2 or 3mm deep and bend it over at right angles. Repeat for the whole circumference of the tin and then tap down slightly and crimp tight with the pliers.
This kid did a great job with a guitar conversion
http://youtu.be/tgw4oSDhorM
Gotta love these Candy tin beauties
http://www.randyroosterscigarboxguitars.com/page5.htm
Draw Out Your Plan


Now I got me some bits of wood from a discarded shipping pallet put the resonating cone at one end and sketch out the shape I want.
Got me some bits of wood for the back too. Perhaps I should have been more careful not to have those big nail holes at the joint between the neck and the body. Never mind - adds to the character.
Got me some bits of wood for the back too. Perhaps I should have been more careful not to have those big nail holes at the joint between the neck and the body. Never mind - adds to the character.
Glue the Top and Bottom Together

Now glue the top together and glue the bottom together but don't glue the bottom to the top yet.
Cut Out the Resonator Hole and Hollow Out

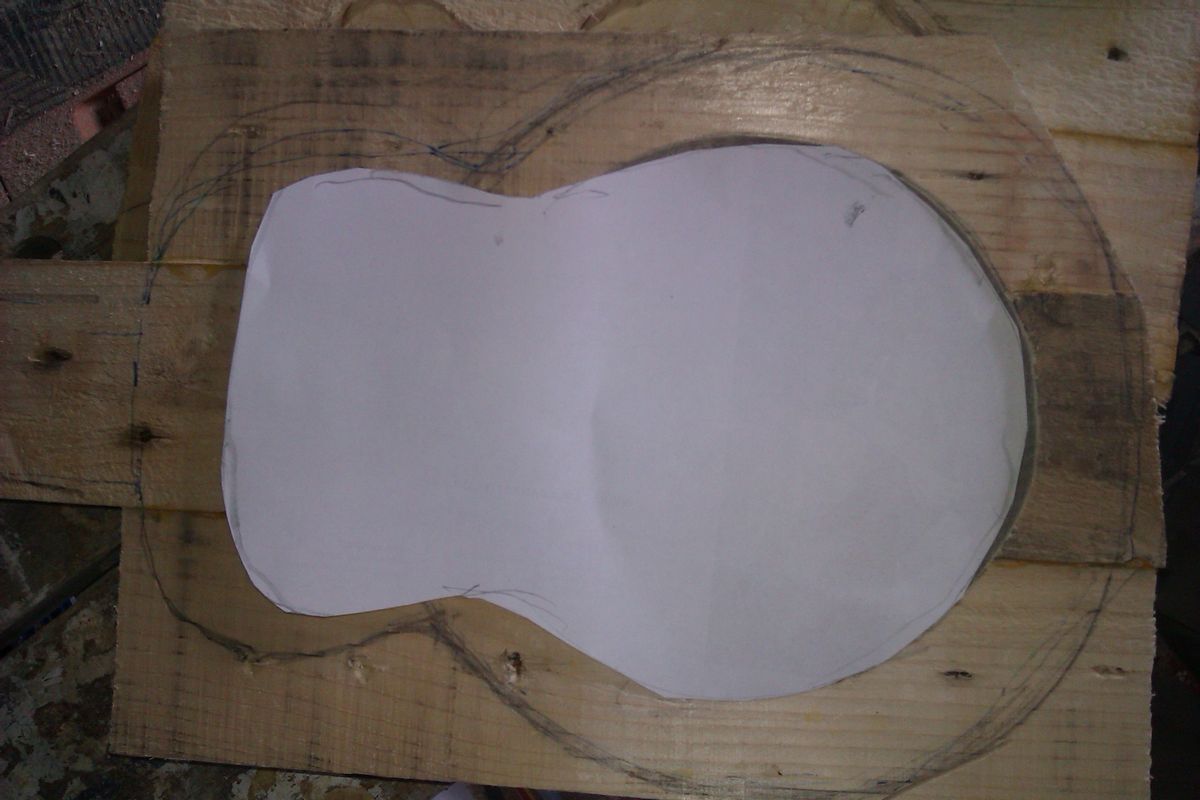
Cut out the resonator hole and hollow out the back and the front a little to make a little bit of a sound box. A paper template to copy the shape makes things easier. I used a jig saw to cut out the hole and a router to hollow out. The router is very handy because you can hollow out to very precise depths- you just have to be careful you are not precisely wrong. The bottom piece of wood was about 5 mm (3/16 inch) after I had finished
Added Some F Holes

Now I added some F holes to the top to let the noise out of the sound box
Now Glue the Top and Bottom Together
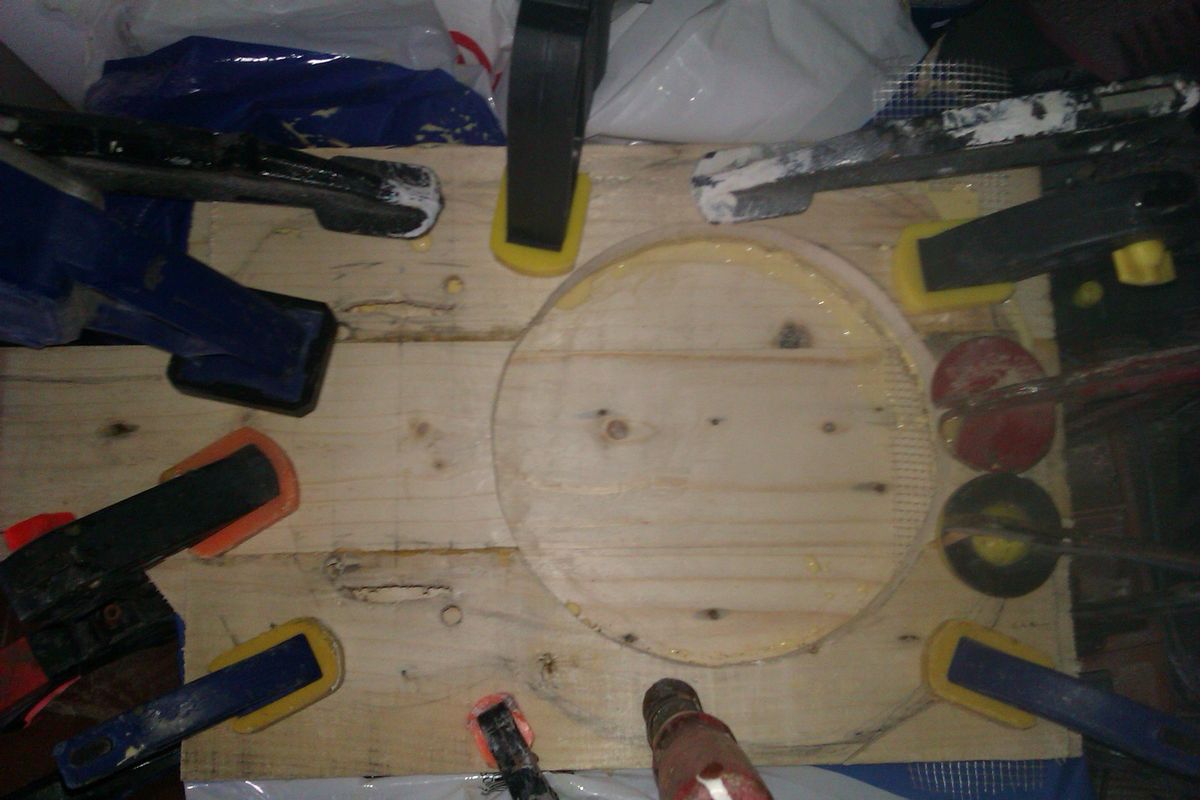
Now I glued the top and bottom together. because I was going to have a bit of a long piece of thinnish across the grain wood in this design I added a bit of fibreglass drywall tape into the layup to increase the strength and minimise the chance of splitting. If I had been using better quality wood I may not have bothered with this.
Edit: More recently when I made another one from better quality wood I have just looked at my roll of fibreglass drywall tape and thought - well it can't hurt and have finished up using it on a few narrower ukes less in need of reinforcement as well, so use it if you got it. It was about ten bucks for a big roll and I use it for heaps of stuff.
After this I cut out the shape of the Ukulele using my jig saw, sorry forgot to take picture, but you can see what it finished up looking like in the end. As you can see in the following pictures the outer line is about an inch outside that inner hollow I created (didn't follow it exactly - just went for a nice look..
Cut and Glue the Headstock - Maybe Add a Face Plate

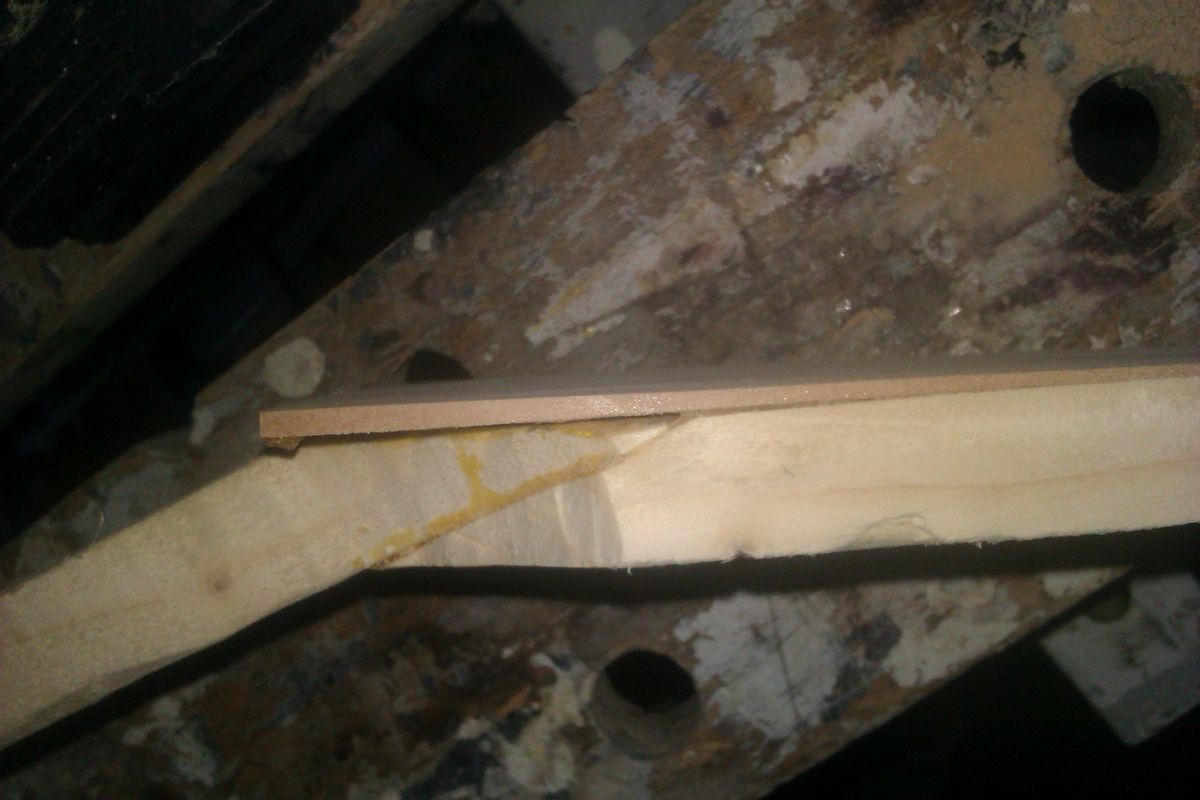
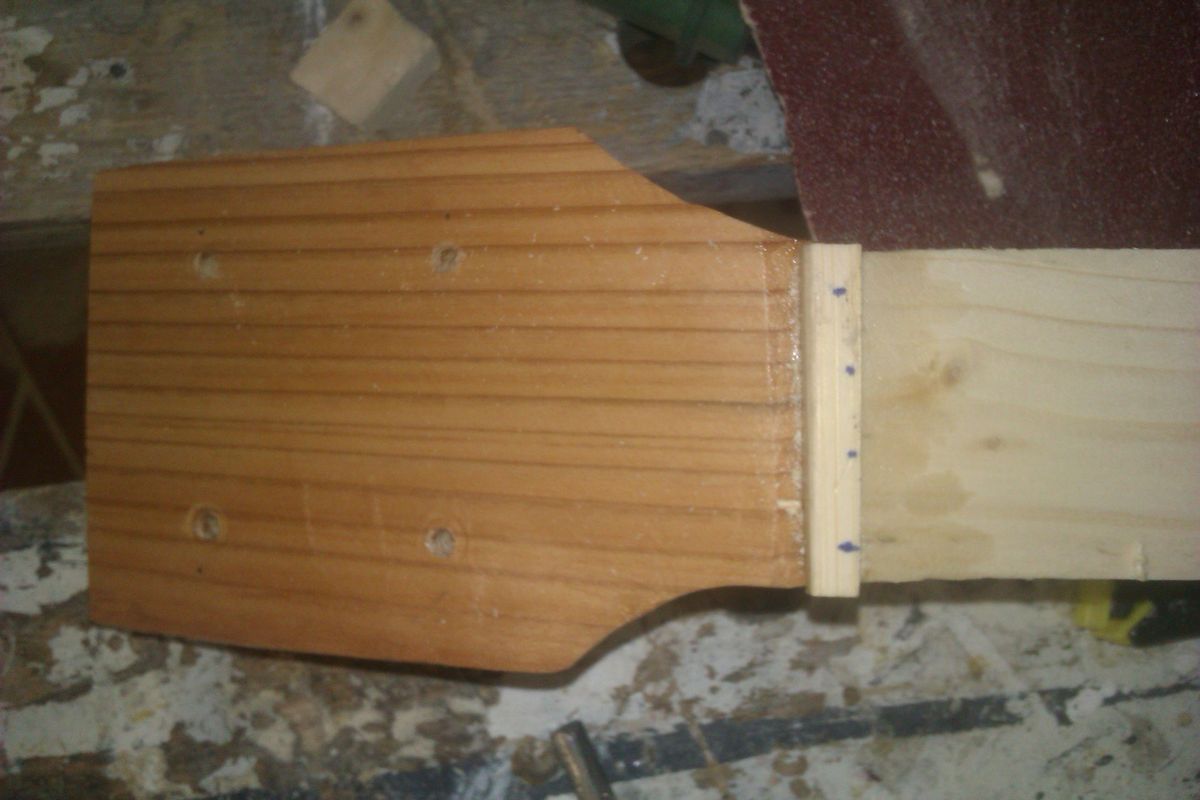
Now I cut and glued the head stock - I made a bit of a mess of this and had a fair amount sanding and rasping to get the angle back to something workable.
To improve the final look of the headstock I added a face plate. Now normally the pros will use a thin piece of wood for this but getting a nice 3 inch wide and thin piece of wood is not easy if you don't have a thicknesser. I did try to do a bit of thicknessing on the scrap of wood I decided to use with a hand plane and found very quickly that it is hard to hold a small thin piece of wood. So I glued the hole thing on and was able to clamp the whole ukulele in place and plane the face plate down to something a lot more manageable. with my hand plane and finish it off with the sander. Believe it or not the piece of what looks like cedar I used came from the same pine shipping palette as the rest of the wood.
A short piece off a bamboo chopstick forms the nut.
Add a String Anchor

The cruising of the internet found a few people who had used fancy cabinet hinges as tail pieces/string anchors on cigar box guitars so I looked in my box of spares to find something reasonably suitable and came up with this. I needed to drill a couple of extra holes in it but it does the job and IMHO adds to the metallic resophonic ambience. I would call it steampunk but home made and even commercial resonator guitars were around before steampunk was invented so Pre- steampunk might be a better term.
I also added some more bits off the bamboo chopstick to create a gap between the bottom and the cone to form a sound channel to the top bout (as it is referred to in luthiery circles).
I also added some more bits off the bamboo chopstick to create a gap between the bottom and the cone to form a sound channel to the top bout (as it is referred to in luthiery circles).
Attach the Biscuit to the Cone

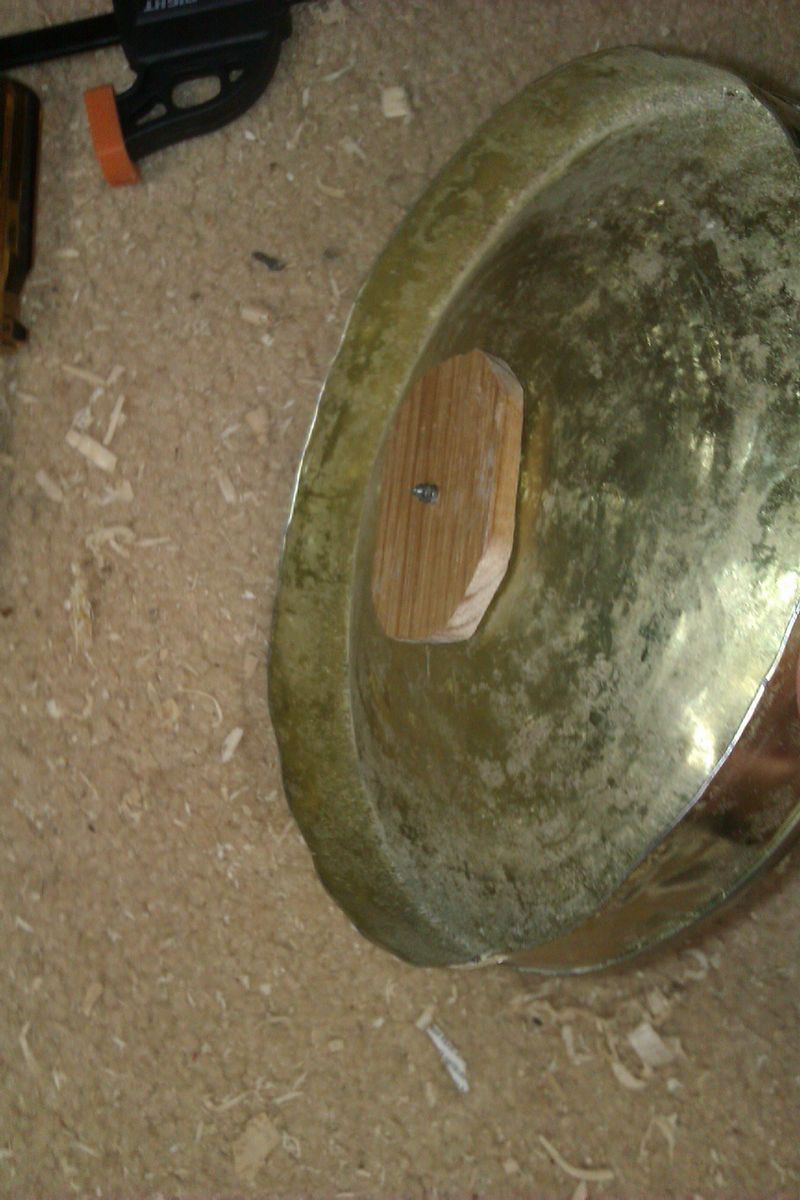
Now I used a small screw to attach the hardwood biscuit to the cone. The bridge sits on top of the biscuit. I did try mounting the bridge directly on the cone but they obviously have the biscuit there for a reason. The clamp is there to prevent the biscuit from splitting when the screw goes into it.
As those of you with good eyes may see the screw stuck out a little bit so I cut it off with my dremmel.
As those of you with good eyes may see the screw stuck out a little bit so I cut it off with my dremmel.
Add Tuning Pegs and Frets
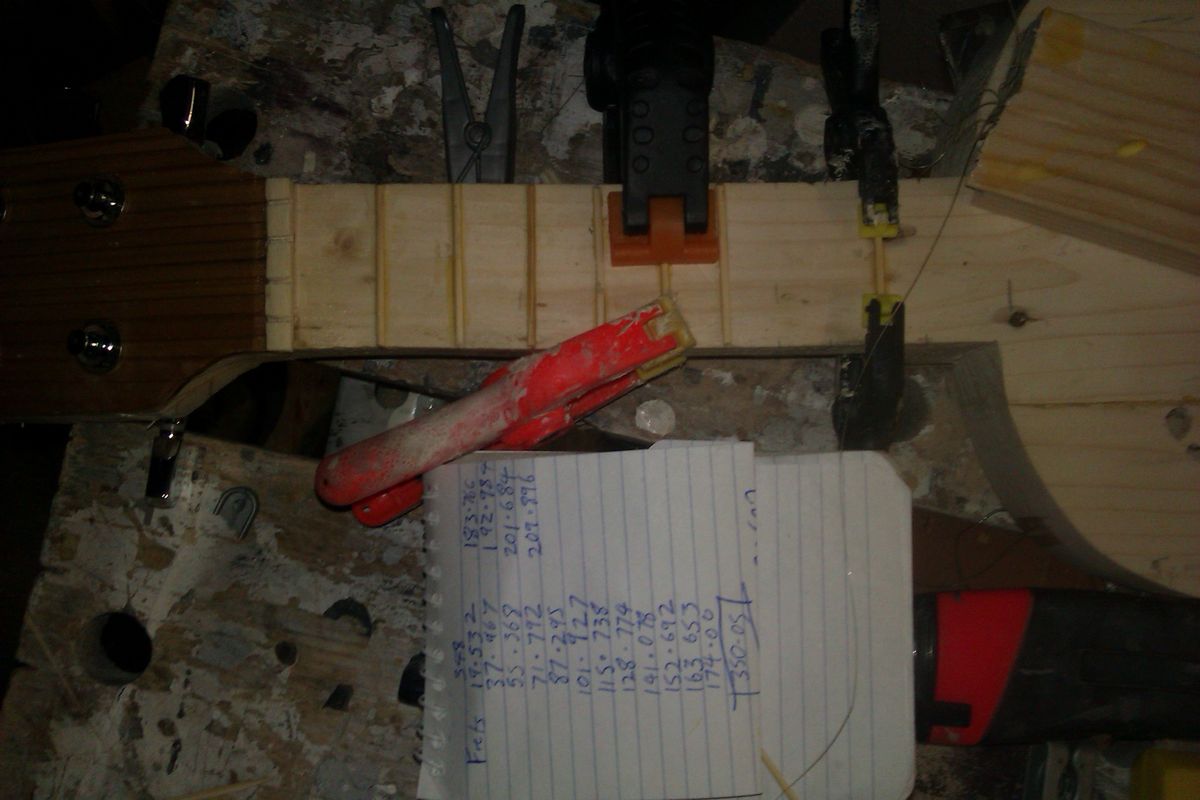
Add tuning pegs and frets.
Type fret calculator into the search engine of your choice and measure accurately.
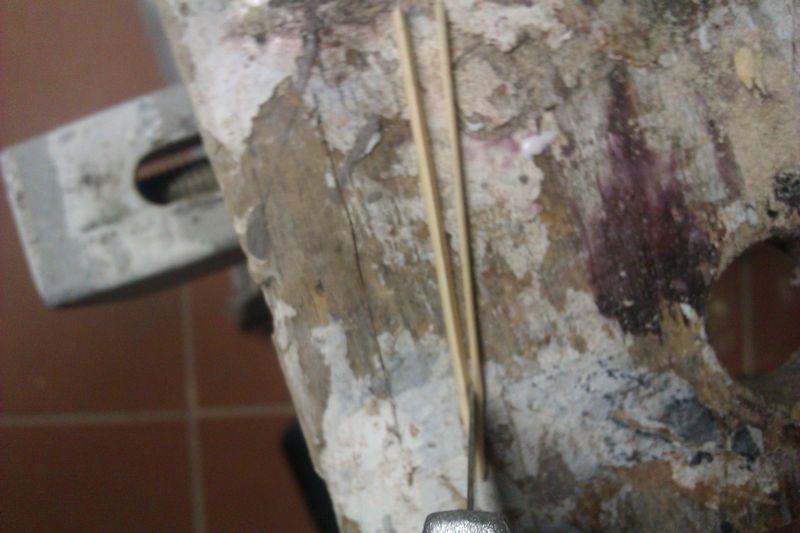
These frets are made by splitting bamboo toothpicks with a sharp knife.They can be made thinner by scraping the sharp knife on the flat back. Generally I only get one usable side from each toothpick as I stick with the slightly thicker side and you MUST use as even thickness frets as you can. Or you can sand them off to a uniform thickness later
When marking the position for the frets it helps if you mark a little bit down the sides this way you can see the mark after you put the fret on top of the fretboard.
I have not bothered with a separate fret board
OK OK the Tuning pegs are fancy sealed pegs I bought on Ebay but everything else is home made or scavenged.
See my other instructable on the Tahitian Uke for how to make your own tuning pegs from scratch.
https://www.instructables.com/id/Good-enough-for-the-bush-Australian-version-of-Tah/
Decorate - Add Fret Markers
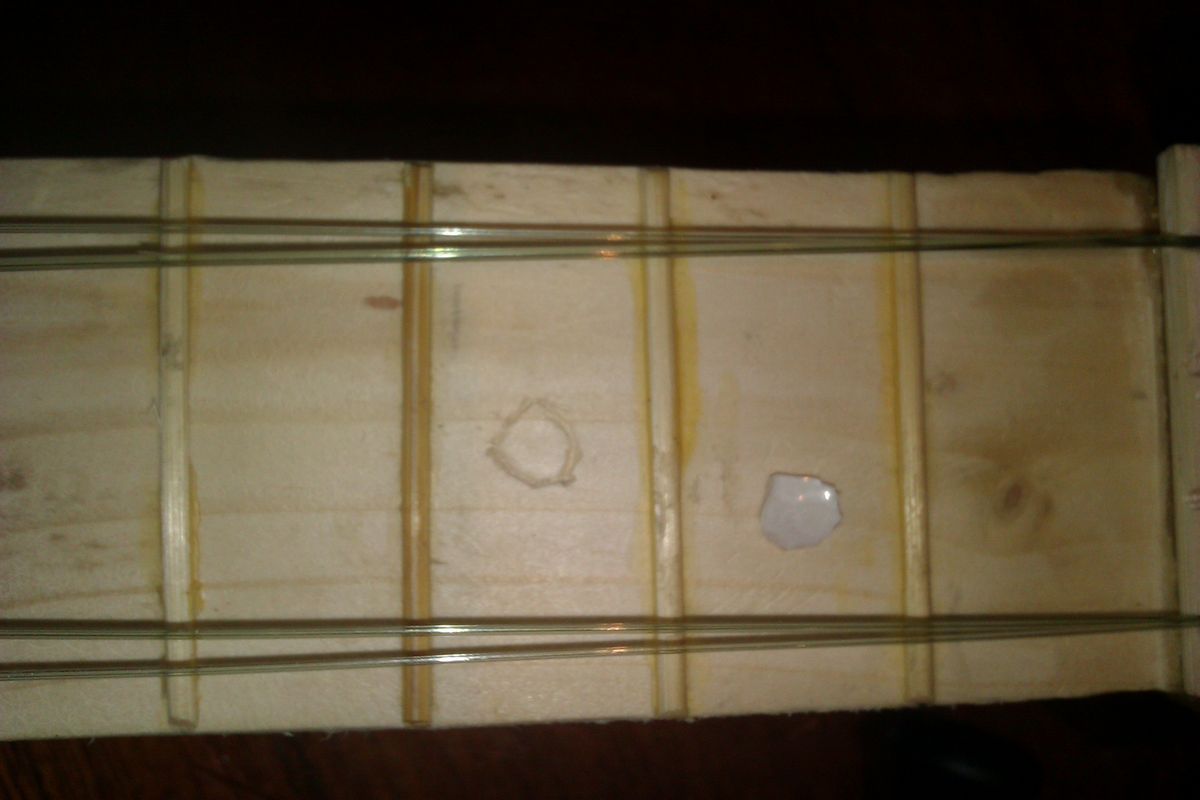
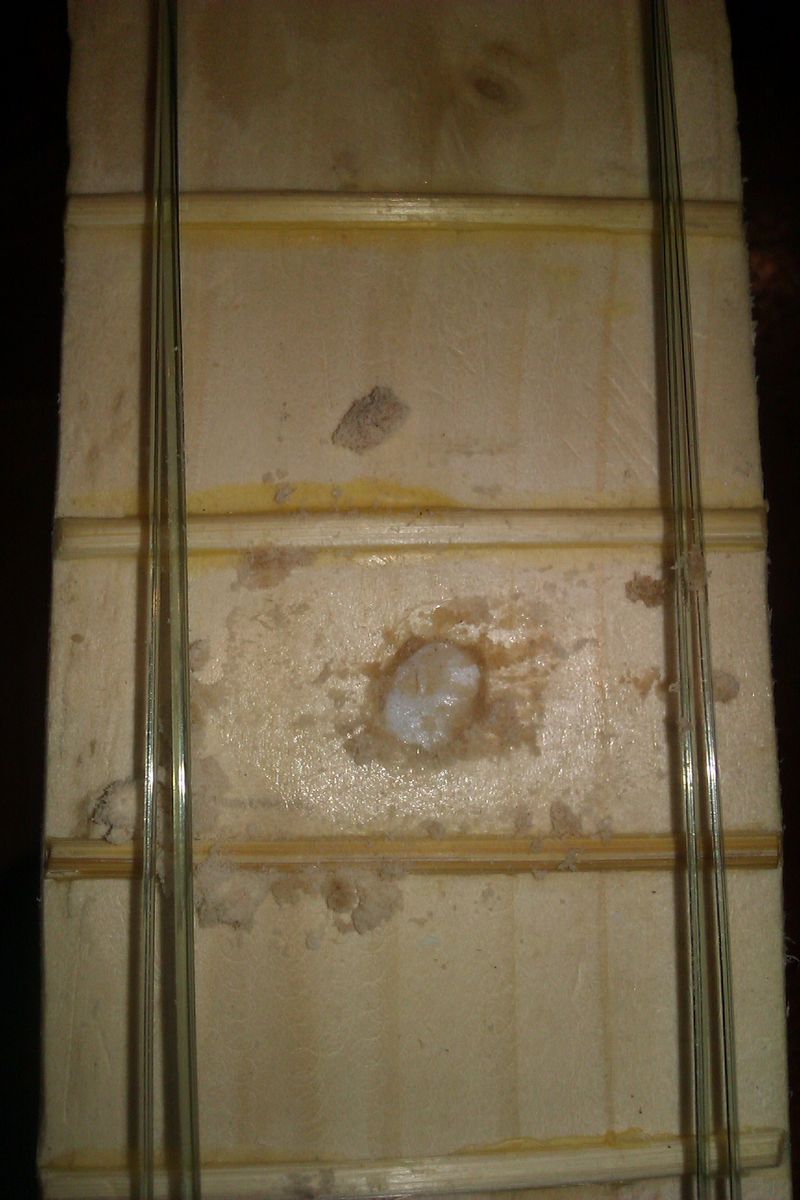
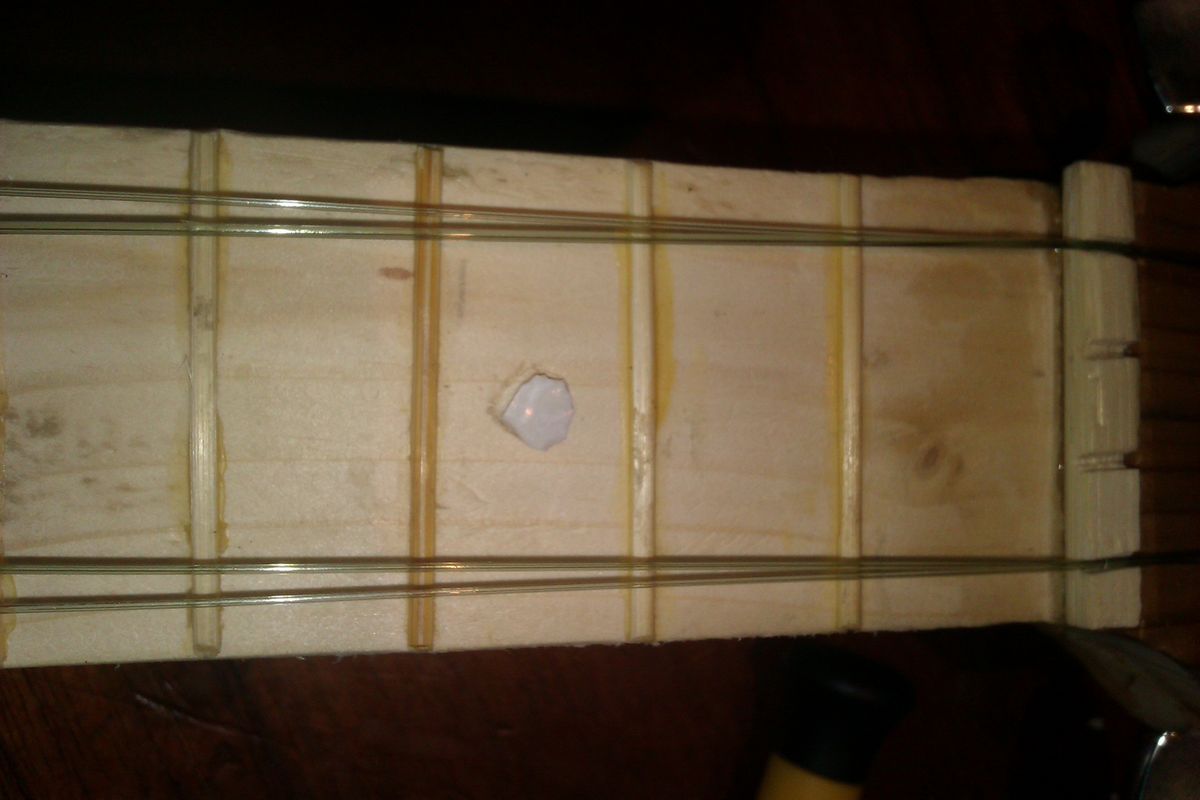
Now I added my fret markers
On my other Ukes I have just made pencil marks but I decided to show off by adding "pearl" inlay.
The "pearl" inlay was just a broken up bit of pipi shell I brought back with me from my last trip to the beach (a pipi is a small clam common on Australian beaches). I broke the shell up formed it roughly into a bit of a circle by nibbling off bits of shell with a pair of pliers and then rounding and smoothing with sandpaper. The circle shape was then cut out of the face of the fret board ( not very well) and the shell was pressed in firmly using a clamp which was then removed and superglue applied. Sandpaper, adding fine sawdust and filling the gaps with sawdust followed by superglue followed by more sanding completes the task.
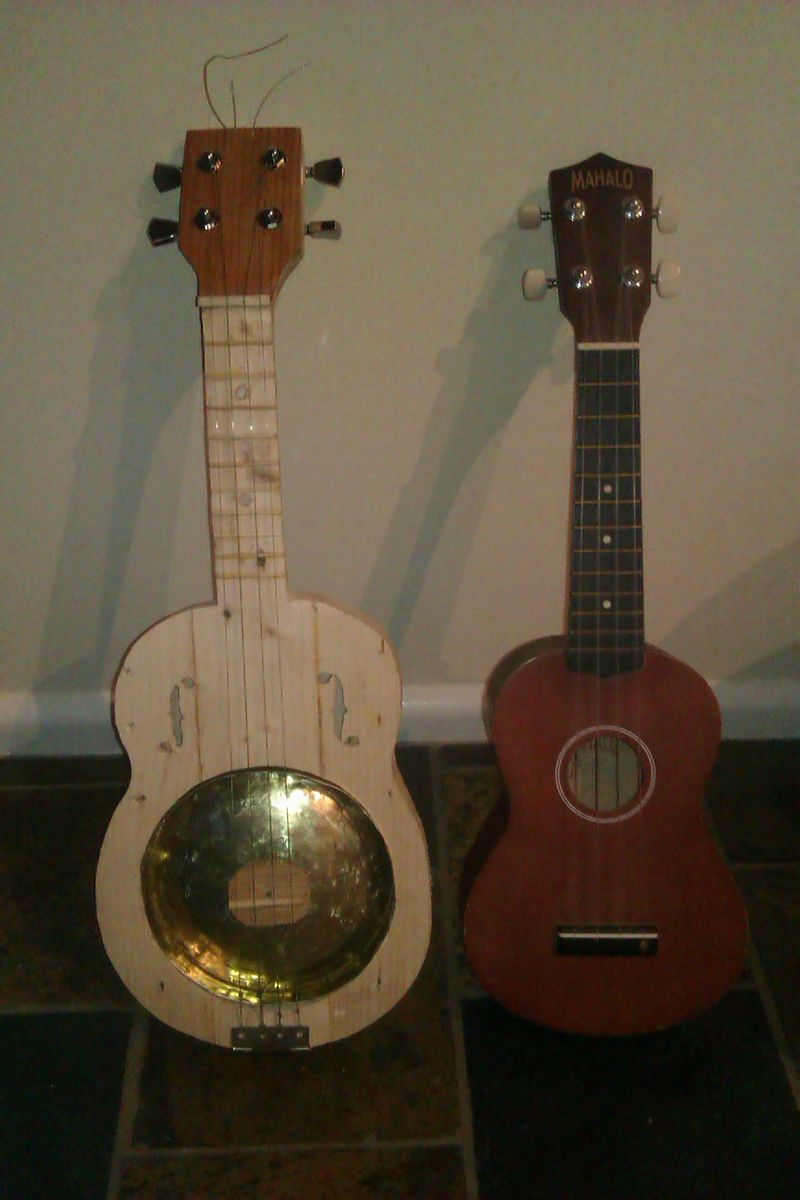

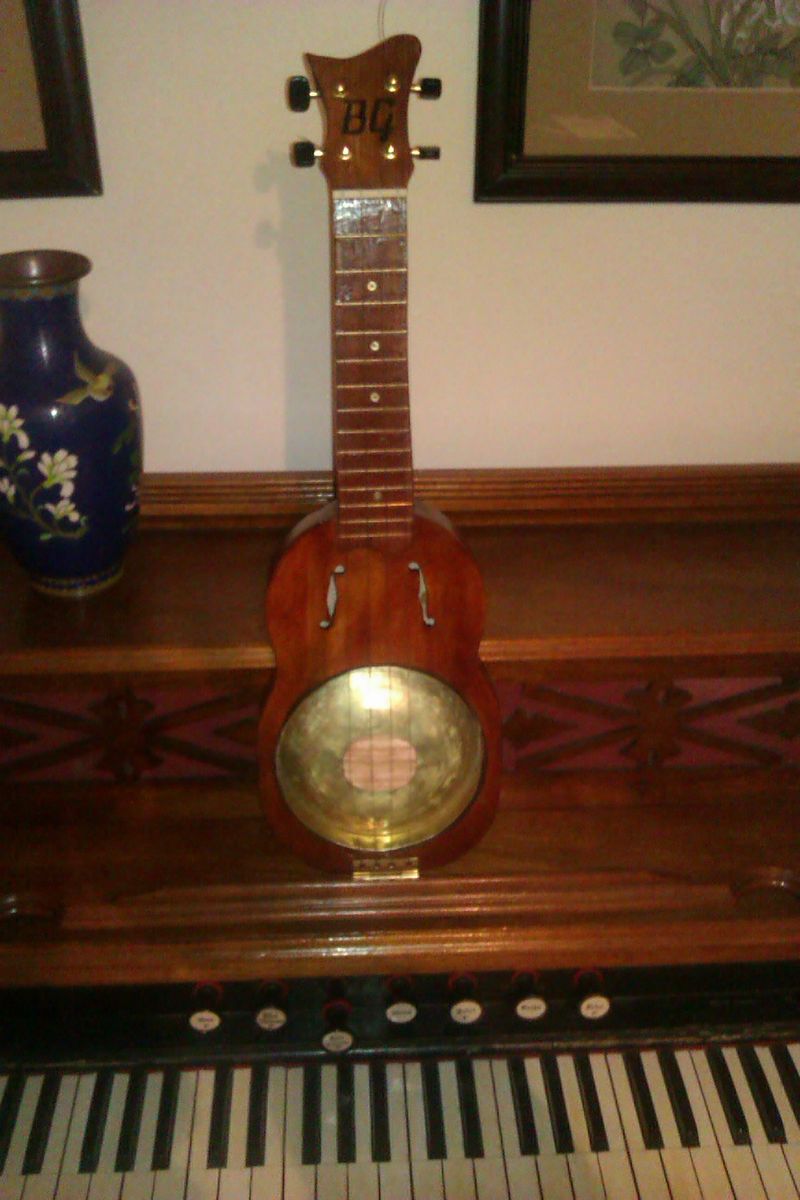
Now polish up the can, add strings and play.
A coat of lacquer was added a week or so later. Because the lumber I used was low grade recycled shipping pallette pine it will soak up skin oils and look pretty yucky in short order, it also is a bit fuzzy in places so a coat of lacquer to stabilise then sand back, add a couple more coats and polish.
That gold coloured lining on the dolmade tin sure looks purdy.
I strung this using 40 80 60 and 40 lb fishing line for the GCEA strings respectively.
I have also attached a photo of newer version made to a slightly higher standard with slightly better quality wood and with a proper fretboard and bone nut and more brass etc.