Revive Your Old Digital Camera: Battery Swap With Vape Cell & 3D-Printed Housing
by valentinomorandi1 in Design > 3D Design
302 Views, 2 Favorites, 0 Comments
Revive Your Old Digital Camera: Battery Swap With Vape Cell & 3D-Printed Housing
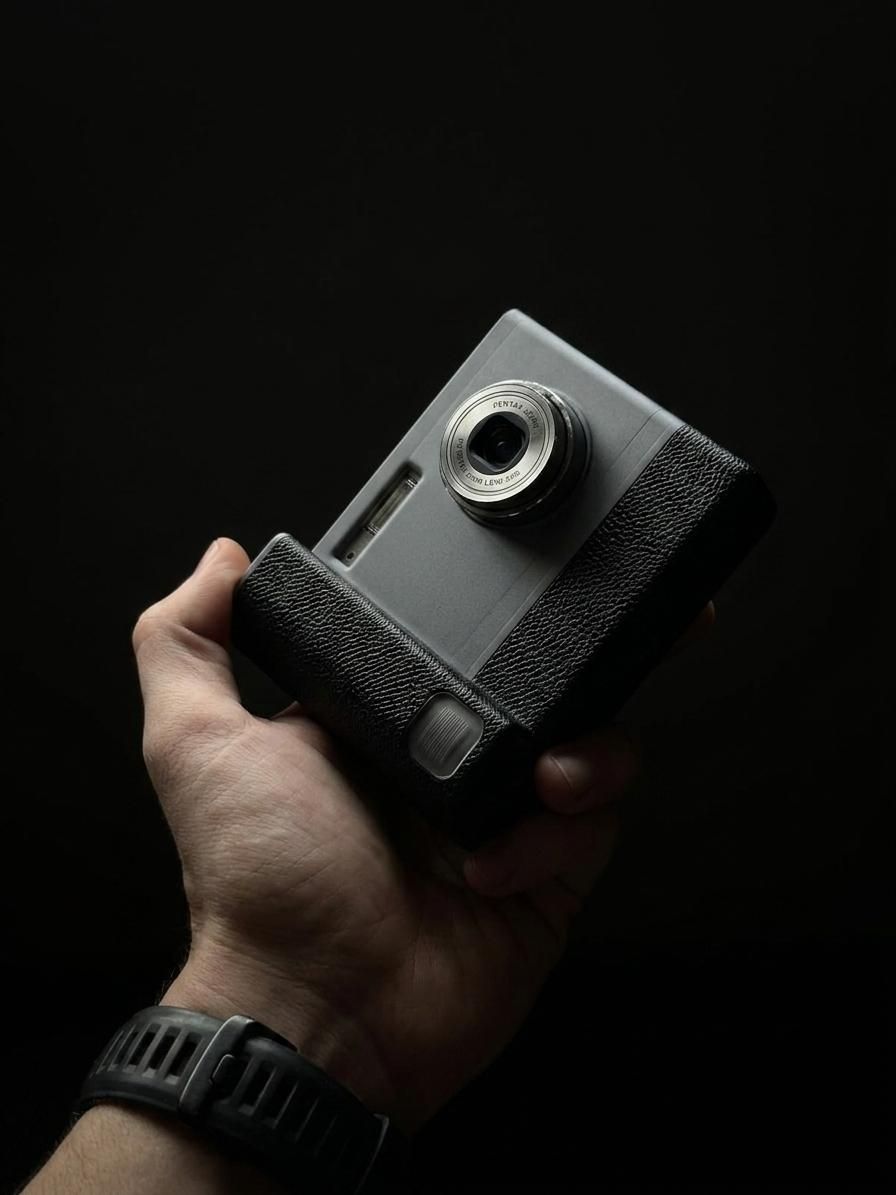
Old digital cameras have a special place in maker culture—they're nostalgic, mechanically interesting, and often discarded once the battery dies. This project shows how to resurrect a Pentax Optio M30 that's been sitting in a drawer with a dead battery by harvesting a cell from a recycled vape device and creating a custom 3D-printed housing to contain it.
This is a perfect example of upcycling: taking e-waste (both the camera and the disposable vape) and giving it new life through some soldering, 3D design, and engineering. You'll learn battery adapter techniques, basic soldering, 3D CAD design, and how to repurpose modern lithium cells for vintage electronics.
Why this project matters: Millions of disposable vape devices end up in landfills each year. Their high-capacity lithium batteries are perfectly usable for other projects. Similarly, countless digital cameras are discarded because of dead batteries. This instructable demonstrates sustainable electronics hacking.
Supplies
Electronics Components
- 1x Pentax Optio M30 digital camera (non-functional due to dead battery)
- 1x Disposable vape device with intact lithium battery (e-waste)
- Solder and soldering iron
- Electrical solder flux
- Insulated wire (22-24 AWG copper wire)
Battery Adapter Materials
- Copper contact strips or spring contacts (optional, for better connections)
- Nickel or copper bus bar strips
3D Printing & Assembly
- PLA / ASA / PETG filament (color of choice)
- Silicone-based adhesive (clear silicone sealant or electronics-grade epoxy)
- 8x small neodymium magnets (4mm diameter)
Tools
- Soldering iron and solder (60/40 or lead-free)
- Calipers or ruler (for precise measurements)
- Small screwdrivers (battery compartment opening)
- Safety glasses and heat-resistant gloves
- Hobby knife or craft knife
- CAD software (SolidWorks, FreeCAD, or Fusion 360)
- 3D printer with heated bed
- Micro SD card reader (optional, for testing photos post-revival)
Protective Equipment
- Safety glasses
- Work gloves
- Heat-resistant gloves for soldering
Disassemble the Vape Device
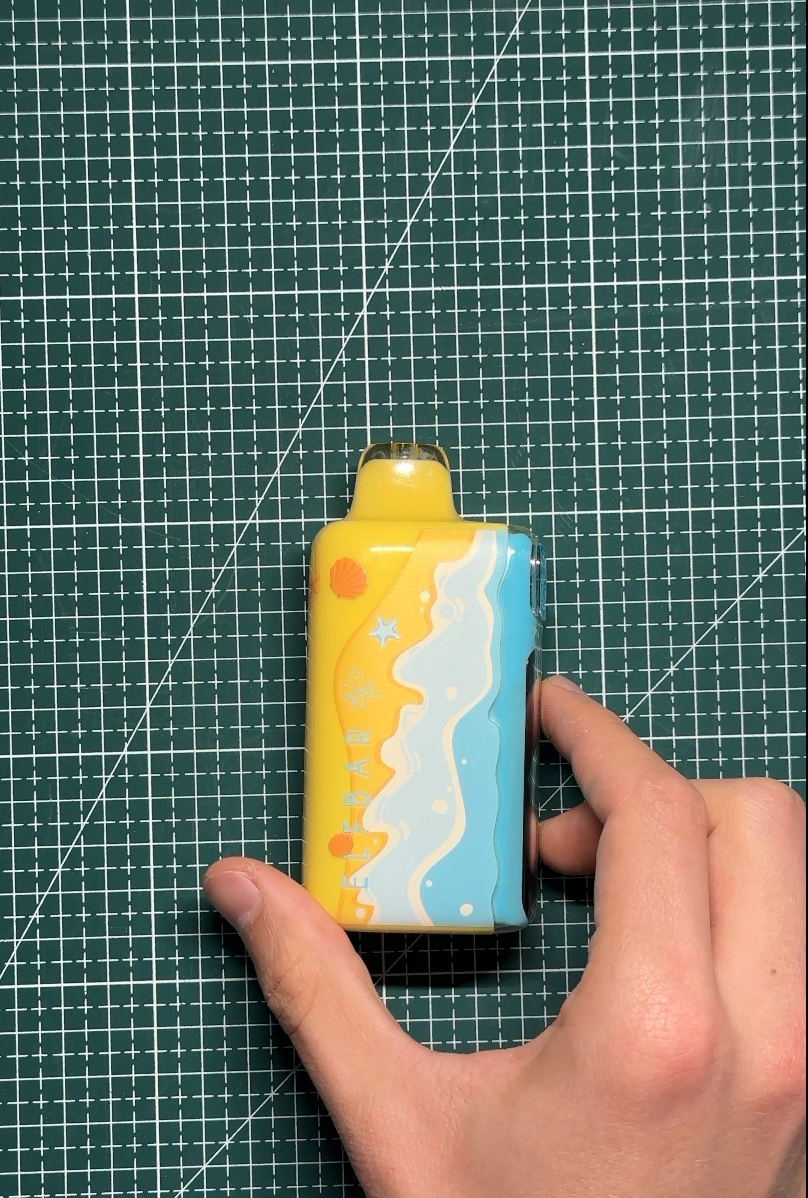
Safety first: Before working with any lithium battery, ensure the device is completely powered off and disconnected.
- Using a small screwdriver, carefully disassemble the vape device.
- Locate the lithium battery (usually a single cylindrical cell labeled with capacity in mAh and voltage).
- Carefully remove the battery without forcing it—note which end is positive (+) and which is negative (-). These are typically marked on the battery itself.
- Set aside the battery in a safe location. Do not short-circuit the terminals.
Important: Document the battery specifications:
- mAh capacity (usually 200-600 mAh for disposable vapes)
- Voltage rating (typically 3.7V nominal for lithium-ion cells)
- Physical dimensions (diameter and height)
Measure the Original Camera Battery
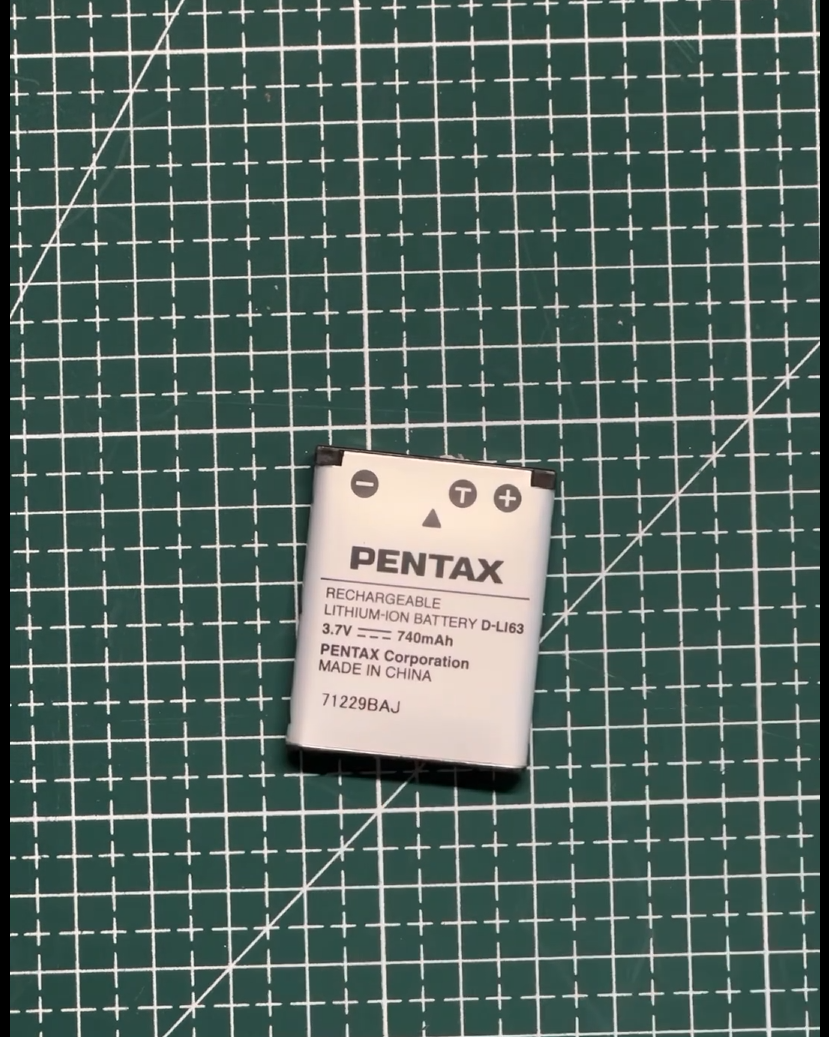
- Open the Pentax Optio M30 battery compartment (located on the bottom or back, depending on your model).
- Note the battery dimensions: length, width, and height.
- Identify the contact points inside the compartment. The Optio M30 typically uses a proprietary battery with specific contact positions.
- Use calipers to measure:
- Battery housing length, width, and height
- Distance between positive and negative contact points
- Contact point diameter (usually 3-5mm)
- Take clear photos of the battery compartment from multiple angles.
- Critical measurement: The compartment's internal height—this determines how tall your 3D-printed adapter can be.
Design the Battery Dummy Adapter in 3D CAD
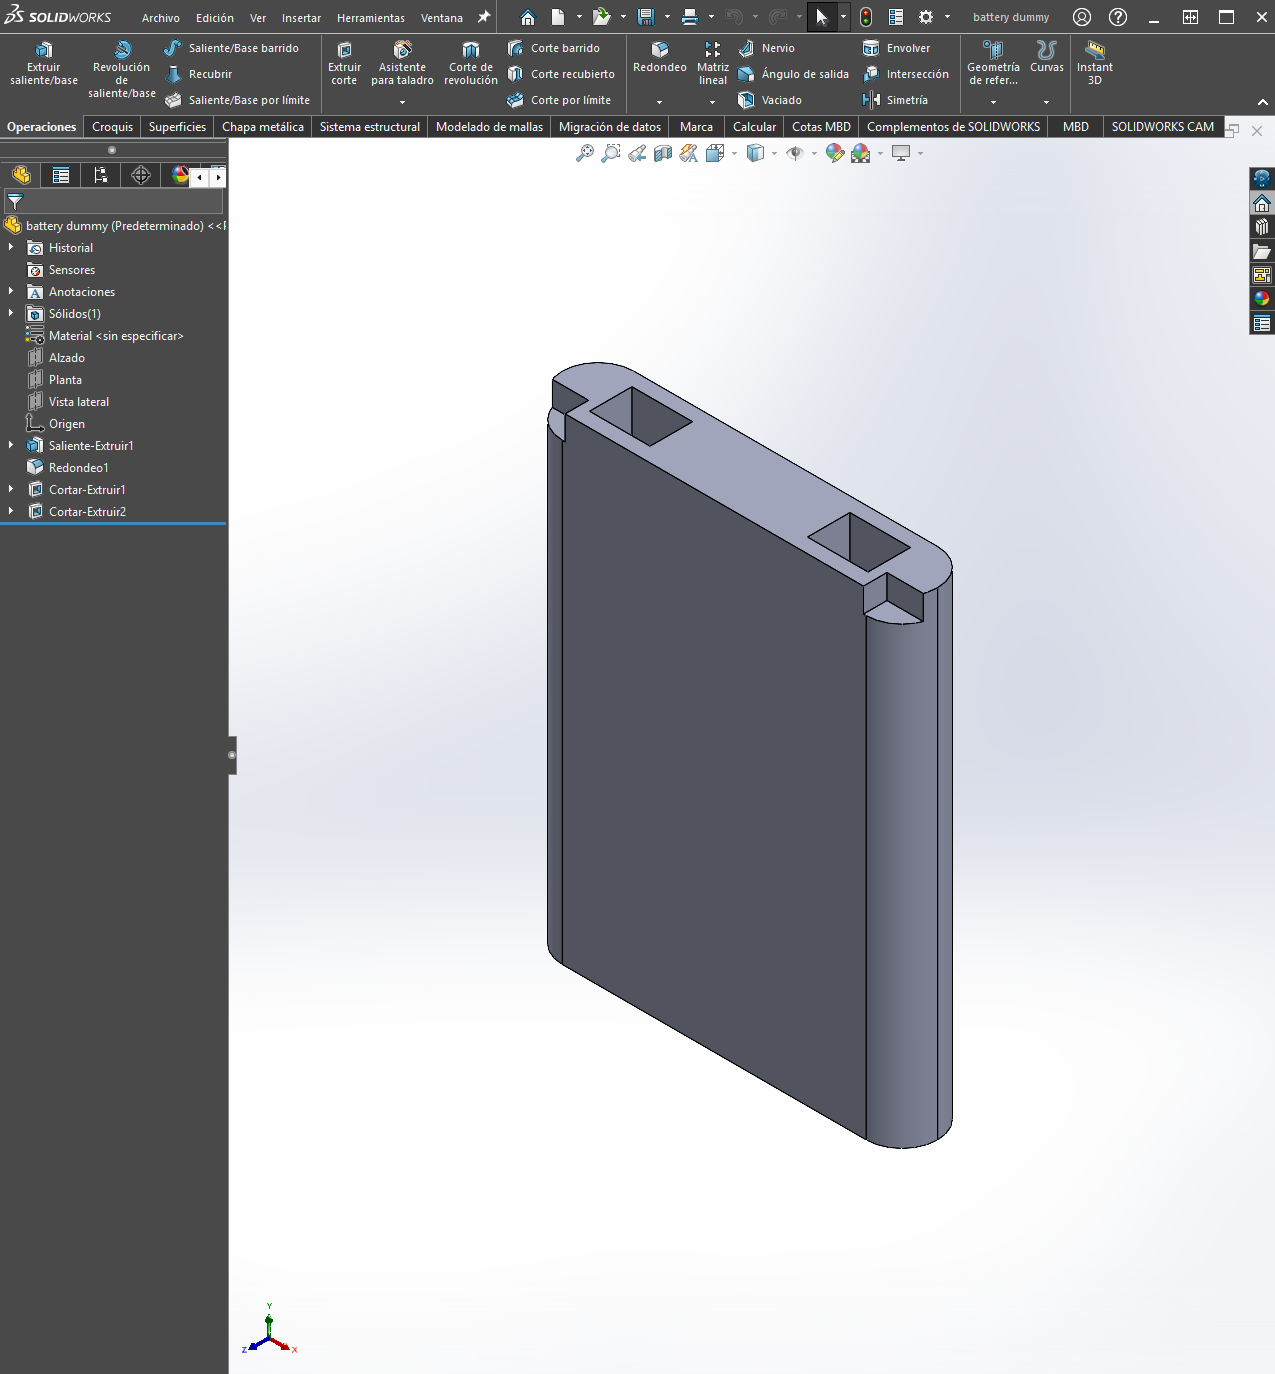
- Open your CAD software (SolidWorks, FreeCAD, or Fusion 360).
- Create a new part using the measurements from Step 2.
- Design your battery dummy adapter with:
- Outer shell dimensions matching the original battery form factor
- Two contact points positioned exactly where the original battery's contacts were
- Internal space to safely route wires from the vape cell
- A slight taper or lip to slide smoothly into the battery compartment
- Tolerance of ±0.5mm for sliding fit
- Contact design:
- Create two small cylindrical pockets (3-4mm diameter) where the positive and negative contacts will be soldered
- Leave at least 2mm of plastic between contacts to prevent short-circuiting
- Consider adding a thin wall (2-3mm) to hold spring contacts or solder points
- Example design approach:
- Main body: 38mm × 30mm × 15mm (adjust to your measurements)
- Contact pockets: 4mm diameter circles positioned at original battery contact points
- Cable routing: small channel or hole (2-3mm) along the side for wires
- Save as STL file for 3D printing.
Print the Battery Dummy Housing
- Printer settings:
- Material: PLA or PETG (PETG is more flexible and durable)
- Infill: 20-30% (balance between strength and print time)
- Layer height: 0.2mm for detail
- Support: Enable if needed for overhangs
- Print the battery dummy adapter.
- Post-processing:
- Remove support material carefully
- Sand any rough edges with 120-240 grit sandpaper
- Test-fit into the battery compartment—it should slide in smoothly
- File or sand any friction points until it fits perfectly
Prepare the Vape Battery Terminals
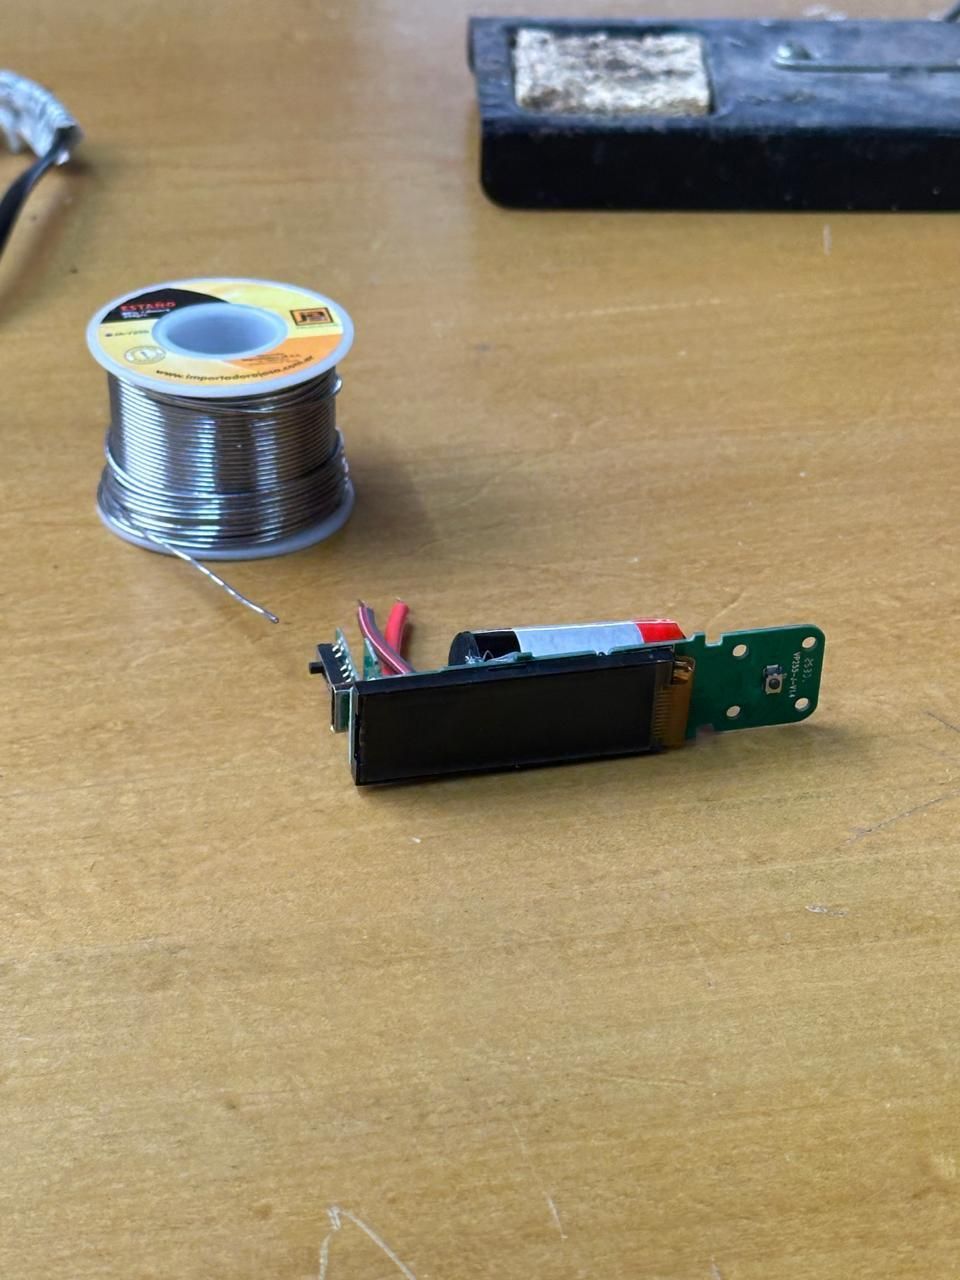
- Using a multimeter, verify the battery voltage (should read ~3.7-4.2V for a charged lithium-ion cell).
- Carefully strip about 5mm of insulation from two pieces of 22-24 AWG copper wire—these will become your positive and negative leads.
- Pre-tin the wire ends with solder (heat the wire tip and apply solder to coat it evenly). This makes the final connections cleaner.
- For the battery contacts:
- If your vape battery has solder pads, clean them with flux
- If it has spring contacts, carefully solder your pre-tinned wires directly to them
- Apply heat shrink tubing to each solder joint to prevent accidental short circuits
- Let connections cool completely before proceeding
Solder Contacts to the Battery Dummy Adapter
- Position your battery dummy with the contact pockets facing up.
- Insert each pre-tinned wire into its corresponding contact pocket (positive to +, negative to -).
- Using your soldering iron, carefully solder the wire to create a strong mechanical and electrical connection:
- Apply flux to both the wire and the contact point
- Heat both parts with the iron for 2-3 seconds
- Apply solder to create a solid joint
- Let cool—do not move the assembly while cooling
- Reinforce the connection:
- Carefully solder any copper contact strips or spring contacts into the same pockets for better surface area and mechanical strength
- This increases reliability and improves the battery contact
- Cover all exposed solder joints with heat shrink tubing and apply heat to seal.
Connect the Vape Battery to the Dummy Adapter
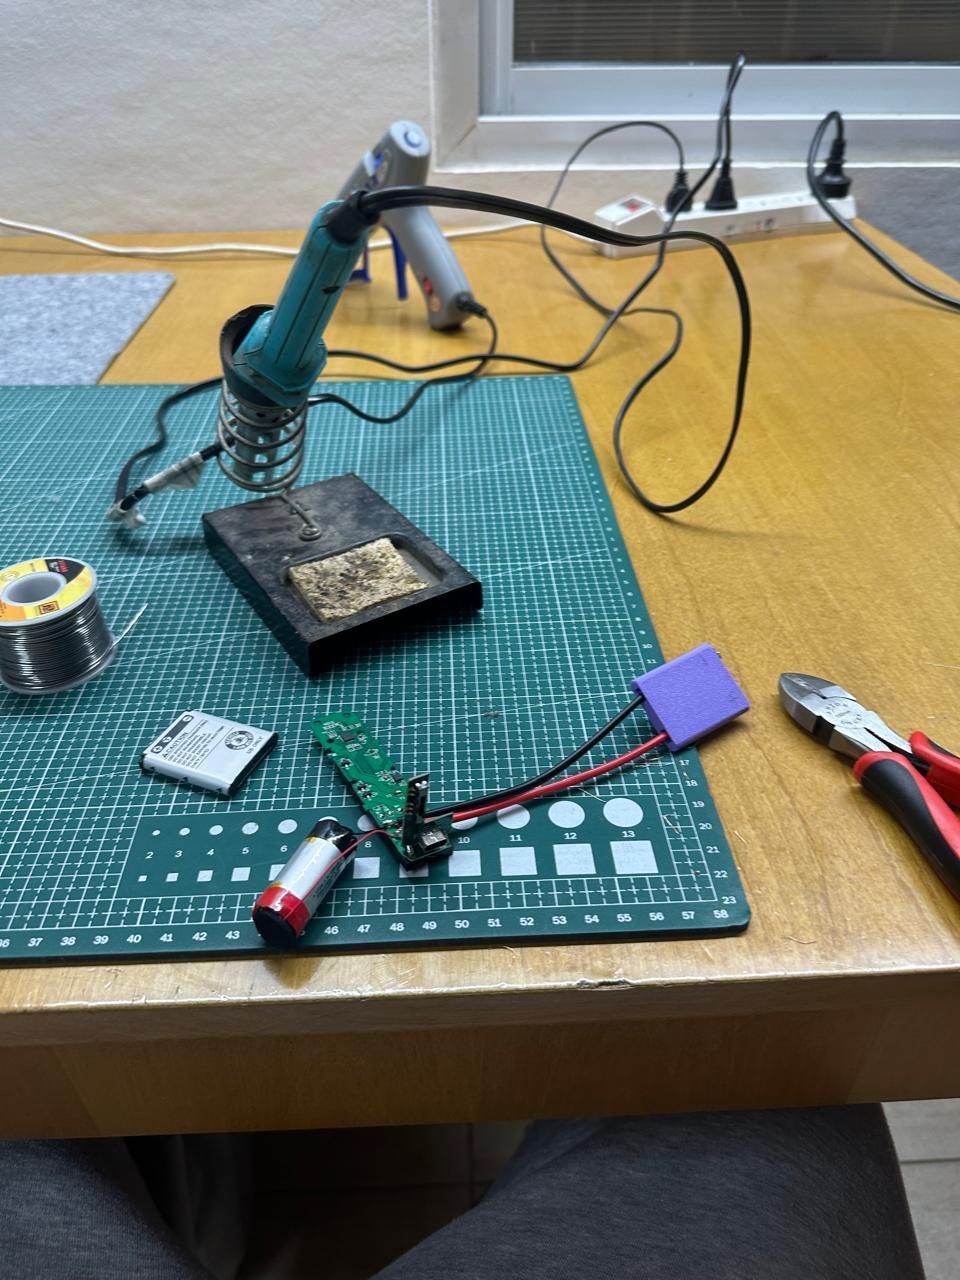
- Final check before connection:
- Use your multimeter to verify there's no short circuit between the positive and negative leads
- The resistance should be very high or infinite (open circuit) at this stage
- Route the wires from the vape battery to the dummy adapter:
- You can either solder them directly, or
- Use small crimp connectors for a removable connection (advanced)
- Solder the positive wire from the vape battery to the positive lead of the dummy adapter.
- Solder the negative wire to the negative lead.
- Apply heat shrink tubing to each joint.
- Test the connection with your multimeter: Voltage should read the vape battery's nominal voltage (3.7V or whatever your battery is rated for).
Test the Assembly
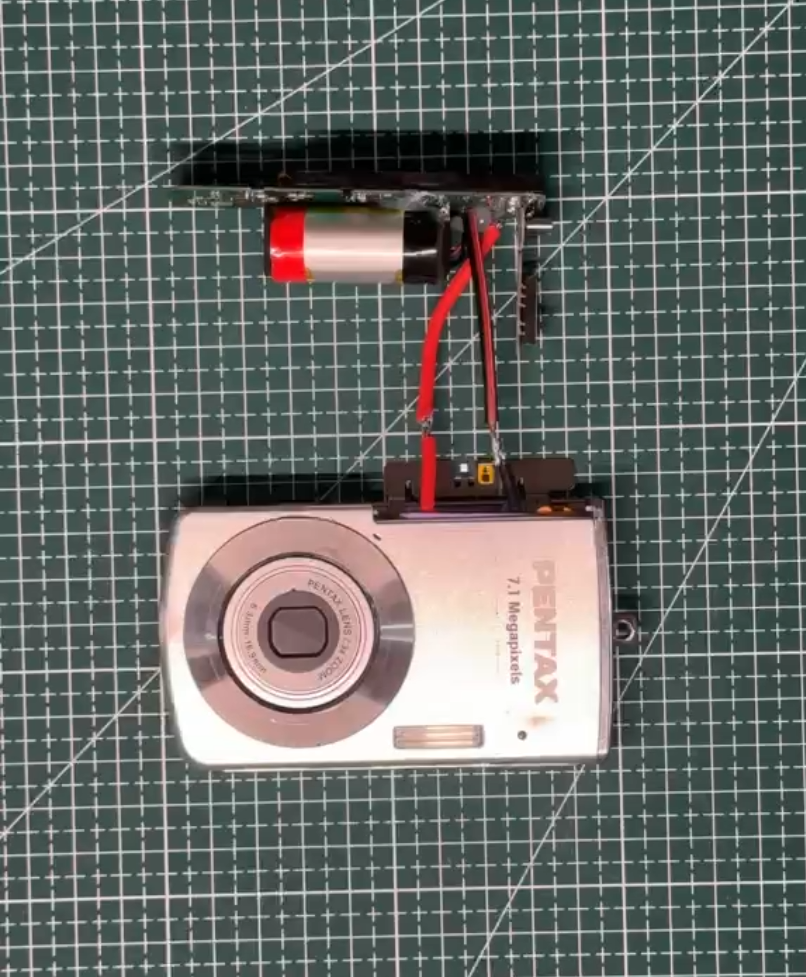
This is critical before proceeding further.
- Carefully insert the dummy adapter with the attached vape battery into the Pentax Optio M30's battery compartment.
- Close the battery compartment door.
- Attempt to power on the camera:
- You should see an LED indicator light up
- The camera should recognize the battery
- Press the power button
- If it works: Excellent! Your basic battery swap is functional. Test taking a photo to confirm everything works.
- If it doesn't work:
- Check voltage with multimeter—should match the battery nominal voltage
- Verify the contact pressure—contacts may need to be adjusted or repositioned
- Clean the contact surfaces with a cotton swab and isopropyl alcohol
- Try again
Measure the Full Assembly for Housing Design
.jpeg)
Once the dummy adapter is working inside the camera:
- Measure the external dimensions of the complete assembly (camera + battery + dummy adapter).
- Measure how far the battery-dummy assembly protrudes from the battery compartment.
- Take photos of the camera from all angles with the new battery installed.
- Identify any awkward gaps or areas where protective housing might be beneficial.
Why this measurement? The 3D-printed housing exterior will protect the vape battery cell and provide a professional appearance.
Design the Protective Housing in SolidWorks
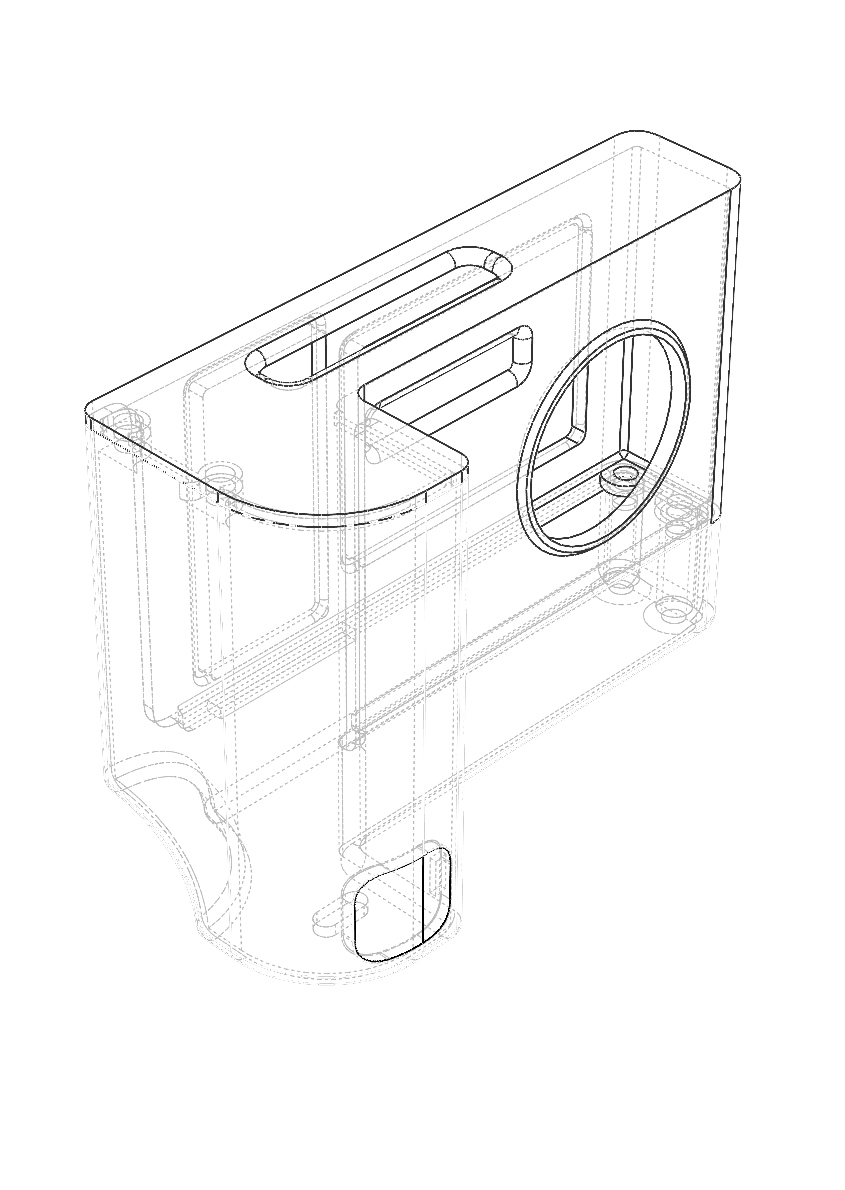
- Return to SolidWorks with your complete assembly measurements.
- Design an external housing shell that:
- Wraps around the vape battery cell (with 1-2mm clearance)
- Maintains the same overall form factor as the original battery
- Includes two small pockets for neodymium magnets (for secure mounting inside the camera or to a metal surface)
- Has a smooth, finished appearance
- Routes any exposed wires neatly along one edge
- Design considerations:
- Magnet pockets: 6-8mm diameter × 3-4mm deep, positioned at the bottom or back of the housing
- Cable exit: smooth routing channel, 3mm wide × 5mm tall
- Outer finish: slightly glossy appearance if desired (achieved through sanding and sealing)
- Tolerance: ±0.3mm for fit
- Export as STL.
Print the Final Protective Housing
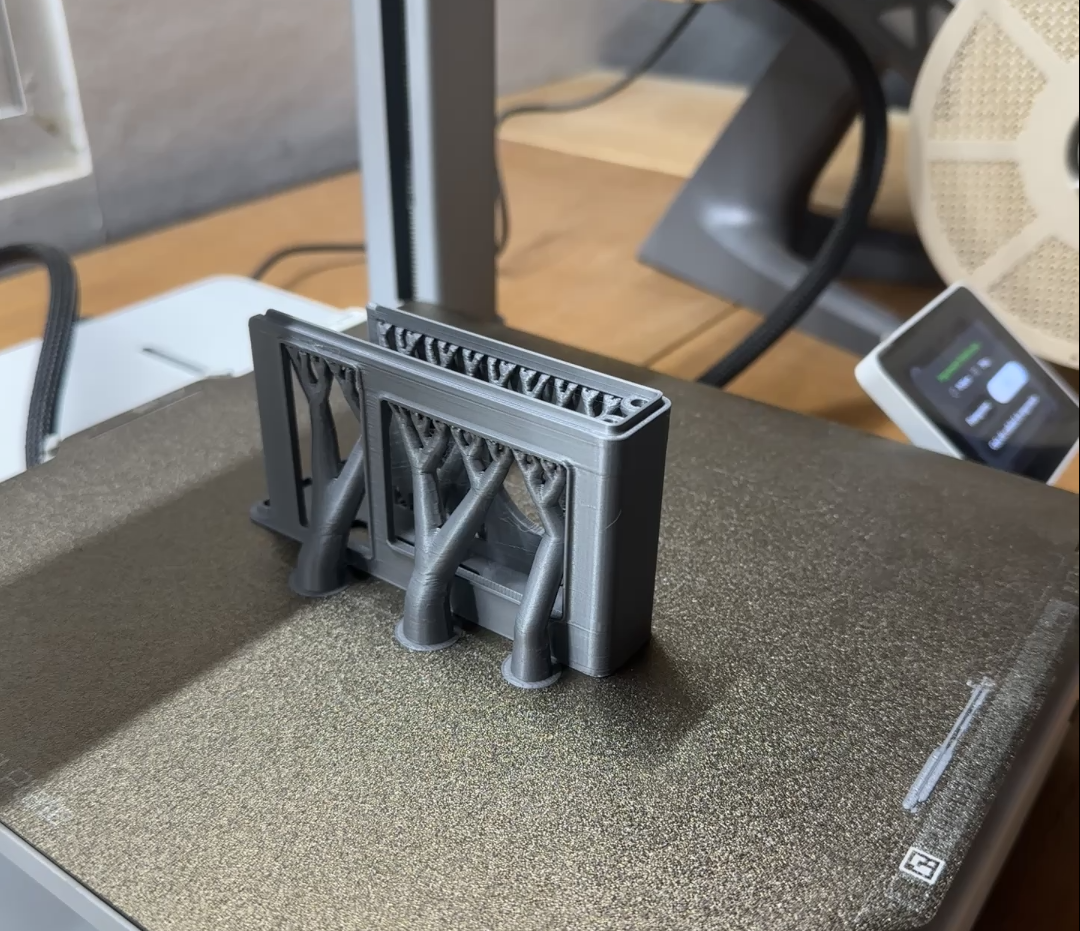
- Print settings:
- Material: PLA or PETG
- Infill: 15-20% (cosmetic part, less structural need)
- Layer height: 0.15mm for smooth finish
- Support: Minimal or none if your design is self-supporting
- Print the housing shell.
- Post-processing for a finished look:
- Sand with 120 grit, then 240 grit for smoothness
- Optionally apply a clear coat spray paint for durability and sheen
- Let dry completely
Insert Magnets and Assemble
- Preparing the magnets:
- You'll use two small neodymium magnets to provide mounting security
- Do NOT touch bare magnets to electronic components yet—they can damage data or affect circuitry
- Apply a thin layer of silicone adhesive into the magnet pockets:
- Place one magnet in each pocket
- Press down to set (do not over-fill—adhesive should be flush with surface)
- Let cure for 2-3 hours (check adhesive instructions)
- Optional: If your magnets are too strong or risk interfering, wrap them in thin plastic film or non-ferrous material before installing.
Integrate the Protective Housing
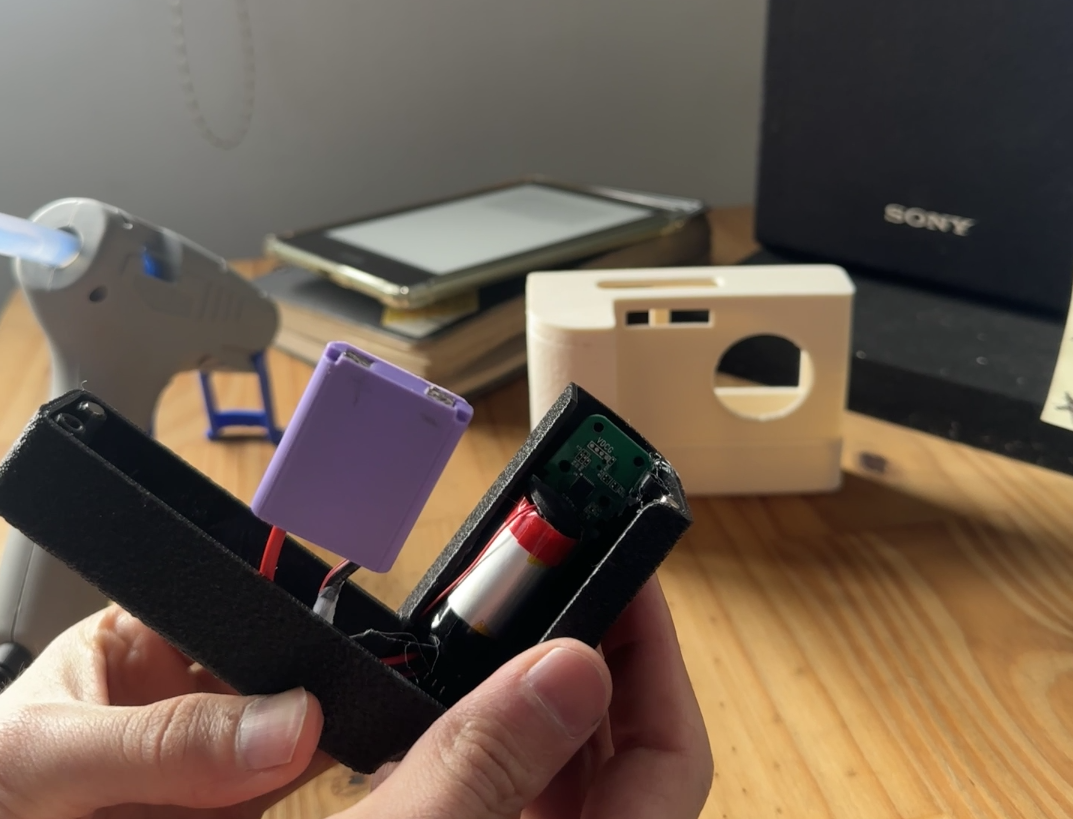
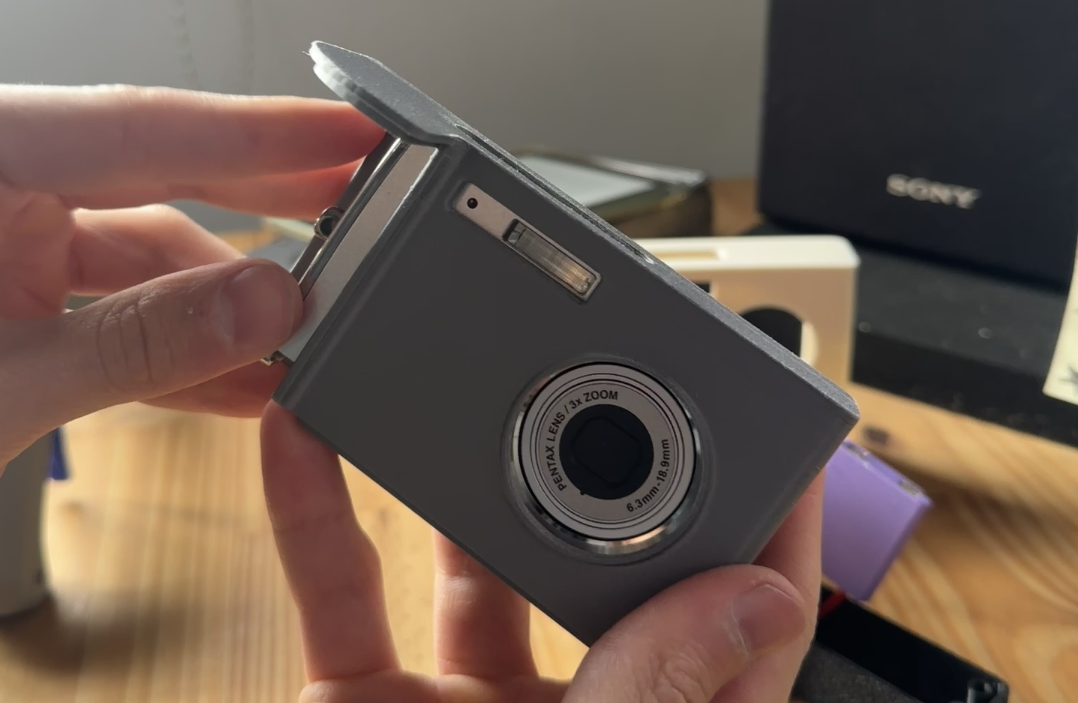
- Test-fit the protective housing around the vape battery assembly:
- It should slide smoothly over the dummy adapter and battery
- Check that it doesn't interfere with the camera's battery compartment door
- Apply silicone adhesive to the inside back of the housing where it contacts the dummy adapter:
- Use a small bead around the perimeter
- This keeps the housing fixed to the assembly
- Alternative assembly: If you prefer a removable design, skip this step and just use the magnet positioning.
- Slide the protective housing onto the battery assembly.
- Let the silicone cure for 4-6 hours (check your adhesive's instructions).
: Final Assembly and Testing
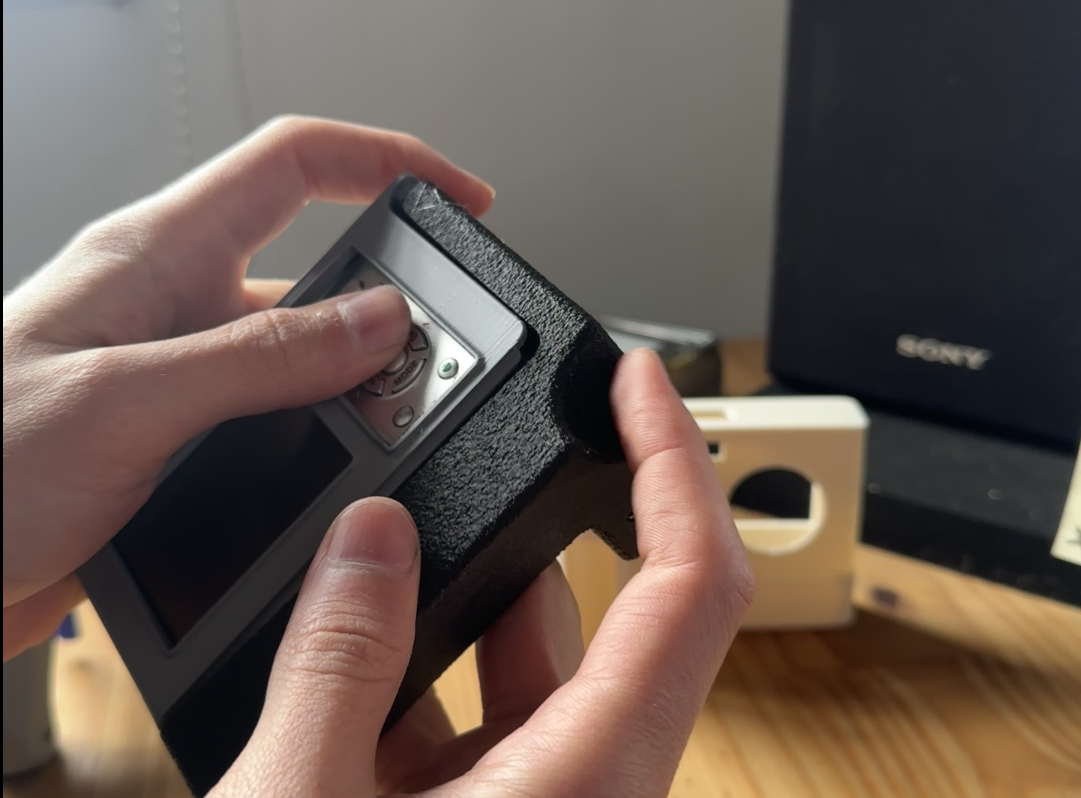
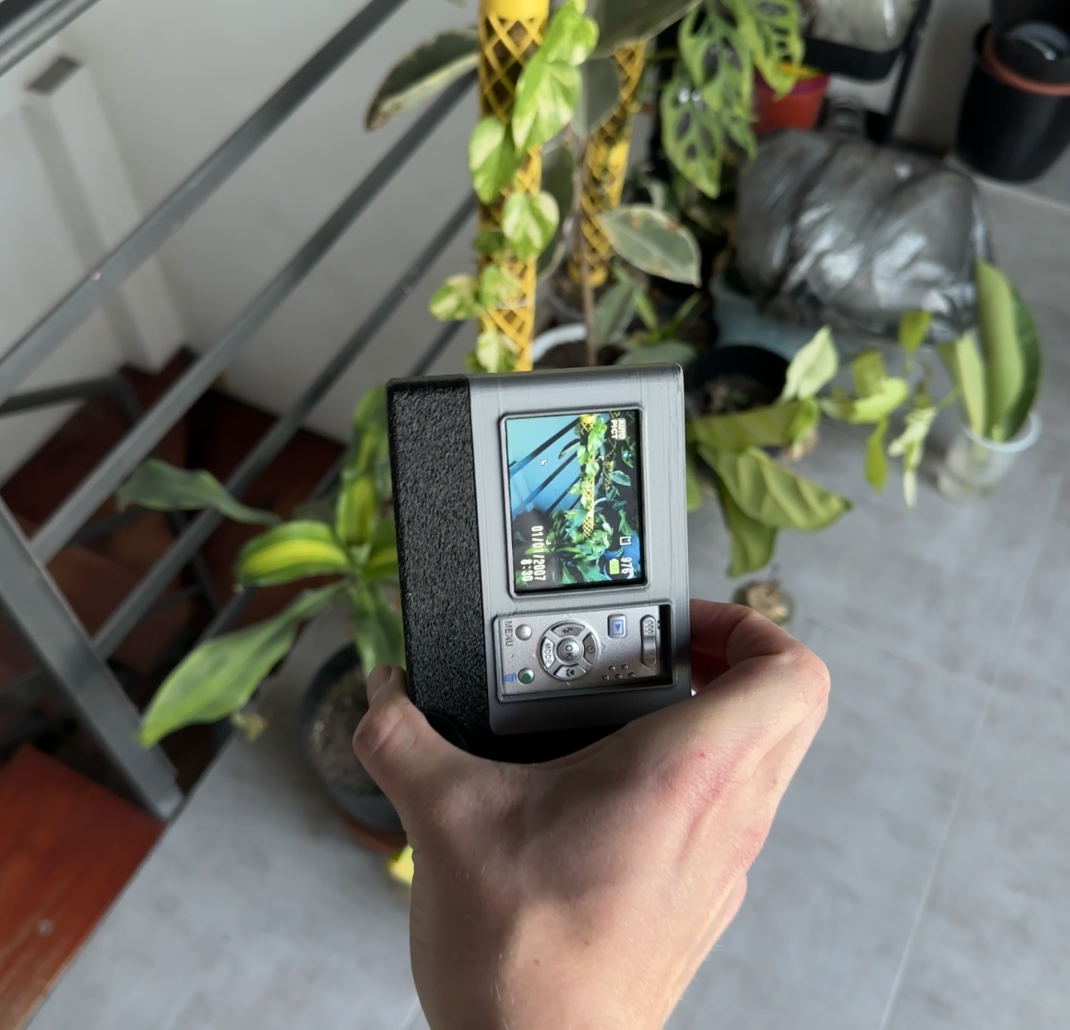
- Once the housing adhesive is fully cured, insert the complete assembly back into the camera's battery compartment.
- Close the battery door and verify it closes fully.
- Power on the camera and test:
- Does it boot normally?
- Can you take photos?
- Does the flash work (if equipped)?
- Test battery level indicator (if available)
- Functionality test:
- Take 10-20 test photos
- Review them on the camera's screen or transfer to your computer via USB
- Verify image quality and camera operation
- Celebrate! Your Pentax Optio M30 is now revived with sustainable e-waste components.
Tips & Troubleshooting
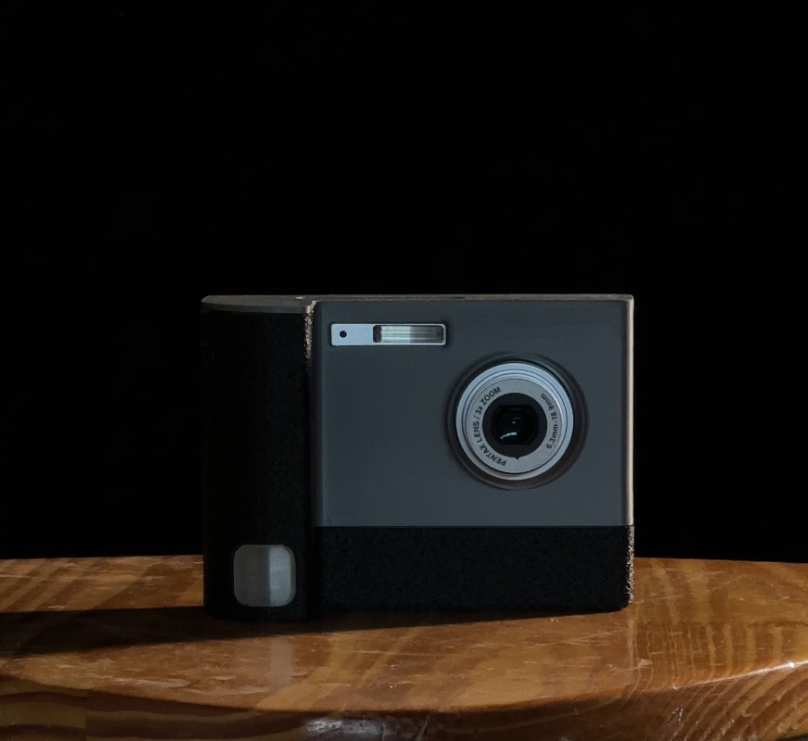
Camera won't power on:
- Verify battery voltage with multimeter (should show ~3.7V)
- Check contact cleanliness—clean with isopropyl alcohol
- Adjust contact pressure or position slightly
- Verify polarity is correct (+ to +, - to -)
Intermittent power:
- Contacts may be loose—re-solder if necessary
- Try adjusting the dummy adapter's position slightly
- Apply contact cleaner to the battery contacts
Housing doesn't fit:
- Re-measure the assembly and ensure your 3D design is accurate
- Test-fit before adhesive—sand as needed
- Print with slightly larger inner dimensions if needed
Battery drains quickly:
- This is normal with lithium-ion cells powering older cameras
- The Pentax will draw more current than the vape device was designed for
- Consider this a proof-of-concept; for daily use, upgrade to a larger battery
3D print has rough surfaces:
- Sand progression: 120 → 240 → 320 grit
- For a glossy finish, apply clear coat spray paint
- For smooth layers, print with 0.1mm layer height (longer print time)
Final Thoughts
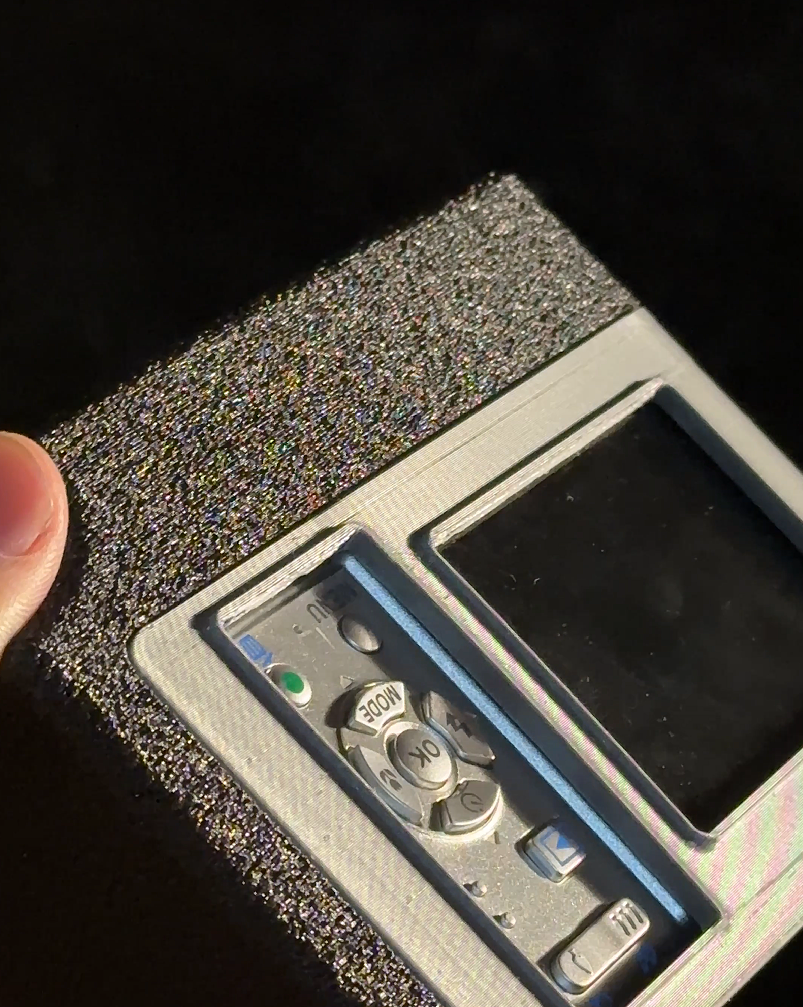
his project demonstrates several valuable maker skills:
- Electronics: soldering, battery handling, circuit understanding
- CAD design: 3D modeling, tolerancing, engineering thinking
- Manufacturing: 3D printing, post-processing, finishing
- Sustainability: e-waste recovery, component reuse, circular design
Your revived Pentax Optio M30 is now a conversation piece and a working camera that bridges vintage and modern technology. Share your results and your photos with the community!
Safety Notes
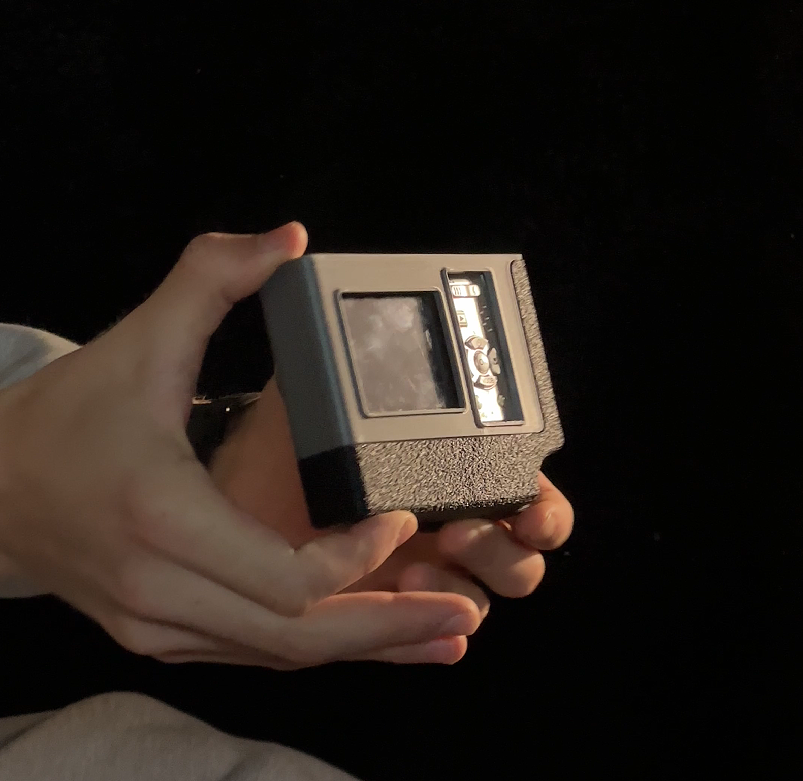
- Lithium batteries: These can catch fire or explode if short-circuited. Always verify polarity before connecting.
- Soldering: Use proper ventilation. Lead-free solder releases flux fumes—work in a well-ventilated area.
- 3D printing: Ensure your printer has proper cooling. Don't leave it unattended during long prints.
- Neodymium magnets: Keep away from electronic devices, credit cards, and medical implants. Store safely away from other magnets.
Keywords for Instructables
upcycling, recycling, digital camera, Pentax, battery hack, lithium-ion, e-waste, 3D printing, SolidWorks, soldering, electronics, restoration, sustainability, camera repair, vape recycling, DIY electronics, maker project, CAD design, FDM printing, circuit assembly