Rori the Robot Coffee Who Act on the Movie
by eric dirgahayu in Circuits > Robots
8218 Views, 121 Favorites, 0 Comments
Rori the Robot Coffee Who Act on the Movie

.jpeg)


Hello my Name Eric Dirgahayu im from Indonesia, today i will show you about My Robot Coffee The Name Rori, his a Robot Coffee who can be a robot assistant too, Rori is a Character in a Indonesia new web series Movie, but his a real Robot who can serve the coffee.
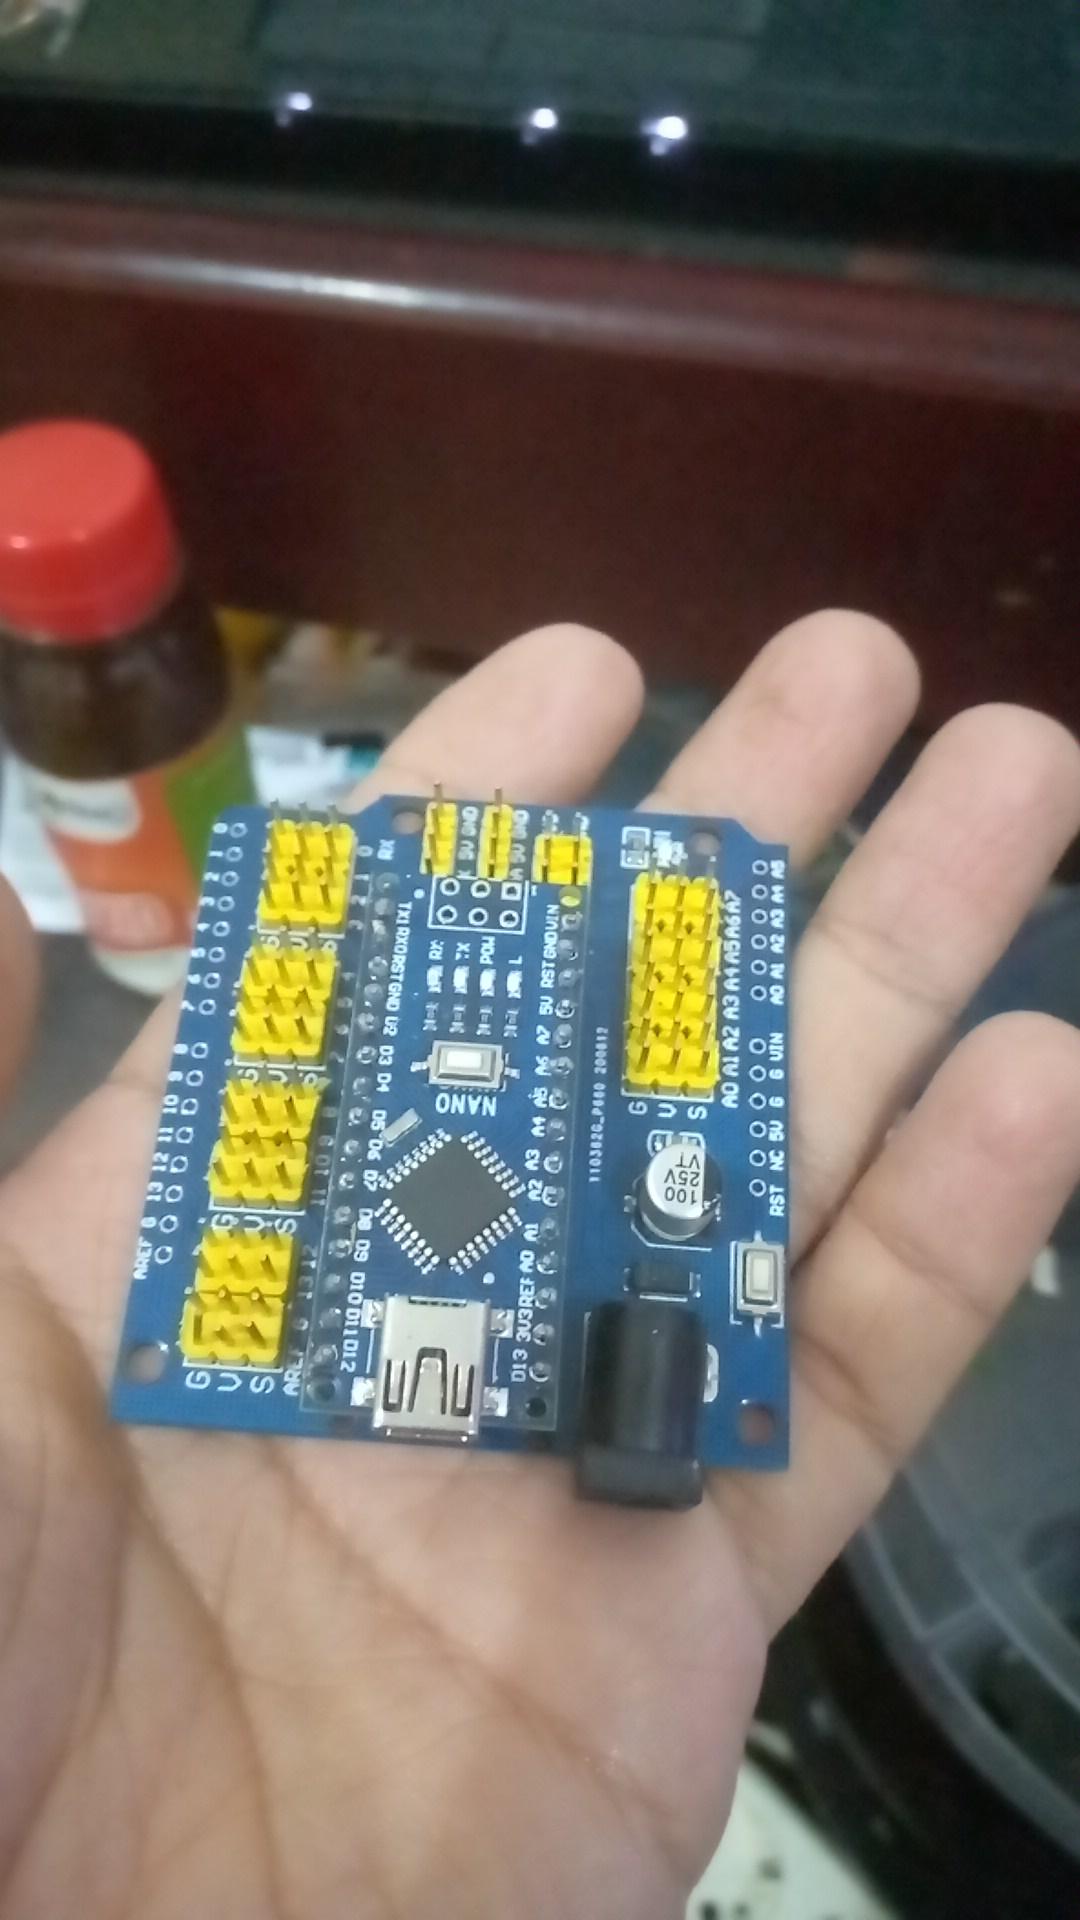
I make a Robot Rori in Two week, use a 3dsmax and fusion 360 to making a model from a draft concept design. the model i create with 3ds max 2019 and a split them to a partising for 3d printing using fusion 360, and printed with FDM printing with PLA+ material. For mechanical movement i use Servo motor from Hitec and a couple from another servo. the system i use 2 mode, autonomus and manual control because need inprovement act with the actors. for autonomus i Use arduino and Ez-Board controller, and manual i use 16 Channel Radio Control from Radio Master.
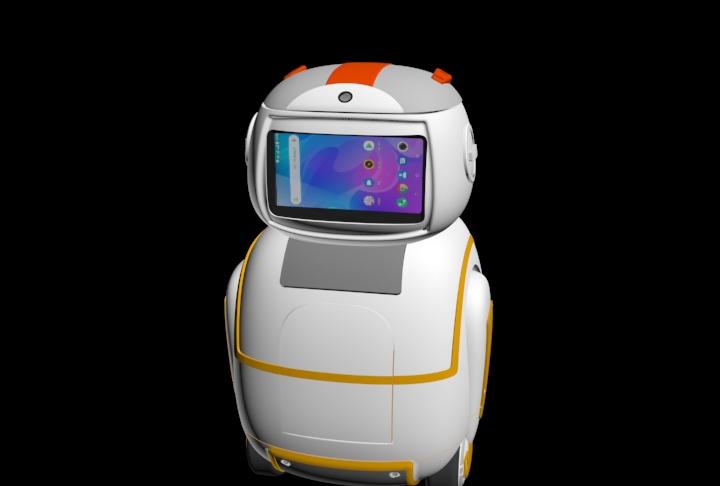
The robot tall is 60cm with 2 arm 180 rotate, griper, 180 degre head of predom, the face is android screen with apps face and coffee menu inside, He move with 2 wheel drive and 1 free omni wheel backside, who can make the movement smoothly.
This tutorial maybe not complete step because is a long step so if you need for more detail can message me on my profile or just comment on this tutorial, Thankyou 😀
Supplies





- 3ds Max 2019 https://www.autodesk.com/products/3ds-max/overview
- Fusion 360 https://www.autodesk.com/products/fusion-360/personal
- anycubic delta plus 3d printer https://www.anycubic.com/collections/fdm-printer/products/anycubic-kossel-3d-printer
- Anet e12 3d printer
- hitect servo https://www.hitecrcd.com/products/servos
- Arduino
- Ez-Board from Ez-Robot https://www.ez-robot.com/
- RadioMaster TX16S Aula Sensor
- Flysky FS_iA10B Receiver 2.4G10CH PPM
- 7 Inch Tablet Android 10
- 5 Inch Universal Polyurethane Shopping Cart Wheels Set of 2
- 2x YoungRC 30A ESC Brushed Electric Speed Controller
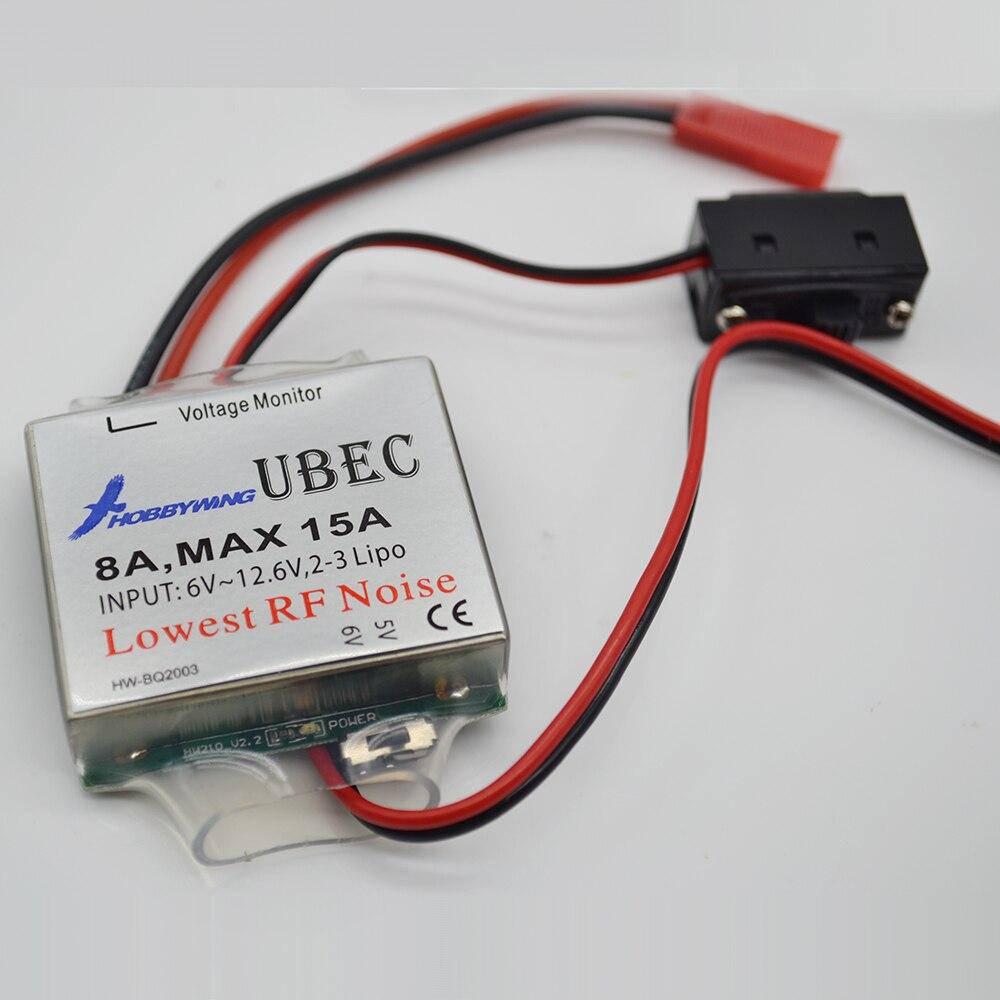
- Turnigy 8-15A UBEC
- Iron Flask Sports Water Bottle
- Gikfun Mini DC 6V to 12V R385 Water cooled Water Pump
- DIYmall 16 Bits 16 X WS2812 5050 RGB LED Ring
- ExpertPower Standard 12V 7AH Rechargeable
- Auto Battery Recharger 12v Car Battery Charger
- GREEN FABWOOD 75 Type Plastic Crown Gear
- coating and paint spray
- alteco EPO Putty A+B
- 2xJIUWU 3x6x2.5mm Miniature Steel Bearings
Downloads
2d Concept to 3d Design






# Make a 2d concept design and 3d design for print
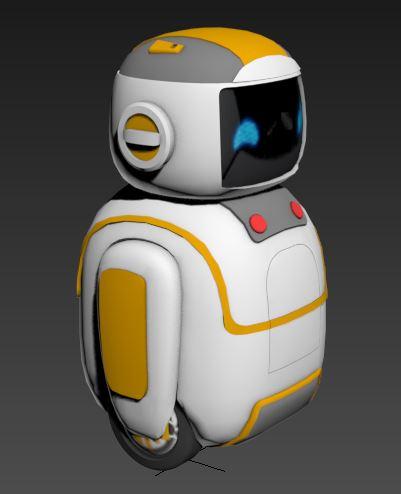
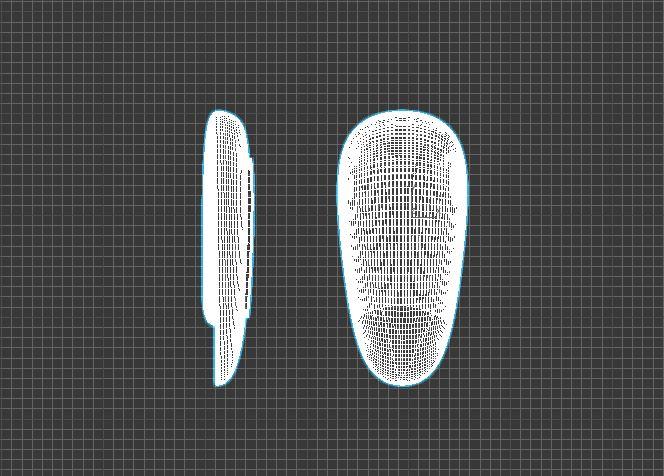
First think first, is a consept, make your concept robot who you want to build,this is a copcept robot for a movie who i will made, not really detail but we can make the detail in 3d design after next step, the concept must contain the most important and most iconic things for the robot.
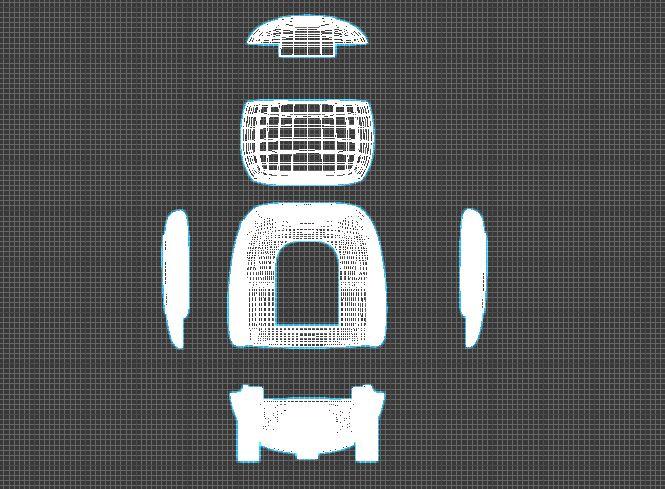
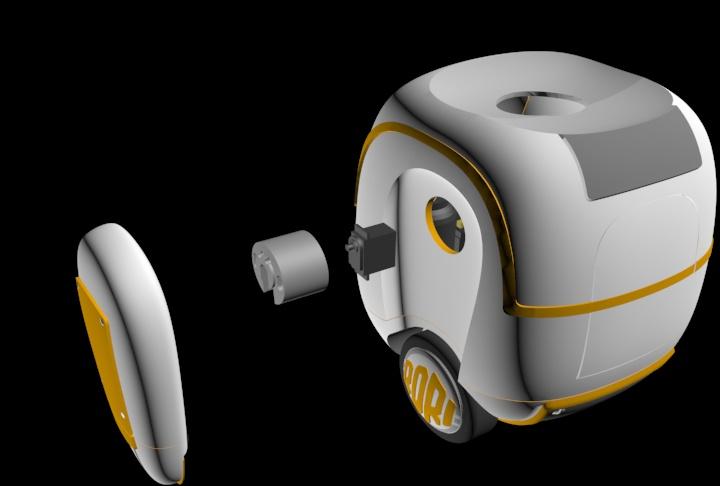
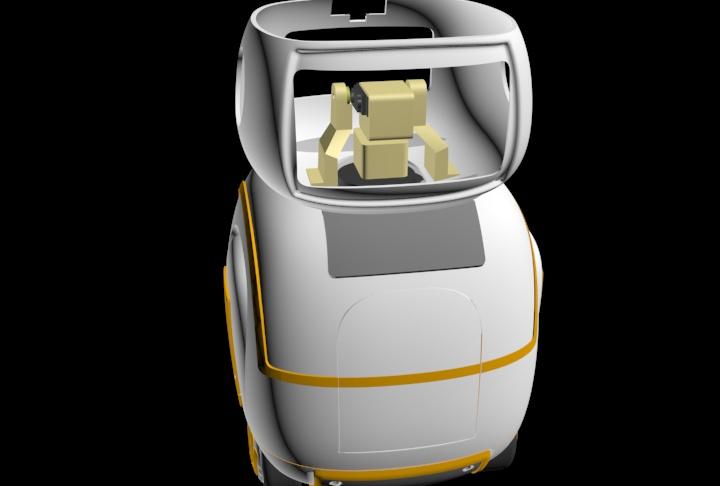
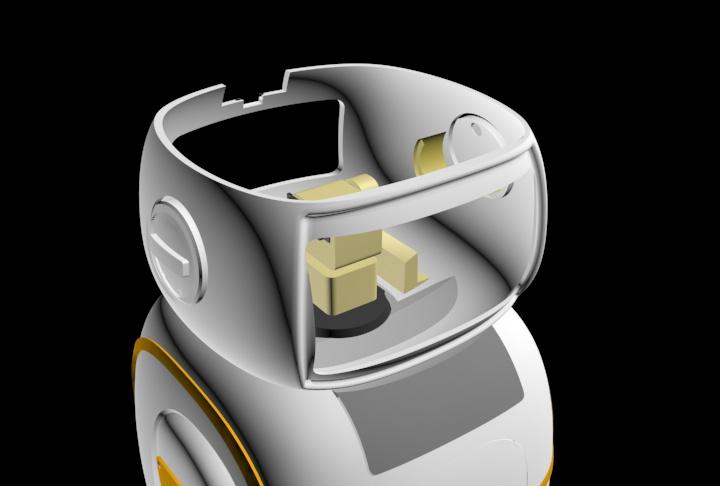
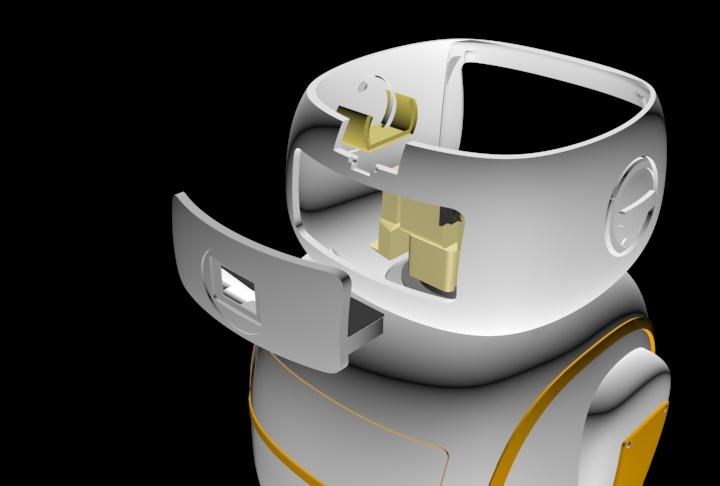
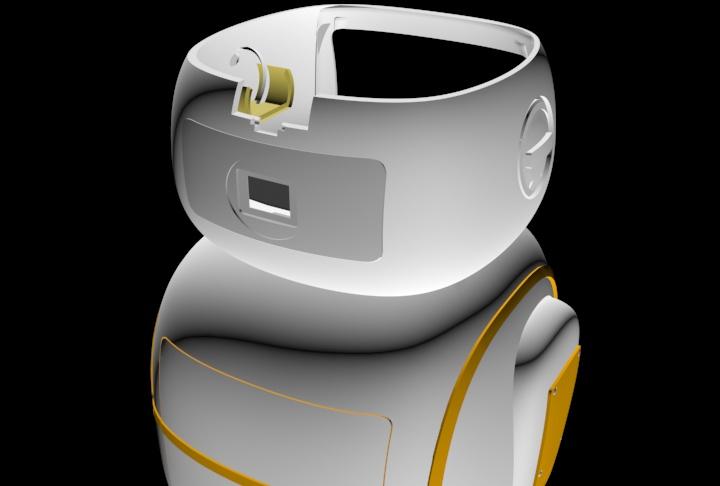
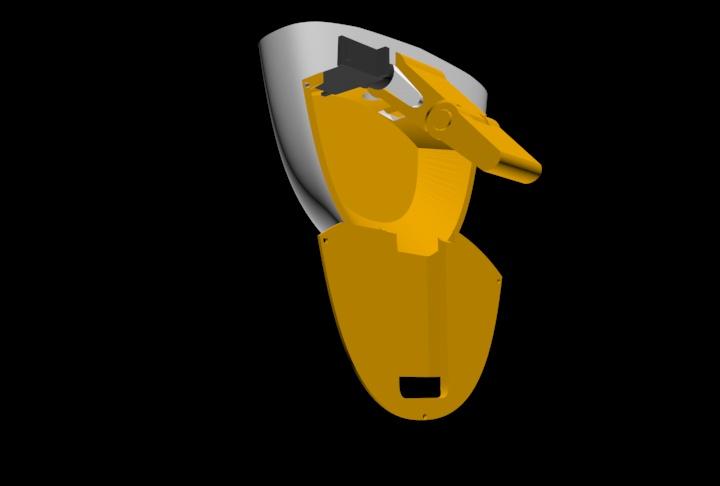
If the concept accepted, we turn the 2d model to 3d model with 3ds Max, in this step we can make a detailing for mechanical system for robot movement in one peaces. next we split a 3d model to a part with fusion 360, you can split to 2 big part first, Head and Body, next we create the detail head model with a part head, for my robot i make a couple a part main head, top head, back door and side door, see the picture. For Body part, i make that to a 5 big Part split to proceed on 3d printing next. Dont forget make a detail front door, back door, and hole for arm. Next make a Arm and another part. and mechanical inside the robot, like holder for servo and any harware part else.
Printing




# 3d printing prosess
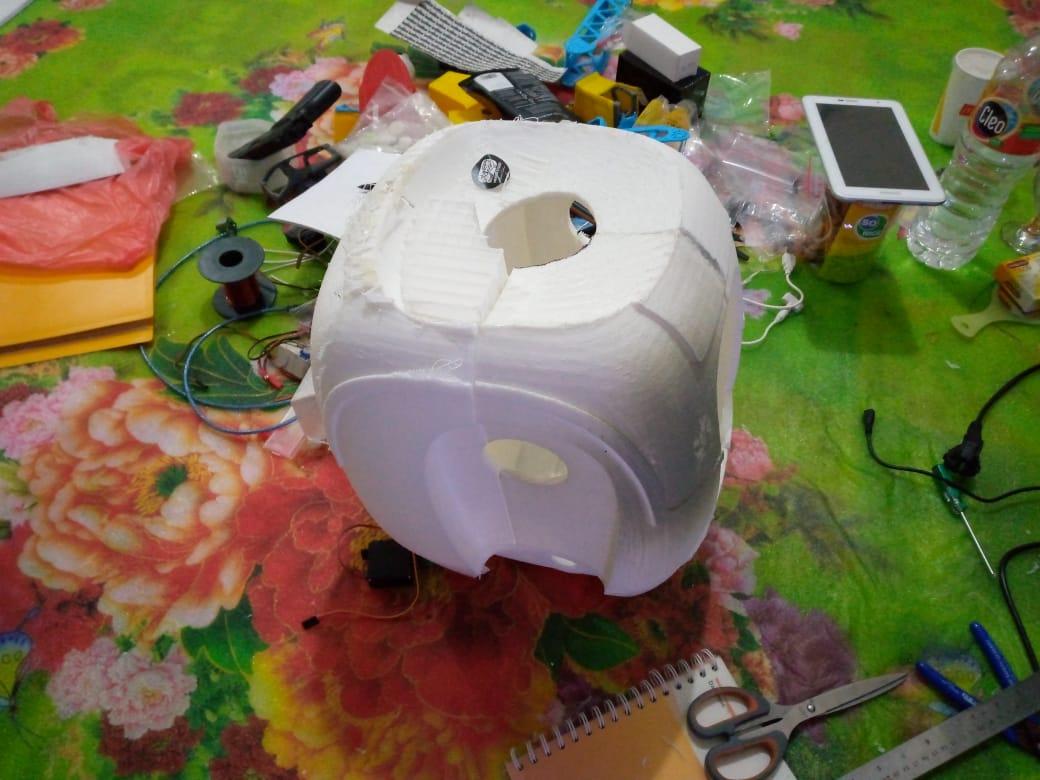
Next Step, print your 3d models, after 3d model ready, we can split if the model to large for print, so you can split to a couple part with Fuson 360, print for all part. for the the Stl file you can request to me, because is a lots of file. after print part ready you have to put it back together, use super strong glue or use couplers. the STL file has uploading and ready to download, there are 126 part.
Downloads
Painting


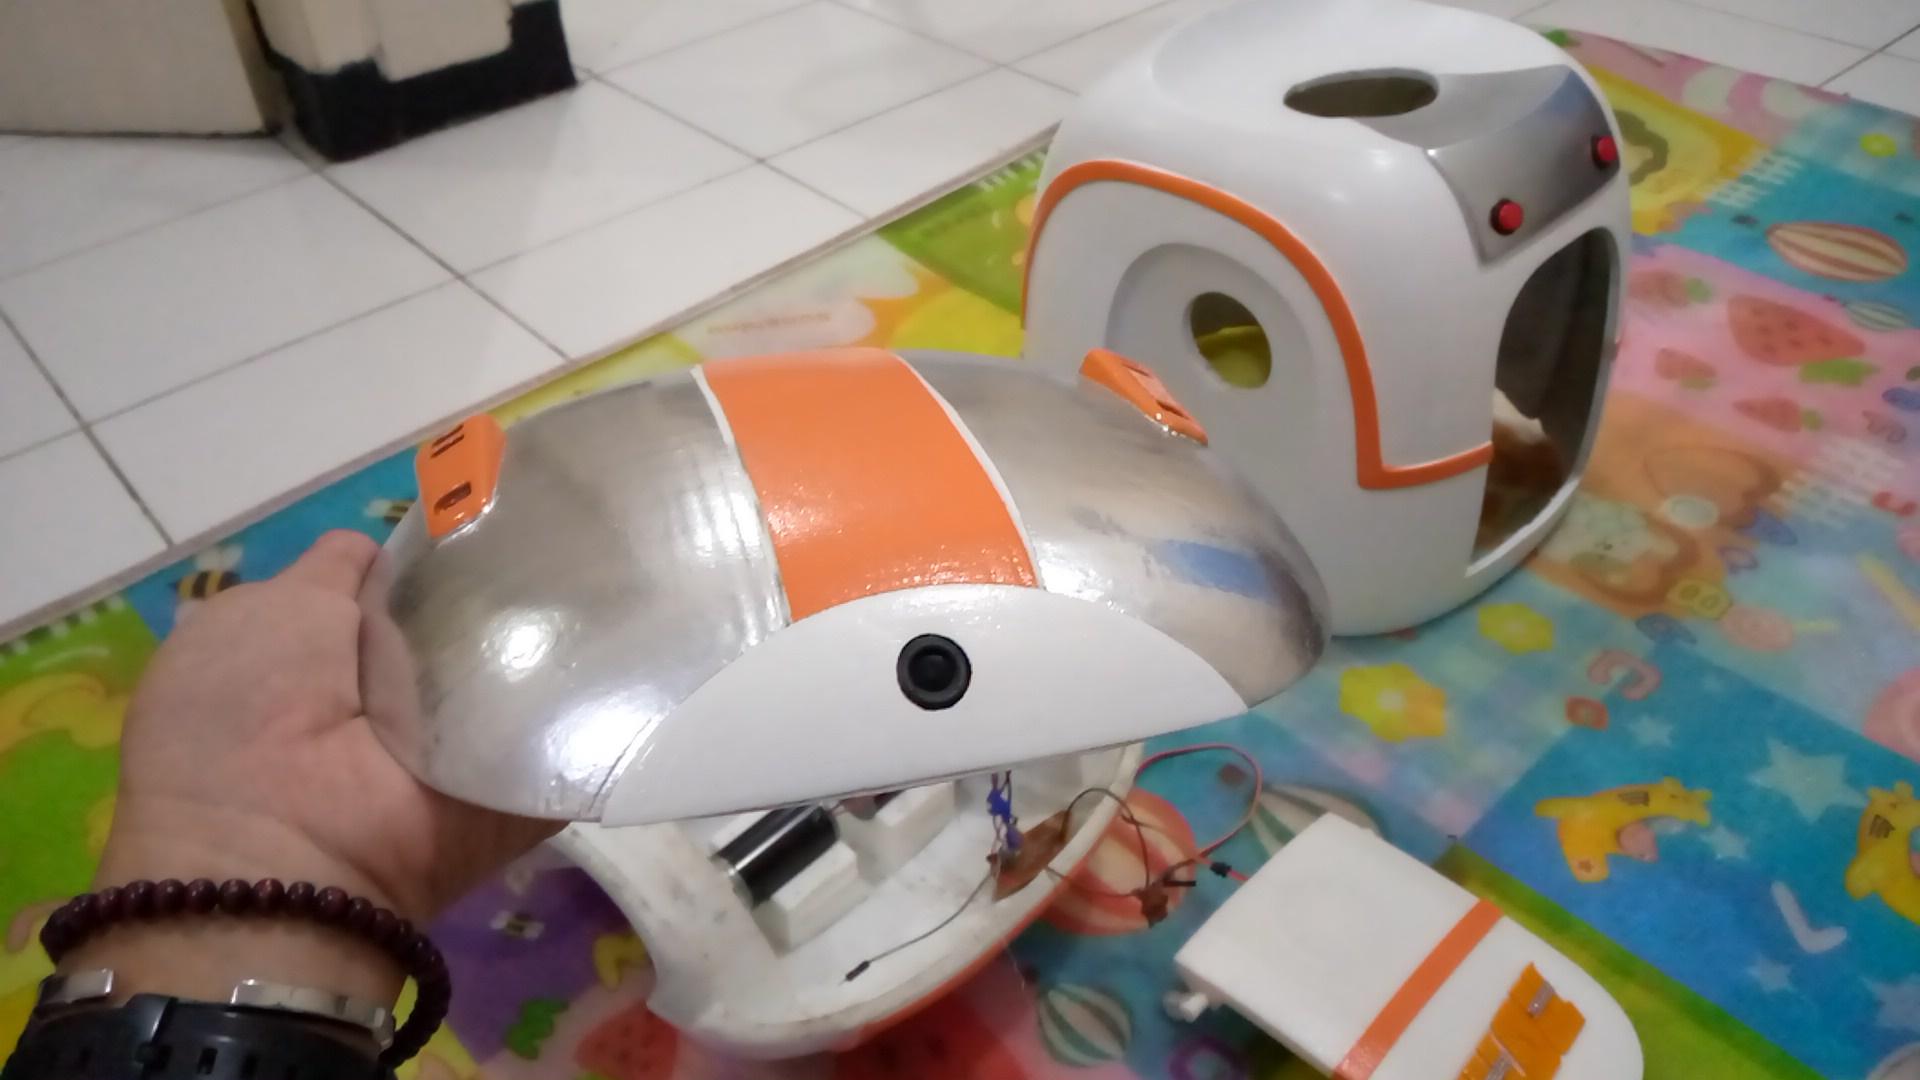


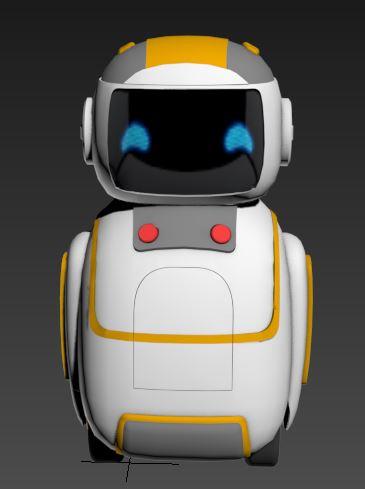
After printing done, for smoothty surface i use coating paint spray tin, make a few layer for best quality maybe sanding needed for more best result, after coating use a base paint before you painted.
How to paint :
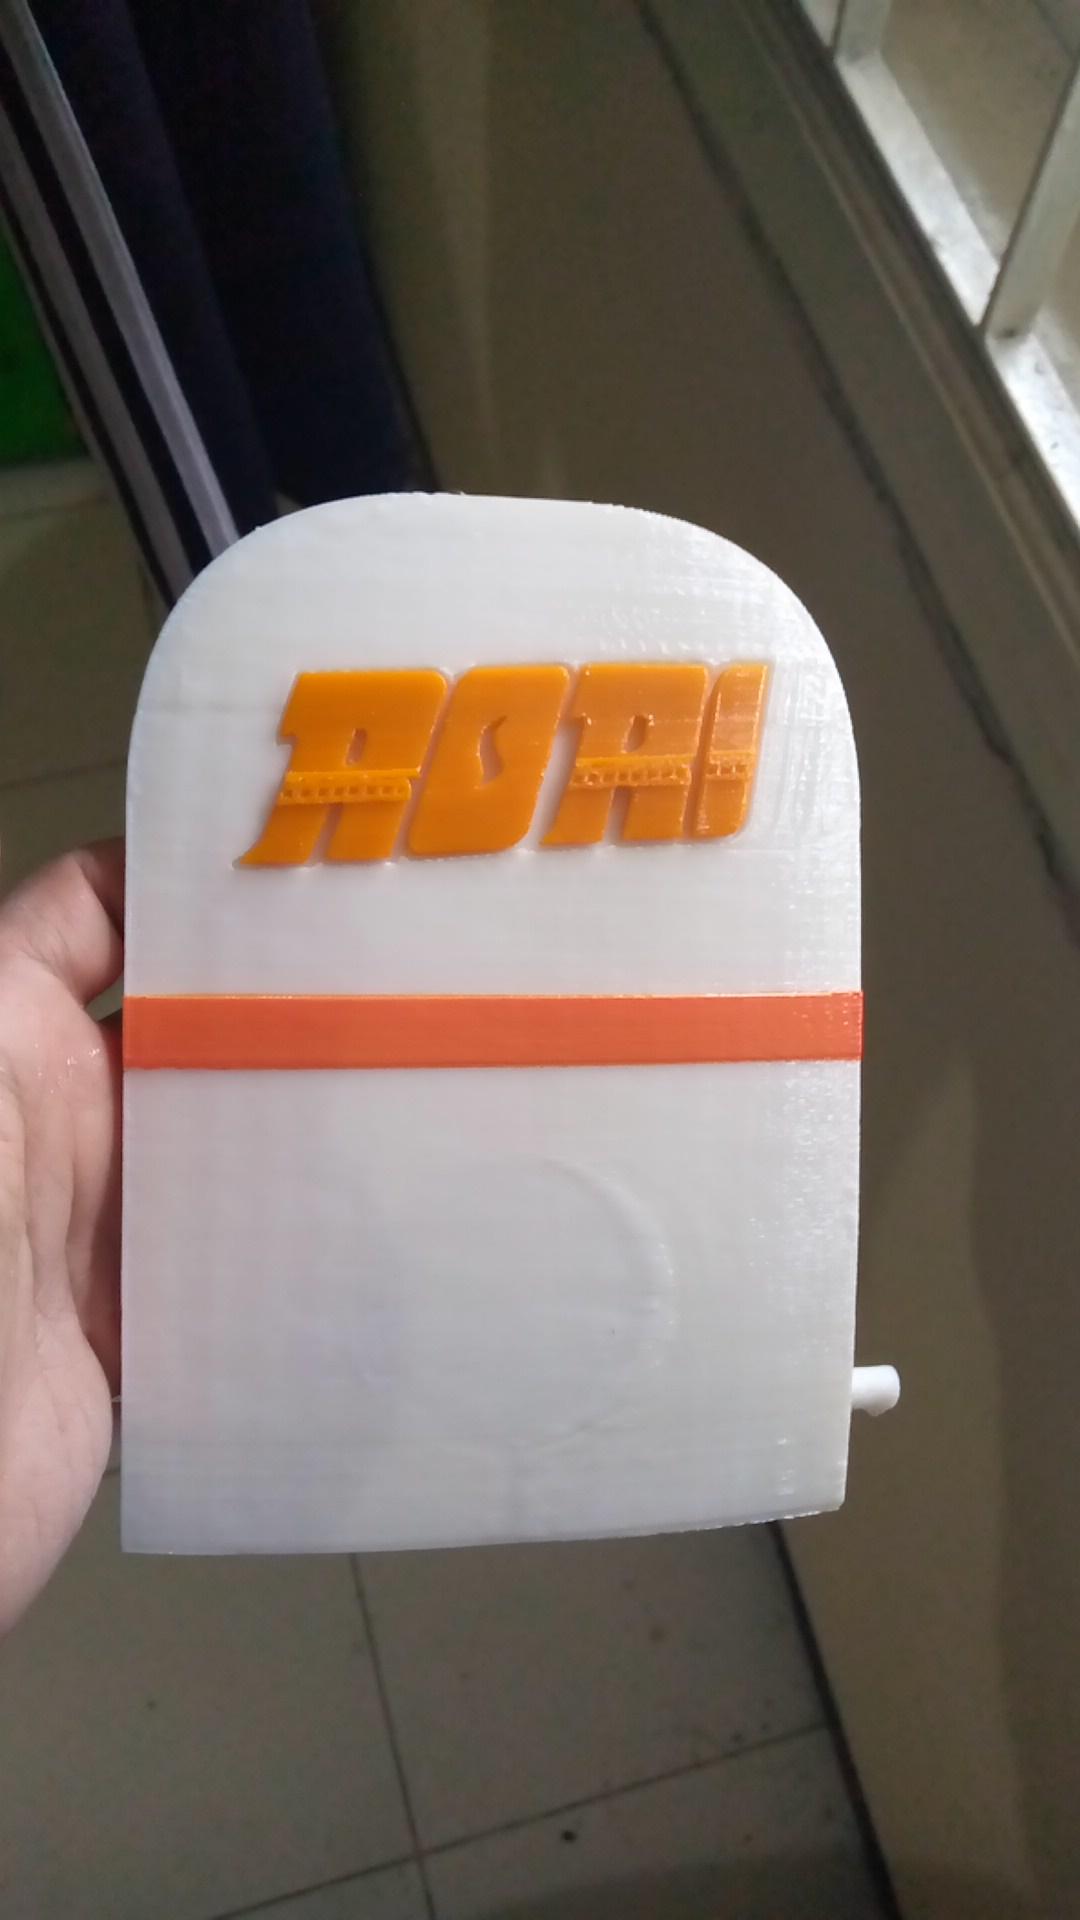
- after coating and base paint, apply a base color, i use white color for all part, but for little part i think no need paint just use a color a Filament with a same color on robot concept. After all part finish with base color for detail lake a list line and detail use a mask tape and paint with the color who you want, if done woth a color pain use a clear coated for finishing.
- the last 3 picture is guide for original colors.
If all part finish so you can next to the step.
Install Mechanical






























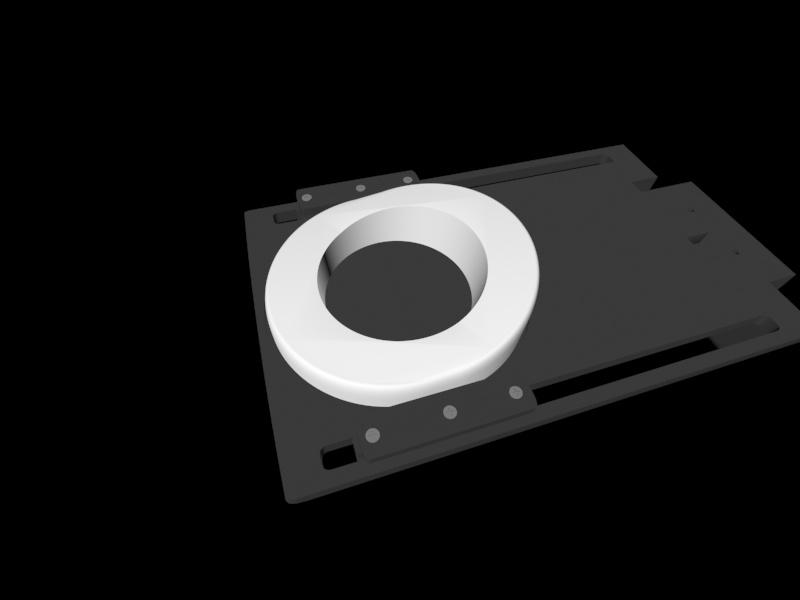

# Mechanical, part, Hardware
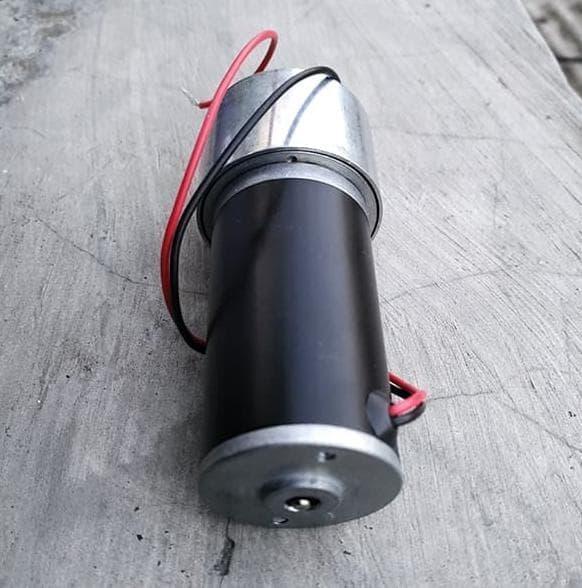
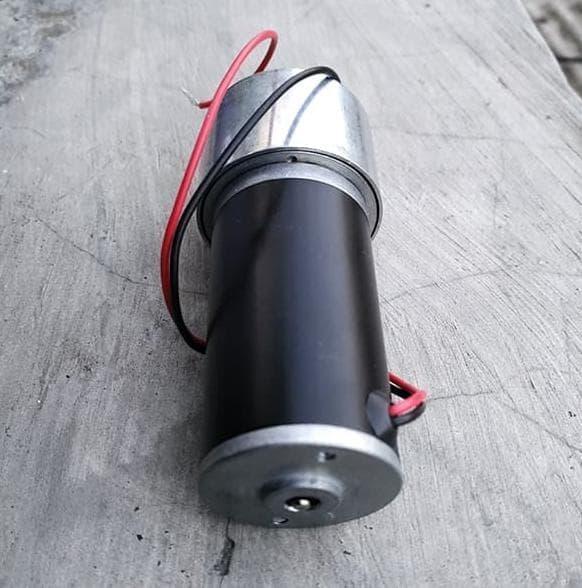
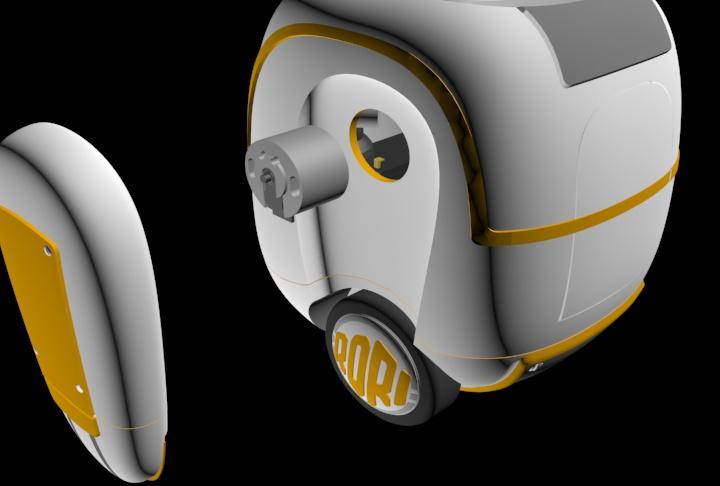
Next step is importan thing for Robot, Mechanikal, i use Servo and motor DC gearbox for actuator, 2pcs Motor DC gerabox 12 V for wheel driver , 10pcs servo 180 degre for front door, arm and head movemen, 1pcs servo 360 roration servo for slider tray coffee. wheel Part, i use 2pcs 5 inch wheel for driver wheel, and and 1 omni wheel, for free wheels on the back. i make costum omni wheel for this robot, just print from .stl file on this Instructables.
Put together part and apply the actuactor such as motor and servo to a place who craete on 3d design, screw to holder and apply a part item such as wheel or body part.
#Look to the picture :
- 3d printed models includes all brackets for mounting hardware including motors, servos, sensors and devices.
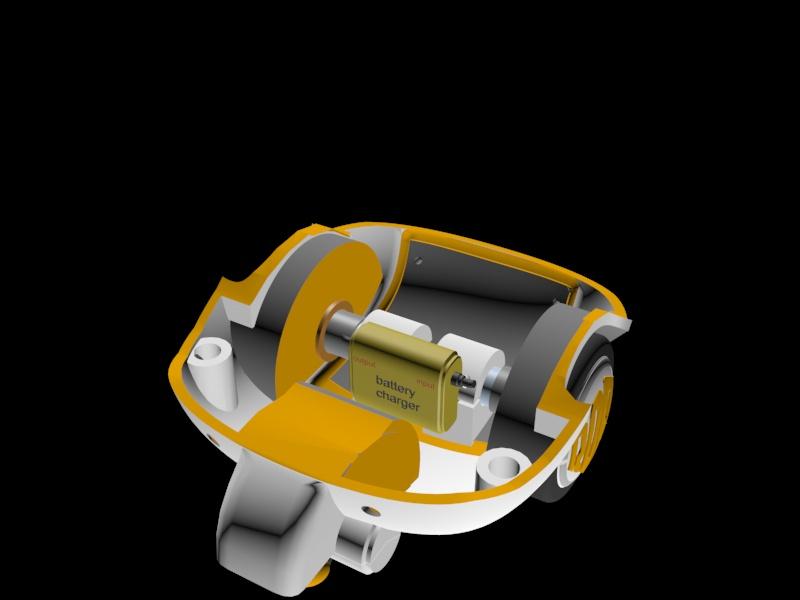
- intall motor gearbox to the base robot, the base rabot include braket for 12v Motor gearbox, just install the two motors to the place provided, adjust the position of the motor shaff so that it is parallel between the left and right motors, lock with motor bracket and secure with couplers.
- If the motor is firmly installed, also install the main drive wheel on both motors, strengthen the installed wheel by installing the screw on the wheel saff.
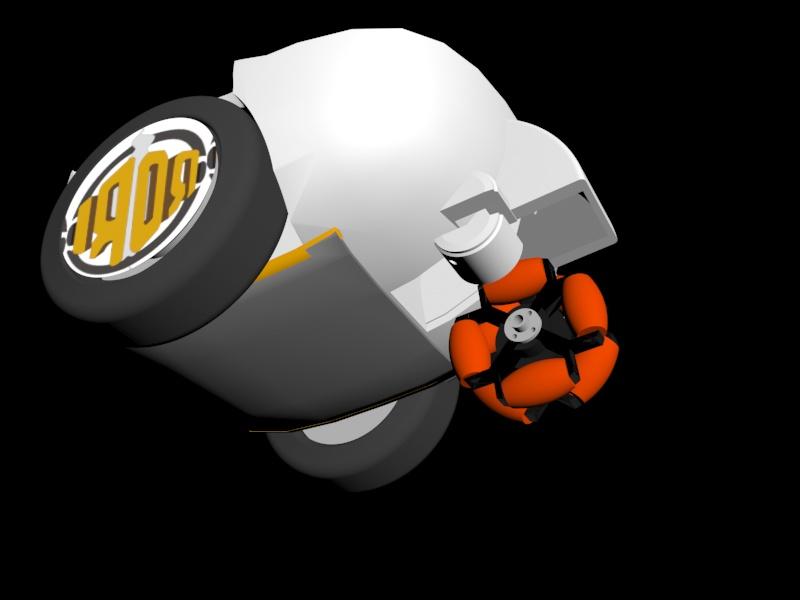
- for the rear wheel using an omni wheel, this wheel is custom, made with 3d print and the file is available and ready to print.
- install other parts, base has ready, now intall another part, first install the battery charger, this is placed behind the dc motor bracket.
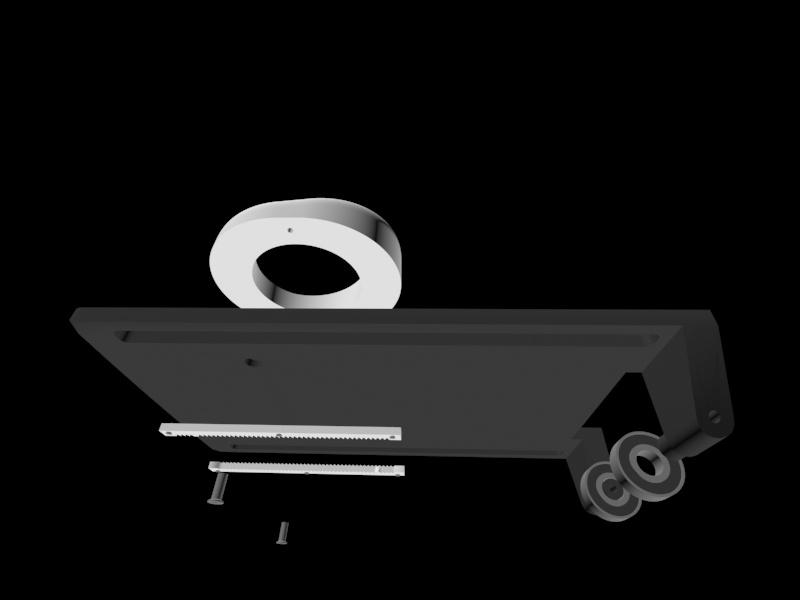
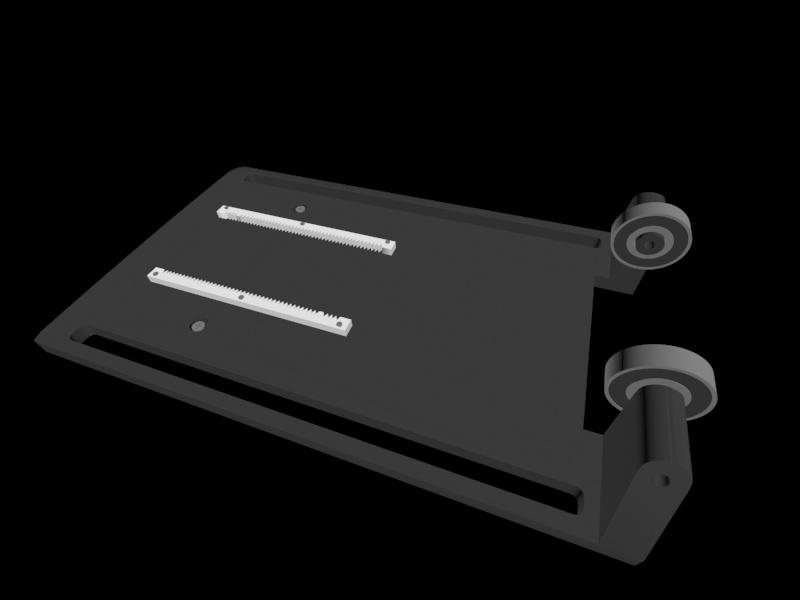
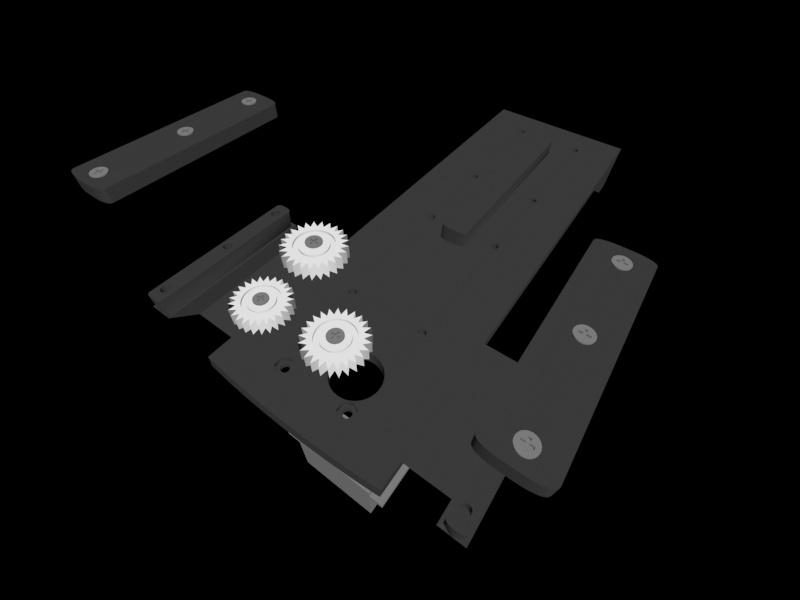
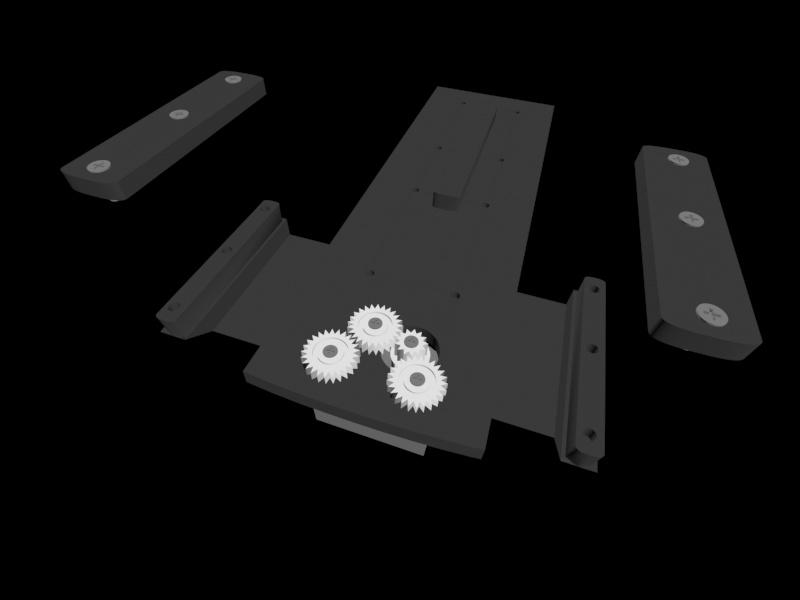
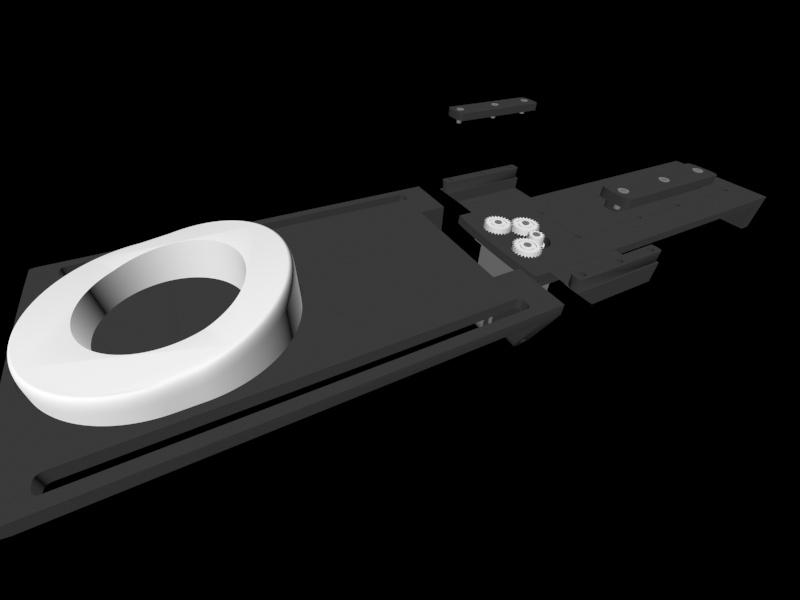
- next slider coffee tray, this slider is installed above the battery charger and DC motor, the slider coffee tray part is ready to print on the .stl file, you just need to assemble, install the gear and servo 360 degrees to the bracket that is already available.
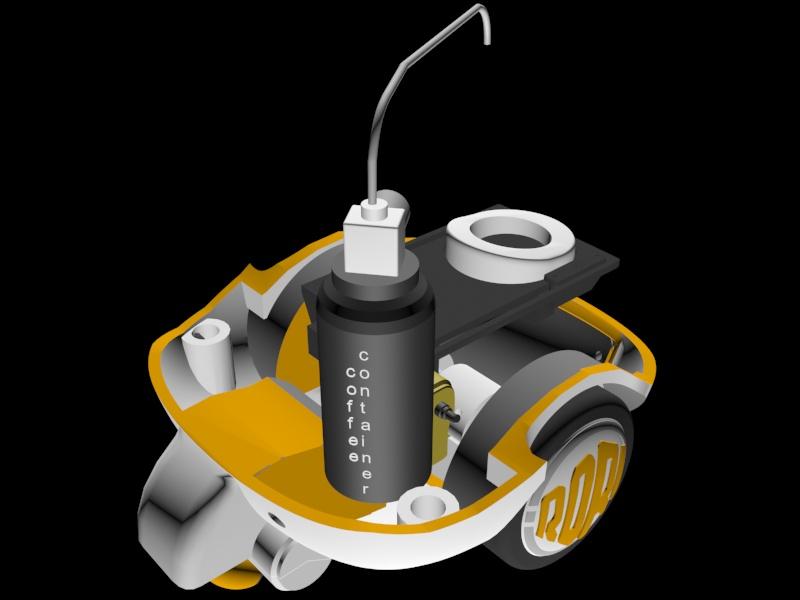
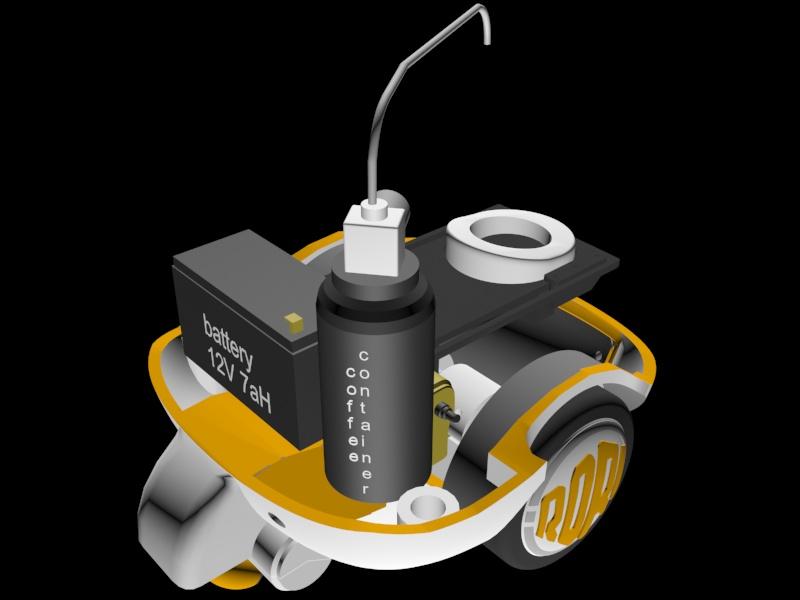
- then install the coffee container that has been installed with the pump motor and pipe, make sure the length of the pipe matches the distance to where the cup is placed, container bottles are thermos bottles that are widely available in the market, adjust the height and size of the bottle so that it can fit into the robot's body.
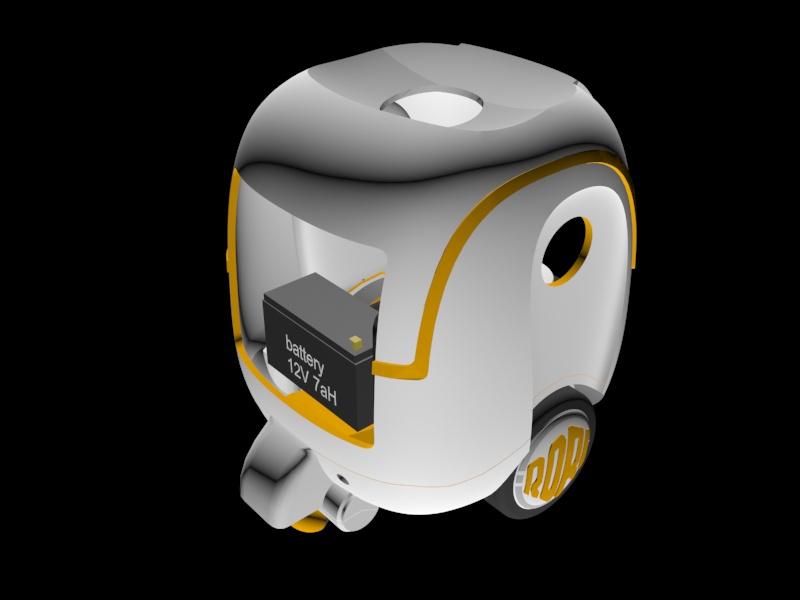
- then install the battery next to the bottle container
- all parts have been stored in the robot body, then install the robot body case, bolt holes are available to strengthen the robot body and base.
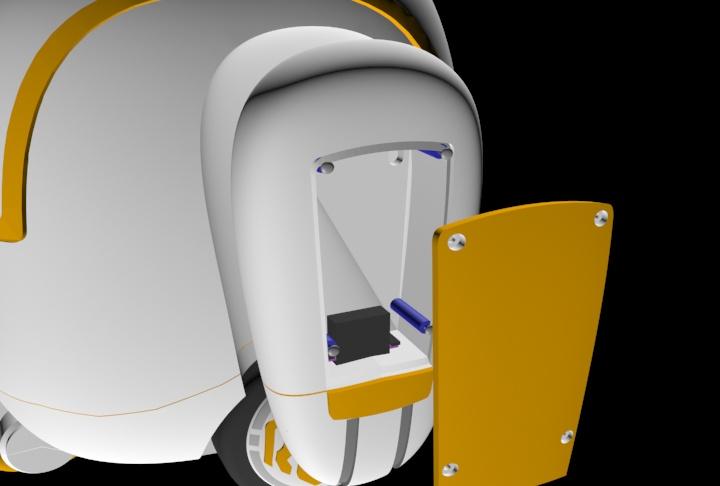
- make sure the coffee tray slider fits into the door hole, it's better to make the trial tray move out make sure there are no problems, if there is no problem, it's time to install the front door in the 3d printing part, there is already a bracket for the front pin and a servo bracket where the std servo must be installed 180degre.
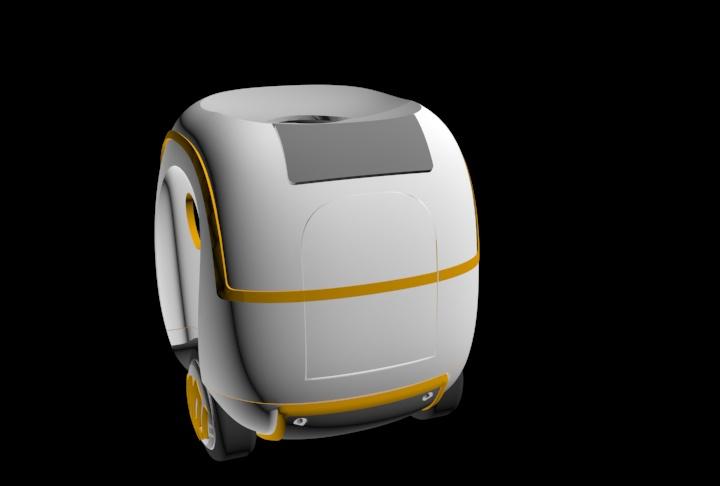
- and at the back, just install the back door, the back door is made manually.
- After installing the body, then installing the hands, there is further information on assembling the hands in the next stage.
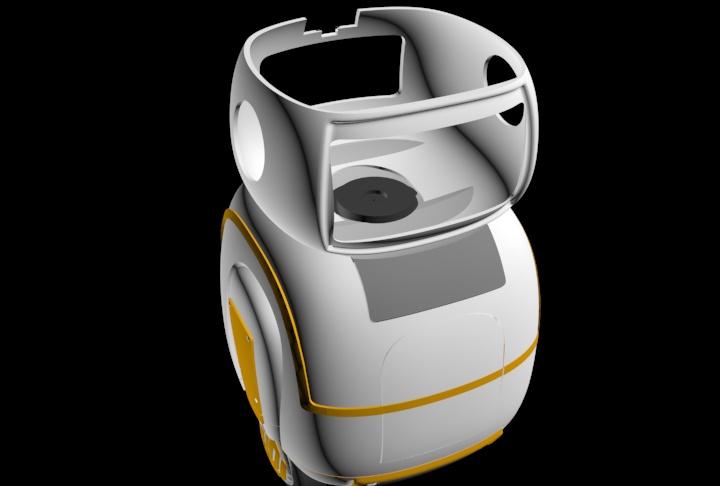
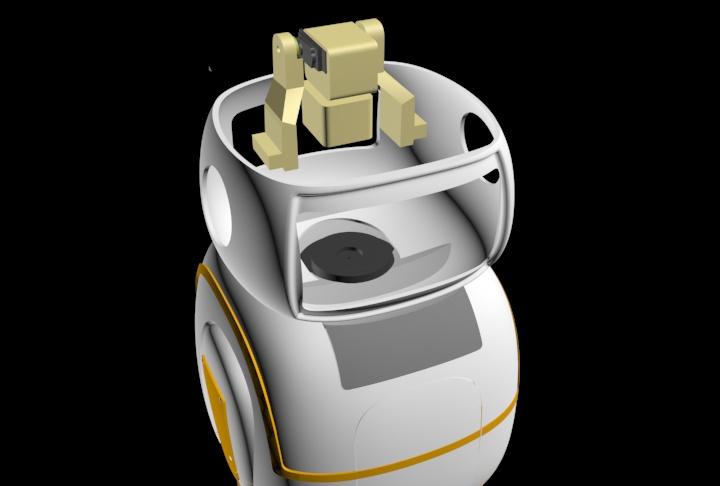
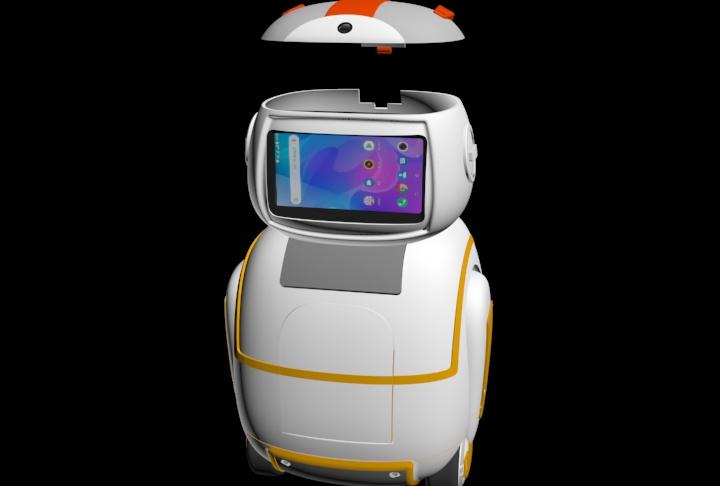
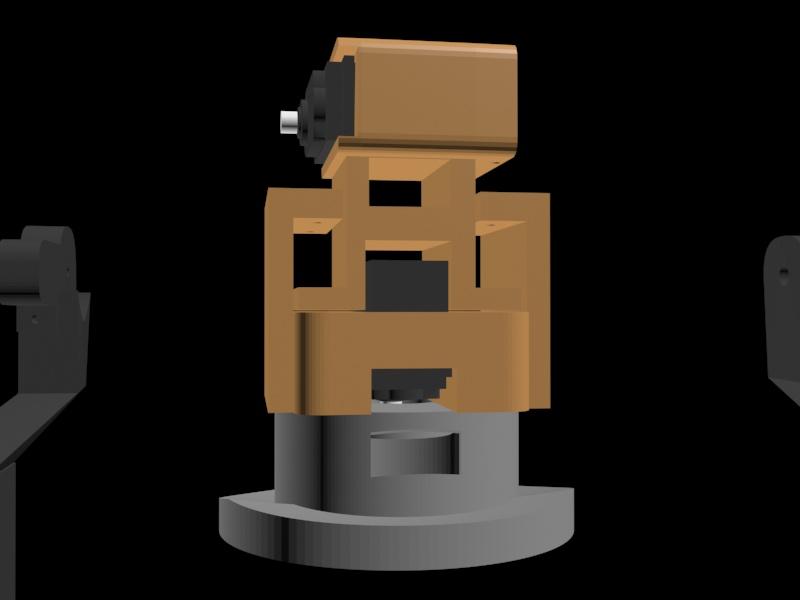
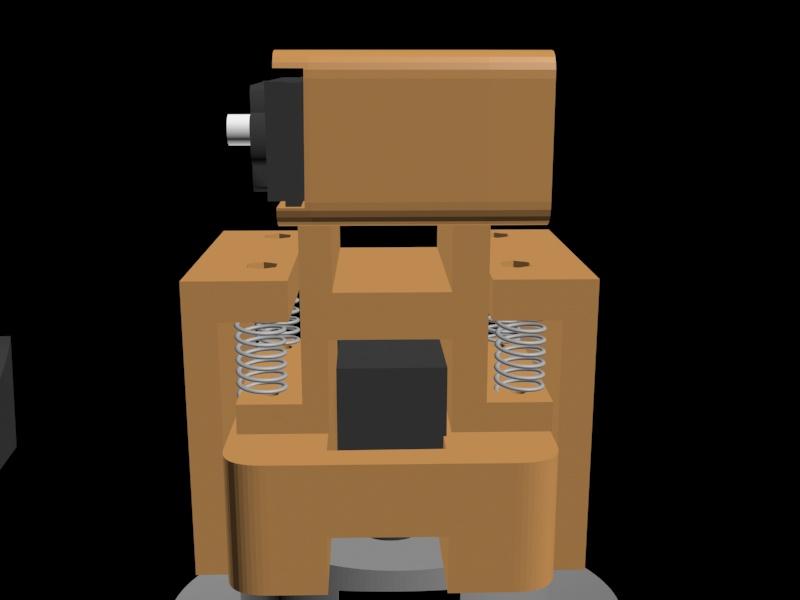
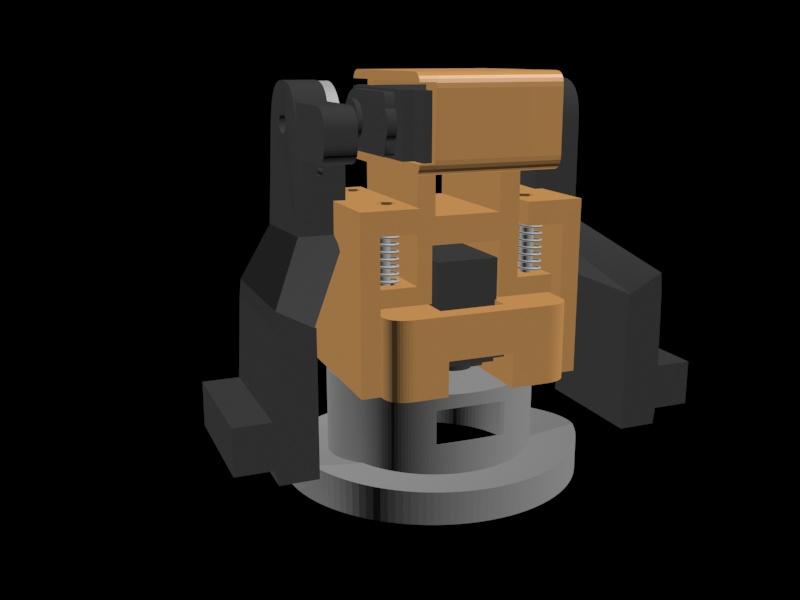
- Next install the head, to install the head there are three steps that must be done, namely installing the neck on the robot body, then installing the head, and finally installing the mechanical neck, this mechanical neck is available in the 3d print file, you just print and assemble it by installing 2 std servo 180degre.
- install other parts on the head, the ears are installed on the left and right of the robot's head and it's manual, the rear door is also installed manually, all parts are ready to be printed in a 3d file
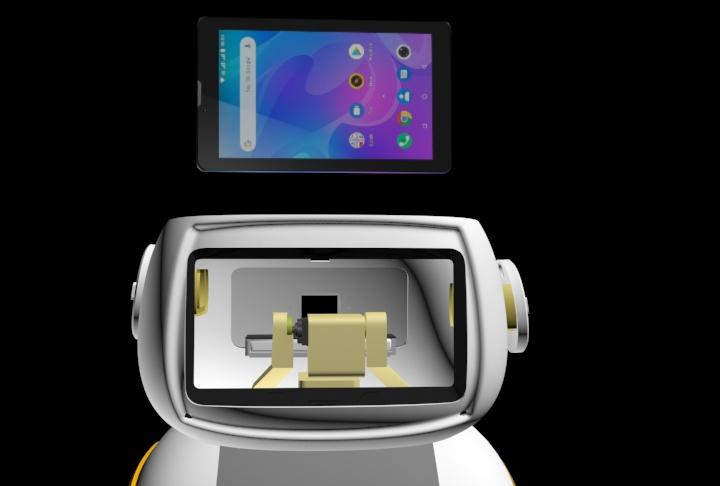
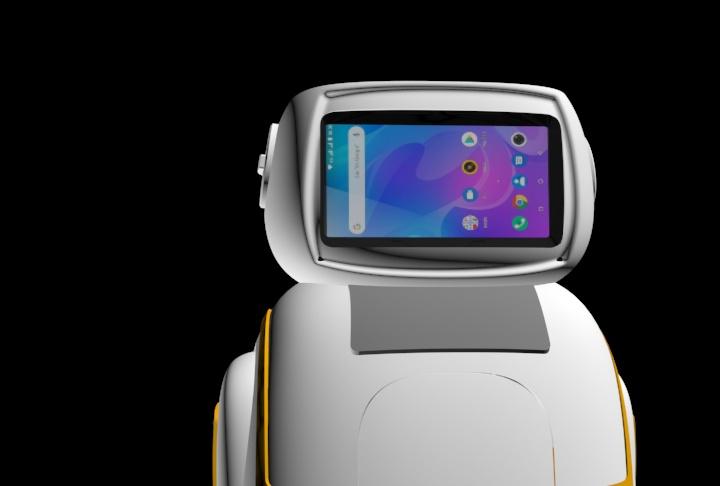
- for the face we need a 7inch android tab, but we have to install the face frame first, it is installed from the inside of the robot's head, you can use glue to install this frame, after it is installed there is only a new tab that has been made apps or facial animations robot.
# hand detail (on the picture)
- The hand consists of 2 parts, namely the upper hand and the palm, consisting of 3 servos from each hand, the first servo is for the shoulder which is located on the robot body, the second servo is at the tip of the upper hand for palm rotation, and the last is a micro servo for move finger
- you need to open the hand cover to attach the hand to the robot body, just attach the servo shaft to the hand hole and screw in
- install the std servo at the bottom of the upper hand part towards the palm of the robot's hand.
- on the palm of the hand you need to install the micro servo 180 degrees on the finger, then install it on the palm of the hand and close it with the cover that is already available and secure it with a few small screws
- attach all the hand parts by attaching the palm of the pliers to the soft servo that was installed at the bottom of the upper hand part.
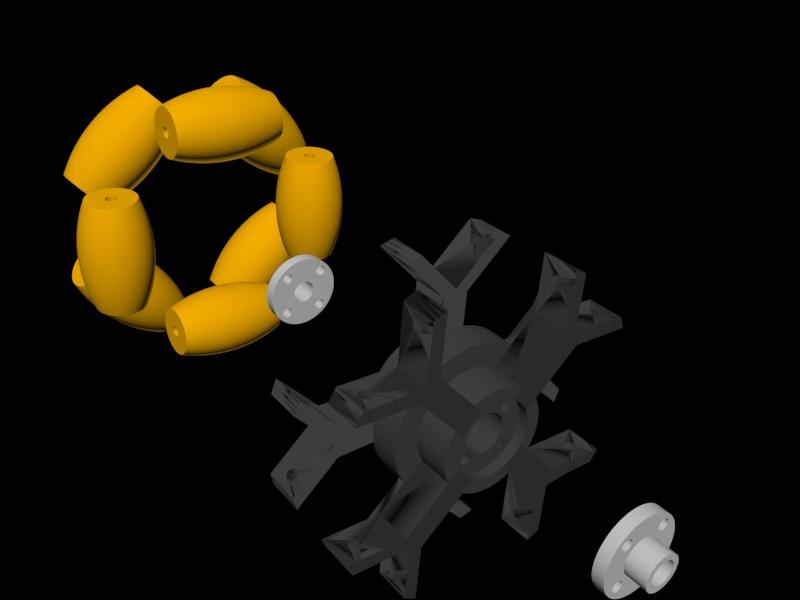
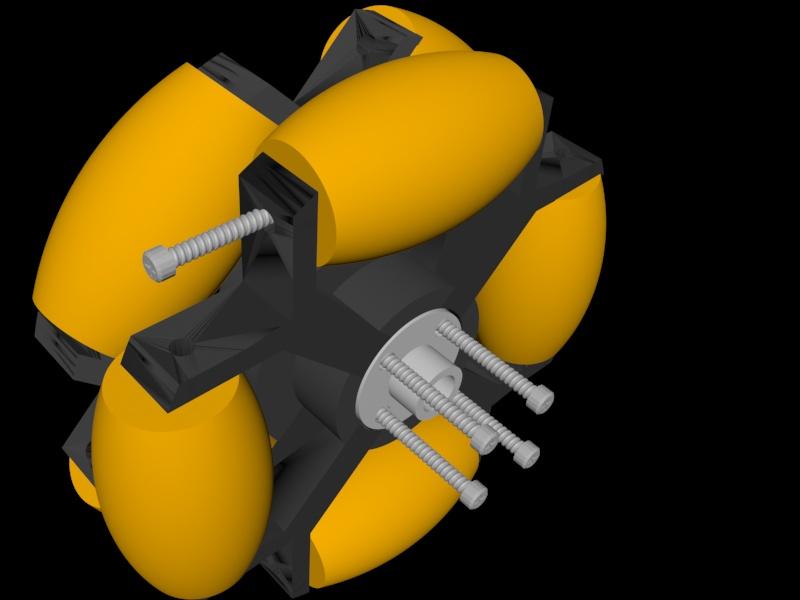
#Omni Wheel detail (on the picture)
- Print the part of omni wheel, there are 11 part, 3part for frame, and 8 part the little wheels, you need 2 alumunium servo shaft.
- Look at the picture how to install all the part and be strengthened with screws.
#Neck detail (on the picture)
- Print the 5 part of neck, you need 4 little spring diameter 6mm, 2cm height and couple a long screw.
- look at picture how to install all part.
#Slider Tray Coffee detail (on the picture)
- Print all this part on .STL file in this Instructables, you need bearing and gear set
- look at the picture how to install this part.
Downloads
Put Together and Wiring
.gif)
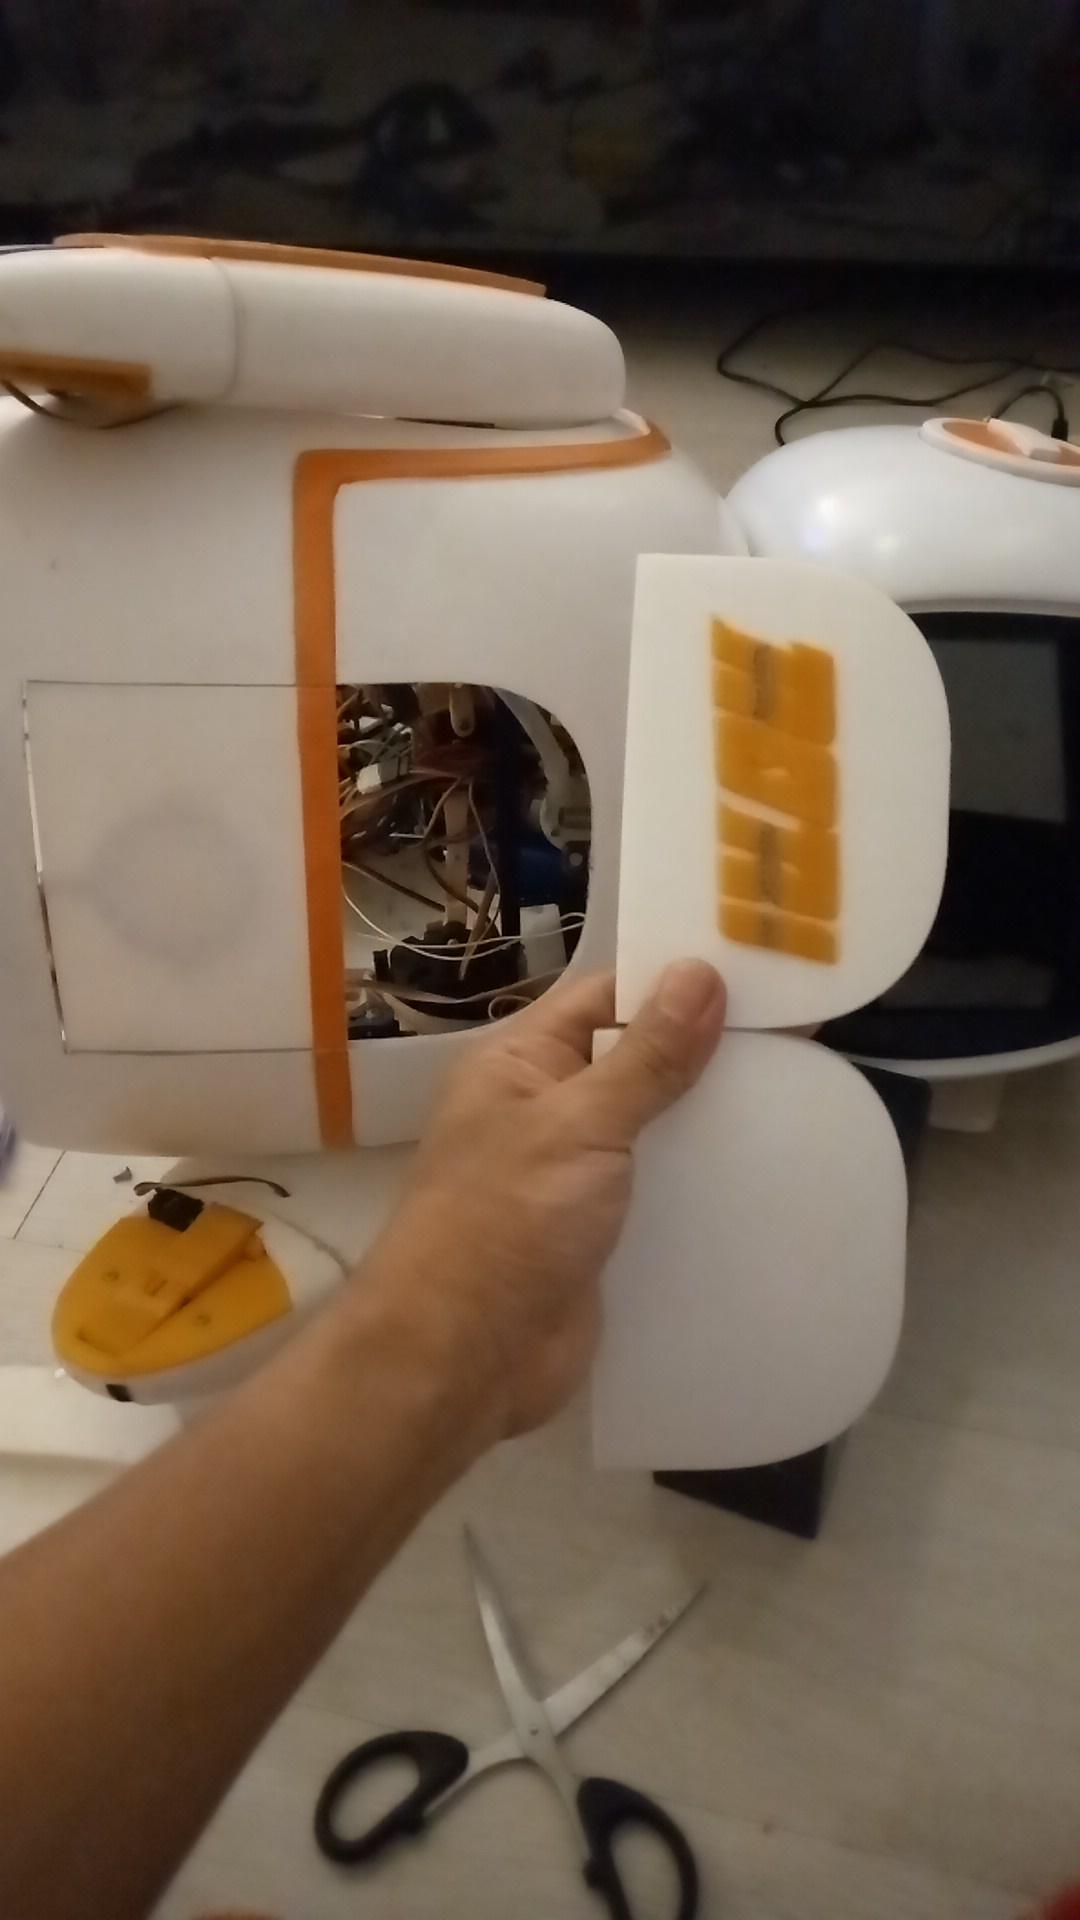


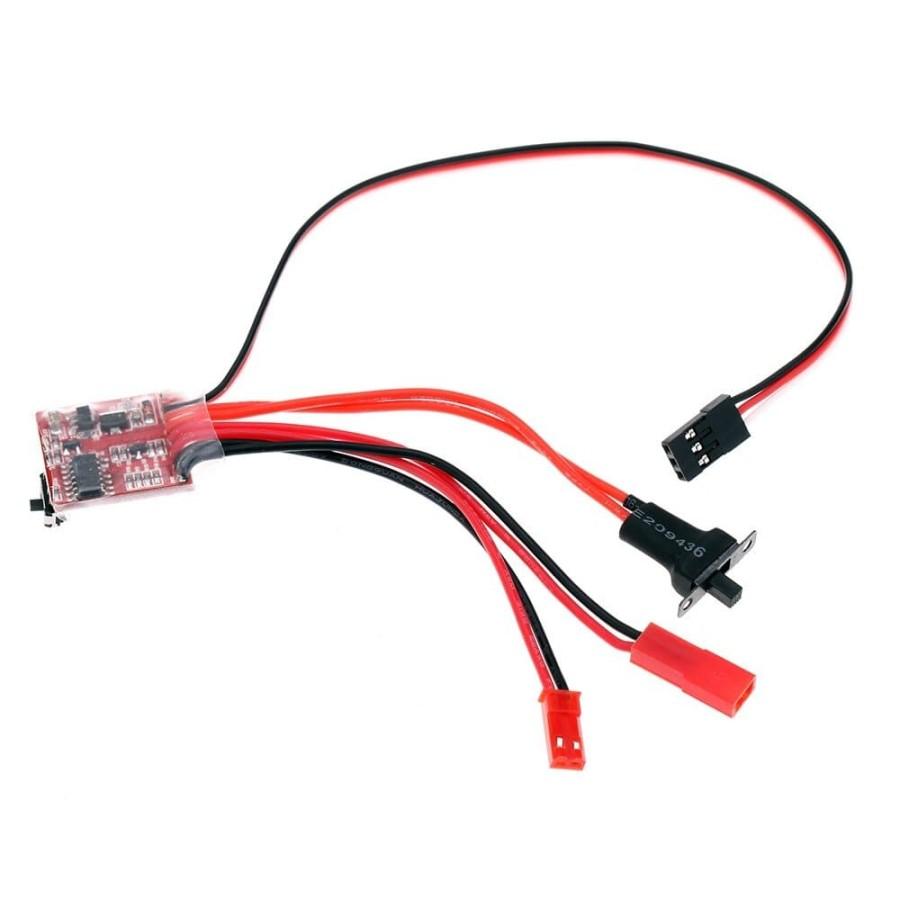
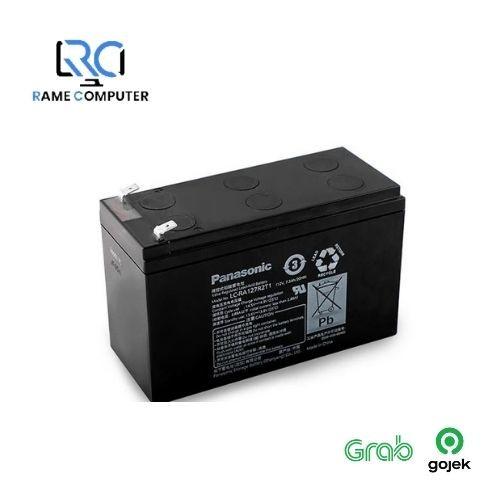

All part is ready, now it's time to connect everything including small parts, and also wiring, This robot has several programs, depending on the needs of its use, for these instructables I will explain the manual mode using RX TX, using the remote from the radio master and also the receiver, in the picture I describe a little wiring in a simple way, power all from the battery to powered all the hardware that add in the robot.
power vcc battery goes into the UBEC input as well as the gnd goes into the ubec gnd input
output UBEC to pin bind receiver , input ESC and vin Arduino for + and gnd to pin gnd arduino pin.
- ESC 1 for pump motor
- ESC 2 for Motor wheel R
- ESC 3 for Motor wheel L
- ESC2 pin out motor R to pin CH1 receiver
- ESC3 pin out motor L to pin CH2 receiver
- Servo 1 to CH3 receiver
- Servo 2 to CH4 receiver
- Servo 3 to CH5 receiver
- Servo 4 to CH6 receiver
- Servo 5 to CH7 receiver
- Servo 6 to CH8 receiver
- Servo 7 to CH9 receiver
- Servo 8 to CH10 receiver
- Servo 9 to CH11 receiver
- Servo 10 to CH12 receiver
Hardware & Software
.gif)


# Software installation
System software , the Robot is multy mode, is autonomus, manual control and semi controller, for autonomus i use arduino and Ez-board with a couple sensor who need to apply on the robot, for serving coffee we just need a water pump and coffee container bottle who replace on the robot body, for manual control use TX Remote Controller and Rx receiver module, the controller use Radio master remote 16 channel with receiver, just add the pin servo to receiver pin, for DC motor need ESC brushed motor, Robot uses a 12V battery powered connected to Ubec as power management.
The led effect use a led ring neopixle 16bit this led installation in coffee door.
#code for LED ring 16bit:
int red = 50; // Red part of LED colour 0 to 256
int green = 10; // Green part of LED colour 0 to 256
int blue = 0; // Blue part of LED colour 0 to 256
int no_of_leds = 24; //set this to the number of LEDs on your Ring
int mode = 0; //0 = all leds lit, 1 = spin
int led_pos = 1; //position of led to be lit (used in spin mode)
char BluetoothData; // the data received from bluetooth serial link
int interval=40; //in milliseconds. Determines speed of updates & spin effect,
unsigned long lastUpdateTime=0;
void setup() {
pinMode(8, OUTPUT); //Pin 8 used for led data line
digitalWrite(8,LOW);
//Initiate Serial for Bluetooth Communication
Serial.begin(9600);
}
void loop() {
//Process any info coming from the bluetooth serial link
if (Serial.available()){
BluetoothData=Serial.read(); //Get next character from bluetooth
if(BluetoothData=='R') red=Serial.parseInt(); //Read Red value
if(BluetoothData=='G') green=Serial.parseInt(); //Read Green Value
if(BluetoothData=='B') blue=Serial.parseInt(); //Read Blue Value
if(BluetoothData=='A') mode=1; //Spin Mode
if(BluetoothData=='a') mode=0; //All Leds On Mode
if(BluetoothData=='S') interval=150-Serial.parseInt(); //Read Interval
if(BluetoothData=='N') no_of_leds=Serial.parseInt(); //Read Number of LEDs
}
//See if its time to update the LEDs
unsigned long t=millis();
if ((t-lastUpdateTime)>interval){
colorRing(); //update the LED colors
lastUpdateTime=millis();
led_pos++; //point to next led for spin effect
if (led_pos>no_of_leds) led_pos=1; //go back to the first led when the end is reached
}
}
void colorRing(){
// Assembly code to update LED colors
// Loops though all LEDs in order
// For each LED, 8 Green bits are sent first, followed by the 8 red bits and finally the 8 blue bits
// The Most Signifiacnt Bit (MSB) is sent first
cli(); //dissable interupts whilst we update LEDs
asm("mov R17,%0 \n\t": "+r" (no_of_leds)); //Store number of leds in Register 17
asm("mov R22,%0 \n\t": "+r" (led_pos)); //Store LED lit position in Register 22
asm("mov R21,%0 \n\t": "+r" (mode)); //Store mode in Register 21
asm("LedLoop:\n\t"); //Start of Loop for each LED
//Set color for LED
asm("cpi R21,0x00 \n\t"); //See if we are in 'all on' mode
asm("breq on\n\t"); //if so, all LEDs are lit -> jump to LED on code
asm("cp R22,R17 \n\t"); //else we see if this LED is the one to be lit
asm("brne off\n\t"); //if not, we jump to the LED off code.
asm("on: \n\t"); // LED on
asm("mov R18,%0 \n\t": "+r" (red)); //Store Red part of Color in Register 18
asm("mov R19,%0 \n\t": "+r" (green)); //Store Green part of Color in Register 19
asm("mov R20,%0 \n\t": "+r" (blue)); //Store Blue part of Color in Register 20
asm("jmp cont \n\t");
asm("off: \n\t"); // LED off
asm("ldi R18,0x00 \n\t"); // Red = 0
asm("ldi R19,0x00 \n\t"); // Green = 0
asm("ldi R20,0x00 \n\t"); // Blue = 0
asm("cont: \n\t");
///// GREEN - Send green bits out to Pin 8
asm("ldi R16,0x08 \n\t"); // Number of green bits (8) to send put in Register R16
asm("GreenLoop: \n\t"); // Start of Loop for green bits
asm("sbrs R19,7 \n\t"); //Test bit 7 of the green byte, Skip next command if a 1
asm("jmp GreenZero \n\t"); //jump over the write 'one' code
//write a 'one' to the Leds data line
asm("sbi 5,0 \n\t"); //Set Port B Bit 0 (aka Output Pin 8) to High
asm("nop\n\t""nop\n\t""nop\n\t""nop\n\t""nop\n\t""nop\n\t""nop\n\t""nop\n\t""nop\n\t""nop\n\t");
asm("cbi 5,0 \n\t"); //Set Port B Bit 0 to Low
asm("nop\n\t""nop\n\t""nop\n\t""nop\n\t""nop\n\t"); //Wait a few clock cycles
asm("jmp GreenCont \n\t"); //jump over the write 'zero' code
//write a 'zero' to the Leds data line
asm("GreenZero:\n\t");
asm("sbi 5,0\n\t"); //Set Port B Bit 0 (aka Output Pin 8) to High
asm("nop\n\t""nop\n\t""nop\n\t""nop\n\t""nop\n\t"); //Wait a few clock cycles
asm("cbi 5,0\n\t"); //Set Port B Bit 0 to Low
asm("nop\n\t""nop\n\t""nop\n\t""nop\n\t""nop\n\t""nop\n\t""nop\n\t""nop\n\t");
asm("GreenCont:\n\t");
asm("lsl R19\n\t"); //Rotate the green Byte so that we point to next bit
asm("dec R16\n\t"); //Decrease the count of green bits left to do
asm("cpi R16,0x00\n\t"); //See if we have counted down to zero
asm("brne GreenLoop\n\t"); //If not zero, Loop back and do the next green bit
///// RED - Send red bits out to Pin 8
asm("ldi R16,0x08 \n\t"); // Number of red bits (8) to send put in Register R16
asm("RedLoop: \n\t"); // Start of Loop for Red bits
asm("sbrs R18,7 \n\t"); //Test bit 7 of the Red byte, Skip next command if a 1
asm("jmp RedZero \n\t"); //jump over the write 'one' code
//write a 'one' to the Leds data line
asm("sbi 5,0 \n\t"); //Set Port B Bit 0 (aka Output Pin 8) to High
asm("nop\n\t""nop\n\t""nop\n\t""nop\n\t""nop\n\t""nop\n\t""nop\n\t""nop\n\t""nop\n\t""nop\n\t");
asm("cbi 5,0 \n\t"); //Set Port B Bit 0 to Low
asm("nop\n\t""nop\n\t""nop\n\t""nop\n\t""nop\n\t");
asm("jmp RedCont \n\t"); //jump over the write 'zero' code
//write a 'zero' to the Leds data line
asm("RedZero:\n\t");
asm("sbi 5,0\n\t"); //Set Port B Bit 0 (aka Output Pin 8) to High
asm("nop\n\t""nop\n\t""nop\n\t""nop\n\t""nop\n\t");
asm("cbi 5,0\n\t"); //Set Port B Bit 0 to Low
asm("nop\n\t""nop\n\t""nop\n\t""nop\n\t""nop\n\t""nop\n\t""nop\n\t""nop\n\t");
asm("RedCont:\n\t");
asm("lsl R18\n\t"); //Rotate the Red Byte so that we point to next bit
asm("dec R16\n\t"); //Decrease the count of red bits left to do
asm("cpi R16,0x00\n\t"); //See if we have counted down to zero
asm("brne RedLoop\n\t"); //If not zero, Loop back and do the next Red bit
///// BLUE - Send blue bits out to Pin 8
asm("ldi R16,0x08 \n\t"); // Number of Blue bits (8) to send put in Register R16
asm("BlueLoop: \n\t"); // Start of Loop for Blue bits
asm("sbrs R20,7 \n\t"); //Test bit 7 of the Blue byte, Skip next command if a 1
asm("jmp BlueZero \n\t"); //jump over the write 'one' code
//write a 'one' to the Leds data line
asm("sbi 5,0 \n\t"); //Set Port B Bit 0 (aka Output Pin 8) to High
asm("nop\n\t""nop\n\t""nop\n\t""nop\n\t""nop\n\t""nop\n\t""nop\n\t""nop\n\t""nop\n\t""nop\n\t");
asm("cbi 5,0 \n\t"); //Set Port B Bit 0 to Low
asm("nop\n\t""nop\n\t""nop\n\t""nop\n\t""nop\n\t");
asm("jmp BlueCont \n\t"); //jump over the write 'zero' code
//write a 'zero' to the Leds data line
asm("BlueZero:\n\t");
asm("sbi 5,0\n\t"); //Set Port B Bit 0 (aka Output Pin 8) to High
asm("nop\n\t""nop\n\t""nop\n\t""nop\n\t""nop\n\t");
asm("cbi 5,0\n\t"); //Set Port B Bit 0 to Low
asm("nop\n\t""nop\n\t""nop\n\t""nop\n\t""nop\n\t""nop\n\t""nop\n\t""nop\n\t");
asm("BlueCont:\n\t");
asm("lsl R20\n\t"); //Rotate the Blue Byte so that we point to next bit
asm("dec R16\n\t"); //Decrease the count of blue bits left to do
asm("cpi R16,0x00\n\t"); //See if we have counted down to zero
asm("brne BlueLoop\n\t"); //If not zero, Loop back and do the next Blue bit
// See if we have more LEDs to update
asm("dec R17\n\t"); //Decrease the count of LEDs left to update
asm("cpi R17,0x00\n\t"); //See if we have counted down to zero
asm("breq Done\n\t"); //If zero, jump to Done
asm("jmp LedLoop\n\t"); //Else, send the data for the next LED in the chain
asm("Done:\n\t"); //Done, awesome!
sei(); //enable interupts again
}
Screen Interface

.gif)


# Interface screen for face
For interface screen use a java code to make apps include a animation robot face, menus of caffee, choice tuch and animation for coffee prosess, or just add video face animation.
Finishing


# Finish.....Your Robo is ready to act
Sorry if this Instructables is not complete tutorial because is a lot a steps and file can't upload on this site because unsupport file, and large size file, but you can ask me for detail.
Thankyou, Eric Dirgahayu.