Rushtp #7.1 - ISpindel - Getting the Data Out and Streaming With a DIY ESP8266 ISpindelink (Rev2)
by Rushtp in Circuits > Microcontrollers
714 Views, 1 Favorites, 0 Comments
Rushtp #7.1 - ISpindel - Getting the Data Out and Streaming With a DIY ESP8266 ISpindelink (Rev2)
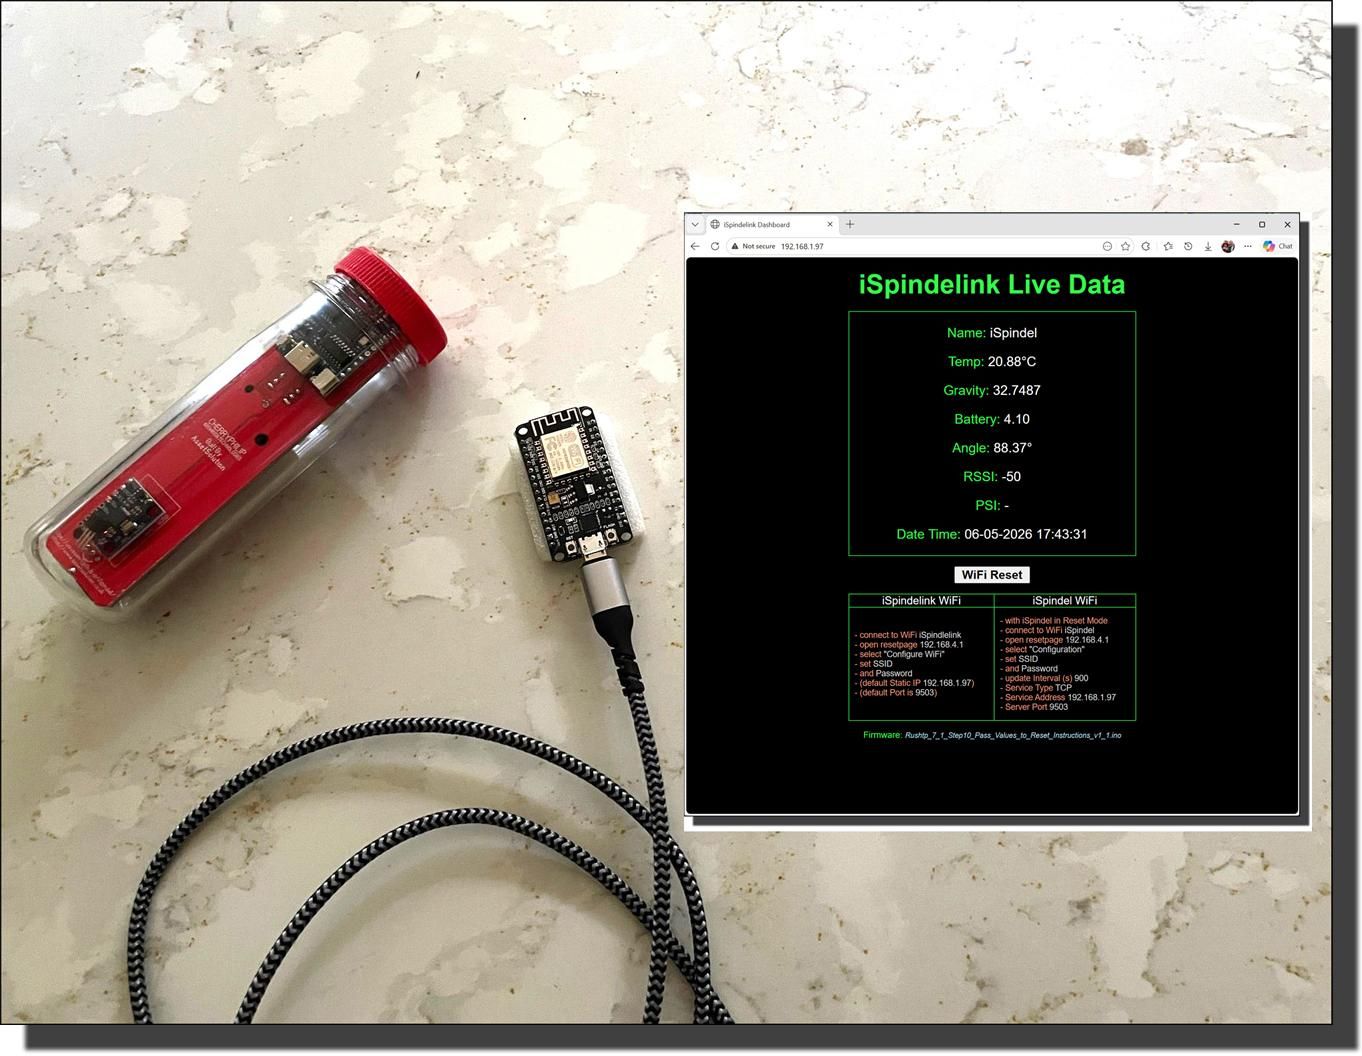
Background
The iSpindel has a number of ways to transmit it’s data out. Service Types are built into the software to allow data to be retrieved. The most common one is HTTP (or HTTPS), used to send data to platforms like Brewfather, BrewSpy, Brewer's Friend, or Monitor.Beer.
Before going any further I suggest you take a look at these references...Acknowledgments & References:
- How Sockets Actually Work - From Your Browser to the Backend - by ByteMonk.
- Sockets and Client/Server Communication - by Jeff Chase (Duke University)
- TCP/IP Client Sockets - by Sujith’s Library
- Put Your iSpindel Into "Config Mode" - by Assetsolution.co.uk
- Installing ESP8266 Boards - by Welcome to ESP8266 Arduino Core's documentation
- ESP8266 ESP-12E NodeMCU - Hello world and blink function tests - by Jamesits
- A NTP Request on the ESP8266 including Daylight Saving Time - by Werner Rothschopf
- DateTime to string - by Arduino Stackexchange
- ConfigTime(MY_TZ, MY_NTP_SERVER); fails with WiFi.config(local_IP, gateway, subnet) - by AI Overview
- WifiManager a popular Arduino library for the ESP8266. - Google Search
- wifimanager for esp8266 what is it? - Google Search
- WiFiManager with ESP8266 - Autoconnect - Random Nerd Tutorials
- LittleFS.h what is it used for? - Google Search
- ESP8266 NodeMCU: Write Data to a File (LittleFS) - Random Nerd Tutorials
- Double Reset Detector - Stephen Denne
- Interface Multiple DS18B20s with ESP32 & Display Values Using Web Server - Shreepad Prabhu
- ESP8266 (ajax) update part of web page without refreshing - Manoj R Thakur
- Esp8266 stream data to xml page - Google Search
- What is JavaScript - OVHcloud
When the iSpindel is set to TCP it becomes a Socket Server sending out data packages at regular update intervals of 900 seconds (15 mins).
In this series of projects I will show how to be program a NodeMCU ESP8266 Development Board as a Socket Client to receive, process and display the Tilt, Temperature, Battery and Gravity data.
Then I’ll show how to stream the live data to a web page over your home network.
In the next project (Rushtp #7.2) project will show how to chart the data in Excel on any PC or Laptop on your local network.
Finally I’ll connect a 2.4" LCD Screen and show how to box the components in a cheap enclosure.
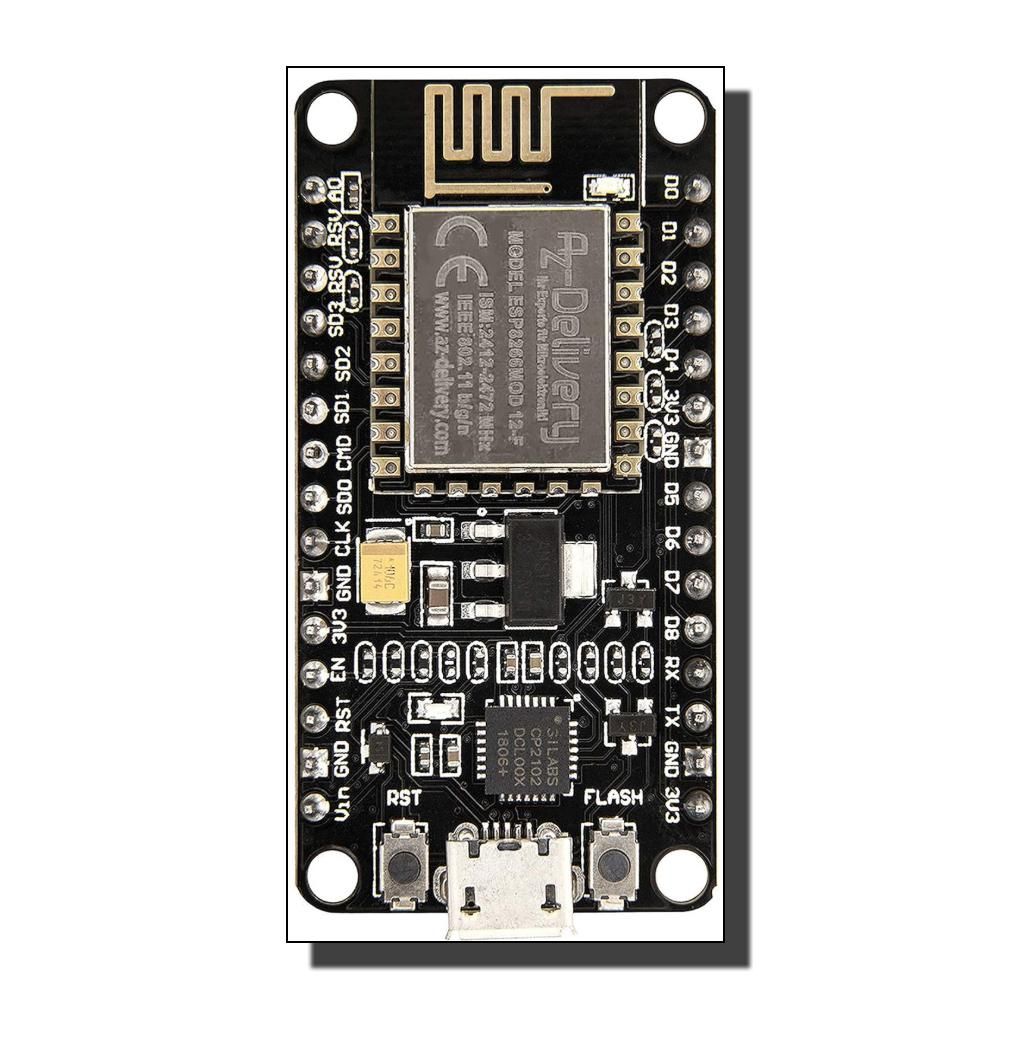
| Please Note: There are a number of ESP8266 Development Boards on the market and they have different pinouts. I am using the ESP8266 ESP-12F I2C Development Board that has the pinout shown here. You can use a board with a different pinout for the steps in This project (Rushtp #7.1) and the next (Rushtp #7.2). However, from the third project (Rushtp #7.3) onwards I’ll be creating a prototype circuit for a 2.4” TFT LCD Colour Screen SPI Serial Port Module ILI9341 3.3V Driver (again with a specific pinout). |
|
Table of Contents:
Supplies: List of project essentials
Step 1: iSpindel - Configuration Mode
Step 2: ESP8266 - Testing It Works
Step 3: ESP8266 - Listening For The iSpindel Data As A TCP Socket Client
Step 4: ESP8266 - Extracting Data Values With Arduinojson 7 DeserializeJson()
Step 5: ESP8266 - Adding A Date & Time in GMT/BST
Step 6: ESP8266 - Customising WifiManager
Step 7: ESP8266 -Merge With WifiManager
Step 8: ESP8266 - Streaming Live Readings On The Web Page
Step 9: ESP8266 - Reset Wifi Manager From A Button on the Web Page
Step 10: ESP8266 - Adding A Timestamp to Streamed Data
Step 11: Summing Up…
Supplies
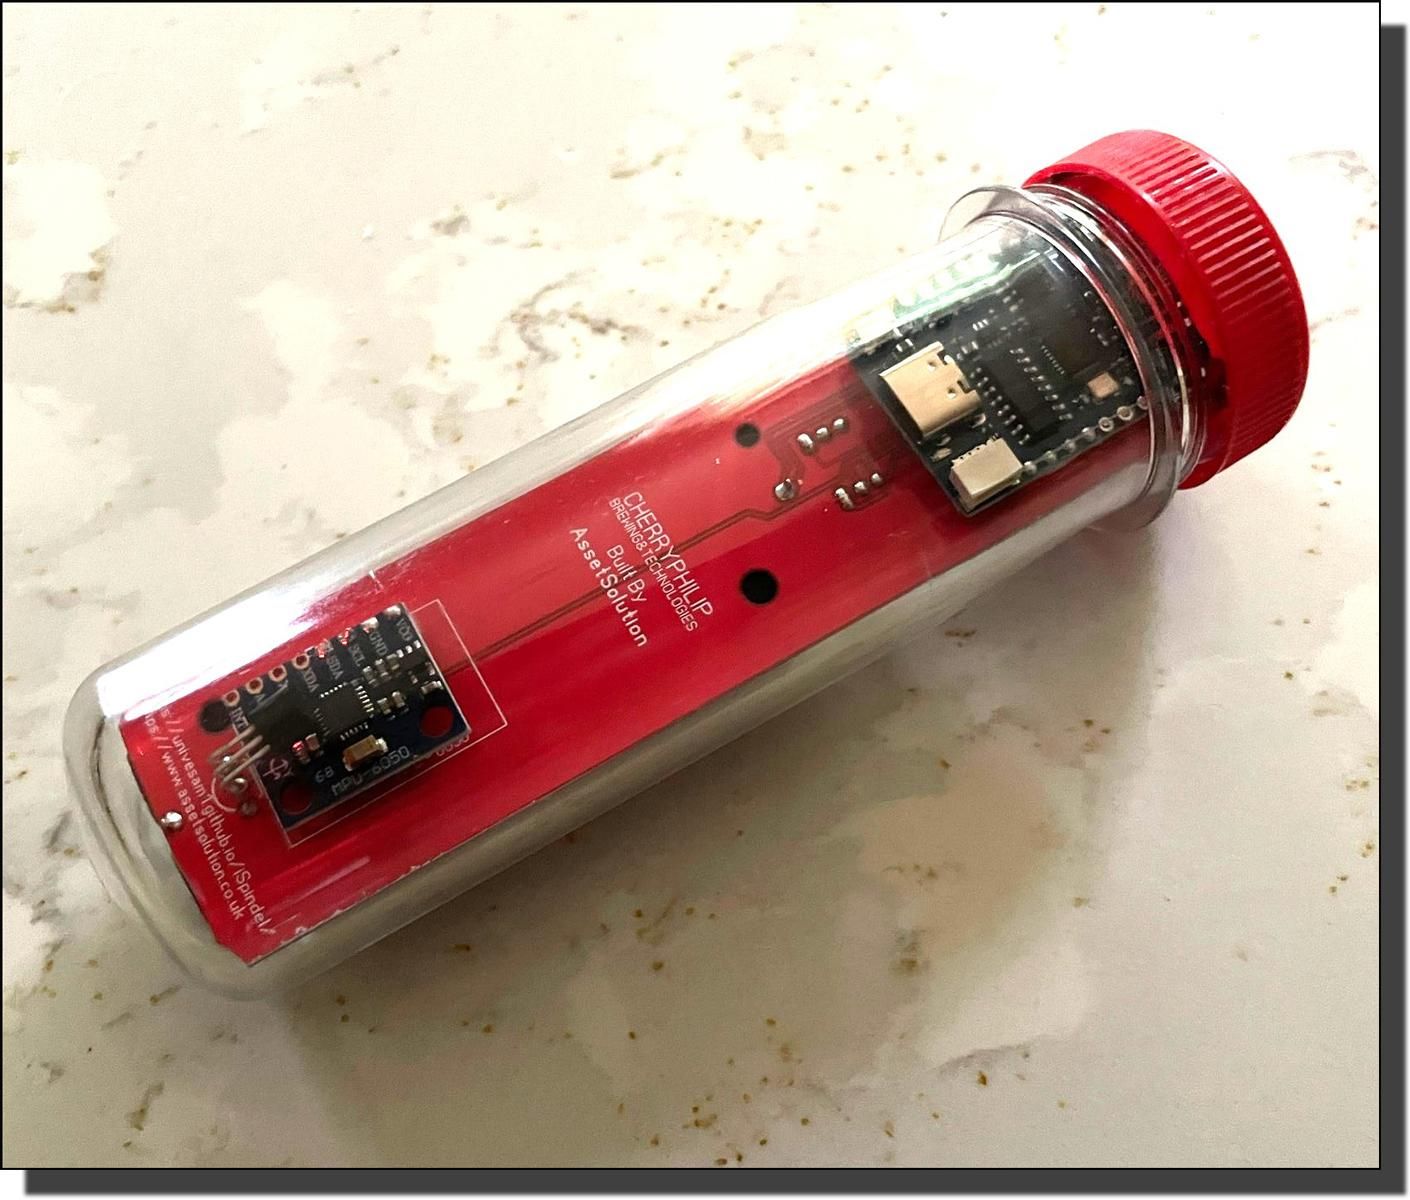
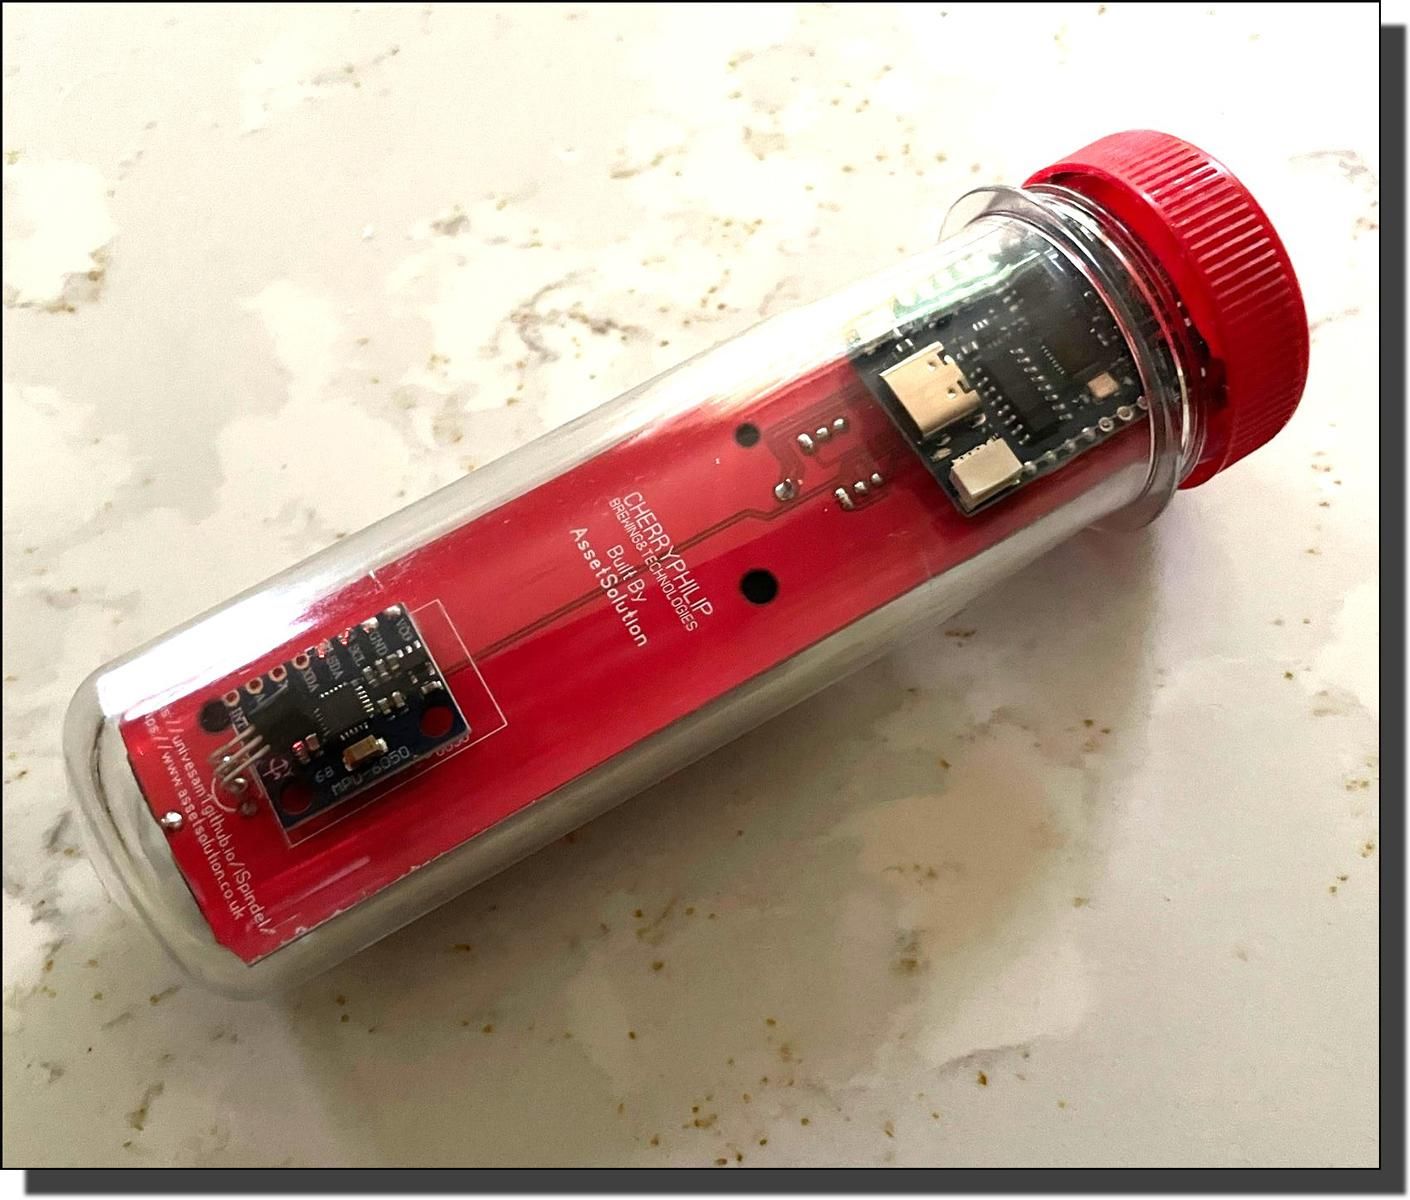
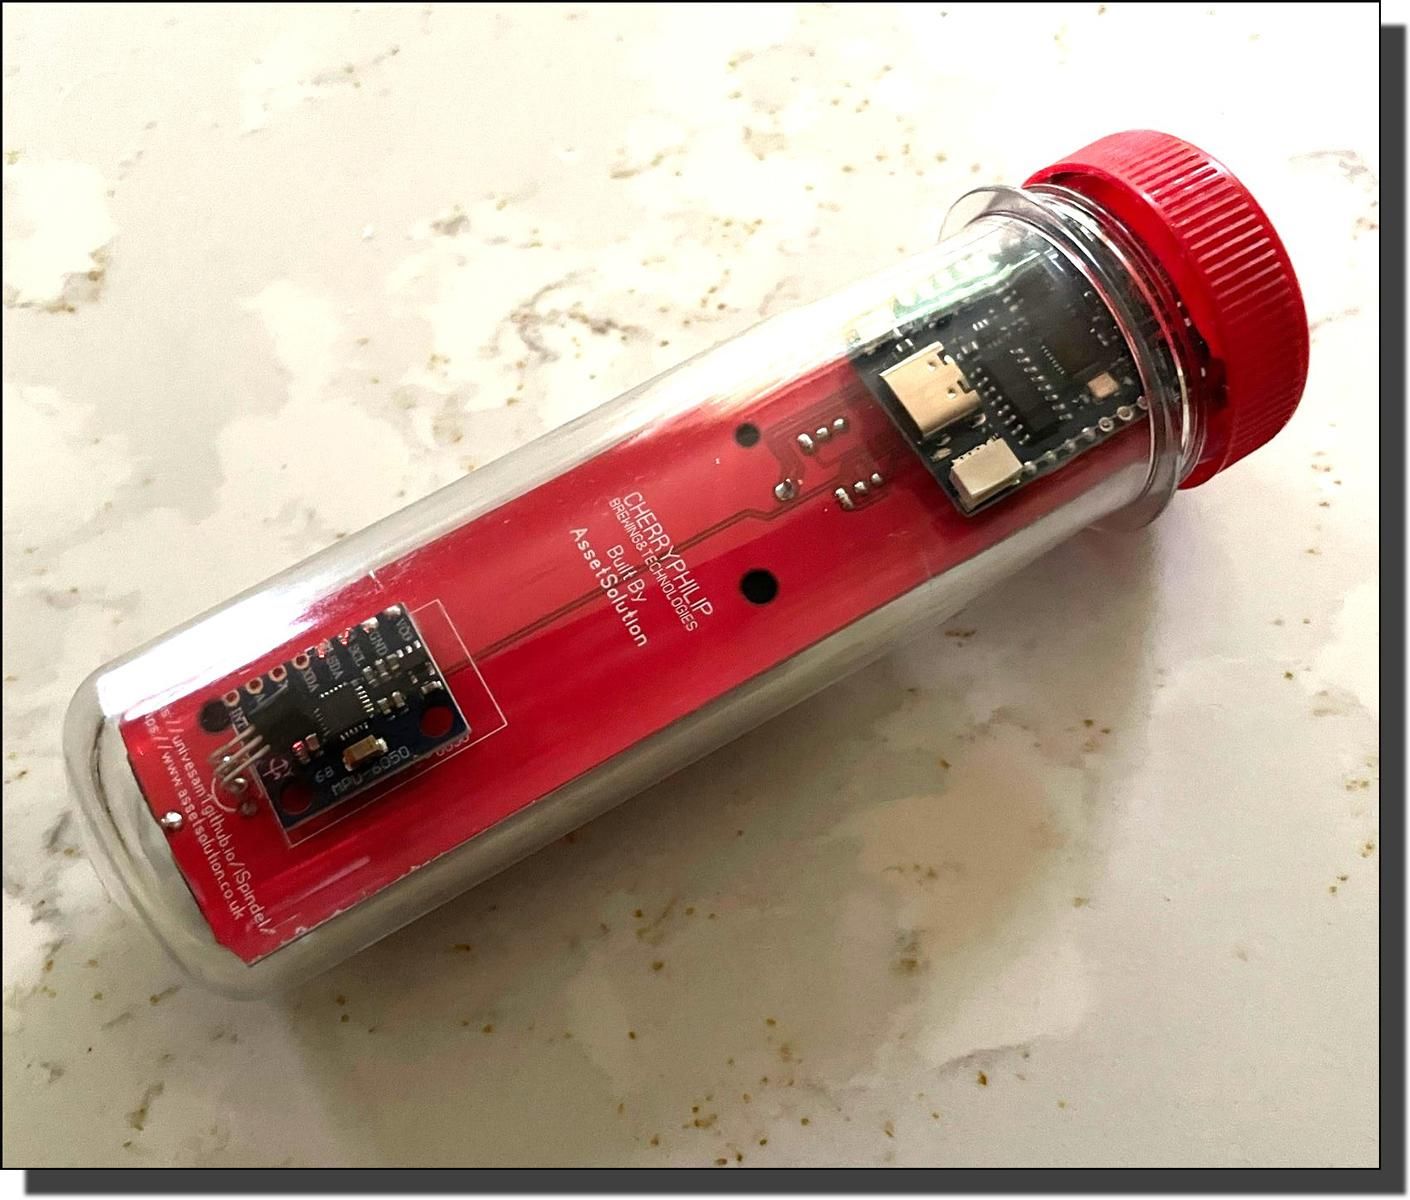
- iSpindel - WiFi Hydrometer - Calibrated, Built & Balanced
- ESP8266 - NodeMCU ESP8266 ESP-12F I2C Development Board
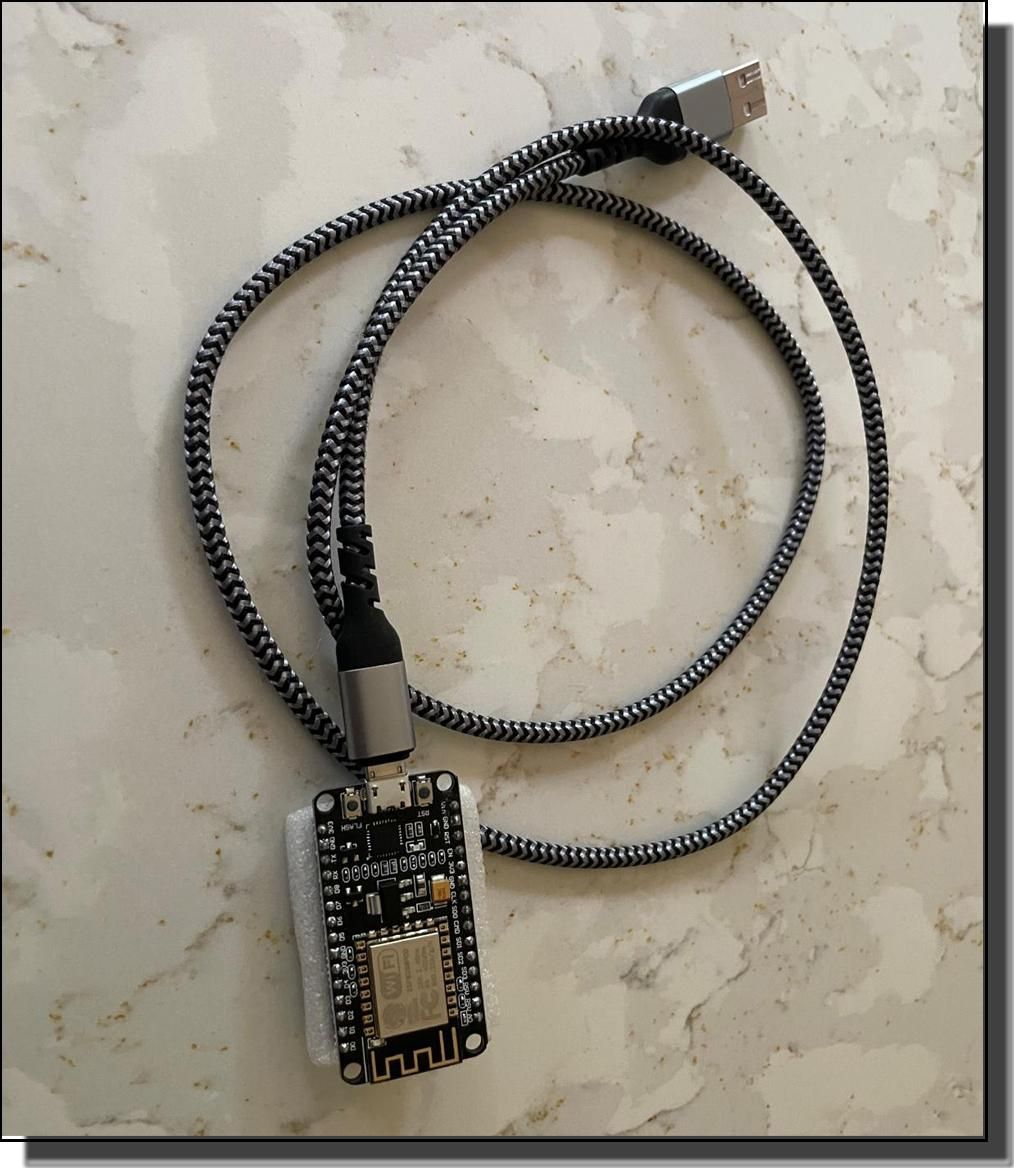
- USB Cable - Micro USB lead with data sync
- Arduino IDE - Download
ISpindel - Configuration Mode
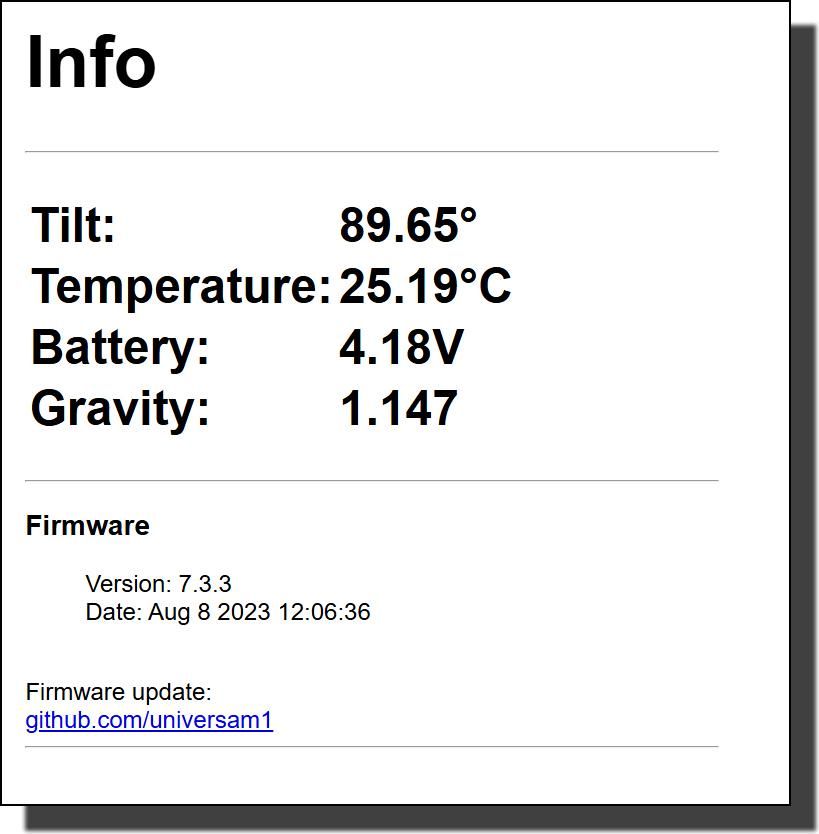
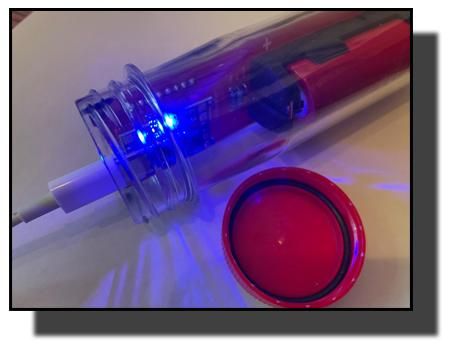
Connecting to your Local Network and set the iSpindel Service Type to TCP:
Access the iSpindel Config Mode:
Follow the instructions in the short video provided by Assetsolution.co.uk called First Put Your iSpindel Into "Config Mode"- Power On: Ensure the iSpindel is switched on.
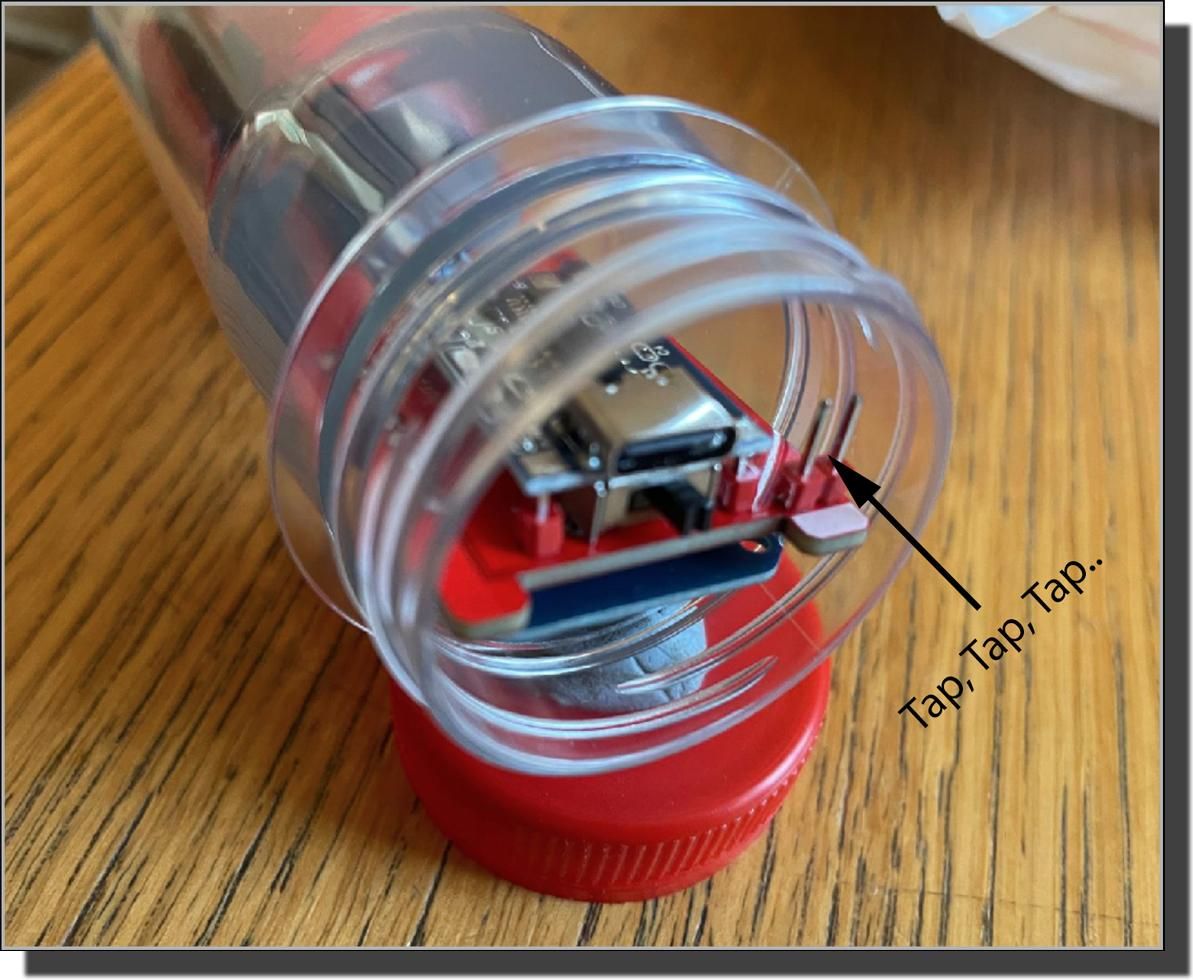
- Trigger Config Mode: short out the two reset pins on the pcb board 3–4 times rapidly.
- Confirm Activation: The LED on the board will start blinking continuously (roughly 1-second intervals), indicating the configuration portal is active.
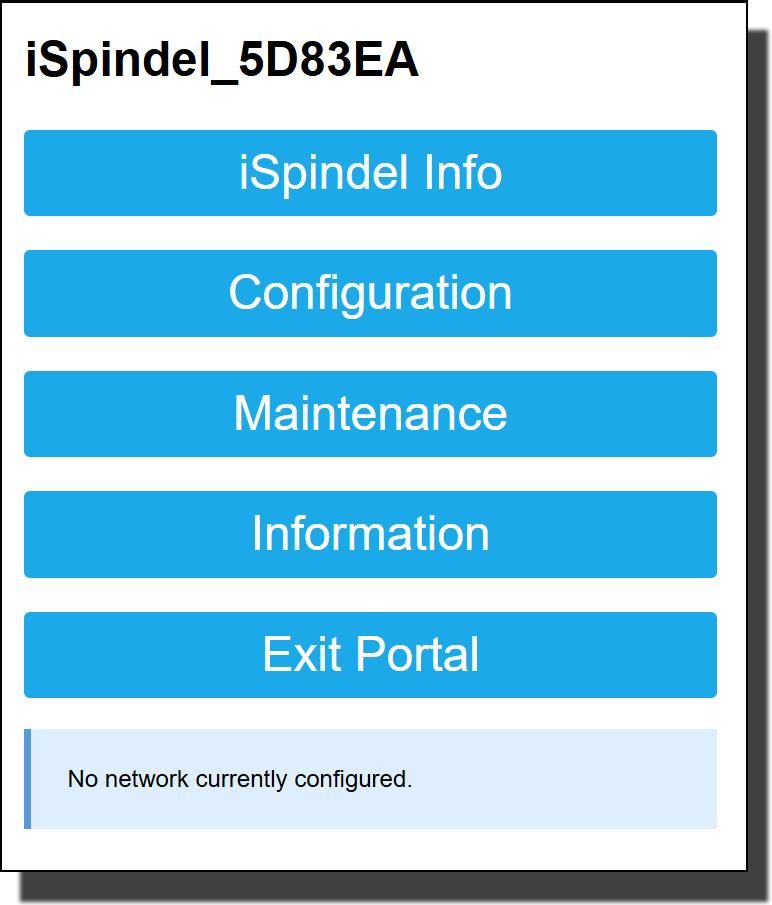
- Connect via Wi-Fi: On your smartphone or computer, search for available Wi-Fi networks and connect to the network named “iSpindel_5D83DA” or someting like that.
- Open Configuration Page: Once connected, open a web browser and enter the address: http://192.168.4.1. If the browser does not automatically load the page, manual enter 192.168.4.1.
- Timeout: The config mode only stays active for about 5 minutes to save battery.
- LED Indicator: A solid blink sequence means it is in configuration mode; if it is just doing a single quick flash, it is in normal operation mode.
- Access Point: The config portal is not active during normal operation, as the device is designed to sleep to preserve battery life.
- Wifi Frequency: The iSpindel requires a 2.4GHz network, it will not connect to 5GHz.
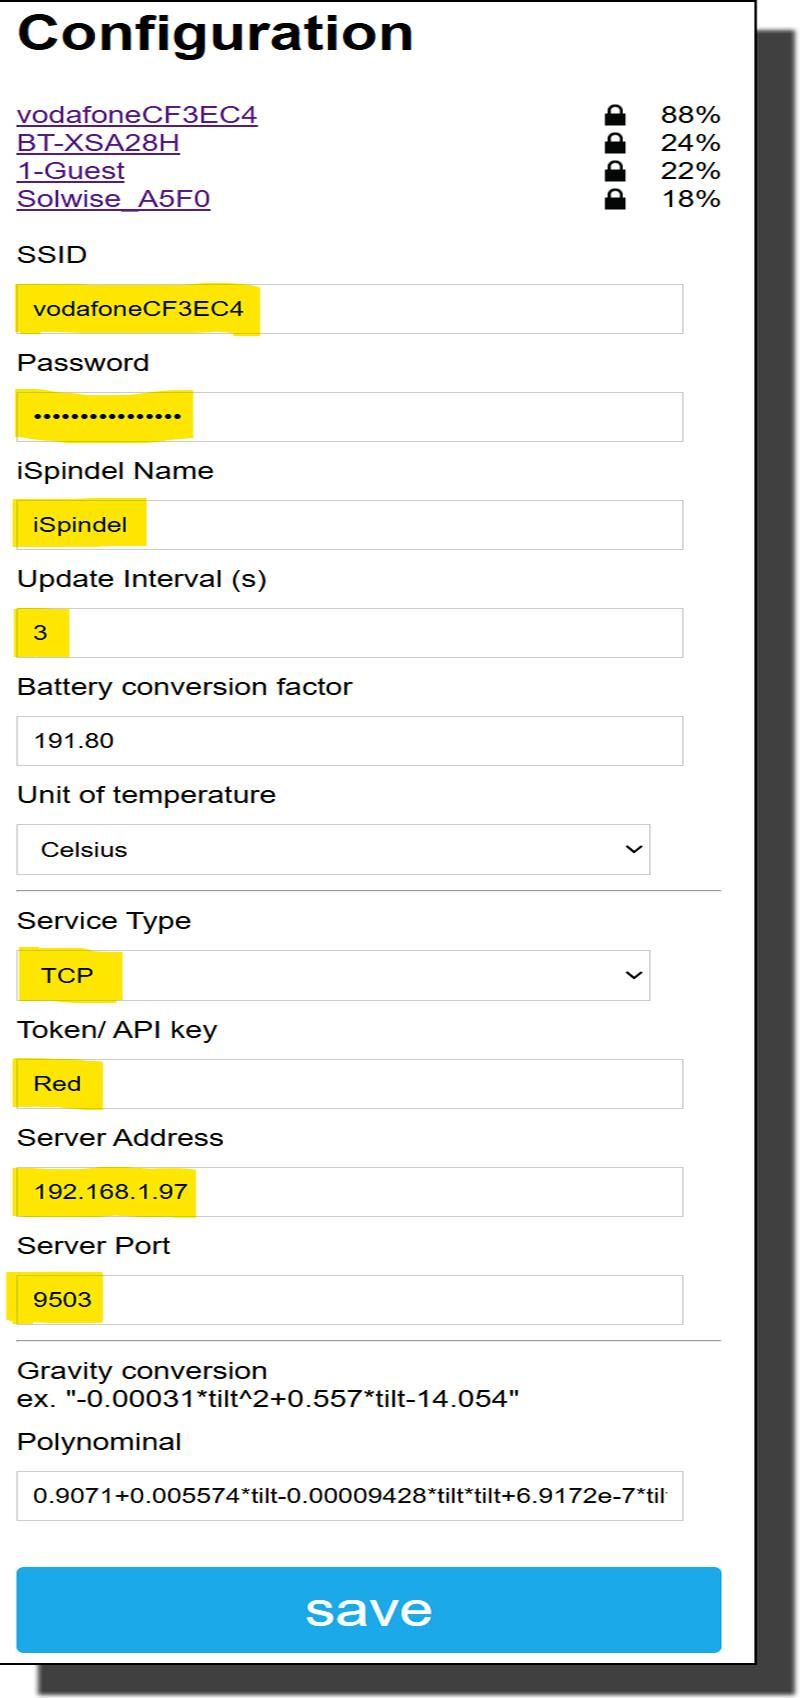
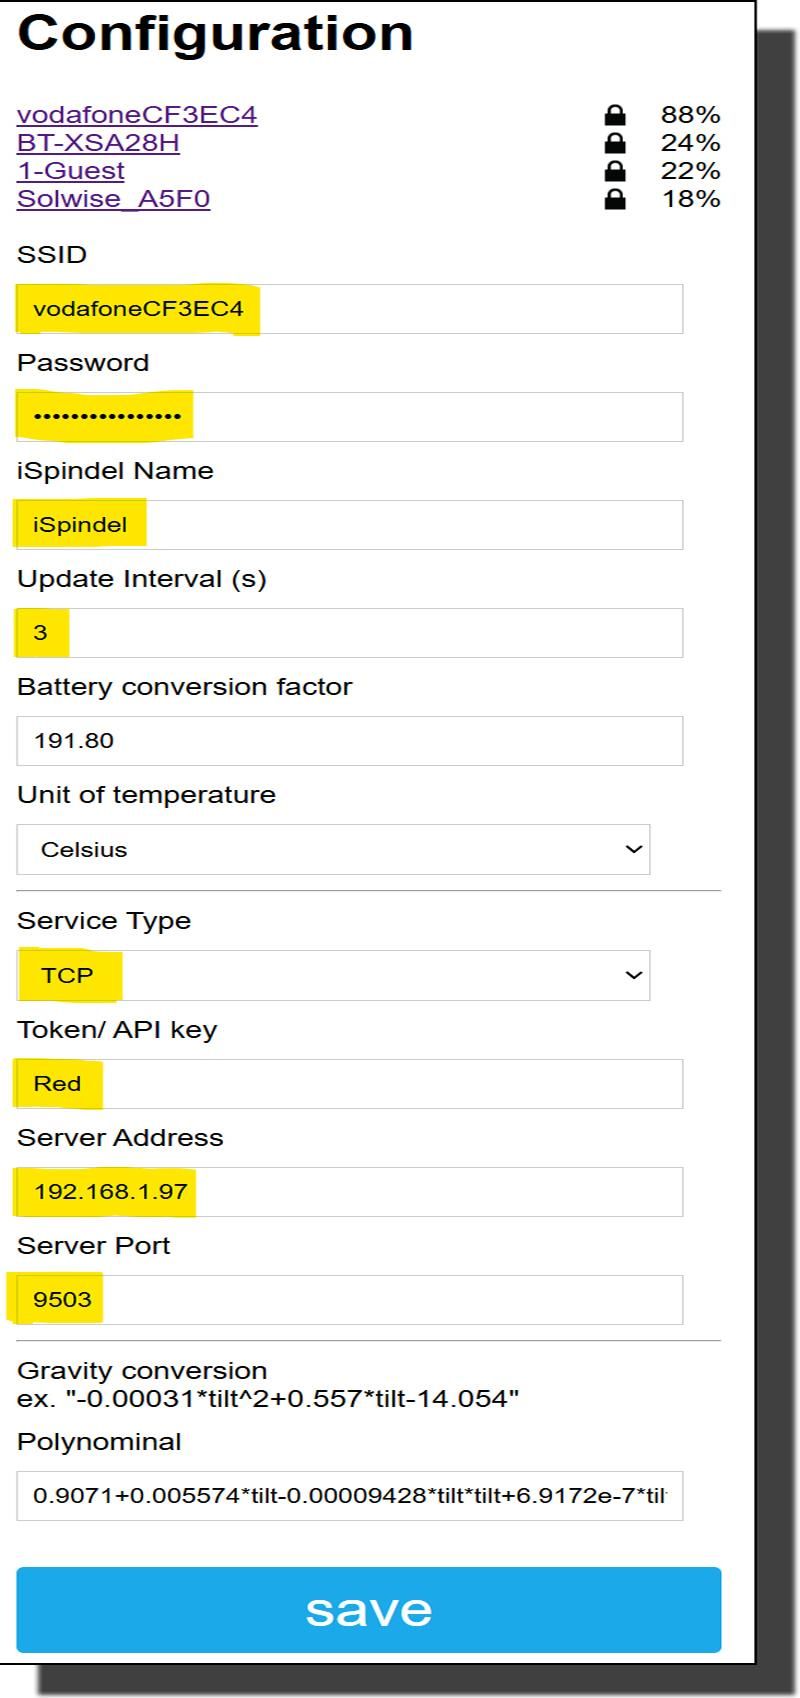
- Select your local network for the SSID and set the password
- Name your iSpindel. I have called mine “iSpindel”
- For our project testing set the Update interval to “3” seconds
- Select "TCP" in Service Type
- For the Token/ API key I put “Red”. You can put any short single word
- Server Address put “192.168.1.97”, This is the IP address we will be listening to with a NodeMCU ESP8266 Development Board programmed as a TCP Socket Client to receive and process the Tilt, Temperature, Battery and Gravity data, etc.
- in Server Port put “9503”.
| Important Notes |
Data Format: The iSpindel will send a JSON string directly to the defined IP address over a TCP socket.
ESP8266 - Testing It Works
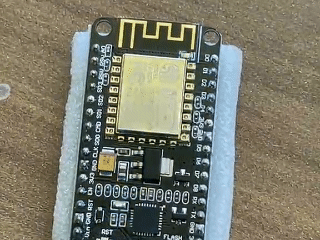
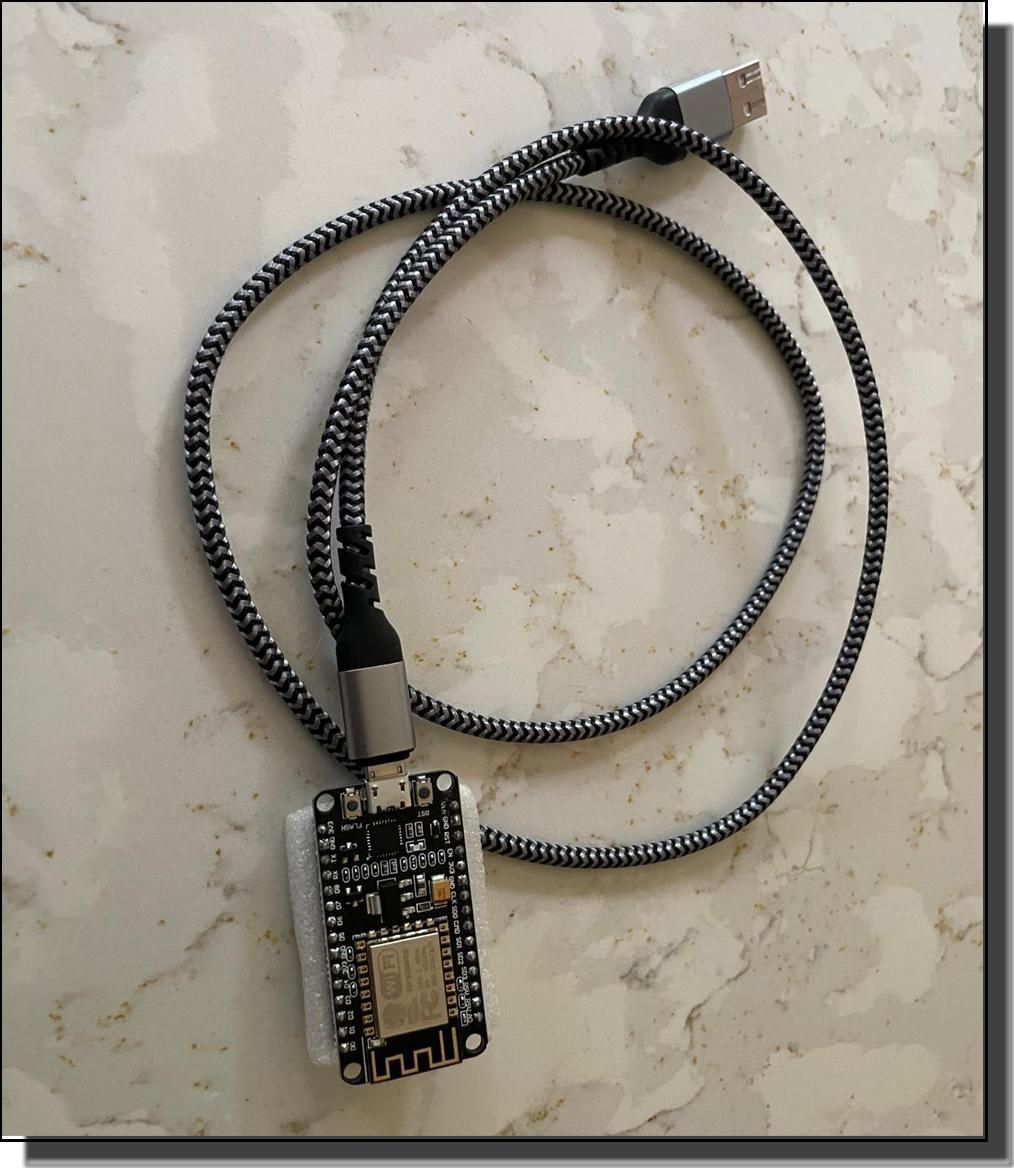
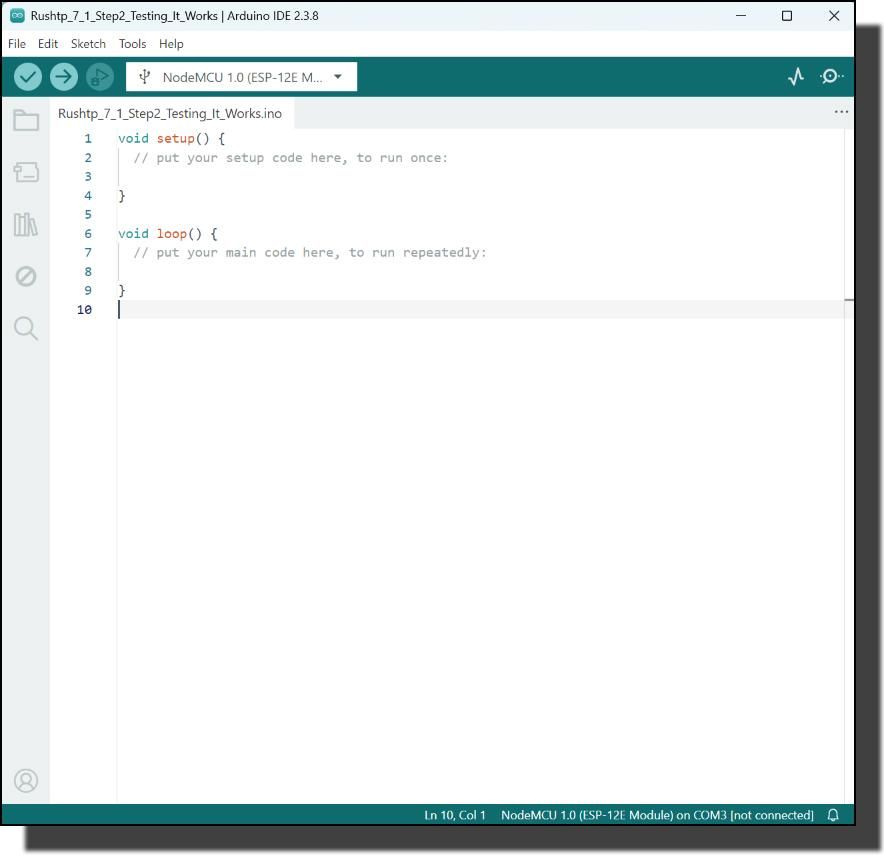
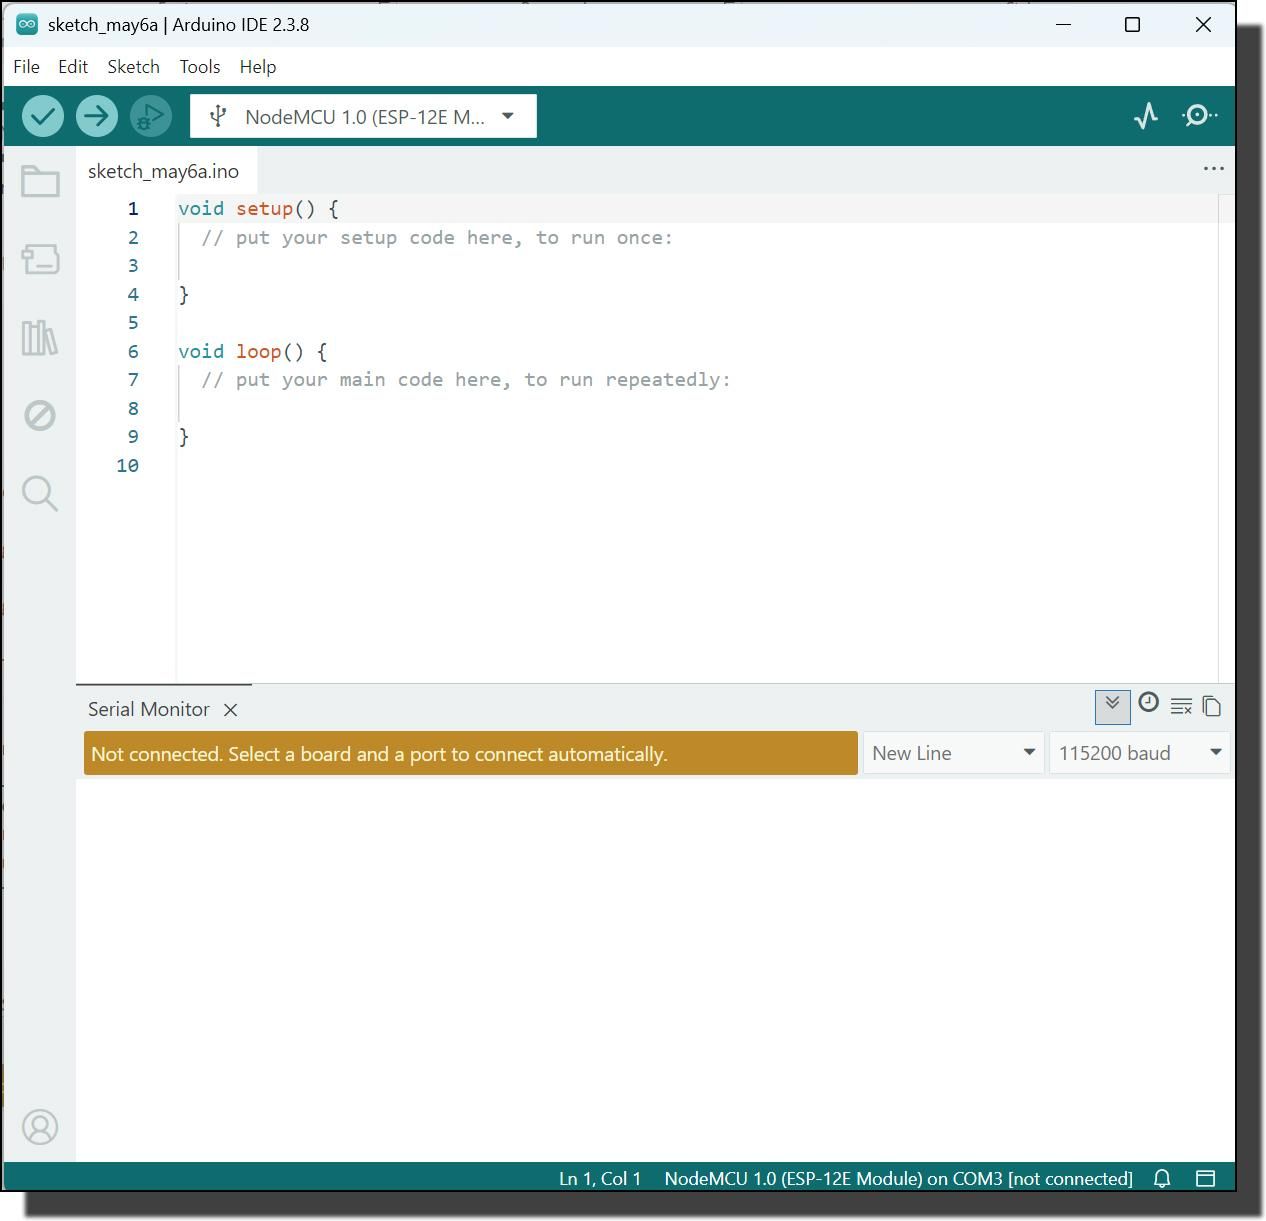
Download the latest Arduino IDE if required, Connect the ESP8266 NodeMCU Development Board with a Micro USB lead with data sync.
Installing ESP8266 Boards https://arduino-esp8266.readthedocs.io/en/latest/installing.html
Installing ESP8266 Arduino Core:
Now go to Tools, Board, ESP8266 and select “NodeMCU 1.0 (ESP-12E Module). |
Now open a new sketch in the Arduino IDE (File, New Sketch…) then save it as “Rushtp_7_1_Step2_Testing_It_Works” in your project directory. Note: the “_” linking all the text. The IDE will create a new folder with that name and add a file called Rushtp_7_1_Step2_Testing_It_Works.ino.
To test everything works I will be using this ESP8266 ESP-12E NodeMCU - Hello world and blink function tests - by Jamesits.
Note: I have added a header to acknowledge where it came from.
Copy and paste the following script to replace the default script. Then save the file again.
/*
Board: NodeMCU 1.0 (ESP-12E Module)
Ref: https://gist.github.com/Jamesits/a3c128d050e6d3a16e9a
*/
// See the comment for flashing instruction.
#include <ESP8266WiFi.h>
#define ONBOARD_LED 16
#define ESP8266_LED 2
// ADC_MODE(ADC_VCC); will result in compile error. use this instead.
int __get_adc_mode(void) { return (int) (ADC_VCC); }
void setup()
{
pinMode(ONBOARD_LED, OUTPUT);
pinMode(ESP8266_LED, OUTPUT);
Serial.begin(115200);
// Print Wi-Fi Information
WiFi.printDiag(Serial);
// Print VCC intervalage
Serial.print("Current VCC: ");
Serial.println(ESP.getVcc());
}
void loop()
{
digitalWrite(ONBOARD_LED, HIGH);
digitalWrite(ESP8266_LED, HIGH);
Serial.println("LED on");
delay(500);
digitalWrite(ONBOARD_LED, LOW);
digitalWrite(ESP8266_LED, LOW);
Serial.println("LED off");
delay(500);
}
Set the baud rate in the top right of the Serial Monitor to figue set in the script by Serial.begin(115200);.
Use ✔ Verify or ➔ Upload to check for errors in the script. If any are found the Serial Monitor will indicate what is wrong.
In the example below I left the “;” off the end of row 18.
Note: The Arduino IDE Serial Monitor does not wrap the text.
| D:\0-All\Peter\0) Project Files\01) Rushtp #7.1 - iSpindelink - Getting the Data Out\IDE\Rushtp_7_1_Step2_Testing_It_Works\Rushtp_7_1_Step2_Testing_It_Works.ino: In function 'void setup()': D:\0-All\Peter\0) Project Files\01) Rushtp #7.1 - iSpindelink - Getting the Data Out\IDE\Rushtp_7_1_Step2_Testing_It_Works\Rushtp_7_1_Step2_Testing_It_Works.ino:18:31: error: expected ';' before 'pinMode' 18 | pinMode(ONBOARD_LED, OUTPUT) | ^ | ; 19 | pinMode(ESP8266_LED, OUTPUT); | ~~~~~~~ exit status 1 Compilation error: expected ';' before 'pinMode' |
| If the iSpindel does not connect check that the battery is fully charged (with the usb connected a blue LED lights up when charging is complete). Also check the configutations are correct (see Step 1…). |
If there are no errors use ➔ Upload and the Serial Monitor should display something like this…
| . Variables and constants in RAM (global, static), used 28284 / 80192 bytes (35%) ║ SEGMENT BYTESDESCRIPTION ╠══ DATA 1496 initialized variables ╠══ RODATA 1004 constants ╚══ BSS 25784 zeroed variables . Instruction RAM (IRAM_ATTR, ICACHE_RAM_ATTR), used 60347 / 65536 bytes (92%) ║ SEGMENT BYTESDESCRIPTION ╠══ ICACHE 32768 reserved space for flash instruction cache ╚══ IRAM 27579 code in IRAM . Code in flash (default, ICACHE_FLASH_ATTR), used 243960 / 1048576 bytes (23%) ║ SEGMENT BYTESDESCRIPTION ╚══ IROM 243960 code in flash esptool.py v3.0 Serial port COM3 Connecting.... Chip is ESP8266EX Features: WiFi Crystal is 26MHz MAC: e8:db:84:99:3e:ee Uploading stub... Running stub... Stub running... Configuring flash size... Auto-detected Flash size: 4MB Compressed 278192 bytes to 203999... Writing at 0x00000000... (7 %) Writing at 0x00004000... (15 %) Writing at 0x00008000... (23 %) Writing at 0x0000c000... (30 %) Writing at 0x00010000... (38 %) Writing at 0x00014000... (46 %) Writing at 0x00018000... (53 %) Writing at 0x0001c000... (61 %) Writing at 0x00020000... (69 %) Writing at 0x00024000... (76 %) Writing at 0x00028000... (84 %) Writing at 0x0002c000... (92 %) Writing at 0x00030000... (100 %) Wrote 278192 bytes (203999 compressed) at 0x00000000 in 18.1 seconds (effective 123.2 kbit/s)... Hash of data verified. Leaving... Hard resetting via RTS pin... |
Now select the Serial Monitor to display the ESP8266 output (LED on / LED off, etc…) along with the two blinking blue LEDs.
If you press the Reset (RST) button on the ESP8266 a line of gobbledygook will be desplayed along with other information lines before the output (LED on / LED off, etc…).
| rll��|�#_�o_�l�_p�r�_�_�{�#�#��no�dno���_c_p��l{l{lp�n�___�$��__b_n�|_��_�"��oN�_$��l PHY mode: N Channel: 1 AP id: 0 Status: 255 Auto connect: 1 SSID (14): vodafoneCF3EC4 Passphrase (16): ------------------- BSSID set: 0 Current VCC: 3038 LED on LED off LED on LED off LED on LED off LED on LED off LED on LED off |
Once you are happy the ESP8266 NodeMCU Development Board is working go on to the next step.
ESP8266 - Listening for the ISpindel Data As a TCP Socket Client
TCP/IP Client Sockets
The internet operates on a client-server model, where remote computers (servers) running listening software wait for incoming requests initiated by other devices (clients) on the network. When a listening server receives a request it establishes the connection and delivers data to the client. Then closes the connection.
| Ref: Sujith’s Library “TCP/IP sockets are the foundation for creating reliable, two-way, and continuous connections between programs over a network. Think of a TCP socket connection as a telephone call for data: once the call is established, both parties can communicate back and forth until one hangs up.” “ServerSocket (The Listener): This class is used by a server application. Its job is to "listen" on a specific network port for incoming connection requests from clients.“ |
To set up an ESP8266 Client to request connection to the iSpindel we have to repeatedly request for data using the iSpindel TCP Server address and Port to catch data made available at the update intervals.
For our test we have set the iSpindel Update Interval to “3” seconds
ESP8266 NodeMCU code to listen on a specific IP address 192.168.1.97 on Port 9503
Ref: Make an ESP8266 listen for incoming network traffic on a specific IP and port - by Google AI
Global Initialisation
- Include the ESP8266WiFi.h library
- Replace the network credentials with your ones
- Set up a static IP address (a typical Static IP Configuration for home networks):
Static IP Address: 192.168.1.97
Default Gateway: 192.168.1.1 (Router's IP to route traffic between local devices)
Subnet Mask: 255.255.255.0 (Standard subnet allows up to 254 connection devices)
DNS 8.8.8.8 (For converting domain names into IP addresses)
- Create a server object for Port 9503
setup()
- Start a Serial connection
- Apply static IP configuration 192.168.1.97, 192.168.1.1, 255.255.255.0
- Connect and set up a server TCP to listen for incoming connections (. . . …)
- Begin the connect to your local WiFi (with your ssid, password)
- Start the server and listen to Port 9503
loop() (Repeat this over and over)
- Check for connected clients to see if the iSpindel is sending out data
- If it is available open the connection and get the data string
- Print the data string to the Serial Monitor
- I have also incorporated the blink LED code on pin 2 to indicate when the connected/disconnected is made.
- Close the connection
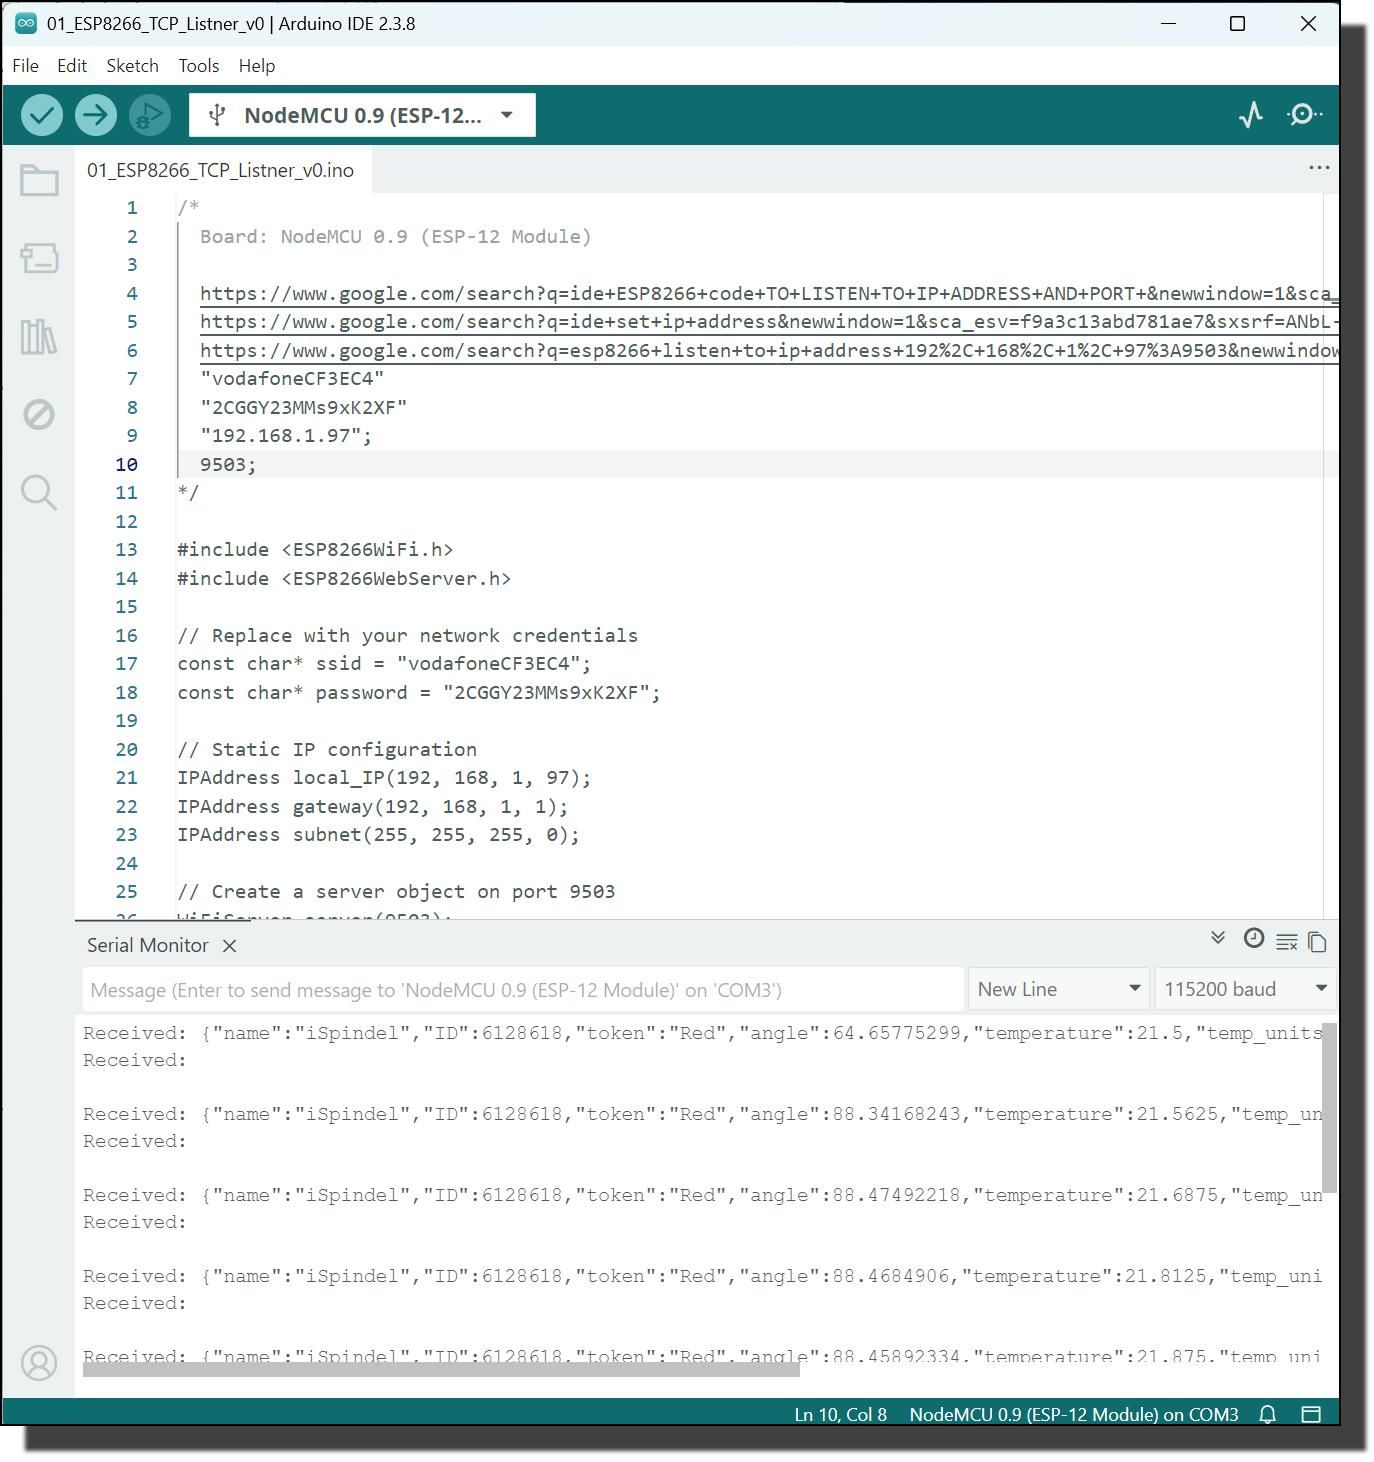
Open a new sketch in the Arduino IDE (File, New Sketch…) then save it as “Rushtp_7_1_Step3_Listening_For_The_iSpindel_Data” in your project directory. Note: the “_” linking all the text. The IDE will create a new folder with that name and add a file called Rushtp_7_1_Step3_Listening_For_The_iSpindel_Data.ino.
Copy and paste the following script to replace the default script. Then save the file again.
Change the settings in const char* ssid = "vodafoneCF3EC4"; and const char* password = "***************"; to match your local Wifi Network.
/*
Board: NodeMCU 1.0 (ESP-12E Module)
Code for an ESP8266 NodeMCU to listen on a specific IP address (192.168.1.97) and port (9503) and
configure it with a static IP address and set up a server TCP to listen for incoming connections.
Ref: Google search “ESP8266 listen to ip address 192, 168, 1, 97:9503”
Blink ESP8266_LED pin 2 On/Off when connected/disconnected
192.168.1.97
9503
*/
#include <ESP8266WiFi.h>
// Replace with your network credentials
const char* ssid = "vodafoneCF3EC4";
const char* password = "***************";
// Static IP configuration
IPAddress local_IP(192, 168, 1, 97);
IPAddress gateway(192, 168, 1, 1);
IPAddress subnet(255, 255, 255, 0);
IPAddress dns(8, 8, 8, 8);
// Create a server object on port 9503
WiFiServer server(9503);
//----------------------------------------------------------------------------//
void setup()
{
pinMode(2, OUTPUT); //ESP8266_LED
digitalWrite(2, HIGH); //ESP8266_LED Off
Serial.begin(115200);
// Apply static IP configuration
if (!WiFi.config(local_IP, gateway, subnet, dns))
{
Serial.println("Static IP configuration failed!");
}
// Connect to WiFi
WiFi.begin(ssid, password);
while (WiFi.status() != WL_CONNECTED)
{
delay(1000);
Serial.print(".");
}
// Start the server to listen on port 9503
server.begin();
Serial.println("\nServer started at 192.168.1.97:9503");
Serial.println("---------------------------------------------------------------------");
Serial.println();
}
//----------------------------------------------------------------------------//
void loop()
{
// Check for connected clients
WiFiClient client = server.available();
if (client)
{
while (client.connected())
{
if (client.available())
{
digitalWrite(2, LOW); //ESP8266_LED On
//readStringUntil('\n') used instead of '\r' to stop blank lines in the serial monitor
String request = client.readStringUntil('\n');
Serial.println(request);
}
}
client.stop();
digitalWrite(2, HIGH); //ESP8266_LED Off
//Serial.println("Disconnected");
}
}
| If the iSpindel does not connect check that the battery is fully charged (with the usb connected a blue LED lights up when charging is complete). Also check the configutations are correct (see Step 1…). |
Assuming your iSindel set to stream it’s output on TCP 192.168.1.97:9503 every 3 seconds switch it on.
Then, if there are no errors, use ➔ Upload and the Serial Monitor should display something like this…
Note: The Arduino IDE Serial Monitor does not wrap the text.
| ... Server started at 192.168.1.97:9503 --------------------------------------------------------------------- {"name":"iSpindel","ID":6128618,"token":"Red","angle":88.44329834,"temperature":19.875,"temp_units":"C","battery":4.098018646,"gravity":32.78403091,"interval":3,"RSSI":-47} {"name":"iSpindel","ID":6128618,"token":"Red","angle":88.34824371,"temperature":19.875,"temp_units":"C","battery":4.092804909,"gravity":32.73629379,"interval":3,"RSSI":-46} {"name":"iSpindel","ID":6128618,"token":"Red","angle":88.34083557,"temperature":19.875,"temp_units":"C","battery":4.092804909,"gravity":32.73257446,"interval":3,"RSSI":-51} {"name":"iSpindel","ID":6128618,"token":"Red","angle":88.35655975,"temperature":19.9375,"temp_units":"C","battery":4.092804909,"gravity":32.74047089,"interval":3,"RSSI":-53} {"name":"iSpindel","ID":6128618,"token":"Red","angle":88.32746887,"temperature":19.9375,"temp_units":"C","battery":4.098018646,"gravity":32.7258606,"interval":3,"RSSI":-48} {"name":"iSpindel","ID":6128618,"token":"Red","angle":88.3348465,"temperature":19.9375,"temp_units":"C","battery":4.092804909,"gravity":32.72956467,"interval":3,"RSSI":-48} |
Well, now we can see the iSpindel data stream. It is in JSON format. So in the next step we will extract the fields we want to use.
ESP8266 - Extracting Data Values With Arduinojson 7 DeserializeJson()
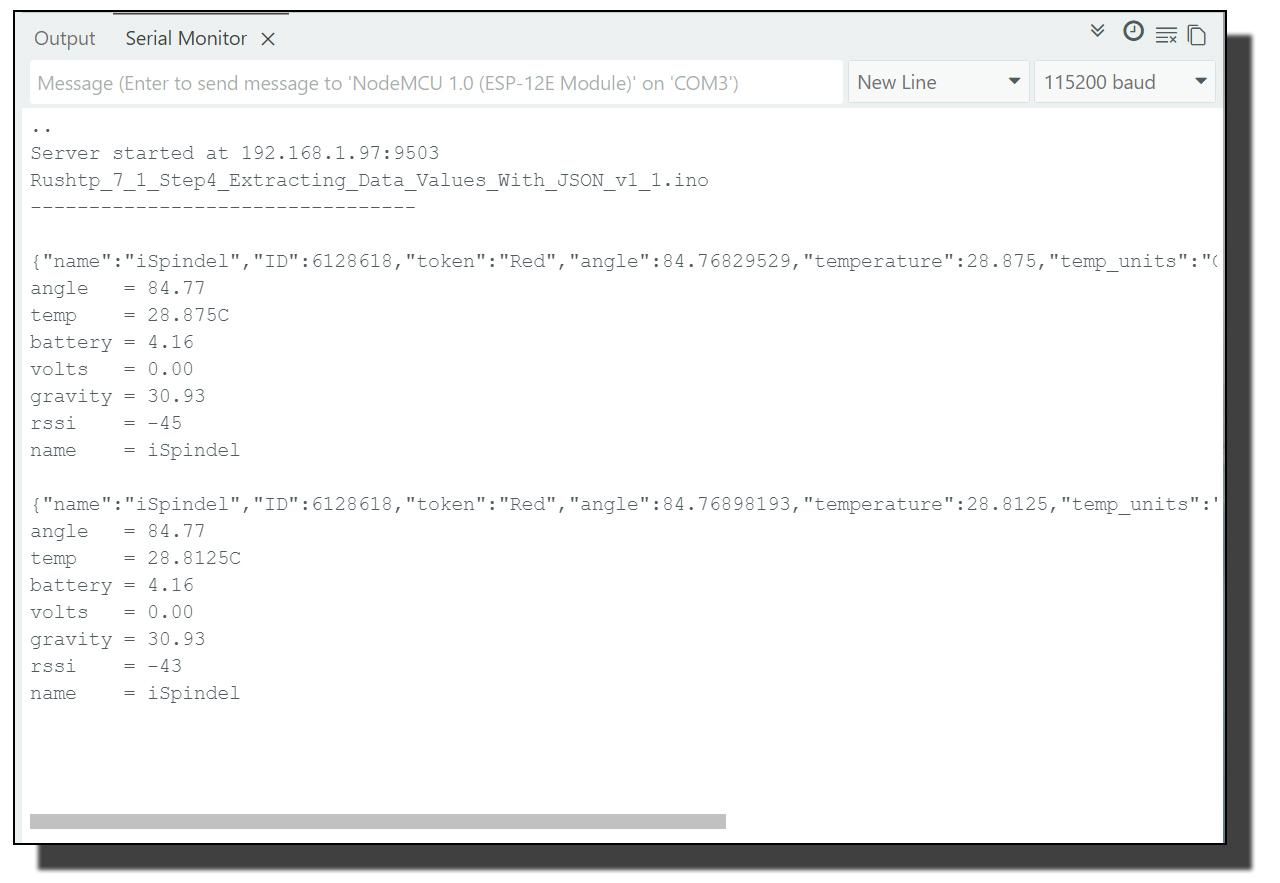
In Step 3 we proved we could get a data stream from the iSpindel and sent to TCP at address 192.168.1.97:9503. It is in a Json format - a collection of name/value pairs enclosed in curly braces { }…
{"name":"iSpindel","ID":6128618,"token":"Red","angle":88.44329834,"temperature":19.875,"temp_units":"C","battery":4.098018646,"gravity":32.78403091,"interval":3,"RSSI":-47}
Our next Step is to use AeduinoJson deserializeJson() to extract some of the name/value pairs and assign them to variables so we can print the values to the Serial Monitor e.g. Serial.println("angle = " + String(angle));.
| Many thanks to Benoit Blanchon for his Deserialization tutorial | ArduinoJson 7 for help extracting data fields from a Json document (i.e. the iSpindel data stream in JSON format). ArduinoJson 7 simplifies JSON operations for microcontrollers by creating a single JsonDocument class. It streamlines common workflows like deserialization, serialization, and working with custom objects, with all official examples accessible directly from the Arduino IDE. To read a JSON string, you pass the input and your JsonDocument to deserialization (). |
Open a new sketch in the Arduino IDE (File, New Sketch…) then save it as “Rushtp_7_1_Step4_Extracting_Data_Values_With_JSON” in your project directory. Note: the “_” linking all the text It has to be one long string of text, no spaces.. The IDE will create a new folder with that name and add a file called Rushtp_7_1_Step4_Extracting_Data_Values_With_JSON.ino.
Copy and paste the following script to replace the default script. Then save the file again.
Change the settings in const char* ssid = "vodafoneCF3EC4"; and const char* password = "***************"; to match your local Wifi Network.
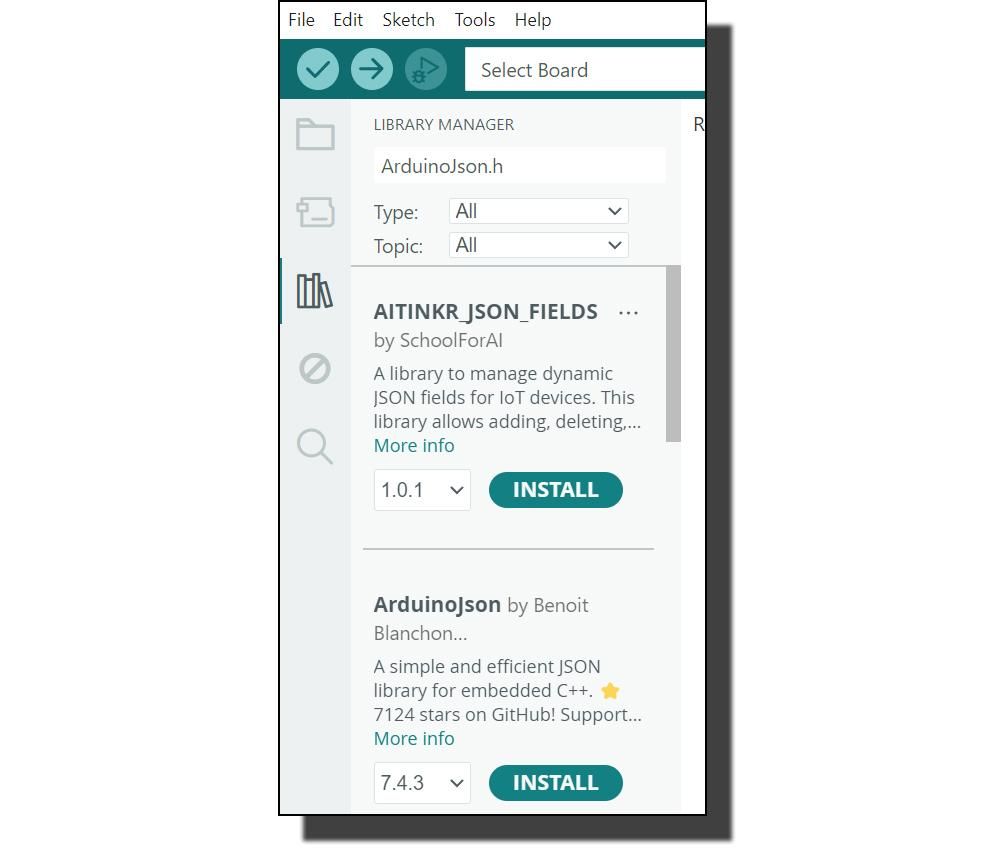
In The Arduino IDE Library Manager search for ArduinoJson.h and look for “Arduinojson by Benoit Blanchon”. Then install or update it.
Key feature…
| Global Initialisation - Include the ArduinoJson.h library setup() loop() (Repeat this over and over) |
  /*
   Board: NodeMCU 0.9 (ESP-12 Module)
Code for an ESP8266 NodeMCU to listen on a specific IP address (192.168.1.97) and port (9503) and
   configure it with a static IP address and set up a server TCP to listen for incoming connections.

  Using Arduino JSON 7 deserializeJson to extract selected fields from the iSpindel output;
  Ref: Google search “ArduinoJSON 7 Examples”
        Ref: https://arduinojson.org/v7/

Define and Serial.println) IDE Filename
Ref: https://forum.arduino.cc/t/send-sketch-filename-to-serial-monitor/1174427

Blink ESP8266_LED pin 2 On/Off when connected/disconnected

   "192.168.1.97";
   9503;
*/
#include <ESP8266WiFi.h>
#include <ArduinoJson.h>
// Replace with your network credentials
const char* ssid = "vodafoneCF3EC4";
const char* password = "**************";

// Static IP configuration
IPAddress local_IP(192, 168, 1, 97);
IPAddress gateway(192, 168, 1, 1);
IPAddress subnet(255, 255, 255, 0);
IPAddress dns(8, 8, 8, 8);

// Create a server object on port 9503
WiFiServer server(9503);

//define IDE sketch filename
#define __FILENAME__ (strrchr(__FILE__, '\\') ? strrchr(__FILE__, '\\') + 1 : __FILE__)

//----------------------------------------------------------------------------//
void setup()
{
  pinMode(2, OUTPUT); //ESP8266_LED
  digitalWrite(2, HIGH);   //ESP8266_LED Off

  Serial.begin(115200);

   // Apply static IP configuration
  if (!WiFi.config(local_IP, gateway, subnet, dns))
  {
    Serial.println("Static IP configuration failed!");
  }

   // Connect to WiFi
  WiFi.begin(ssid, password);
  while (WiFi.status() != WL_CONNECTED)
  {
    delay(1000);
    Serial.print(".");
  }

   // Start the server to listen on port 9503
  server.begin();
  Serial.println("\nServer started at 192.168.1.97:9503");

  //IDE sketch filename
  Serial.println(__FILENAME__);
  Serial.println("---------------------------------");
  Serial.println();

}
//----------------------------------------------------------------------------//
void loop()
{
  // Create a JsonDocument, it is initially empty
  JsonDocument doc;

   // Check for connected clients
  WiFiClient client = server.available();
  if (client)
  {
    while (client.connected())
    {
      if (client.available())
      {
        digitalWrite(2, LOW);  //ESP8266_LED On
         //readStringUntil('\n') used instead of '\r' to stop blank lines in the serial monitor
        String request = client.readStringUntil('\n');
          Serial.println(request);

        // Deserialize the JSON document
        DeserializationError error = deserializeJson(doc, request);

          // Test if parsing succeeds.
          if (error)
          {
            //Serial.print(F("deserializeJson() failed: "));
            //Serial.println(error.f_str());
            return;
          }

          // Fetch values
          // {"name":"iSpindel","ID":6128618,"token":"Red","angle":88.49937439,
          //  "temperature":22.8125,"temp_units":"C","battery":3.910323143,
          //  "gravity":32.81218719,"interval":3,"RSSI":-45}

          //Data: Angle Temp°C  Battery Interval Gravity Interval Secs RSSI  Name  PSI
          double angle   = doc["angle"];
          String temp    = doc["temperature"];
          String units   = doc["temp_units"];
          double battery = doc["battery"];
          double interval   = doc["interval"];
          double gravity = doc["gravity"];
          int rssi       = doc["RSSI"];
          String name    = doc["name"];

          // Print values.
          Serial.println("angle   = " + String(angle));
          Serial.println("temp    = " + temp + units);
          Serial.println("battery = " + String(battery));
          Serial.println("interval   = " + String(interval));
          Serial.println("gravity = " + String(gravity));
          Serial.println("rssi    = " + String(rssi));
          Serial.println("name    = " + name);
          Serial.println();
      }
    }
    client.stop();
    doc.clear();  //Empties the Json document and clears the memory making it ready for reuse.
    digitalWrite(2, HIGH);   //ESP8266_LED Off
     //Serial.println("Disconnected");
  }
}
| If the iSpindel does not connect check that the battery is fully charged (with the usb connected a blue LED lights up when charging is complete). Also check the configutations are correct (see Step 1…). |
Assuming your iSindel set to stream it’s output on TCP 192.168.1.97:9503 every 3 seconds switch it on.
Then, if there are no errors, use ➔ Upload and the Serial Monitor should display something like this…
Note: The Arduino IDE Serial Monitor does not wrap the text.
| Server started at 192.168.1.97:9503 Rushtp_7_1_Step3_JSON.ino --------------------------------- {"name":"iSpindel","ID":6128618,"token":"Red","angle":88.46206665,"temperature":22.8125,"temp_units":"C","battery":3.894681931,"gravity":32.79345322,"interval":3,"RSSI":-49} {"name":"iSpindel","ID":6128618,"token":"Red","angle":88.45462036,"temperature":22.8125,"temp_units":"C","battery":3.894681931,"gravity":32.78971481,"interval":3,"RSSI":-48} |
Now that we have the iSpindel fields and values in Step 5 we will add a variable to hold the date and time the iSpindel data stream was received Daylight Saving Time (dd-mm-yyyy hh:mm:ss).
ESP8266 - Adding a Date & Time in GMT/BST
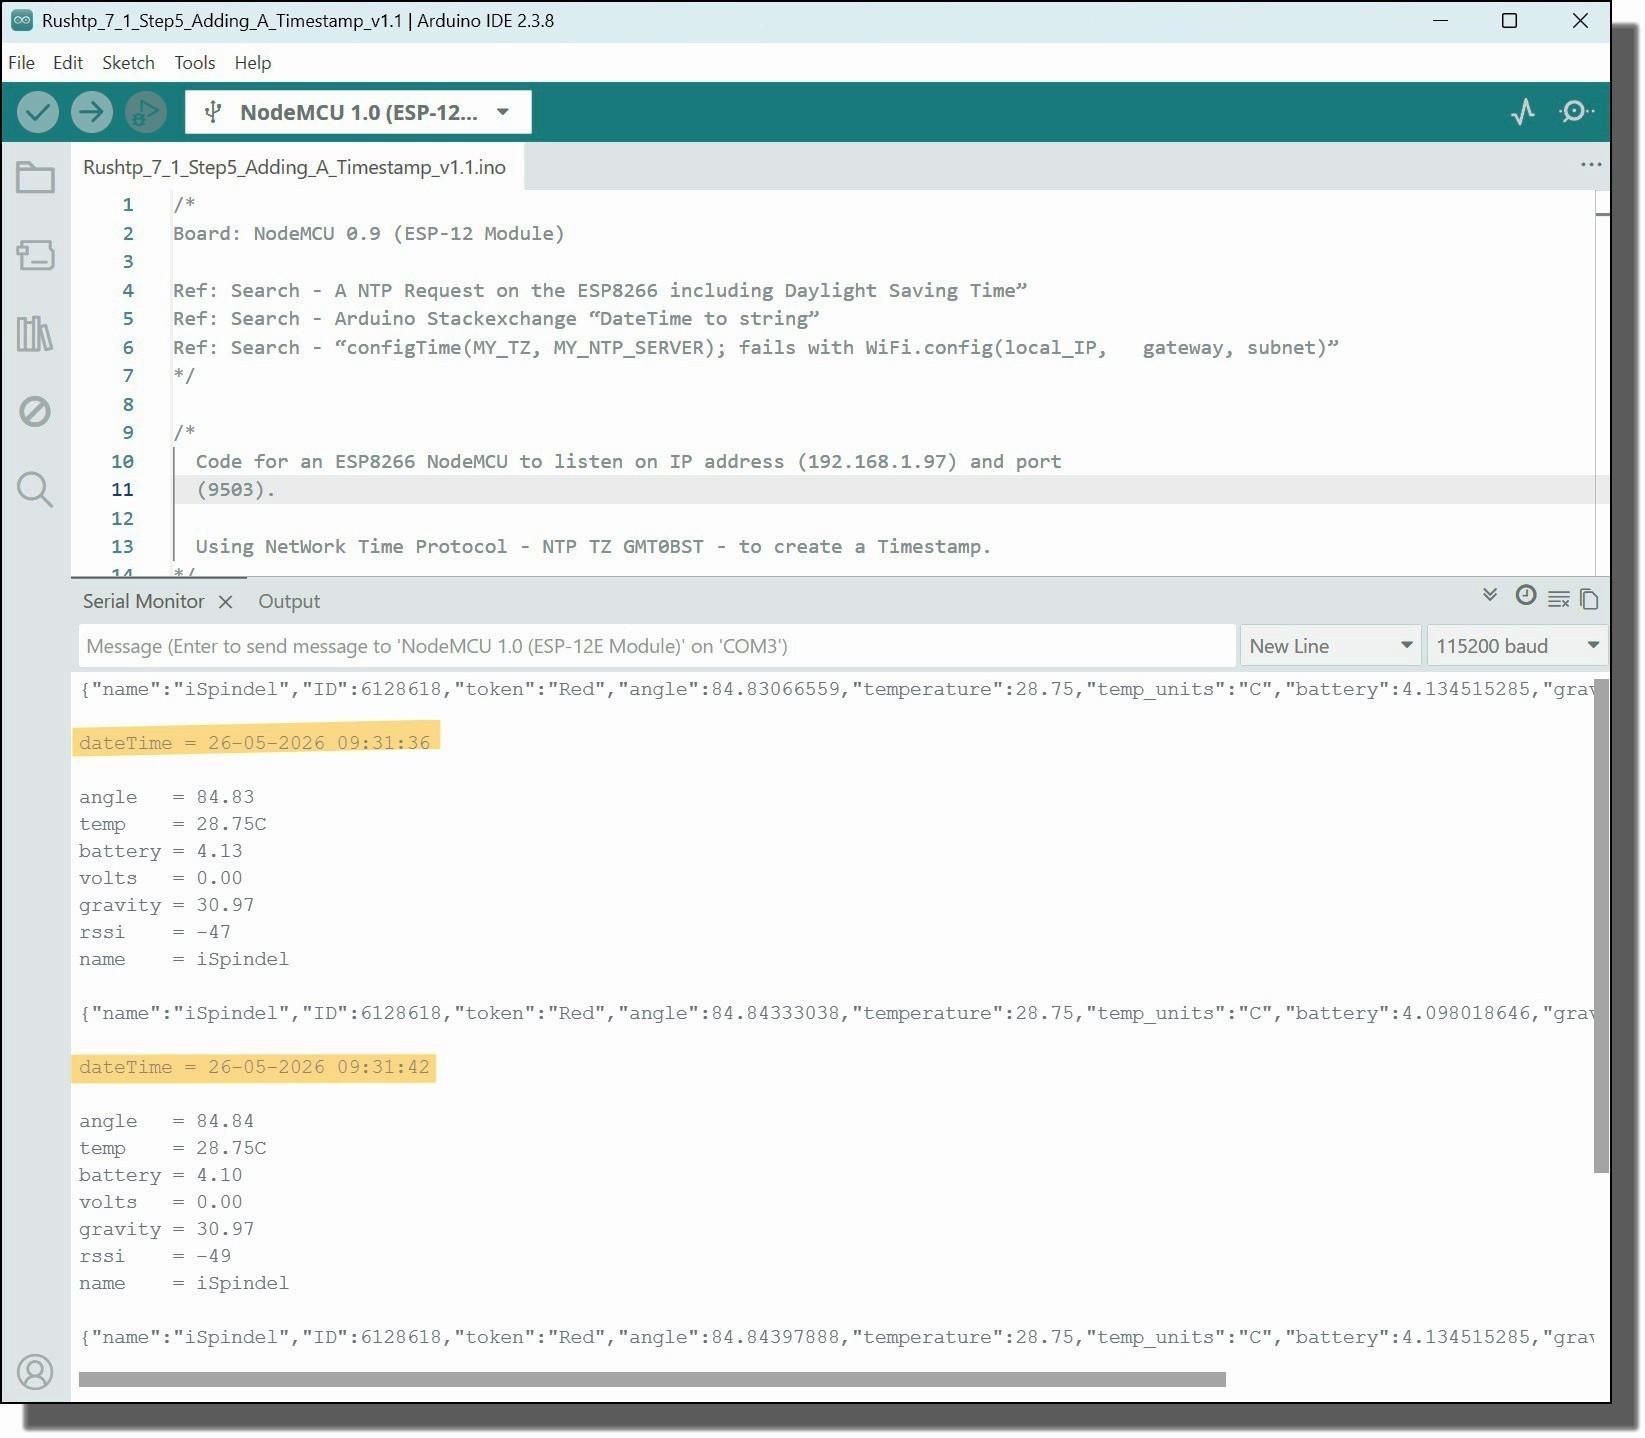
Let's create a String variable dateTime to hold the date and time the iSpindel data stream was received GMT/BST (dd-mm-yyyy hh:mm:ss). It will be used in a later project to chart the ispindel output in an MS Excel chart.
DST - I am in the UK so use Summer time / Winter time. If you want to use other time zones Search to the appropriate coding for Network Time Protocol (NTP).
|
Open a new sketch in the Arduino IDE (File, New Sketch…) then save it as “Rushtp_7_1_Step5_Adding_A_Timestamp” in your project directory. Note: the “_” linking all the text It has to be one long string of text, no spaces.. The IDE will create a new folder with that name and add a file called Rushtp_7_1_Step5_Adding_A_Timestamp.ino.
Copy and paste the following script to replace the default script. Then save the file again.
Change the settings in const char* ssid = "vodafoneCF3EC4"; and const char* password = "***************"; to match your local Wifi Network.
Key feature…
| Global Initialisation #include <time.h> // this is available with the ESP8266 core in Arduino IDE setup() void loop() |
 /*
Board: NodeMCU 0.9 (ESP-12 Module)

Ref: Search - A NTP Request on the ESP8266 including Daylight Saving Time”
Ref: Search - Arduino Stackexchange “DateTime to string”
Ref: Search - “configTime(MY_TZ, MY_NTP_SERVER); fails withWiFi.config(local_IP,   gateway, subnet)”
*/

/*
  Code for an ESP8266 NodeMCU to listen on IP address (192.168.1.97) and port
  (9503).

 Using NetWork Time Protocol - NTP TZ GMT0BST - to create a Timestamp.
*/

#include<ESP8266WiFi.h>
#include <time.h>
#include<ArduinoJson.h>

// Replace with your network credentials
const char* ssid = "vodafoneCF3EC4";
const char* password = "**************";

// Globals
time_t now;   // these are the seconds since Epoch (1970) - UTC
tm tm;        // the structure tm holds time in a more convenient way
String dateTime;

// Static IP configuration
IPAddress local_IP(192, 168, 1, 97);
IPAddress gateway(192, 168, 1, 1);
IPAddress subnet(255, 255, 255, 0);
IPAddress dns(8, 8, 8, 8);

// Create a server object on port 9503
WiFiServer server(9503);

//define IDE sketch filename
#define __FILENAME__ (strrchr(__FILE__, '\\') ? strrchr(__FILE__, '\\') + 1 : __FILE__)

// Configuration of NTP
#define MY_NTP_SERVER "at.pool.ntp.org"
#define MY_TZ "GMT0BST,M3.5.0/1,M10.5.0/2"
//----------------------------------------------------------------------------//
void setup()
{
 pinMode(2, OUTPUT); //ESP8266_LED
 digitalWrite(2, HIGH);  //ESP8266_LED Off

 Serial.begin(115200);

 // Initializes NTP time synchronization on ESP8266, setting the timezone and time server.
 configTime(MY_TZ, MY_NTP_SERVER);

  // Apply static IP configuration
 if(!WiFi.config(local_IP, gateway, subnet, dns))
 {
  Serial.println("Static IP configuration failed!");
 }

  // Connect to WiFi
 WiFi.begin(ssid, password);
 while(WiFi.status() != WL_CONNECTED)
 {
  delay(1000);
  Serial.print(".");
 }

  // Start the server to listen on port 9503
 server.begin();
 Serial.println("\nServer started at 192.168.1.97:9503");

  //IDE sketch filename
 Serial.println(__FILENAME__);
 Serial.println("---------------------------------");
 Serial.println();

}

//----------------------------------------------------------------------------//
void loop()
{
  // Read Current Time and format as "dd-mm-yyy hh:mm:ss"
  time(&now);                       // read the current time
  localtime_r(&now, &tm);           // update tm with the current time
  char dateTime[20];
  sprintf(dateTime, "%02d-%02d-%02d %02d:%02d:%02d",  tm.tm_mday, tm.tm_mon + 1, tm.tm_year + 1900, tm.tm_hour, tm.tm_min, tm.tm_sec);
  //Serial.println(dateTime);

  // Create a JsonDocument, it is initially empty
  JsonDocument doc;

  // Check for connected clients
  WiFiClient client = server.available();
  if(client)
  {
   while(client.connected())
  {
   if(client.available())
   {
    digitalWrite(2, LOW); //ESP8266_LED On
     //readStringUntil('\n') used instead of '\r' to stop blank lines in the serial monitor
     String request = client.readStringUntil('\n');
     Serial.println(request);

     // Deserialize the JSON document
     DeserializationError error = deserializeJson(doc, request);

      // Test if parsing succeeds.
     if(error)
     {
       //Serial.print(F("deserializeJson() failed: "));
       //Serial.println(error.f_str());
      return;
     }

     Serial.println();
     Serial.println("dateTime = " + String(dateTime));

      // Fetch values
      // {"name":"iSpindel","ID":6128618,"token":"Red","angle":88.49937439,
      //  "temperature":22.8125,"temp_units":"C","battery":3.910323143,
      //  "gravity":32.81218719,"interval":3,"RSSI":-45}

      double angle   = doc["angle"];
      String temp    = doc["temperature"];
      String units   = doc["temp_units"];
      double battery = doc["battery"];
      double interval= doc["interval"];
      double gravity = doc["gravity"];
      int  rssi      = doc["RSSI"];
      String name    = doc["name"];

      // Print values.

     Serial.println();
     Serial.println("angle    = " + String(angle));
     Serial.println("temp     = " + temp + units);
     Serial.println("battery  = " + String(battery));
     Serial.println("interval = " + String(interval));
     Serial.println("gravity  = "  + String(gravity));
     Serial.println("rssi     = " + String(rssi));
     Serial.println("name     = " + name);
     Serial.println();
   }
  }
  client.stop();
  doc.clear(); //Empties the Json document and clears the memory making it ready for reuse.
  digitalWrite(2, HIGH);  //ESP8266_LED Off
   //Serial.println("Disconnected");
 }
}
| If the iSpindel does not connect check that the battery is fully charged (with the usb connected a blue LED lights up when charging is complete). Also check the configutations are correct (see Step 1…). |
Assuming your iSindel set to stream it’s output on TCP 192.168.1.97:9503 every 3 seconds switch it on.
Then, if there are no errors, use ➔ Upload and the Serial Monitor should display something like this…
Note: The Arduino IDE Serial Monitor does not wrap the text.
| Server started at 192.168.1.97:9503 Rushtp_7_1_Step3_JSON.ino --------------------------------- {"name":"iSpindel","ID":6128618,"token":"Red","angle":88.46206665,"temperature":22.8125,"temp_units":"C","battery":3.894681931,"gravity":32.79345322,"interval":3,"RSSI":-49} {"name":"iSpindel","ID":6128618,"token":"Red","angle":88.45462036,"temperature":22.8125,"temp_units":"C","battery":3.894681931,"gravity":32.78971481,"interval":3,"RSSI":-48} |
Good!
We now have programmed a NodeMCU ESP8266 Development Board as a Socket Client to receive, process and display the Tilt, Temperature, Battery and Gravity data from an iSpindel using the TCP settings.
| Up till now we have had been hard-coding our network credentials (SSID and password) to connect to the local Wifi Network. This is no use if we want to use the iSpindelink in different Wifi environments. In the Step 6 we will explore the WifiManager library WiFiManager.h. |
ESP8266 - Customising WifiManage
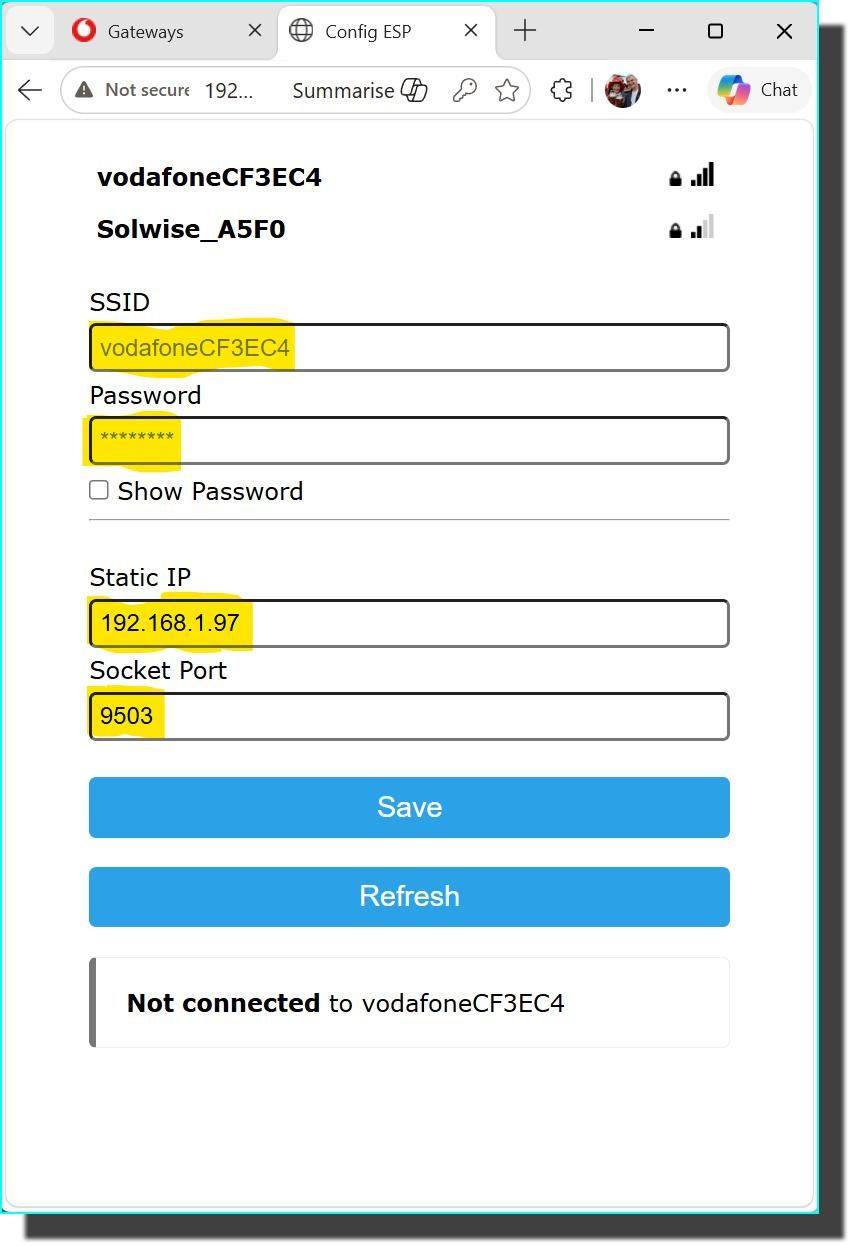
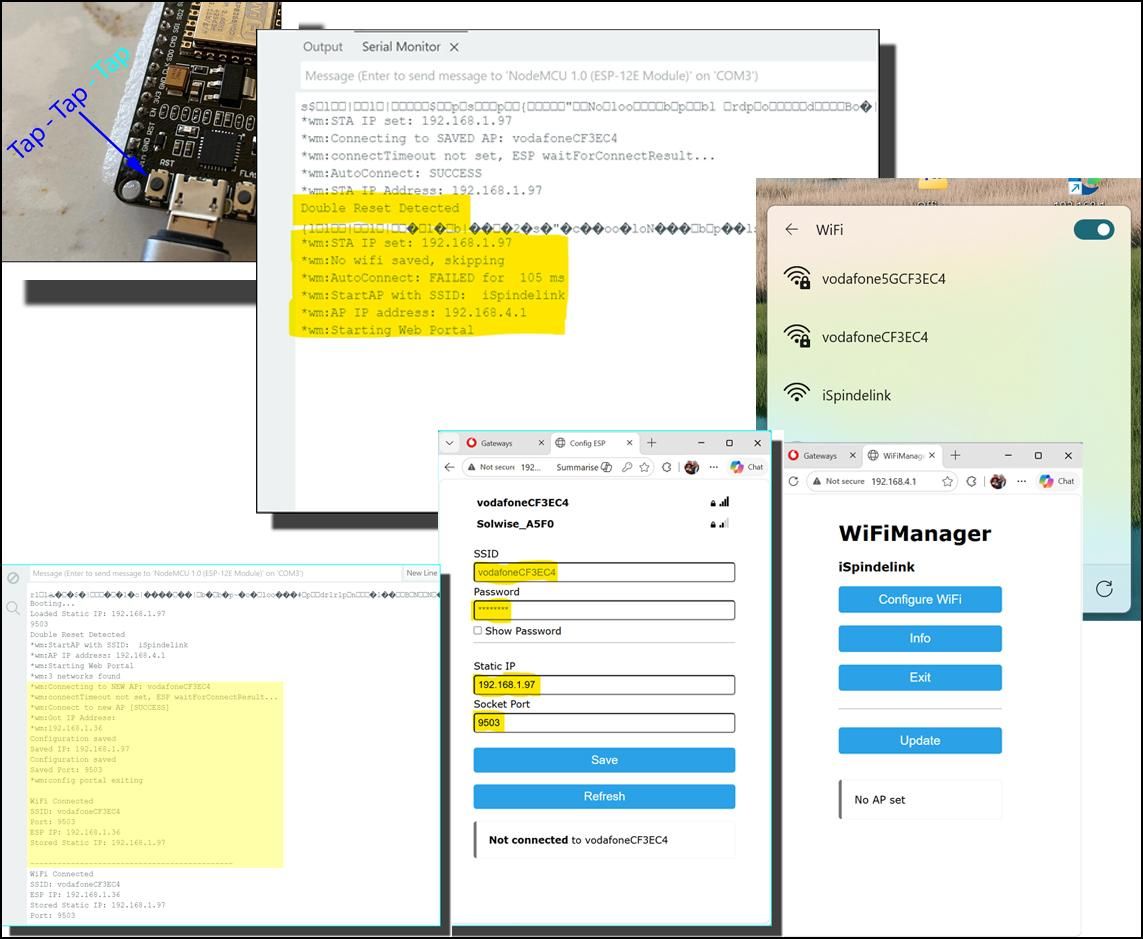
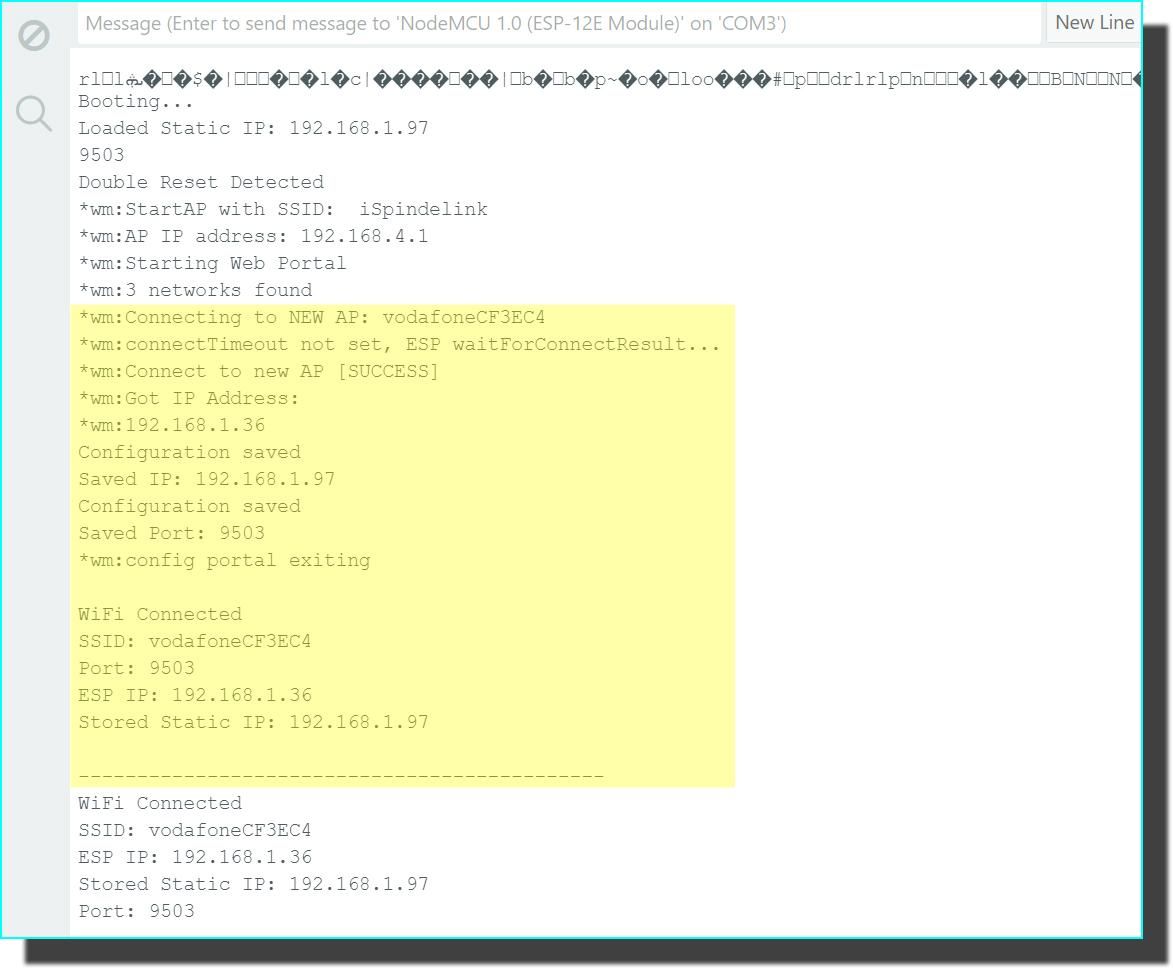
In this step I want to use WifiManager to create access to a configuration page on a web browser in a similar way to the one iSpindel uses.
| WiFiManager is a popular Arduino library for the ESP8266 that allows the microcontroller to connect to Wi-Fi networks without hard-coding the network credentials (SSID and password) in your code. We will be using #include <WiFiManager.h >. Go to the Arduino Library Manager and search for “Tzapu”. Then Install WiFiManager by Tzapu. We will also be using #include <DoubleResetDetector.h > by Stephen Denne. Go to the Arduino Library Manager and search for “DoubleResetDetector.h”. Then Install it. |
We will add two Custom Parameters so we can match those set in the iSpindel TCP Configuration for Static Ip Address (192.168.1.97) and Socket Port (9503). Their values will be saved to and retreaved from the ESP8266 onboard flash memory and will not be lost during Reset or when the power is disconnected.
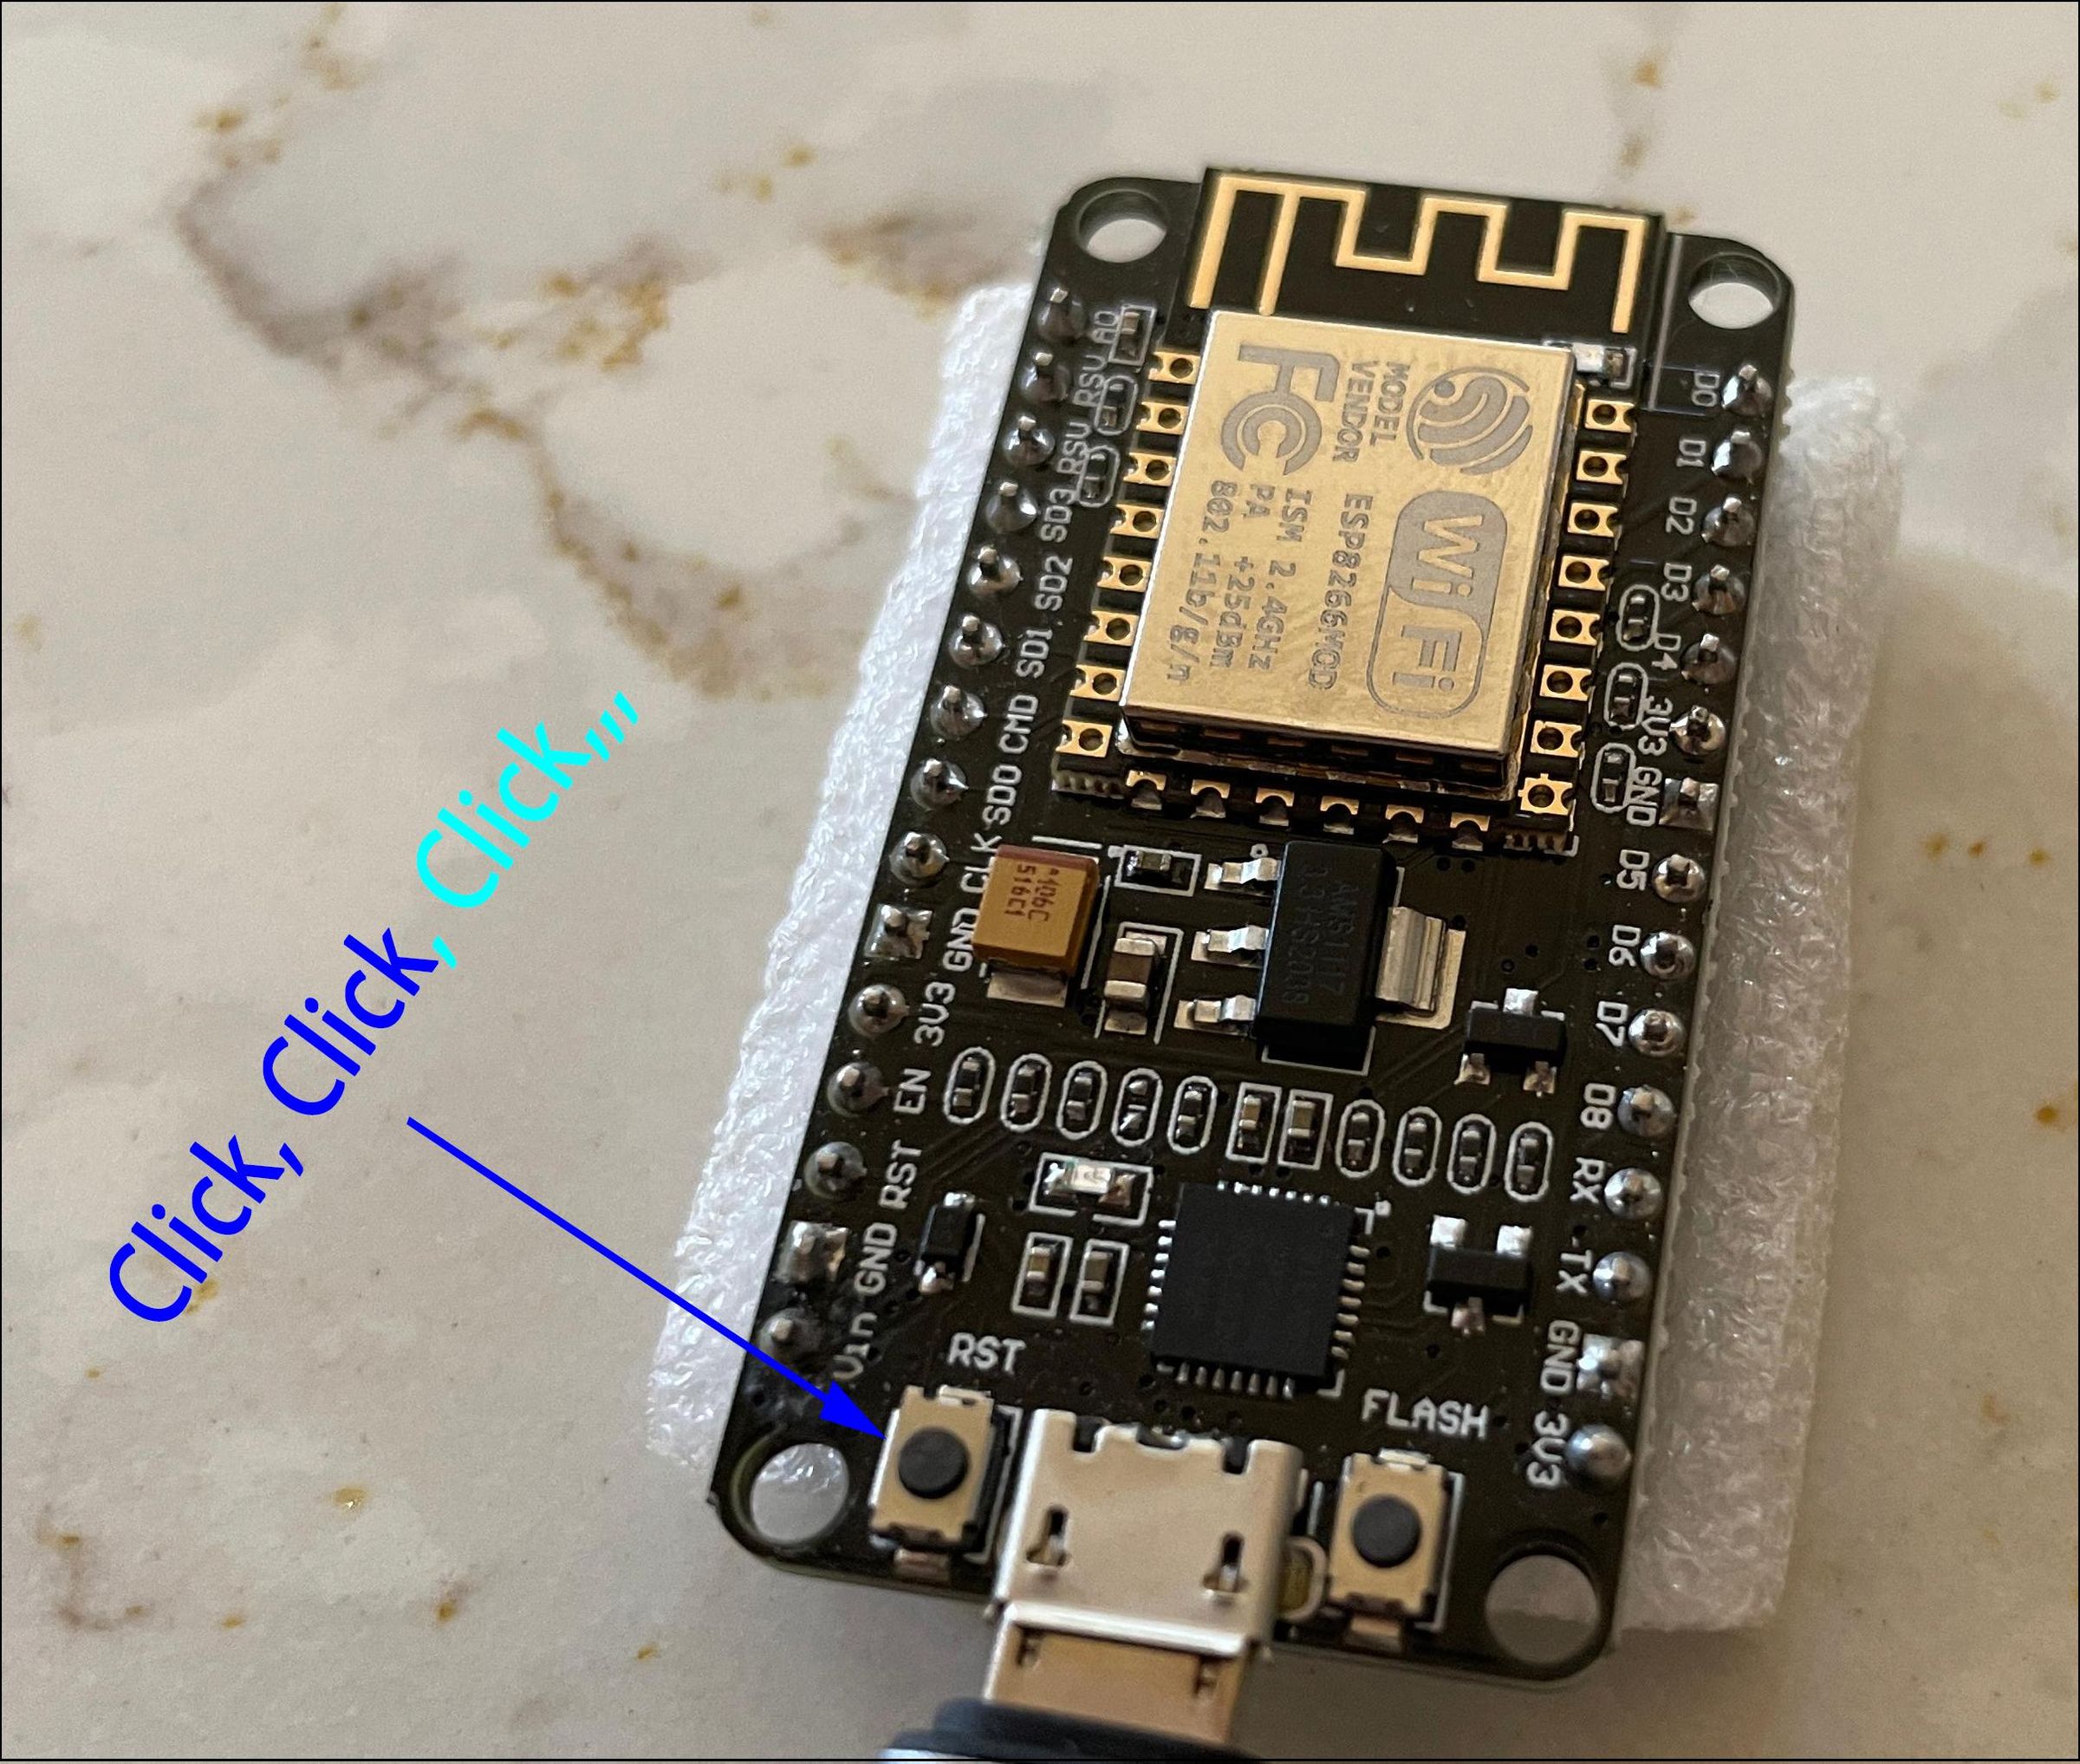
In addition we will be using Double Reset Detector by Stephen Denne to trigger the WifiManager Configutation Mode and trigger a reset and load the iSpindelink Wifi Configuration page at IP Address 192.168.4.1.
Many thanks to:
|
Flowchart…
| START | v Load saved IP and Port from LittleFS | v Double Reset? | +----YES----> Open WiFiManager Config Portal | | | v | User enters Static IP and Port | | | v | Save to LittleFS | +----NO-----> Apply Stored Static IP and Port | v Auto Connect WiFi | +---------+---------+ | | Success Failure | | v v Print Network Info Restart ESP | v LOOP | v Monitor DRD Print SSID/IP, Static IP and Port Wait 3 seconds | +----> Repeat |
Open a new sketch in the Arduino IDE (File, New Sketch…) then save it as “Rushtp_7_1_Step6_Customising_WifiManager” in your project directory. Note: the “_” linking all the text It has to be one long string of text, no spaces.. The IDE will create a new folder with that name and add a file called Rushtp_7_1_Step6_Customising_WifiManager.ino.
Copy and paste the following script to replace the default script. Then save the file again.
/*
Board: NodeMCU 0.9 (ESP-12 Module)

Ref: “wifimanager for esp8266 what is it?” - Google Search
*/

/*
  Use wifimanager to auto connect to Wifi Networks and store Login and Passwords
    in the ESP8266 Flash memory without hard-coding.

  Customising wifimanager for an ESP8266 NodeMCU to allow
    Static IP Address and Socket Port values to be changes
    and reloaded after Esp8266 reset.

  Create Custom Parameters to Display, Amend, and Set:
    Static IP Address (WiFiManagerParameter custom_ip)
    Socket Port (WiFiManagerParameter custom_pt)

  Double Reset Detector by Stephen Denne is used to erase and reset
    the ESP8266 (iSpingelink) configuration.
*/
#include <ESP8266WiFi.h>
#include <WiFiManager.h>
#include <LittleFS.h>
#include <DoubleResetDetector.h>

#define DRD_TIMEOUT 10
#define DRD_ADDRESS 0

DoubleResetDetector drd(DRD_TIMEOUT, DRD_ADDRESS);

WiFiManager wm;

char staticIP[16] = "192.168.1.97";
char soc_port[5] = "9503";

WiFiManagerParameter custom_ip("staticip", "Static IP", staticIP, 16);
WiFiManagerParameter custom_pt("Soc_port", "Socket Port", soc_port, 5);

bool shouldSaveConfig = false;

// ===========================================
// Save callback
// ===========================================
void saveConfigCallback() {

  strcpy(staticIP, custom_ip.getValue());
  strcpy(soc_port, custom_pt.getValue());

  File f = LittleFS.open("/ip.txt", "w");
  if (f) {
    f.println(staticIP);
    f.close();

    Serial.println("Configuration saved");
    Serial.print("Saved IP: ");
    Serial.println(staticIP);
  }

  File g = LittleFS.open("/pt.txt", "w");
  if (g) {
    g.println(soc_port);
    g.close();

    Serial.println("Configuration saved");
    Serial.print("Saved Port: ");
    Serial.println(soc_port);
  }

  shouldSaveConfig = true;
}

// ===========================================
// Load configuration
// ===========================================
void loadConfig() {

  if (!LittleFS.begin()) {
    Serial.println("LittleFS mount failed");
    return;
  }

  if (!LittleFS.exists("/ip.txt")) {
    Serial.println("No saved IP file found");
    return;
  }
  File f = LittleFS.open("/ip.txt", "r");
  if (!f) {
    Serial.println("Failed to open config file");
    return;
  }
  String ip = f.readStringUntil('\n');
  ip.trim();
  if (ip.length() > 0) {
    ip.toCharArray(staticIP, sizeof(staticIP));
  }
  f.close();

  if (!LittleFS.exists("/pt.txt")) {
    Serial.println("No saved IP file found");
    return;
  }
  File g = LittleFS.open("/pt.txt", "r");
  if (!g) {
    Serial.println("Failed to open config file");
    return;
  }
  String pt = g.readStringUntil('\n');
  ip.trim();
  if (pt.length() > 0) {
    pt.toCharArray(soc_port, sizeof(soc_port));
  }
  g.close();
  Serial.print("Loaded Static IP: ");
  Serial.println(staticIP);
  Serial.println(soc_port);
}

// ===========================================
// Apply static IP
// ===========================================
void applyStaticIP() {

  IPAddress ip;

  if (!ip.fromString(staticIP)) {
    Serial.println("Invalid static IP");
    return;
  }

  IPAddress gateway(192, 168, 1, 1);
  IPAddress subnet(255, 255, 255, 0);
  IPAddress dns1(8, 8, 8, 8);

  WiFi.config(ip, gateway, subnet, dns1);

  Serial.print("Configured static IP: ");
  Serial.println(staticIP);
}

// ===========================================
// Setup
// ===========================================
void setup() {

  Serial.begin(115200);
  delay(1000);

  Serial.println();
  Serial.println("Booting...");

  loadConfig();

  custom_ip.setValue(staticIP, sizeof(staticIP));
  wm.addParameter(&custom_ip);

  custom_pt.setValue(soc_port, sizeof(soc_port));
  wm.addParameter(&custom_pt);

  wm.setSaveConfigCallback(saveConfigCallback);

  bool forcePortal = drd.detectDoubleReset();

  if (forcePortal) {
    Serial.println("Double Reset Detected");
    wm.startConfigPortal("iSpindelink");
  }
  else {

    applyStaticIP();

    if (!wm.autoConnect("iSpindelink")) {

      Serial.println("Failed to connect");
      ESP.restart();
    }
  }

  // Retrieve latest value entered in portal
  strcpy(staticIP, custom_ip.getValue());

  Serial.println();
  Serial.println("WiFi Connected");
  Serial.print("SSID: ");
  Serial.println(WiFi.SSID());

  Serial.print("Port: ");
  Serial.println(soc_port);
  Serial.print("ESP IP: ");
  Serial.println(WiFi.localIP());

  Serial.print("Stored Static IP: ");
  Serial.println(staticIP);
}

// ===========================================
// Loop
// ===========================================
void loop() {

  drd.loop();

  Serial.println();
  Serial.println("---------------------------------------------");
  Serial.println("WiFi Connected");
  Serial.print("SSID: ");
  Serial.println(WiFi.SSID());

  Serial.print("ESP IP: ");
  Serial.println(WiFi.localIP());

  Serial.print("Stored Static IP: ");
  Serial.println(staticIP);

  Serial.print("Port: ");
  Serial.println(soc_port);
  delay(3000);
}
| If the iSpindel does not connect check that the battery is fully charged (with the usb connected a blue LED lights up when charging is complete). Also check the configutations are correct (see Step 1…). |
Then, if there are no errors, use ➔ Upload and the Serial Monitor should display something like this…
Note: The Arduino IDE Serial Monitor does not wrap the text.| Booting... Loaded Static IP: 192.168.1.97 9503 Configured static IP: 192.168.1.97 *wm:AutoConnect *wm:Connecting to SAVED AP: vodafoneCF3EC4 *wm:connectTimeout not set, ESP waitForConnectResult... *wm:AutoConnect: SUCCESS *wm:STA IP Address: 192.168.1.97 WiFi Connected SSID: vodafoneCF3EC4 Port: 9503 ESP IP: 192.168.1.97 Stored Static IP: 192.168.1.97 --------------------------------------------- WiFi Connected SSID: vodafoneCF3EC4 ESP IP: 192.168.1.97 Stored Static IP: 192.168.1.97 Port: 9503 --------------------------------------------- |
After “Click, Click, Clicking…” the ESP8266 Reset button...
| Booting... Loaded Static IP: 192.168.1.97 9503 Double Reset Detected *wm:StartAP with SSID: iSpindelink *wm:AP IP address: 192.168.4.1 *wm:Starting Web Portal |
Connect to wifi iSpindelink. Goto internet address 192.168.4.1 in your web browser. Then Configure Wifi and select your SSID and set the Password (it must be selected even though it appears in grey text). Amend the Static IP address and Port to to say 192.168.1.96 and 9502. then Save. the ESP8266 should reset and display the following in the Serial monitor …
| *wm:Starting Web Portal *wm:4 networks found *wm:Connecting to NEW AP: vodafoneCF3EC4 *wm:connectTimeout not set, ESP waitForConnectResult... *wm:Connect to new AP [SUCCESS] *wm:Got IP Address: *wm:192.168.1.36 Configuration saved Saved IP: 192.168.1.96 Configuration saved Saved Port: 9502 *wm:config portal exiting WiFi Connected SSID: vodafoneCF3EC4 Port: 9502 ESP IP: 192.168.1.36 Stored Static IP: 192.168.1.96 |
Try a single click of the Esp8266 reset button and confirm the new settings have been retained.
Finally unplug the ESP8266, then reconnect it. the new setting should still be set.
| … You can repeat the Click, Click, Clicking of the ESP8266Reset button. Then go back into the iSpindelink wifi and in web page 192.168.4.1 change the configuration back to match the iSpindel settings 192.168.1.97 and 9503 and Save. |
Great!
We now have the NodeMCU ESP8266 Development Board programmed with WifiManager and custom parameters to allow the local network to be connected and the iSpindelink Static IP address and listening Port to be set without hard coding the changes.
In the next Step we will merge the iSpindel Socket Client listening code with this WifiManager code.
ESP8266 - Merge With WifiManager
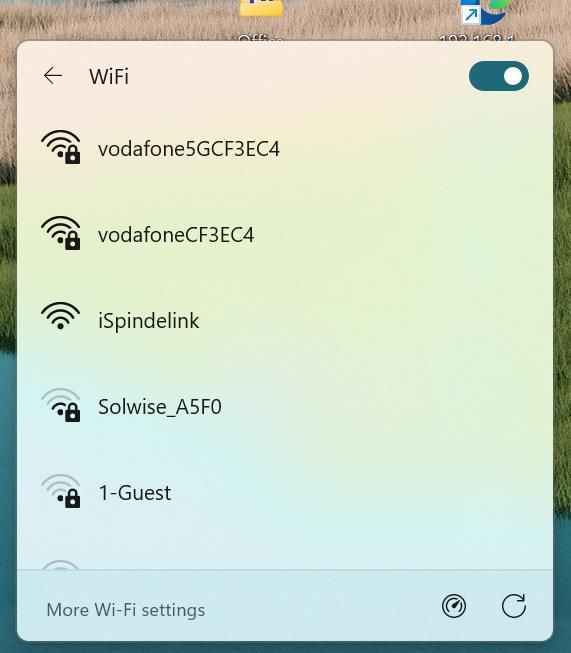
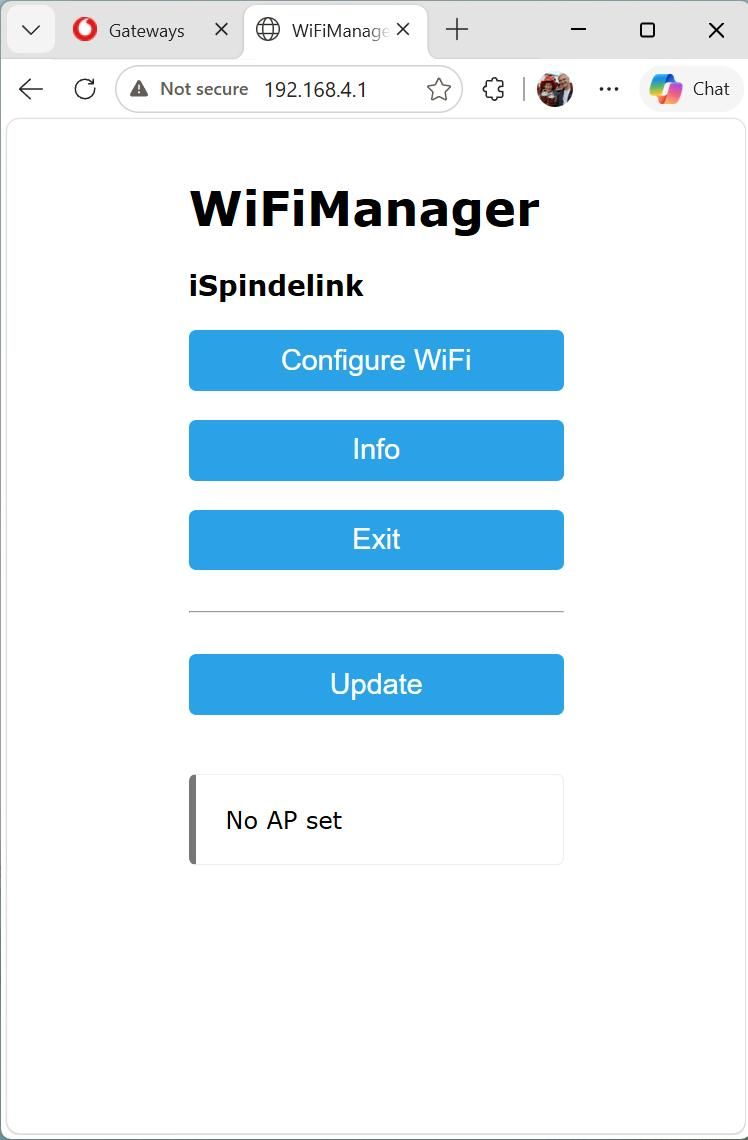
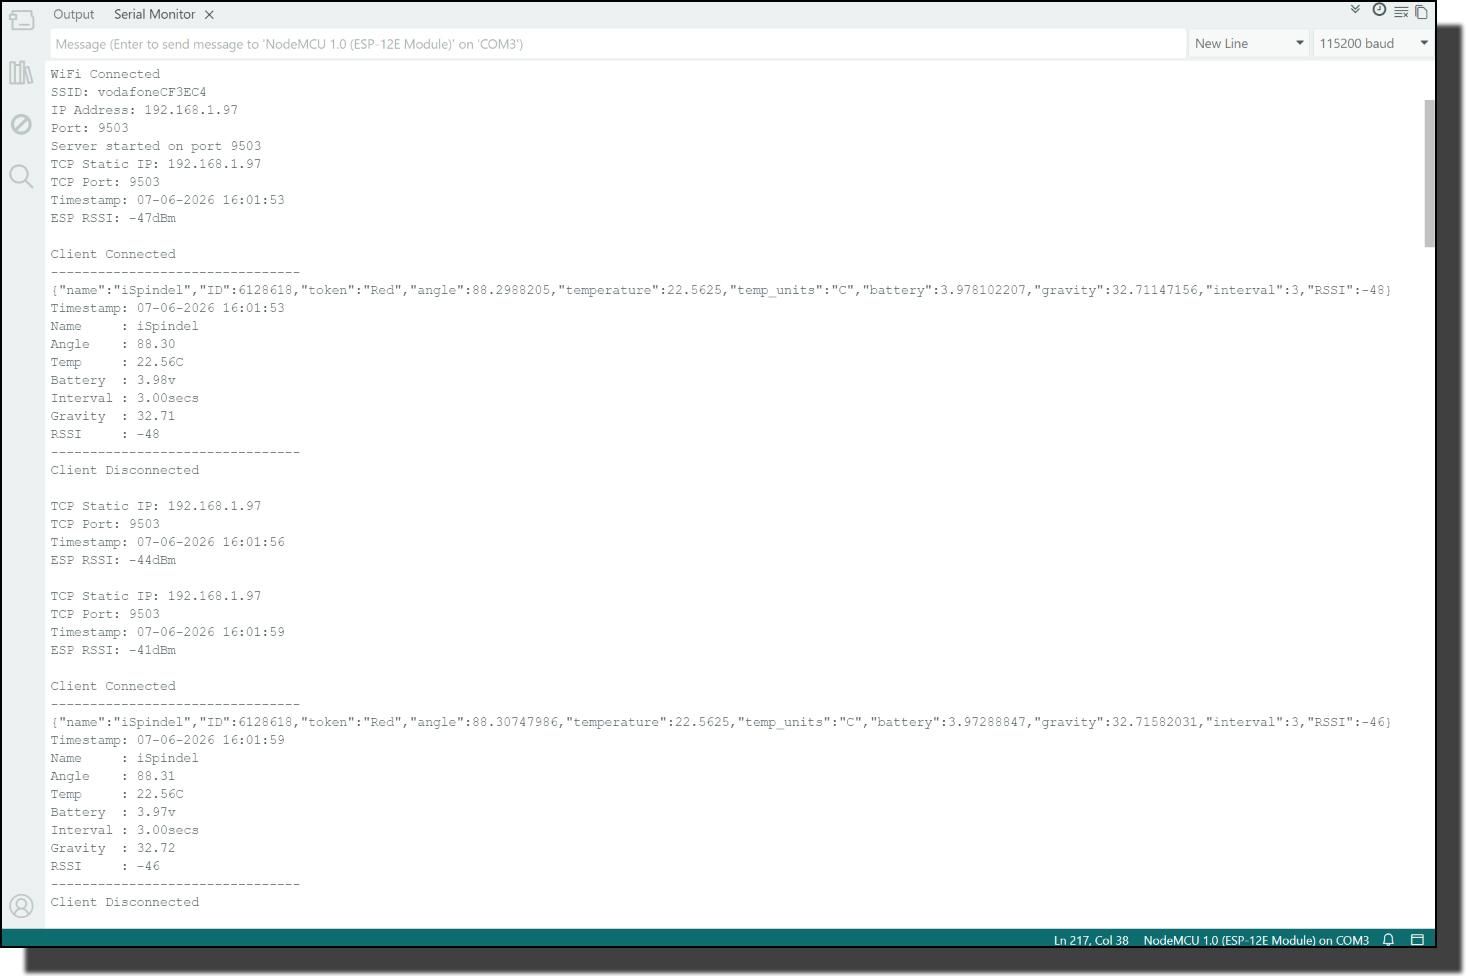
In this step I have used Chat GPT, an online AI agent, to merge our iSpindelink socket client listening code with the WifiManager functionality to enable the Wifi to be set up in a similar way the iSpindel is configured.
After checking and modifying the initial merged script I have made the following changes: - Made “char dateTime[25];” a global variable to allow it to be used in the handelTCP() function.
- Replaced the blocking “delay(3000);” in the Loop function with “if (currentMillis - previousMillis >= 3000)”.
| Serial.print("TCP Static IP: "); Serial.println(staticIP); Serial.print("TCP Port: "); Serial.println(soc_port); Serial.print("Timestamp: "); Serial.println(dateTime); Serial.print("ESP RSSI: "); Serial.println(String(WiFi.RSSI()) + "dBm"); |
| Serial.print("Timestamp: "); Serial.println(dateTime); Serial.print("Name : "); Serial.println(name); Serial.print("Angle : "); Serial.println(angle); Serial.print("Temp : "); Serial.print(temp); Serial.println(units); Serial.print("Battery : "); Serial.print("battery); Serial.println("v"); Serial.print("Interval : "); Serial.print("interval); Serial.println("secs"); Serial.print("Gravity : "); Serial.println(gravity); Serial.print("RSSI : "); Serial.println(rssi); |
| “WiFiManager allows you to connect your ESP8266 to different Access Points (AP) without having to hard-code and upload new code to your board” - Random Nerd Tutorials |
Flowchart…
| START | v Load saved IP ; Port | Check for Double Reset | +-- Yes --> Open WiFi Configuration Portal | | | Save Settings | | | Restart | +-- No --> Apply Static IP | Connect WiFi | Configure NTP | Start TCP Server | LOOP | Get Timestamp | Check for Double Reset Trigger | +--------------------------+ | | TCP Client Connected? If 3000 Millis Elapsed / \ | No Yes Print Static IP, Port and Timestamp | | | Repeat Read JSON Data Repeat | JSON Valid? / \ No Yes | | Error Extract Fields | Display Values | Client Connected? / \ Yes No | | Read More Disconnect | | +-------------+ | Repeat |
Open a new sketch in the Arduino IDE (File, New Sketch…) then save it as “Rushtp_7_1_Step7_Merge_With_WifiManage” in your project directory. Note: the “_” linking all the text It has to be one long string of text, no spaces.. The IDE will create a new folder with that name and add a file called Rushtp_7_1_Step7_Merge_With_WifiManage.ino.
Copy and paste the following script to replace the default script. Then save the file again.
 /*
Board: NodeMCU 0.9 (ESP-12 Module)

Ref: Merged two scripts using initially with ChatGPT - Then Amended the combined script:
  Rushtp_7_11_Step5_Adding_A_Timestamp_v1.1 (iSpindelink)
  Rushtp_7_1_Step6_Customising_WifiManager (Wifi Manager)
*/

/*
   ESP8266 iSpindel Listener
   - WiFiManager
   - Static IP configuration
   - Configurable Socket Port
   - LittleFS storage
   - Double Reset Detector
   - NTP Timestamp
   - JSON TCP Listener
*/

#include <ESP8266WiFi.h>
#include <WiFiManager.h>
#include <LittleFS.h>
#include <DoubleResetDetector.h>
#include <ArduinoJson.h>
#include <time.h>

// -----------------------------------------------------
// Network Time
// -----------------------------------------------------
#define MY_NTP_SERVER "at.pool.ntp.org"
#define MY_TZ "GMT0BST,M3.5.0/1,M10.5.0/2"

time_t now;
tm tm_info;
char dateTime[25];  //Format for dd-mm-yyyy hh:mm:ss

// -----------------------------------------------------
// Double Reset Detector
// -----------------------------------------------------
#define DRD_TIMEOUT  10
#define DRD_ADDRESS 0
DoubleResetDetector drd(DRD_TIMEOUT, DRD_ADDRESS);

// -----------------------------------------------------
// TCP Server
// -----------------------------------------------------
WiFiServer*tcpServer = nullptr;

// -----------------------------------------------------
// Hold a value for non blocking delay
// -----------------------------------------------------
unsigned long previousMillis = 0;

// -----------------------------------------------------
// Wifi Manager
// -----------------------------------------------------
WiFiManager wm;

char staticIP[16] = "192.168.1.97";
char soc_port[6]  = "9503";

WiFiManagerParameter custom_ip("staticip", "Static IP", staticIP, sizeof(staticIP));
WiFiManagerParameter custom_pt("Soc_port", "Socket Port", soc_port, sizeof(soc_port));

bool shouldSaveConfig = false;

// -----------------------------------------------------
// Wifi Manager - Save Config
// -----------------------------------------------------
void saveConfigCallback()
{
  strcpy(staticIP, custom_ip.getValue());
  strcpy(soc_port, custom_pt.getValue());

  File f = LittleFS.open("/ip.txt", "w");

  if (f)
  {
    f.println(staticIP);
    f.close();
  }

  File g = LittleFS.open("/pt.txt", "w");

  if (g)
  {
    g.println(soc_port);
    g.close();
  }

  shouldSaveConfig = true;

  Serial.println("Configuration Saved");
}

// -----------------------------------------------------
// Wifi Manager - Load Config
// -----------------------------------------------------
void loadConfig()
{
  if (!LittleFS.begin())
  {
    Serial.println("LittleFS Mount Failed");
    return;
  }

  if (LittleFS.exists("/ip.txt"))
  {
    File f = LittleFS.open("/ip.txt", "r");

    if (f)
    {
      String ip = f.readStringUntil('\n');
      ip.trim();

      if (ip.length())
      {
        ip.toCharArray(staticIP, sizeof(staticIP));
      }

      f.close();
    }
  }

  if (LittleFS.exists("/pt.txt"))
  {
    File g = LittleFS.open("/pt.txt", "r");

    if (g)
    {
      String pt = g.readStringUntil('\n');
      pt.trim();

      if (pt.length())
      {
        pt.toCharArray(soc_port, sizeof(soc_port));
      }

      g.close();
    }
  }

  Serial.print("Loaded Static IP: "); Serial.println(staticIP);
  Serial.print("Loaded Port: "); Serial.println(soc_port);
}

// -----------------------------------------------------
// Set Static IP - using variable staticIP from Flash drive
// -----------------------------------------------------
void applyStaticIP()
{
  IPAddress ip;

  if (!ip.fromString(staticIP))
  {
    Serial.println("Invalid Static IP");
    return;
  }

  IPAddress gateway(192, 168, 1, 1);
  IPAddress subnet(255, 255, 255, 0);
  IPAddress dns(8, 8, 8, 8);

  WiFi.config(ip, gateway, subnet, dns);

  Serial.print("Configured Static IP: "); Serial.println(staticIP);
}

// -----------------------------------------------------
// TCP SERVER - listen for iSpindel socket data and extract fields and values
// -----------------------------------------------------
void handelTCP()
{
  WiFiClient client =tcpServer->available();

  if (!client)
  {
    //Serial.println("iSpindel NOT connected!");
    return;
  }

  Serial.println("Client Connected");

  JsonDocument doc;

  while (client.connected())
  {
    if (client.available())
    {
      digitalWrite(2, LOW);  //Blue LED Off

      String request = client.readStringUntil('\n');

      Serial.println("--------------------------------");
      Serial.println(request);

      DeserializationError error = deserializeJson(doc, request);
      if (error)
      {
        Serial.println("JSON Parse Failed");
        continue;
      }

      double angle   = doc["angle"] | 0.0;
      double temp    = doc["temperature"] | 0.0;
      String units   = doc["temp_units"] | "";
      double battery = doc["battery"] | 0.0;
      double interval   = doc["interval"] | 0.0;
      double gravity = doc["gravity"] | 0.0;
      int rssi       = doc["RSSI"] | 0;
      String name    = doc["name"] | "";

      Serial.print("Timestamp: "); Serial.println(dateTime);
      Serial.print("Name     : "); Serial.println(name);
      Serial.print("Angle    : "); Serial.println(angle);
      Serial.print("Temp     : "); Serial.print(temp); Serial.println(units);
      Serial.print("Battery  : "); Serial.println(battery); Serial.println("v");
      Serial.print("Interval  : "); Serial.println(interval); Serial.println("secs");
      Serial.print("Gravity  : "); Serial.println(gravity);
      Serial.print("RSSI     : "); Serial.println(rssi);

      doc.clear();
    }

    yield();
  }

  client.stop();

  digitalWrite(2, HIGH);  //Blue LED Off

  Serial.println("--------------------------------");
  Serial.println("Client Disconnected");
  Serial.println();
}

// -----------------------------------------------------
// Setup
// -----------------------------------------------------
void setup()
{
  pinMode(2, OUTPUT);
  digitalWrite(2, HIGH);  //Blue LED Off

  Serial.begin(115200);
  delay(1000);

  Serial.println();
  Serial.println("Booting...");

  loadConfig();   //Wifi Manager - Load Config

  custom_ip.setValue(staticIP, sizeof(staticIP));
    wm.addParameter(&custom_ip);
  custom_pt.setValue(soc_port, sizeof(soc_port));
    wm.addParameter(&custom_pt);

  wm.setSaveConfigCallback(saveConfigCallback); //Save custon variables to flash drive


bool forcePortal = drd.detectDoubleReset();
  if (forcePortal)
  {
    Serial.println("Double Reset Detected");
    //wm.resetSettings();  //This clears the SSID and Password boxes else current SSID greyed out.
    wm.startConfigPortal("iSpindelink");
    delay(200);
    ESP.restart();
  }
  else
  {
    applyStaticIP();  //using variable staticIP from Flash drive

    if (!wm.autoConnect("iSpindelink"))
    {
      Serial.println("WiFi Failed");
      ESP.restart();
    }
  }

  strcpy(staticIP, custom_ip.getValue());
  strcpy(soc_port, custom_pt.getValue());

  Serial.println();
  Serial.println("WiFi Connected");

  Serial.print("SSID: "); Serial.println(WiFi.SSID());
  Serial.print("IP Address: "); Serial.println(WiFi.localIP());
  Serial.print("Port: "); Serial.println(soc_port);

  // NTP
  configTime(MY_TZ, MY_NTP_SERVER);

  // Create tcpServer using custom port value from flash drive

uint16_t port = atoi(soc_port);

  tcpServer = new WiFiServer(port);
  tcpServer->begin();

  Serial.print("Server started on port "); Serial.println(port);
}


// -----------------------------------------------------
// Loop
// -----------------------------------------------------
void loop()
{
  // Current time
  time(&now);
  localtime_r(&now, &tm_info);

  /* Get inbound data from iSpindel and uses deserializeJson(doc, inbound)
      and extract keys and key values into global variables*/
  handelTCP();

  //Check for Double Reset
  drd.loop();

  unsigned long currentMillis = millis();

  if (currentMillis - previousMillis >= 3000)     //Do every 3 seconds
  {
    sprintf(
      dateTime,
      "%02d-%02d-%04d %02d:%02d:%02d",
      tm_info.tm_mday,
      tm_info.tm_mon + 1,
      tm_info.tm_year + 1900,
      tm_info.tm_hour,
      tm_info.tm_min,
      tm_info.tm_sec
    );
    delay(100);
    // Serial Print these variables even if socket client is not connected.
    Serial.print("TCP Static IP: "); Serial.println(staticIP);
    Serial.print("TCP Port: "); Serial.println(soc_port);
    Serial.print("Timestamp: "); Serial.println(dateTime);
    Serial.print("ESP RSSI: "); Serial.println(String(WiFi.RSSI()) + "dBm");
    Serial.println();

    previousMillis = currentMillis;
  }

}
| If the iSpindel does not connect check that the battery is fully charged (with the usb connected a blue LED lights up when charging is complete). Also check the configutations are correct (see Step 1…). |
Then, if there are no errors, use ➔ Upload and the Serial Monitor should display something like this…
Note: The Arduino IDE Serial Monitor does not wrap the text.| Booting... Loaded Static IP: 192.168.1.97 Loaded Port: 9503 Configured Static IP: 192.168.1.97 *wm:AutoConnect *wm:Connecting to SAVED AP: vodafoneCF3EC4 *wm:connectTimeout not set, ESP waitForConnectResult... *wm:AutoConnect: SUCCESS *wm:STA IP Address: 192.168.1.97 WiFi Connected SSID: vodafoneCF3EC4 IP Address: 192.168.1.97 Port: 9503 Server started on port 9503 Client Connected -------------------------------- {"name":"iSpindel","ID":6128618,"token":"Red","angle":88.3065033,"temperature":22.625,"temp_units":"C","battery":3.97288847,"gravity":32.71533203,"interval":3,"RSSI":-44} Timestamp: Name : iSpindel Angle : 88.31 Temp : 22.63C Battery : 3.97v Interval : 3.00secs Gravity : 32.72 RSSI : -44 -------------------------------- Client Disconnected TCP Static IP: 192.168.1.97 TCP Port: 9503 Timestamp: 01-01-1970 00:00:01 ESP RSSI: -43dBm TCP Static IP: 192.168.1.97 TCP Port: 9503 Timestamp: 07-06-2026 16:07:40 ESP RSSI: -47dBm Client Connected -------------------------------- {"name":"iSpindel","ID":6128618,"token":"Red","angle":88.27786255,"temperature":22.625,"temp_units":"C","battery":3.97288847,"gravity":32.70094681,"interval":3,"RSSI":-43} Timestamp: 07-06-2026 16:07:40 Name : iSpindel Angle : 88.28 Temp : 22.63C Battery : 3.97v Interval : 3.00secs Gravity : 32.70 RSSI : -43 -------------------------------- Client Disconnected |
Now we are getting there!
We now have the NodeMCU ESP8266 Development Board programmed with WifiManager and custom parameters to allow the local network to be connected and the iSpindelink Static IP address and listening Port to be set without hard coding the changes.
| So far we have been using the Arduino IDE Serial Monitor to retrieve the iSpindel data. In Step 8 we will create a web page on the Static IP Address 192.168.1.97 to display the live readings over your home network. |
ESP8266 - Streaming Live Readings on the Web Page
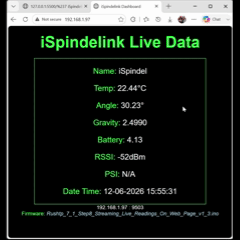
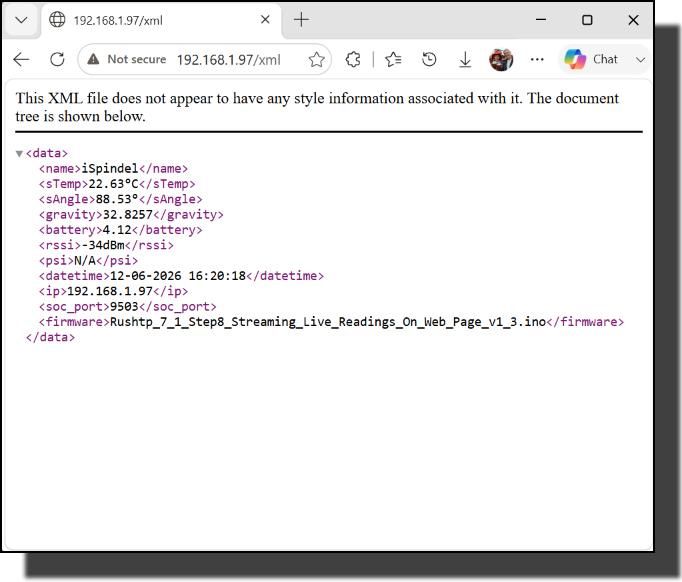
So have sucessfully got the iSpindelink listening for the iSpindel TCP data and streaming it to the Arduino IDE Serial Monitor. Now let’s give the ESP8266 NodeMCU it’s independence and stream the live data to a web page…
The objective now is to stream iSpindel data to a web page in XML format. The ESP8266 will act as a web server, and send data to http://192.168.1.97/XML so that it can be parsed by JavaScript into a dashboard web page at our static IP address 192.168.1.97.
Many thanks to:
|
Let’s walk through the new code we will be using. In the full working Arduino IDE sketch I have defined functions() to hold the HTML and XML code to make the sketch easier to read and debug. the function is called by server.on("/", handleRoot); where handelRoot is the function containing the HTML for the home page.
Example
| void handleRoot() { String htmlRootSite = R"rawliteral( . . HTML and Script goes here… . )rawliteral"; server.send(200, "text/html", htmlRootSite); } server.on("/", handleRoot); server.begin(); |
Note the used of R"rawliteral(…)rawliteral"; to tell the compiler to treat everything between the brackets not as IDE code but to load it exactly as it is typed. That allows us to insert the HTML, JavaScript and XML code for sent by the ESP8266 webserver using server.send(200, "text/html", htmlRootSite);. The 200 tells the browser that it can use the HTML we sent.
HTML (Hypertext Markup Language) is a simple markup coding language used to layout content on a webpage. HTML programming language to tell web browsers how to display the page contents.
Here we set up our iSpindelink Live Data dashboard. The <script> …</script> tags are used to embed executable Javascript code as detailed below.
| <!DOCTYPE html> <html> <head> <title>iSpindelink Dashboard</title> <style> body { font-family: Arial; background:black; color:#0f0; text-align:center; } .data{ color:white; } </style> </head> <body> <h1><font color:#0f0; size=8>iSpindelink Live Data</font></h1> <table align='center' width='520' border='1px' cellpadding='0' cellspacing='0' style='border-color:#0f0; background-color:black'> <tr> <td> <font size=5> <p>Name: <span Class="data" id="name"></span></p> <p>Temp: <span Class="data" id="sTemp"></span></p> <p>Angle: <span Class="data" id="sAngle"></span></p> <p>Gravity: <span Class="data" id="gravity"></span></p> <p>Battery: <span Class="data" id="battery"></span></p> <p>RSSI: <span Class="data" id="rssi"></span></p> <p>PSI: <span Class="data" id="psi"></span></p> <p>Date Time: <span Class="data" id="datetime"></span></p> </font> </td > </tr> </table <p><span Class="data" id="ip"></span> : <span Class="data" id="soc_port"></span> <br>Firmware: <em><font style="color: lightblue;"><span id="firmware"></span></font></em></p> <script> function load() { . . . See details in JavaScript below… . } setInterval(load,2000); load(); </script> </body> </html> |
JavaScript is a browser-based programming language that brings interactivity to static web pages, applications and more.
In our case the Javascript function load() is triggered every 2 seconds by setInterval(load,2000); and gets the iSpindel data values from the XML page and inserts it into the HTML tabs with the ids with the associated field name (e.g. <span Class="data" id="gravity"></span>)
| <script> function load() { fetch('/xml') .then(r=>r.text()) .then(str=>(new DOMParser()).parseFromString(str,"text/xml")) .then(d=> { ["sTemp", "gravity", "battery", "sAngle", "rssi", "name", "psi", "datetime", "ip", "soc_port", "firmware"].forEach(k=> { document.getElementById(k).innerText = d.getElementsByTagName(k)[0].textContent; }); }); } setInterval(load,2000); load(); </script> |
XML (eXtensible Markup Language). Unlike HTML, which is designed specifically to display data visually in a web browser, XML is strictly focused on defining and carrying the data itself.
Here a string variable “XML” is built to include the iSpindel data fields and values.
| String xml = "<?xml version='1.0'?><data>"; xml += "<name>" + String(name) + "</name>"; xml += "<sTemp>" + String(sTemp) + "</sTemp>"; xml += "<sAngle>" + String(sAngle) + "</sAngle>"; xml += "<gravity>" + String(gravity, 4) + "</gravity>"; xml += "<battery>" + String(battery, 2) + "</battery>"; xml += "<rssi>" + String(String(WiFi.RSSI()) + "dBm") + "</rssi>"; xml += "<psi>" + String(psi) + "</psi>"; xml += "<datetime>" + String(dateTime) + "</datetime>"; xml += "<ip>" + WiFi.localIP().toString() + "</ip>"; xml += "<soc_port>" + String(soc_port) + "</soc_port>"; xml += "<firmware>" + String(__FILENAME__) + "</firmware>"; xml += "</data>"; server.send(200, "text/xml", xml); |
Flowchart…
| Start │ ▼ Initialize Web Server ESP8266WebServer server(80); | ▼ Design XML page Design HTML Home Page | ▼ Connect to Wifi with WifiManager | +---------------------+ | | Yes No | | | Reset Configuration | | | Retry ▼ Configure Web Pages server.send(200, "text/html", htmlRootSite); server.send(200, "text/xml", xml); | ▼ Start Web Server server.begin(); | ▼ LOOP | ▼ Handle Client Request server.handleClient(); | +--------------- Send HTML Page | server.on("/", handleRoot); | +--------------- Read data into XML page | server.on("/xml", handleXML); | ▼ Repeat |
Open a new sketch in the Arduino IDE (File, New Sketch…) then save it as “Rushtp_7_1_Step8_Streaming_Live_Readings_On_Web_Page” in your project directory. Note: the “_” linking all the text It has to be one long string of text, no spaces.. The IDE will create a new folder with that name and add a file called Rushtp_7_1_Step8_Streaming_Live_Readings_On_Web_Page.ino.
Copy and paste the following script to replace the default script. Then save the file again.
| You do not need to download ESP8266WebServer.h separately. The library is included automatically when we installed the ESP8266 Arduino Core in your Arduino IDE (See Step 2...). |
 /*
  Board: NodeMCU 0.9 (ESP-12 Module)

  iSpindelink listens for, and processes the iSpindel TCP data stream
  then broardcasts the live data on a local network stativ IP address Web Page.
  The TCP static IP address and port can be set in WifiManager
  and saved along with your network ID and Password.
*/

/*
   ESP8266 iSpindel Listener
   - WiFiManager
   - Static IP configuration
   - Configurable Socket Port
   - LittleFS storage
   - Double Reset Detector
   - NTP Timestamp
   - JSON TCP Listener
   - Arduino IDE aketch file name
   - Web Page at 192.168.1.97
*/

#include <ESP8266WiFi.h>
#include <ESP8266WebServer.h>
#include <WiFiManager.h>
#include <LittleFS.h>
#include <DoubleResetDetector.h>
#include <ArduinoJson.h>
#include <time.h>

// -----------------------------------------------------
// Network Time
// -----------------------------------------------------
#define MY_NTP_SERVER "at.pool.ntp.org"
#define MY_TZ "GMT0BST,M3.5.0/1,M10.5.0/2"
time_t now;
tm tm_info;
char dateTime[25];  //Format for dd-mm-yyyy hh:mm:ss

// -----------------------------------------------------
// Double Reset Detector
// -----------------------------------------------------
#define DRD_TIMEOUT 10
#define DRD_ADDRESS 0
DoubleResetDetector drd(DRD_TIMEOUT, DRD_ADDRESS);

// -----------------------------------------------------
// Web server
// -----------------------------------------------------
ESP8266WebServer server(80);

// -----------------------------------------------------
// TCP Server
// -----------------------------------------------------
WiFiServer*tcpServer = nullptr;

// -----------------------------------------------------
// iSpindel DATA
// -----------------------------------------------------
double angle      = 0;
double temp       = 0;
double battery    = 0;
double gravity    = 0;
int interval      = 0;
const char* units = "-";
String name  = "-";
int rssi          = 0;
String sTemp      = "-"; //String(temp, 2)+String("°")+String(units);
String sAngle     = "-";  //String(Angle, 2)+String("°")
const char* psi   = "N/A";   //PSI to be used later

// -----------------------------------------------------
// Arduino IDE sketch filename
// -----------------------------------------------------
#define __FILENAME__ (strrchr(__FILE__, '\\') ? strrchr(__FILE__, '\\') + 1 : __FILE__)

// -----------------------------------------------------
// Hold a value for non blocking delay
// -----------------------------------------------------
unsigned long previousMillis = 0;

// -----------------------------------------------------
// Wifi Manager
// -----------------------------------------------------
WiFiManager wm;

char staticIP[16] = "192.168.1.97";
char soc_port[6]  = "9503";

WiFiManagerParameter custom_ip("staticip", "Static IP", staticIP, sizeof(staticIP));
WiFiManagerParameter custom_pt("Soc_port", "Socket Port", soc_port, sizeof(soc_port));

bool shouldSaveConfig = false;

// -----------------------------------------------------
// Wifi Manager - Save Config
// -----------------------------------------------------
void saveConfigCallback()
{
  strcpy(staticIP, custom_ip.getValue());
  strcpy(soc_port, custom_pt.getValue());

  File f = LittleFS.open("/ip.txt", "w");

  if (f)
  {
    f.println(staticIP);
    f.close();
  }

  File g = LittleFS.open("/pt.txt", "w");

  if (g)
  {
    g.println(soc_port);
    g.close();
  }

  shouldSaveConfig = true;

  Serial.println("Configuration Saved");
}

// -----------------------------------------------------
// Wifi Manager - Load Config
// -----------------------------------------------------
void loadConfig()
{
  if (!LittleFS.begin())
  {
    Serial.println("LittleFS Mount Failed");
    return;
  }

  if (LittleFS.exists("/ip.txt"))
  {
    File f = LittleFS.open("/ip.txt", "r");

    if (f)
    {
      String ip = f.readStringUntil('\n');
      ip.trim();

      if (ip.length())
      {
        ip.toCharArray(staticIP, sizeof(staticIP));
      }

      f.close();
    }
  }

  if (LittleFS.exists("/pt.txt"))
  {
    File g = LittleFS.open("/pt.txt", "r");

    if (g)
    {
      String pt = g.readStringUntil('\n');
      pt.trim();

      if (pt.length())
      {
        pt.toCharArray(soc_port, sizeof(soc_port));
      }

      g.close();
    }
  }

  Serial.print("Loaded Static IP: "); Serial.println(staticIP);
  Serial.print("Loaded Port: "); Serial.println(soc_port);
}

// -----------------------------------------------------
// Set Static IP - using variable staticIP from Flash drive
// -----------------------------------------------------
void applyStaticIP()
{
  IPAddress ip;

  if (!ip.fromString(staticIP))
  {
    Serial.println("Invalid Static IP");
    return;
  }

  IPAddress gateway(192, 168, 1, 1);
  IPAddress subnet(255, 255, 255, 0);
  IPAddress dns(8, 8, 8, 8);

  WiFi.config(ip, gateway, subnet, dns);

  Serial.print("Configured Static IP: "); Serial.println(staticIP);
}

// -----------------------------------------------------
// TCP SERVER - listen for iSpindel socket data and extract fields and values
// -----------------------------------------------------
void handelTCP()
{
  WiFiClient client =tcpServer->available();

  if (!client)
  {
    //Serial.println("iSpindel NOT connected!");
    return;
  }

  Serial.println("Client Connected");

  JsonDocument doc;

  while (client.connected())
  {
    if (client.available())
    {
      digitalWrite(2, LOW);  //Blue LED Off

      String request = client.readStringUntil('\n');

      Serial.println("--------------------------------");
      Serial.println(request);

      DeserializationError error = deserializeJson(doc, request);
      if (error)
      {
        Serial.println("JSON Parse Failed");
        continue;
      }

      angle      = doc["angle"].as<double>();
      temp       = doc["temperature"].as<double>();
      battery    = doc["battery"].as<double>();
      gravity    = doc["gravity"].as<double>();
      interval   = doc["interval"] | 0;
      units      = doc["temp_units"] | "?";
      name       = doc["name"] | "unknown";
      rssi       = doc["RSSI"] | 0;
      sTemp      = String(doc["temperature"].as<double>()) + "°" + String(doc["temp_units"]);
      sAngle     = String(doc["angle"].as<double>()) + "°";

      Serial.print("name    = "); Serial.println(name);
      Serial.print("sTemp   = "); Serial.println(sTemp);
      Serial.print("sAngle  = "); Serial.println(sAngle);
      Serial.print("gravity = "); Serial.println(gravity, 4);
      Serial.print("battery = "); Serial.println(battery);
      Serial.print("interval= "); Serial.println(interval);
      Serial.print("rssi    = "); Serial.println(rssi);
      Serial.print("psi     = "); Serial.println(psi);

      doc.clear();
    }
  }

  client.stop();

  digitalWrite(2, HIGH);  //Blue LED Off

  Serial.println("--------------------------------");
  Serial.println("Client Disconnected");
  Serial.println();
}

// -----------------------------------------------------
// Web XML
// -----------------------------------------------------
void handleXML()
{
  String xml = "<?xml version='1.0'?><data>";
         xml += "<name>"     + String(name) + "</name>";
         xml += "<sTemp>"    + String(sTemp) + "</sTemp>";
         xml += "<sAngle>"  + String(sAngle) + "</sAngle>";
         xml += "<gravity>"  + String(gravity, 4) + "</gravity>";
         xml += "<battery>"  + String(battery, 2) + "</battery>";
         xml += "<rssi>"     + String(String(WiFi.RSSI()) + "dBm") + "</rssi>";
         xml += "<psi>"      + String(psi) + "</psi>";
         xml += "<datetime>" + String(dateTime) + "</datetime>";
         xml += "<ip>" + WiFi.localIP().toString() + "</ip>";
         xml += "<soc_port>" + String(soc_port) + "</soc_port>";
         xml += "<firmware>" + String(__FILENAME__) + "</firmware>";
         xml += "</data>";

  server.send(200, "text/xml", xml);
}

// -----------------------------------------------------
// Web page
// -----------------------------------------------------
void handleRoot()
{
  String htmlRootSite =
    R"rawliteral(
      <!DOCTYPE html>
      <html>
        <head>
          <title>iSpindelink Dashboard</title>
          <style>
          body { font-family: Arial; background:black; color:#0f0; text-align:center; }
          .data{ color:white; }
          </style>
        </head>

        <body>
          <h1><font color:#0f0; size=8>iSpindelink Live Data</font></h1>

          <table align='center' width='520' border='1px' cellpadding='0' cellspacing='0' style='border-color:#0f0;
          background-color:black'>
            <tr>
              <td>
                <font size=5>
                  <p>Name:      <span Class="data" id="name"></span></p>
                  <p>Temp:      <span Class="data" id="sTemp"></span></p>
                  <p>Angle:     <span Class="data" id="sAngle"></span></p>
                  <p>Gravity:   <span Class="data" id="gravity"></span></p>
                  <p>Battery:   <span Class="data" id="battery"></span></p>
                  <p>RSSI:      <span Class="data" id="rssi"></span></p>
                  <p>PSI:       <span Class="data" id="psi"></span></p>
                  <p>Date Time: <span Class="data" id="datetime"></span></p>
                </font>
              </td >
            </tr>
          </table

          <p><span Class="data" id="ip"></span> : <span Class="data" id="soc_port"></span>
          <br>Firmware: <em><font style="color: lightblue;"><span id="firmware"></span></font></em></p>

          <script>
            function load(){
            fetch('/xml')
            .then(r=>r.text())
            .then(str=>(new DOMParser()).parseFromString(str,"text/xml"))
            .then(d=>{
              ["sTemp","gravity","battery","sAngle","rssi","name","psi","datetime","ip","soc_port","firmware"].forEach(k=>{
              document.getElementById(k).innerText =
              d.getElementsByTagName(k)[0].textContent;
              });
            });
            }
            setInterval(load,2000);
            load();
          </script>

        </body>
      </html>
    )rawliteral";

  server.send(200, "text/html", htmlRootSite);
}

// -----------------------------------------------------
// Setup
// -----------------------------------------------------
void setup()
{
  pinMode(2, OUTPUT);
  digitalWrite(2, HIGH);  //Blue LED Off

  Serial.begin(115200);
  delay(1000);

  Serial.println();
  Serial.println("Booting...");

  loadConfig();   //Wifi Manager - Load Config

  custom_ip.setValue(staticIP, sizeof(staticIP));
    wm.addParameter(&custom_ip);
  custom_pt.setValue(soc_port, sizeof(soc_port));
    wm.addParameter(&custom_pt);

  wm.setSaveConfigCallback(saveConfigCallback); //Save custon variables to flash drive


  bool forcePortal = drd.detectDoubleReset();
  if (forcePortal)
  {
    Serial.println("Double Reset Detected");
    //wm.resetSettings();  //This clears the SSID and Password boxes else current SSID greyed out.
    wm.startConfigPortal("iSpindelink");
    delay(200);
    ESP.restart();
  }
  else
  {
    applyStaticIP();  //using variable staticIP from Flash drive

    if (!wm.autoConnect("iSpindelink"))
    {
      Serial.println("WiFi Failed");
      ESP.restart();
    }
  }

  strcpy(staticIP, custom_ip.getValue());
  strcpy(soc_port, custom_pt.getValue());

  Serial.println();
  Serial.println("WiFi Connected");

  Serial.print("SSID: "); Serial.println(WiFi.SSID());
  Serial.print("IP Address: "); Serial.println(WiFi.localIP());
  Serial.print("Port: "); Serial.println(soc_port);

  // NTP
  configTime(MY_TZ, MY_NTP_SERVER);

  // Create tcpServer using custom port value from flash drive
  uint16_t port = atoi(soc_port);

  tcpServer = new WiFiServer(port);
  tcpServer->begin();
  Serial.print("Server started on port "); Serial.println(port);

  // Web server routes
  server.on("/", handleRoot);
  server.on("/xml", handleXML);
  server.begin();
  //Serial.println("Web server started");
}


// -----------------------------------------------------
// Loop
// -----------------------------------------------------
void loop()
{
  // Current time
  time(&now);
  localtime_r(&now, &tm_info);

  /* Get inbound data from iSpindel and uses deserializeJson(doc, inbound)
     and extract keys and key values into global variables*/
  handelTCP();

  //Manage the incoming network communications
  server.handleClient();

  //Check for Double Reset
  drd.loop();

  unsigned long currentMillis = millis();
  if (currentMillis - previousMillis >= 3000)     //Do every 3 seconds
  {
    sprintf(
      dateTime,
      "%02d-%02d-%04d %02d:%02d:%02d",
      tm_info.tm_mday,
      tm_info.tm_mon + 1,
      tm_info.tm_year + 1900,
      tm_info.tm_hour,
      tm_info.tm_min,
      tm_info.tm_sec
    );
    //delay(100);
    // Serial Print these variables even if socket client is not connected.
    Serial.print("TCP Static IP: "); Serial.println(staticIP);
    Serial.print("TCP Port: "); Serial.println(soc_port);
    Serial.print("Timestamp: "); Serial.println(dateTime);
    Serial.print("ESP RSSI: "); Serial.println(String(WiFi.RSSI()) + "dBm");
    Serial.println();
    previousMillis = currentMillis;
  }

}
| If the iSpindel does not connect check that the battery is fully charged (with the usb connected a blue LED lights up when charging is complete). Also check the configutations are correct (see Step 1…). |
Assuming your iSindel set to stream it’s output on TCP 192.168.1.97:9503 every 3 seconds the iSpindelink will display the live readings in a web browser at address http://192.168.1.97.
Then, if there are no errors, use ➔ Upload and your web page should look something like this…
iSpindelink Live Data
Firmware: Rushtp_7_1_Step8_Streaming_Live_Readings_On_Web_Page.ino |
That’s it - we got there.
Just using a NodeMCU ESP8266 Development Board programmed as a Socket Client we can live stream the Tilt Angle, Temperature, Battery voltage and Gravity data from an iSpindel using the TCP settings. We have also integrated WifiManager to manage connection and built a web site to display fields and values we want to monitor.
| However, there is one issue that need addressing and that is a simple way to put the iSpindelink into Configuration mode without having to Click, Click, Clicking... the Reset button! This is a job for a button on the web page and we will look at doing that next in Step 9… |
ESP8266 - Reset WifiManager From Web Page Button
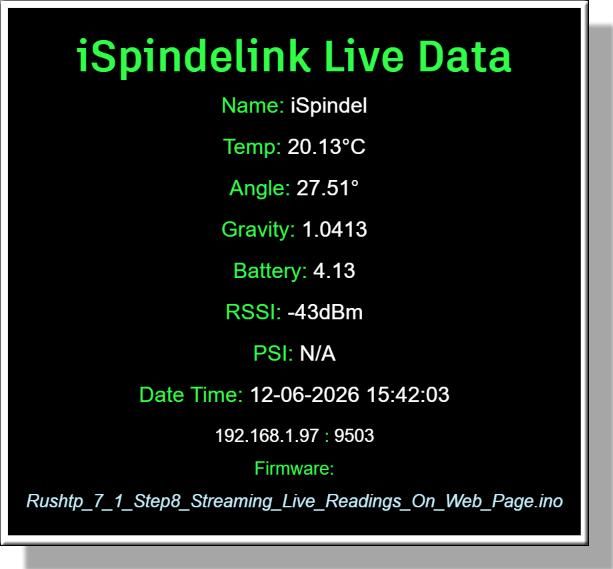
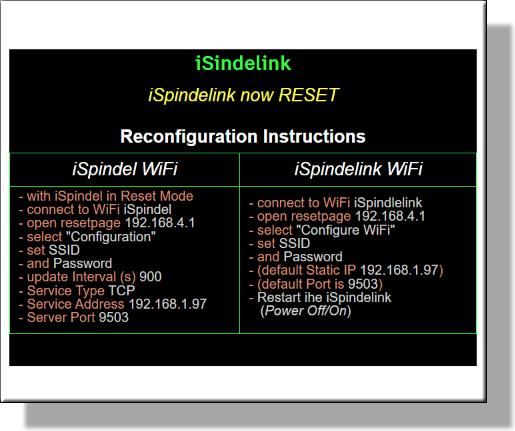
Here we are close to the end of this iSindelink web streaming project and its time to take a moment to consider the ESP8266 web server and how it functions. Up to now I had assumed a web page was already constructed by athe web server ready to be opened by calling it with a URL… but DURRR I got it all wrong!
Reading the tutorial ESP8266: Setting a simple HTTP web server by Techtutorialsx I now understand the web server “listens” for the client browser URL and then constructs the web page “on demand” to fullfill the request.
With that being the case we can intersept the URL request to trigger another event.
In our case we want to trigger a WifiManager reset to start it in configuration mode at IP address 192.168.4.1.
The following code is triggered by a browser call to http://192.168.1.97/APreset when a Wifi Reset button is pressed on the live “Dashboard” page…
| <button type="button" onclick="if(confirm('Are you sure?')) { window.location.href='/APreset'; }"> <b>WiFi Reset</b> </button> |
This portion of code captures the URL request sets our resetButton flag to true.
| // Web Page Reset button pressed... server.on("/APreset", [&]() { buildResetPage(); resetButton = true; Serial.println("Web Page Reset Button Pressed"); } ); |
The global variable resetButton set to true is picked up in the loop function to perform the WifiManager reset.
| //Check if Web Page Wifi Reset Button Pressed if (resetButton) { Serial.println("Web Page Reset Button Detected"); wm.resetSettings(); ESP.restart();/p> } |
Many thanks to:
|
I have drawn up a simple logic flowchart of the operation.
Flowchart…
| Load Server Library - #include "ESP8266WebServer.h" |
Open a new sketch in the Arduino IDE (File, New Sketch…) then save it as “Rushtp_7_1_Step9_Reset_WifiManager_From_Web_Page_Button” in your project directory. Note: the “_” linking all the text It has to be one long string of text, no spaces.. The IDE will create a new folder with that name and add a file called Rushtp_7_1_Step9_Reset_WifiManager_From_Web_Page_Button.ino.
Copy and paste the following script to replace the default script. Then save the file again.
The blue highlighting in the full code listing indicated the additional code added to get the Reset button to function. While I was at it, I made various code changes to display the Battery readings with the volts symbol v. These changes are highlighted in green.
/*
Board: NodeMCU 0.9 (ESP-12 Module)
iSpindelink listens for, and processes the iSpindel TCP data stream
then broardcasts the live data on a local network static IP address Web Page.
The TCP static IP address and port can be set in WifiManager
and saved along with your network ID and Password.
*/
/*
ESP8266 iSpindel Listener
- WiFiManager
- Static IP configuration
- Configurable Socket Port
- LittleFS storage
- Double Reset Detector
- NTP Timestamp
- JSON TCP Listener
- Arduino IDE aketch file name
- Web Page at 192.168.1.97
- Reset button on Web Page
*/
#include <ESP8266WiFi.h>
#include <ESP8266WebServer.h>
#include <WiFiManager.h>
#include <LittleFS.h>
#include <DoubleResetDetector.h>
#include <ArduinoJson.h>
#include <time.h>
// -----------------------------------------------------
// Network Time
// -----------------------------------------------------
#define MY_NTP_SERVER "at.pool.ntp.org"
#define MY_TZ "GMT0BST,M3.5.0/1,M10.5.0/2"
time_t now;
tm tm_info;
char dateTime[25]; //Format for dd-mm-yyyy hh:mm:ss
// -----------------------------------------------------
// Double Reset Detector
// -----------------------------------------------------
#define DRD_TIMEOUT 10
#define DRD_ADDRESS 0
DoubleResetDetector drd(DRD_TIMEOUT, DRD_ADDRESS);
// -----------------------------------------------------
// Web Page Reset Button Detector
// -----------------------------------------------------
bool resetButton = false;
// -----------------------------------------------------
// Web server
// -----------------------------------------------------
ESP8266WebServer server(80);
// -----------------------------------------------------
// TCP Server
// -----------------------------------------------------
WiFiServer*tcpServer = nullptr;
// -----------------------------------------------------
// iSpindel DATA
// -----------------------------------------------------
double angle = 0;
double temp = 0;
double battery = 0;
double gravity = 0;
int interval = 0;
const char* units = "-";
String name = "-";
int rssi = 0;
String sTemp = "-"; //String(temp, 2)+String("°")+String(units);
String sAngle = "-"; //String(Angle, 2)+String("°")
String sBattery = "-"; //String(battery, 2)+String("v")
const char* psi = "N/A"; //PSI to be used later
// -----------------------------------------------------
// Arduino IDE sketch filename
// -----------------------------------------------------
#define __FILENAME__ (strrchr(__FILE__, '\\') ? strrchr(__FILE__, '\\') + 1 : __FILE__)
// -----------------------------------------------------
// Hold a value for non blocking delay
// -----------------------------------------------------
unsigned long previousMillis = 0;
// -----------------------------------------------------
// Wifi Manager
// -----------------------------------------------------
WiFiManager wm;
char staticIP[16] = "192.168.1.97";
char soc_port[6] = "9503";
WiFiManagerParameter custom_ip("staticip", "Static IP", staticIP, sizeof(staticIP));
WiFiManagerParameter custom_pt("Soc_port", "Socket Port", soc_port, sizeof(soc_port));
bool shouldSaveConfig = false;
// -----------------------------------------------------
// Wifi Manager - Save Config
// -----------------------------------------------------
void saveConfigCallback()
{
strcpy(staticIP, custom_ip.getValue());
strcpy(soc_port, custom_pt.getValue());
File f = LittleFS.open("/ip.txt", "w");
if (f)
{
f.println(staticIP);
f.close();
}
File g = LittleFS.open("/pt.txt", "w");
if (g)
{
g.println(soc_port);
g.close();
}
shouldSaveConfig = true;
Serial.println("Configuration Saved");
}
// -----------------------------------------------------
// Wifi Manager - Load Config
// -----------------------------------------------------
void loadConfig()
{
if (!LittleFS.begin())
{
Serial.println("LittleFS Mount Failed");
return;
}
if (LittleFS.exists("/ip.txt"))
{
File f = LittleFS.open("/ip.txt", "r");
if (f)
{
String ip = f.readStringUntil('\n');
ip.trim();
if (ip.length())
{
ip.toCharArray(staticIP, sizeof(staticIP));
}
f.close();
}
}
if (LittleFS.exists("/pt.txt"))
{
File g = LittleFS.open("/pt.txt", "r");
if (g)
{
String pt = g.readStringUntil('\n');
pt.trim();
if (pt.length())
{
pt.toCharArray(soc_port, sizeof(soc_port));
}
g.close();
}
}
Serial.print("Loaded Static IP: "); Serial.println(staticIP);
Serial.print("Loaded Port: "); Serial.println(soc_port);
}
// -----------------------------------------------------
// Set Static IP - using variable staticIP from Flash drive
// -----------------------------------------------------
void applyStaticIP()
{
IPAddress ip;
if (!ip.fromString(staticIP))
{
Serial.println("Invalid Static IP");
return;
}
IPAddress gateway(192, 168, 1, 1);
IPAddress subnet(255, 255, 255, 0);
IPAddress dns(8, 8, 8, 8);
WiFi.config(ip, gateway, subnet, dns);
Serial.print("Configured Static IP: "); Serial.println(staticIP);
}
// -----------------------------------------------------
// TCP SERVER - listen for iSpindel socket data and extract fields and values
// -----------------------------------------------------
void handelTCP()
{
WiFiClient client =tcpServer->available();
if (!client)
{
//Serial.println("iSpindel NOT connected!");
return;
}
Serial.println("Client Connected");
JsonDocument doc;
while (client.connected())
{
if (client.available())
{
digitalWrite(2, LOW); //Blue LED Off
String request = client.readStringUntil('\n');
Serial.println("--------------------------------");
Serial.println(request);
DeserializationError error = deserializeJson(doc, request);
if (error)
{
Serial.println("JSON Parse Failed");
continue;
}
angle = doc["angle"].as<double>();
temp = doc["temperature"].as<double>();
battery = doc["battery"].as<double>();
gravity = doc["gravity"].as<double>();
interval = doc["interval"] | 0;
units = doc["temp_units"] | "?";
name = doc["name"] | "unknown";
rssi = doc["RSSI"] | 0;
sTemp = String(doc["temperature"].as<double>()) + "°" + String(doc["temp_units"]);
sAngle = String(doc["angle"].as<double>()) + "°";
sBattery = String(doc["battery"].as<double>()) + "v";
Serial.print("name = "); Serial.println(name);
Serial.print("sTemp = "); Serial.println(sTemp);
Serial.print("sAngle = "); Serial.println(sAngle);
Serial.print("gravity = "); Serial.println(gravity, 4);
Serial.print("sBattery = "); Serial.println(sBattery);
Serial.print("interval = "); Serial.println(interval);
Serial.print("rssi = "); Serial.println(rssi);
Serial.print("psi = "); Serial.println(psi);
doc.clear();
}
}
client.stop();
digitalWrite(2, HIGH); //Blue LED Off
Serial.println("--------------------------------");
Serial.println("Client Disconnected");
Serial.println();
}
// -----------------------------------------------------
// Web XML
// -----------------------------------------------------
void handleXML()
{
String xml = "<?xml version='1.0'?><data>";
xml += "<name>" + String(name) + "</name>";
xml += "<sTemp>" + String(sTemp) + "</sTemp>";
xml += "<sAngle>" + String(sAngle) + "</sAngle>";
xml += "<gravity>" + String(gravity, 4) + "</gravity>";
xml += "<sBattery>" + String(sBattery) + "</sBattery>";
xml += "<rssi>" + String(String(WiFi.RSSI()) + "dBm") + "</rssi>";
xml += "<psi>" + String(psi) + "</psi>";
xml += "<datetime>" + String(dateTime) + "</datetime>";
xml += "<ip>" + WiFi.localIP().toString() + "</ip>";
xml += "<soc_port>" + String(soc_port) + "</soc_port>";
xml += "<firmware>" + String(__FILENAME__) + "</firmware>";
xml += "</data>";
server.send(200, "text/xml", xml);
}
// -----------------------------------------------------
// Web page
// -----------------------------------------------------
void handleRoot()
{
String htmlRootSite =
R"rawliteral(
<!DOCTYPE html>
<html>
<head>
<title>iSpindelink Dashboard</title>
<style>
body { font-family: Arial; background:black; color:#0f0; text-align:center; }
.data{ color:white; }
</style>
</head>
<body>
<h1><font color:#0f0; size=8>iSpindelink Live Data</font></h1>
<table align='center' width='520' border='1px' cellpadding='0' cellspacing='0' style='border-color:#0f0;
background-color:black'>
<tr>
<td>
<font size=5>
<p>Name: <span Class="data" id="name"></span></p>
<p>Temp: <span Class="data" id="sTemp"></span></p>
<p>Angle: <span Class="data" id="sAngle"></span></p>
<p>Gravity: <span Class="data" id="gravity"></span></p>
<p>Battery: <span Class="data" id="sBattery"></span></p>
<p>RSSI: <span Class="data" id="rssi"></span></p>
<p>PSI: <span Class="data" id="psi"></span></p>
<p>Date Time: <span Class="data" id="datetime"></span></p>
</font>
</td >
</tr>
<tr>
<td>
<p>
<button type="button" onclick="if(confirm('Are you sure?')) { window.location.href='/APreset'; }">
<b>WiFi Reset</b>
</button>
</p>
</td>
</tr>
</table
<p><span Class="data" id="ip"></span> : <span Class="data" id="soc_port"></span>
<br>Firmware: <em><font style="color: lightblue;"><span id="firmware"></span></font></em></p>
<script>
function load(){
fetch('/xml')
.then(r=>r.text())
.then(str=>(new DOMParser()).parseFromString(str,"text/xml"))
.then(d=>{
["sTemp", "gravity", "sBattery", "sAngle", "rssi", "name", "psi", "datetime", "ip", "soc_port", "firmware"].forEach(k=>{
document.getElementById(k).innerText =
d.getElementsByTagName(k)[0].textContent;
});
});
}
setInterval(load,2000);
load();
</script>
</body>
</html>
)rawliteral";
server.send(200, "text/html", htmlRootSite);
}
// -----------------------------------------------------
// Wifi Reset Web Page
// -----------------------------------------------------
void buildResetPage()
{
String htmlInstructions =
R"rawliteral(
<!DOCTYPE html>
<html>
<head>
<title>ESP8266 Dashboard</title>
<style>
body {font-family: Arial; background:#111; color:#0f0; text-align:center; }
</style>
</head>
<body>
<h1>iSindelink</h1>
<p style='background-color:black; color:yellow; text-align:center;'>
<em>iSpindelink now RESET</em>
</p>
<span style='background-color:black; font-size:20px; color:White; font-weight:bold; text-align:center;'>
Reconfiguration Instructions
</span>
<table align='center' width='520' border='1' cellpadding='0' cellspacing='0' style='border-color:#0f0; background-color:black'>
<tr>
<td style='text-align:center; font-size:20px; color:white;'>
<em>iSpindel WiFi</em>
</td>
<td style='text-align:center; font-size:20px; color:white;'>
<em>iSpindelink WiFi</em>
</td>
</tr>
<tr>
<td style='text-align:left; font-size:15px; color:DarkSalmon; padding-left: 10px;'>
<p>
- with iSpindel in Reset Mode<br>
- connect to WiFi <a style='color:LightGrey;'>iSpindel</a><br>
- open resetpage <a style='color:LightGrey;'>192.168.4.1</b></a><br>
- select <a style='text-align:left; color:LightGrey;'>"Configuration" </b></a><br>
- set <a style='color:LightGrey;'>SSID</b></a><br>
- and <a style='color:LightGrey;'>Password</b></a><br>
- update Interval (s) <a style='color:LightGrey;'>900</b></a><br>
- Service Type <a style='color:LightGrey;'>TCP</b></a><br>
- Service Address <a style='color:LightGrey;'>localIP()</b></a><br>
- Server Port <a style='color:LightGrey;'>soc_port</b></a><br>
</p>
</td>
<td style='text-align:left; font-size:15px; color:DarkSalmon; padding-left: 10px;'>
<p>
- connect to WiFi <a style='color:LightGrey;'>iSpindelink</a><br>
- open resetpage <a style='color:LightGrey;'>192.168.4.1</b></a><br>
- select <a style='color:LightGrey;'>"Configure WiFi" </b></a><br>
- set <a style='color:LightGrey;'>SSID</b></a><br>
- and <a style='color:LightGrey;'>Password</b></a><br>
- (default Static IP <a style='color:LightGrey;'>localIP()</b></a>)<br>
- (default Port is <a style='color:LightGrey;'>soc_port</b></a>)<br>
- <a style='color:LightGrey;'>Restart ihe iSpindelink (<em>Power Off/On</em>)</b></a>
</p>
</td>
</tr>
</table>
</body>
</html>
)rawliteral";
//Replace localIP and Port place holders in thr raw HTML with live values.
htmlInstructions.replace("localIP()", WiFi.localIP().toString());
htmlInstructions.replace("soc_port", String(soc_port));
server.send(200, "text/html", htmlInstructions);
}
// -----------------------------------------------------
// Setup
// -----------------------------------------------------
void setup()
{
pinMode(2, OUTPUT);
digitalWrite(2, HIGH); //Blue LED Off
Serial.begin(115200);
delay(1000);
Serial.println();
Serial.println("Booting...");
loadConfig(); //Wifi Manager - Load Config
custom_ip.setValue(staticIP, sizeof(staticIP));
wm.addParameter(&custom_ip);
custom_pt.setValue(soc_port, sizeof(soc_port));
wm.addParameter(&custom_pt);
wm.setSaveConfigCallback(saveConfigCallback); //Save custom variables to flash drive
bool forcePortal = drd.detectDoubleReset();
if (forcePortal)
{
Serial.println("Double Reset Detected");
//wm.resetSettings(); //This clears the SSID and Password boxes else current SSID greyed out.
wm.startConfigPortal("iSpindelink");
delay(200);
ESP.restart();
} else
{
applyStaticIP(); //using variable staticIP from Flash drive
if (!wm.autoConnect("iSpindelink"))
{
Serial.println("WiFi Failed");
ESP.restart();
}
}
strcpy(staticIP, custom_ip.getValue());
strcpy(soc_port, custom_pt.getValue());
Serial.println();
Serial.println("WiFi Connected");
Serial.print("SSID: "); Serial.println(WiFi.SSID());
Serial.print("IP Address: "); Serial.println(WiFi.localIP());
Serial.print("Port: "); Serial.println(soc_port);
// NTP
configTime(MY_TZ, MY_NTP_SERVER);
// Create tcpServer using custom port value from flash drive
uint16_t port = atoi(soc_port);
tcpServer = new WiFiServer(port);
tcpServer->begin();
Serial.print("Server started on port "); Serial.println(port);
// Web server routes
server.on("/", handleRoot);
server.on("/xml", handleXML);
// Web Page Reset button pressed... Search
server.on("/APreset", [&]()
{
buildResetPage();
resetButton = true;
Serial.println("Web Page Reset Button Pressed");
}
);
server.begin();
//Serial.println("Web server started");
}
// -----------------------------------------------------
// Loop
// -----------------------------------------------------
void loop()
{
// Current time
time(&now);
localtime_r(&now, &tm_info);
/* Get inbound data from iSpindel and uses deserializeJson(doc, inbound)
and extract keys and key values into global variables*/
handelTCP();
//Manage the incoming network communications
server.handleClient();
//Check for Double Reset
drd.loop();
//Check if Web Page Wifi Reset Button Pressed
if (resetButton)
{
Serial.println("Web Page Reset Button Detected");
wm.resetSettings();
ESP.restart();
}
unsigned long currentMillis = millis();
if (currentMillis - previousMillis >= 3000) //Do every 3 seconds
{
sprintf(
dateTime,
"%02d-%02d-%04d %02d:%02d:%02d",
tm_info.tm_mday,
tm_info.tm_mon + 1,
tm_info.tm_year + 1900,
tm_info.tm_hour,
tm_info.tm_min,
tm_info.tm_sec
);
//delay(100);
// Serial Print these variables even if socket client is not connected.
Serial.print("TCP Static IP: "); Serial.println(staticIP);
Serial.print("TCP Port: "); Serial.println(soc_port);
Serial.print("Timestamp: "); Serial.println(dateTime);
Serial.print("ESP RSSI: "); Serial.println(String(WiFi.RSSI()) + "dBm");
Serial.println();
previousMillis = currentMillis;
}
}
| If the iSpindel does not connect check that the battery is fully charged (with the usb connected a blue LED lights up when charging is complete). Also check the configutations are correct (see Step 1…). |
Assuming your iSindel set to stream it’s output on TCP 192.168.1.97:9503 every 3 seconds the iSpindelink will display the live readings in a web browser at address http://192.168.1.97/APreset.
Then, if there are no errors, use ➔ to Upload the sketch to the ESP8266…
Reset sorted!
Press the Wifi Reset button in the dashboard page and follow the instructions we included on the APreset page for both the iSpindel and the iSpindelink
ESP8266 - Adding a Timestamp to Streamed Data
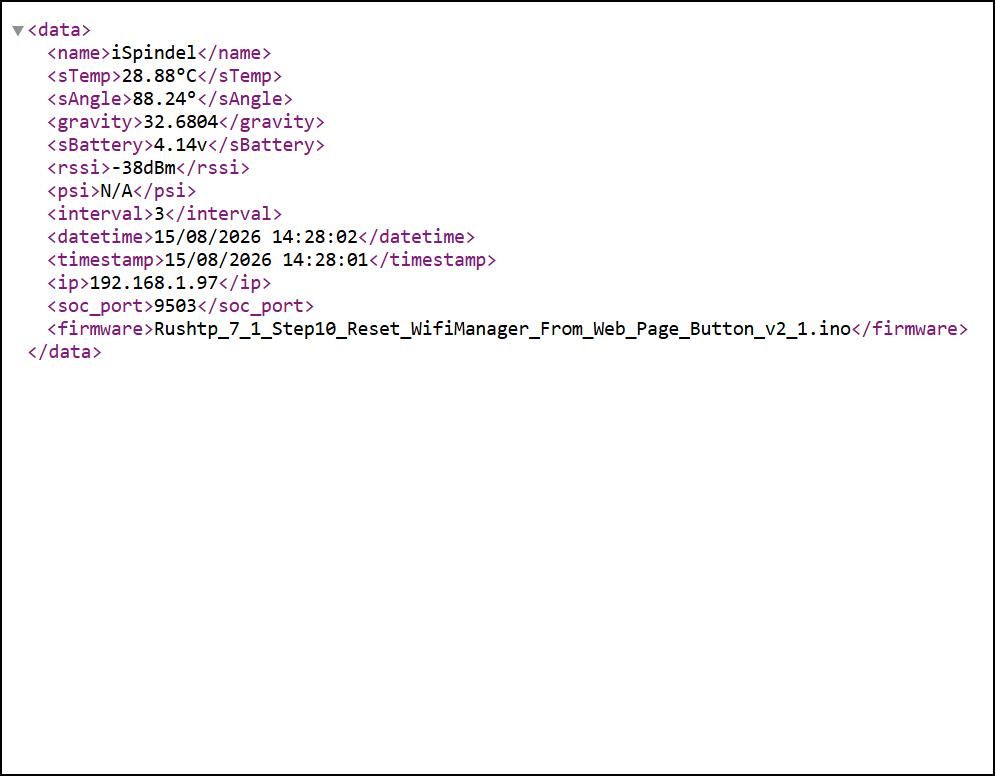
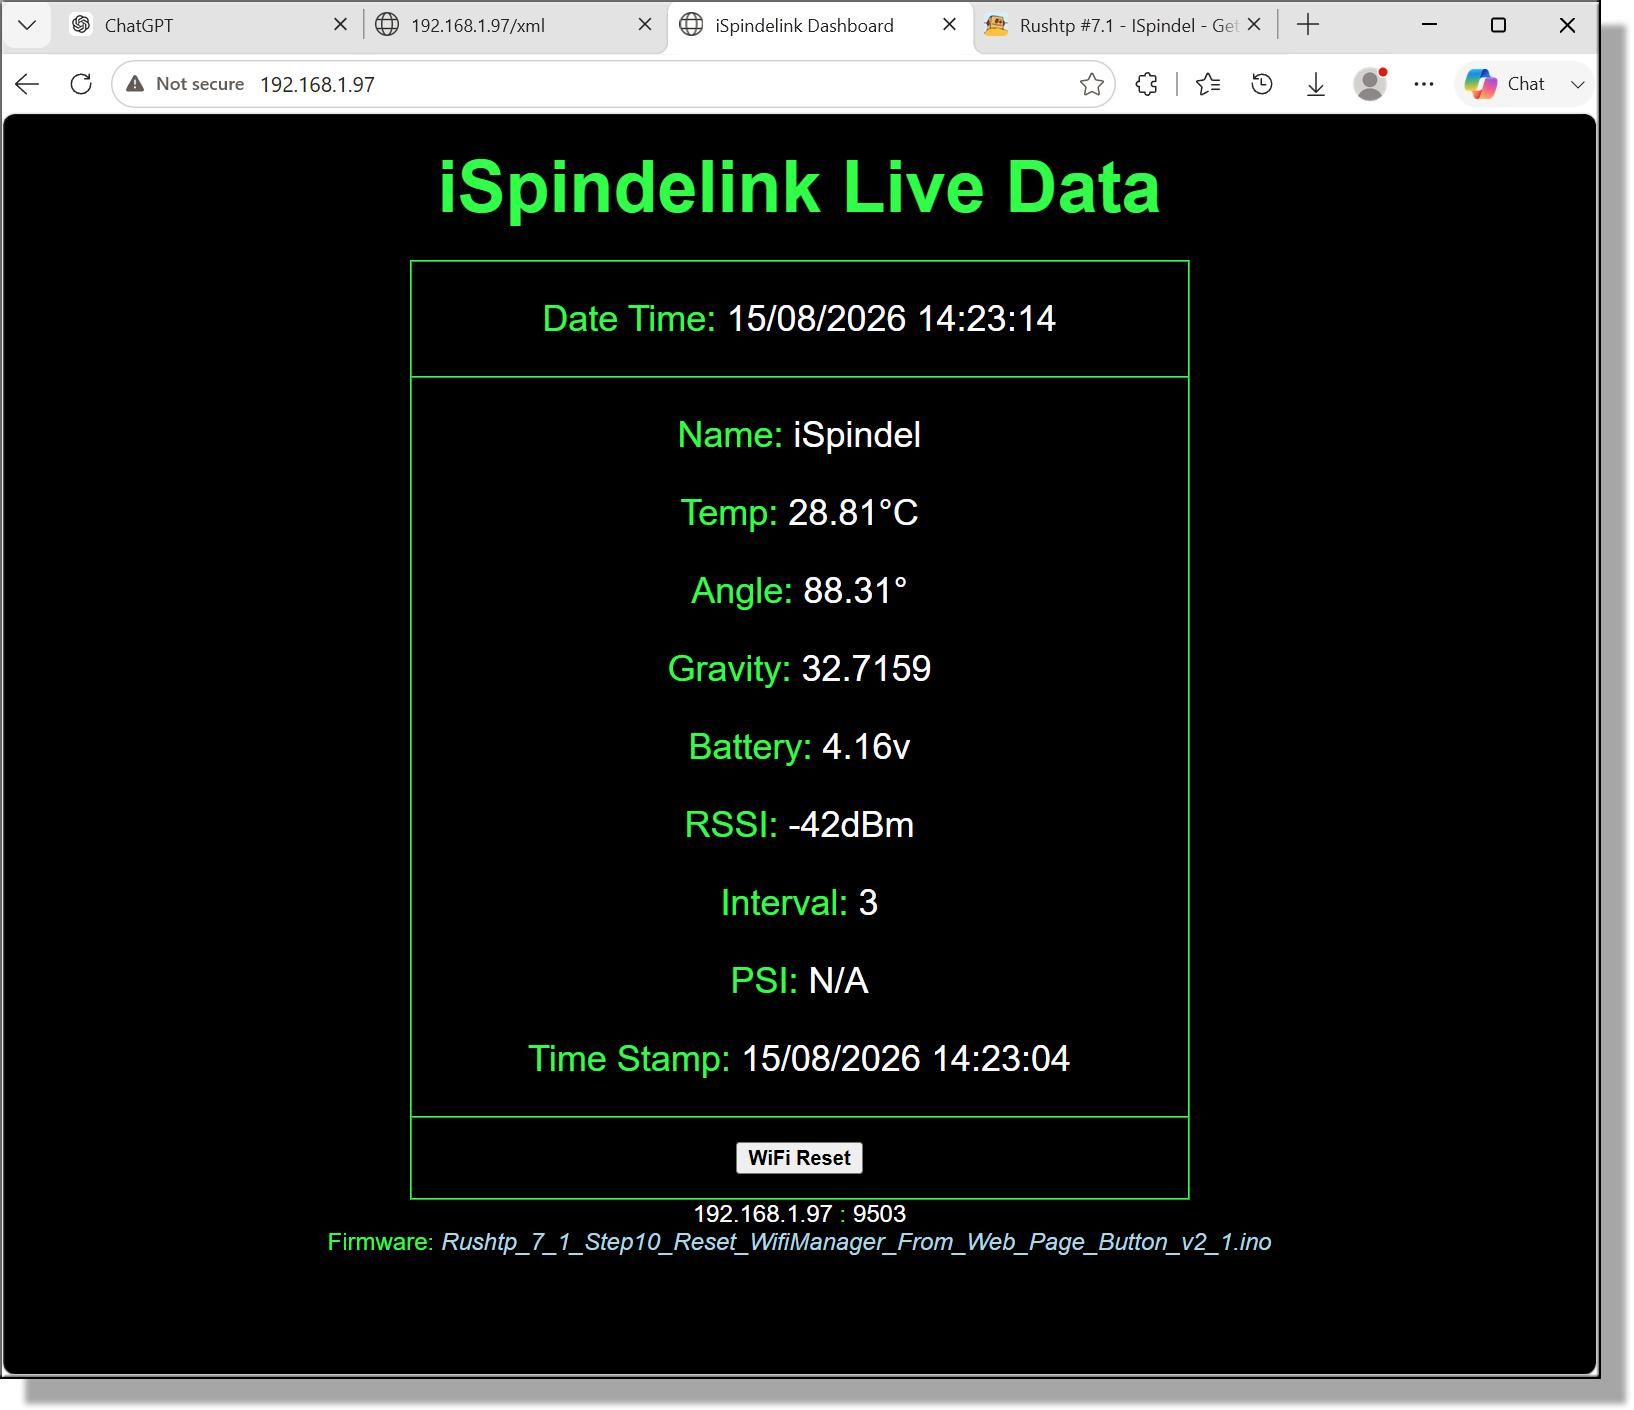
I have modified the script to add a Time stamp to the iSpindel data stream.
These changes are to address an issue I had while programming Excel macros for data logging in my next project. I need to know when the data was generated so I could filter out any duplicate reading during the logging routine.
The modifications are highlighted below…
- Add a new global variable char timeStamp[25];
- Set timestamp = dateTime memcpy(timeStamp, dateTime, 25);
- Other changes to Serial.Println() the timeStamp
- Include this in the XML data xml += "<timestamp>" + String(timeStamp) + "</timestamp>";
- Include this in the XML data xml += "<interval>" + String(interval) + "</interval>";
- Add “interval”, and “timestamp”, into the tab id list in the JavaScript function load()
["sTemp", "gravity", "sBattery", "sAngle", "rssi", "name", "psi", “interval”, "datetime", "timestamp", "ip", "soc_port", "firmware"] - Add these lines to the web dashboard script
<p>Time Stamp: <span Class="data" id="timestamp"></span></p>
<p>Interval: <span Class="data" id="interval"></span></p> - Alter the web dashboard layout to accommodate the Time Stamp
/*
Board: NodeMCU 0.9 (ESP-12 Module)
iSpindelink listens for, and processes the iSpindel TCP data stream
then broardcasts the live data on a local network static IP address Web Page.
The TCP static IP address and port can be set in WifiManager
and saved along with your network ID and Password.
*/
/*
ESP8266 iSpindel Listener
- WiFiManager
- Static IP configuration
- Configurable Socket Port
- LittleFS storage
- Double Reset Detector
- NTP Timestamp
- JSON TCP Listener
- Arduino IDE aketch file name
- Web Page at 192.168.1.97
- Reset button on Web Page
*/
#include <ESP8266WiFi.h>
#include <ESP8266WebServer.h>
#include <WiFiManager.h>
#include <LittleFS.h>
#include <DoubleResetDetector.h>
#include <ArduinoJson.h>
#include <time.h>
// -----------------------------------------------------
// Network Time
// -----------------------------------------------------
#define MY_NTP_SERVER "at.pool.ntp.org"
#define MY_TZ "GMT0BST,M3.5.0/1,M10.5.0/2"
time_t now;
tm tm_info;
char dateTime[25]; //Format for dd/mm/yyyy hh:mm:ss
char timeStamp[25]; //Format for dd/mm/yyyy hh:mm:ss
// -----------------------------------------------------
// Double Reset Detector
// -----------------------------------------------------
#define DRD_TIMEOUT 10
#define DRD_ADDRESS 0
DoubleResetDetector drd(DRD_TIMEOUT, DRD_ADDRESS);
// -----------------------------------------------------
// Web Page Reset Button Detector
// -----------------------------------------------------
bool resetButton = false;
// -----------------------------------------------------
// Web server
// -----------------------------------------------------
ESP8266WebServer server(80);
// -----------------------------------------------------
// TCP Server
// -----------------------------------------------------
WiFiServer*tcpServer = nullptr;
// -----------------------------------------------------
// iSpindel DATA
// -----------------------------------------------------
double angle = 0;
double temp = 0;
double battery = 0;
double gravity = 0;
int interval = 0;
const char* units = "-";
String name = "-";
int rssi = 0;
String sTemp = "-"; //String(temp, 2)+String("°")+String(units);
String sAngle = "-"; //String(Angle, 2)+String("°")
String sBattery = "-"; //String(battery, 2)+String("v")
const char* psi = "N/A"; //PSI to be used later
// -----------------------------------------------------
// Arduino IDE sketch filename
// -----------------------------------------------------
#define __FILENAME__ (strrchr(__FILE__, '\\') ? strrchr(__FILE__, '\\') + 1 : __FILE__)
// -----------------------------------------------------
// Hold a value for non blocking delay
// -----------------------------------------------------
unsigned long previousMillis = 0;
// -----------------------------------------------------
// Wifi Manager
// -----------------------------------------------------
WiFiManager wm;
char staticIP[16] = "192.168.1.97";
char soc_port[6] = "9503";
WiFiManagerParameter custom_ip("staticip", "Static IP", staticIP, sizeof(staticIP));
WiFiManagerParameter custom_pt("Soc_port", "Socket Port", soc_port, sizeof(soc_port));
bool shouldSaveConfig = false;
// -----------------------------------------------------
// Wifi Manager - Save Config
// -----------------------------------------------------
void saveConfigCallback()
{
strcpy(staticIP, custom_ip.getValue());
strcpy(soc_port, custom_pt.getValue());
File f = LittleFS.open("/ip.txt", "w");
if (f)
{
f.println(staticIP);
f.close();
}
File g = LittleFS.open("/pt.txt", "w");
if (g)
{
g.println(soc_port);
g.close();
}
shouldSaveConfig = true;
Serial.println("Configuration Saved");
}
// -----------------------------------------------------
// Wifi Manager - Load Config
// -----------------------------------------------------
void loadConfig()
{
if (!LittleFS.begin())
{
Serial.println("LittleFS Mount Failed");
return;
}
if (LittleFS.exists("/ip.txt"))
{
File f = LittleFS.open("/ip.txt", "r");
if (f)
{
String ip = f.readStringUntil('\n');
ip.trim();
if (ip.length())
{
ip.toCharArray(staticIP, sizeof(staticIP));
}
f.close();
}
}
if (LittleFS.exists("/pt.txt"))
{
File g = LittleFS.open("/pt.txt", "r");
if (g)
{
String pt = g.readStringUntil('\n');
pt.trim();
if (pt.length())
{
pt.toCharArray(soc_port, sizeof(soc_port));
}
g.close();
}
}
Serial.print("Loaded Static IP: "); Serial.println(staticIP);
Serial.print("Loaded Port: "); Serial.println(soc_port);
}
// -----------------------------------------------------
// Set Static IP - using variable staticIP from Flash drive
// -----------------------------------------------------
void applyStaticIP()
{
IPAddress ip;
if (!ip.fromString(staticIP))
{
Serial.println("Invalid Static IP");
return;
}
IPAddress gateway(192, 168, 1, 1);
IPAddress subnet(255, 255, 255, 0);
IPAddress dns(8, 8, 8, 8);
WiFi.config(ip, gateway, subnet, dns);
Serial.print("Configured Static IP: "); Serial.println(staticIP);
}
// -----------------------------------------------------
// TCP SERVER - listen for iSpindel socket data and extract fields and values
// -----------------------------------------------------
void handelTCP()
{
WiFiClient client =tcpServer->available();
if (!client)
{
//Serial.println("iSpindel NOT connected!");
return;
}
Serial.println("Client Connected");
JsonDocument doc;
while (client.connected())
{
if (client.available())
{
digitalWrite(2, LOW); //Blue LED On
String request = client.readStringUntil('\n');
Serial.println("--------------------------------");
Serial.println(request);
DeserializationError error = deserializeJson(doc, request);
if (error)
{
Serial.println("JSON Parse Failed");
continue;
}
angle = doc["angle"].as<double>();
temp = doc["temperature"].as<double>();
battery = doc["battery"].as<double>();
gravity = doc["gravity"].as<double>();
interval = doc["interval"] | 0;
units = doc["temp_units"] | "?";
name = doc["name"] | "unknown";
rssi = doc["RSSI"] | 0;
sTemp = String(doc["temperature"].as<double>()) + "°" + String(doc["temp_units"]);
sAngle = String(doc["angle"].as<double>()) + "°";
sBattery = String(doc["battery"].as<double>()) + "v";
//timeStamp=dateTime;
memcpy(timeStamp, dateTime, 25);
Serial.print("name = "); Serial.println(name);
Serial.print("sTemp = "); Serial.println(sTemp);
Serial.print("sAngle = "); Serial.println(sAngle);
Serial.print("gravity = "); Serial.println(gravity, 4);
Serial.print("sBattery = "); Serial.println(sBattery);
Serial.print("interval = "); Serial.println(interval);
Serial.print("rssi = "); Serial.println(rssi);
Serial.print("psi = "); Serial.println(psi);
Serial.print("TimeStamp = "); Serial.println(timeStamp);
doc.clear();
}
}
client.stop();
digitalWrite(2, HIGH); //Blue LED Off
Serial.println("--------------------------------");
Serial.println("Client Disconnected");
Serial.println();
}
// -----------------------------------------------------
// Web XML
// -----------------------------------------------------
void handleXML()
{
String xml = "<?xml version='1.0'?><data>";
xml += "<name>" + String(name) + "</name>";
xml += "<sTemp>" + String(sTemp) + "</sTemp>";
xml += "<sAngle>" + String(sAngle) + "</sAngle>";
xml += "<gravity>" + String(gravity, 4) + "</gravity>";
xml += "<sBattery>" + String(sBattery) + "</sBattery>";
xml += "<rssi>" + String(String(WiFi.RSSI()) + "dBm") + "</rssi>";
xml += "<psi>" + String(psi) + "</psi>";
xml += "<interval>" + String(interval) + "</interval>";
xml += "<datetime>" + String(dateTime) + "</datetime>";
xml += "<timestamp>" + String(timeStamp) + "</timestamp>";
xml += "<ip>" + WiFi.localIP().toString() + "</ip>";
xml += "<soc_port>" + String(soc_port) + "</soc_port>";
xml += "<firmware>" + String(__FILENAME__) + "</firmware>";
xml += "</data>";
server.send(200, "text/xml", xml);
}
// -----------------------------------------------------
// Web page
// -----------------------------------------------------
void handleRoot()
{
String htmlRootSite =
R"rawliteral(
<!DOCTYPE html>
<html>
<head>
<title>iSpindelink Dashboard</title>
<style>
body { font-family: Arial; background:black; color:#0f0; text-align:center; }
.data{ color:white; }
</style>
</head>
<body>
<h1><font color:#0f0; size=8>iSpindelink Live Data</font></h1>
<table align='center' width='520' border='1px' cellpadding='0' cellspacing='0' style='border-color:#0f0; background-color:black'>
<tr>
<td>
<font size=5>
<p>Date Time: <span Class="data" id="datetime"></span></p>
</td>
</tr>
<tr>
<td>
<font size=5>
<p>Name: <span Class="data" id="name"></span></p>
<p>Temp: <span Class="data" id="sTemp"></span></p>
<p>Angle: <span Class="data" id="sAngle"></span></p>
<p>Gravity: <span Class="data" id="gravity"></span></p>
<p>Battery: <span Class="data" id="sBattery"></span></p>
<p>RSSI: <span Class="data" id="rssi"></span></p>
<p>Interval: <span Class="data" id="interval"></span></p>
<p>PSI: <span Class="data" id="psi"></span></p>
<p>Time Stamp: <span Class="data" id="timestamp"></span></p>
</font>
</td>
</tr>
<tr>
<td>
<p>
<button type="button" onclick="if(confirm('Are you sure?')) { window.location.href='/APreset'; }">
<b>WiFi Reset</b>
</button>
</p>
</td>
</tr>
</table
<p><span Class="data" id="ip"></span> : <span Class="data" id="soc_port"></span>
<br>Firmware: <em><font style="color: lightblue;"><span id="firmware"></span></font></em></p>
<script>
function load(){
fetch('/xml')
.then(r=>r.text())
.then(str=>(new DOMParser()).parseFromString(str,"text/xml"))
.then(d=>{
["sTemp", "gravity", "sBattery", "sAngle", "rssi", "name", "psi", "interval", "datetime", "timestamp", "ip", "soc_port", "firmware"].forEach(k=>{
document.getElementById(k).innerText =
d.getElementsByTagName(k)[0].textContent;
});
});
}
setInterval(load,2000);
load();
</script>
</body>
</html>
)rawliteral";
server.send(200, "text/html", htmlRootSite);
}
// -----------------------------------------------------
// Wifi Reset Web Page
// -----------------------------------------------------
void buildResetPage()
{
String htmlInstructions =
R"rawliteral(
<!DOCTYPE html>
<html>
<head>
<title>ESP8266 Dashboard</title>
<style>
body {font-family: Arial; background:#111; color:#0f0; text-align:center; }
</style>
</head>
<body>
<h1>iSindelink</h1>
<p style='background-color:black; color:yellow; text-align:center;'>
<em>iSpindelink now RESET</em>
</p>
<span style='background-color:black; font-size:20px; color:White; font-weight:bold; text-align:center;'>
Reconfiguration Instructions
</span>
<table align='center' width='520' border='1' cellpadding='0' cellspacing='0' style='border-color:#0f0; background-color:black'>
<tr>
<td style='text-align:center; font-size:20px; color:white;'>
<em>iSpindel WiFi</em>
</td>
<td style='text-align:center; font-size:20px; color:white;'>
<em>iSpindelink WiFi</em>
</td>
</tr>
<tr>
<td style='text-align:left; font-size:15px; color:DarkSalmon; padding-left: 10px;'>
<p>
- with iSpindel in Reset Mode<br>
- connect to WiFi <a style='color:LightGrey;'>iSpindel</a><br>
- open resetpage <a style='color:LightGrey;'>192.168.4.1</b></a><br>
- select <a style='text-align:left; color:LightGrey;'>"Configuration" </b></a><br>
- set <a style='color:LightGrey;'>SSID</b></a><br>
- and <a style='color:LightGrey;'>Password</b></a><br>
- update Interval (s) <a style='color:LightGrey;'>900</b></a><br>
- Service Type <a style='color:LightGrey;'>TCP</b></a><br>
- Service Address <a style='color:LightGrey;'>localIP()</b></a><br>
- Server Port <a style='color:LightGrey;'>soc_port</b></a><br>
</p>
</td>
<td style='text-align:left; font-size:15px; color:DarkSalmon; padding-left: 10px;'>
<p>
- connect to WiFi <a style='color:LightGrey;'>iSpindelink</a><br>
- open resetpage <a style='color:LightGrey;'>192.168.4.1</b></a><br>
- select <a style='color:LightGrey;'>"Configure WiFi" </b></a><br>
- set <a style='color:LightGrey;'>SSID</b></a><br>
- and <a style='color:LightGrey;'>Password</b></a><br>
- (default Static IP <a style='color:LightGrey;'>localIP()</b></a>)<br>
- (default Port is <a style='color:LightGrey;'>soc_port</b></a>)<br>
- <a style='color:LightGrey;'>Restart ihe iSpindelink (<em>Power Off/On</em>)</b></a>
</p>
</td>
</tr>
</table>
</body>
</html>
)rawliteral";
//Replace localIP and Port place holders in thr raw HTML with live values.
htmlInstructions.replace("localIP()", WiFi.localIP().toString());
htmlInstructions.replace("soc_port", String(soc_port));
server.send(200, "text/html", htmlInstructions);
}
// -----------------------------------------------------
// Setup
// -----------------------------------------------------
void setup()
{
pinMode(2, OUTPUT);
digitalWrite(2, HIGH); //Blue LED Off
Serial.begin(115200);
delay(1000);
Serial.println();
Serial.println("Booting...");
loadConfig(); //Wifi Manager - Load Config
custom_ip.setValue(staticIP, sizeof(staticIP));
wm.addParameter(&custom_ip);
custom_pt.setValue(soc_port, sizeof(soc_port));
wm.addParameter(&custom_pt);
wm.setSaveConfigCallback(saveConfigCallback); //Save custom variables to flash drive
bool forcePortal = drd.detectDoubleReset();
if (forcePortal)
{
Serial.println("Double Reset Detected");
//wm.resetSettings(); //This clears the SSID and Password boxes else current SSID greyed out.
wm.startConfigPortal("iSpindelink");
delay(200);
ESP.restart();
} else
{
applyStaticIP(); //using variable staticIP from Flash drive
if (!wm.autoConnect("iSpindelink"))
{
Serial.println("WiFi Failed");
ESP.restart();
}
}
strcpy(staticIP, custom_ip.getValue());
strcpy(soc_port, custom_pt.getValue());
Serial.println();
Serial.println("WiFi Connected");
Serial.print("SSID: "); Serial.println(WiFi.SSID());
Serial.print("IP Address: "); Serial.println(WiFi.localIP());
Serial.print("Port: "); Serial.println(soc_port);
// NTP
configTime(MY_TZ, MY_NTP_SERVER);
// Create tcpServer using custom port value from flash drive
uint16_t port = atoi(soc_port);
tcpServer = new WiFiServer(port);
tcpServer->begin();
Serial.print("Server started on port "); Serial.println(port);
// Web server routes
server.on("/", handleRoot);
server.on("/xml", handleXML);
// Web Page Reset button pressed... Search
server.on("/APreset", [&]()
{
buildResetPage();
resetButton = true;
Serial.println("Web Page Reset Button Pressed");
}
);
server.begin();
//Serial.println("Web server started");
}
// -----------------------------------------------------
// Loop
// -----------------------------------------------------
void loop()
{
// Current time
time(&now);
localtime_r(&now, &tm_info);
/* Get inbound data from iSpindel and uses deserializeJson(doc, inbound)
and extract keys and key values into global variables*/
handelTCP();
//Manage the incoming network communications
server.handleClient();
//Check for Double Reset
drd.loop();
//Check if Web Page Wifi Reset Button Pressed
if (resetButton)
{
Serial.println("Web Page Reset Button Detected");
wm.resetSettings();
ESP.restart();
}
unsigned long currentMillis = millis();
if (currentMillis - previousMillis >= 3000) //Do every 3 seconds
{
sprintf(
dateTime,
"%02d/%02d/%04d %02d:%02d:%02d",
tm_info.tm_mday,
tm_info.tm_mon + 1,
tm_info.tm_year + 1900,
tm_info.tm_hour,
tm_info.tm_min,
tm_info.tm_sec
);
//delay(100);
// Serial Print these variables even if socket client is not connected.
Serial.print("TCP Static IP: "); Serial.println(staticIP);
Serial.print("TCP Port: "); Serial.println(soc_port);
Serial.print("Time Stamp: "); Serial.println(timeStamp);
Serial.print("ESP RSSI: "); Serial.println(String(WiFi.RSSI()) + "dBm");
Serial.println();
previousMillis = currentMillis;
}
}
| If the iSpindel does not connect check that the battery is fully charged (with the usb connected a blue LED lights up when charging is complete). Also check the configutations are correct (see Step 1…). |
Assuming your iSindel set to stream it’s output on TCP 192.168.1.97:9503 every 3 seconds the iSpindelink will display the live readings in a web browser at address http://192.168.1.97/APreset.
Then, if there are no errors, use ➔ to Upload the sketch to the ESP8266…
That should fix the Excel Logging in the next project.
Summing Up…
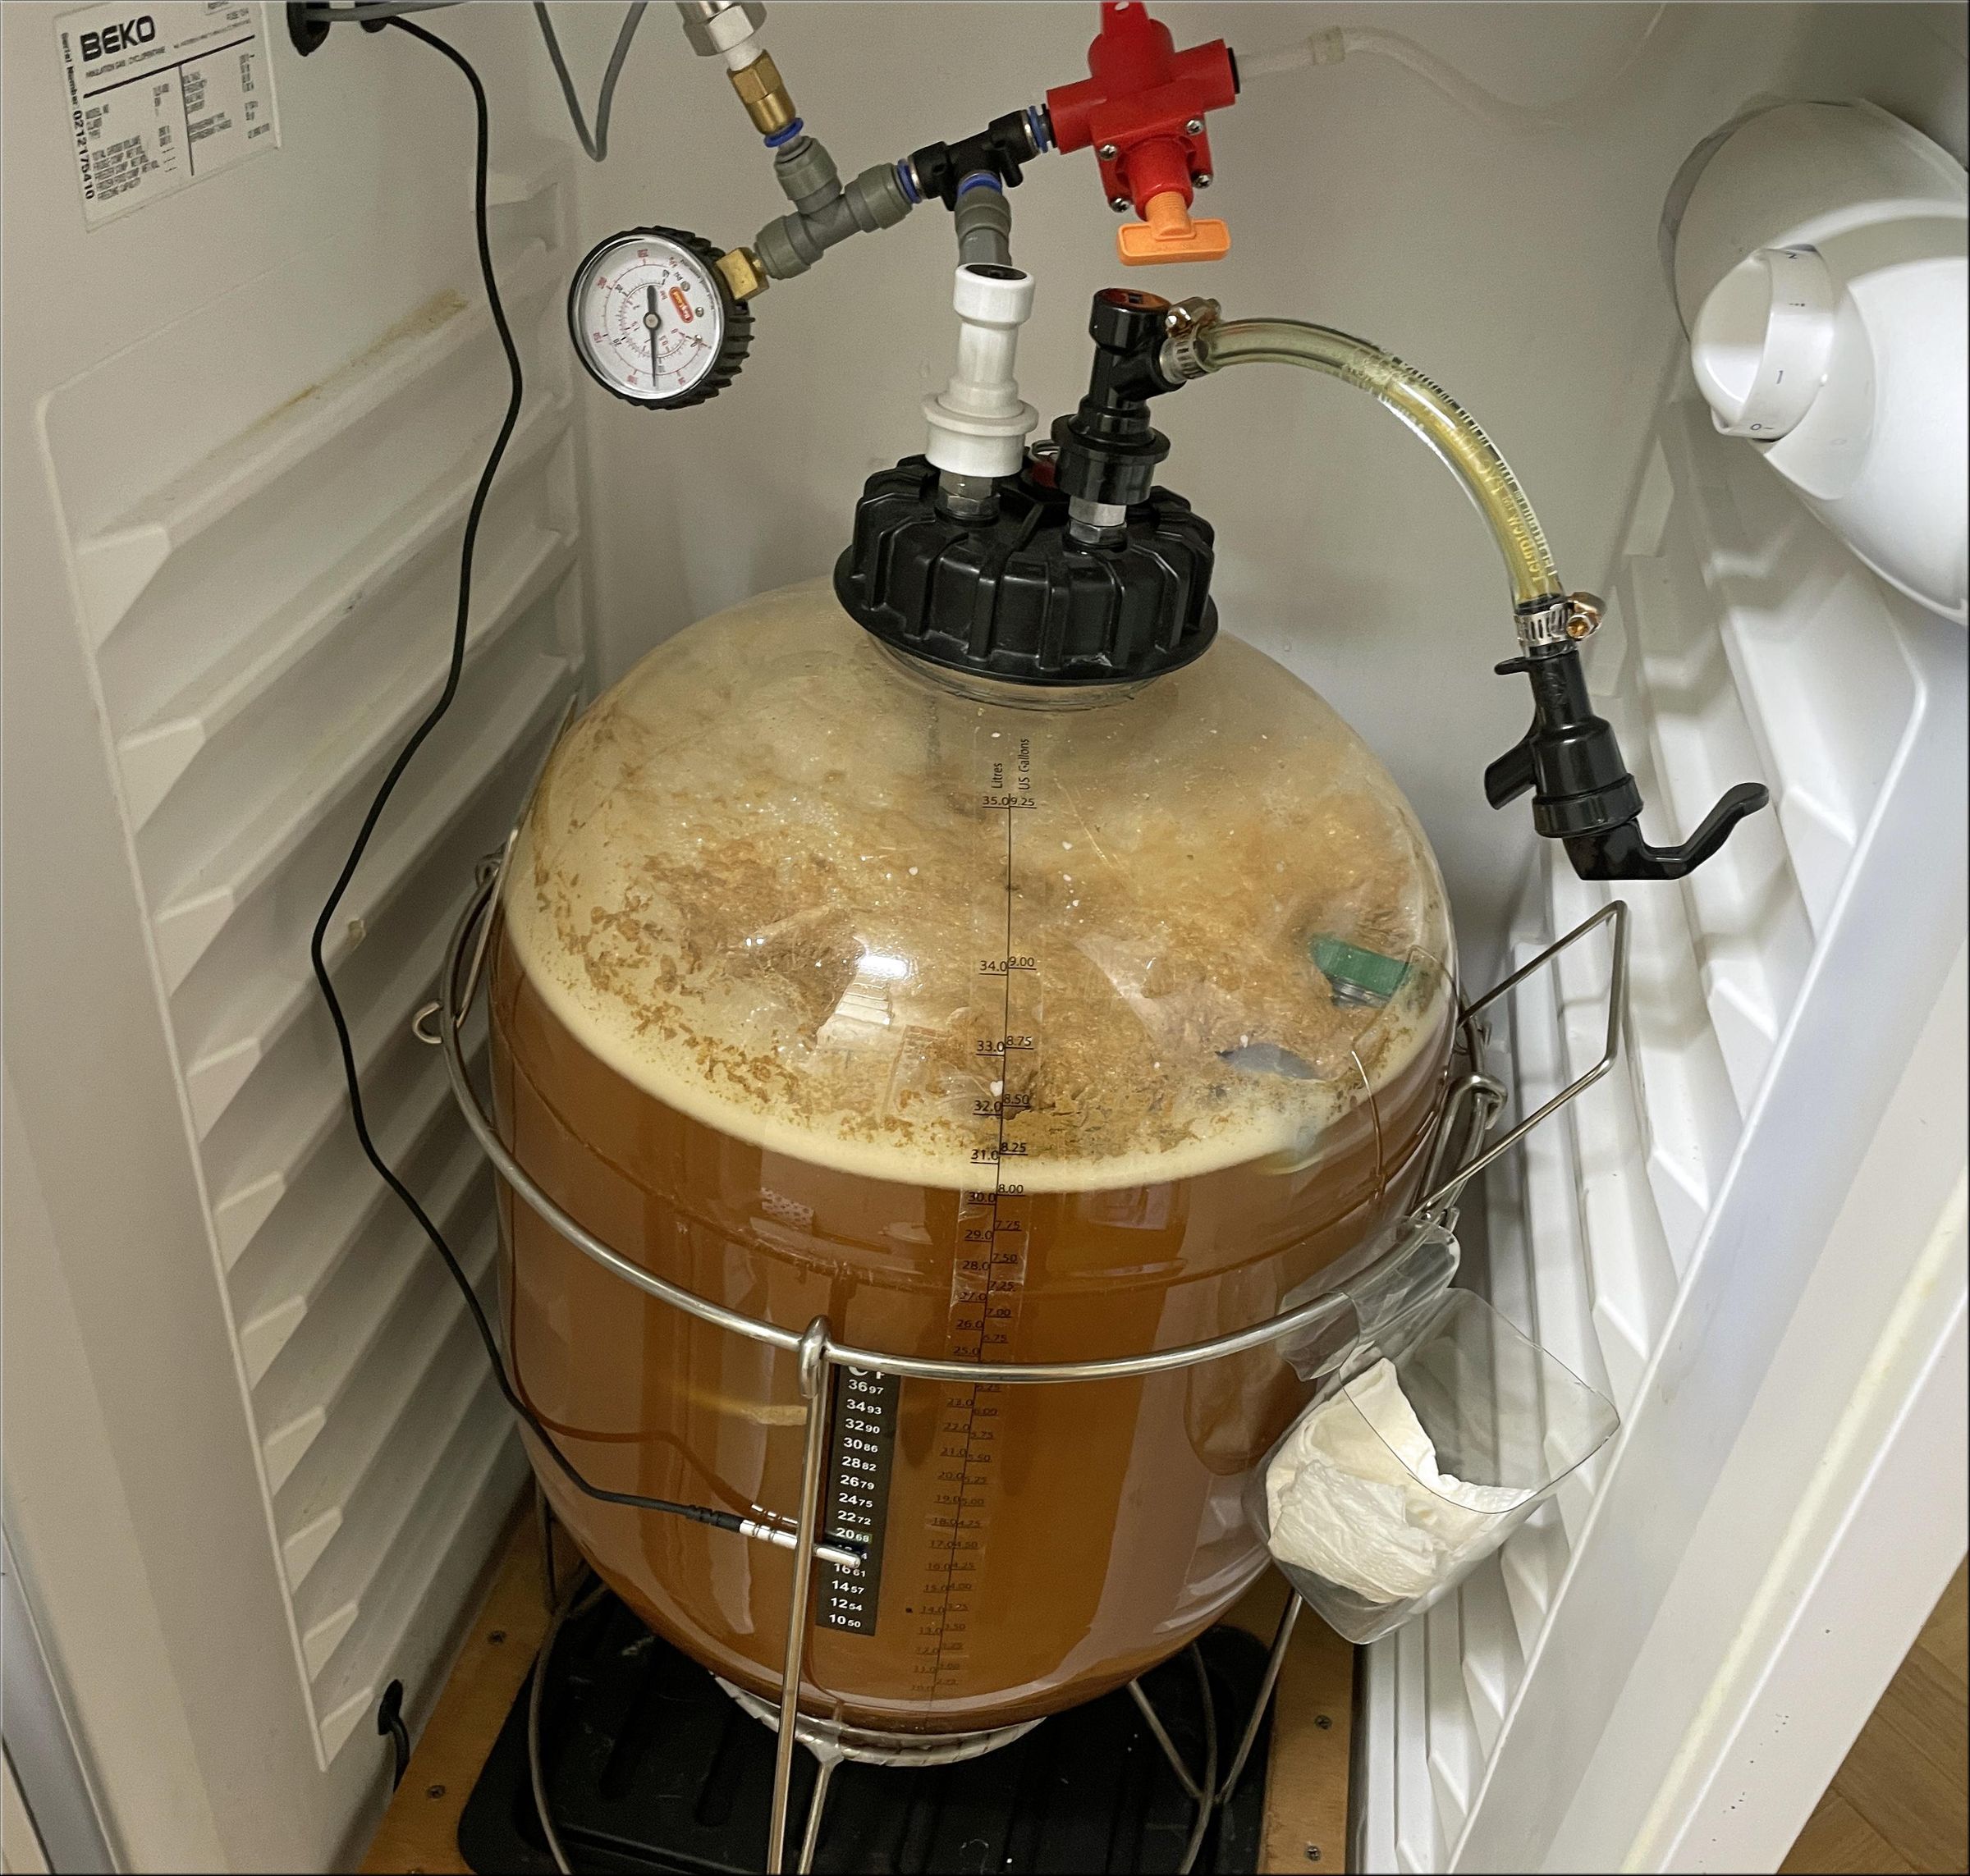
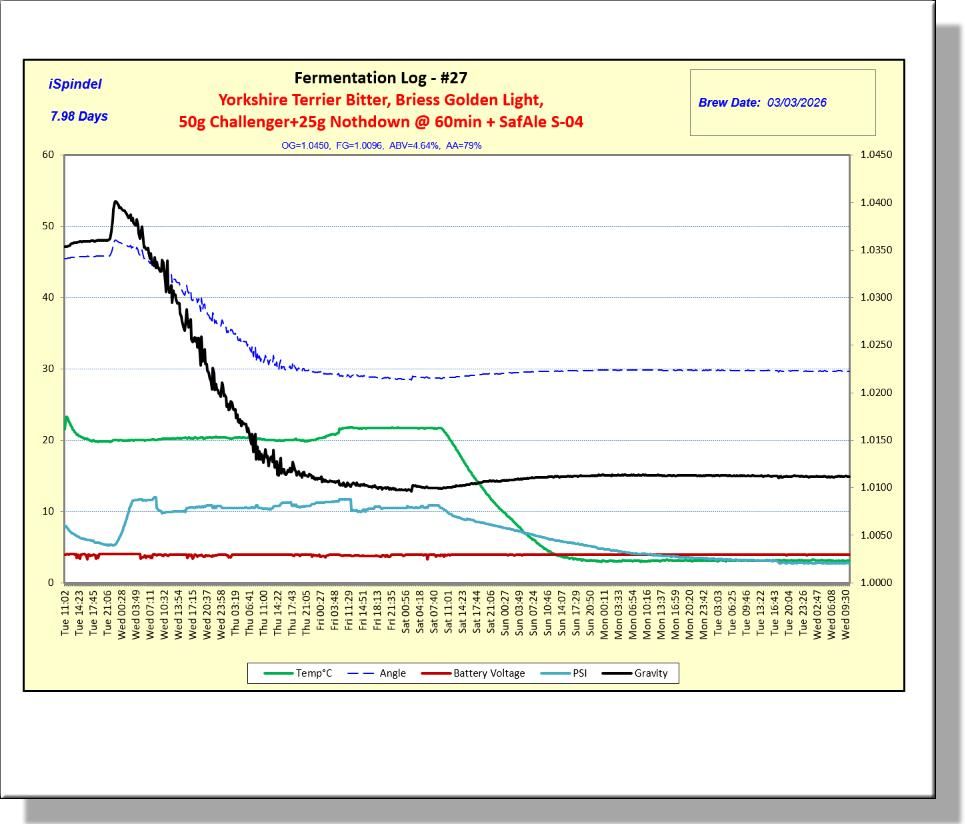
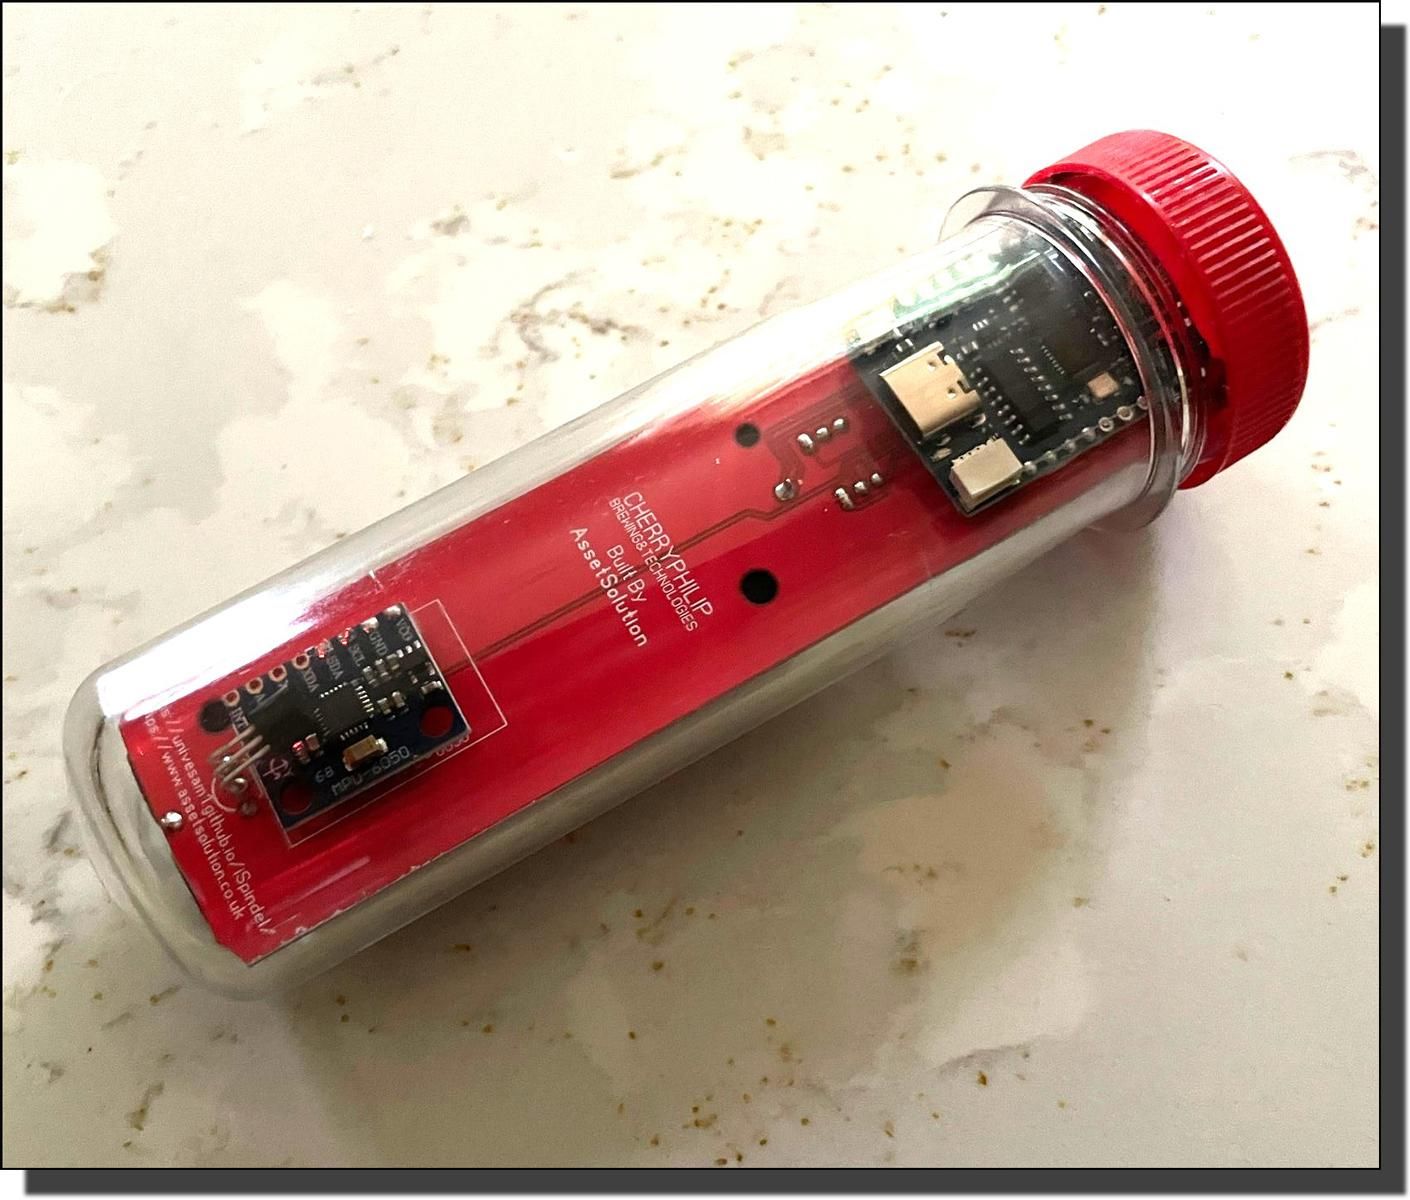
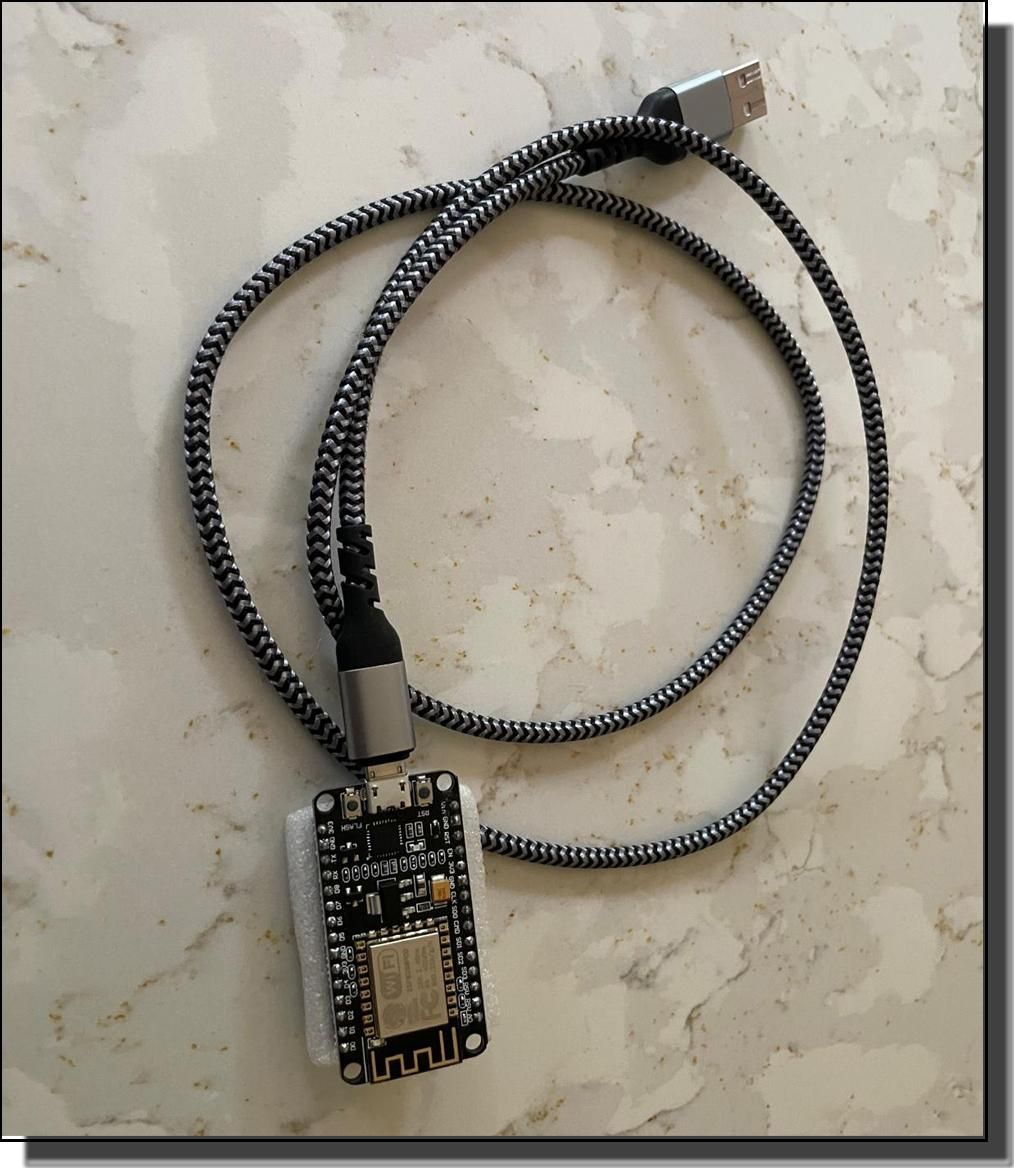
So there you have it!
At the start of this project, we set out to show how a NodeMCU ESP8266 Development Board can be programmed as a Socket Client to listen to the iSpindel data broadcast using a TCP Service Type set in the configuration mode.
We used AeduinoJson deserializeJson() to extract some of the name/value pairs and assign them to variables so we can print the values to the Arduino IDE Serial Monitor. i.e. Tilt angle, Temperature, Battery and Gravity data etc.
We created a String variable dateTime to add the date and time to show when the iSpindel data was received. Formatted as dd-mm-yyy hh:mm:ss in GMT/BST (UK Summer/Winter time) with coding to get it from the internet using Network Time Protocol (NTP).
To simulate the iSpindel’s configuration mode we replaced the hard coded settings for your local network with WifiManager code.
We employed Double Reset Detector code by Stephen Denne to trigger the WifiManager Configutation Mode so we can access the iSpindelink Wifi Configuration page at IP Address 192.168.4.1. Here we can set the static IP Address for the socket client to 192.168.1.97 and the listening port to 9503.
To free us from looking at the data stream in the IDE Serial Monitor we created a simple HTTP web server to stream the live data to a web page dashboard over your home network with the URL http://192.168.1.97/. Live data is posted to an XML web page and parsed by JavaScript and a timer into a dashboard web page.
iSpindelink Live Data
Firmware: Rushtp_7_1_Step9_Reset_WifiManager_From_Web_Page_Button.ino |
We added a Wifi Reset button on the web dashboard to put the iSpindelink into configuration mode and finally displayed the Reconfiguration Instructions.
iSindelinkiSpindelink now RESET Reconfiguration Instructions
|
I can recommend purchasing a USB Cable with an ON/Off switch and a USB Socket Adapter to power your ESP8266 Development board and place it close to your Beer Fermenter containing your iSpindel. You can then monitor the brewing process anywhere in range of your home wifi network on a web browser (Mobile phone, Tablet, PC or Laptop).
| I hope you enjoyed following this project and, if you have created your own iSpindelink, raise a pint of home brew to celebrate the achievement. Just to wet your appetite (no pun intended). . . Happy brewing Rushtp |
To be continued…
In the next project - Rushtp #7.2 - we will learn how to chart the data in Microsoft Excel with vba macros so we can monitor a beer fermentation on a PC or Laptop on a local network.
In later projects:-
- We’ll connect a 2.4" LCD Screen and a Pressure Sensor to the ESP8266 to be display the streaming data.
- Then explore PCB Design and Manufacture for the iSpindelink
- Finally, we’ll box the components in a small plastic transparent enclosure.