Simple Electric Motor
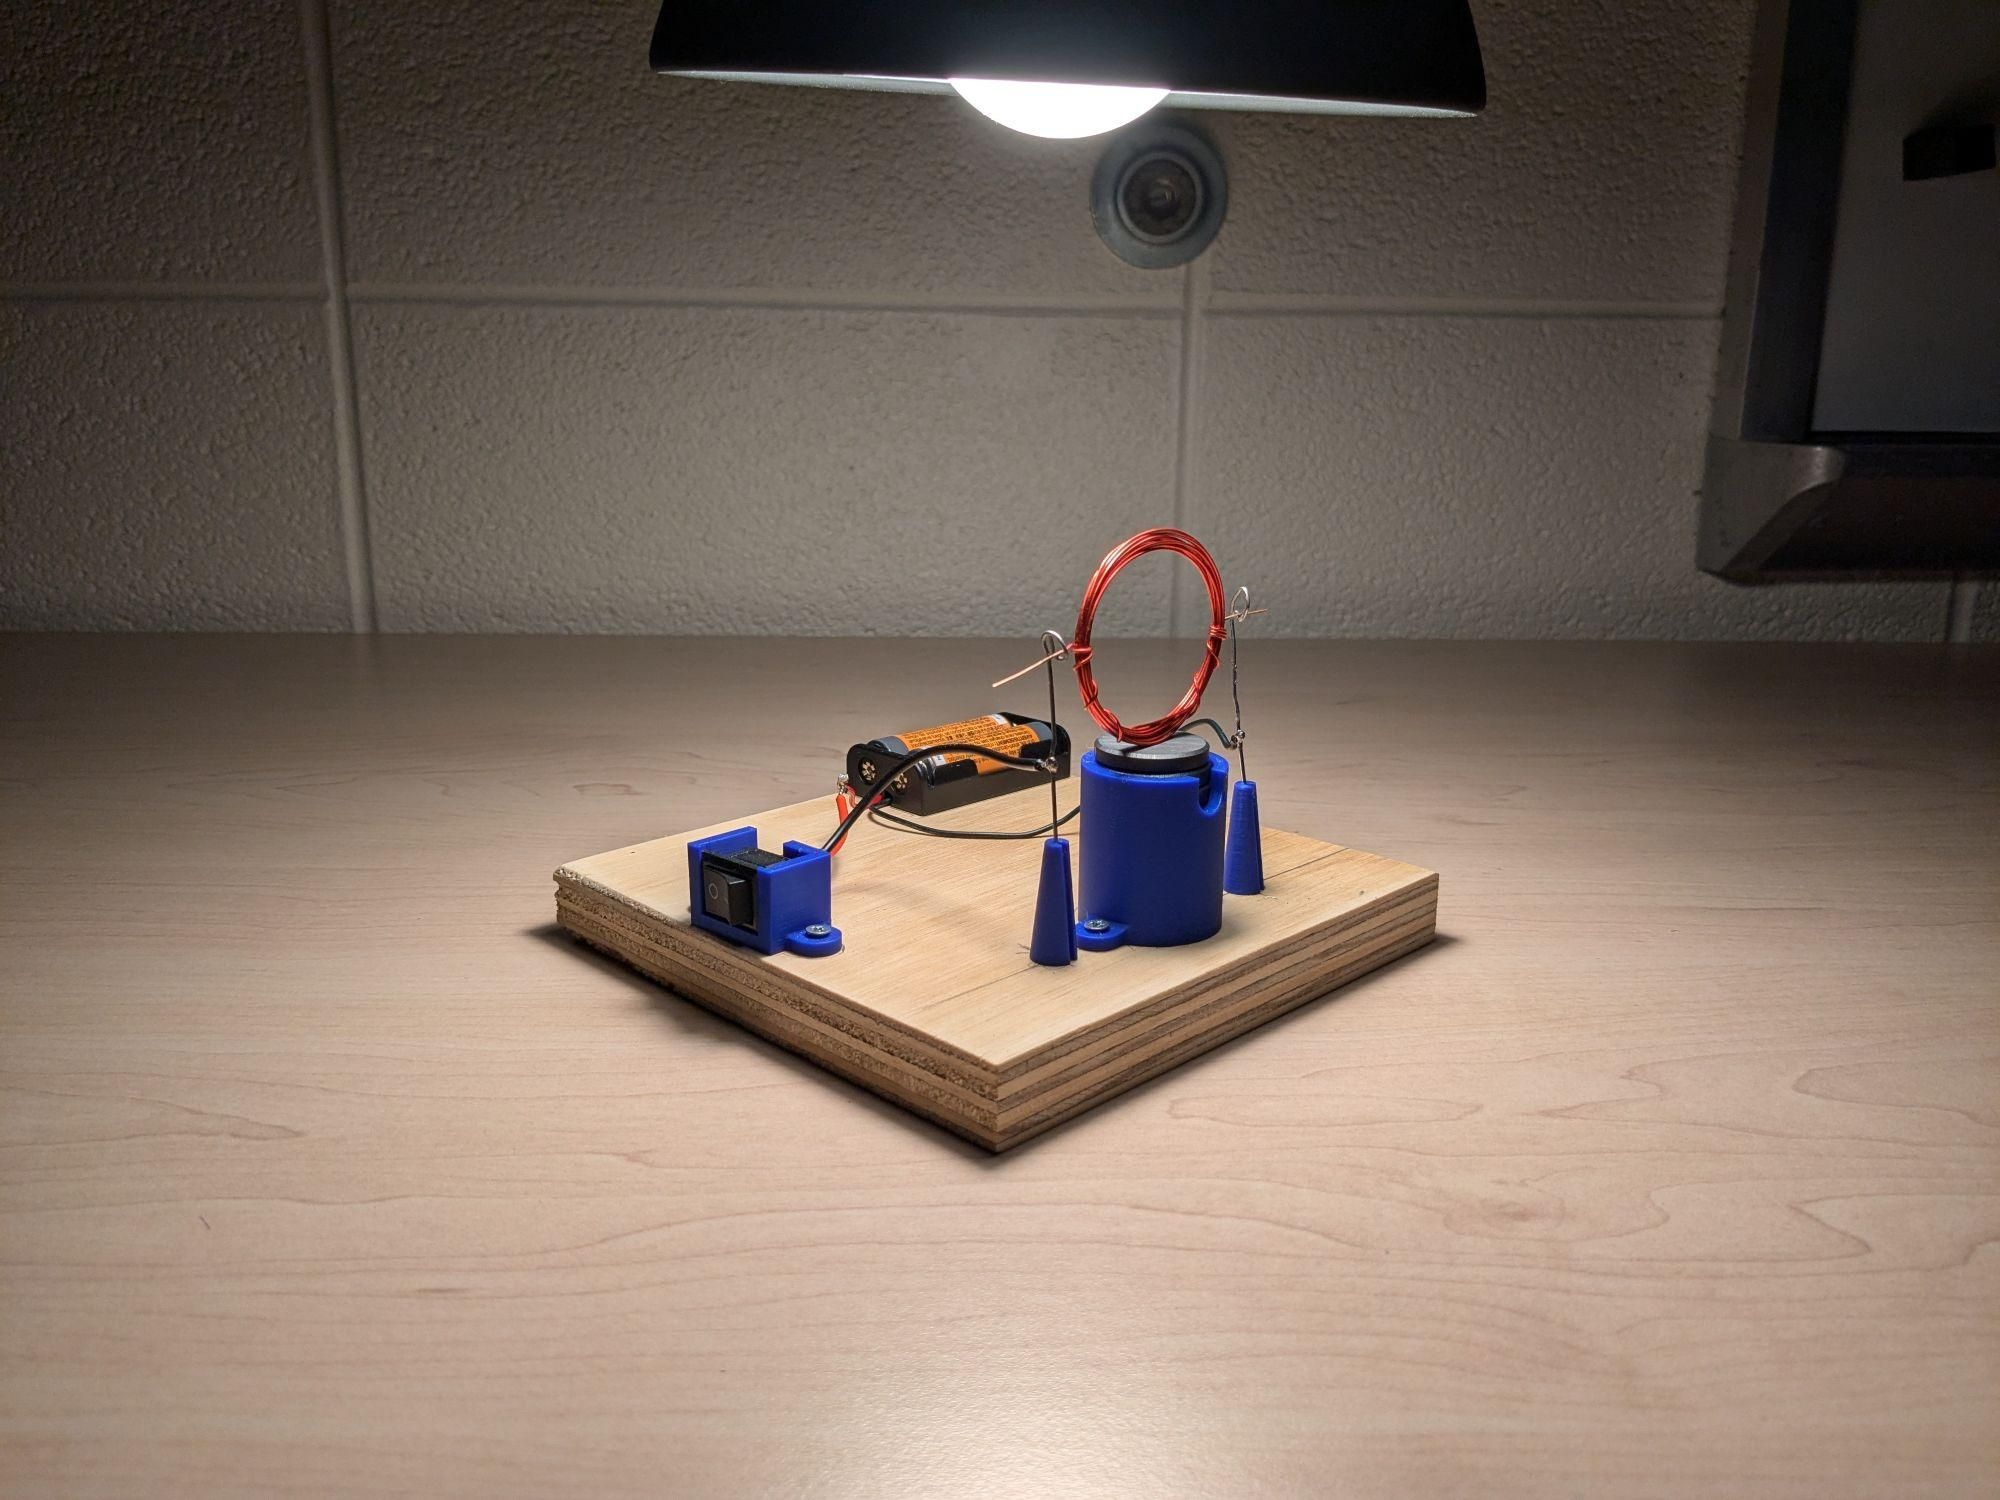
This is a project I used this year in my level 1 manufacturing class at the conclusion of our ohms law and circuit work and before we get into industrial electrical safety with Lock Out Tag Out. This isn't a new idea, there are plenty of resources out there for this type of activity, but I couldn't find anything exactly like I was looking for.
I always prefer when I can have my units and lessons build off of one another and make the students connect concepts and skill from one part of our class with another. For this I wanted to include some measurement practice, reading a set of prints and then also the electricity skills we learned during the current unit.
In this Instructable I cover the building of this simple electric motor.
Let's get into it!
Supplies
-Copper Wire
-Battery Holder
-Paper Clips
-Switch
-Switch Holder (Optional)
-Paper Clip Holders (Optional)
-Soldering Iron
-Solder
-Batteries
-Wood
-Screws (Optional)
-Magnet Holder (Optional)
Video Tutorial
If you'd rather watch and learn, the video above covers this entire project in a little more than 10 minutes.
Setup and Plans
I made up a set of plans that I have my students use to complete this project. Earlier in the year we covered how to read a set of manufacturing drawings, so I use this as a chance to reinforce those skills.
I have the class use the parts list from the exploded view drawing to gather all the materials at their work station before starting to build their motor.
The battery and the magnets I hold back and make the students show me their completed project before I let them have these two parts to test their motor.
Before starting in the shop, I go over the steps I want them follow to make their electric motor. They write these steps on their drawings and use them to complete the build.

Downloads
Base
Sand the Base
I rough cut all the bases to size ahead of running the project with the class.
My shop/classroom is primarily a metal shop so we don't have access to much woodworking equipment during class, if I did I would have the students cut their own bases out as part of the project.
I have the students do a quick hand sand to remove the rough edges and reduce chances of splinters before starting in on the rest of the build.

Layout Components on Base
I have the students place the components on their base according to the set of plans. Then they trace around the parts with a pencil and then label those areas.

This allows them to mark the hole locations and do a quick quality check of their layout before they do any drilling.
The only part of layout that the students need to measure out is the position of the paper clip holders. This is due to the size of the copper wire ring they have to make later.
When finished the base should look like this.

Drill Holes in Base
Using the locations they marked earlier the students drill the needed holes into the base. Look up the proper pilot hole size you would need to drill for whatever screws you have on hand. We used #4 x 1/2" size screws for ours this year.
To help make this project more standarized and easy to work with in my classes I designed and 3D printed the paper clip, switch, and magnet holders. I designed them to use the same screws as the battery holders I had purchased for this project.
The paper clip holders I designed and 3D printed for this project were designed to fit into a 1/4 hole.

Install Battery Holder, Switch Holder, and Paper Clip Holders
To finish off the base use screws to fasten down the battery, switch, and magnet holders.
You can do this step without any of the 3D printed holders I'm showing, by just drilling different size holes and using some hot glue. I like the higher quality look of using the the 3D printed holders but they aren't necessary to get the little motor working.

Copper Wire Ring
Make Copper Wire Ring (Coil)
To make the copper wire ring, which is the spinny bit of this motor, take some wire and wrap it around a cylindrical object a few times and voila, you're done!
Again to make this standardized for my classes, I designed and printed a simple little tool to help my students make their rings.
To get a high quality copper wire ring I have my students follow these steps.
Leave somewhere between 2 -3 inches of wire extra on one side of the tool, I use the term "whiskers" for these in my class. Like shown below:

Wrap the wire around the groove 15-25 times, leave another 2-3 inches extra of wire on the opposite side, and then cut the wire from the spool.

Take the wire off of the tool and wrap the whisker wires tightly around the middle of ring so it will hold the circular shape. These bits of wire that stick out will be what goes into the paper clip loops later.
When all is said and done, you should end up with something like this

If the wire has a coating on it like what I've shown here, use sand paper to remove the coating from the whiskers.

Paper Clips
Form Paper Clips
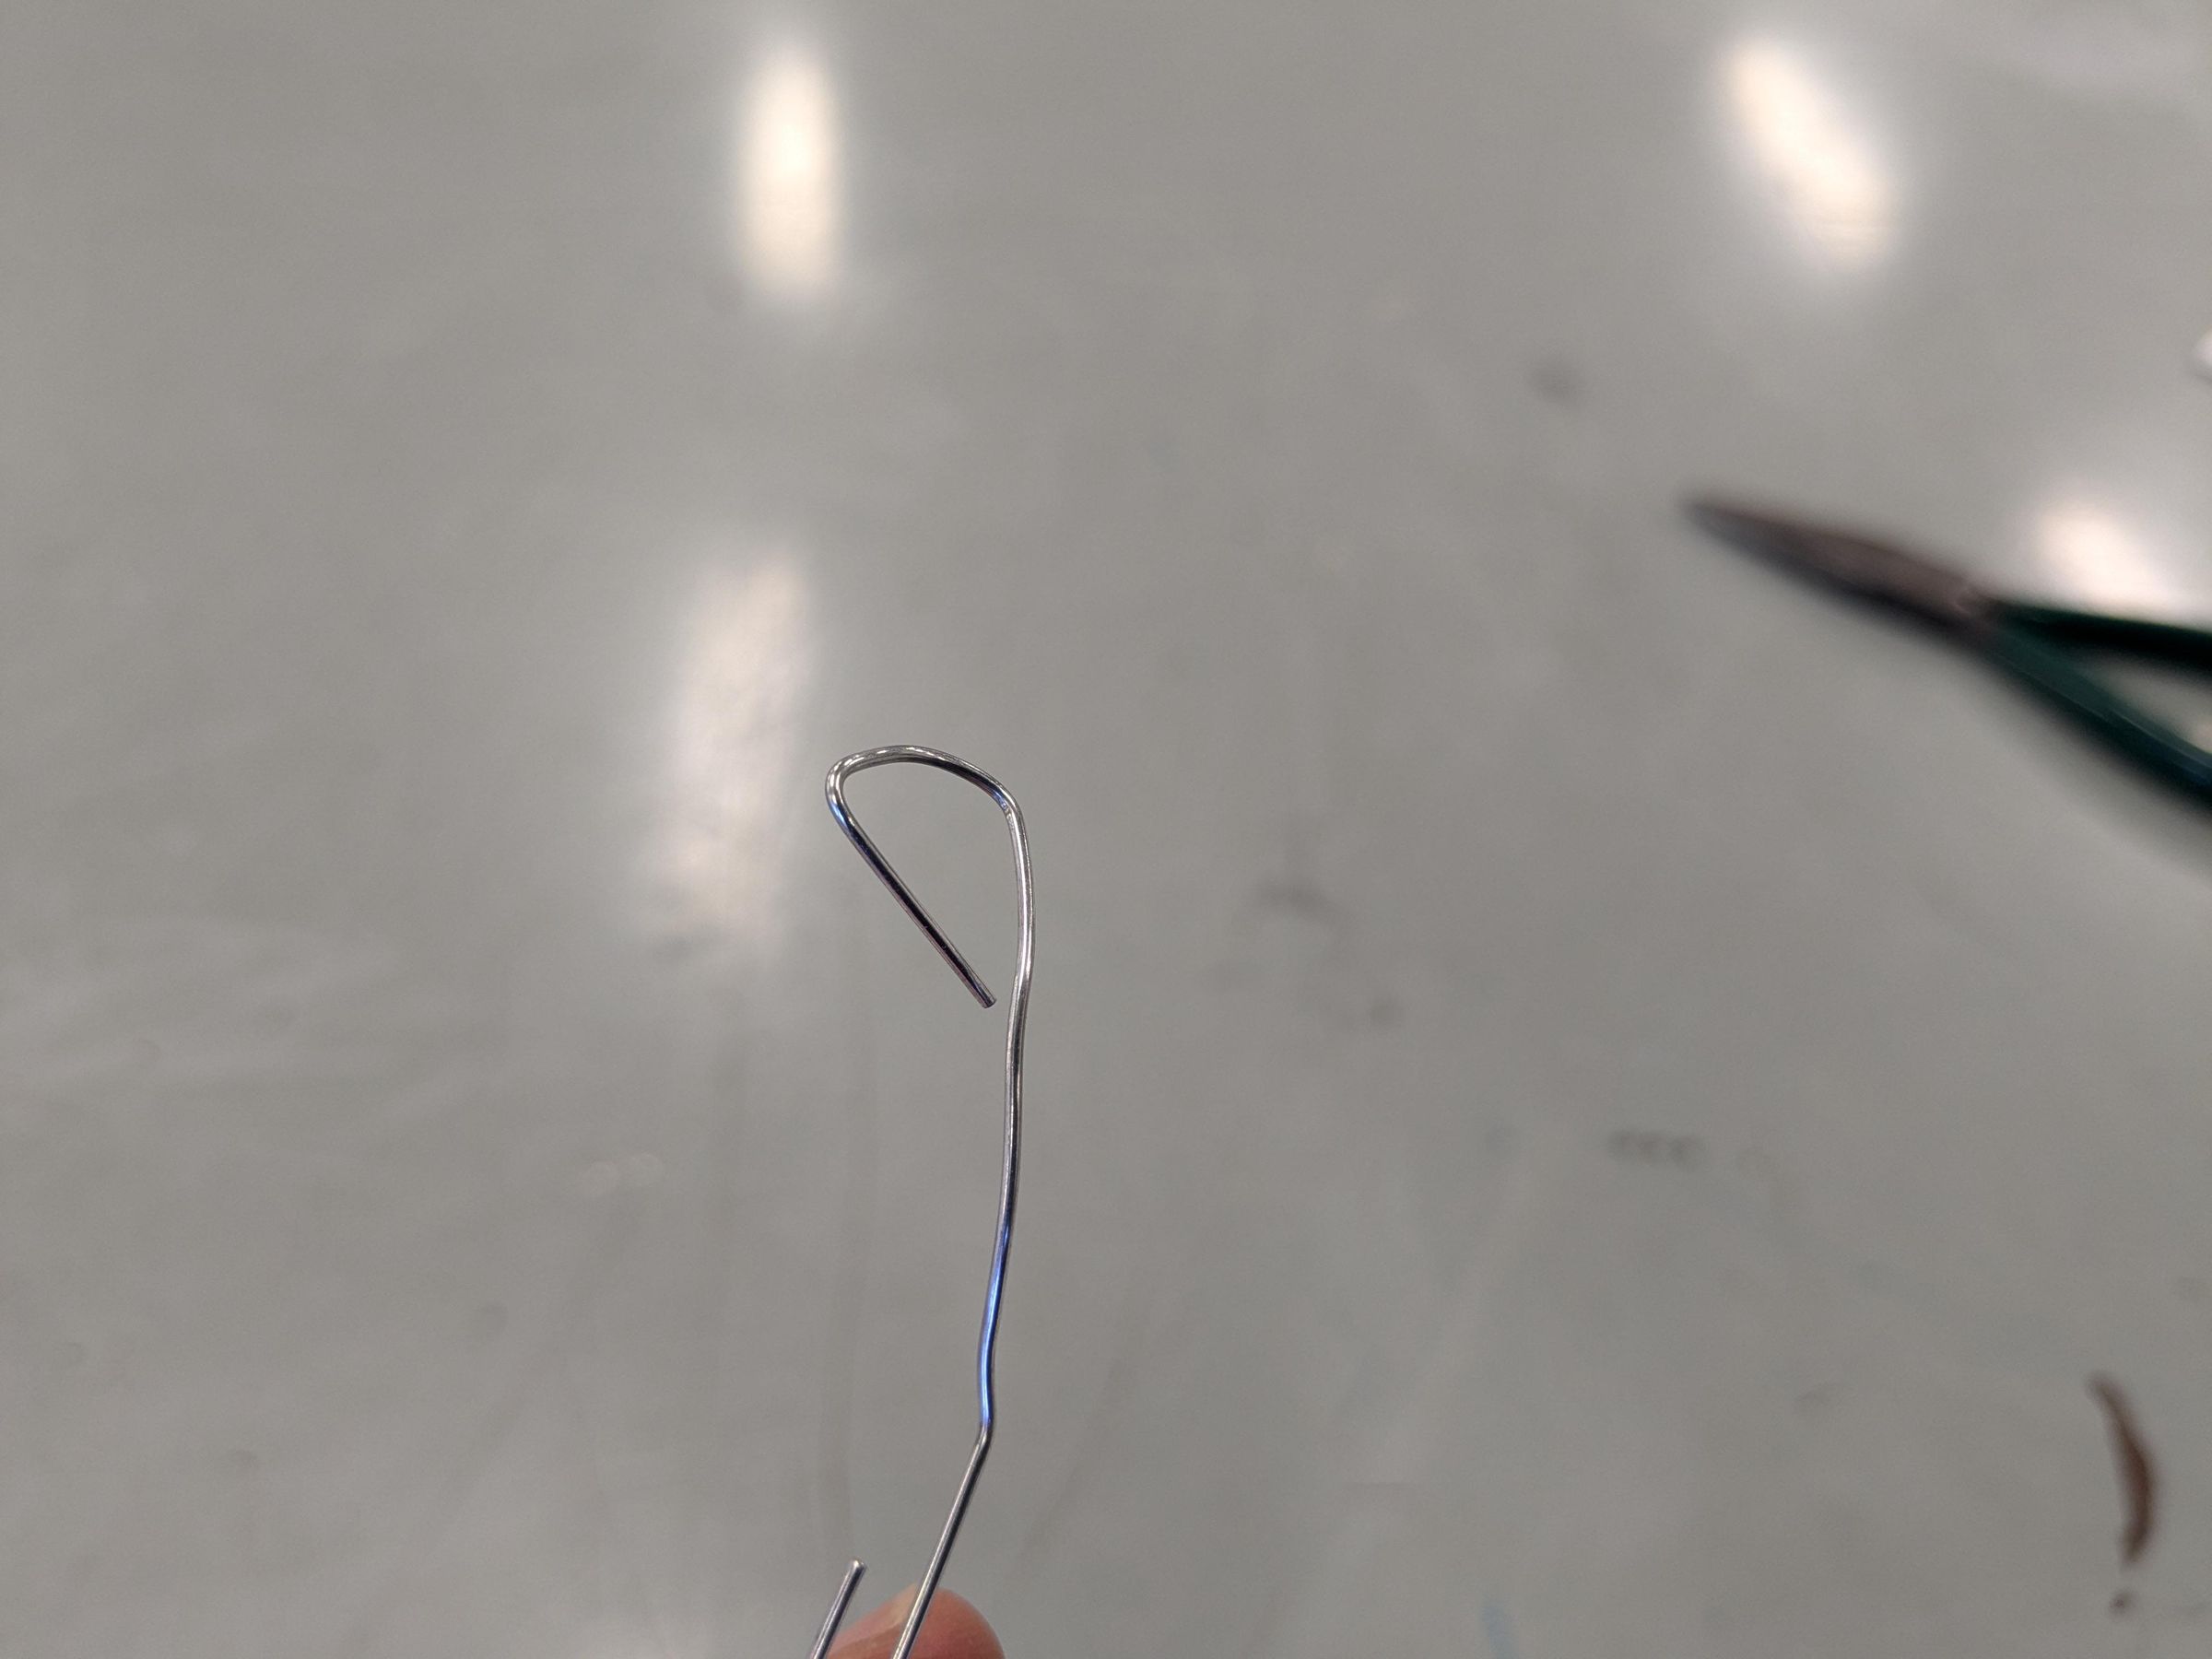
Straighten out the paper clips by bending them into a straight piece of wire.
Use pliers to curl a nice loop on one end of the paper clip. Make sure the opening on the loop is facing up and doesn't allow for a "catch spot" for the whiskers of the copper wire ring. You'll want the paper clips looking something like this:

The image below will not work well. (Just ask my students who don't like listening/following the instructions)
Cut Paper Clips Down
Stick the paper clips through the paper clip holders and put the holders into your base. Insert the whiskers of your wire ring into the loops of the paper clips.
You want the bottom of your ring to sit just barely above the top the magnets, something close to 1/8 to 1/4 of an inch is what we have found worked best for us.

Cut length from the bottom of your paper clips to lower your ring to sit in the proper position.

You want the ring to spin freely at this stage or the motor may not work well once electricity is running through it.

You can make these work from a number of different ring positions, it can be pretty forgiving project in that way, especially if you use bigger/more batteries. But we have found the most success when the ring hovers just over the magnets as shown in the above example.
Soldering
Solder Wires
Cut all of your wires so that you don't have tons of excess and then strip the coating from the ends.
Start by soldering your two red wires together.

Then solder you black wires to the paper clips. I recommend soldering the black wires to the middle of the paper clips.

This gives you some wiggle room if you need to adjust the height of your ring to make your motor spin better later on.
With all of that done, your project should look something something like this:

And when you add the ring into the paper clips it will look like this and be ready to test.

Testing
Test
Put batteries in the battery holder, place two magnets in your magnet holder, and make sure your copper ring is in place on your paper clips.
Turn your switch on and give your ring a little tap to get it spinning. If everything is lined up right your motor should take off.
The End Bit
Thank you so much for checking out my Instructable. I truly appreciate people taking time to view my work! Please feel free to take this project and turn it into something better than what I have here.
If you make one or use it in your class let me know in the comments below or shoot me an email.
Also, if you noticed anything I'm doing wrong with building these or have ideas on how we can do it better please let me know in the comments.
Subscribe to my fledgling YouTube Channel Here for more shop class projects!
If you teach shop class of some kind, I've started a little website to document/compile shop teacher content/curriculum. I'm really just getting started with it but I hope to be posting much more to it soon. If you want a more official lesson or project plan/class overview of this project it will eventually be on my website.
Find it at Shop Class Builds.
Again, thank you for taking time out of your day to scan through my project!