Simple HexaBot With IR Remote TV or MP3
by eric dirgahayu in Circuits > Robots
2601 Views, 30 Favorites, 0 Comments
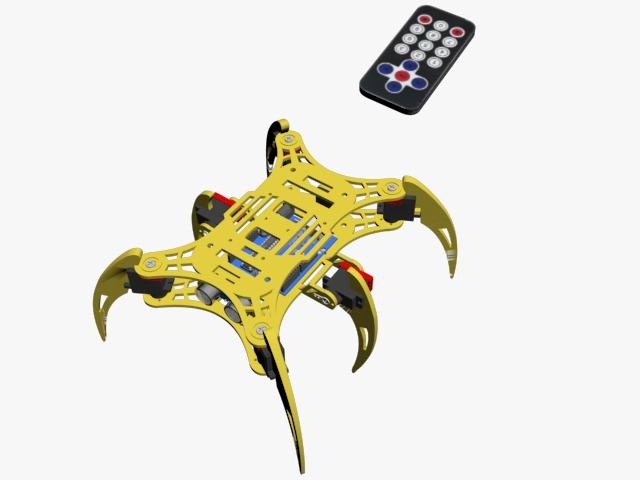
Simple HexaBot With IR Remote TV or MP3


do you like robots? want to have one but the robot is so expensive, why not make one? you can still have a robot and even make it yourself, trust me you can make it easily and you don't have to pay a lot because it's really cheap.
Supplies

- Arduino uno compatible board (Kuman UNO R3 Board ATmega328P)
- 6pcs micro servo Readytosky SG90 9G Micro Servo Motor+Multi Servo Tester for RC Helicopter Airplane Car Boat Robot
- Ubec Calvas RC UBEC 3A Remote Control Full Shielding Antijamming Switching Regulator for Mini QAV250
- battery 18650 2slot holder LBTODH 2PCS 18650 Battery Holder with Lead Wire Bundle 18650 Battery Holder 7.4V DIY Battery Storage Boxes Black Plastic Battery Case Kit
- 2 pcs battery 18650
- on/off switch QTEATAK 5Pcs On/Off Boat Rocker Switch 5Pcs 2 Pin Position Snap 12V 110V 250V with 10Pcs Terminals
- IR Remote with receiver module DollaTek Infrared IR Wireless Remote Control Sensor Module Kits for Arduino
- ultrasonic sensor (optional)SainSmart HC-SR04 Ranging Detector Mod Distance Sensor (Blue)
- mini breadboard ELEGOO 6PCS 170 tie-Points Mini Breadboard kit
- jumper wire ELEGOO 120pcs Multicolored Dupont Wire 40pin Male to Female, 40pin Male to Male, 40pin Female to Female Breadboard Jumper Wires Ribbon Cables Kit Compatible with Arduino
- cutting acrylic File is ready to download as .pdf , you can change the format to .cdr if thats need
Cutting Acrylic Frame
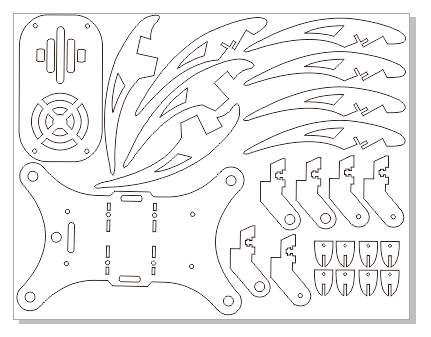

- Use this layout for making a frame with 2mm Acrylic
- Make sure the size is right, don't leave any parts left.
Downloads
Frame Intallation


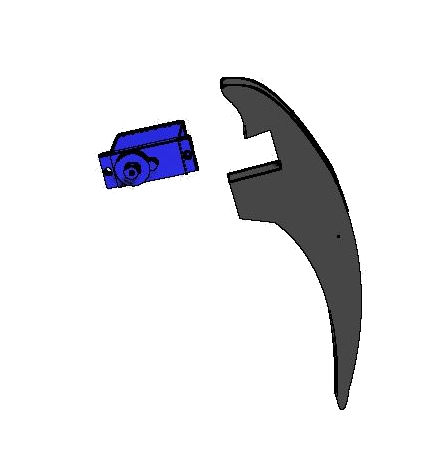


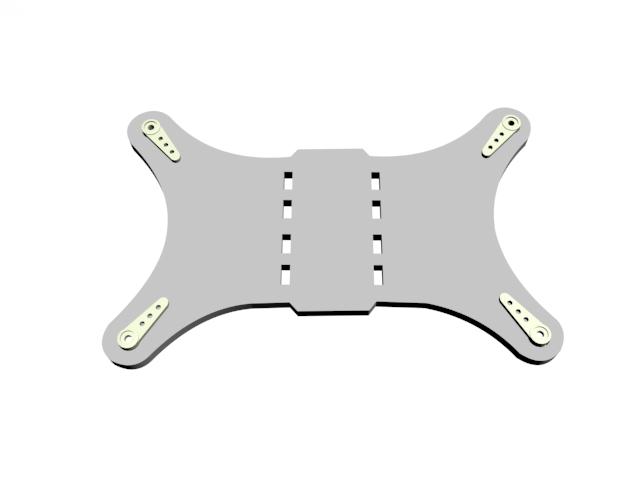


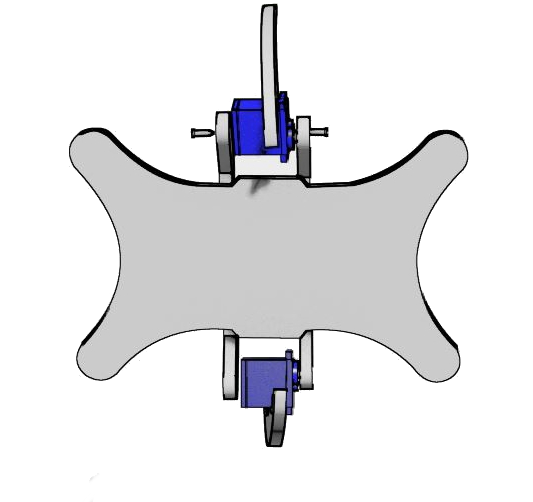


- Prepare the Acrylic frame and 6pcs mg90 micro servos, you need a acrylic glue for this step
- Pic.1 this a leg part, attach the small parts to the legs, make sure the hole at smal part fits the cut area in the leg part, fix it with glue, and install the servo using the bolt on the part that has been made, do the same to the other legs. total is 4 led this is for the four legs that are in the corner.
- there are 2 more legs in the middle pic.4-5, is just attack the servo in the middle leg using a screw.
- pic 6-11 is is how you attach the middle leg to the main frame, fix it using a glue.
- pic 12-14 attach all the legs to the main frame.
- don't forget before installing the servo, put the horn servo on the holes of the acrylic frame.
Hardware Intallation


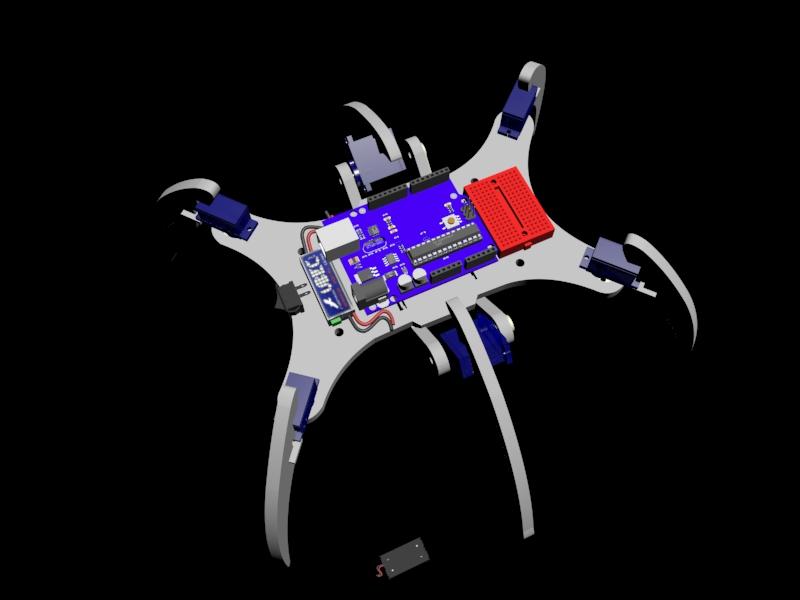
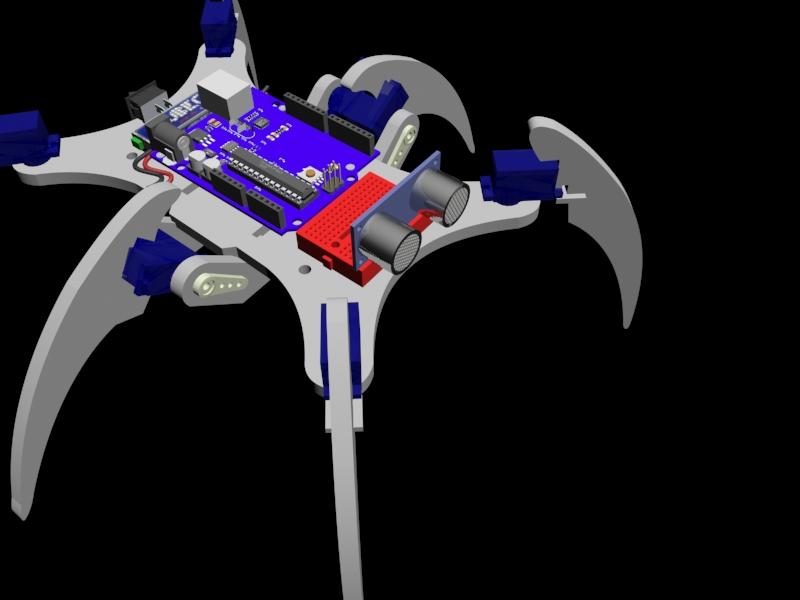


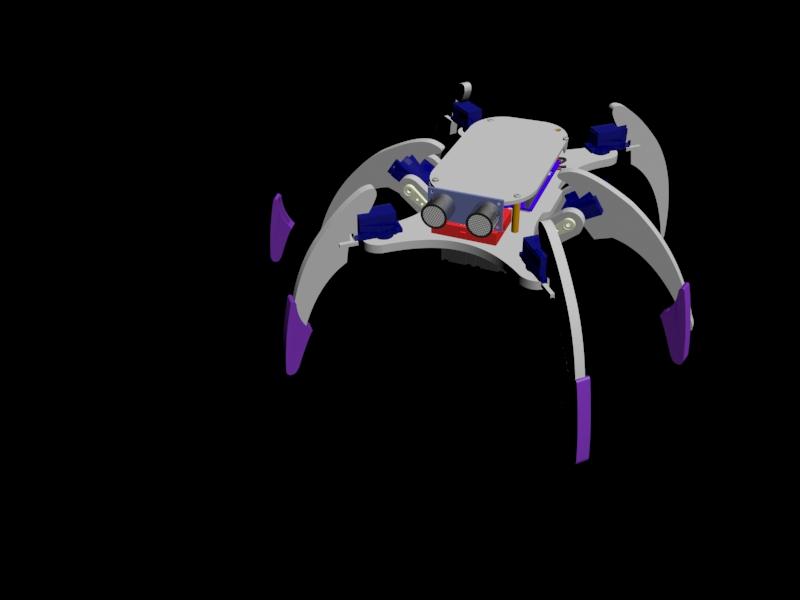


- Acrylic Frame is ready with servos added, now you prepare install the harware to the frame, take look to the picture.
- pic.1 the switch on/off add in a back side body robot. use a glue to pin it.
- pic.2 Ubec 3A placed close to the on/ow switch
- pic.3 place the Arduino in the middle of the body, fix it with the screw in the hole provided on the body frame
- pic.4 open the sticker cover on the back of the mini breadboard and stick it on the back of the arduino
- pic.5 Plug the ultrasonic pins in the middle of the front of the breadboard
- pic.6 also plug the IR sensor receiver in the breadboard, make sure the sensor can be seen out
- pic.7 Also install the battery at the bottom of the robot body, use screws or glue to attach it
- install the top cover by adding spacers with screw.
- last pictute is optional, shoes for robot, made from 3d print setting print without support.
Downloads
Wiring

- look at the pic.1 or open the wiring.pdf for more detail and clear
- put all the positive servo wires together as well as the negative ones.Plug it into the breadboard which is connected to the arduino Vin pin for the positive cable and the arduino Gnd pin for the negative cable
- for the servo data pins, we will make 6 servos into 3 data output lines by connecting 2 cables and the servo into one line. the rear front leg data cable to the arduino D7 pin, the right middle leg with the left middle leg to the Arduino D4 pin, the left front leg with the left rear leg to the Arduino D2 pin
- IR Receiver sensor the Vcc pin to 5V pin arduino, Gdn pin tu Gnd arduino, and the pin S to A0 arduino pin
- Utrasonic sensor Vcc to 5v arduino pin, Gnd to Gnd Arduino pin, echoo to A3 arduino pin, Trig to A4 arduino pin
- Battery : positif wire to pin swict on/off continued to input + Ubec , Gnd wire to Gnd input Ubec.
- Outpu Ubec : vcc wire to pin Vin Arduino , and Gnd to pin Gnd Arduino.
- Note : servo is at 90 degrees at the position as in the picture
Downloads
Programing

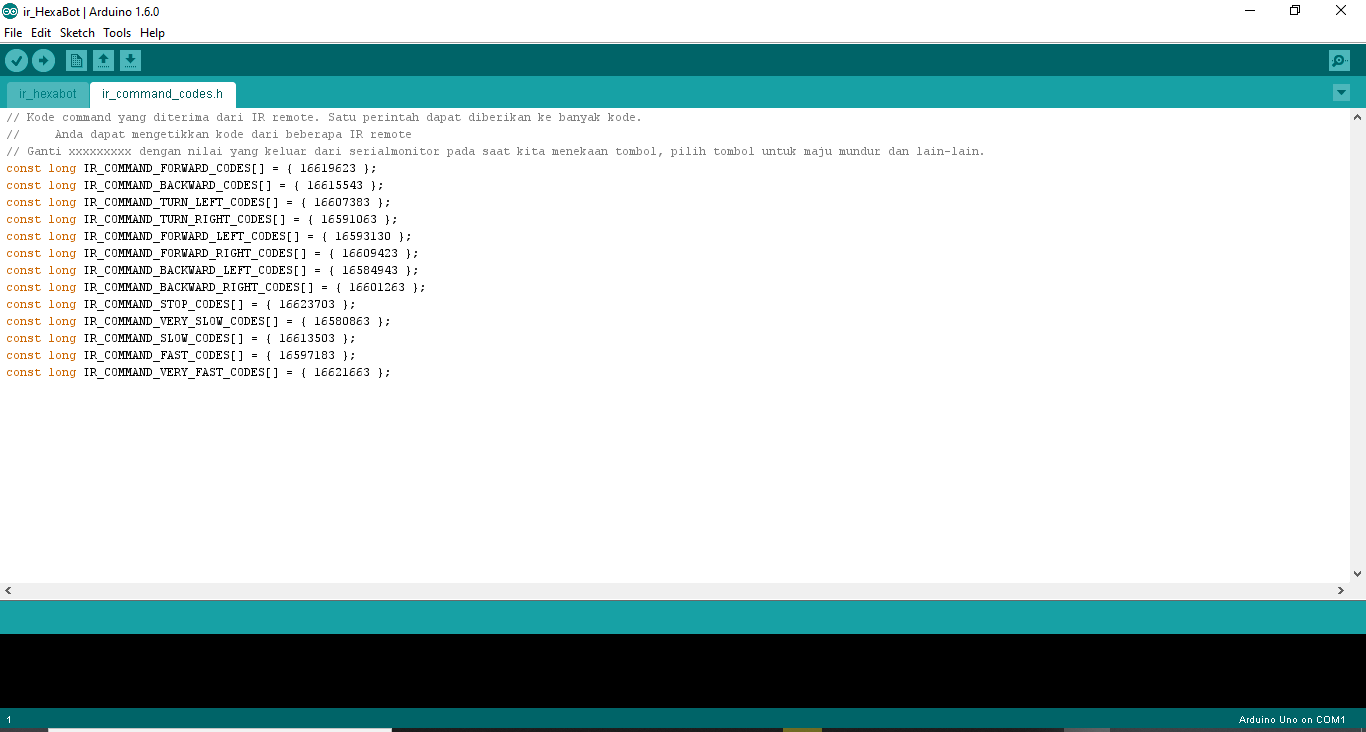
1.Install Arduino IDE if you don't have the software. can be downloaded here
https://code.google.com/p/arduino/downloads/detail?name=arduino-1.0.5-windows.execan=2
2.copy the Arduino-IRremote-master file that has been provided and then open the Arduino
file on your computer at local disk/programfiles/arduino/libraries Paste the file
Arduino-IRremote-master.
3.Run the Arduino IDE software, click File open and select the IR_Receiver file that
has been provided or simply double-click on the IR_receiver.ino file
4.prepare Arduino uno
5.plug in the T-sop or IR Receiver included in the package. we have given the color on
each leg of the T-Sop, red for Vcc, Black for Gnd, and blue or yellow for
to enter analog pin A0.
6.connect the arduino that has been installed with T-sop and upload the IR_receiver. if successful,
open Serial Monitor on Arduino IDE. by clicking on the magnifying glass icon in the right corner
software, and a new window will appear now press a button from the remote that has been provided, you can use any IR remote such as remote tv, mp3 .
if a number or value comes out, it means you have succeeded in the first
stage.now open the IR_Onggobot.ino file after it appears click the ir_command_codes.h option and
a command for the robot action will appear. your task now replaces the value
XXXXXXX in ir_command_codes.h with the number of each key you selected to perform the command.
for example, you select button no.1 to go forward then press the number button 1
and the serial monitor will display a value for example 12345678 and now open the ir_command_codes.h
window where you have entered the number from pressing button one to
'const long IR_COMMAND_FORWARD_CODES[] = { xxxxxxxxx };'you change xxxx with the value 12345678
obtained from serial monitor button no.1 so 'const long IR_COMMAND_FORWARD_CODES[] = { 12345678 };
and select another button for reverse turn command and others.
7.if everything is filled now, upload ir.kolomonggobot.ino to arduino. when Upload done.
means the robot is ready to receive commands from the remote control earlier.
8.Install battery and your robot is ready
9.Code https://github.com/ericdir/Ir_-HEXABOT
Source Code :
//this hexabot using IR remote control
#include "IRremote.h"
#include "ir_command_codes.h"
#include <Servo.h>
// // Analog pin rof IR receiver sensor
const int IR_PIN = A0;
// pin for servos
const int LEFT_SERVO_PIN = 2;
const int CENTRAL_SERVO_PIN = 4;
const int RIGHT_SERVO_PIN = 7;
// default angle
const long LEFT_SERVO_ZERO_VALUE = 90;
const long RIGHT_SERVO_ZERO_VALUE = 90;
const long CENTRAL_SERVO_ZERO_VALUE = 90;
const long SIDE_SERVOS_FULL_AMPLITUDE = 30;
const long SIDE_SERVOS_HALF_AMPLITUDE = 15;
const long CENTRAL_SERVO_AMPLITUDE = 20;
const long STEP_PERIOD_VERY_SLOW = 2000;
const long STEP_PERIOD_SLOW = 1500;
const long STEP_PERIOD_FAST = 1000;
const long STEP_PERIOD_VERY_FAST = 500;
long lastMillis;
long globalPhase;
float angleShiftLeftServo;
float angleShiftRightServo;
float angleShiftCentralServo;
long stepPeriod;
long amplitudeLeftServo;
long amplitudeRightServo;
boolean isAttached;
boolean isStopped;
// // EN: IRreceiver code
IRrecv irrecv(IR_PIN);
Servo LeftServo;
Servo RightServo;
Servo CentralServo;
void attachServos() {
if (!isAttached) {
LeftServo.attach(LEFT_SERVO_PIN);
RightServo.attach(RIGHT_SERVO_PIN);
CentralServo.attach(CENTRAL_SERVO_PIN);
isAttached = true;
}
}
void detachServos() {
if (isAttached) {
LeftServo.detach();
RightServo.detach();
CentralServo.detach();
isAttached = false;
}
}
void setup() {
irrecv.enableIRIn();
attachServos();
isStopped = true;
lastMillis = millis();
angleShiftLeftServo = 0;
angleShiftRightServo = 0;
angleShiftCentralServo = 0;
stepPeriod = STEP_PERIOD_FAST;
}
int getAngle(long amplitude, long phaseMillis, float shiftAngle) {
float alpha = 2 * PI * phaseMillis / stepPeriod + shiftAngle;
float angle = amplitude * sin(alpha);
return (int)angle;
}
template<typename T,size_t N>
boolean hasCode(T (&commandCodes)[N], long code) {
for (int i = 0; i < N; i++) {
if (commandCodes[i] == code) {
return true;
}
}
return false;
}
void loop() {
long millisNow = millis();
long millisPassed = millisNow - lastMillis;
if (isStopped) {
if (millisPassed >= 500) {
lastMillis = 0;
detachServos();
}
globalPhase = 0;
} else {
lastMillis = millisNow;
globalPhase += millisPassed;
globalPhase = globalPhase % stepPeriod;
}
decode_results results;
if (irrecv.decode(&results)) {
if (hasCode(IR_COMMAND_FORWARD_CODES, results.value) ||
hasCode(IR_COMMAND_FORWARD_LEFT_CODES, results.value) ||
hasCode(IR_COMMAND_FORWARD_RIGHT_CODES, results.value)) {
attachServos();
isStopped = false;
angleShiftLeftServo = 0;
angleShiftRightServo = 0;
angleShiftCentralServo = PI/2;
amplitudeLeftServo = SIDE_SERVOS_FULL_AMPLITUDE;
amplitudeRightServo = SIDE_SERVOS_FULL_AMPLITUDE;
if (hasCode(IR_COMMAND_FORWARD_LEFT_CODES, results.value)) {
amplitudeLeftServo = SIDE_SERVOS_HALF_AMPLITUDE;
} else if (hasCode(IR_COMMAND_FORWARD_RIGHT_CODES, results.value)) {
amplitudeRightServo = SIDE_SERVOS_HALF_AMPLITUDE;
}
} else if(hasCode(IR_COMMAND_BACKWARD_CODES, results.value) ||
hasCode(IR_COMMAND_BACKWARD_LEFT_CODES, results.value) ||
hasCode(IR_COMMAND_BACKWARD_RIGHT_CODES, results.value)) {
attachServos();
isStopped = false;
angleShiftLeftServo = 0;
angleShiftRightServo = 0;
angleShiftCentralServo = -PI/2;
amplitudeLeftServo = SIDE_SERVOS_FULL_AMPLITUDE;
amplitudeRightServo = SIDE_SERVOS_FULL_AMPLITUDE;
if (hasCode(IR_COMMAND_BACKWARD_LEFT_CODES, results.value)) {
amplitudeRightServo = SIDE_SERVOS_HALF_AMPLITUDE;
} else if (hasCode(IR_COMMAND_BACKWARD_RIGHT_CODES, results.value)) {
amplitudeLeftServo = SIDE_SERVOS_HALF_AMPLITUDE;
}
} else if (hasCode(IR_COMMAND_TURN_LEFT_CODES, results.value)) {
attachServos();
isStopped = false;
angleShiftLeftServo = 0;
angleShiftRightServo = PI;
angleShiftCentralServo = -PI/2;
amplitudeLeftServo = SIDE_SERVOS_FULL_AMPLITUDE;
amplitudeRightServo = SIDE_SERVOS_FULL_AMPLITUDE;
} else if (hasCode(IR_COMMAND_TURN_RIGHT_CODES, results.value)) {
attachServos();
isStopped = false;
angleShiftLeftServo = 0;
angleShiftRightServo = PI;
angleShiftCentralServo = PI/2;
amplitudeLeftServo = SIDE_SERVOS_FULL_AMPLITUDE;
amplitudeRightServo = SIDE_SERVOS_FULL_AMPLITUDE;
} else if (hasCode(IR_COMMAND_STOP_CODES, results.value)) {
attachServos();
isStopped = true;
angleShiftLeftServo = 0;
angleShiftRightServo = 0;
angleShiftCentralServo = 0;
amplitudeLeftServo = SIDE_SERVOS_FULL_AMPLITUDE;
amplitudeRightServo = SIDE_SERVOS_FULL_AMPLITUDE;
} else if (hasCode(IR_COMMAND_VERY_SLOW_CODES, results.value)) {
// globalPhase koreksi untuk menyimpan posisi servo ketika mengubah periode.
globalPhase = globalPhase * STEP_PERIOD_VERY_SLOW / stepPeriod;
stepPeriod = STEP_PERIOD_VERY_SLOW;
} else if (hasCode(IR_COMMAND_SLOW_CODES, results.value)) {
globalPhase = globalPhase * STEP_PERIOD_SLOW / stepPeriod;
stepPeriod = STEP_PERIOD_SLOW;
} else if (hasCode(IR_COMMAND_FAST_CODES, results.value)) {
globalPhase = globalPhase * STEP_PERIOD_FAST / stepPeriod;
stepPeriod = STEP_PERIOD_FAST;
} else if (hasCode(IR_COMMAND_VERY_FAST_CODES, results.value)) {
globalPhase = globalPhase * STEP_PERIOD_VERY_FAST / stepPeriod;
stepPeriod = STEP_PERIOD_VERY_FAST;
}
irrecv.resume();
}
if (isAttached) {
LeftServo.write(LEFT_SERVO_ZERO_VALUE + getAngle(amplitudeLeftServo, globalPhase, angleShiftLeftServo));
RightServo.write(RIGHT_SERVO_ZERO_VALUE + getAngle(amplitudeRightServo, globalPhase, angleShiftRightServo));
CentralServo.write(CENTRAL_SERVO_ZERO_VALUE + getAngle(CENTRAL_SERVO_AMPLITUDE, globalPhase, angleShiftCentralServo));
}
}
ir_command_codes.h
// Command code received from remote IR. One command can be assigned to many codes
// You can type the code of several IR remotes
// You can type the code of several IR remotes^^// Replace xxxxxxxxx with the value that comes out of the serialmonitor when we press the button, select the button to go back and forth and etc.
const long IR_COMMAND_FORWARD_CODES[] = { 16619623 };
const long IR_COMMAND_BACKWARD_CODES[] = { 16615543 };
const long IR_COMMAND_TURN_LEFT_CODES[] = { 16607383 };
const long IR_COMMAND_TURN_RIGHT_CODES[] = { 16591063 };
const long IR_COMMAND_FORWARD_LEFT_CODES[] = { 16593130 };
const long IR_COMMAND_FORWARD_RIGHT_CODES[] = { 16609423 };
const long IR_COMMAND_BACKWARD_LEFT_CODES[] = { 16584943 };
const long IR_COMMAND_BACKWARD_RIGHT_CODES[] = { 16601263 };
const long IR_COMMAND_STOP_CODES[] = { 16623703 };
const long IR_COMMAND_VERY_SLOW_CODES[] = { 16580863 };
const long IR_COMMAND_SLOW_CODES[] = { 16613503 };
const long IR_COMMAND_FAST_CODES[] = { 16597183 };
const long IR_COMMAND_VERY_FAST_CODES[] = { 16621663 };
Finish

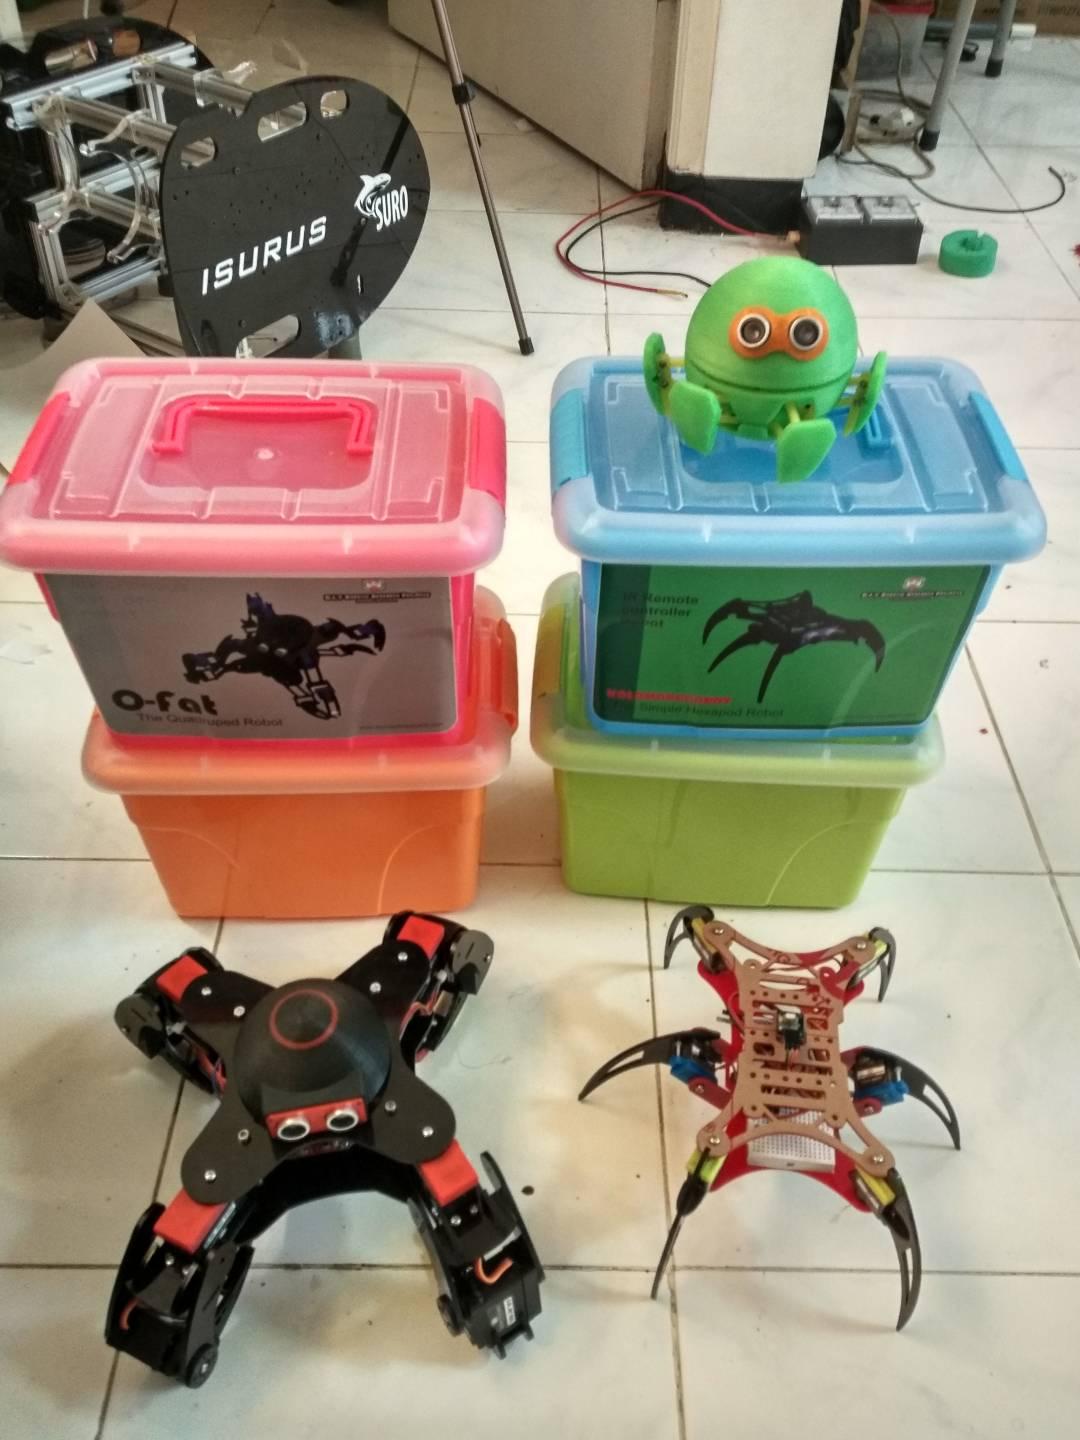
Finish, now you can make another Robot.... :D
Thankyou, Eric Dirgahayu