Simple JAVA Scheduler

I've been tinkering with code again and wanted a simple way to schedule a few jobs on my PC. So got dusted off the old JAVA IDE and saw what was out there.
Required:
- JAVA 7
- Netbeans
- Maven
I know the basics of the above three, so this will be a 'dummies' guide.
You can download all of the above in one single package here:
Step 1: Start Netbeans and Create a Project


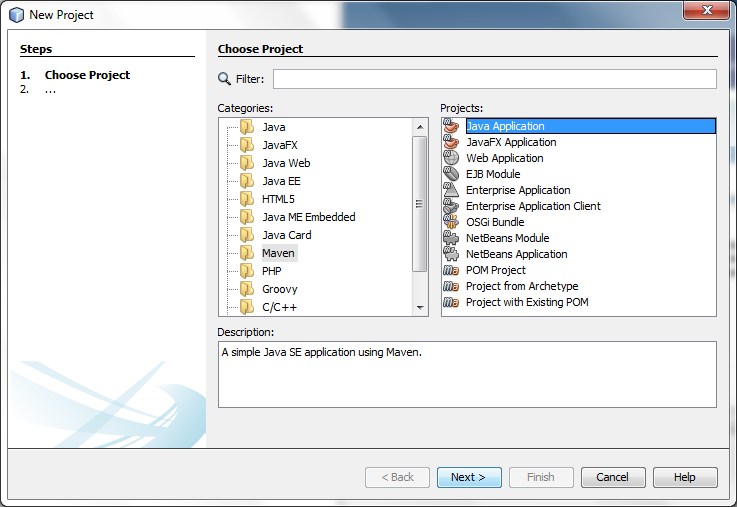
- Start Netbeans and create a new Maven project (Image 1). I chose Maven as I found it the easiest way to add some of the required libraries for logging and scheduling.
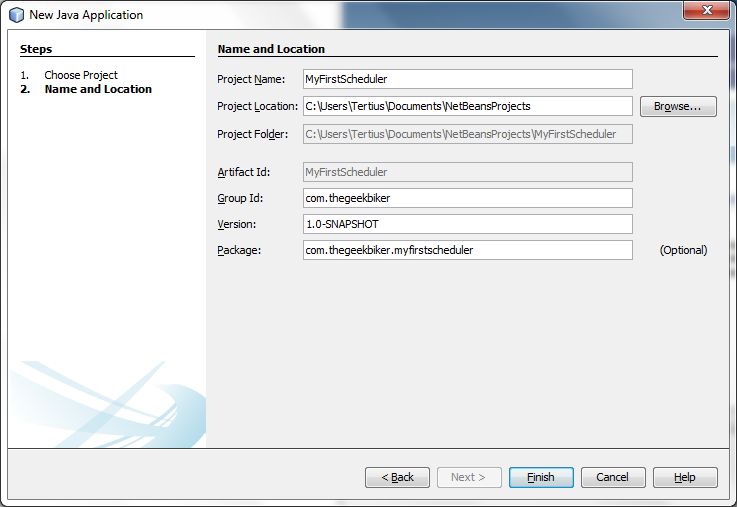
- Next, add a project name. I chose MyFirstScheduler. (Image 2)
Step 2: What Is in a Clean Project?


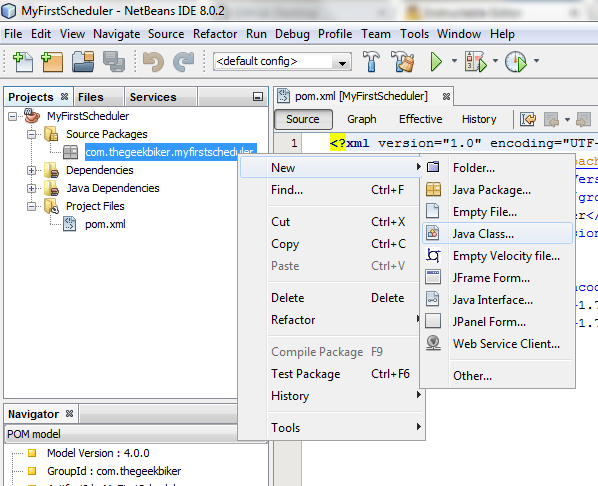
A clean maven project only contains a single file. The POM file is basically the foundation that holds the key to how the project is built, what it should include, and way more. (Image 1)
We will add a main class to make this project a bare bone run-able project.
- Right click on the source package and select to create a new Java Class.(Image 2)
- Name the new class
- Add the good old MAIN method to make it executable
public static void main(String[] args) {
	System.out.println("My First Scheduler!"); // Display the string.
}
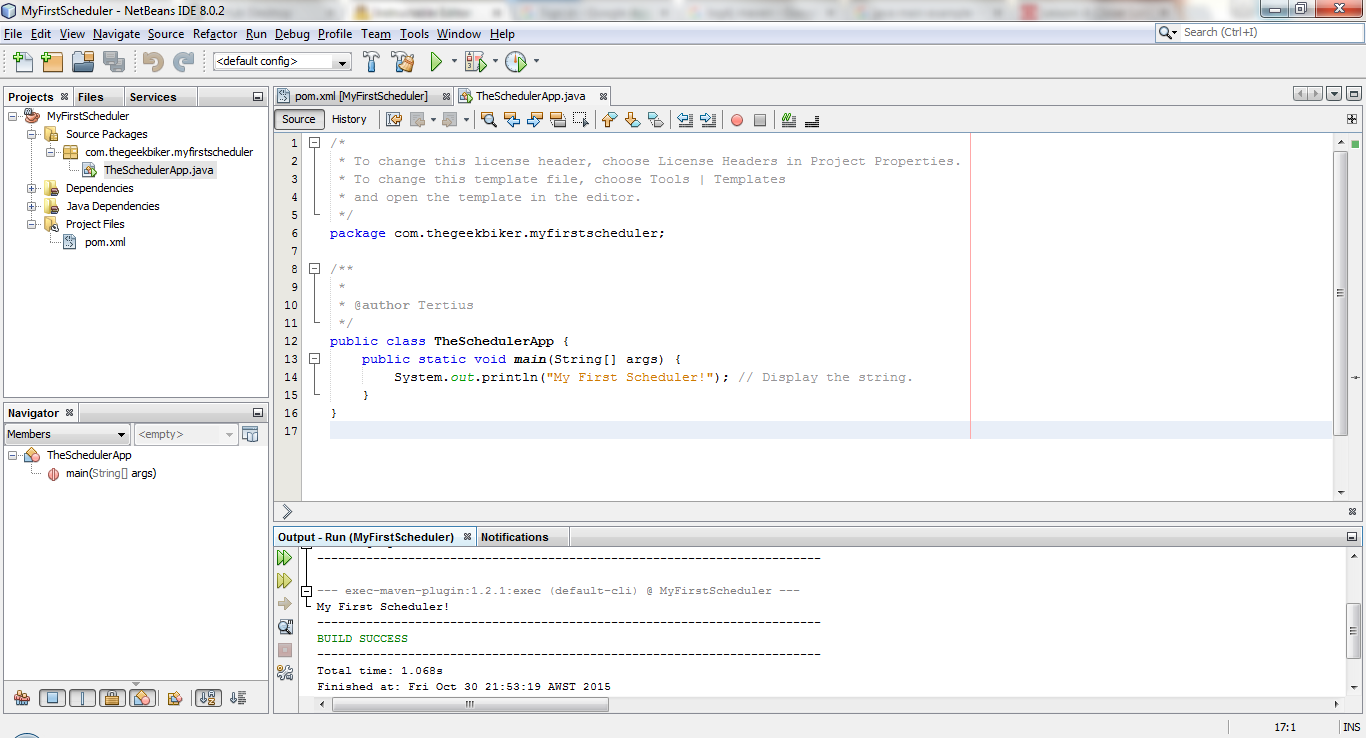
4. Execute the application by selecting Run (F6) and you should see
<p>cd C:\Users\Tertius\Documents\NetBeansProjects\MyFirstScheduler; "JAVA_HOME=C:\\Program Files\\Java\\jdk1.8.0_40" cmd /c "\"\"C:\\Program Files\\NetBeans 8.0.2\\java\\maven\\bin\\mvn.bat\" -Dexec.args=\"-classpath %classpath com.thegeekbiker.myfirstscheduler.TheSchedulerApp\" -Dexec.executable=\"C:\\Program Files\\Java\\jdk1.8.0_40\\bin\\java.exe\" -Dmaven.ext.class.path=\"C:\\Program Files\\NetBeans 8.0.2\\java\\maven-nblib\\netbeans-eventspy.jar\" -Dfile.encoding=UTF-8 org.codehaus.mojo:exec-maven-plugin:1.2.1:exec\""<br>Running NetBeans Compile On Save execution. Phase execution is skipped and output directories of dependency projects (with Compile on Save turned on) will be used instead of their jar artifacts.
Scanning for projects...

------------------------------------------------------------------------
Building MyFirstScheduler 1.0-SNAPSHOT
------------------------------------------------------------------------</p><p>--- exec-maven-plugin:1.2.1:exec (default-cli) @ MyFirstScheduler ---
My First Scheduler!
------------------------------------------------------------------------
BUILD SUCCESS
------------------------------------------------------------------------
Total time: 1.068s
Finished at: Fri Oct 30 21:53:19 AWST 2015
Final Memory: 4M/119M
------------------------------------------------------------------------</p>
Notice the line 'My First Scheduler!'
In the next steps we'll add the first dependency/library to use in the project.
Step 3: Add Cron4J Scheduling Package
From the Cron4J homepage:
cron4j is a scheduler for the Java platform which is very similar to the UNIX cron daemon. With cron4j you can launch, from within your Java applications, any task you need at the right time, according to some simple rules.
So first we open the pom.xml file in netbeans and add the following:
<dependencies>
  <dependency>
    <groupId>it.sauronsoftware.cron4j</groupId>
    <artifactId>cron4j</artifactId>
    <version>2.2.5</version>
  </dependency>
</dependencies>
or just copy and paste from the Maven Repository.
Netbeans should download the required java packages and you should end up with something like what is in the image.
Step 4: Adding a Scheduler

We should now be in a position to add our fist scheduled. Cron4J can execute a number of jobs.
We will start out with something simple and nonsensical. I'll expand on one of the examples from the cron4j website. We are going to start notepad.exe Monday, Tuesday, Wednesday, Thursday and Friday at 11:59.
Cron4J uses patterns to let it know when to start a job. The above's pattern would be:
59 11 * * 1,2,3,4,5 notepad.exe
But we need to add the scheduler first. To do that, you need to add the following code to your main class:
package com.thegeekbiker.myfirstscheduler;

import it.sauronsoftware.cron4j.ProcessTask;
import it.sauronsoftware.cron4j.Scheduler;
public class TheSchedulerApp {
    public static void main(String[] args) {
	System.out.println("My First Scheduler!"); // Display the string.
	//Add a schedule to run
        Scheduler myFirstSchedule = new Scheduler();
        //The task is the application you want to start
        ProcessTask task = new ProcessTask("C:\\Windows\\System32\\notepad.exe");
        //The schedule pattern is when we want to execute the task.
        myFirstSchedule.schedule("59 11 * * 1,2,3,4,5", task);
	//start the schedule
	myFirstSchedule.start();
    }
}
See the image attached.
Step 5: Running the Application

You can now run the application through Netbeans. When you hit the time and day, boom! , notepad opens.
Note how I've added another output string to show that the scheduler started.
In following instructables I'll show how to expand on this to do the following:
- Add logging so you know what is happening in your application
- Add you own code to execute in a schedule
- Package an application up to run outside of Netbeans.