Simple Vex Car

A simple-to-create vex car with a bevel gear differential and two-wheel drive connected to a single motor and a 9V battery.
Supplies
.jpg)
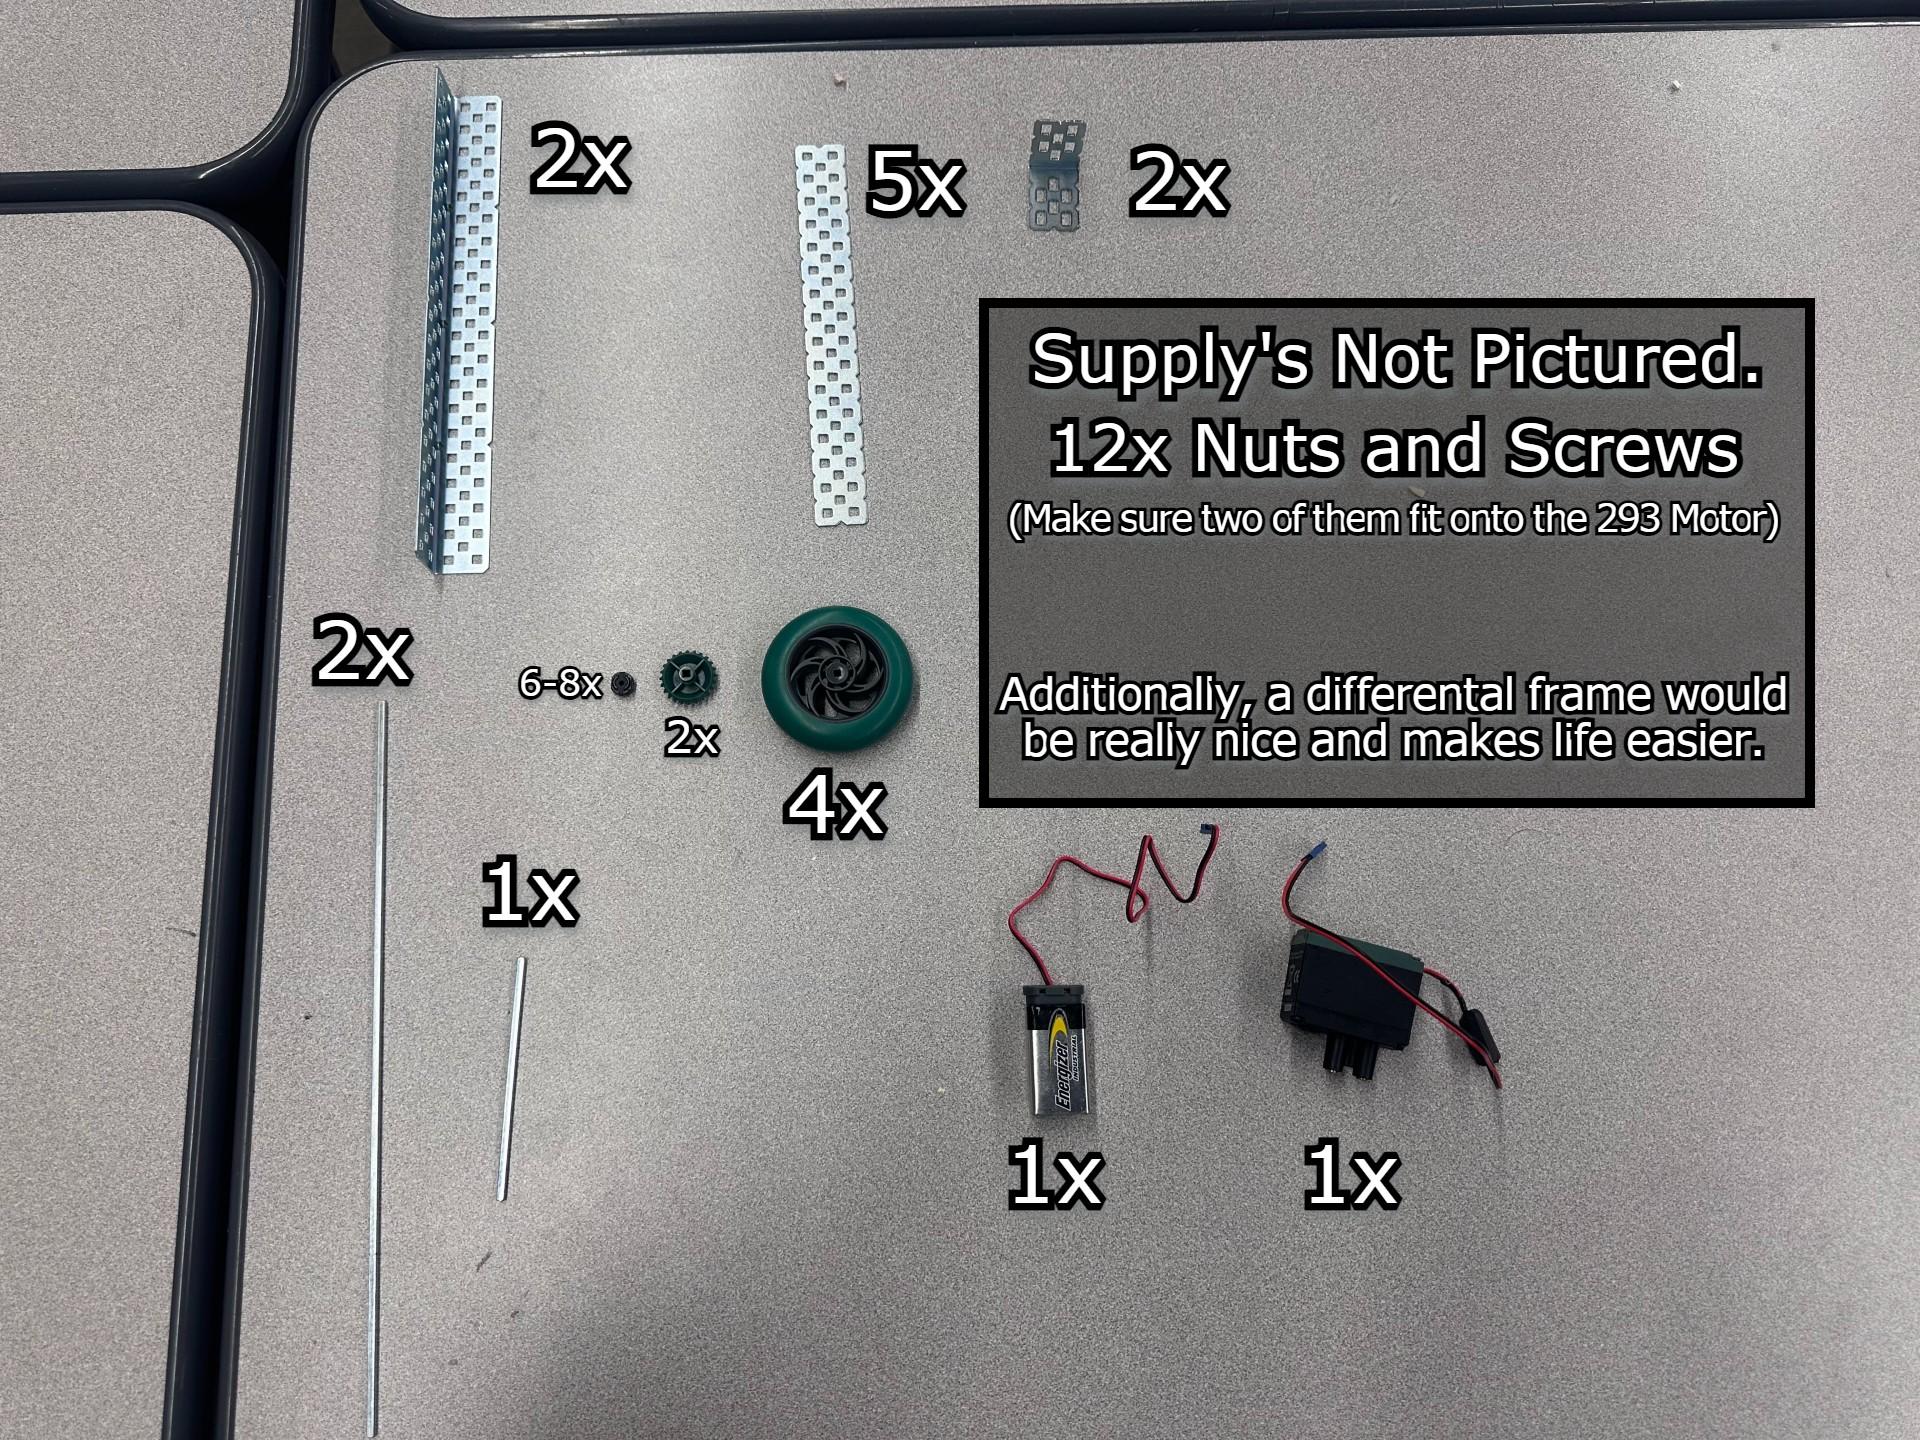
Total Materials Used
2x Large Sliding Metal Pieces.
4x Small Metal Pieces.
2x 90 Degree Angled Metal Pieces.
2x Large Driveshafts.
1x Small Driveshaft.
1x 9V Battery w/ Connector to Motor.
12x Screws.
10x Nuts.
2x Bevel Gears (I recommend a differential frame, but it isn't a requirement.)
1x 293 Motor.
6-8x Rubber Shaft Collar (6 will be fine how like I used it but sub-optimal)
1x Screwdriver compatible with your screws.
Building the Chassis
.jpeg)
Before we start building the chassis, you aren't required to follow my exact chassis. You may use whatever you have on hand as long as it is 3x high and has an area in the center for additional equipment.
First, you want to align each of the large sliding metal pieces parallel to each other.
Now after placing them parallel to each other, you would take 2 of the small metal pieces and connect them at the top and the bottom with nuts and screws as shown in the picture making the entire chassis connected like a rectangle.
Thirdly we need to connect the center, starting with taking one small metal piece and putting them in the center, and oriented exactly like the ones connected at the top and bottom then you would screw it onto the large sliding metal pieces with screws and nuts.
Finally, we need to place two small metal pieces vertically down the center, so it intersects the horizontal center metal piece we just placed in the last step.
Make sure everything is screwed in tightly before moving on to the next step.
Preparing the Driveshafts

Add the bevel gear to the middle of the drive shaft before 2x rubber shaft collars on each side. And another 2x towards the end as shown in the picture.
With the secondary driveshaft, you would like to add 2x rubber shaft collars towards the ends similarly to as shown in the picture.
The rubber shaft collars are essential to make sure the car stays reliable. (Furthermore, using a differential frame will make it way more reliable if you do have it on hand.)
Before we move on you can add the second bevel onto the smaller driveshaft just to have it ready for the next few steps.
Adding the Large Driveshafts Onto the Chassis

Add the driveshafts to each end of the car and make sure the bevel gear is in the center and the driveshafts are as elevated as possible to avoid the gears hitting the bottom of the chassis.
It may be worth noting that taking off one of the rubber shaft collars on the ends and inserting one end of the drive shaft before replacing it back onto the driveshaft may make it easier.
In the end, all of the steps you have followed should have ended up with the picture above! :D.
Adding Motor Mounting Points

For this step, we will need all of the 90-degree angled metal pieces.
The first one will go near the bevel gear from the first large driveshaft roughly 3 center holes forward to hold the smaller driveshaft when the motor is mounted make sure to screw it in with a screw and a nut in the center hole of the 90-degree angled piece.
The second driveshaft will go on the center horizontal metal plate and is to be exactly one to the left of the center 90-degree angle metal piece we placed down and remember to screw it down with a nut and a bolt.
Adding the 293 Motor

Adding the 293 Motor is straightforward, just bring it to the motor mounting point and screw it on in.
In case the bevel gears don't want to spin but are connected it might be more beneficial to elevate it by one hole and angle it at a 45-degree angle while screwing it in.
Adding the Small Driveshaft to the Motor

Adding the driveshaft is simple but it can be a bit difficult to get it through due to the area being just cramped, and in the end, it should look like this picture above.
Now you're all done, connect up the battery and test it!
If the bevel gears don't want to spin each other, try adjusting, it by pushing the smaller drive shafts bevel gear forward or try the alternative method in step 5.