SipSniper - Scale Based Trinking Game
by WorksAsDesigned in Circuits > Arduino
9 Views, 0 Favorites, 0 Comments
SipSniper - Scale Based Trinking Game


Sip Sniper: The Ultimate High-Tech Precision Drinking Game
Forget flipping cups or bouncing ping-pong balls. Sip Sniper takes drinking games into the age of microcontrollers, gram-perfect load cells, and ruthless precision.
Designed for bachelor parties, weekend game nights, and makers who love over-engineering their fun, Sip Sniper tests your group's ability to judge exactly how much liquid they are consuming.
The Concept: Place your full glass on the scale. The system calculates a random target—say, 73 ml. You take a sip and put the glass back down. The high-precision load cell weighs your attempt. Drink too little? You lose a try. Hit the target? You win. Drink just a single drop too much? Disqualified!
Supplies
To build your own Sip Sniper, you’ll need a mix of microcontroller tech, precision sensors, and some basic power management components. Here is exactly what goes into the build:
1. The Brains & Display
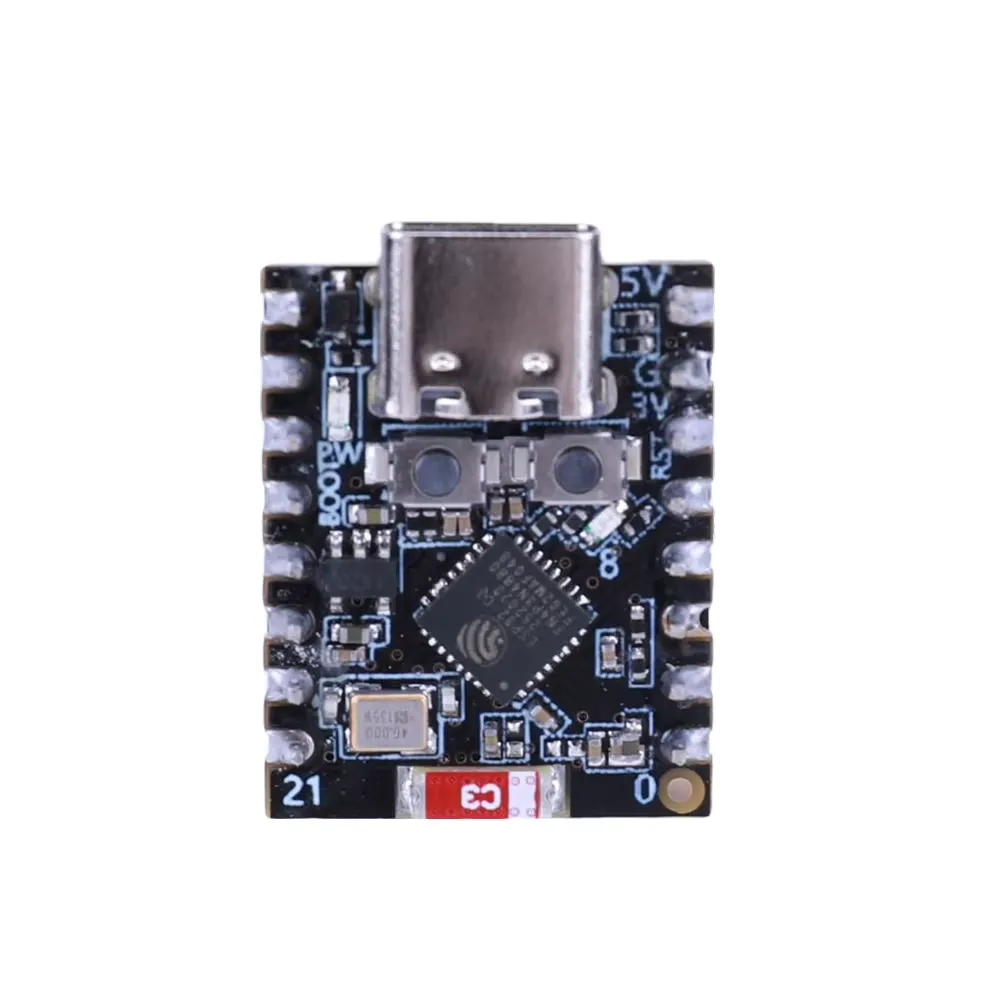
- 1x ESP32-C3 Mini Development Board: The powerhouse of the project. It handles the Wi-Fi web server, the game logic, and drives the display via high-speed hardware SPI.
- 1x 1.47-inch TFT LCD Display (ST7789 Driver): A crisp 172x320 pixel screen with an SPI interface. Essential for those buttery-smooth real-time progress bars.
- 1x Arcade Button / Heavy-Duty Tactile Button: For manual control at the table (starting rounds, skipping players). Its positioned unter the device. "Water" will get everywhere.... i took a 9mm version (6x6x9mm)
2. The Sensor (The Scale)
- 1x Load Cell (Aluminum Bending Beam): A 1 kg or 2 kg load cell is perfect, depending on how heavy your typical party glasses are. I recommend the 2kg version. Still precise enough.
- 1x HX711 Amplifier Breakout Board (Green Board): This 24-bit ADC acts as the translator, turning the microscopic physical bends of the load cell into gram-perfect digital data for the ESP32.
3. Power & Charging (Go Wireless!)
- 1x 18650 Lithium-Ion Battery: Provides hours of cord-free, table-top gameplay. get one with already attached cables! You can't solder a cable to the poles (without having a spot welder)
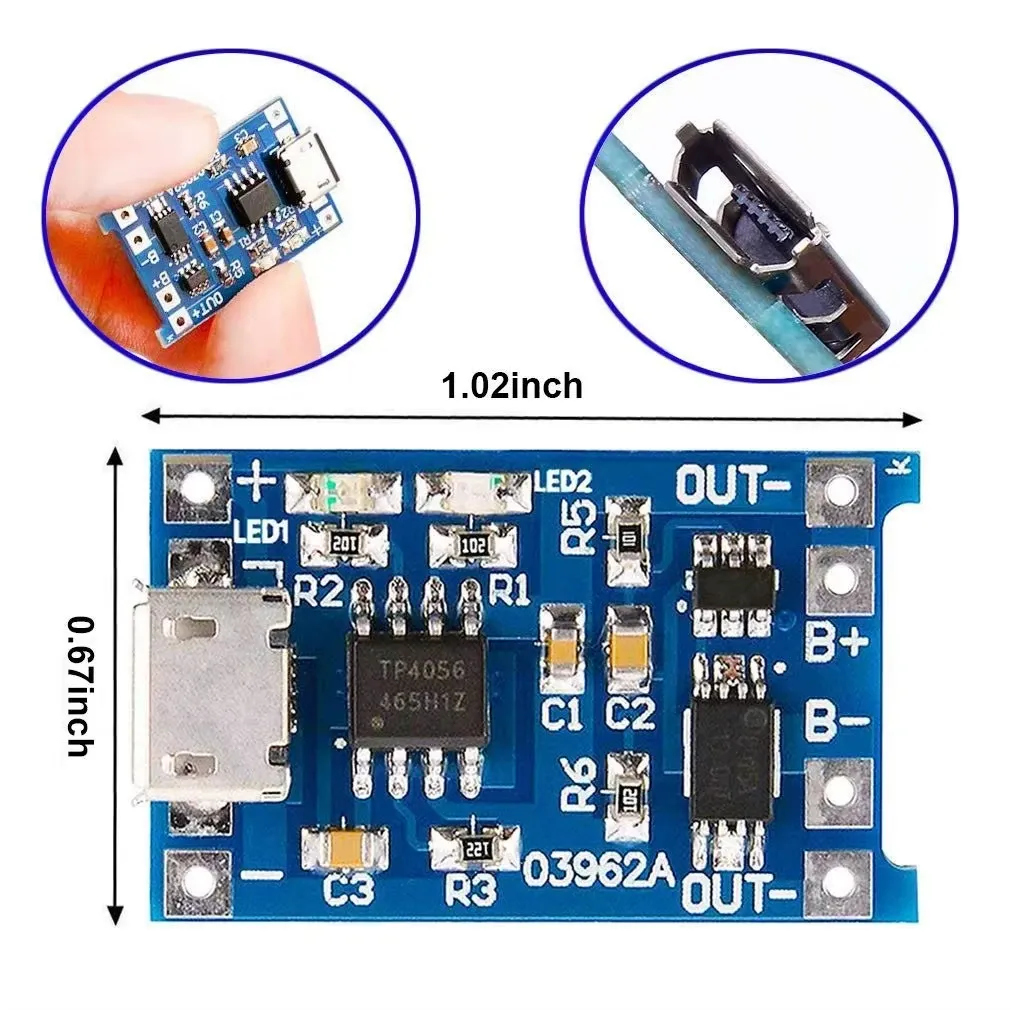
- 1x TP4056 Lithium Battery Charging Board: Crucial: Make sure you get the version with battery protection circuit (OUT+ and OUT- pads) to prevent your battery from over-discharging.
- 1x MT3608 Step-Up / Boost Converter: The 18650 battery only provides 3.7V - 4.2V. This board boosts it to a rock-solid 5.0V to keep the ESP32 and display happy. Ensure to set the voltage correctly! Usually 7-8 turns counter clockwise!
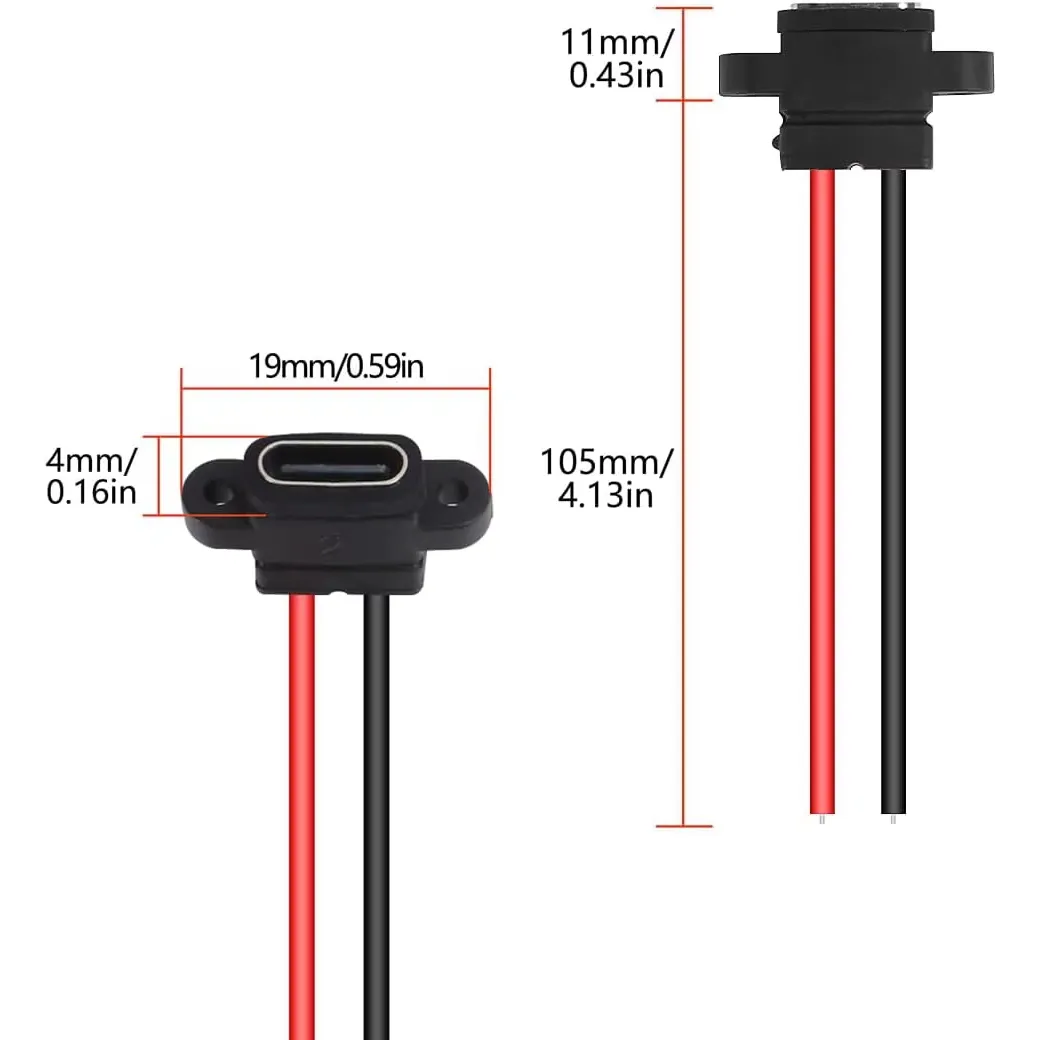
- 1x USB-C Breakout Board: Mount this flush to the outside of your enclosure so you can easily plug in a charger without opening the case.
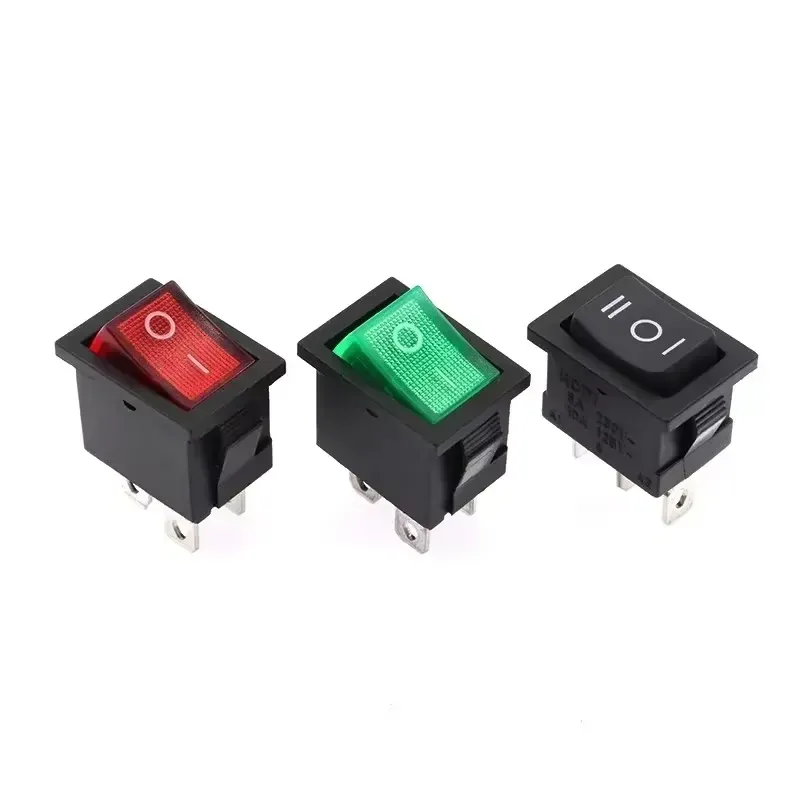
- 1x Toggle or Rocker Switch (SPST): A simple ON/OFF switch placed between the battery and the rest of the circuit to save power when the party is over.
4. Consumables & Enclosure
- Hook-up Wire (AWG 24 or 26): Flexible silicone wire is highly recommended for routing inside a tight case.
- Heat Shrink Tubing: Don't skip this! You want to completely insulate your soldered joints (especially on the switch and USB port) to prevent shorts.
- 3D Printed Enclosure: You'll need a custom case to house the electronics safely and, most importantly, to mechanically isolate the bottom of the load cell from the weighing platform on top.
- electrical tape - as we do not built something for eternity - just wrap all boards in tape and place it in the case.
⚠️ PRO TIP FOR BEGINNERS: > Out of the factory, the MT3608 Boost Converter might be outputting 12V or even 20V! DO NOT connect it to your ESP32 yet. Hook it up to the battery first, grab a multimeter, and turn the tiny brass screw on the potentiometer until the output reads exactly 5.0V. Once dialed in, it's safe to connect your ESP32.
Parts:
Affiliate links. Check for best prices at your store of choice!
Best : Go to your small local maker store!
TP4056
https://s.click.aliexpress.com/e/_c3CxDBct
1€ / pcs
ESP32-c3
https://s.click.aliexpress.com/e/_c3EJZQ0H
4€
switch
https://s.click.aliexpress.com/e/_c3La99LR
1€
USBC Port
https://s.click.aliexpress.com/e/_c3N2xX2H
0.5€
Stepup MT3608
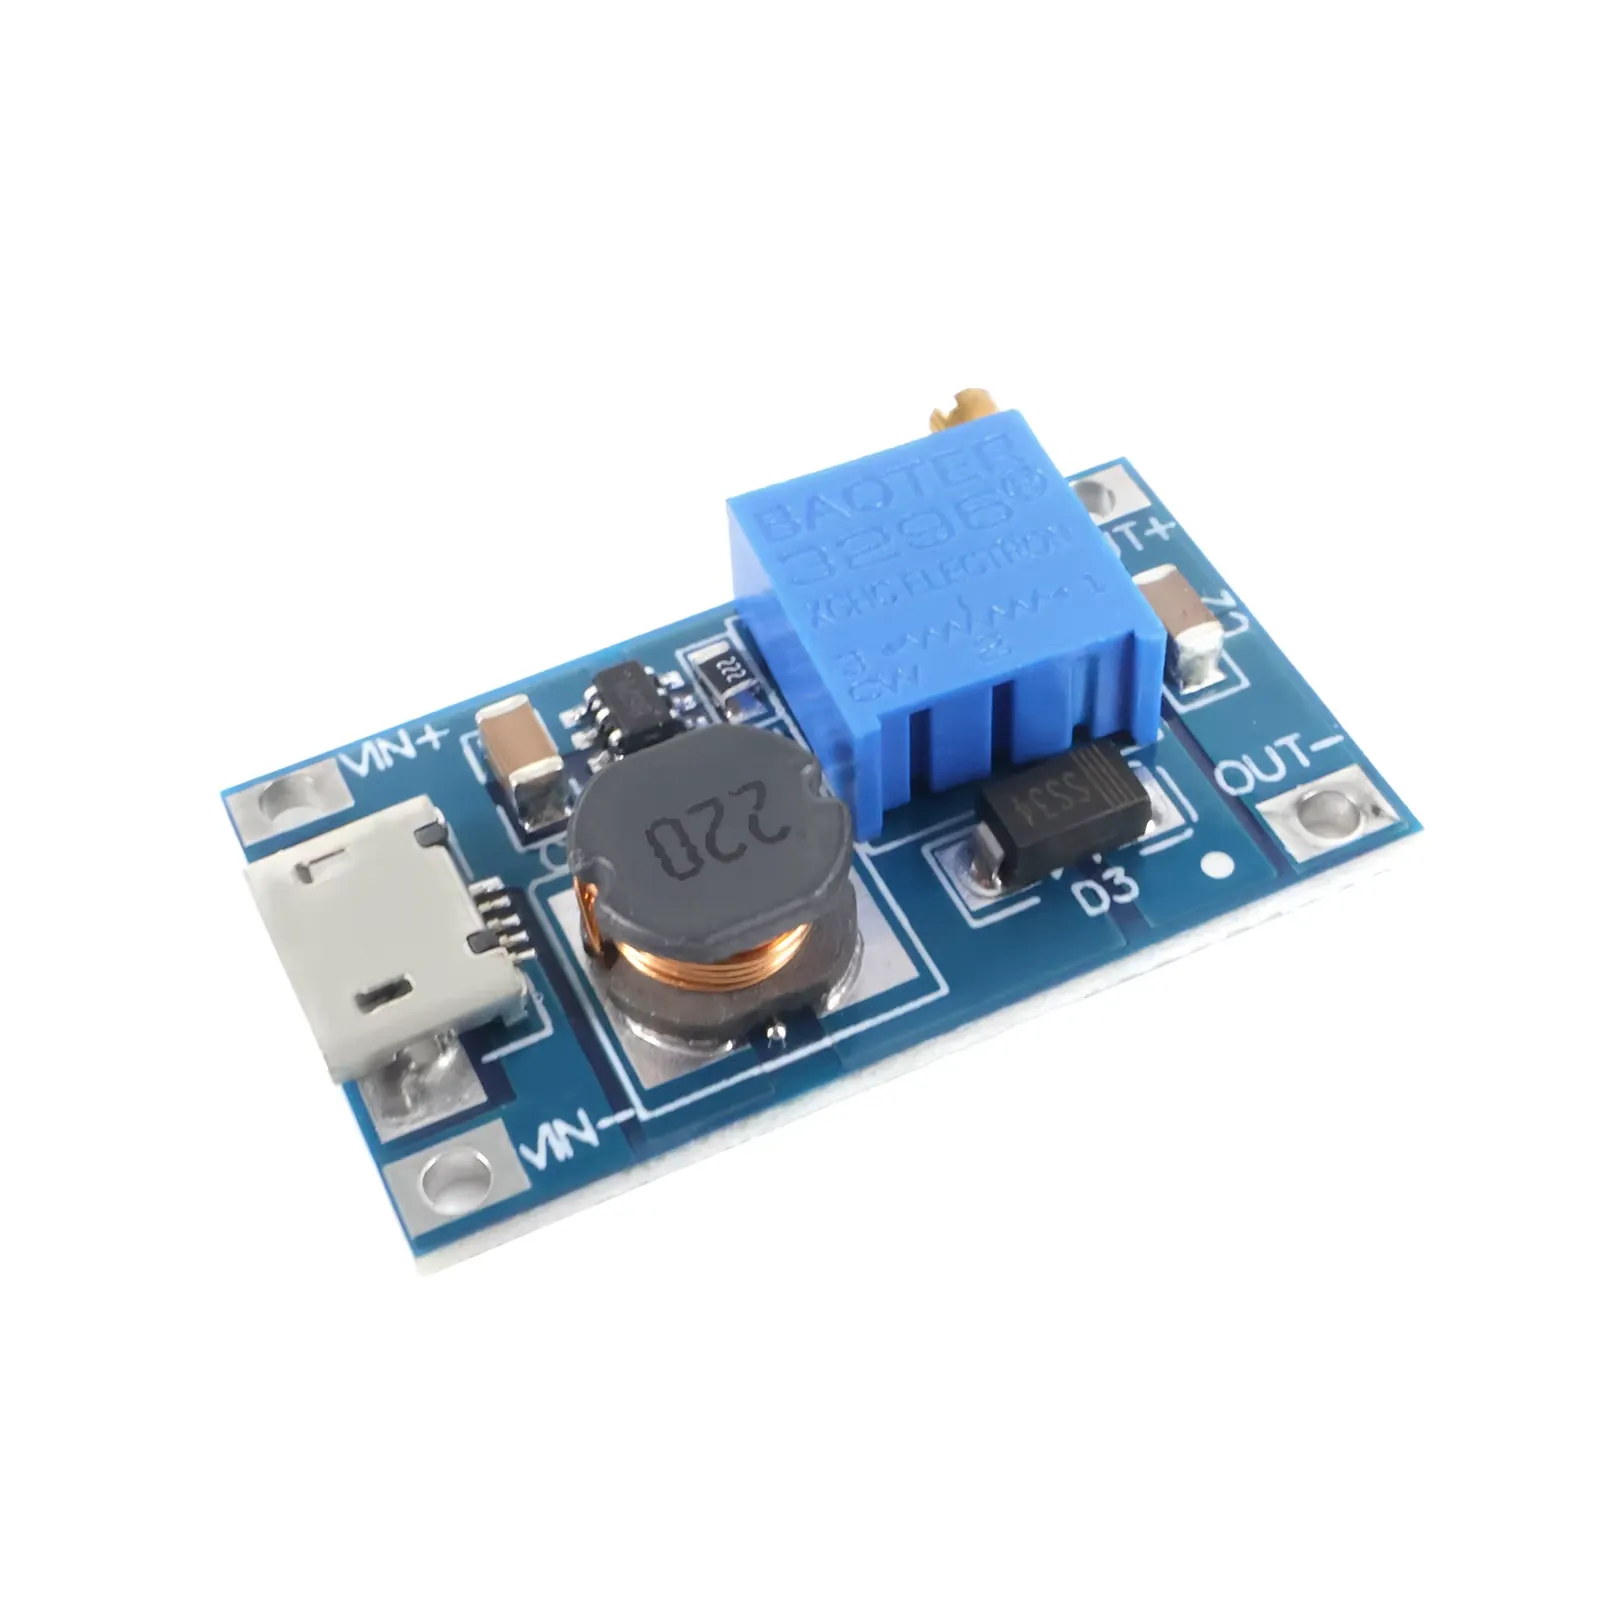
https://s.click.aliexpress.com/e/_c4ct4tE5
1€
HX711 Load Cell Weight Sensor 1 or better 2kg!
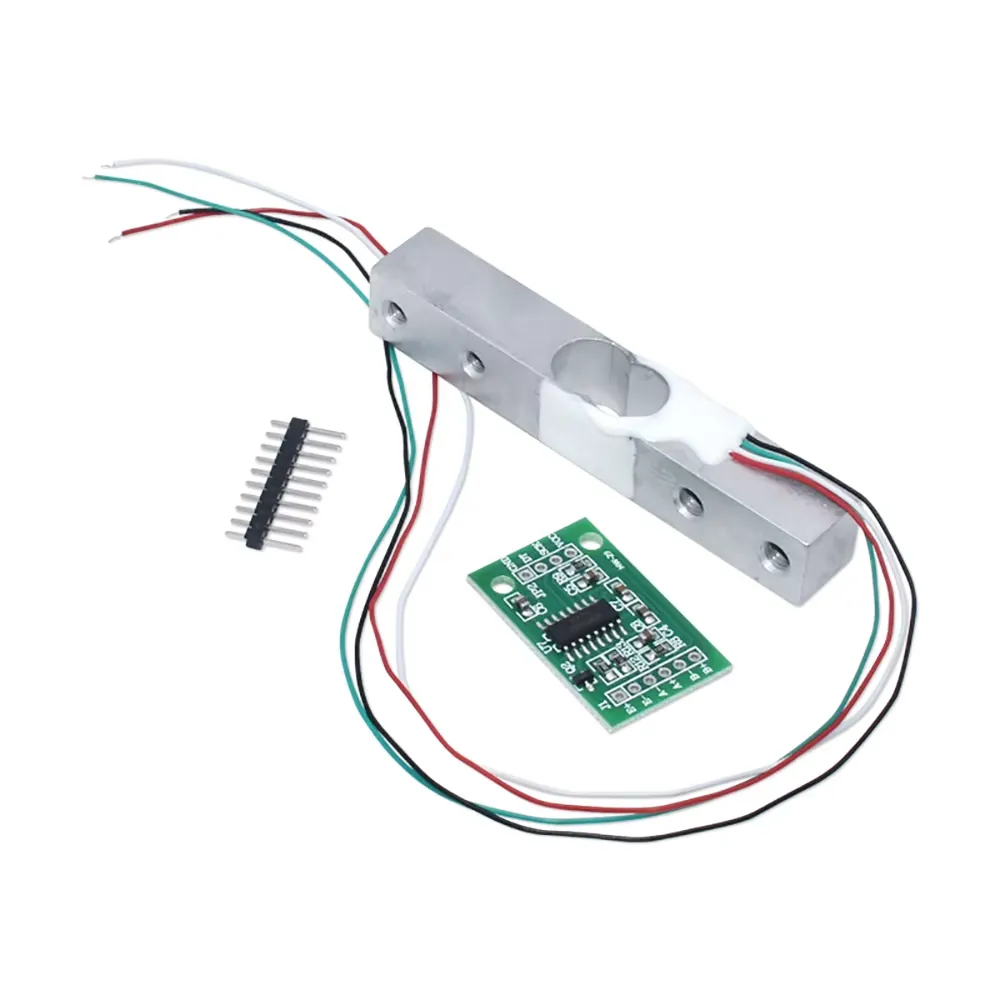
https://s.click.aliexpress.com/e/_c4b6BQMz
3-4€
3D Print
Go to Makerworld and download the 3D files. I printed it in PETG.
As we try to print a clear frame for the display, you might want to print a little 0,6mm thick test to ensure setting which makes your filament transparent. If you don't want to buy transparent PETG for 2g ... you can also cut out the window and simply glue and seal! a transparent piece of plastic.
Link to Makerworld: https://makerworld.com/de/models/2831803-sip-sniper-the-smart-scale-drinking-game#profileId-3155448
Cable Chaos


1. Power Management (The Battery Circuit)
Its a lot of cabels... but absolutely straight forward. No reason for panic ;-)
CRITICAL WARNING: Before you connect the ESP32, you must connect a multimeter to the output pads of the MT3608 (VOUT+ / VOUT-). Turn the tiny brass screw on the potentiometer until it outputs exactly 5.0V. Straight out of the factory, they often output 12V or 20V, which will instantly fry your ESP32!
(Optional but highly recommended: Put your ON/OFF toggle switch on the wire connecting TP4056 (OUT+) to MT3608 (VIN+) to completely kill the power when not in use.)
2. The Display (1.47" ST7789)
The display runs entirely on 3.3V logic. We are using the dedicated hardware SPI pins of the ESP32-C3 for maximum speed.
3. The Scale (HX711 Green Board & Load Cell)
The HX711 must be powered with 3.3V so it doesn't send 5V data signals back into the sensitive pins of the ESP32.
A. Wiring the HX711 to the ESP32:
B. Wiring the Load Cell to the HX711:
4. The Tactile / Arcade Button
Because we are using the internal pull-up resistor (INPUT_PULLUP) in the code, you do not need an external resistor. The button simply connects the GPIO pin to Ground when pressed.
Note: If you are using a standard 4-leg tactile switch, the legs directly across from each other are usually permanently connected internally. Just solder to two legs that are diagonally across from each other to guarantee it works.
Software
You will find the code here:
https://github.com/worksasdesigned/sipsniper
It comes with a webserver to set up :
- Name lists
- calibrate the scale
- choose the game you want to play
Its running fine, but in times of AI, you can simply copy it to gemini, claude or the AI of your choice to change the things you want to change.
Preparing the Arduino IDE & Flashing the Code
Before we can bring Sip Sniper to life, we need to teach the Arduino IDE how to talk to the ESP32-C3 and install the necessary libraries for our hardware.
1. Board Setup
- Open the Arduino IDE. Go to File > Preferences.
- In the "Additional Boards Manager URLs" field, paste this link: https://dl.espressif.com/dl/package_esp32_index.json
- Go to Tools > Board > Boards Manager..., search for esp32, and install the package by Espressif Systems.
2. Install Required Libraries Go to Tools > Manage Libraries... and search for and install the following:
- Adafruit GFX Library (by Adafruit)
- Adafruit ST7789 and ST7735 Library (by Adafruit)
- HX711 Arduino Library (by Bogdan Necula) (Note: Libraries like WiFi, WebServer, ArduinoOTA, and Preferences are already built into the ESP32 core, so you don't need to download them manually.)
3. Flashing the Initial Code (via USB)
- Connect your ESP32-C3 to your computer via USB.
- Go to Tools > Board and select ESP32C3 Dev Module.
- Go to Tools > Port and select the COM port your board is connected to.
- Copy the complete Sip Sniper source code into the editor.
- Hit the Upload button (the right-pointing arrow).
(Remember: Once this first USB upload is done and the device is sealed in its case, all future updates can be done wirelessly via OTA!)
Troubleshooting: The Stubborn ESP32
Sometimes, the ESP32-C3 absolutely refuses to accept new code. You hit upload, and the console at the bottom just gets stuck on Connecting... followed by an error message. I won't sugarcoat it: this is a known hardware quirk.
If your board is acting up, force it into bootloader mode manually:
- Hit Upload in the Arduino IDE.
- Watch the black console window at the bottom.
- The moment you see Connecting..., press and hold the BOOT button on the physical ESP32 board.
- As soon as you see the upload percentage start ticking up (Writing at 0x00000000...), you can release the button.
If your specific board layout requires a hard reset: Hold the BOOT button, press the RESET (or EN) button once, release RESET, and then release BOOT. Now try uploading again.
Drinking
Start the device. Fill your glass. Follow the instructions ( as long as you can ) ;-)