Smart Home Automation: Project With Home Assistant and ODROID N2+
by SmartHomeMaster in Circuits > Remote Control
717 Views, 4 Favorites, 0 Comments
Smart Home Automation: Project With Home Assistant and ODROID N2+

Introduction
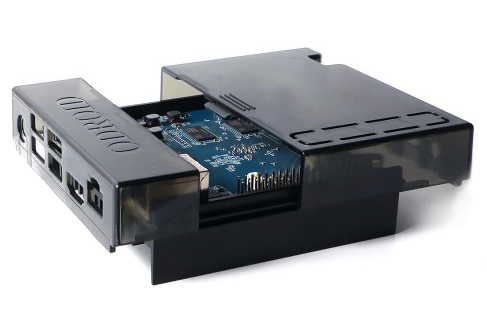
This project is part of my studies in Embedded Systems Engineering and is a free project where knowledge is shared with others. This guide provides a simple way to build a reliable smart home system using Home Assistant, powered by the Odroid N2+ mini-computer. With the growing interest in smart home technology, this project makes it easy to control devices like electric blinds, lights, sensors, and more from one central system. By choosing Home Assistant as the platform, users gain access to a flexible, free tool that works with many smart devices and allows for custom settings.
The Odroid N2+ is the core of this setup. It’s a powerful, energy-efficient computer that can run all day without overheating. To connect devices smoothly, we use Zigbee, a popular wireless system that links sensors and switches in a strong network. This guide covers everything from setting up the hardware and installing the software to connecting Zigbee, helping you build a flexible smart home system that you can control through web and mobile apps.
Supplies


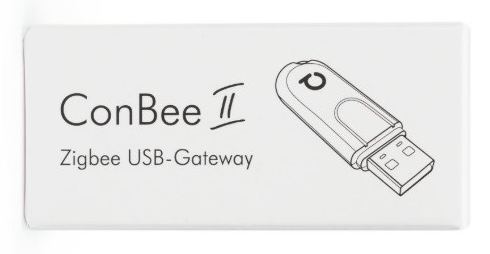
- Odroid N2+ 4GB Home Assistant Kit
- 64GB eMMC Module
- ROBB SMARRT Zigbee Roller Shutter Switch
- ConBee II Zigbee USB Dongle
- Odroid USB 3.0 Adapter to eMMC
- Ethernet cable
- Electric shutters
- Laptop or PC
- Wi-Fi network or wired connection
Selection of Automation Platform
The first step in building a smart home is choosing the right automation platform. There are different options, such as Home Assistant, OpenHAB, and Domoticz. Each platform has its own features, so it's important to look at them based on flexibility, ease of use, and support from the user community.
After comparing these factors, I chose Home Assistant as my automation platform. I made this choice mainly because it works with many different smart devices. Home Assistant also has a flexible design that makes it easy to customize and connect different parts of a smart home. Its active community and many plugins make it even more user-friendly, making it the best choice for my home automation project.
Hardware Research
In building a smart home, it’s important to choose hardware that is reliable and efficient for continuous use. Three options compatible with Home Assistant were considered: the Odroid N2+, Raspberry Pi 4, and Raspberry Pi 5.
Temperature Comparison and Choice Reason
In a home automation project, where the hardware is always on, good temperature management is crucial. Keeping a low temperature helps prevent overheating and extends the life of the parts.
- Odroid N2+: Operates at temperatures between 40°C and 60°C under normal use without needing a fan, making it ideal for running all day and handling complex tasks.
- Raspberry Pi 4: Runs at 50°C to 70°C with normal use and can go over 80°C under heavy use, which may slow it down.
- Raspberry Pi 5: A bit more powerful but can reach 65°C to 86°C without a fan. Often needs cooling during heavy use.
Because the Odroid N2+ runs cooler and doesn’t need a fan for normal use, it is the best choice for home automation. It provides reliable and energy-saving performance suited to the 24/7 needs of this project. The Odroid N2+ also gives a stable base for the complex processing needed in home automation.
Installation of Home Assistant on the ODROID N2+
Hardware Preparation
Start by preparing your hardware. First, connect the Odroid N2+ to a power source and use an Ethernet cable to connect it to your network for a stable connection. Next, insert the eMMC module, ensuring it is securely attached for a successful installation.
Downloading the Home Assistant Image
Once your hardware is set up, go to the official Home Assistant installation page for Odroid devices at https://www.home-assistant.io/installation/odroid/. Download the correct Home Assistant image for the Odroid N2+. Be sure to check that the downloaded image is compatible with your hardware for a smooth installation.
Writing the Image to the eMMC Module
After downloading the image, you need to write it to the eMMC module. Connect the eMMC module to your PC using a USB adapter, and use software like Balena Etcher or Win32 Disk Imager to write the image. Follow the software instructions carefully, as errors here can cause booting issues.
Booting the Odroid
Once the image is successfully written, safely remove the eMMC module from your PC and reinsert it into the Odroid N2+. Power on the Odroid and watch the boot process to ensure the device starts up successfully and connects to the network. If everything is set up correctly, you should be able to access Home Assistant through your web browser.
Troubleshooting
If the Odroid doesn’t boot properly, first check all connections, including power and network cables, to ensure they are secure. If the issue continues, try restarting the device a few times. You may also need to check for issues with the image itself, as it could be damaged or incompatible with your Odroid. If the initial image doesn’t work, look for alternative versions of the Home Assistant image that might be more compatible with the Odroid N2+. Once you find a new version, repeat the image writing process on a new eMMC module. If the alternative version installs correctly, the Odroid should boot up with Home Assistant without any issues.
Zigbee Integration With Home Assistant


Zigbee is a reliable wireless protocol designed for short-range communication between devices with low power consumption. It’s an ideal choice for smart home applications that require stable communication and support for many devices.
Required Hardware
To integrate Zigbee into Home Assistant, you need a Zigbee controller. A popular option is the ConBee II, which is a USB Zigbee controller that is compatible with a wide range of devices. Other options include Zigbee2mqtt, which uses a Zigbee radio module with a Raspberry Pi or similar device, and ZHA (Zigbee Home Automation), an integrated solution in Home Assistant that works with supported USB sticks like the ConBee II.
ZHA Integration
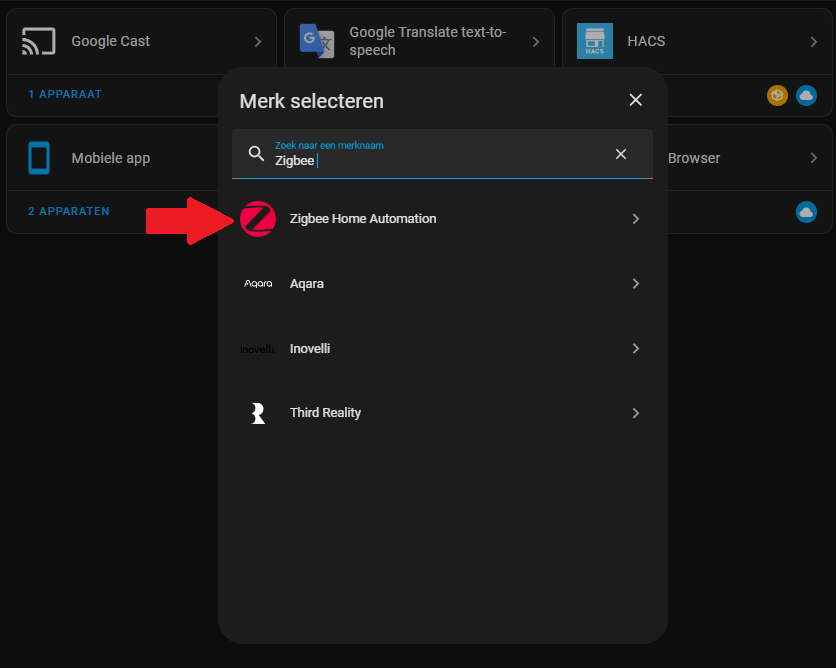
To add Zigbee devices to Home Assistant using the ZHA integration, follow these steps:
- Connect the ConBee II (or another supported Zigbee USB stick) to your Home Assistant device.
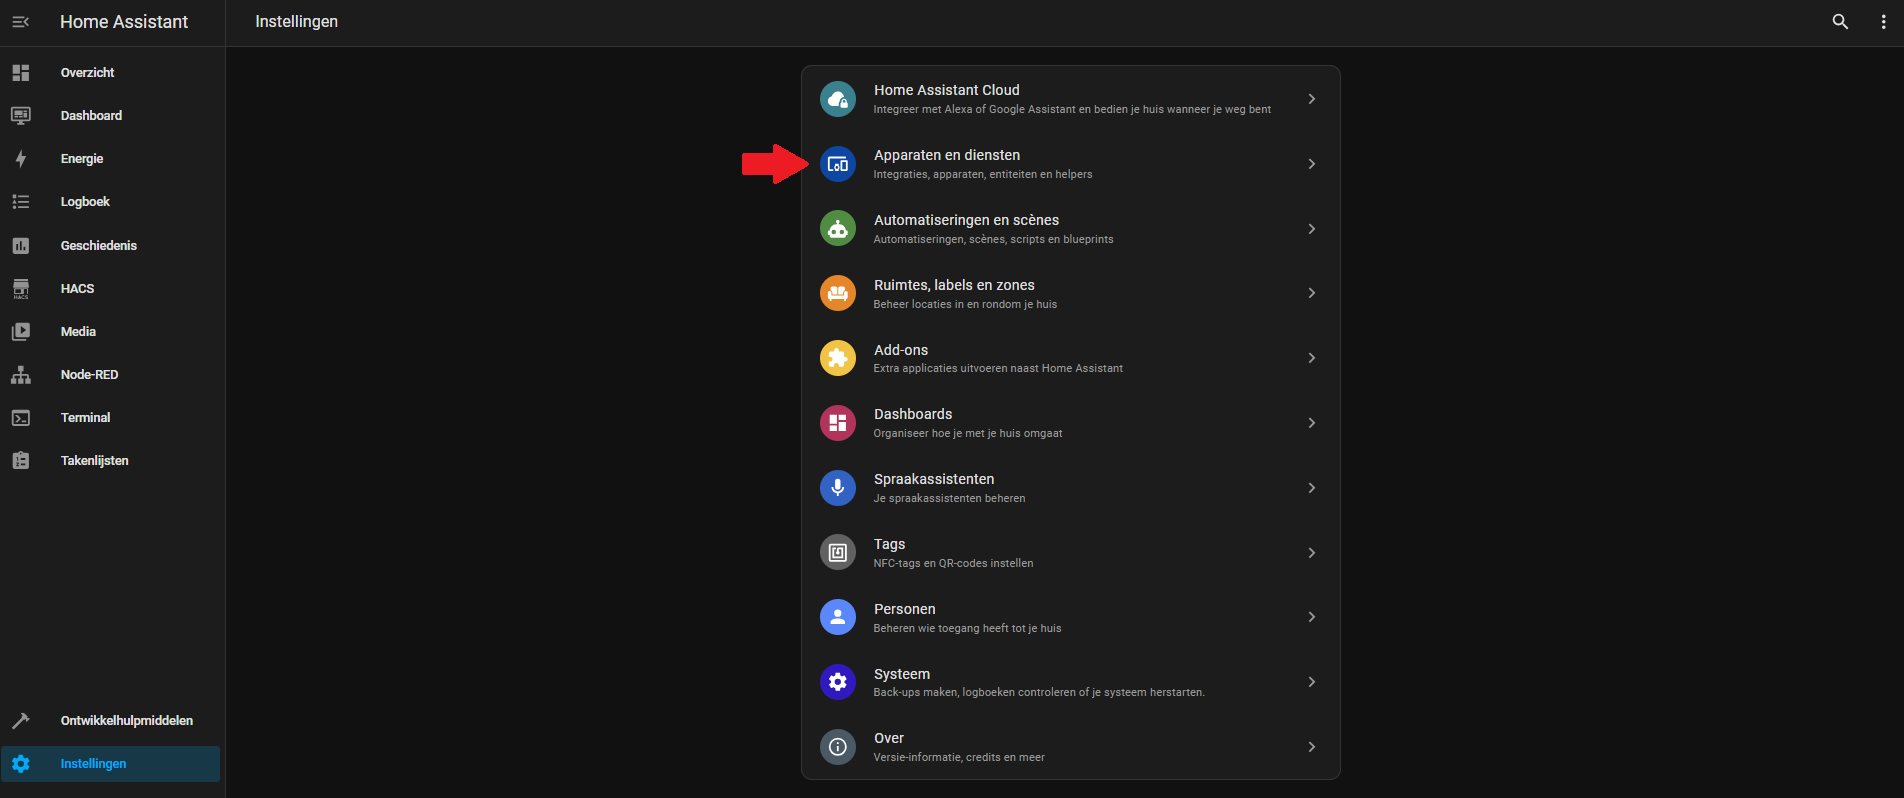
- Go to Settings > Devices & Services > + Add Integration > Zigbee Home Automation.
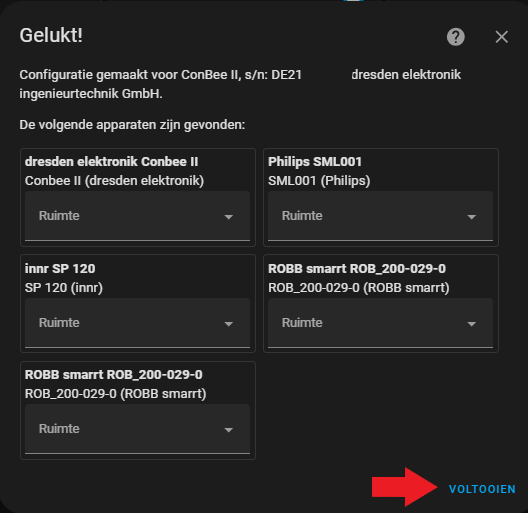
- Select your ConBee II device from the list of available hardware.
Pair ROBB SMARRT Zigbee Roller Shutter in Home Assistant


For the installation of the ROBB SMARRT Zigbee Roller Shutter, I used the ROBB SMARRT user manual available on the robbshop website.
Steps to Add the ROBB SMARRT Zigbee Roller Shutter in Home Assistant:
- Make sure the Zigbee USB stick (like the ConBee II) is connected to your Home Assistant device.
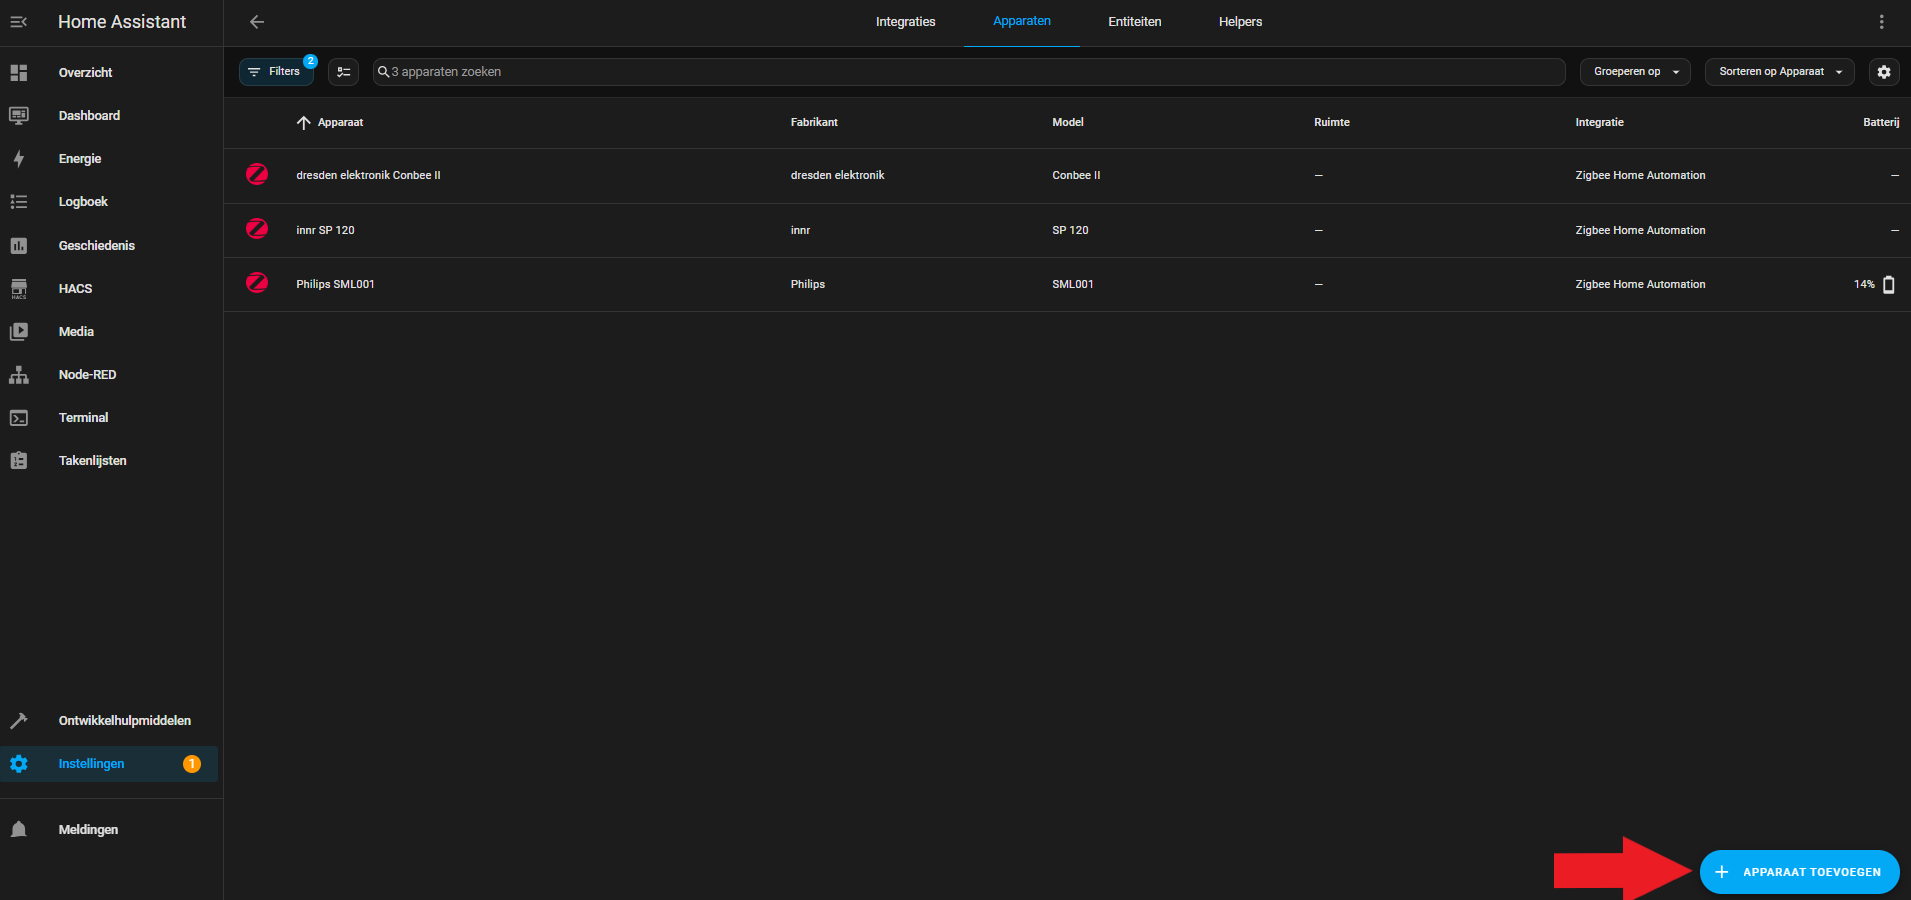
- Go to Settings > Devices & Services > Zigbee Home Automation Devices and select + Add Device to start pairing.
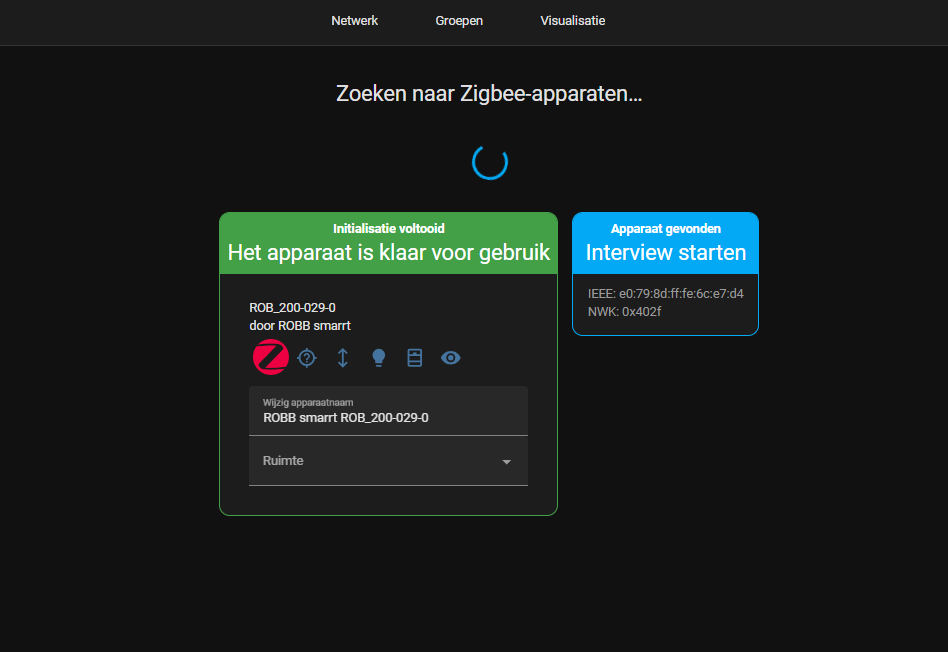
- Put the roller shutter into pairing mode by following the instructions in the ROBB SMARRT manual: Short press the K2 button four times to enter pairing mode, or five times for a factory reset.
- Once in pairing mode, the roller shutter should show up in Home Assistant. Select it and give the device a name to make it easier to find.
- Tip: For calibration, follow step 3 in the ROBB SMARRT manual: For roller blinds, press the K1 button twice; for shutters, press K1 three times.
Add Dashboard Buttons to Control the Roller Shutter


To control the roller shutter from the dashboard:
- Go to the Dashboard and select Edit Dashboard.
- Add a new card:
- Click Add Card and choose the Entities card type.
- In the card settings, add your roller shutter entity (for example, cover.rolluik_voorportaal_raambekleding).
- Optionally, add a name like "Roller Shutter" to make it easy to identify.
- Save the changes to the dashboard.
Conclusion
This project shows how to create a central and efficient smart home automation system using Home Assistant on the Odroid N2+. With step-by-step instructions for hardware setup, Zigbee integration, and automation configuration, this setup provides a stable and customizable way to manage devices like electric shutters. The Odroid N2+ is a great choice for hardware because of its energy efficiency and reliable 24/7 performance, making it a solid base for any smart home.
If this guide has been helpful, please feel free to leave a like!