Smart Parking Lot System With Arduino and HTML
by noam5012345 in Workshop > Cars
623 Views, 3 Favorites, 0 Comments
Smart Parking Lot System With Arduino and HTML

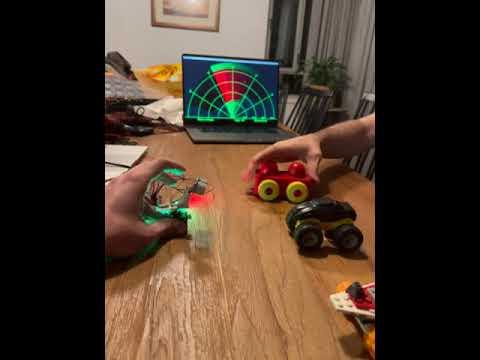
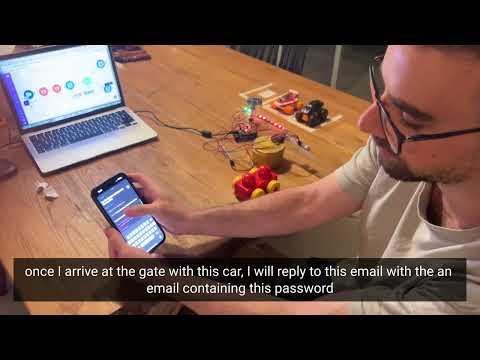
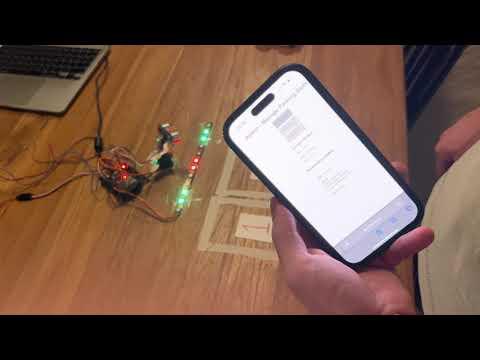
In this project, we will develop a smart parking lot system that not only allows users to reserve parking slots in real-time but also helps them save time by indicating available slots instantly. This means no more circling around looking for an open spot in crowded lots. Our system utilizes an ESP32 to manage the entry and exit gates, perform scans of the parking lot to identify available slots, and communicate this data to an HTML-based server for user access. Whether you're a hobbyist looking to implement a practical IoT solution or a developer interested in smart city technologies, this guide will walk you through every step of the process—from assembling the hardware to programming the ESP32 and launching the web server. By the end of this tutorial, you’ll have a fully functional smart parking system that enhances user convenience and optimizes parking space usage. If you wish to see the system's capabilities before starting, first check out the videos attached to steps 2 , 5 and 7 to see the system in action!
Supplies
.jpeg)
.jpeg)
.jpeg)
.jpeg)

.jpeg)
.jpeg)

Essential Components for Building a Smart Parking Lot:
- The relevant code file for Arduino IDE and HTML page.
- Arduino esp32 board - 1
- Servo Motors - 2
- Ultrasonic Sensors - 2
- LED Strip - 1
- Jumper Wires
- VS Code for programming
- Web Server setup
- Basic web development tools (text editor for HTML/CSS/JavaScript)
- Physical instruments to help you set it up (glue, tape, peaces of plastic, thumbtack, sewing thread, etc)
Set Up the Enviorment With Visual Studio Code

Step 1: Install Visual Studio Code
1.1 Download Visual Studio Code:
- Visit the Visual Studio Code website and download the appropriate version for your operating system (Windows, macOS, or Linux).
1.2 Install Visual Studio Code:
- Follow the installation instructions provided on the website to install Visual Studio Code on your computer.
Step 2: Install PlatformIO Extension
2.1 Add PlatformIO to VS Code:
- Open Visual Studio Code.
- Access the Extensions view by clicking on the square icon on the sidebar or pressing Ctrl+Shift+X.
2.2 Search and Install PlatformIO:
- In the search bar, type "PlatformIO IDE".
- Click on the install button for the PlatformIO IDE extension.
2.3 Access PlatformIO:
- Once installed, PlatformIO will be integrated into VS Code and can be accessed from the bottom bar or the activity bar on the side.
Step 3: Create a New Project
3.1 Setting Up a New Project:
- In VS Code with PlatformIO installed, click on the PlatformIO icon in the activity bar and go to the 'Quick Access' section.
- Select ‘New Project’.
3.2 Configure Project Settings:
- Enter a name for your project, select ‘Espressif ESP32 Dev Module’ as the board, and choose ‘Arduino’ as the framework.
- Choose a folder where you want your project to be stored and confirm by clicking ‘Finish’.
3.3 Project Structure:
- PlatformIO will create a new project folder with all necessary files including a src directory for your code, and a platformio.ini configuration file.
Step 4: Configure the platformio.ini File
4.1 Modify Project Settings:
- Open the platformio.ini file located in the root of your project directory.
- Ensure that the board and framework are correctly specified as follows:
[env:esp32dev]
platform = espressif32
board = esp32dev
framework = arduino
4.2 Add Necessary Libraries:
- Add the following libraries which support web serving, WiFi connectivity, and HTTP communication:
lib_deps =
ESPAsyncWebServer
AsyncTCP
HTTPClient
These libraries will be automatically downloaded and installed by PlatformIO when you build your project.
Build Your Own HTML Interface for the Smart Parking Lot


Overview
In this guide, you will learn how to create HTML interfaces for a smart parking lot system, allowing users to reserve slots and administrators to manage reservations and control settings. You will modify provided templates to build fully functional, interactive, and user-friendly web pages that form the backbone of your smart parking system.
Functionality:
- User Interface: Users can easily reserve parking slots and check real-time availability.
- Admin Interface: Administrators can manage reservations, view detailed slot information, and control system settings.
Step 1: Tools and Materials Needed
- Text Editor:
- Use Visual Studio Code, Sublime Text, or any preferred HTML editor.
- Local Server Software:
- Install XAMPP, WAMP, or a similar software to host and test the website locally.
- Basic Knowledge Required:
- HTML/CSS: Essential for designing and styling the web pages.
- JavaScript (Optional): For adding dynamic functionalities and real-time updates.
- Provided Templates:
- 4.1 Access the provided templates from GitHub Repository.
- 4.2 Files Included:
- Parking_Manager_iot Directory:
- Data directory which contains the icons, HTML, CSS, and JavaScript files needed to run the parking management system.
- lib directory which contains the README file.
- src directory which contains the main.cpp (the arduino code).
- sonar display directory which offers a visual tool to help calibrate sensor measurements and display sensor data accurately.
- platformio.ini file.
Step 2: Setting Up the Project
- Download Templates:
- Clone or download the repository to get the required files.
- Extract Files:
- Unzip the downloaded Parking_Manager_iot and Sonar Display directories.
- Ensure all files are accessible and organized within your working directory.
Step 3: Create and Modify HTML Files
3.1 User Interface Files
- index.html:
- This file will display available parking slots and include functionality for users to reserve a slot.
- Modify: Update content to reflect your specific parking slot layout and reservation process.
- index.css:
- Stylesheet defining the look and feel of the user interface.
- Modify: Adjust styles for consistency, responsiveness, and user-friendly design tailored to your layout.
- index.js:
- JavaScript file to handle dynamic behaviors such as reserving slots and updating slot availability in real time.
- Modify: Implement or adjust functions for server communication.
3.2 Administrator Interface Files
- admin.html:
- Designed for parking lot managers to view reservations and control settings.
- Modify: Customize the interface to match the admin's specific needs, such as slot management tools.
- admin.css:
- Stylesheet defining the administrative interface’s styling.
- Modify: Ensure styles are distinct from the user interface to avoid confusion while maintaining a professional look.
- admin.js:
- Handles administrative actions like freeing slots or updating reservation details.
- Modify: Integrate functions for real-time slot management and updates, linking with the backend for data synchronization.
Step 4: Designing the Interface
- Layout Elements Using HTML:
- Use headers, footers, navigation links, and content areas to structure both interfaces.
- Customize to include features relevant to your parking lot, such as slot numbers, reservation buttons, and admin controls.
- Style with CSS:
- Ensure that your designs are responsive and work well across devices.
- Apply consistent branding and differentiate user/admin styles clearly.
Step 5: Add JavaScript Interactivity
- Enhance User Interaction:
- For index.js: Implement functions to allow users to reserve slots, check availability, and receive feedback.
- For admin.js: Add functionalities for admins to manage reservations, update slot statuses, and handle system settings.
Step 6: Test Your Interface
- Local Testing:
- Launch your local server using XAMPP, WAMP, or similar, and navigate to your project directory in a browser to test the functionality.
- Check Responsiveness:
- Ensure the design adapts well to different screen sizes, especially for mobile devices.
- Functional Testing:
- Test all interactive elements, including slot reservations, updates, and administrative controls.
Step 7: Deploy Your Project
- Prepare for Deployment:
- Once testing is successful, prepare the files for deployment on a live server.
- Ensure all paths and configurations are adjusted for the live environment.
- Go Live:
- Host your project to make the parking management system accessible to users and administrators.
Step 8: Utilize the Sonar Display
- Setting Up the Visual Display:
- Use the files from the Sonar Display directory to accurately visualize sensor data.
- Modify: Adjust settings as needed to match your sensor setup and improve the accuracy of slot availability readings.
Step 9: Customization and Future Enhancements
- Template Use and Modification:
- Utilize the provided HTML, CSS, and JS files as a base, and customize them to suit your specific parking lot layout and requirements.
- Future enhancements could include integrating payment systems, advanced data analytics, or expanding to support larger parking facilities.
Conclusion:
By following this guide and leveraging the provided templates, you will build a fully functional, interactive HTML interface for your smart parking lot system. Modify the provided templates to fit your specific needs and create a seamless, user-friendly parking management experience.
Set Up Blynk


Overview:
In this step, we will set Blynk environment up. Blynk will be in charge of opening and closing the gate.
To follow the instructions, you can read the text below and check the attached screenshots, or alternatively, watch the attached video.
Instructions:
Follow the instructions below, referencing the attached screenshots and the video guide for clarity.
Step 1: Sign Up to blynk
1.1. Create Blynk account to get started.
Step 2: Create The Scenario
2.1. Click on "+ New Device"
2.2 Choose "From template" and under "DEVICE NAME" type "esp32".
Step 3: Create The Dashboard
3.1 Click on "edit" which allows editing the dashboard.
3.2 Delete all the buttons that appear besides "Button Control".
3.3 Hover "Button Control" and press on the "wheels" which allows editing it.
- Change the "TITLE" to "gate switch"
Step 4: Change The Scenario name
4.1 Click on "Datastreams"
4.2 Click on the Scenario created
- Change the "NAME" to "gate switch".
Set Up the Data Base


Overview:
In this step, we will add database on Make.com to manage passwords that allows opening the gate when wishing to enter the parking lot.
Instructions:
Follow the steps below, referring to the attached screenshots and the provided video tutorial for visual guidance.
Step 1: Sign in to Make.com
1.1. Visit Make.com and create an account to get started.
Step 2: Create a Data Store
2.1 Press on the 3 dots ("More") and choose "Data Stores".
2.2. Click on "+ Add data store".
2.3 Rename the "Data store name" to "passwords data base".
2.4 Under "Data structure - Choose a data sctructure" - "Add".
- Data structure name: "password".
- Specification:
- Name: "id".
- Required: "yes".
Notify User by Email Upon Ordering a Parking Slot Using Make.com


Overview:
In this step, we will enhance our scenario on Make.com to not only send an email notification upon parking slot reservation but also generate a password for gate access. This password will be used by the user to open the gate upon entering the parking lot.
Instructions:
Follow the instructions below, referencing the attached screenshots and the video guide for clarity.
Step 1: Sign Up to Make.com
1.1. log in to your Make.com user.
Step 2: Create a New Scenario
2.1. Navigate to the "Scenarios" section and create a new folder.
2.2. Within the new folder, click on "+ Create a new scenario".
Step 3: Set Up the Webhook Module
3.1. Click on the "+" button, select the Webhooks module, and choose "Custom webhook".
3.2. Rename the webhook module to reflect its function, like "Parking Slot Reservation".
3.3. Copy the URL provided by the webhook and paste in any browser (don't press enter yet).
3.4. Test the webhook by appending parameters that simulate a user exiting a parking slot (continuing the previous URL):
?slotId=1&fullName=John%20Doe&carNumber=12345678&email=john.doe@example.com&password=uniquepassword
3.5. Verify the setup with a "Accepted" response upon accessing the URL with parameters.
Step 4: Incorporate the Router
4.1. Click on the "+" button, select the Router module to manage different data paths.
- The first path will handle email notifications.
- The second path will connect to a database for password generation.
Step 5: Configure Email Notification
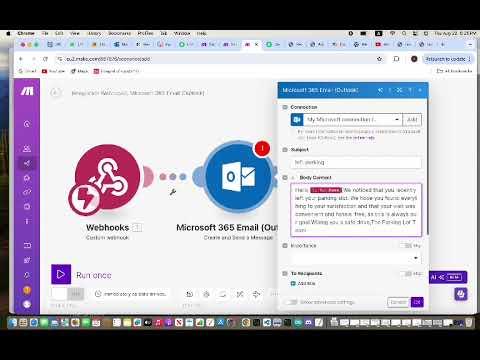
5.1. From one output of the Router, Click on the "+" button, and add a "Microsoft 365 Email"* module of type "Create and Send a Message".
5.2. Configure the email module:
- Connection: Establish a connection to your email server.
- Email Details:
- Subject: "Parking Slot Reservation Confirmation"
- Body Content: Include details like full name, slot ID, and password dynamically from the webhook data.
- Importance: Set as High.
- Recipients: choose the "email" label dynamically from the webhook data.
Step 6: Set Up Database Interaction for Password Generation
6.1. From he other output of the Router, Click on the "+" button, and add a "Data Store" with Add/replace a record" Action.
6.2. Rename the Data store module to reflect its function, like "passwords data base".
6.3. Configure the database module to:
- Key: choose the "password" label dynamically from the webhook data.
Step 7: Activate and Test the Scenario
7.1. Review all connections and settings.
7.2. Save the scenario and switch it on.
7.3. Test by making a reservation to ensure the email is sent, and the password is generated and stored correctly.
* If you use an Email service different from Microsoft, choose the right module for you.
User Wish to Enter the Parking Lot


Overview:
In this step, we will enhance our scenario on Make.com for the user to open the gate by replying to the previous mail with the password he got. This password will open the gate upon entering the parking lot and will not be usable after.
Instructions:
Follow the instructions below, referencing the attached screenshots and the video guide for clarity.
Step 1: Sign Up to Make.com
1.1. log in to your Make.com user.
Step 2: Create a New Scenario
2.1. Navigate to the "Scenarios" section navigate to your folder from Step 3.
2.2. Click on "+ Create a new scenario" within the folder.
Step 3: Set Up the Webhook Module
3.1. Click on the "+" button, and add a "Microsoft 365 Email"* module of type "Watch Messages".
- Connection: Establish a connection to your email server.
- Email Details:
- Watch Messages: "only Unread".
- Mail Folder: "inbox".
- Search: "Parking Slot Reservation Confirmation" (the subject of the email you set on Step 4 when sending an for confirmation).
- Limit: 1
3.2. Click on Ok.
3.3. Choose "From now on".
Step 4: Incorporate The First Text parser
4.1. Click on the "+" button, select the Text parser module and under Transformers choose "HTML to text".
4.2 Choose the "Body: Content" label dynamically from the webhook data.
Step 5: Incorporate The Second Text parser
5.1. Click on the "+" button, select the Text parser module and under Transformers choose "Match pattern".
- Patern: (\b[a-zA-Z0-9]{10}\b)
- Text:
- Text: choose the "Text" label dynamically from the Text parser.
Step 6: Use The Data Base From The Previous Step
6.1. Click on the "+" button, select the Data Store module and under Actions choose "Check the existence of a record".
6.2 Choose dynamically the Data store that was set in the previous step (Step 4).
6.3 under "key" choose dynamically from the "Text parser - Match pattern" the $1.
Step 7: Incorporate the Router
7.1. Click on the "+" button, select the Router module to manage different data paths.
- The first path will handle HTTP request.
- Click on the "wrench", and under Label type "password exists route".
- Click on " Add AND rule" .
- Choose under "Condition", the "Exists" dynamically from the "Data store - check the existence of a record".
- Choose under "Text operations: Equal to" the "Exists" option.
7.2 Click on the first "+" button from the Router module and choose "HTTP - make a request".
7.3 Under "URL" paste the address from the Blynk.
7.4 Under "Query String" - "item 1" - "Name", type "token".
7.5 Under "Query String" - "item 2" - "Name", type "V0", and under "Value" type "1".
- The second path will connect to the database for password deletion.
- Click on the "wrench", and under Label type "delete password in data store".
- Choose under "Condition", the "Exists" dynamically from the "Data store - check the existence of a record".
- Choose under "Text operations: Equal to" the "Exists" option.
7.6 Click on the second "+" button from the Router module and choose "Data store - Delete a record".
7.7 Choose under the "Data store" the data base which was set in step 4 ("passwords data base").
- Key: choose the.
Step 8: Set Up Database Interaction for Password Generation
8.1. From he other output of the Router, Click on the "+" button, and add a "Data Store" with Add/replace a record" Action.
8.2. Rename the Data store module to reflect its function, like "passwords data base".
8.3. Configure the database module to:
- Key: Choose the $1 dynamically from the "Text parser".
Step 9: Activate and Test the Scenario
9.1. Review all connections and settings.
9.2. Save the scenario and switch it on.
9.3. Test by making a reservation to ensure the email is sent, and the password is generated and stored correctly.
9.4 reply to the mail with the given password and make sure the password is being deleted from the data store.
User Left His Parking Slot

)


Overview:
In this step, we will enhance our scenario on Make.com to manage the exit process for users leaving a parking slot.
The parking lot will send a notification email confirming that the user has left the parking.
Instructions:
Follow the steps below, referring to the attached screenshots and the provided video tutorial for visual guidance.
Step 1: Sign in to Make.com
1.1. log in to your Make.com user.
Step 2: Create a New Scenario
2.1. Navigate to the "Scenarios" section navigate to your folder from Step 3.
2.2. Click on "+ Create a new scenario" within the folder.
Step 3: Set Up the Webhook Module
3.1. Click on the "+" button, select the Webhooks module, and choose "Custom webhook".
3.2. Rename the webhook module appropriately, such as "Exit Parking Slot".
3.3. Copy the URL provided by the webhook and paste in any browser (don't press enter yet).
3.4. Test the webhook by appending parameters that simulate a user exiting a parking slot (continuing the previous URL):
?fullName=John%20Doe&email=john.doe@example.com
3.5. Verify the setup with a response "Accepted" upon accessing the URL.
Step 4: Configure Email Notification
4.1. Click on the "+" button, and add a "Microsoft 365 Email"* module of type "Create and Send a Message".
- Connection: Establish a connection to your email server.
- Email Details:
- Subject: "Confirmation of Exit from Parking"
- Body Content: Include details like full name.
- Importance: Set as High.
- Recipients: choose the "email" label dynamically from the webhook data.
Step 5: Activate and Test the Scenario
5.1. Review all settings and connections for accuracy.
5.2. Save the scenario and turn it on.
5.3. Test the entire flow by simulating a user exiting a parking slot to ensure the email sends correctly.
* If you use an Email service different from Microsoft, choose the right module for you.
Upload and Run the Arduino Code
Overview:
This step focuses on uploading the Arduino code to your ESP32 using Visual Studio Code with the PlatformIO extension. The code will control various functions of your smart parking lot system, such as sensor reading, gate control, and communication with your HTML server.
Step 1: Tools and Materials Needed
1.1 Visual Studio Code: Installed and configured with the PlatformIO extension.
1.2 ESP32 Board: Properly connected to your computer via a USB cable.
1.3 Arduino Sketch (Code): Prepared with all necessary libraries and configurations.
Step 2: Instructions
2.1 Connect Your ESP32 to Your Computer
- Ensure that your ESP32 is connected to your computer via a USB cable.
2.2 Select the Correct Board and Port
- Open Visual Studio Code and click on the PlatformIO icon in the activity bar on the left.
- In the platformio.ini file of your project, confirm that the platform and board are set correctly:
[env:esp32dev]
platform = espressif32
board = esp32dev
framework = arduino
- Go to the PlatformIO Home tab, and under the 'Devices' section, find and select the COM port your ESP32 is connected to.
2.3 Load Your Arduino Sketch
- Open your project folder in Visual Studio Code if it's not already open. Your Arduino sketch file should be located in the src folder as main.cpp.
- Ensure that your code is correctly written and includes all the necessary libraries at the beginning of your main.cpp file using #include statements.
2.4 Review and Install Dependencies
- Make sure all necessary libraries are listed in your platformio.ini file under lib_deps. PlatformIO will automatically download and install these libraries during the build process.
- If any libraries are missing or not listed in lib_deps, you can add them and save the platformio.ini file. PlatformIO will handle the installation.
2.5 Upload the Code
- Click on the checkmark icon (Build) in the bottom bar of Visual Studio Code or use the command PlatformIO: Build from the command palette (Ctrl+Shift+P). This will compile your code. Ensure there are no errors.
- After successful compilation, click on the right arrow icon (Upload) or use the command PlatformIO: Upload. This will upload the sketch to your ESP32. Watch the terminal for status messages to confirm the upload is successful.
2.6 Test the Functionality
- Open the Serial Monitor by clicking on the plug icon in the bottom bar or using the command PlatformIO: Serial Monitor.
- Set the baud rate to match the rate specified in your code (usually 115200 baud).
- Verify that the outputs in the Serial Monitor match what's expected based on your code, such as sensor readings, gate operations, and communication messages.