Spaghetti Monster Portion Measurer (with Tinkercad)
by Ham-made in Cooking > Pasta
296 Views, 2 Favorites, 0 Comments
Spaghetti Monster Portion Measurer (with Tinkercad)


Do you often find yourself buried under an entangled mound of cooked spaghetti because the whole bag didn’t seem like it would be enough in its dried state for two people? If only we had one of those portion measuring tools for dried long noodle pasta like spaghetti, linguine, and my personal favourite – bucatini.
These measuring tools contain either specifically dimensioned holes or cut-out shapes based on carefully calculated portion measurements. Because the math on that front has already been done, we can be creative in the design of our Dried Long Noodle Pasta Portion Measuring Device (working title... )! This is a perfect project for honing some 3D modeling skills, as well as, gaining some utilitarian 3D printing experience!
*Pictured is the v.1 variant of this tool, this article will cover how to make the new and improved v.2 version! I can't wait to see your version!
P.S. If you haven't tried the brand of pasta pictured here, I implore you to do so. It will change your life.
Supplies
Access to a computer (as we’ll be using what is perhaps the most intuitive, free, browser-based 3D modeling software Tinkercad )
Access to a 3D printer (if you don’t own a 3D printer, check your local public libraries, makerspaces, secondary schools, colleges, or use an online printing service )
A bag of your favourite dry pasta (to snack on while we 3D model —optional )
Ideation Process
Since we’ve already identified the problem, we can skip right to ideation.
Design constraints: the following circle diameters equate roughly to one, two, three, and four portions of dried spaghetti.
Single Portion:
23mm in diameter
Two Portions:
29mm in diameter
Three Portions:
38.5mm in diameter
Four Portions:
45mm in diameter
With those constraints established, we can start thinking about what we want our measuring tool to look like. In design, one of the best approaches to ideation is to ask a series of pointed polarizing questions to filter out what’s not important to the design.
Questions such as:
Will its shape be simple or complex? Will it be geometric or organic? Will its design be traditional or figurative? Will it have a handle or integrated grip? Will it be thin or thick? Will it be small or large? Will it contain all four portion measurements? Will it be portable or stationary? Will it have circular cut-outs or different shapes of similar proportions? Will it require instructions or be intuitive to use? Will it sit in drawer or on a dedicated stand? Will it have a single use or multiple uses? Will it float or sink? Etc., etc.
By answering these types of questions, we can start refining our design and establish what considerations are most relevant.
Coming up with these types of questions efficiently takes practice, so if this is your first time, start with a list of design must-haves; this will go a long way in establishing what you want to get out of your design, and you can start refining it from there.
Here’s an example:
My design must have:
• Properly proportioned holes for measuring out a single and a double portion of dried spaghetti
• Have a handle
• Be small enough to fit in a cutlery drawer
• Be geometric in shape
• Be thin enough to use as a bookmark in a cookbook
Once you have answered similar questions or established a list of design must-haves, you can start sketching out a design.
I chose to go with a relatively thin, palm-sized, thematic, figurative design with meatball shaped cut-outs of only three of the four portion measurements.
What theme did I settled on? SPAGHETTI MONSTER! :)
3D Modeling (scribbling Spaghetti)

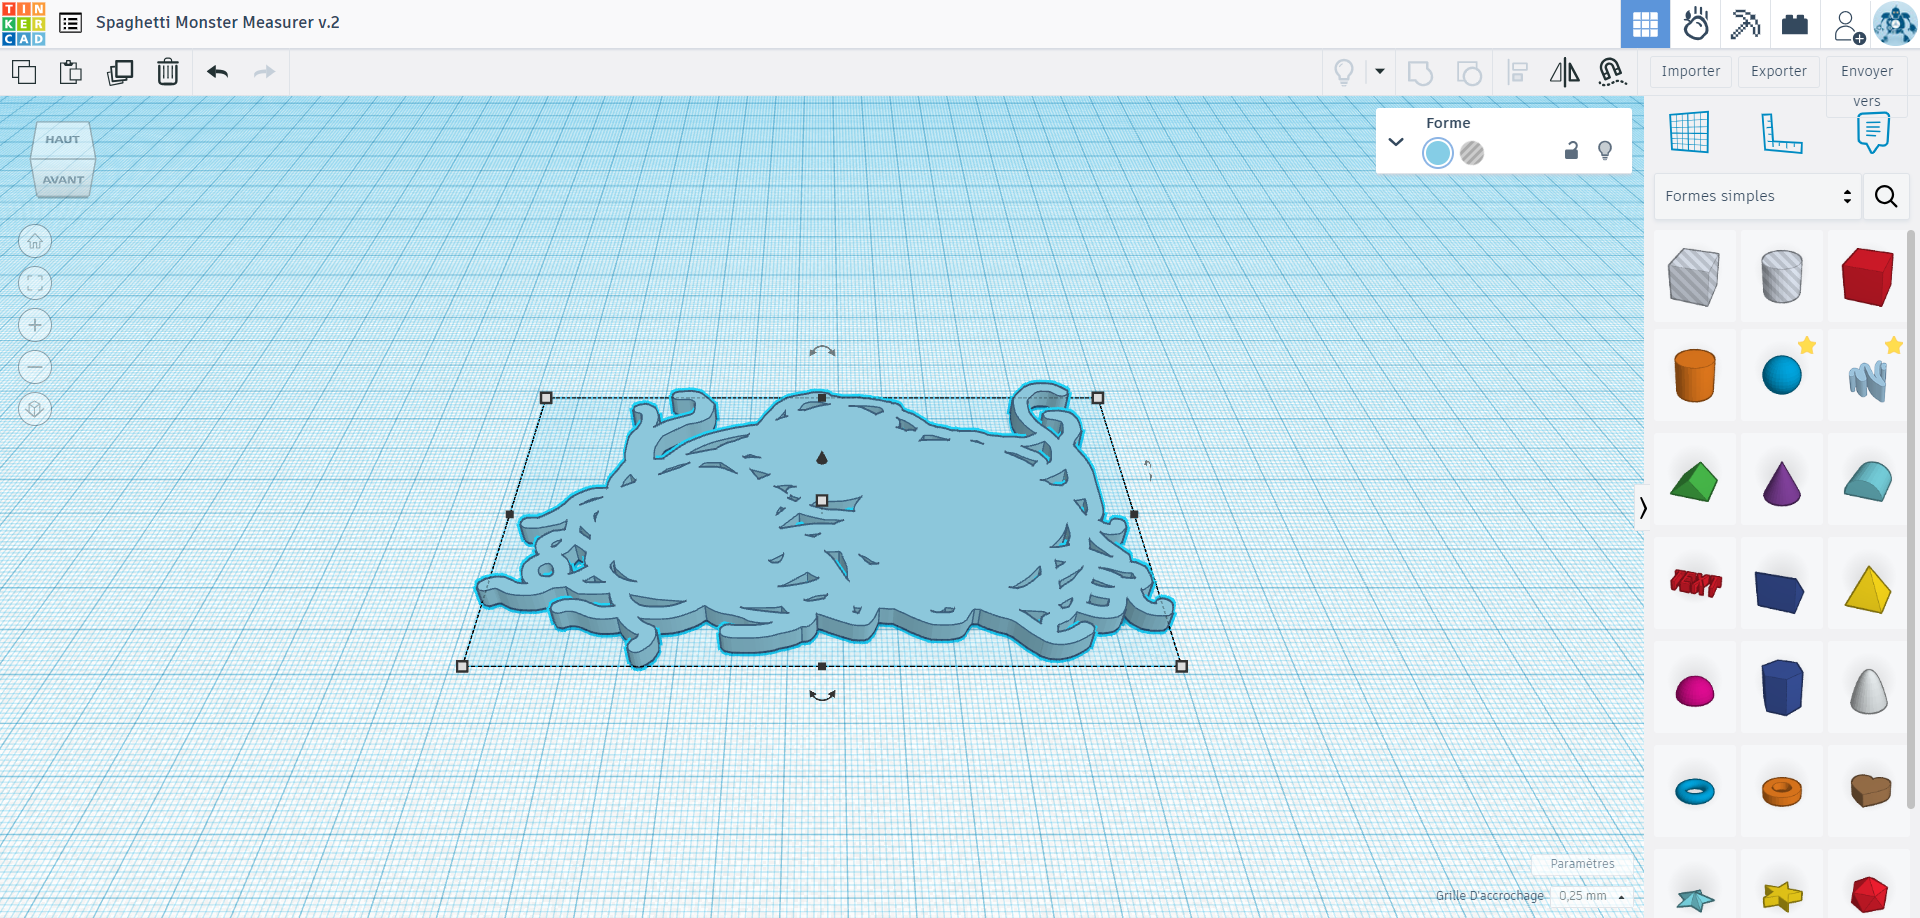


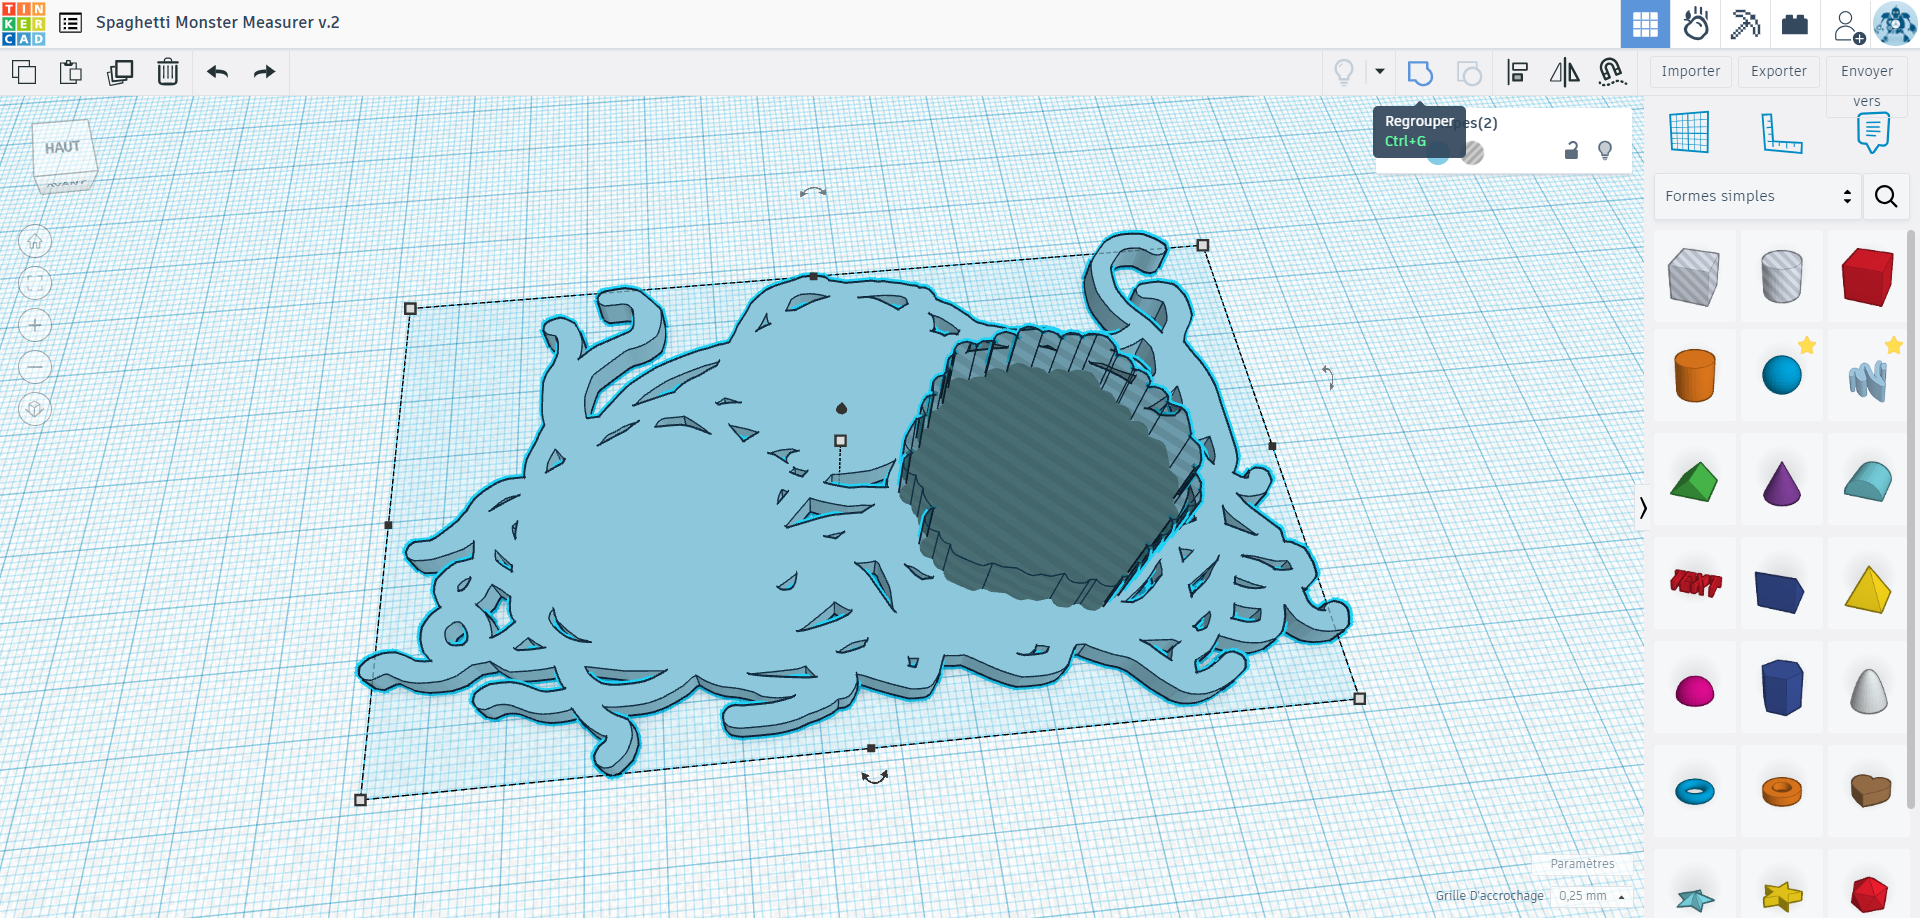


For this step, we’ll be using perhaps the most intuitive, free, browser-based software available, Tinkercad. If you don’t already have a Tinkercad account, create one and follow the tutorials to become familiar with the software. Once you are acquainted, dive in and start modelling!
Next, for my design, I’ll be using the Scribble tool to create the entangled mess of spaghetti that will make up the main body of my spaghetti monster. Using the thickness of the Drawing tool as the width of a single strand of spaghetti, I start by making a rough mound for the body and add two arms.
Next, I concentrate the drawing tool in the areas where I plan to add the circular portion cut-outs which will also serve as the monster’s meatball eyes. To ensure these areas are solid I use the Shape tool within the Scribble tool window (the shape tool icon resembles a solid star-like shape with a pencil ) to draw rough circular shapes where the meatball eyes will be. Once satisfied with the spaghetti monster’s body, I click on Done which closes the Scribble tool window and presents you with an extruded version of the 2D shape you’ve created.
*A note on using the Scribble tool, as well as, an alternative:
Some might find that the Scribble tool function is nearly impossible to use with a regular mouse, to be honest, even as a skilled mouse manipulator, if I wasn’t drawing a tangled mess of spaghetti using a regular mouse would’ve been a frustrating experience. As a work around, you can open up Tinkercad on a touchscreen device such as a smartphone or tablet. If you have access to a dedicated drawing tablet, they work best. Another alternative is to draw out your design by hand and scan or take a photo of the drawing and import it into vector-based software such as Adobe Illustrator or the free alternative Inkscape and export the drawing as an .svg file. That .svg file can then be imported into Tinkercad and manipulated accordingly.
Next, to create the spaghetti monster's meatball eyes, I use the Shape tool within the Scribble tool again to create a rough circle and then switched back to the regular Scribble tool to make the edges knobbly and meatball-esque. Once the meatball shape is created, three copies are made and each is resized appropriately to reflect the desired portions.
I then converted the meatball shapes into holes and placed them on the monster’s tangled spaghetti body. Once I was satisfied with their placement I grouped the shapes together by first selecting the shapes and then using the Group tool (Ctrl+G ) to extract the meatball shapes from the spaghetti heap shape.
*Pro tip: As a habit, before modifying the dimensions of any cylinder, I raise the number of its sides to the maximum possible (64). Otherwise, the cylinder will be faceted.
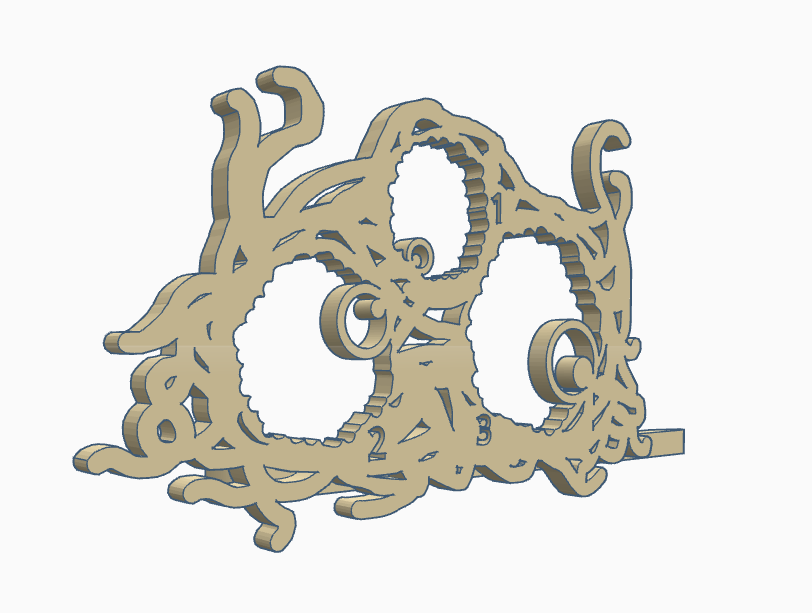
To identify the different portion cut-outs, I use the Text tool to add the numbers one, two, and three next to the different cut-outs.
To sell that these cut-outs are eyes on a monster, I decided to add irises and pupils to them. The irises are created by using the Tube tool and the pupils are created with Cylinder tool. To ensure that the irises and pupils will print with the body as one cohesive piece, I make sure that all the pieces overlap slightly. In addition, to add a bit of visual separation, I decided to make the pieces all different heights before using the Group tool to group them together.
Once everything is grouped together, the Spaghetti Monster Measurer is complete and ready to print! High five!
3D Modeling (Inserting Portion Numbers)


Another revision I made in this second version was adding numbers to indicate the portions each cutout represented. It's a simple addition that takes the guess work out of trying to remember which is which. Start by dragging the Text shape onto the construction plane, replace ''TEXT'' with a "1" and select your font preference (Serif fonts give me rashes). Rinse and repeat for the other portions and group the lot of them together.
3D Modeling (Meatballs= Eyeballs)


To sell the meatball eyes as eyes, I decided to add irises and pupils to the cutout meatball shapes by using the Tube and Cylinder tools. I then grouped them together and placed the new shape within the cutout meatball shape. Once I was happy with its placement, I duplicated the shape twice more and resized them to better fit the other cutouts. Finally I grouped all of the shapes together and made them pasta coloured. Our spaghetti monster now has EYES!
3D Modeling (Optional Bag Clip)

An optional addition to the Spaghetti Monster Measurer is too add a simple bag clip for those opened bags of pasta missing perfectly measured portions! Here's the .stl file on its own to slap on the bottom of your Spaghetti Monster Measurer.
Export and Slice
Export your final design from Tinkercad as either an .stl or .obj file and download it.
Import your 3D file into your preferred slicing software (Cura in my case ) to prepare it for 3D printing. As the print is relatively thin, printing it at 100% infill at a low to medium resolution in PETG garnered good results. *If you're printing the bag clip version, I suggest printing it upside down to minimize supports.
All there is to do now is wait...whilst eating pasta (cooked...or dried... )
*As I am currently updating my 3D printing setup, I only have a physical print of v.1 unfortunately.
Removing and Using the Print

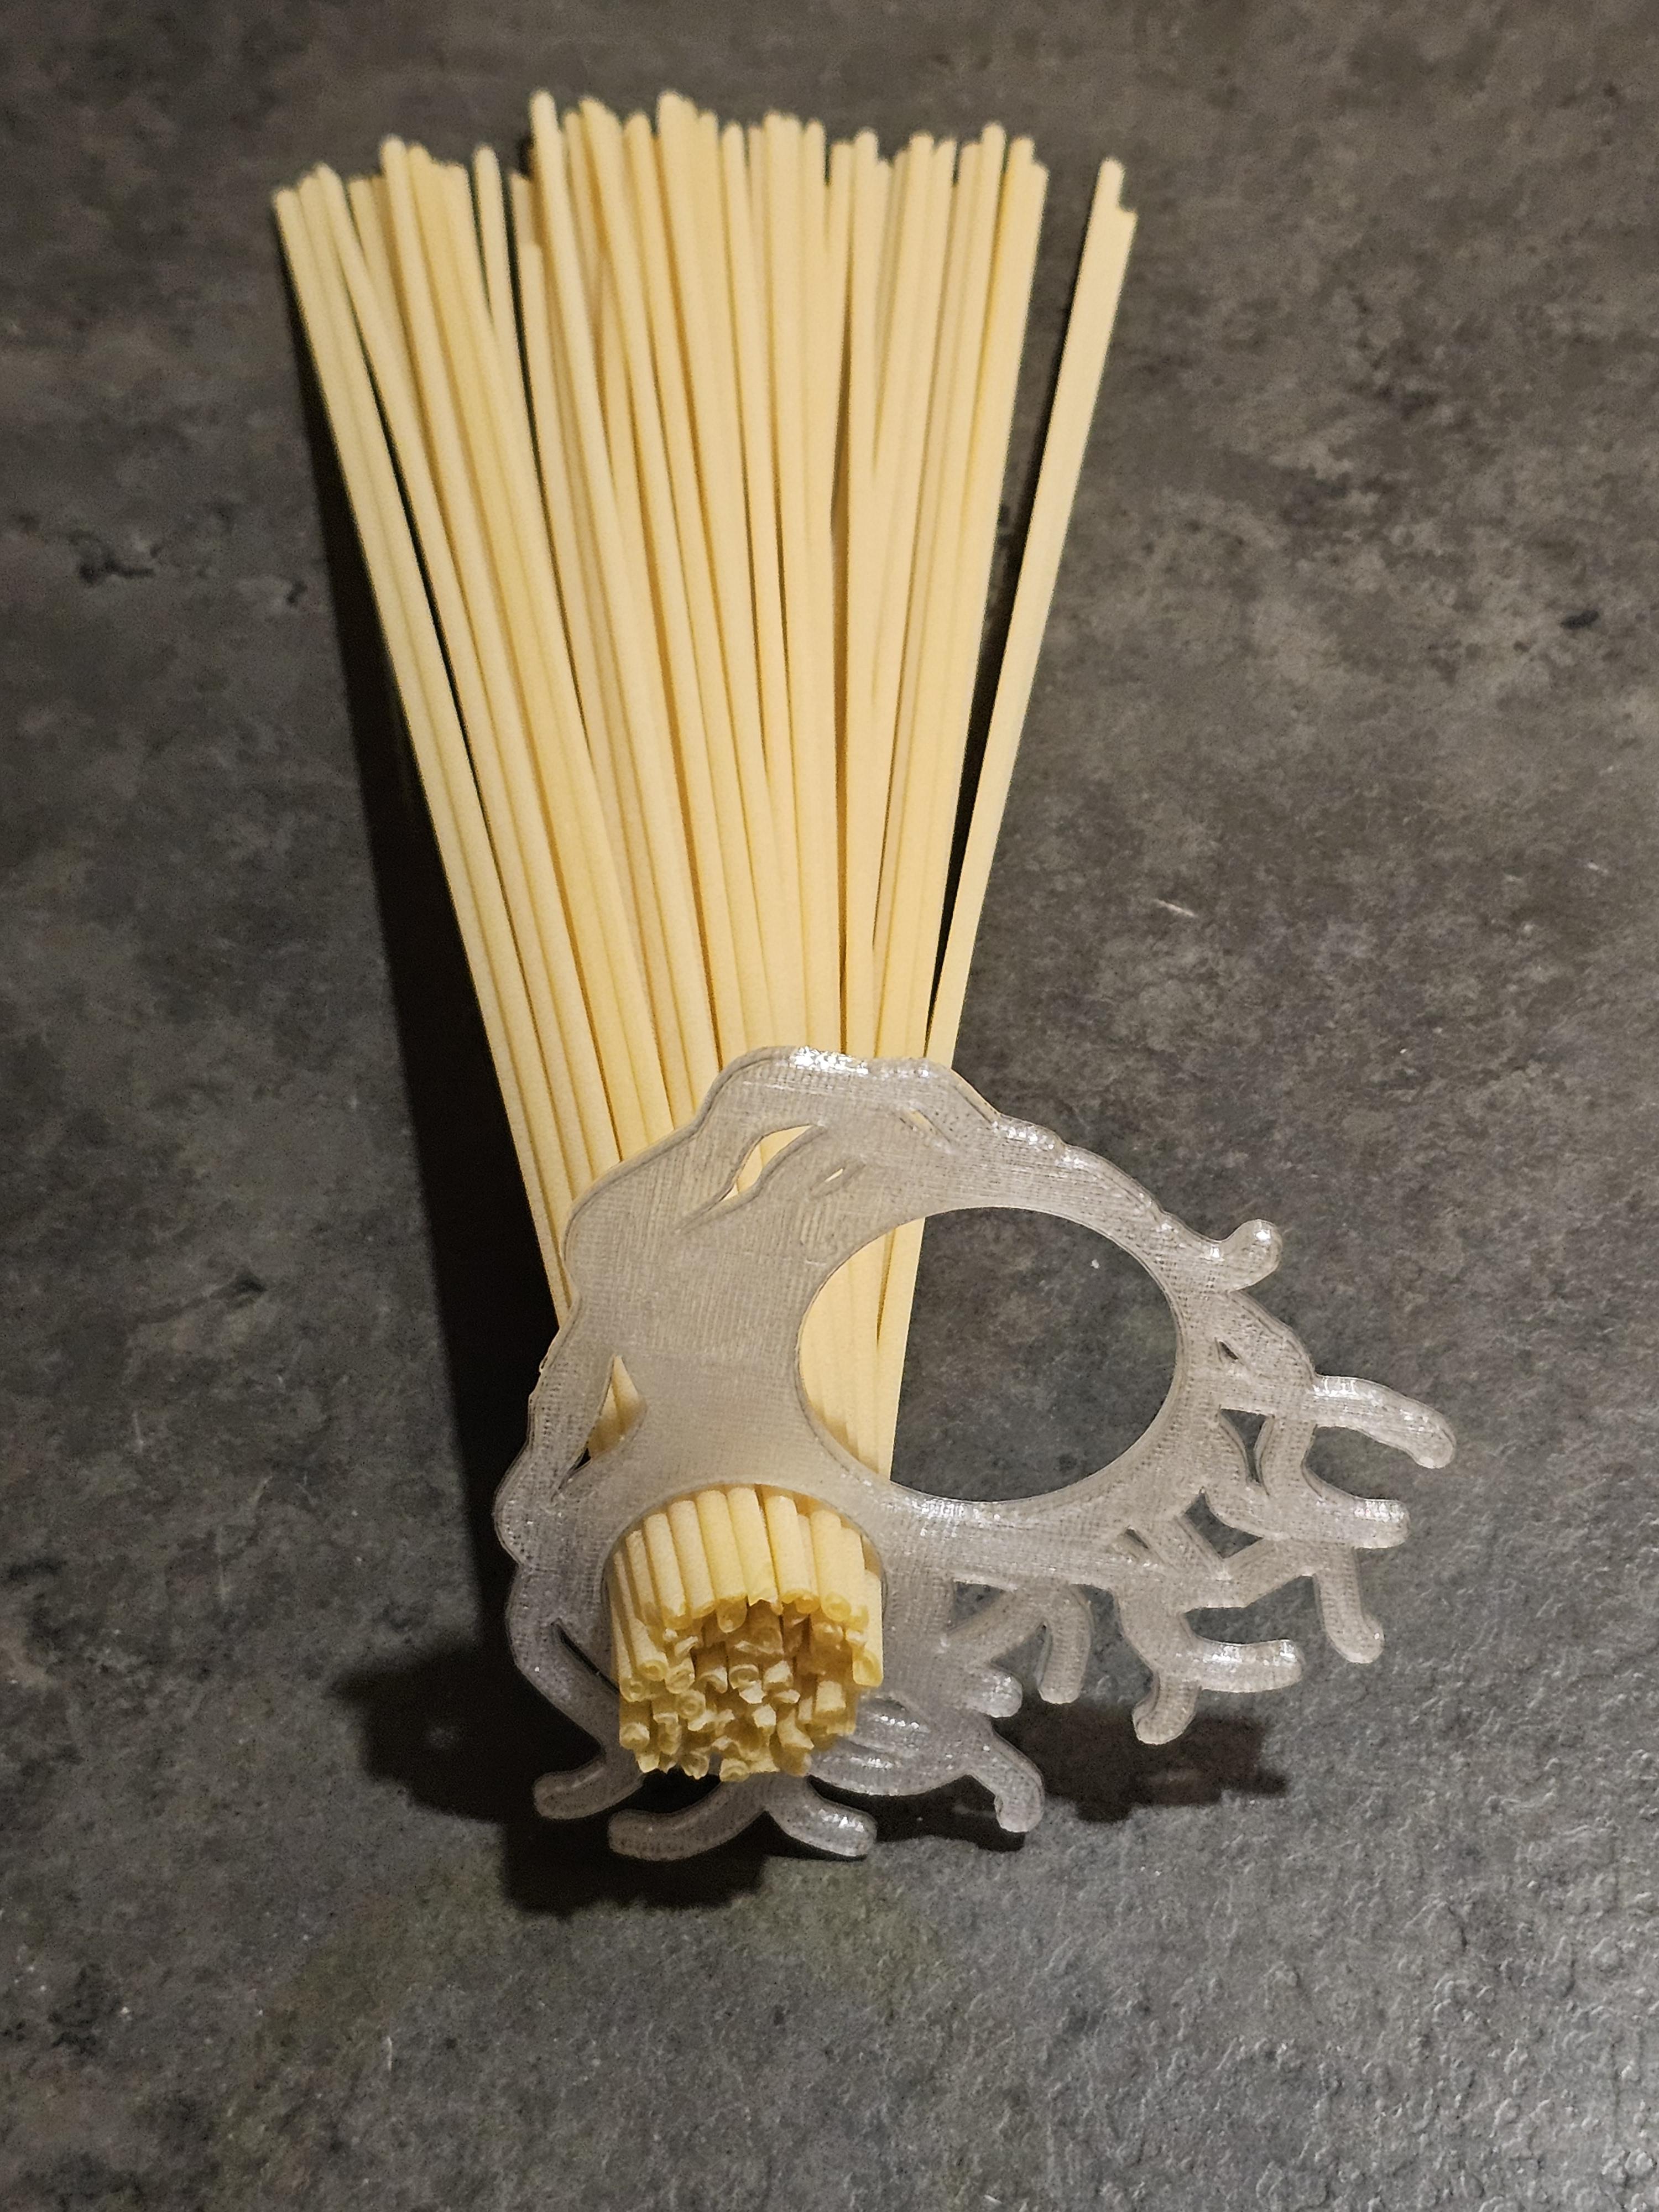


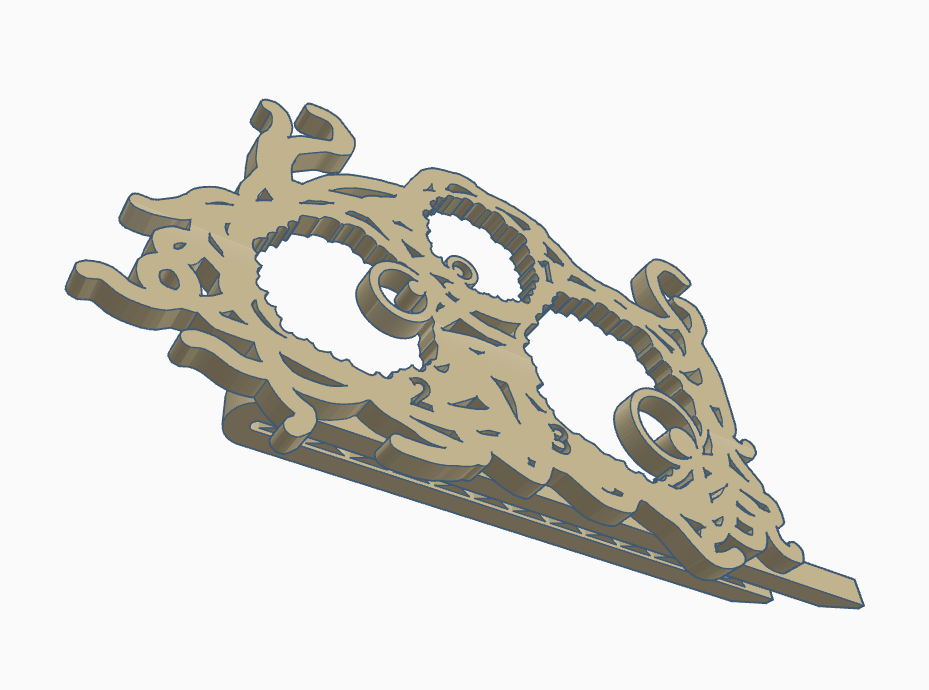
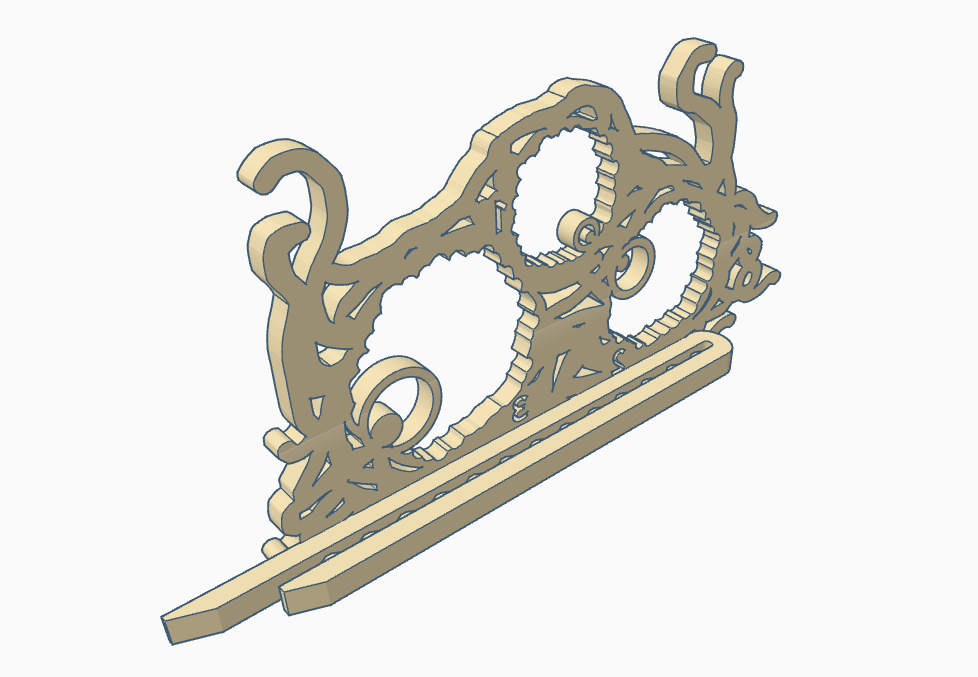
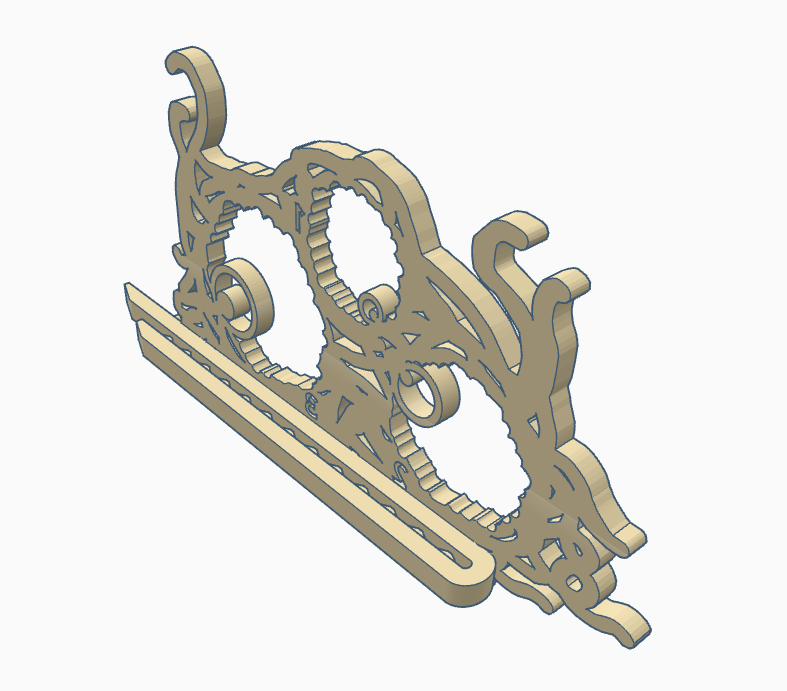

Congrats!
Regardless of the design you ended up settling on, you will now have perfectly proportioned spaghetti (or bucatini ) meals that match the number of people you are serving! If you decided to follow along and create a spaghetti monster of your own, I would love to see it! If you want to download the version covered in this Instructable, the .stl files are below!
Cheers!
Mr. Ham
Tinkercad Model
For those interested, here is the Tinkercad model to play around with and pull apart!
Bonus: Bucatini Carbonara Recipe
Ingredients:
- 6 large room temperature fresh eggs (2 whole, 4 yolks)
- 1 onion (finely chopped)
- 2 garlic cloves (minced or pressed)
- Thick cut bacon (fat trimmed) 6-8 slices (one full fat strip)
- Grana Padano (10-15% more than parm)
- Parmigiano Reggiano
- La Molisana Bucatini no.12 (450g packet)
- 1 cup of pasta water
- Large metal bowl filled with piping hot water
Directions:
- Start boiling a pot of water, add at least 1 tbsp of salt to the water
- Prep thick cut bacon strips by trimming most of the fat from each bacon slice length ways, reserve some fat strips for additional rendered bacon fat
- Insert pasta at rolling boil and cook for 5-6 minutes. Before draining pasta, ladle a cup of pasta water into a Pyrex measuring cup.
- Using two skillets, fry trimmed bacon until crispy and set aside, in the second skillet fry the separated bacon fat, onions, and garlic until onions are properly sweated and fat is rendered. Pour fat drippings, onions and garlic into another Pyrex measuring cup.
- In a mixing bowl whisk the 2 whole eggs with the 4 yolks then season with a pinch of salt and a good amount of black pepper
- Next add the cheese to the egg mixture until fully incorporated, scraping the bowl with the whisk
- Then slowly add the bacon fat reduction with garlic and onions while whisking slowly until pieces of onion are mixed throughout
- Slowly add reserved pasta water to egg mixture.
- Quickly place drained noodles in the pre-warmed metal bowl
- Then fold egg/cheese mixture into pasta in stages making sure that the noodles are evenly coated by twisting and lifting pasta with tongs
- Lastly garnish with crumbled bacon bits, grated Parmigiano Reggiano, and fresh ground black pepper to taste
- Serve with tongs in tight curled stacks, garnish, and enjoy!