Spooky Halloween Raven – Cardboard & Paper Mâché Craft
by Abracardboardra in Craft > Cardboard
138 Views, 1 Favorites, 0 Comments
Spooky Halloween Raven – Cardboard & Paper Mâché Craft
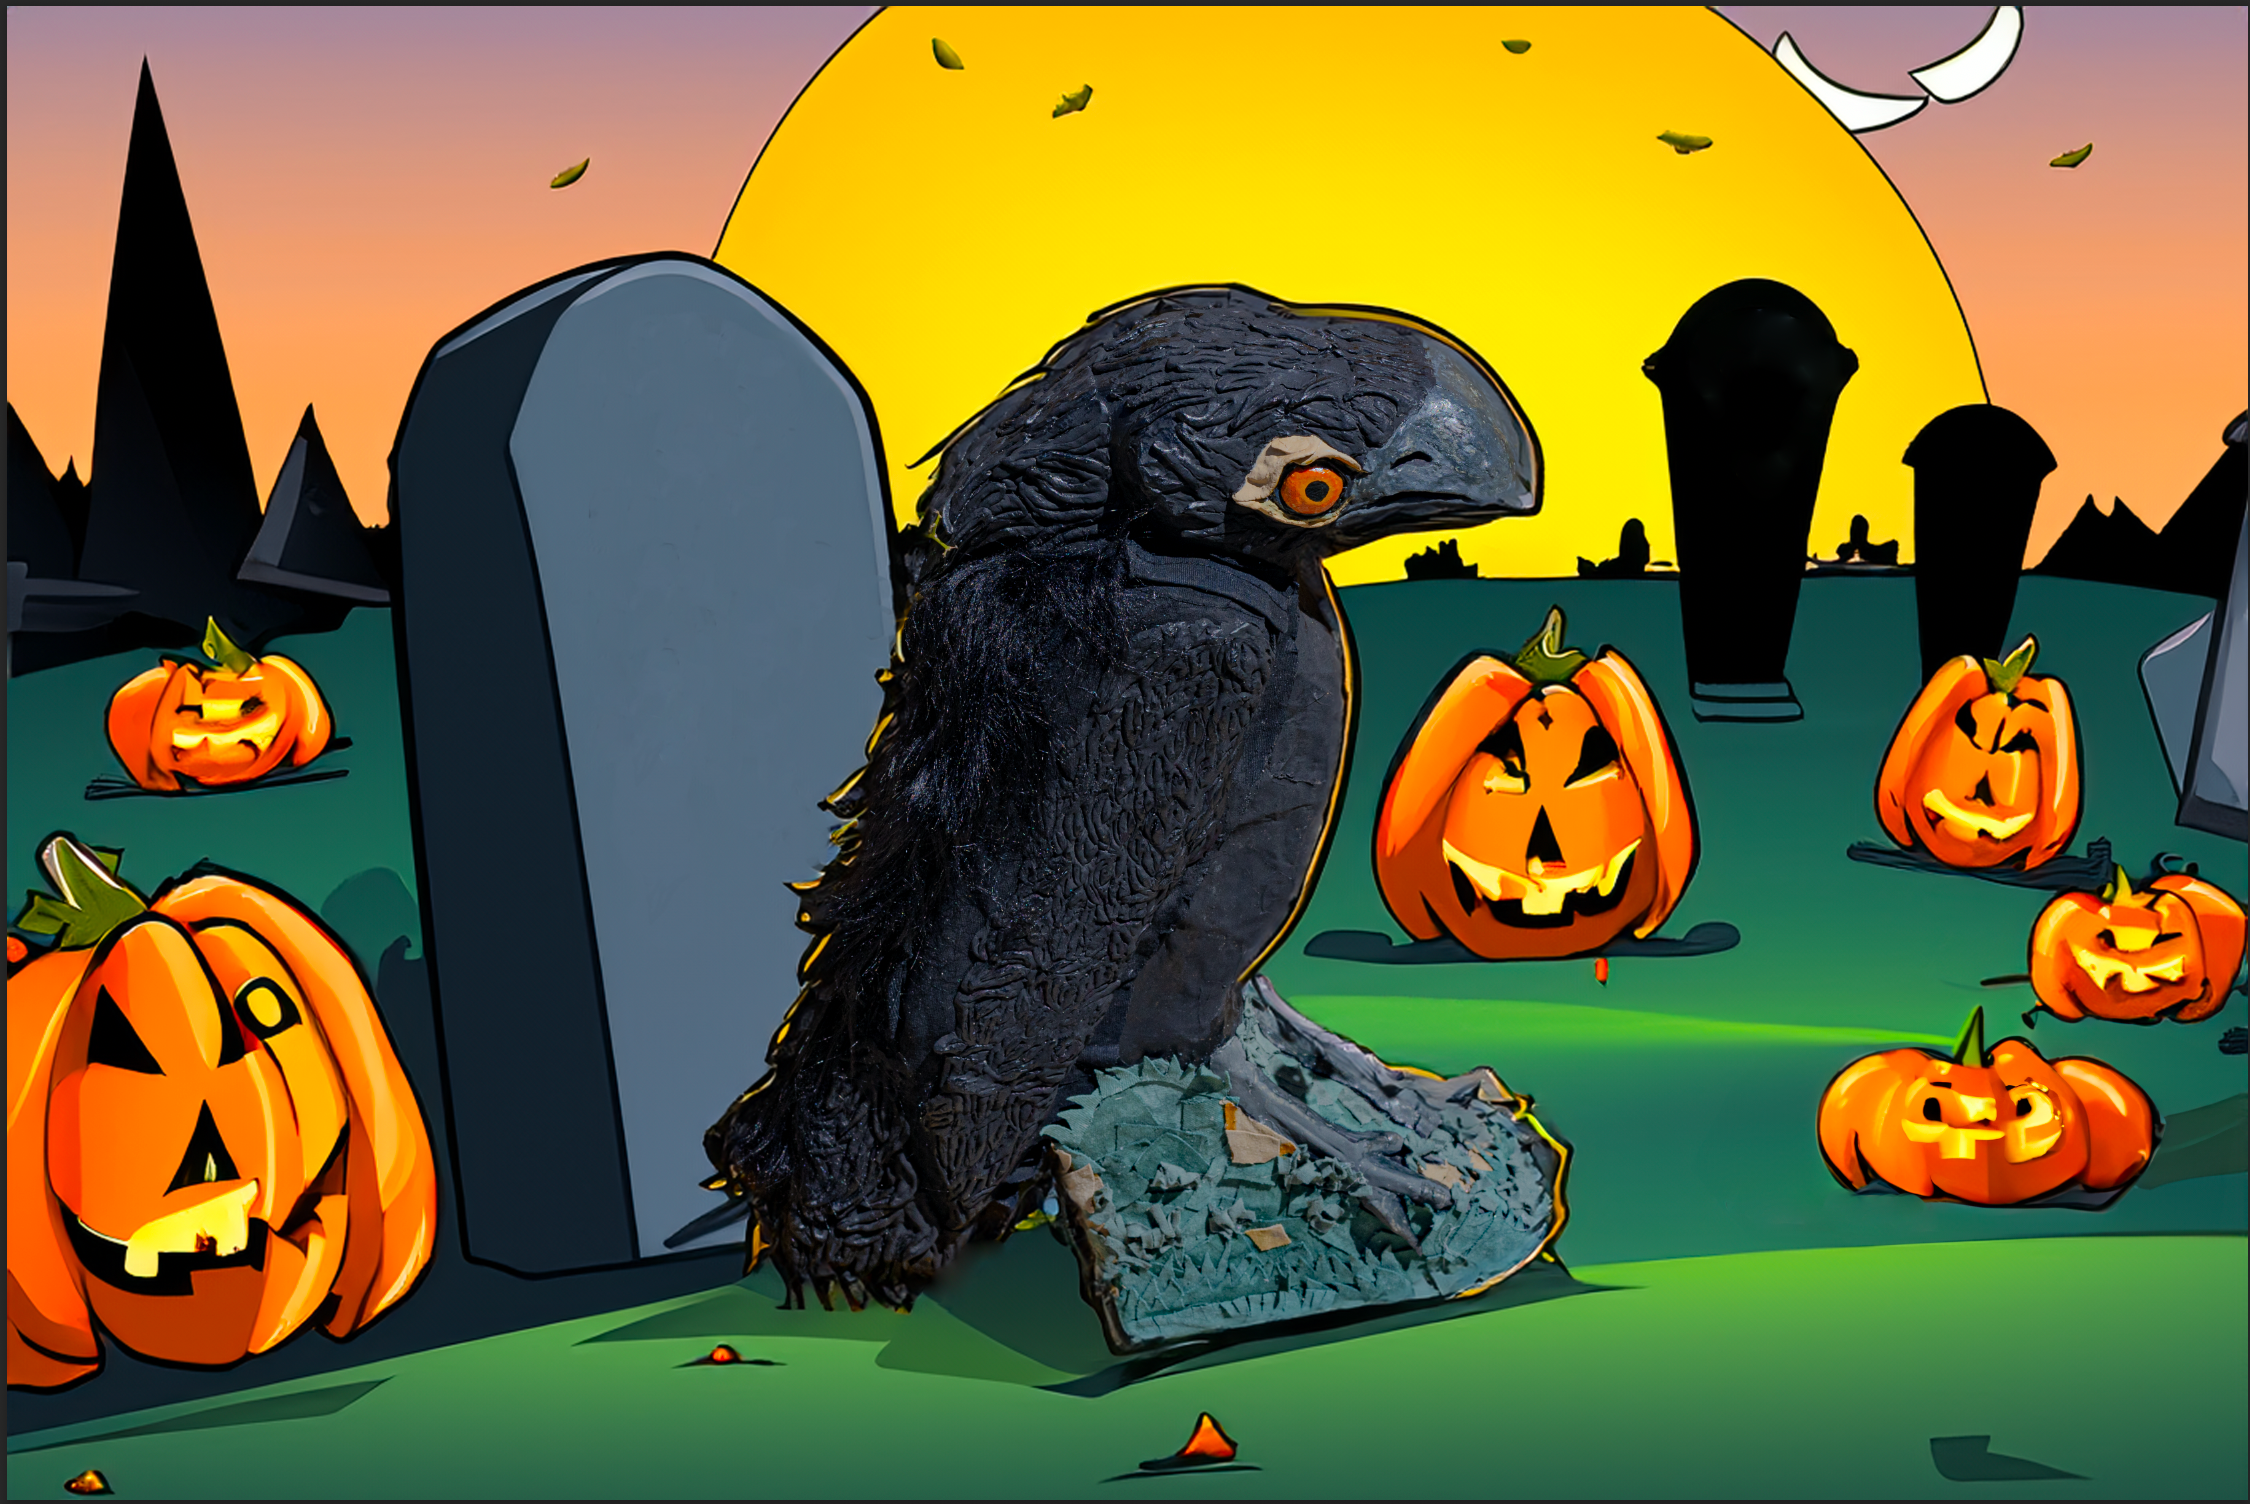


In this Halloween project, I’ll show you how to create a spooky raven using simple materials like cardboard, paper mâché, and old fabric scraps. This eerie bird looks great in any Halloween setup, and it’s beginner-friendly, too!
This craft is perfect for newcomers because the mostly black color hides small imperfections, and the raven’s rugged, bony look makes it naturally spooky.
Watch the full Youtube tutorial here: https://youtu.be/_3T1Es6v6Hk
Supplies

- 1 medium flattened cardboard box
- ½ lb (about 225 g) paper mâché clay
- Craft scissors
- School glue
- Epoxy glue
- Hot glue gun
- Acrylic paints: black, grey, orange, red
- Paintbrushes
- Markers
- Masking tape
- Bubble wrap envelopes
- Foam scraps
- Old fabrics: black, green, beige (denim or leggings work great!)
- Black faux fur and black faux feathers (optional)
- A sock (for neck texture)
- Small bags of rice (for weight)
- Kraft paper
- Wet wipes and a small glass of water (for cleanup and smoothing)
Draw and Cut the Raven Shape


- Draw the outline of a raven directly on cardboard.
- Cut out two identical silhouettes.
- One leg can be slightly behind the other—this creates a sense of depth.
Tip: The “back” leg will serve as support and later be hidden.
Build the 3D Body


- Cut a 2-inch-wide strip of cardboard to connect the two sides.
- Tape it between the silhouettes to form a raven-shaped box.
- Place small bags of rice inside the feet before sealing—it’ll keep your raven stable.
Soften and Shape the Form


- Use foam, fabric cutouts, or bubble wrap envelopes to smooth edges.
- Add extra foam for the wings and eyes.
- For the neck, stuff or wrap a sock (the heel works perfectly for the beak).
- Secure everything with masking tape temporarily.
Cover With Kraft Paper


Cover the entire raven in kraft paper using glue. This helps hold everything together and gives you a smooth surface for painting.
Watching your raven take shape here is super satisfying!
Paint the Base Layer


Paint the whole raven black (3 layers for full coverage).
If you want a simpler version, you can stop here—just paint the eyes and beak or glue on fake eyes later.
Dress Your Raven


- Use black fabric scraps (old leggings work great!) to cover the wings and back.
- Add textured pieces like waistbands or faux fur for realism.
Sculpt Details With Paper Mâché Clay


- Prepare about ½ lb of clay ahead of time for consistency.
- Work with small amounts—paper mâché dries quickly (≈20 min).
- Keep a small cup of water and wet wipes nearby for smoothing and cleanup.
Sculpt:
- Eye:
- Make a small half-ball and glue it on.
- Add an eyelid using a thin coil of clay and sculpt wrinkles.
- Build a hood above the eye for expression.
- Beak:
- Cover with a thin clay layer, sculpting nostrils and beak separation.
- Wings & Tail:
- Add long strips of clay to shape feathers.
- Legs:
- Sculpt over the supporting leg, adding bone-like details and wrinkles.
Paint the Details


It's time to paint!
- Feathers: Black
- Beak & Feet: Shades of grey
- Eyelid: Beige
- Eye Contour: Black
- Sclera: Orange and red
- Iris: Black
Your raven will start looking truly alive (and a little creepy)!
Build the Base


- Cut green and beige denim into rough squares.
- Trim edges into grass-like shapes.
- Roll flexible green fabric scraps and glue them as little bushes.
Final Touches


- Touch up any messy areas with black paint.
- Add faux feathers for extra realism (optional).
- Let everything dry completely before displaying.
Enjoy!


