Sturdy Kusudama for the Origami-Impaired
by watchmeflyy in Craft > Art
10167 Views, 203 Favorites, 0 Comments
Sturdy Kusudama for the Origami-Impaired

I've been experimenting with the Cricut Explore that I won from the Papercraft Contest (Thanks so much for the votes! ^^) and wanted to do something related to origami. However, why would anyone need a Cricut machine for origami? Scoring? Not necessary for that super thin origami paper, and figuring out the positioning of the score lines would be a hassle anyway...
But wait. What could you do with a Cricut machine that you can't do just with your fingers? Cut. Score.
SCORE. Cardstock is WAY to thick for nice, clean folds that most origami models require, so a Cricut machine could help you score folds on cardstock. Problem: folding too many layers of cardstock would warp the paper over time, leading to weird-looking origami, so simple units would be the best choice for a Cricut-origami hybrid project.
~~~~~~
That was basically the short conversation I had with my mind (I'm awesome like that.) while pondering the dilemma introduced in that first paragraph. This project is mainly for those who A) want to fold strong, cardstock kusudama (the model I'm working with in this project is called Little Island Kusudama) or B) are bad with accurately folding origami and want a machine to aid precision. Or even C) too lazy to fold so much for 30 units. And of course there's the category for people like me: D) experimenting types who like to mess around with possibilities.
And I recently came up with E) people who want resilient origami jewelry (you'll need scoring for cardstock and for such small pieces of paper).
If you're any of those types, or just want to see some lovely paperwork in action, simple scroll down. :)
NOTE: I apologize in advance: this tutorial is sometimes lacking in screenshots (whenever I forgot to pause for pictures) so you might have trouble without visual guidance. I'm working on another similar tutorial, though, and I assure you that its instructing is much better.
UPDATE: Part 2 is now available.
Materials
- Cricut Explore (or other Cricut machines, or printer..)
- cutting mat
- weeder tools for Cricut machine
- Adobe Photoshop/Cricut Design Space
- cardstock or other paper
- glue
Those are just the materials that I used; you can substitute for what you have on hand. You can use a Cricut machine or something similar to cut and score (or just cut... you'll see) or print out the pattern and fold along the lines.. either way's fine, but let's face it: using the Cricut machine is way more fun. ^^ Also, printing the design out is pretty pointless (yeah.. it was just a suggestion..). You'll have to cut all the parallelograms out and fold all the same, so might as well fold pre-cut paper the regular origami way. If you really want kusudama made from thicker paper though, printing is an applicable way to go. Just print out one parallelogram with the score lines, cut out 30 of them, and use a pair of scissors' blade to lightly cut along the score lines.
But I'm getting off topic.
Importing Design

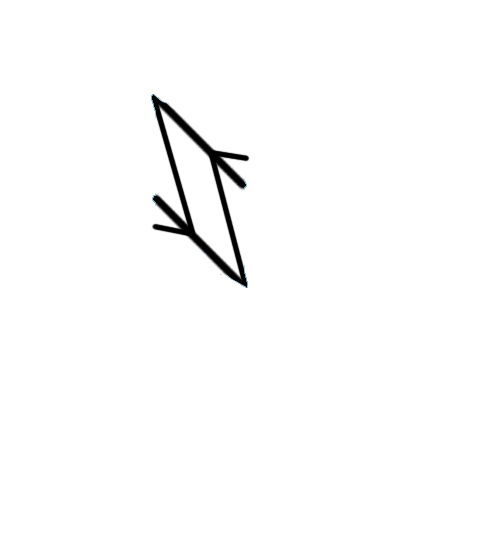


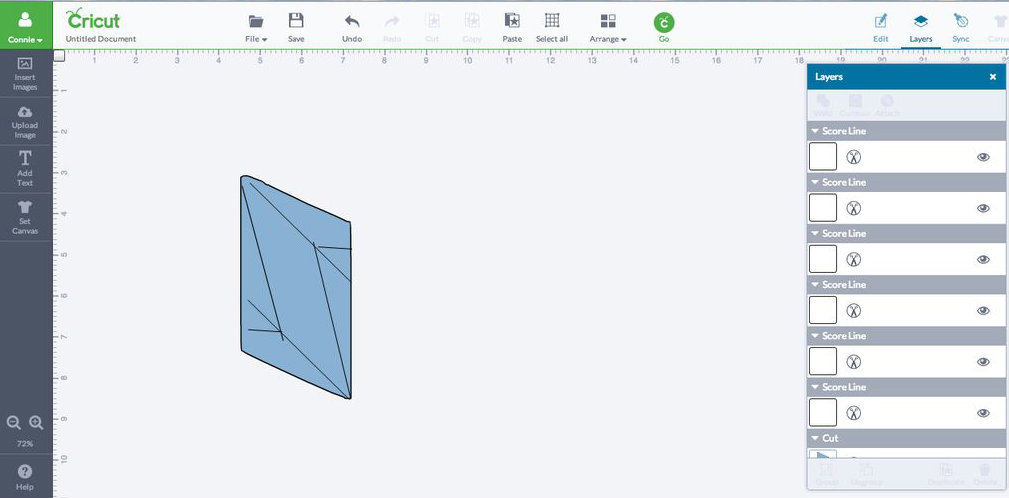
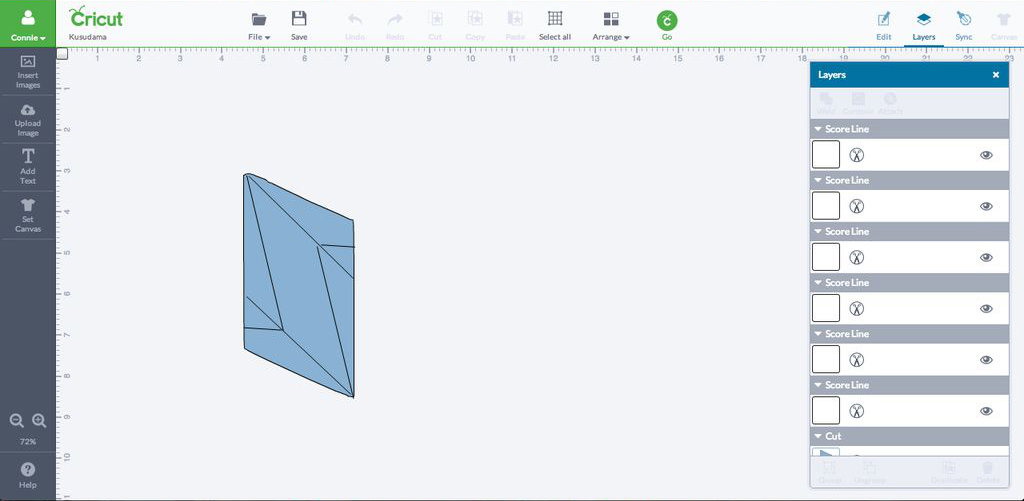

I won't bore you with the painful process I went through to prepare all of this so I'll just jump into what you'll need to do. (what I did will be in the last steps of the tutorial)
Save the first two images above (the file below is just the photoshop document I used, in case you want to see it) and upload them into Cricut Design Space. When editing the shapes in the window prior to official uploading, make sure you don't delete the inner parallelogram of both images.
On the right-hand side layers panel, change the black design into a score type of layer (just click the scissors and choose score in the resulting panel). The lines will become dotted. Then go to "Insert Image" on the left and search up "score line." Insert the free image of score lines (just a straight line) and rotate/pull it to fit it along one of the dotted lines. Copy, paste, and repeat that for each dotted line that you see (except the outer rectangle).
When finished, delete the layer that you changed into score (click the trash can on bottom right corner while selecting that layer). Make sure your parallelogram is sent to back (click "arrange" on the top menu bar, and then click the "send to back" icon in the resulting dropped bar). Now you should see a parallelogram with lines where the scoring is. Fix the lines if necessary
Hold down the shift key and select all the score lines in the layers panel. Group them together before pressing "attach" in the layers panel. Click on "edit" next to layers to open the edit panel, and click "mirror" for both the parallelogram's and the scoring design's layers to flip them horizontally.
Downloads
Cutting


Now that you have your basic design, I suggest you do a trial run (just cut and score ONE parallelogram to make sure the scoring and cutting is correct). First cut your image out and load the next file and score it next WITHOUT removing paper from the mat (read this step and the next one to see how to cut and score).
For cutting, just upload ten total parallelograms (only -- no score lines) into a NEW file (leave your original file alone for now) and press go, making sure the Cricut machine is set up and ready to cut. I won't go into that because different machines are different for setting up, I believe?
Do NOT move around any of the parallelograms on the virtual positioning cutting mat.
Scoring


If you have a scoring stylus, good for you! Make ten total copies of ONLY the scoring lines back in your original document (the first one), and then use the machine to score along the lines on the parallelograms. If you leave the positioning mat alone, you'll be fine (mostly -- see next step..).
If you're like me and don't have a scoring stylus, you can just do lighter cuts along the lines you need scored. I experimented and found the right amount of pressure, and voila -- scored-lines-that-are-actually-cut-but-it's-all-good-in-the-end.
Make ten duplicates, and in the layers panel, make sure that the lines are CUT and NOT score anymore (click the pen-like icon and change it to scissors). Then let your machine cut, making sure that your pressure is set to the right amount (for my Cricut explore, I set the dial on "custom" and slid the slider to 149). Again, if you leave the positioning alone, you'll be mostly fine, but see the next step.
And of course, if you're just doing that trial run I was talking about (check that impatience meter...), just do the steps with ONE parallelogram and score line design.
NOTE: MAKE SURE YOUR PARALLELOGRAMS AND SCORING DESIGNS ARE THE SAME SIZE. You can click on one of the sizing circles on the rectangle that appears when you click on a layer to check the size. My parallelograms were about 2.4" by 1.2".
Mostly Fine But Not Quite


If you look at the first two images above, you'll notice that the last couple cuts on the right are a bit off. You can pull the right-most three scoring designs more to the right to fix that.
Once you've cut out and scored parallelograms for one shade of cardstock, just pull everything off your mat and repeat with another color.
It'd be really nice if you could cut AND score ten parallelograms in one go without switching back and forth, but I haven't discovered how to do that [yet..]. If anyone has any suggestions, please leave them in a comment below. *Bambi eyes*
Folding Units


This won't be too different from the real Little Island kusudama unit folding, but here's how to do it. Just click the above images for step-by-step instructions.
Connecting Units
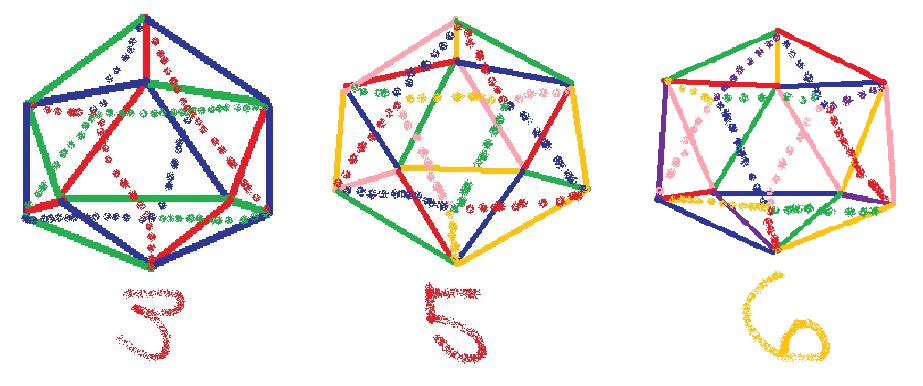


When you've folded all thirty units, use glue to connect them. Glue shouldn't be too necessary, but hey -- if you're going for STURDY KUSUDAMA that would withstand a body slam (not really.. on a bed, perhaps.. ), then go for the extra strength provided by glue. See the first image for a color diagram I made for making sure that no colors will overlap (basically so that all colors will be different for each "point" of the kusudama).
And that's a STRONG Little Island kusudama made the lazy way! You can tweak the process to fit your needs; use five colors, for example. With five colors, you'd need six of each unit (still a total of thirty units per kusudama) so just make six copies instead of ten in Cricut Design Space.
Kusudama Pendant


This time I resized my parallelograms to 1.6" by 8" and used the same color scheme to create a pendant. Later I made another that was 1.4" by 0.7", and WOW it was tricky. I didn't have to do any repositioning on the virtual positioning mat, though.
For this, I'd strongly recommend glue for its additional support; cardstock is heavy, and who knows what kind of activities you'll be doing with this pendant on? ;) The units for this were pretty small, and it's hard to make kusudama with units smaller than this. Downsize the parallelograms (Don't forget the scoring lines!) at your own risk...
But be creative, and have fun!
See the next steps for my pre-project process.
Photoshopin'


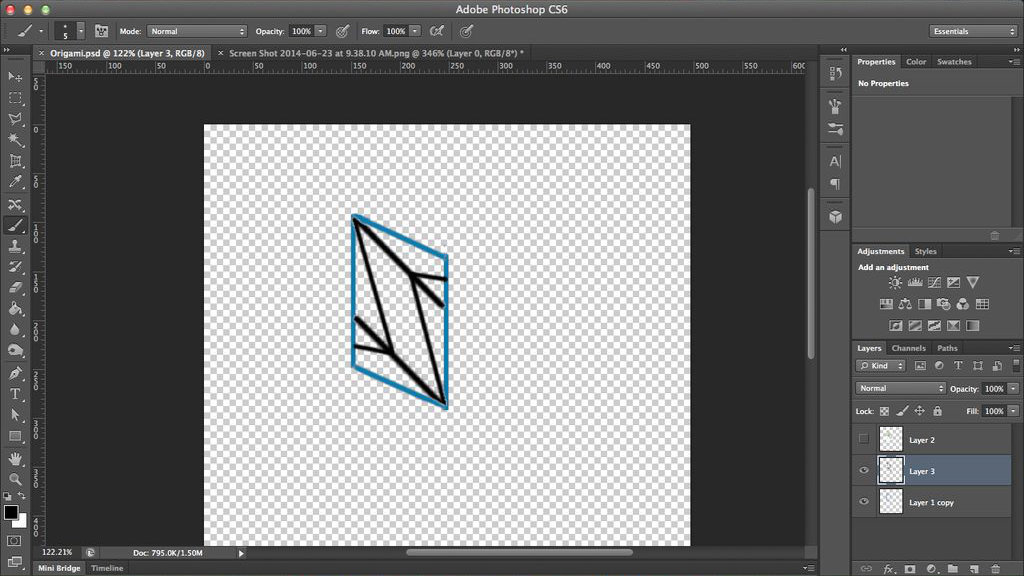
To come up with the design of everything, I folded a unit of the actual Little Island kusudama and studied it for paper folds that weren't necessary for the exterior of the piece. Then... just read the notes on the images above. :3
Mistakes




Ahhh yes.. I had a lot of trial and error going on. Mistakes were made in the production of such a magnificent slice of glory (all right.. that was a bit of generous flattery... ). See above for brief shpeals on what I did wrong.
That concludes my tutorial. I hope you enjoyed it!