Swirl Bowl - a $0 Cost Tangential Twist Turning
by bippy8 in Workshop > Woodworking
8850 Views, 69 Favorites, 0 Comments
Swirl Bowl - a $0 Cost Tangential Twist Turning



I love to find reuses of scraps (some people call it trash). I find it fun to give rebirth to these hidden gems and turn them into something interesting. I've tried this with bowls and pens made from plywood scraps (also even used old skateboard decks), made kazoos from flooring scraps and cabinets doors, rings from veneer scraps and car paint and also a pyramid table from a old 2x4. So I loved seeing this ible challenge since it is right up my trash picking alley.
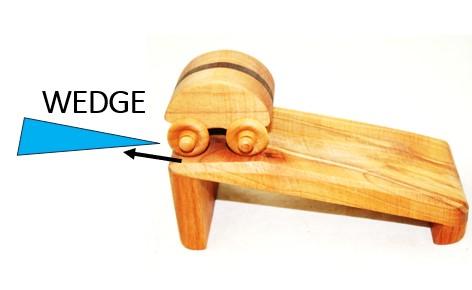
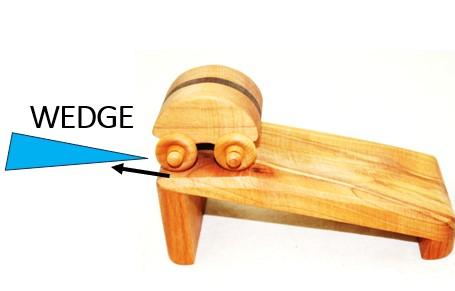
A little background first, my wood club makes toys for less fortunate children (we typically make 4,000 - 5,000/yr - I'm task to make 150-200 kazoos :-). One of my club members makes a toy called a "flip car" that goes down a short ramp and flips over itself and keeps going. Part of the ramp has a wedge cut off to provide a flat section to start the car off. Needless to say that when making hundreds of these toys, there are a plethora of short wedge scraps generated as "waste" but not to me! My club member Len, challenged me in front of the entire club to make something from them. So I did!
BTW, I learned a lot in the process and tried several new techniques. Surprisingly it turned out very nice and won the top award at my wood club and also an award at our county fair. I hope you enjoy.
Supplies


Used typical woodworking tools. Many I obtain from craigslist very cheap. Tip if you join a local wood club, many members are very eager to help you out and mentor so take advantage of these great artisans.
Wedge Wood Scraps (mine were 2.5" H x 3.25" L x 0.5" W at the thick end and went down to 1/16" at the tip (they were at an ~11-12 degree angle)
Wood Veneers (free from my club member)
Table Saw
Lathe
Sanders
Press to make veneer sandwich and compress the wedges into a tight tangential twisted
Clamps
Tennis Ball or Cone
Tons of glue (Tight Bond II)
Design With Interesting Geometry

This was the interesting part. I was watching my nightly YouTube woodworking videos and came across an interesting one that used a tangential twist technique. The original concept came from Robert (Jerzy Gryglaszewski) Craig (article here). I used a variant approach which involved creating wedges and orienting them tangentially around a center (see pic). Then you move them around until you eventually get them to seat perfectly flat against each other (TIP: you might have to remove some wedges to get perfect alignment). Well this amazed me since one of the biggest challenges in making segmented bowls is to cut each piece at a precise angle. If you are even just a little off, then there will be very noticeable gaps that have to finessed by sanding to make flat. For example, if you are just 0.1 degrees/piece off and with 12 pieces, this can yield a 1.2 degree gap. Now imagine have ~30 segments - that's 3.6 degrees to fix which is a tedious process.
The Tangential Twist approach purportedly assured perfect alignment. So you can imagine I was excited to have a box of little wedges for me to try this out.
One challenge I quickly learned... These wedges were inconsistent in the angle and ranged from 11 - 12+ degrees; so I didn't know if this process "woodwork" (pun intended).
Spoiler alert - it did.
Prepare Veneers

To create an interesting pattern for the twist, I decided to make a sandwich of veneers as separators between the wedges to make them more visible and create a nice spiral pattern. My veneer sandwich was made out of Maple +2 Walnuts + Maple and I pressed them tightly in my vise then cut them the size of the wedge flat side.
Prepare Wedges

Next, I glued the veneer sandwiches to the wedges and lathered both sides with tons of glue to prepare for tangential assembly. TIP: Before I glued up the wedges, I did a dry assemble to see if all this would work out. This test gave me some confidence it would.
Glue Up - Work Fast

Once the glue is on the wedges, you have around 15-20 mins to get all the wedges set up around a ball (or cone) to create the tangential assembly. I wrapped the assembly with plastic to contain the glue then tightened the perimeter with band clamps top and bottom. Finally, I put the assembly into a press and tightened as much as possible while checking the band clamps and tightening them too if needed to make sure there would be no gaps in the wedges.
Now i hoped and prayed it will all work. BTW, I had no way to see if the wedges aligned flat with each other.
I kept the bowl in the press for a week before I unwrapped. Since there was plastic around it, the glue wasn't fully dried so I removed the plastic and let it set another week. I was pleasantly surprised with the result - Perfect alignment from wedges that were at different angles.
Flatten the Assembly

I needed to create a flat bottom so I could mount the assembly on my lathe. So I used a belt sander to flatten the bottom and then ran it thru my drum sander to flatten the top. I loved the pattern it made. Sort of hypnotic.
Lathe to Shape
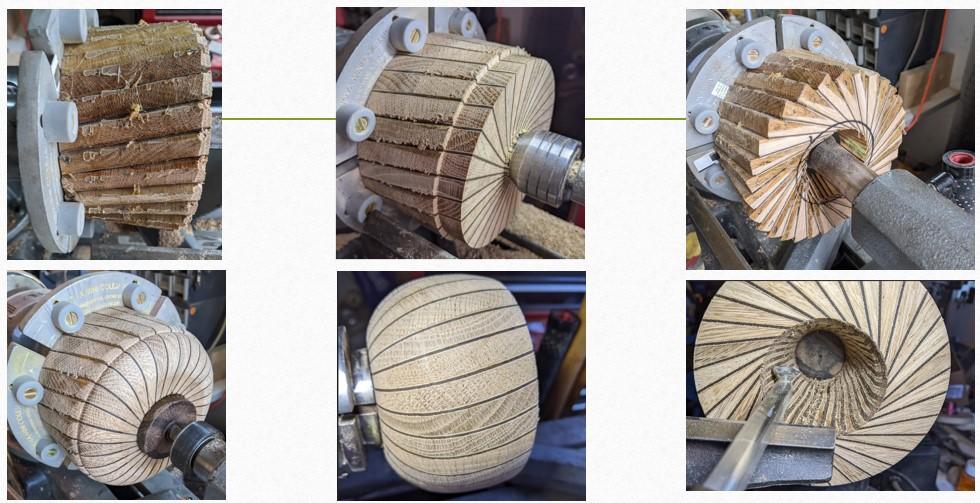
You may think this is funny but the hard part is over. To get to this step took 3 weekends and the lathing process was just a few hours. To me the bowl looked like a cantaloupe so I decided to shape it a bit like that. I mounted a piece of exotic rosewood that another cub member (his work is in the Smithsonian) gave me as the base.
Tweaking
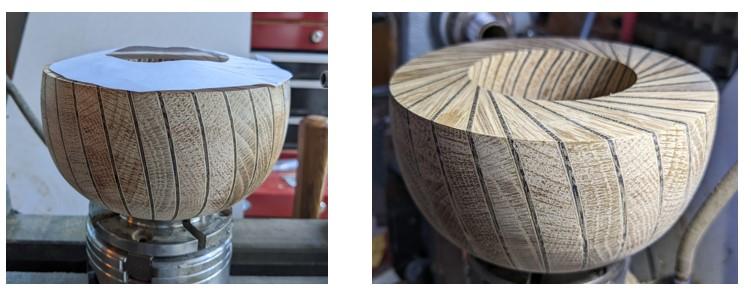
At this point I was almost satisfied with the shape but still felt it needed a little more to make it even more special. I brought it to my club meeting to get their opinion (many are very accomplished world class turns). I was debating if I should angle the top of the bowl down or up a bit. So a suggestion was made to use a paper model to help visualize the shape. That was very helpful and I decided to create a slight curvature to the top.
Finish
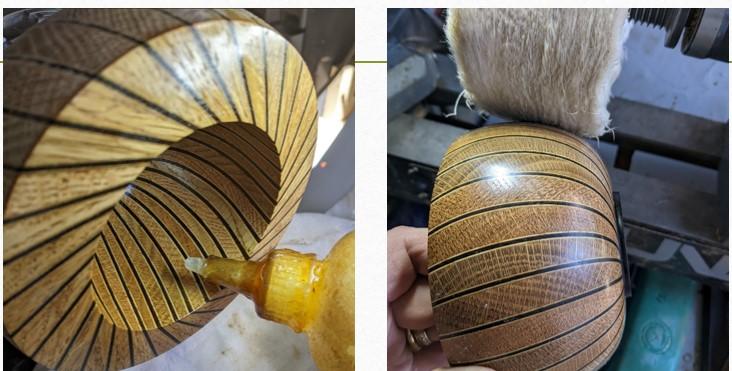
The best part of wood turning is to put on the finish to make the piece come alive. I used a home made friction polish (approximately equal parts: Denature Alcohol, Boiled Linseed Oil, and Wax Free Shellac (there are many YT videos on the process). I completed by buffing to a high luster.
Present


Viola! It's a winner.
I especially like how the outside and inner parts twist around. It’s even fun to hold in your hands since it has a nice weight. I added a small glass candle holder and my wife always laughs when I show it off when guest come to visit. Now I can just send them to this ible (but I'll still show it off)