T-Deck


This instructables show how to play a cyberdeck device presented by LilyGo called T-Deck.
Supplies
What Is Cyberdeck?
Cyberdeck is any customized portable computing devices; Or any portable computing devices cannot called as a laptop/notebook can call cyberdeck :P
Ref.:
https://cyberpunk.fandom.com/wiki/Cyberdeck
What Is T-Deck?
T-Deck is an ESP32-S3 dev device with 2.8" 320x240 capacity touch screen, I2S speaker output and dual microphone input, Blackberry style trackball, Blackberry keyboard and optional LoRa module. T-Deck also can powered by Lipo battery.
ESP32-S3 has 2.4 GHz Wi-Fi & Bluetooth 5 (LE) wireless connective and T-Deck can extendable with Micro-SD card slot and Serial/Grove port.
So T-Deck is capable for many creative projects.
Ref.:
Software Preparation
T-Deck official support develop with Arduino IDE, PlatformlO IDE and Micropython. I mainly using Arduino IDE, so this instructables mainly focus on Arduino IDE.
Arduino IDE
Download and install Arduino IDE latest 1.x version if not yet:
https://www.arduino.cc/en/software
Arduino-ESP32
Follow installation step to add Arduino-ESP32 support if not yet:
https://docs.espressif.com/projects/arduino-esp32/en/latest/installing.html
Arduino_GFX Library
Open Arduino IDE Library Manager by selecting "Tools" menu -> "Manager Libraries...". Search "GFX for various displays" and press "install" button.
You may refer my previous instructables for more information about Arduino_GFX.
LVGL Library
Open Arduino IDE Library Manager by selecting "Tools" menu -> "Manager Libraries...". Search "lvgl", select "lvgl" and press "install" button.
After LVGL library installation, it requires some configurations:
1.Browse to your Arduino IDE libraries folder
2.Copy libraries/lvgl/lv_conf_template.h to libraries/lv_conf.h
3.In lv_conf.h around line 15, enable config file by changing 0 to 1:
#if 1
4.Find "LV_COLOR_DEPTH" and set value to 16:
#define LV_COLOR_DEPTH 16
5.find "LV_TICK_CUSTOM" and enable it by changing 0 to 1:
#define LV_TICK_CUSTOM 1
6.If using SPI or parallel 8 display, 16-bit color swap byte can help improve performance a little bit. Find "LV_COLOR_16_SWAP" and enable it by changing 0 to 1:
#define LV_COLOR_16_SWAP 1
If you don't know where the Arduino IDE libraries folder yet, please refer to:
Sample Source Code
Lilygo released some official example source code in Github:
https://github.com/Xinyuan-LilyGO/T-Deck.git
And here are my examples in Github:
https://github.com/moononournation/T-Deck.git
This instructables mainly introduce my examples, but you can found more T-Deck sources in Github, e.g.:
Arduino VNC

One of a cyberdeck device usage is remote control a system. T-Deck have screen, trackball and keyboard, so it is capable act as a VNC client remote control a VNC server.
The trackball is act as mouse pointer device, you may change the moving speed by changing the follow parameter:
#define TRACK_SPEED 2
You may find more details on VNC client in my previous instructables.
Source code:
https://github.com/moononournation/T-Deck/tree/main/ArduinoVNC
Arduino VNC VGA


320x240 screen resolution is a little bit too small in many case. So the VGA version example virtualize a 640x480 canvas and compress 4 pixels to 1 for display in this tiny screen.
The GFX declaration will become:
Arduino_GFX *gfx = new Arduino_ST7789(bus, GFX_NOT_DEFINED /* RST */, 1 /* rotation */, false /* IPS */);
Arduino_Canvas *canvasGfx = new Arduino_Canvas(640 /* width */, 480 /* height */, gfx);
Then simply initial canvasGfx with begin() will also trigger inner gfx begin():
  Serial.println("Init display");
  if (!canvasGfx->begin(80000000))
  {
    Serial.println("Init display failed!");
  }
Then in every loop, call flushQuad() to compress 640x480 canvas output to 320x240 screen:
canvasGfx->flushQuad();
Source code:
https://github.com/moononournation/T-Deck/tree/main/ArduinoVNC_VGA
LVGL Support

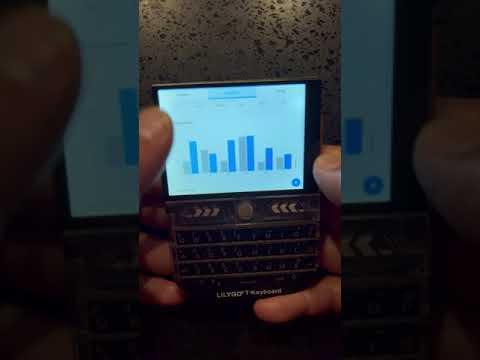
Like other ESP32 dev device, T-Deck also support LVGL. You can customize the trackball as a pointer, but I prefer more make it act as arrow key action.
Source code:
https://github.com/moononournation/T-Deck/tree/main/LvglBenchmark_VGA
https://github.com/moononournation/T-Deck/tree/main/LvglWidgets_VGA
WiFi & VNC Connect UI

Combining with LVGL and VNC example, it can ask user select connect to which WiFi network, input password to connect. And then input the VNC connection detail and connect.
The LVGL UI is developed by SquareLine, you may find more design details in my previous instructables.
In the same way, you can also develop other UI functions that need connect to local WiFi first.
Source code:
https://github.com/moononournation/T-Deck/tree/main/LvglWiFiConnect
https://github.com/moononournation/T-Deck/tree/main/LvglArduinoVNC_VGA
AVI Player
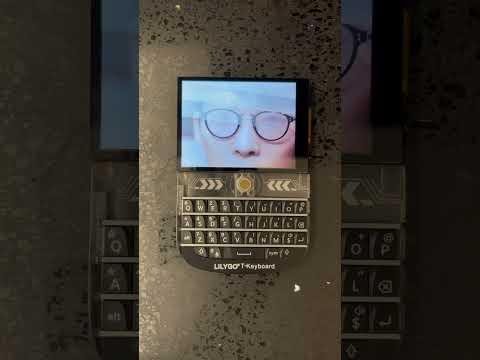
This is a simple demo of playing a short video.
I found I have not yet written something about AVI player, so I should write an intructables about AVI player soon.
Source code:
https://github.com/moononournation/T-Deck/tree/main/AviMp3CinepakDMA
NES Emulator

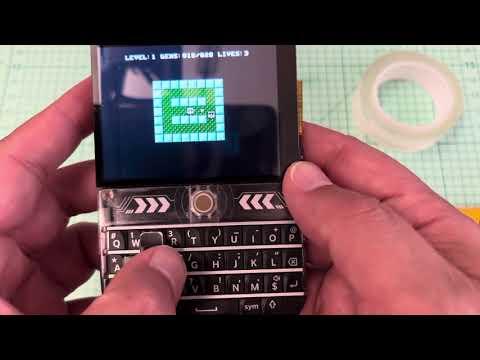
This is a simple demo of running Arduino-nofrendo.
You may found more details about Nofrendo NES emulator in my previous instructables.
Note:
It may a little bit hard to play games with the tiny keyboard, the 2nd video is showing how to customize a arrow key overlay that can help your press the key quickly and precisely.
Source code:
https://github.com/moononournation/T-Deck/tree/main/esp32-nofrendo
X86 Emulator
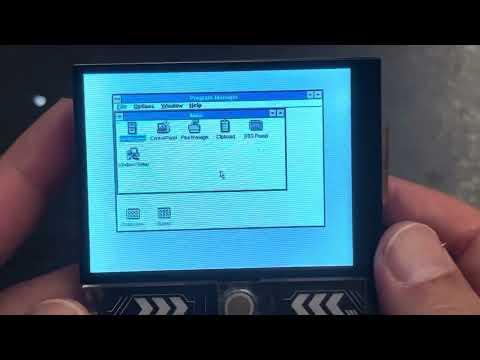
This emulator is still in early status, but it already can run Windows 3.0 in T-Deck slowly.
This project is base on faux86-remake and still porting to Arduino. The hard disk image is not provided in source code, but you can build your own hard disk image following this YouTube video.
Source code:
https://github.com/moononournation/T-Deck/tree/main/esp32-faux86
LoRa Messenger
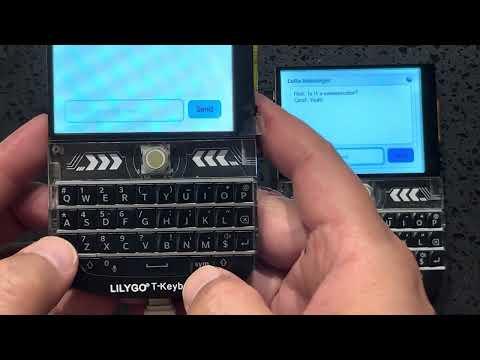
Finally, T-Deck have an optional LoRa module. If you buy 2 or more T-Deck with same frequency range LoRa module, you can communicate with each other within few kilometers that are not require WiFi network connected.
Note:
The LoRa antenna direct affect the communication distance, you should study which antenna is suitable for you LoRa module and your use case.
Source code:
https://github.com/moononournation/T-Deck/tree/main/LvglLoRaMessenger
Enjoy!
It's time to develop your own cyberdeck application!
Optional Case
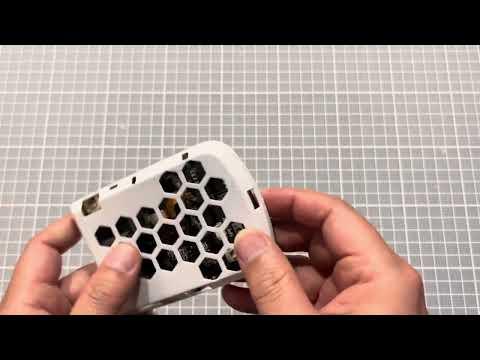
You may download and 3D print a case for T-Deck at Thingiverse: