Talking Plant With ESP32
by dbmaking in Circuits > Microcontrollers
8989 Views, 59 Favorites, 0 Comments
Talking Plant With ESP32


🪴 Talking Plant with ESP32: Speak About Its Condition with a Human Voice!
Have you ever wished your plant could tell you when it’s thirsty, when it’s too hot, or when it’s exposed to too much light? In this project, I will show you how to create a talking plant using an ESP32 board, various environmental sensors, and a small audio module.
💬 The plant will really talk! We’ll use a DFPlayer Mini to play voice messages based on the data collected from the sensors.
Supplies
PROJECT COMPONENTS PART 1
ESP32 NodeMCU 30pin CP2102: https://s.click.aliexpress.com/e/_Dksronr
Temperature Sensor DHT22: https://s.click.aliexpress.com/e/_ooBce5J
Soil Humidity Sensor: https://s.click.aliexpress.com/e/_DmuR277
DFPlayer Mini MP3: https://s.click.aliexpress.com/e/_DD5wtIl
1.44" TFT Display (no touch): https://s.click.aliexpress.com/e/_DlEB6pJ
Button 6x6x13.5: https://s.click.aliexpress.com/e/_Dl11I7x
8GB Micro SD Card: https://s.click.aliexpress.com/e/_onbFi1J
LDR (Light Dependent Resistor): https://s.click.aliexpress.com/e/_DnoclQ9
Resistors 1/4W: https://s.click.aliexpress.com/e/_oE4Grm5
PROJECT COMPONENTS PART 2
50x70 Hole Board: https://s.click.aliexpress.com/e/_oCsYaOD
20x80 Hole Board: https://s.click.aliexpress.com/e/_oCsYaOD
DC12V 5.5mm Female Connector: https://s.click.aliexpress.com/e/_DB0Ls4F
PAM8403 Amplifier Module: https://s.click.aliexpress.com/e/_DFvBE0d
M2/M3 Screws: https://s.click.aliexpress.com/e/_DlGBaQl
RECOMMENDED COMPONENTS
MB-102 Breadboard: https://s.click.aliexpress.com/e/_DehGhSH
Breadboard Cables: https://s.click.aliexpress.com/e/_DluJaxF
JST Connectors: https://s.click.aliexpress.com/e/_Deu6UpB
Pin Strips: https://s.click.aliexpress.com/e/_oDgS9KV
DuPont Terminal Crimping Kit: https://s.click.aliexpress.com/e/_okv1c1n
Silicone Wires: https://s.click.aliexpress.com/e/_oCCG2NB
Documentation: https://drive.google.com/drive/folders/1GlO2vFIKXuiw9raIzTqBurTwYLZVw-Aw?usp=sharing
3D Print Files: https://makerworld.com/en/models/156156-esp32-and-the-talking-plant#profileId-171037
Voice Synthesizer: https://ttsfree.com/text-to-speech/italian#google_vignette
🧠 Understand the Concept

Before starting the assembly, let’s understand the concept behind this project. The idea is to create an interactive plant that can "speak" to you based on the environment’s parameters. The ESP32 board reads data from sensors (soil moisture, temperature, humidity, and light levels) and uses this information to decide when the plant should “talk.”
- If the soil is too dry, the plant might say, “Water me, please!”
- If the temperature is too high, it might warn, “It’s too hot, cool me down!”
- If the plant isn’t getting enough light, it might ask, “Can you move me to a brighter spot?”
The DFPlayer Mini is used to play pre-recorded messages stored on a microSD card. This way, your plant doesn’t just monitor the environment, it responds!
🔌Breadboard Assembly

Start by wiring all components to the ESP32 according to the schematic provided. Note:
- Use two breadboards since the ESP32 occupies an entire one.
- Add a 56 Ohm resistor between the Monitor TFT LED pin and VCC.
- Connect both DFPlayer grounds together before wiring to the ESP32 ground.
Make sure all grounds are connected, and if necessary, use a breadboard power supply for the ESP32.
Downloads
🧪Sensor Calibration


Once everything is connected, you need to calibrate the sensors. This involves reading the raw values from each sensor and determining the threshold values that will trigger the plant to speak.
- For the soil moisture sensor, dry soil typically reads around 2800, and wet soil around 900. These values may vary depending on your sensor.
- The LDR will give a low value in dark conditions (around 380) and a high value when exposed to bright light (around 3200). Use these values to determine the light range your plant prefers.
- The DHT22 will output the temperature and humidity. You can use this data to ensure the environment is suitable for the plant.
Once you have the raw values, adjust your code accordingly to trigger voice messages based on sensor readings.
📦Waterproof the Soil Sensor
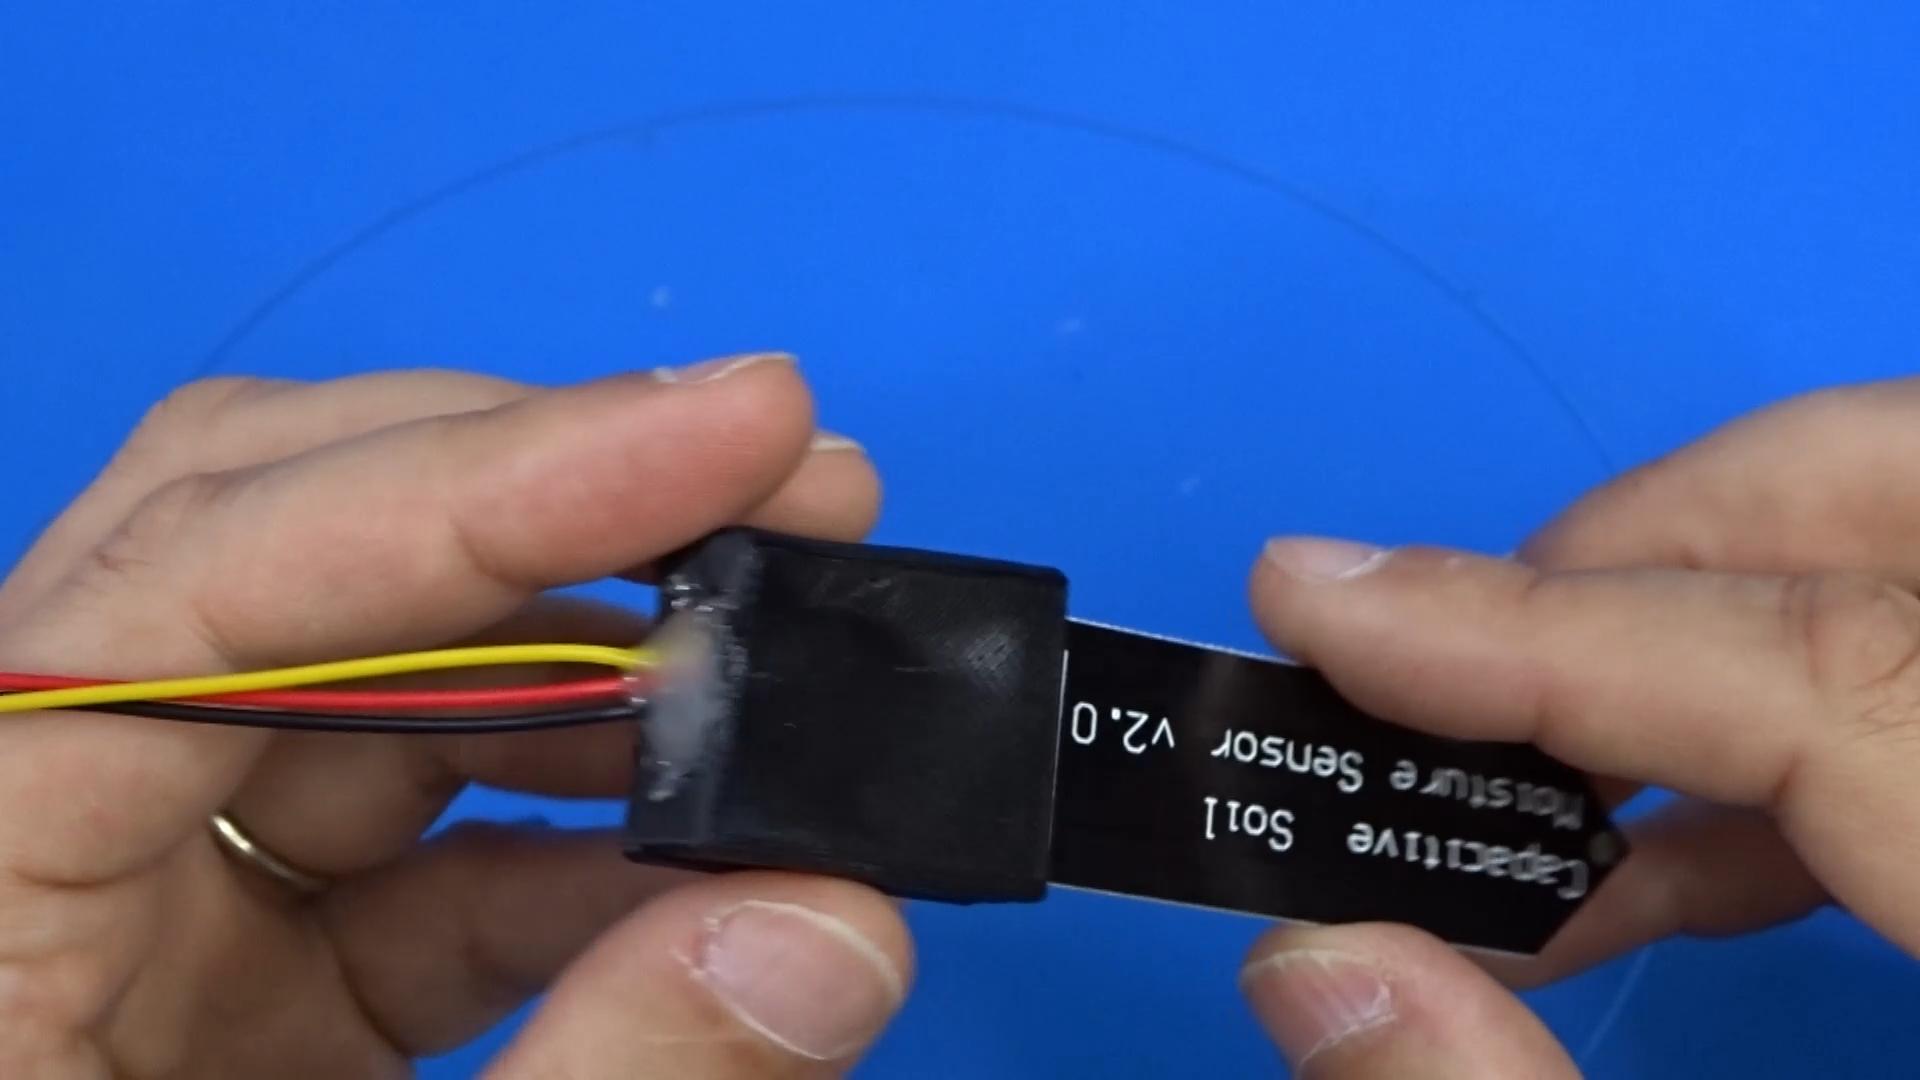
The soil moisture sensor will be placed in the soil, so it is essential to make sure it is waterproof to avoid corrosion. To achieve this:
- Apply hot glue or silicone to seal the sensor's electronic components, ensuring they don’t come into contact with the soil.
- For extra protection, place the sensor in a small 3D-printed case or plastic enclosure that you can fill with silicone to create a waterproof seal.
This will ensure that the sensor lasts and remains functional for longer periods.
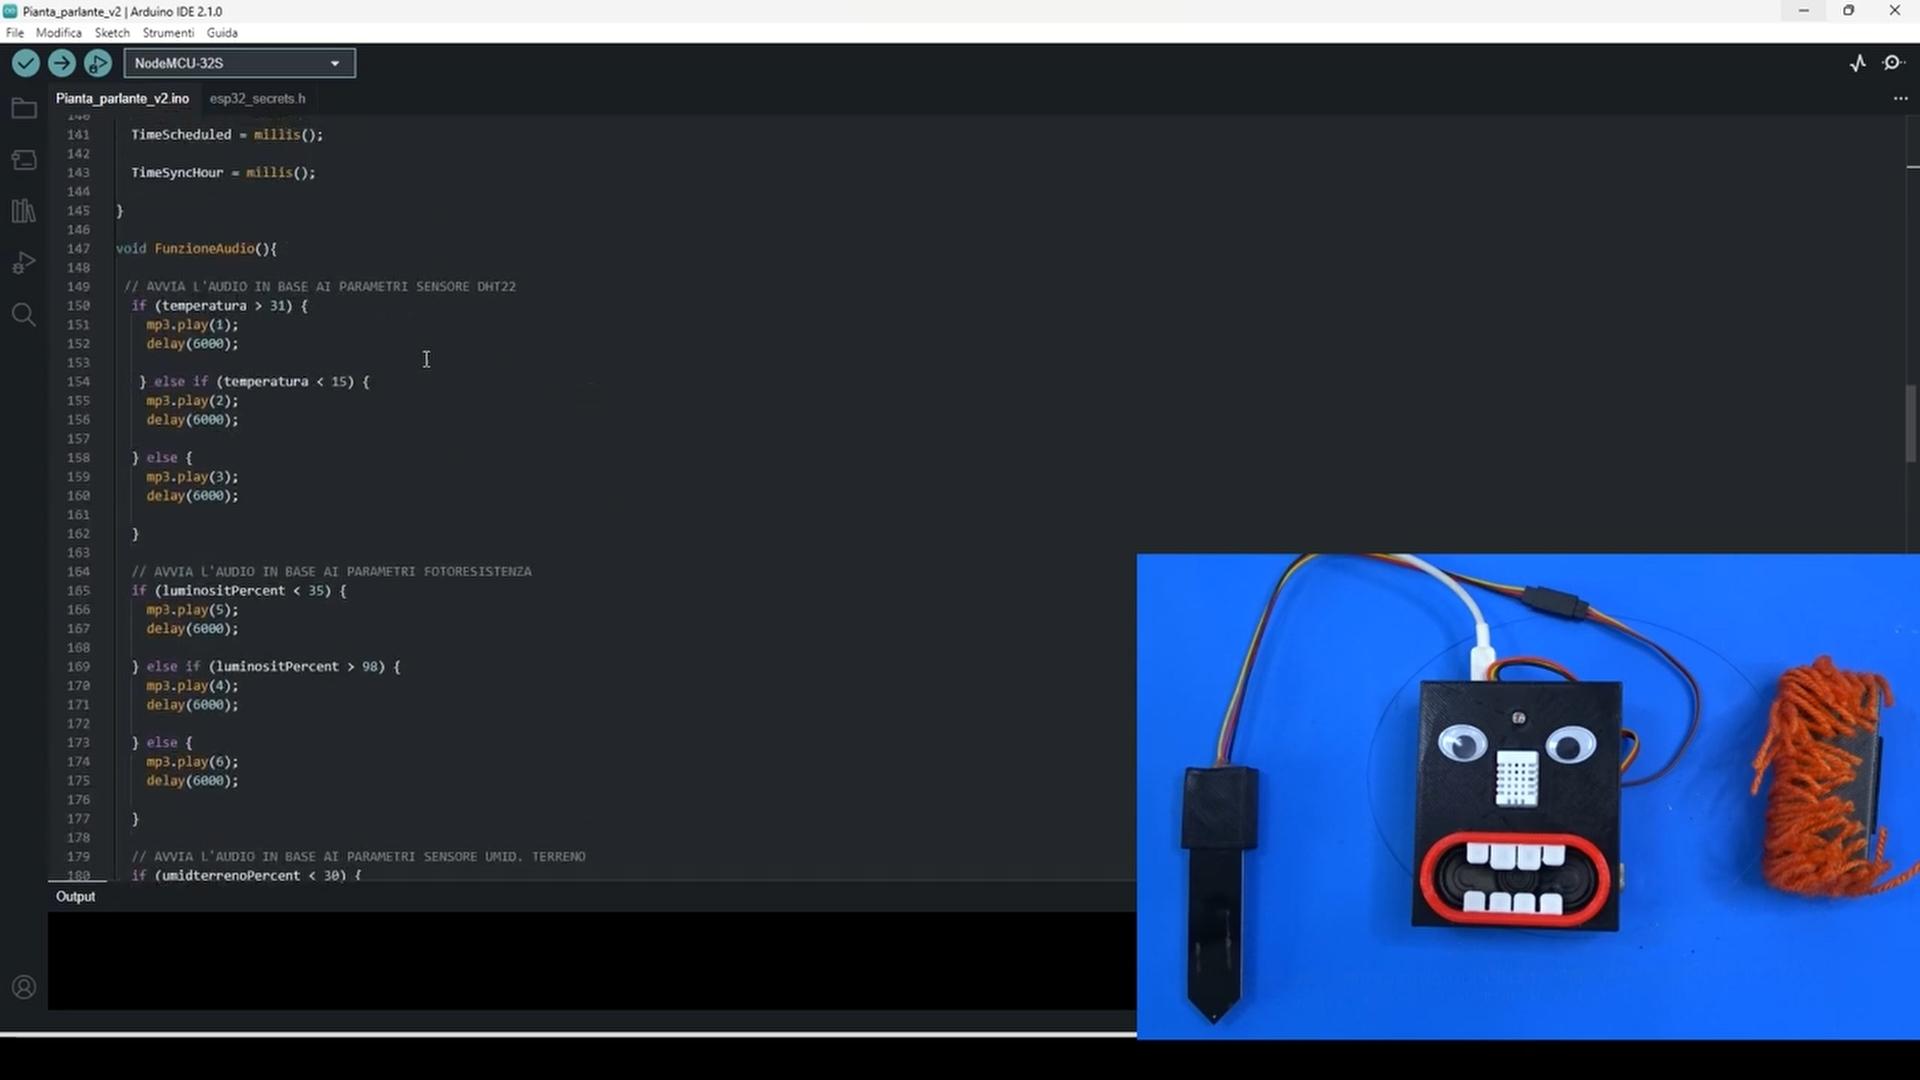
🧑💻Coding the ESP32

Now it’s time to write the code for the ESP32. This code will handle reading data from the sensors, making decisions based on that data, and triggering audio playback through the DFPlayer Mini.
Start by setting up the necessary libraries:
- DFPlayerMini_Fast for controlling the DFPlayer Mini.
- DHT for reading data from the DHT22 temperature and humidity sensor.
- SPI and TFT_eSPI for controlling the optional TFT LCD display.
The main logic of the program will involve:
- Reading data from the soil moisture sensor, temperature and humidity sensor, and photoresistor.
- Checking if any readings exceed the predefined thresholds (e.g., soil too dry, temperature too high, insufficient light).
- If any threshold is exceeded, the ESP32 will trigger the DFPlayer Mini to play a pre-recorded message like "Water me!" or "It’s too hot!"
🔊 Creating the Audio Messages

One of the most fun and creative parts of this project is recording the voice of your plant! These audio messages are played by the DFPlayer Mini when certain environmental conditions are met.
How to Create the Audio:
- Use a voice recorder app (on your smartphone or computer) to record short messages like:
- “Hey, I’m thirsty! Please water me.”
- “It’s getting really hot here…”
- “I need more sunlight!”
- “Thank you for taking care of me!”
- Save each file in MP3 format. You can also use text-to-speech tools if you prefer a robotic or cartoonish voice.
- Rename the files using the DFPlayer naming convention:
- 1.mp3 for the first message,
- 2.mp3 for the second, and so on.
- Copy all the MP3 files to a microSD card formatted as FAT32.
- Insert the microSD into the DFPlayer Mini module.
You can create different personalities for your plant by varying the voice tone, adding music or effects, or even recording in different languages!
🔧Assembling the Electronics

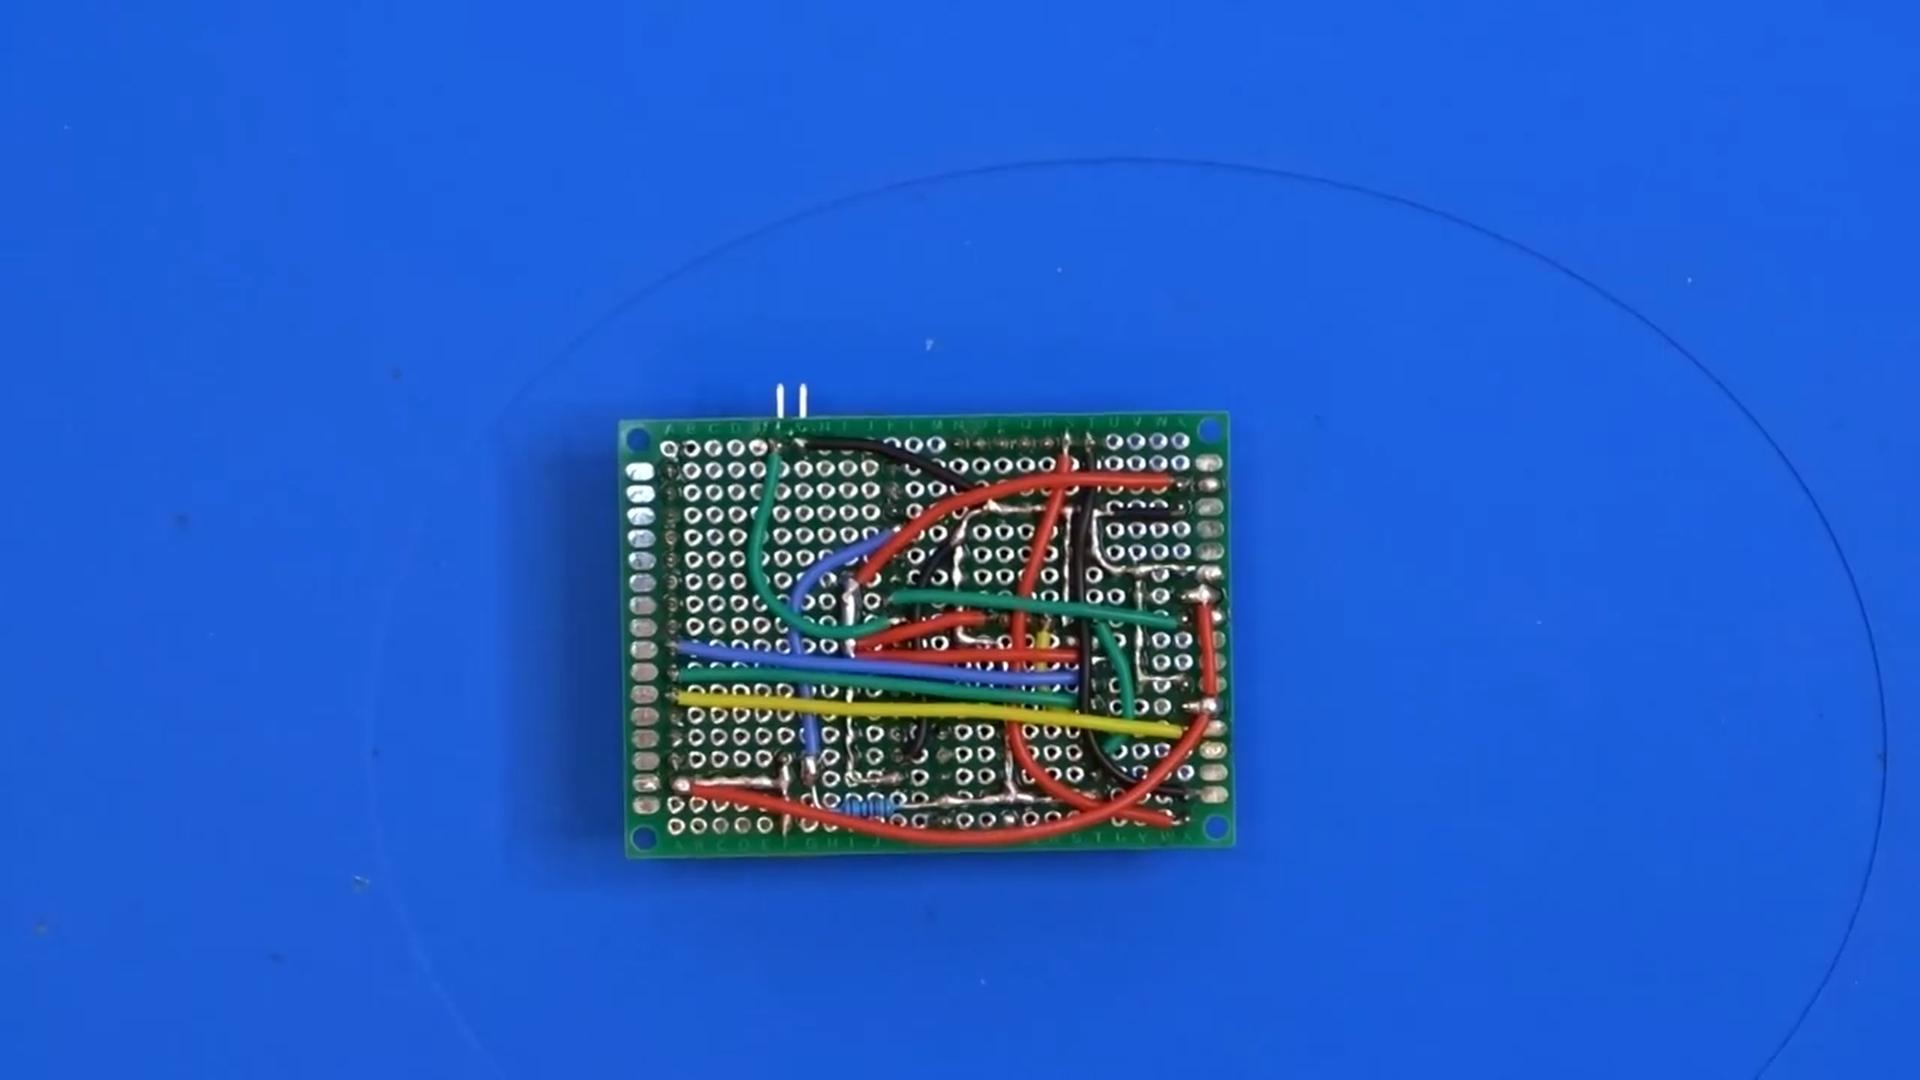
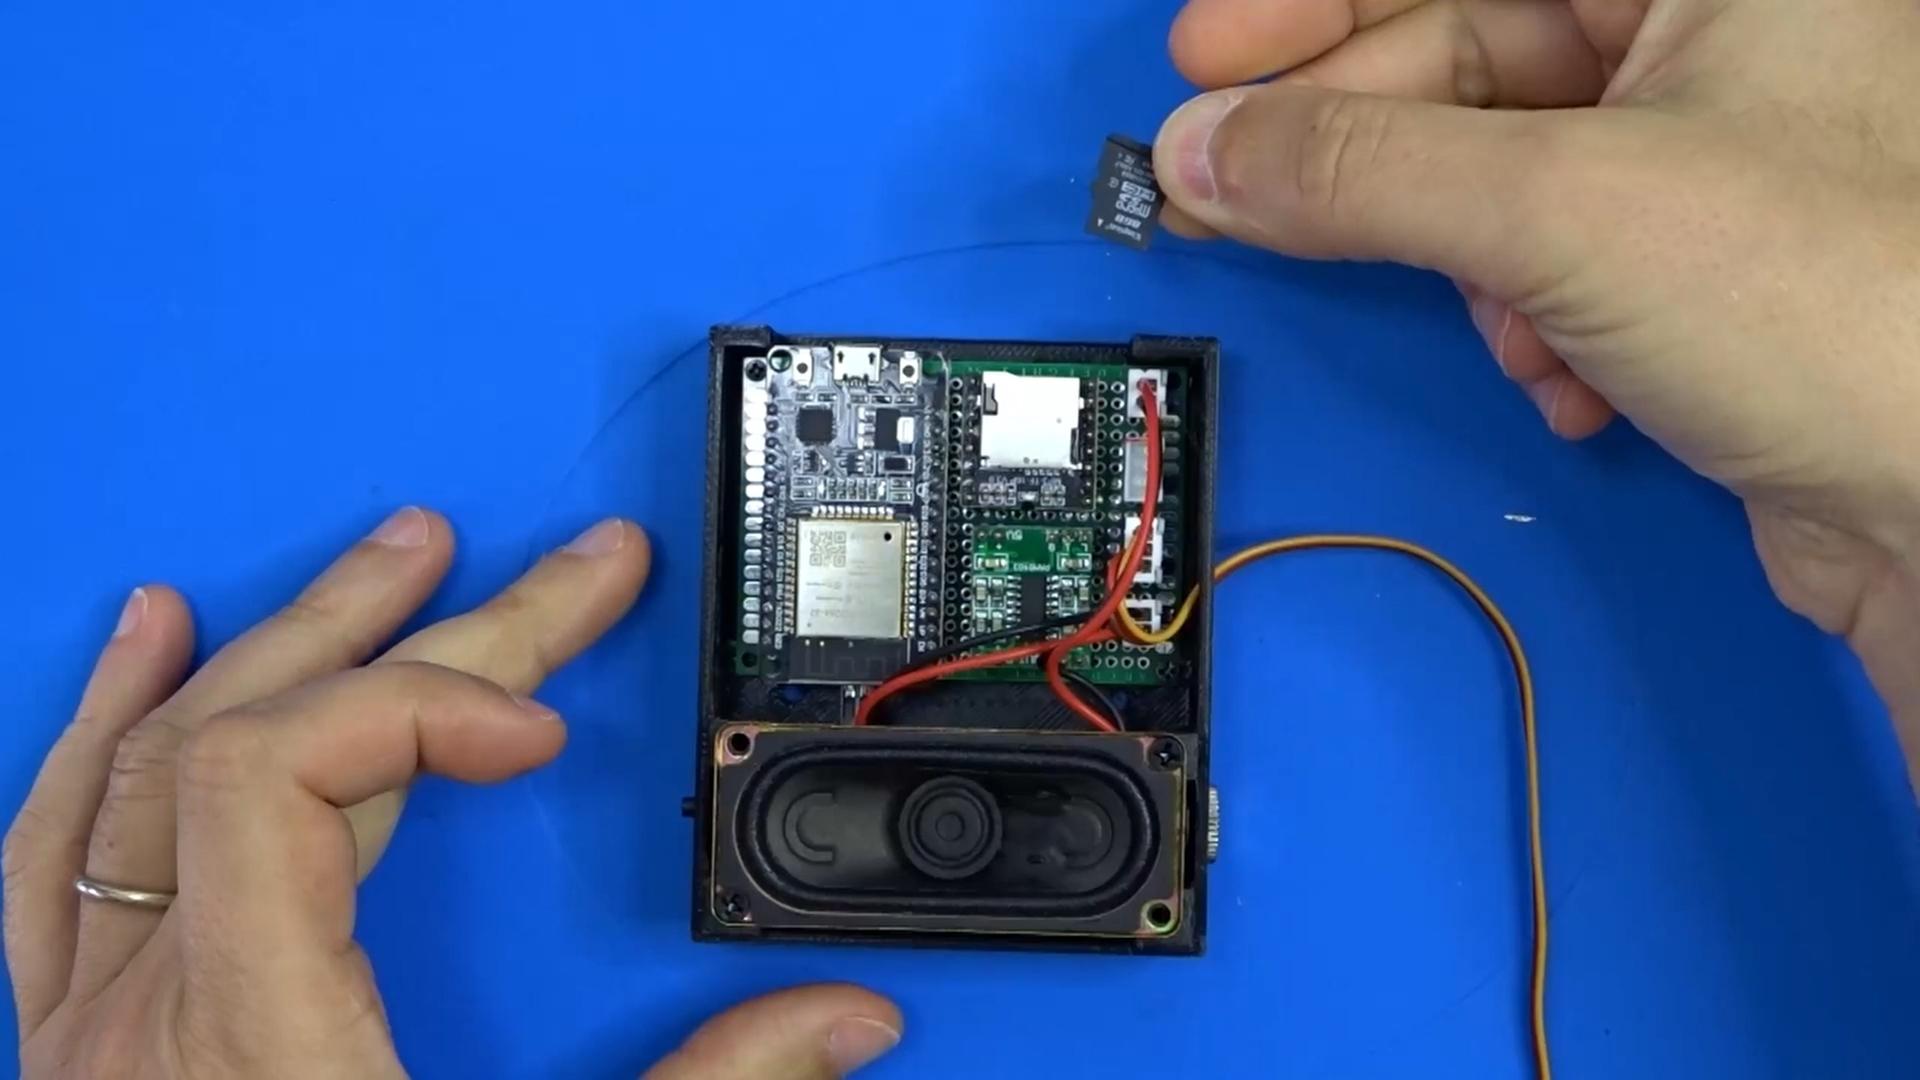

In this step, we install all the electronic components inside the 3D printed enclosure. We start by preparing a perforated board where we mount the ESP32, DFPlayer Mini, and the amplifier. These are positioned and soldered with attention to alignment and orientation.
We then add connectors for all sensors (DHT22, soil moisture, photoresistor), the speaker, and power supply. The wiring must be tidy because of the limited internal space.
Once everything is in place, we screw the board inside the case and begin connecting each sensor and module to its respective position. Each component is secured with small screws or hot glue, where needed.
Finally, we route and tidy the cables, preparing everything for final closure of the case.
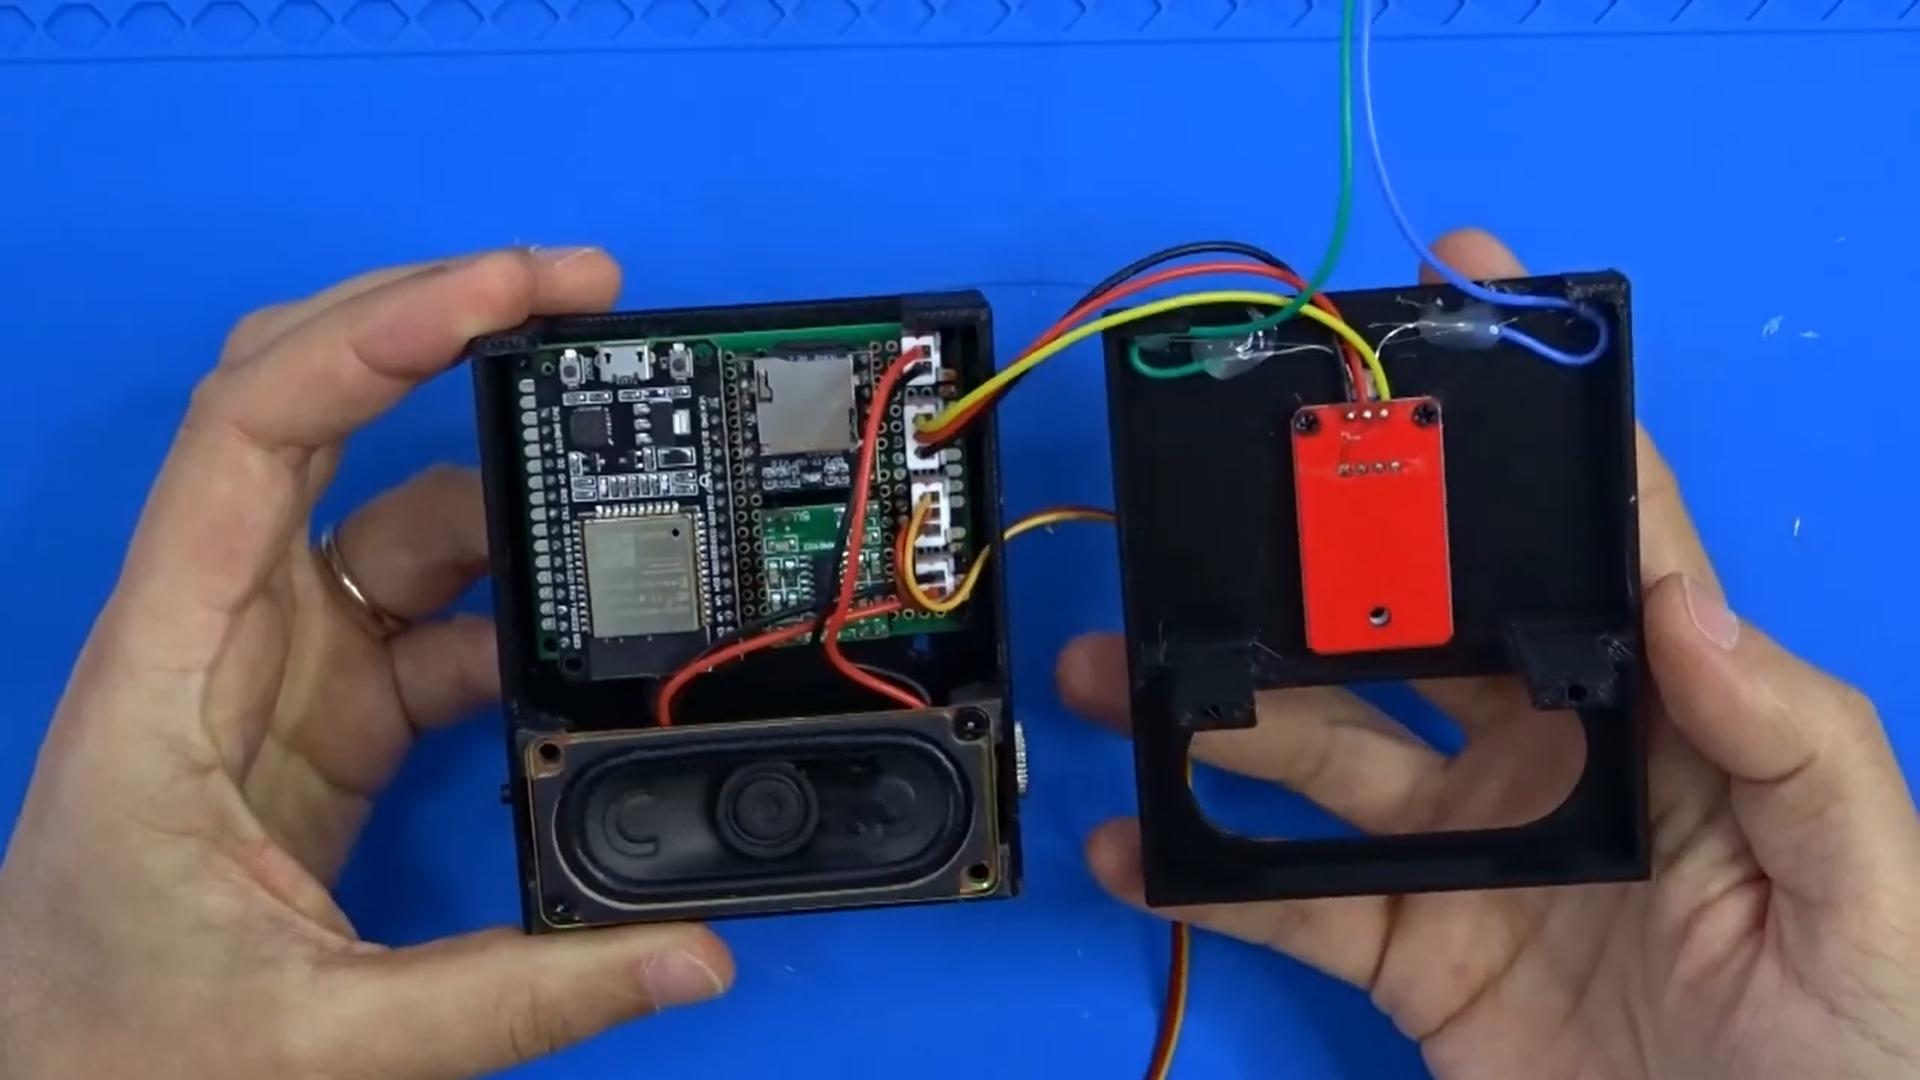
🟨Final Assembly and Decoration

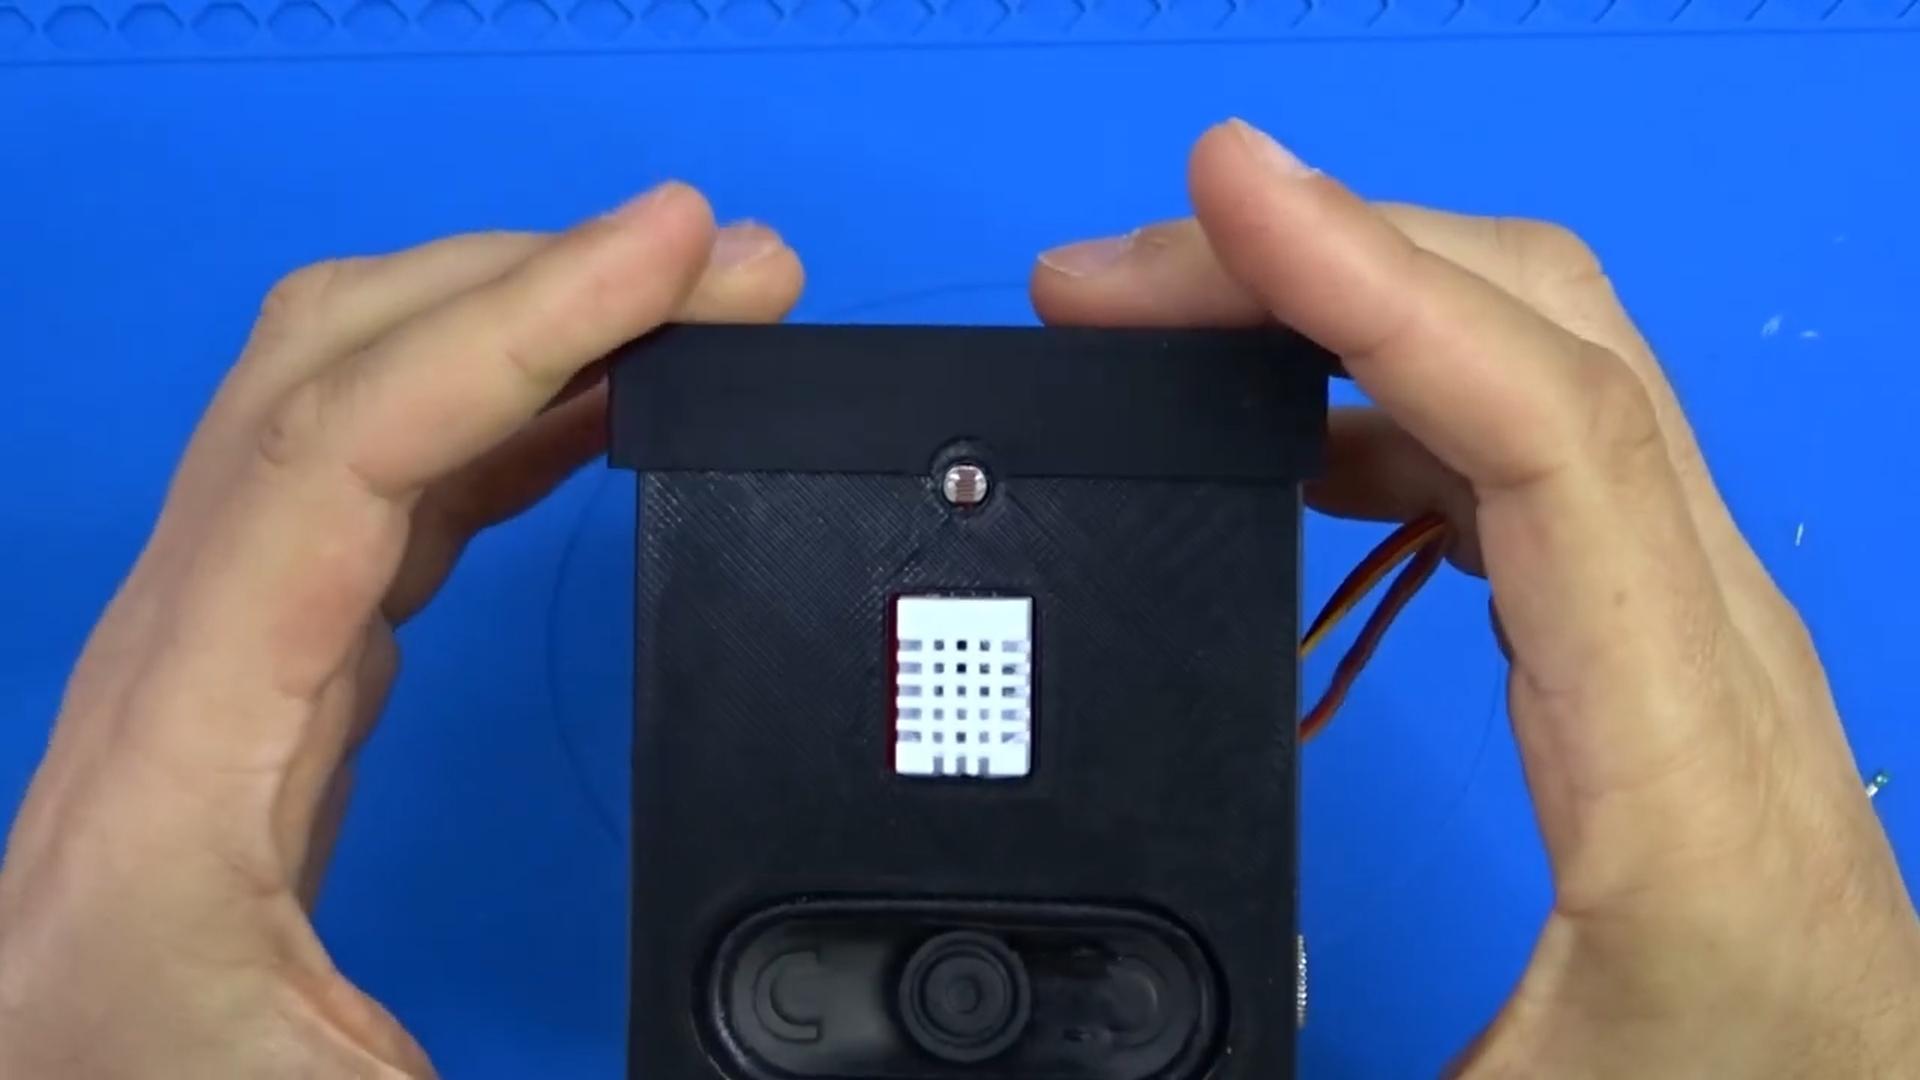
After completing all connections and uploading the final code, it’s time to close the enclosure and add some fun decorations to give your project character.
Carefully place the top part of the 3D-printed box, aligning it with the photoresistor cut-out. Optionally, use screws to secure the lid if you want a tighter fit.
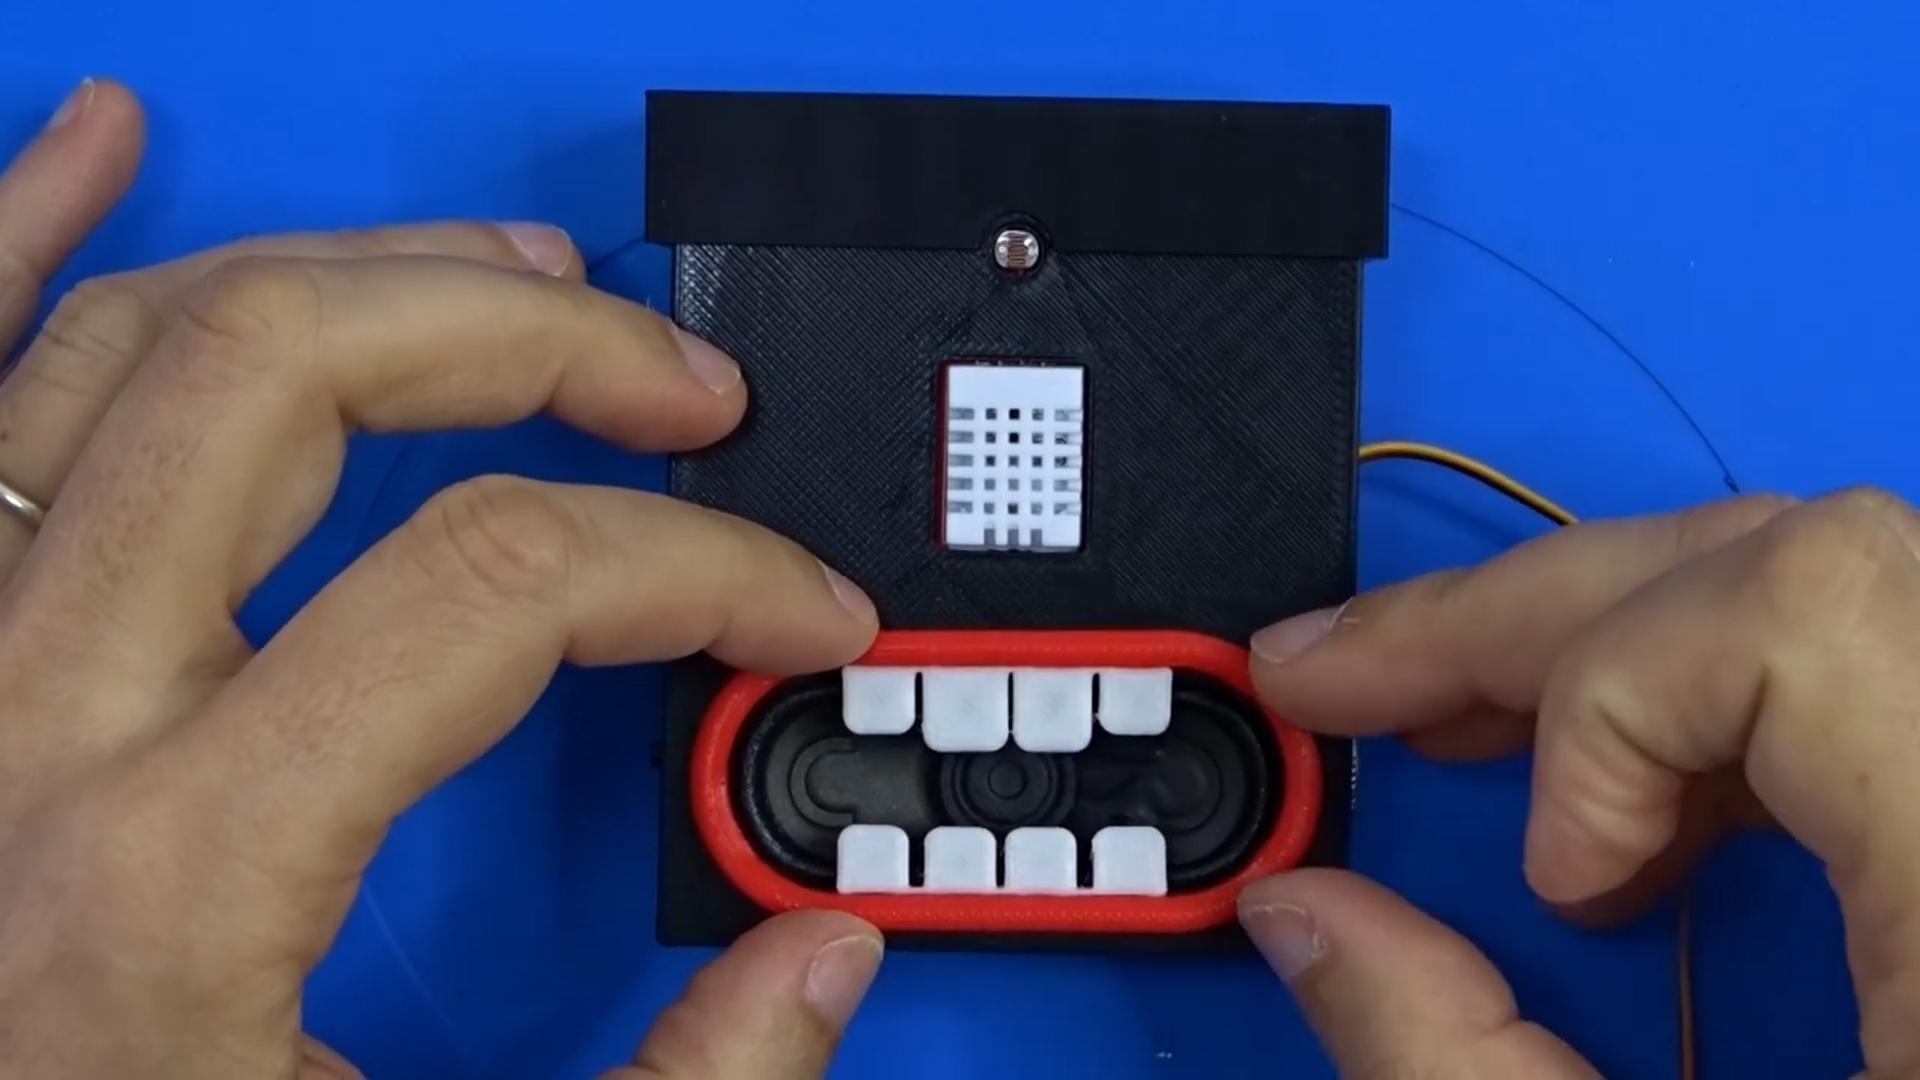
You can now add personality to your plant! I glued on some plastic teeth to the mouth, added sticker eyes, and used yarn to simulate hair. This step is totally up to you—have fun and be creative!
Lastly, I attached my logo using a bit of super glue, but feel free to customize it your way.
🟨Upload Software and Final Testing
🧪 Let’s bring it to life! Time to load the firmware and check if your plant can talk!
Connect the ESP32 board to your computer using a USB cable. Open the Arduino IDE, load the updated sketch (Version 2), and upload it to your board. Make sure all the libraries are correctly installed and that your board and port are selected.
⚠️ If your ESP32 is an older model, you might need to press the BOOT button during upload to avoid errors.
Once the code is uploaded, disconnect the USB cable and power the board using the external power jack. Then press the RESET button to make sure everything initializes correctly.
At this point, your smart plant should be fully functional! Press the button on the case to hear it speak and report the current temperature, light level, and soil humidity.
You can also access its data via browser from the address http://pianta.local within your home network. Refresh the page to see real-time values.
🧾Final Installation and Considerations


🪴 Mounting the Device
Now that everything is assembled and the software is working correctly, it’s time to install your Talking Plant near your real plant and wrap up the build.
You can place the Talking Plant in two ways:
- Beside the pot – using double-sided tape or just standing it on a flat surface
- On the pot itself – by removing the protective layer from the adhesive and sticking the back of the box to the side of the pot
✅ Final Checks
Make sure the light sensor (LDR) is exposed and not covered by anything
Insert the soil moisture sensor into the soil, without exceeding the max line
Plug in the power supply
Hold the button to hear a full status report (temperature, light, soil moisture)
Optionally, access the plant’s web page by typing pianta.local in your browser (within your home network)
In summary, the Talking Plant project is a great technological solution for monitoring plant health, easy to build and customize. It combines practicality and innovation, and can be expanded with new features.
Thank you for following the tutorial, and see you next time!