Taylor Swift's Lover House Musical Touch Painting
by kellechu in Circuits > Microcontrollers
576 Views, 4 Favorites, 0 Comments
Taylor Swift's Lover House Musical Touch Painting
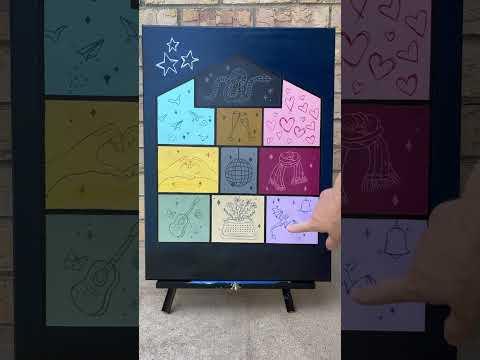


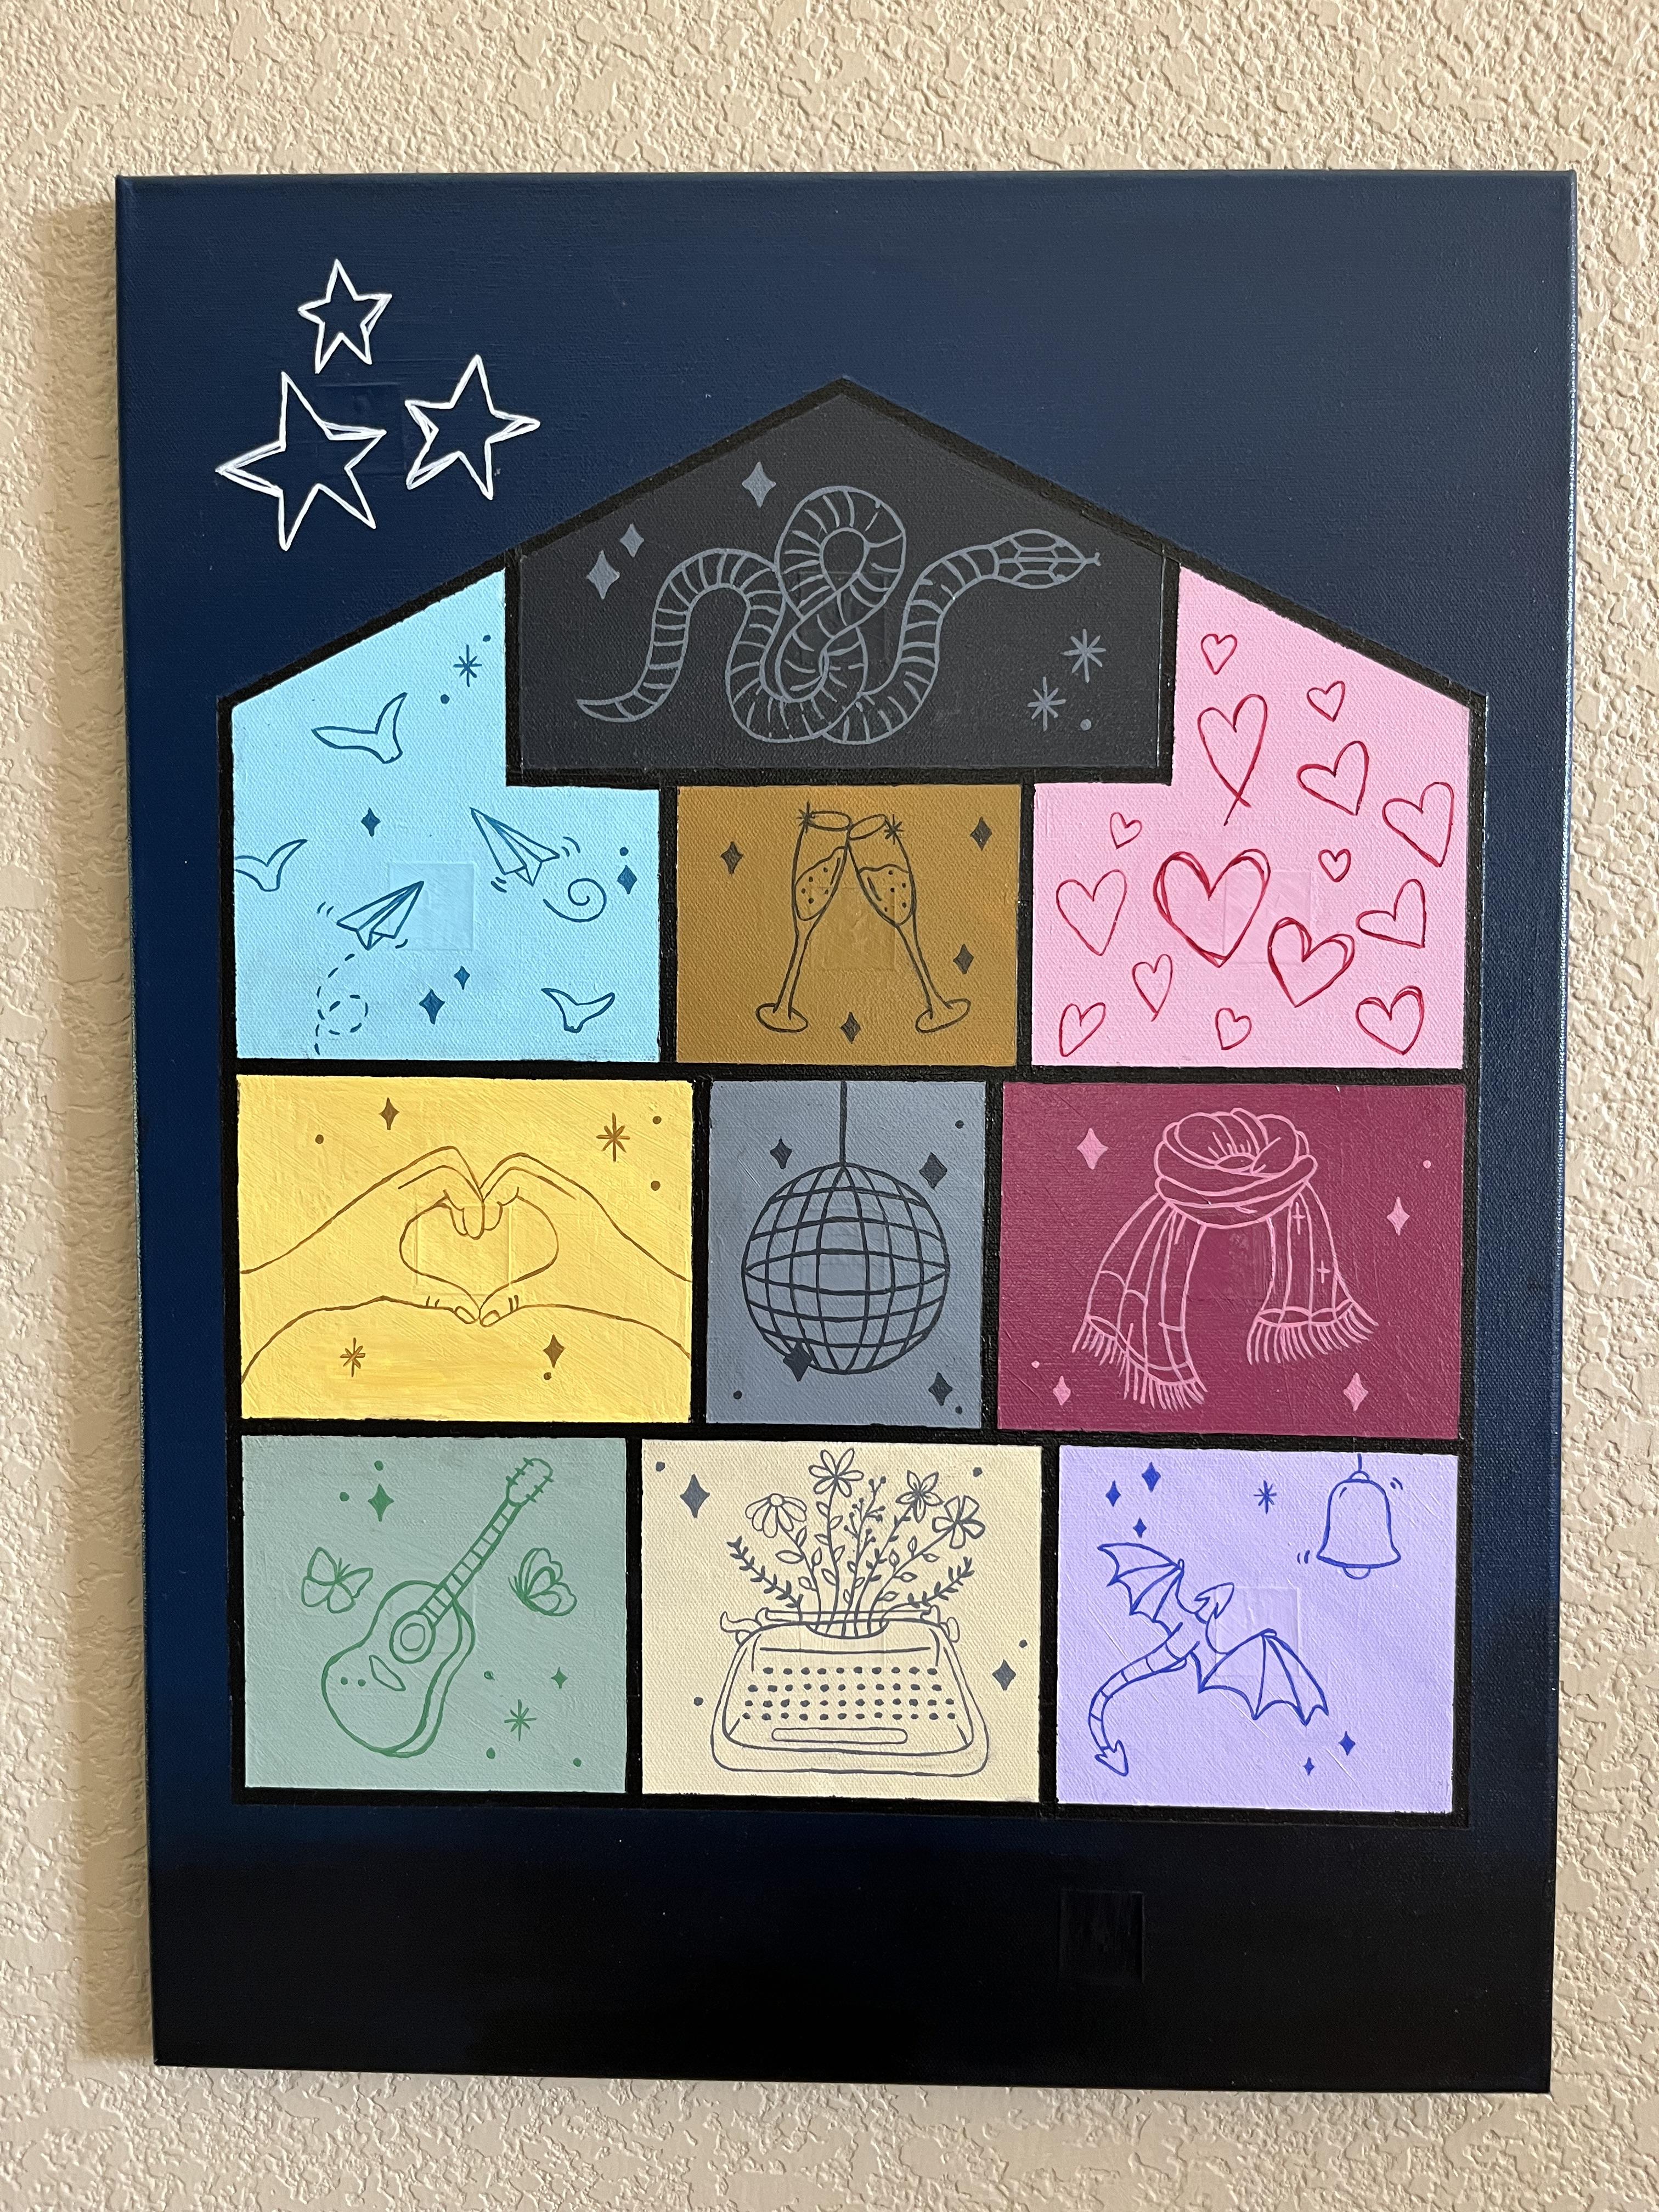
What is Taylor Swift's Lover House and why did I make it into a musical painting that sings tracks from her albums when you press the center of each room (and one hidden easter egg spot)?
The Lover House comes from the video of the song "Lover", and it is a home inside a snow globe gifted to a child for Christmas. The theory is that the couple (the Lovers) gave their child this snow globe as a representation of their love story from the beginning until now. But the lover's house visual has also been interpreted as the singer gifting her fans a house that chronicles her career from her debut album, Taylor Swift, up to Midnights or The Tortured Poets Department (it was my choice to include TTPD as the entryway even though it isn't canon). Hence, the different rooms in the house are the locations of her different albums and, as such, I made each room play a song from the album that it represents. I also made a hidden easter egg spot for her Christmas album, located in the bottom right of the painting.
Why did I make this musical painting? I had an unused touch board lying around and I decided to make a portable sound project to present at an upcoming girls exploring STEM (GESTEM) conference put on by the Society of Women Engineers every May. I am always looking for ways to spark the desire for young girls to pursue an education in STEM. The best way to do that is to make projects relatable--something that they have a connection with or an interest in. Robotics seems to be the default "introduction" for getting kids interested in STEM fields, but not everybody is interested in bashing robots together in battles. Sometimes the artistic or softer side of STEM (like this prom dress I made for my oldest daughter) is a great way to showcase electronics/microcontrollers that girls can see themselves really getting into.
I could have picked any musical genre or artist to spotlight. I happen to like Taylor Swift and she already had a great visual to showcase her songs in a fun simple way! This project also needs no soldering, which is a barrier when creating projects that can be done by children, and I want them to see themselves creating these projects.
Each light touch at the center of the rooms will trigger the touch board to play an MP3 track through a speaker. For the demonstration, I kept the clips of Taylor's music short and brief but still recognizable (to Swifties at least). I didn't want to run into copyright issues playing full tracks of her music in public. Of course, when you load on your own MP3s, you can listen to full tracks of songs on the micro SD card.
Supplies


Stretched Artist Canvas
Portable Headphone Jack Speaker
Acrylic Paints
Push Pin or Sharp Needle
Painter's Tape
Velcro Squares
Load Your Songs Onto the Micro SD Card
You can easily change the sounds on the Touch Board. The audio files are stored on the micro SD card. To change the sounds:
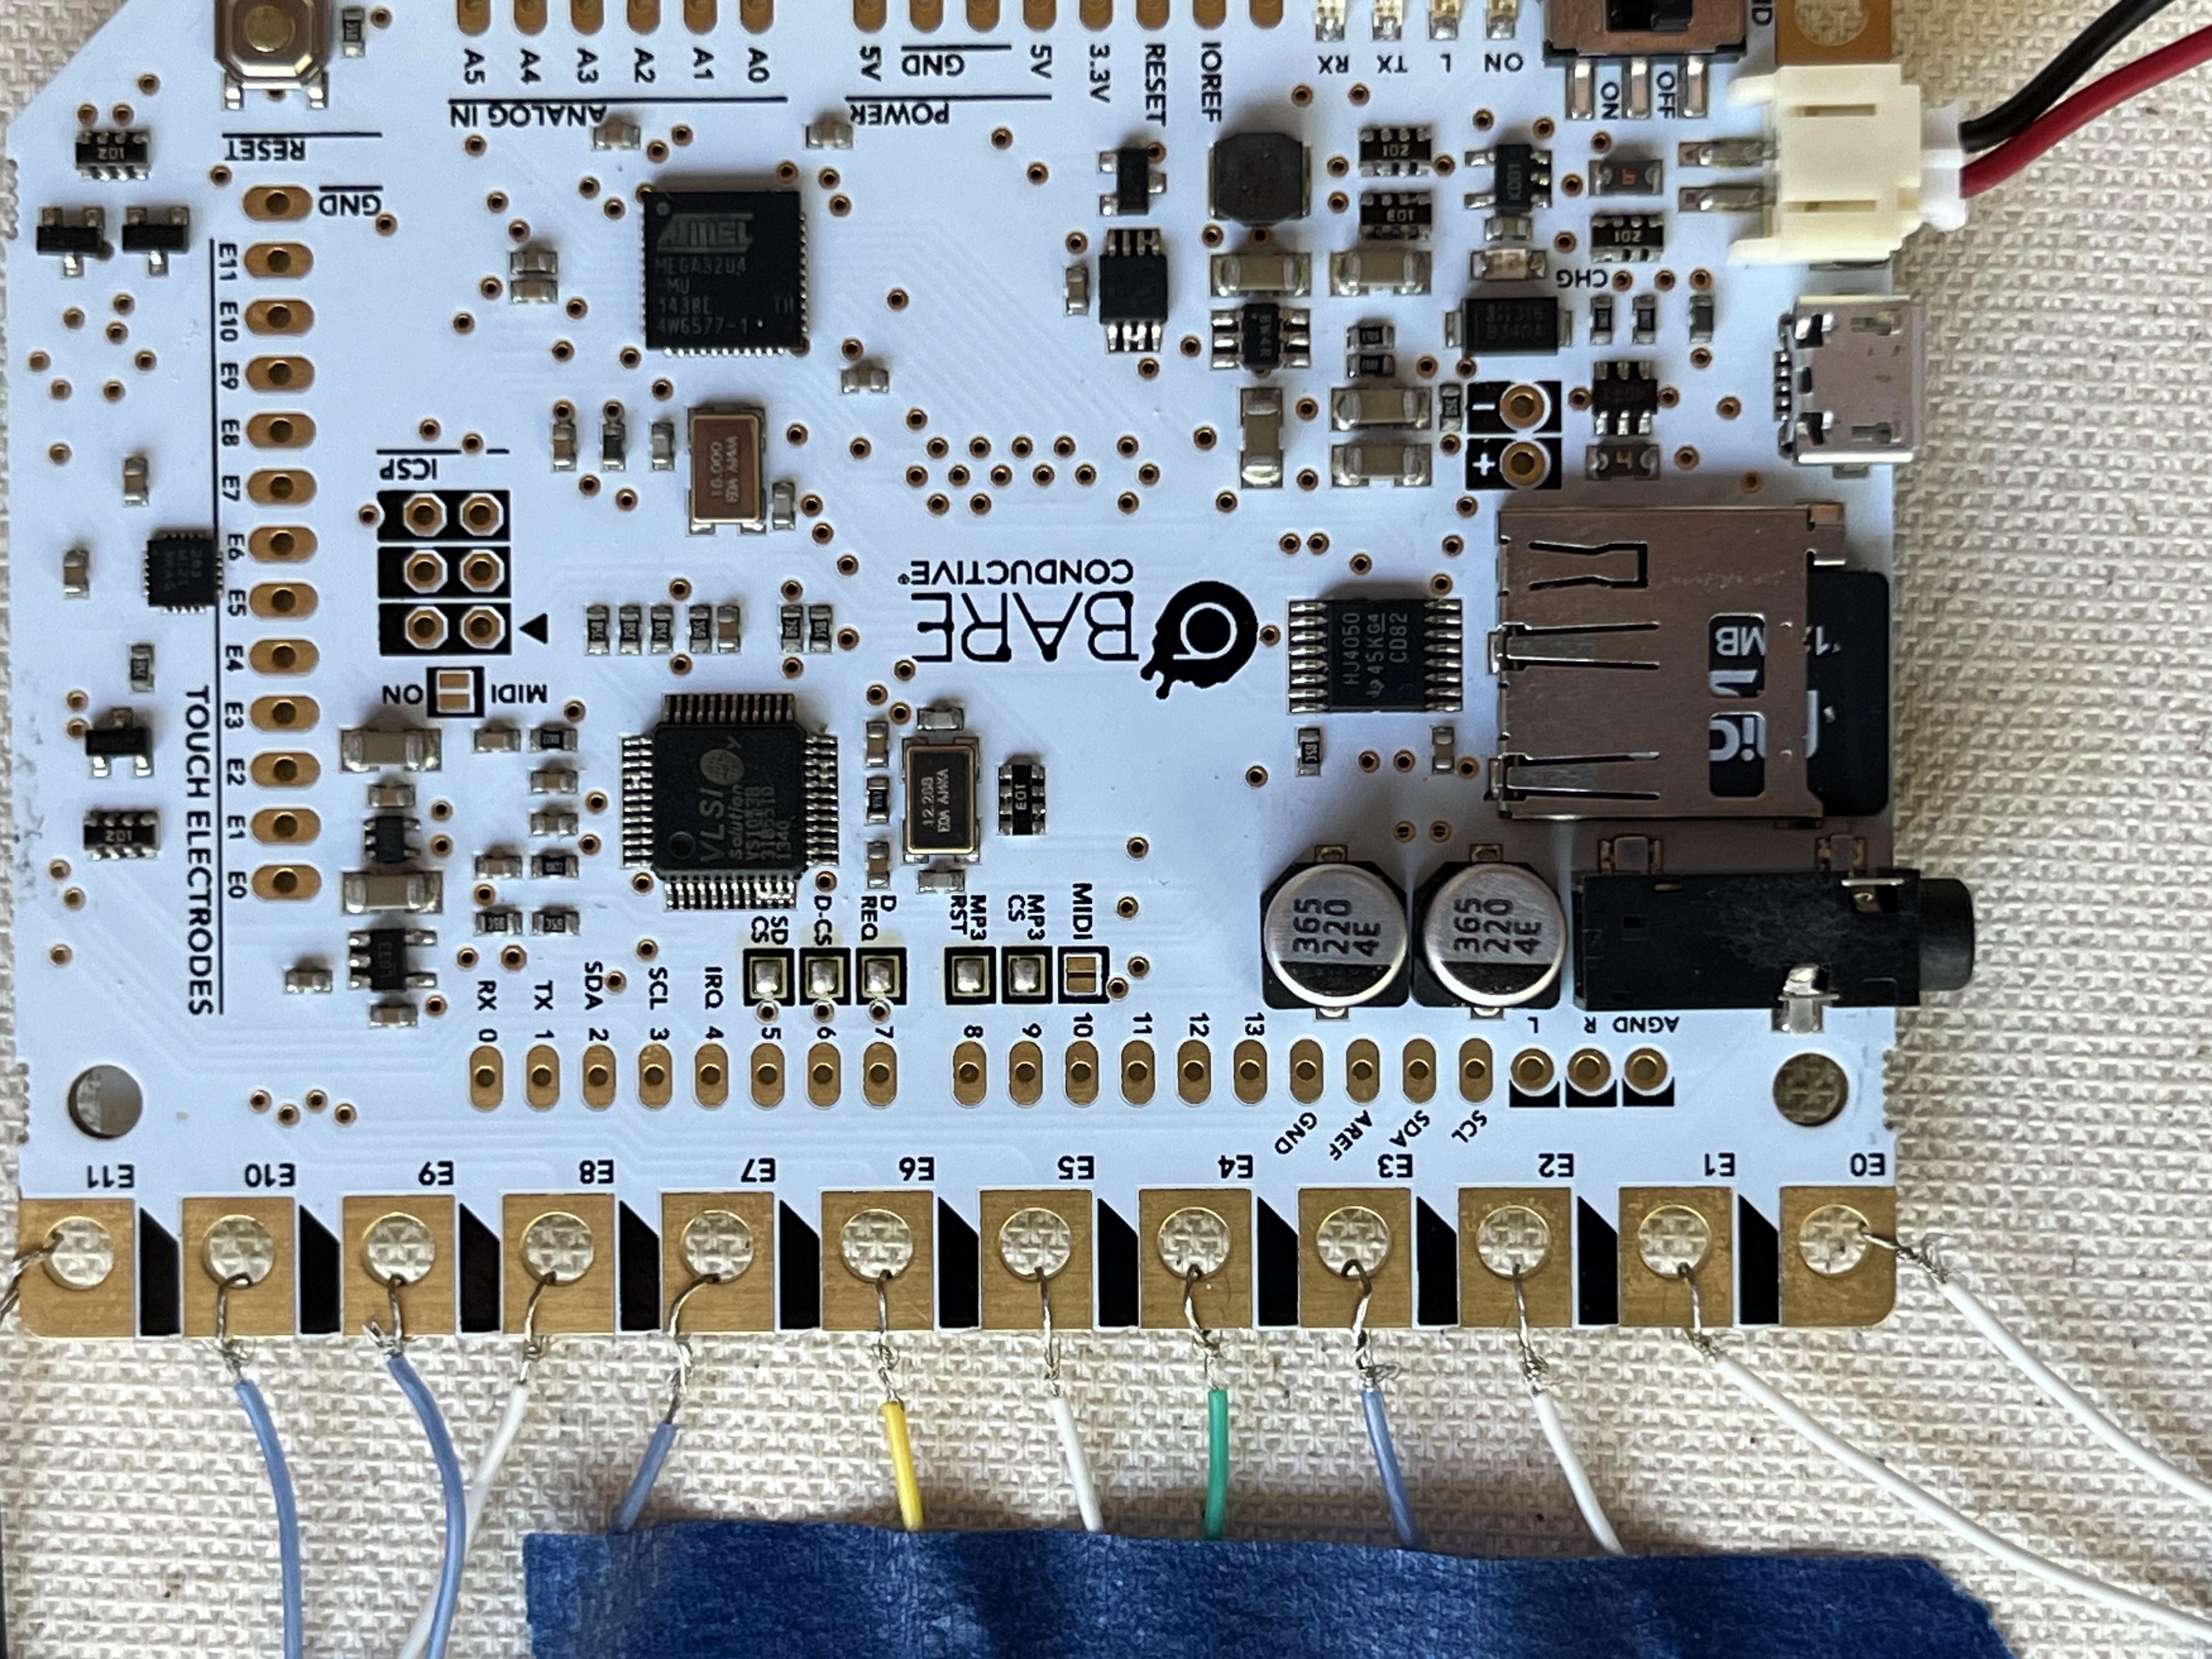
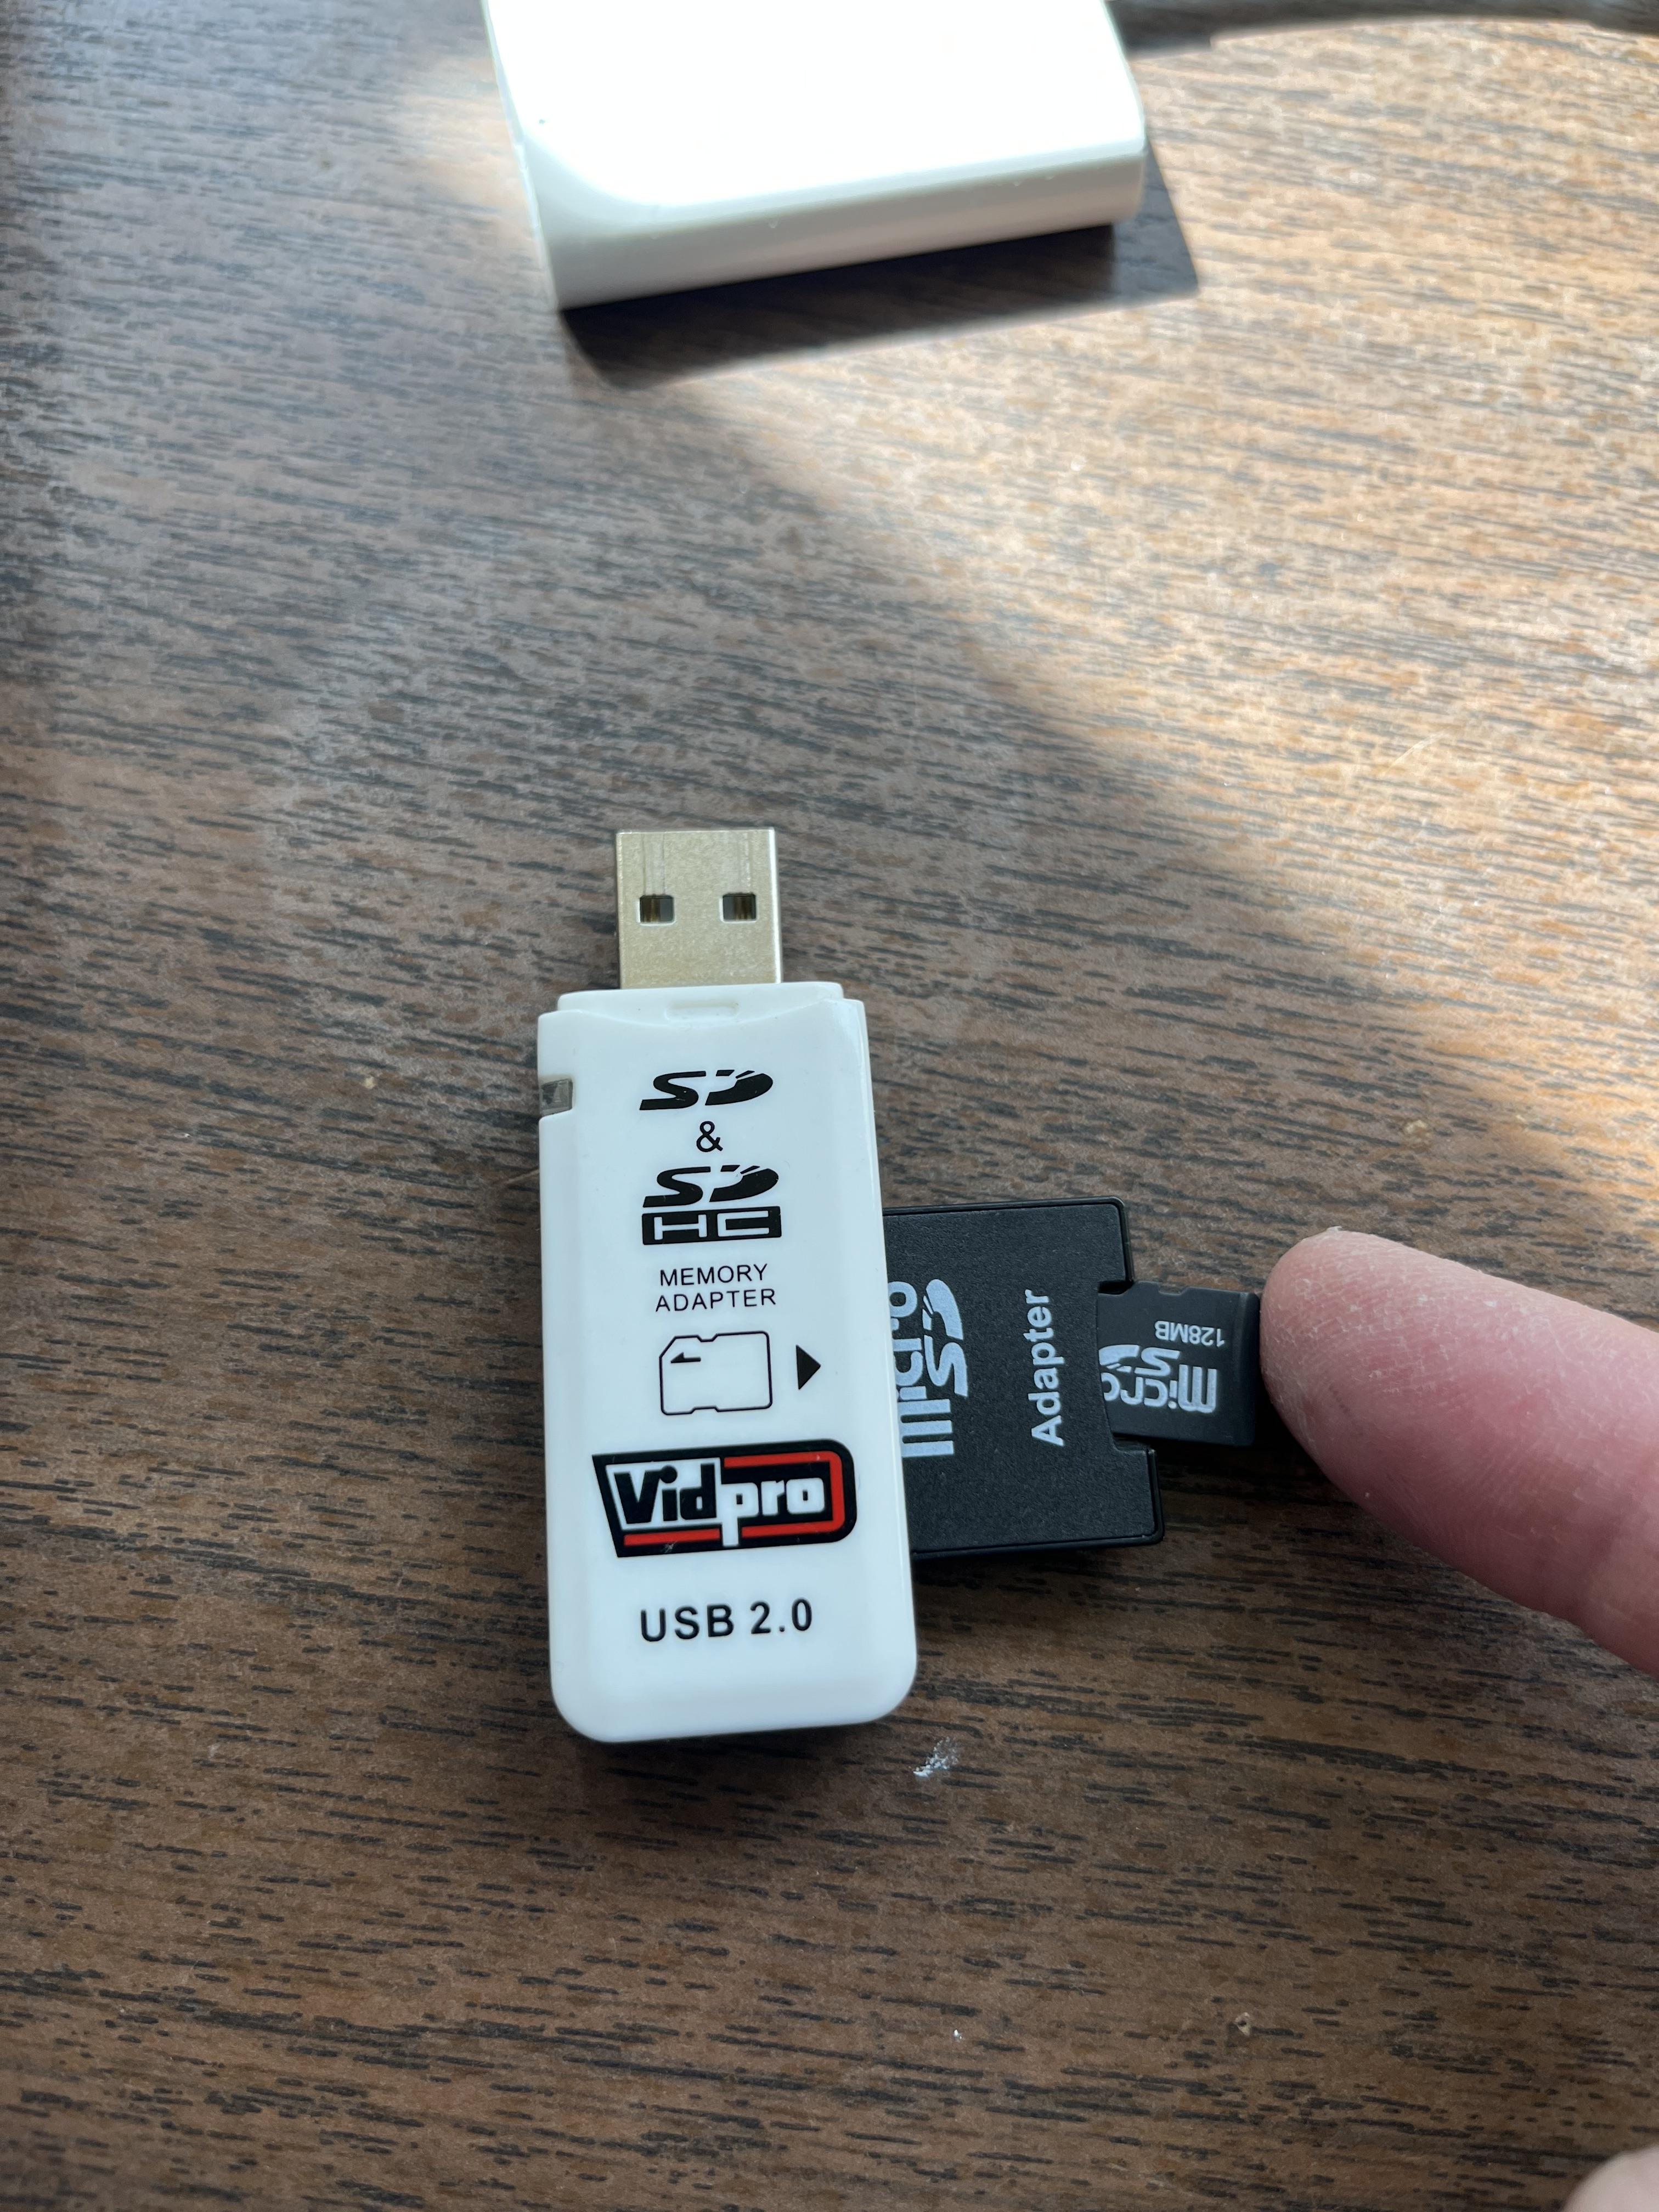
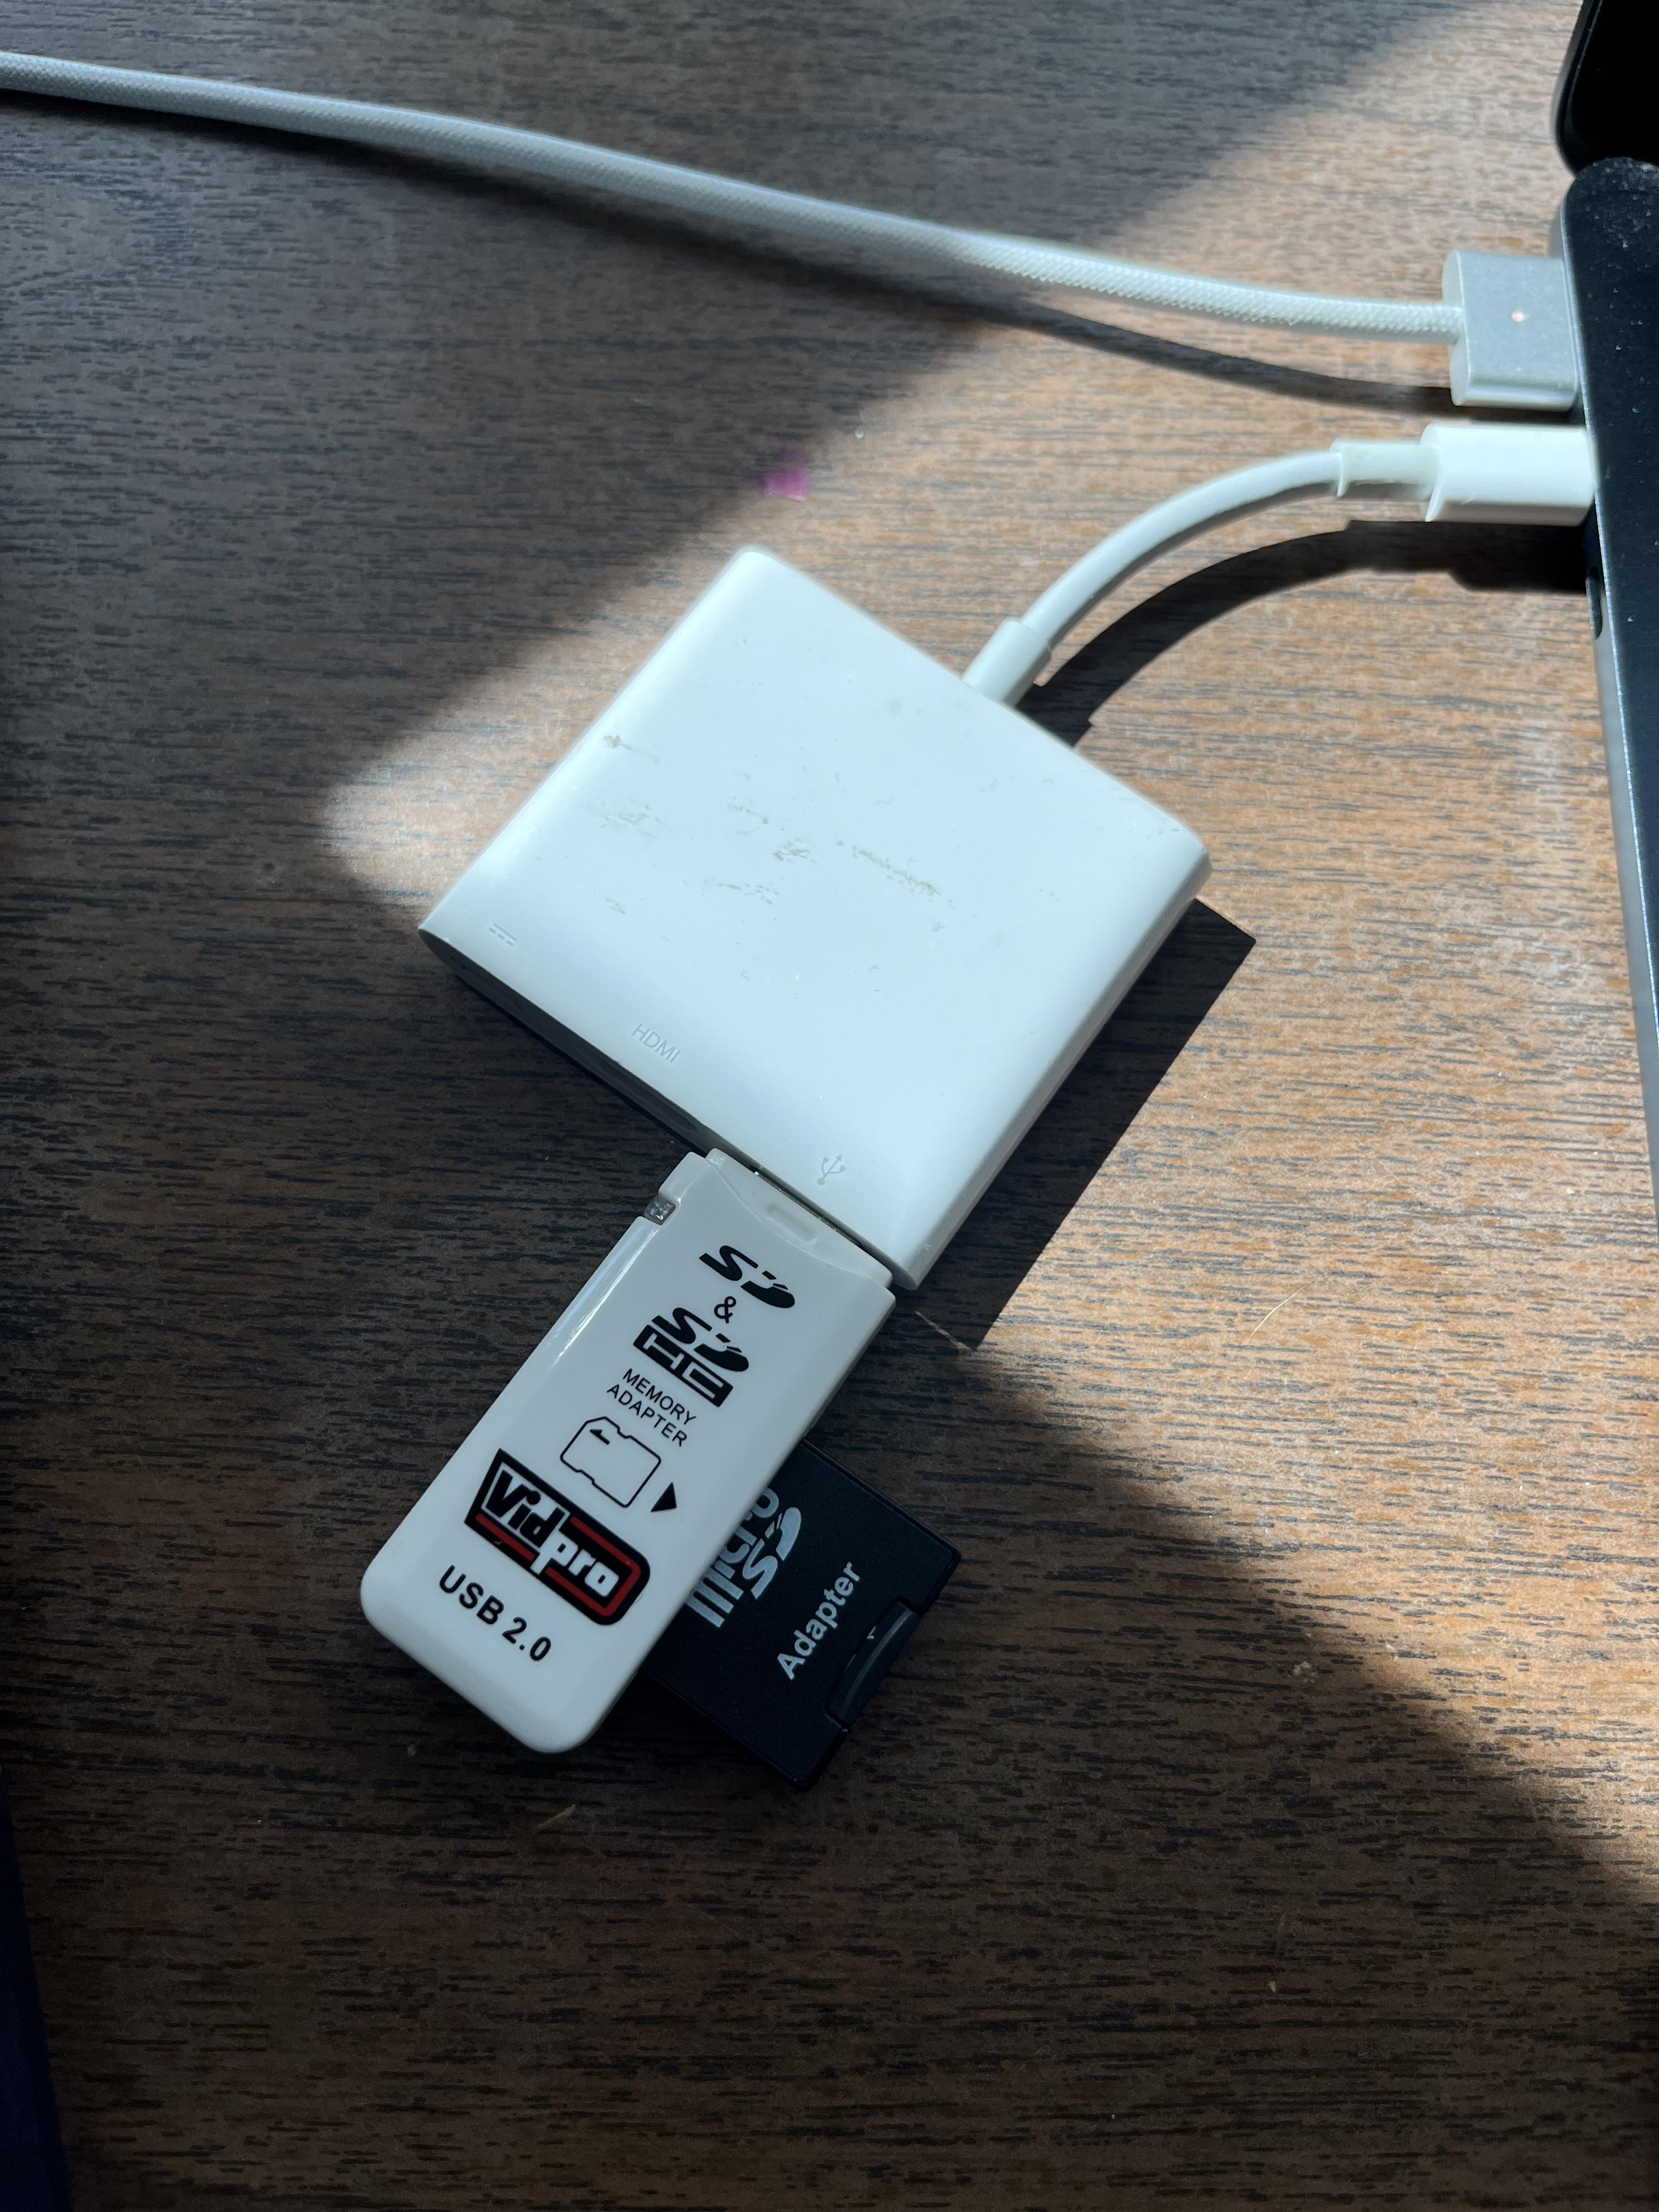
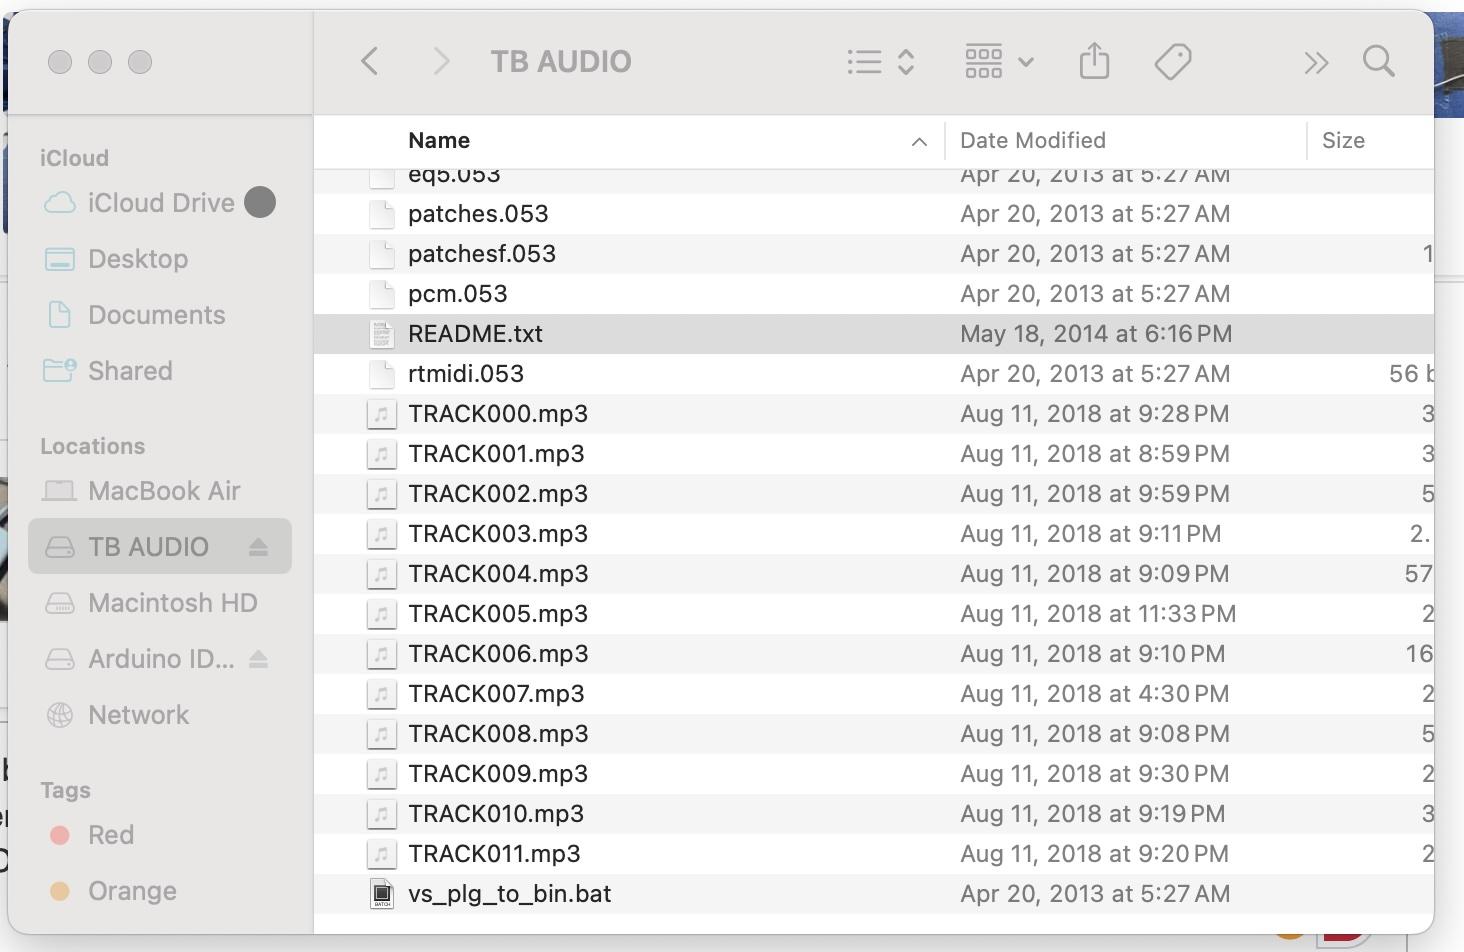
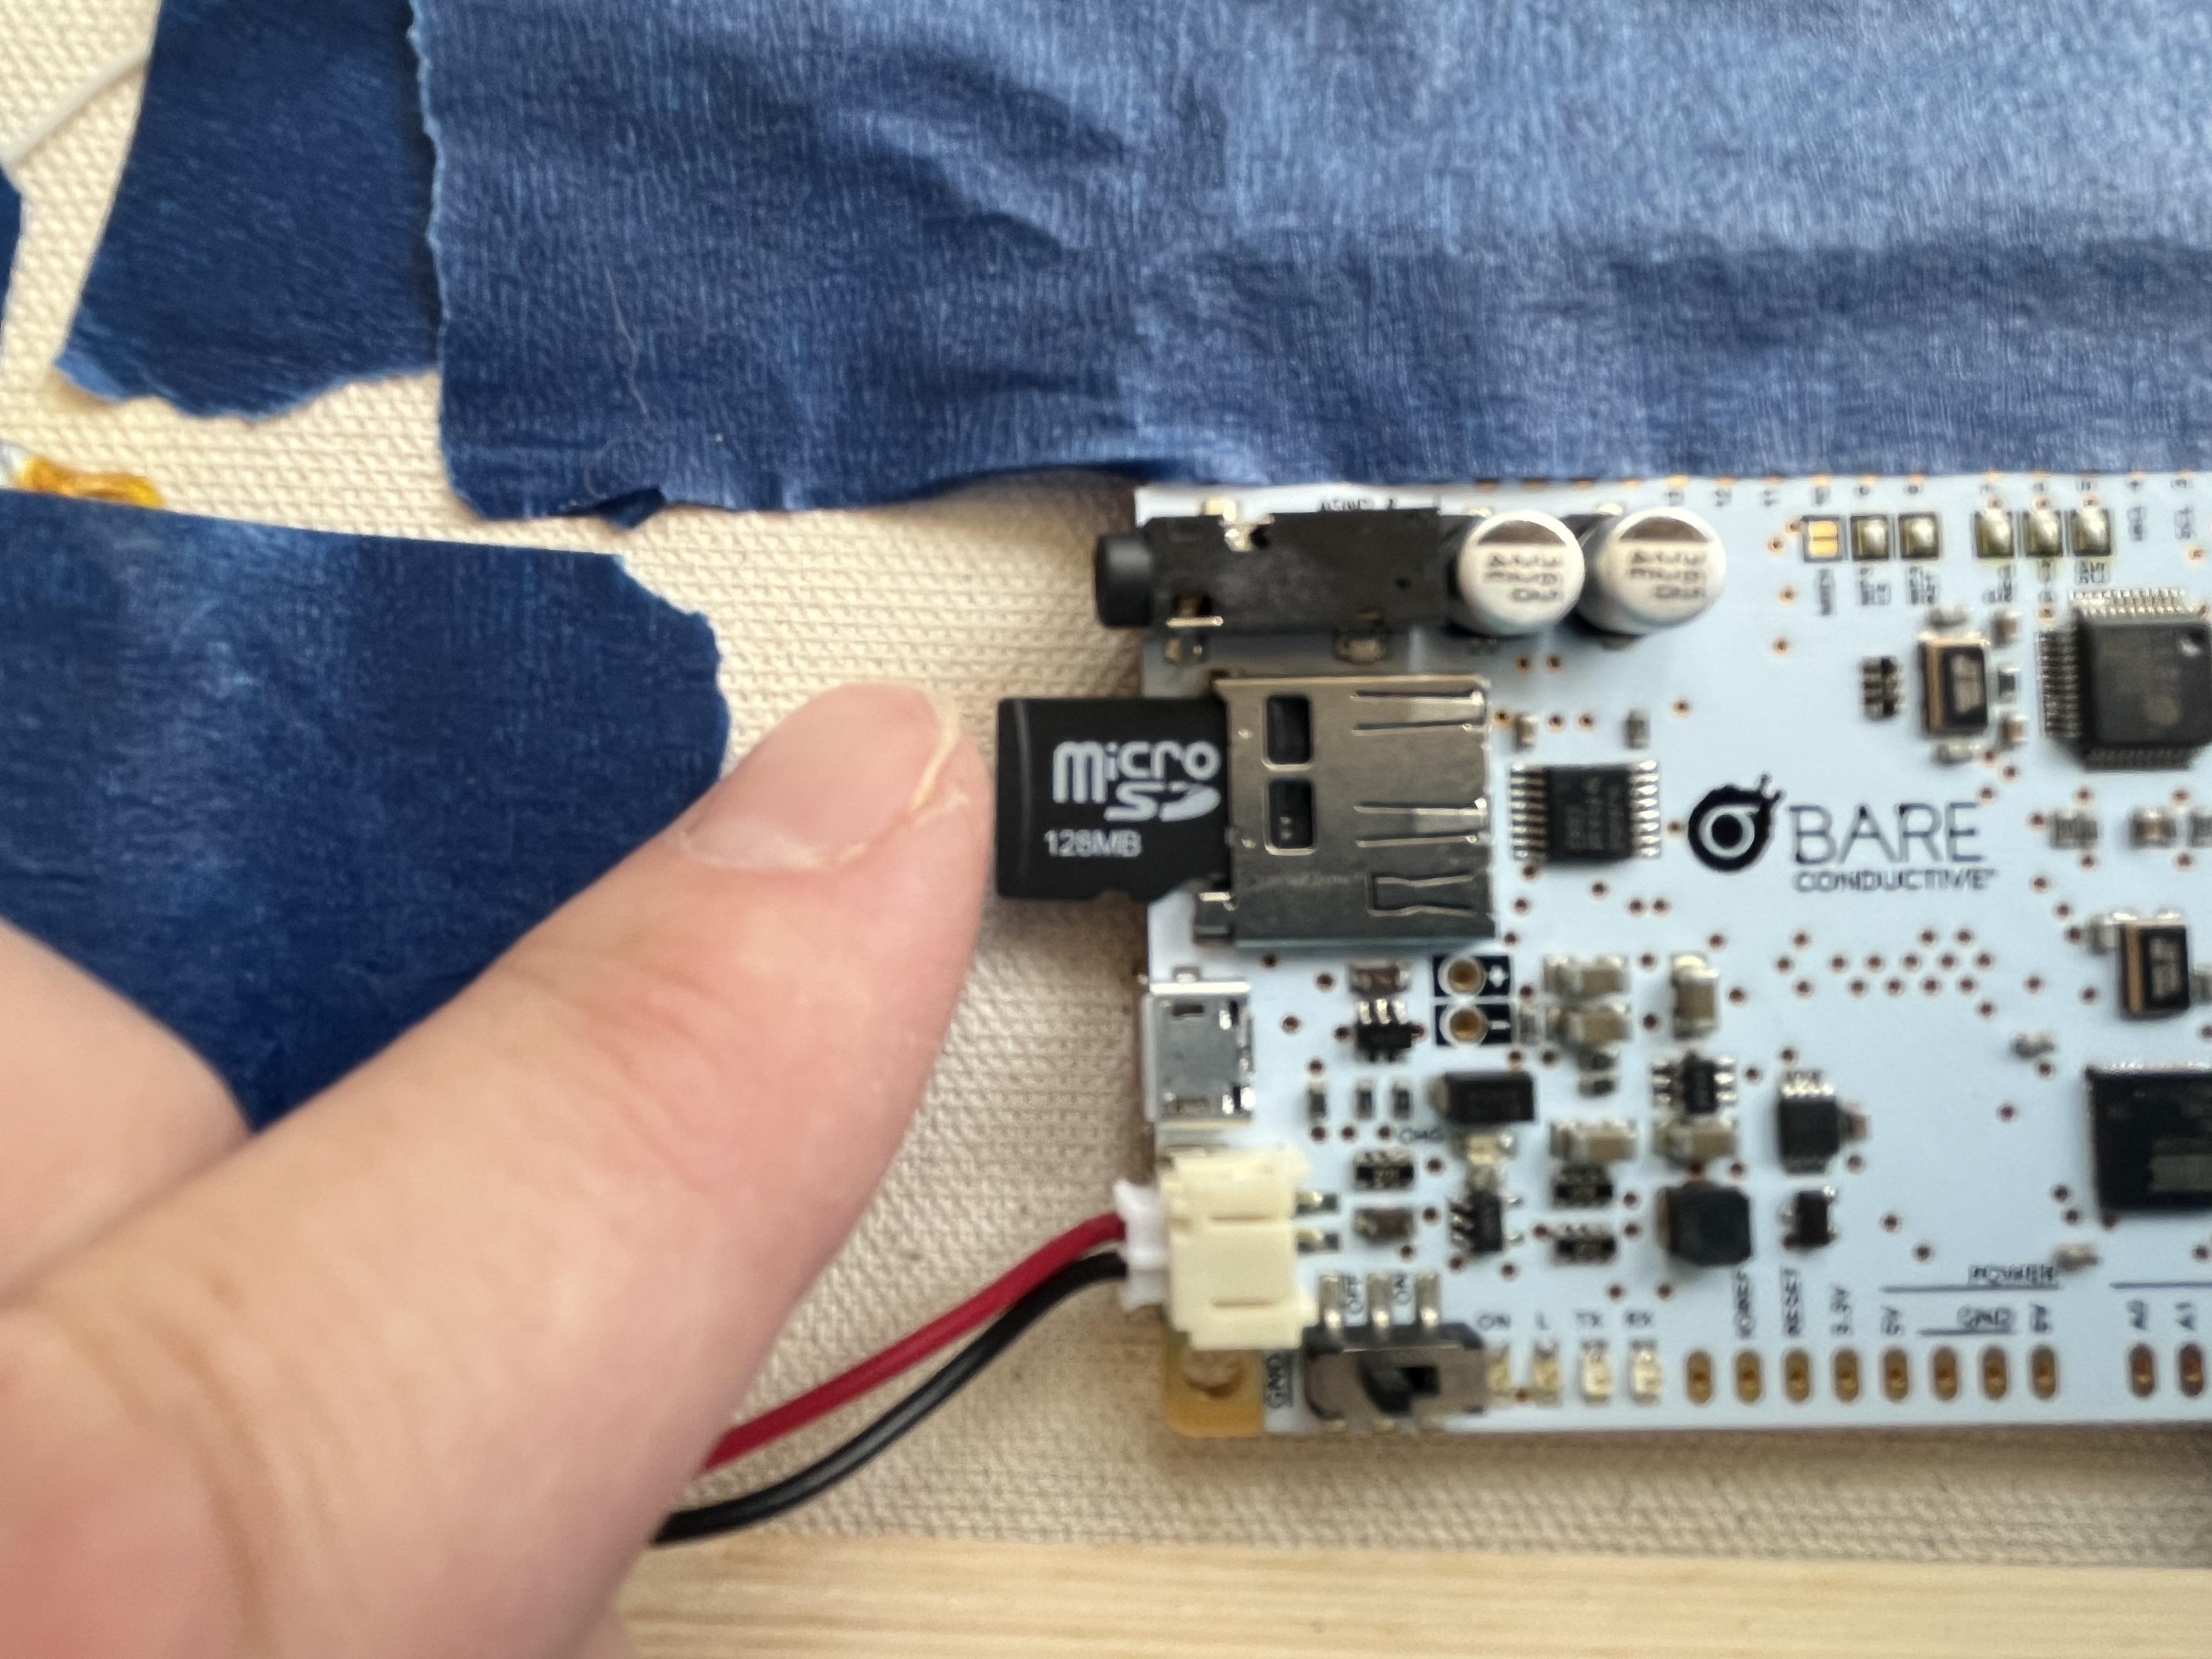
Disconnect the power to the Touch Board, pop out the micro SD card and plug it into a computer (you might need a micro SD card reader for this). Load the micro SD card into its adapter card and put it into the USB drive stick, then insert it into your computer's USB slot (or mac adapter in my case). On your computer's Finder (or whatever drive Windows marks it as), open the location labeled as TB AUDIO. Choose 12 new audio tracks in mp3 format and move them onto the micro SD card. Rename them Track000.mp3, Track001.mp3, Track002.mp3 etc... up to Track011.mp3. The appropriate track will play when the associated electrode is pressed, for example E0 = Track000.mp3, E1 = Track001.mp3 etc. E0 to E11 run left to right along the top of the board. Make sure you know what songs are loaded onto what tracks so you can route the correct wire from the correct room on the painting to the correct electrode. When you are done, remove the micro SD card from its adapter and replace it in the Touch Board.
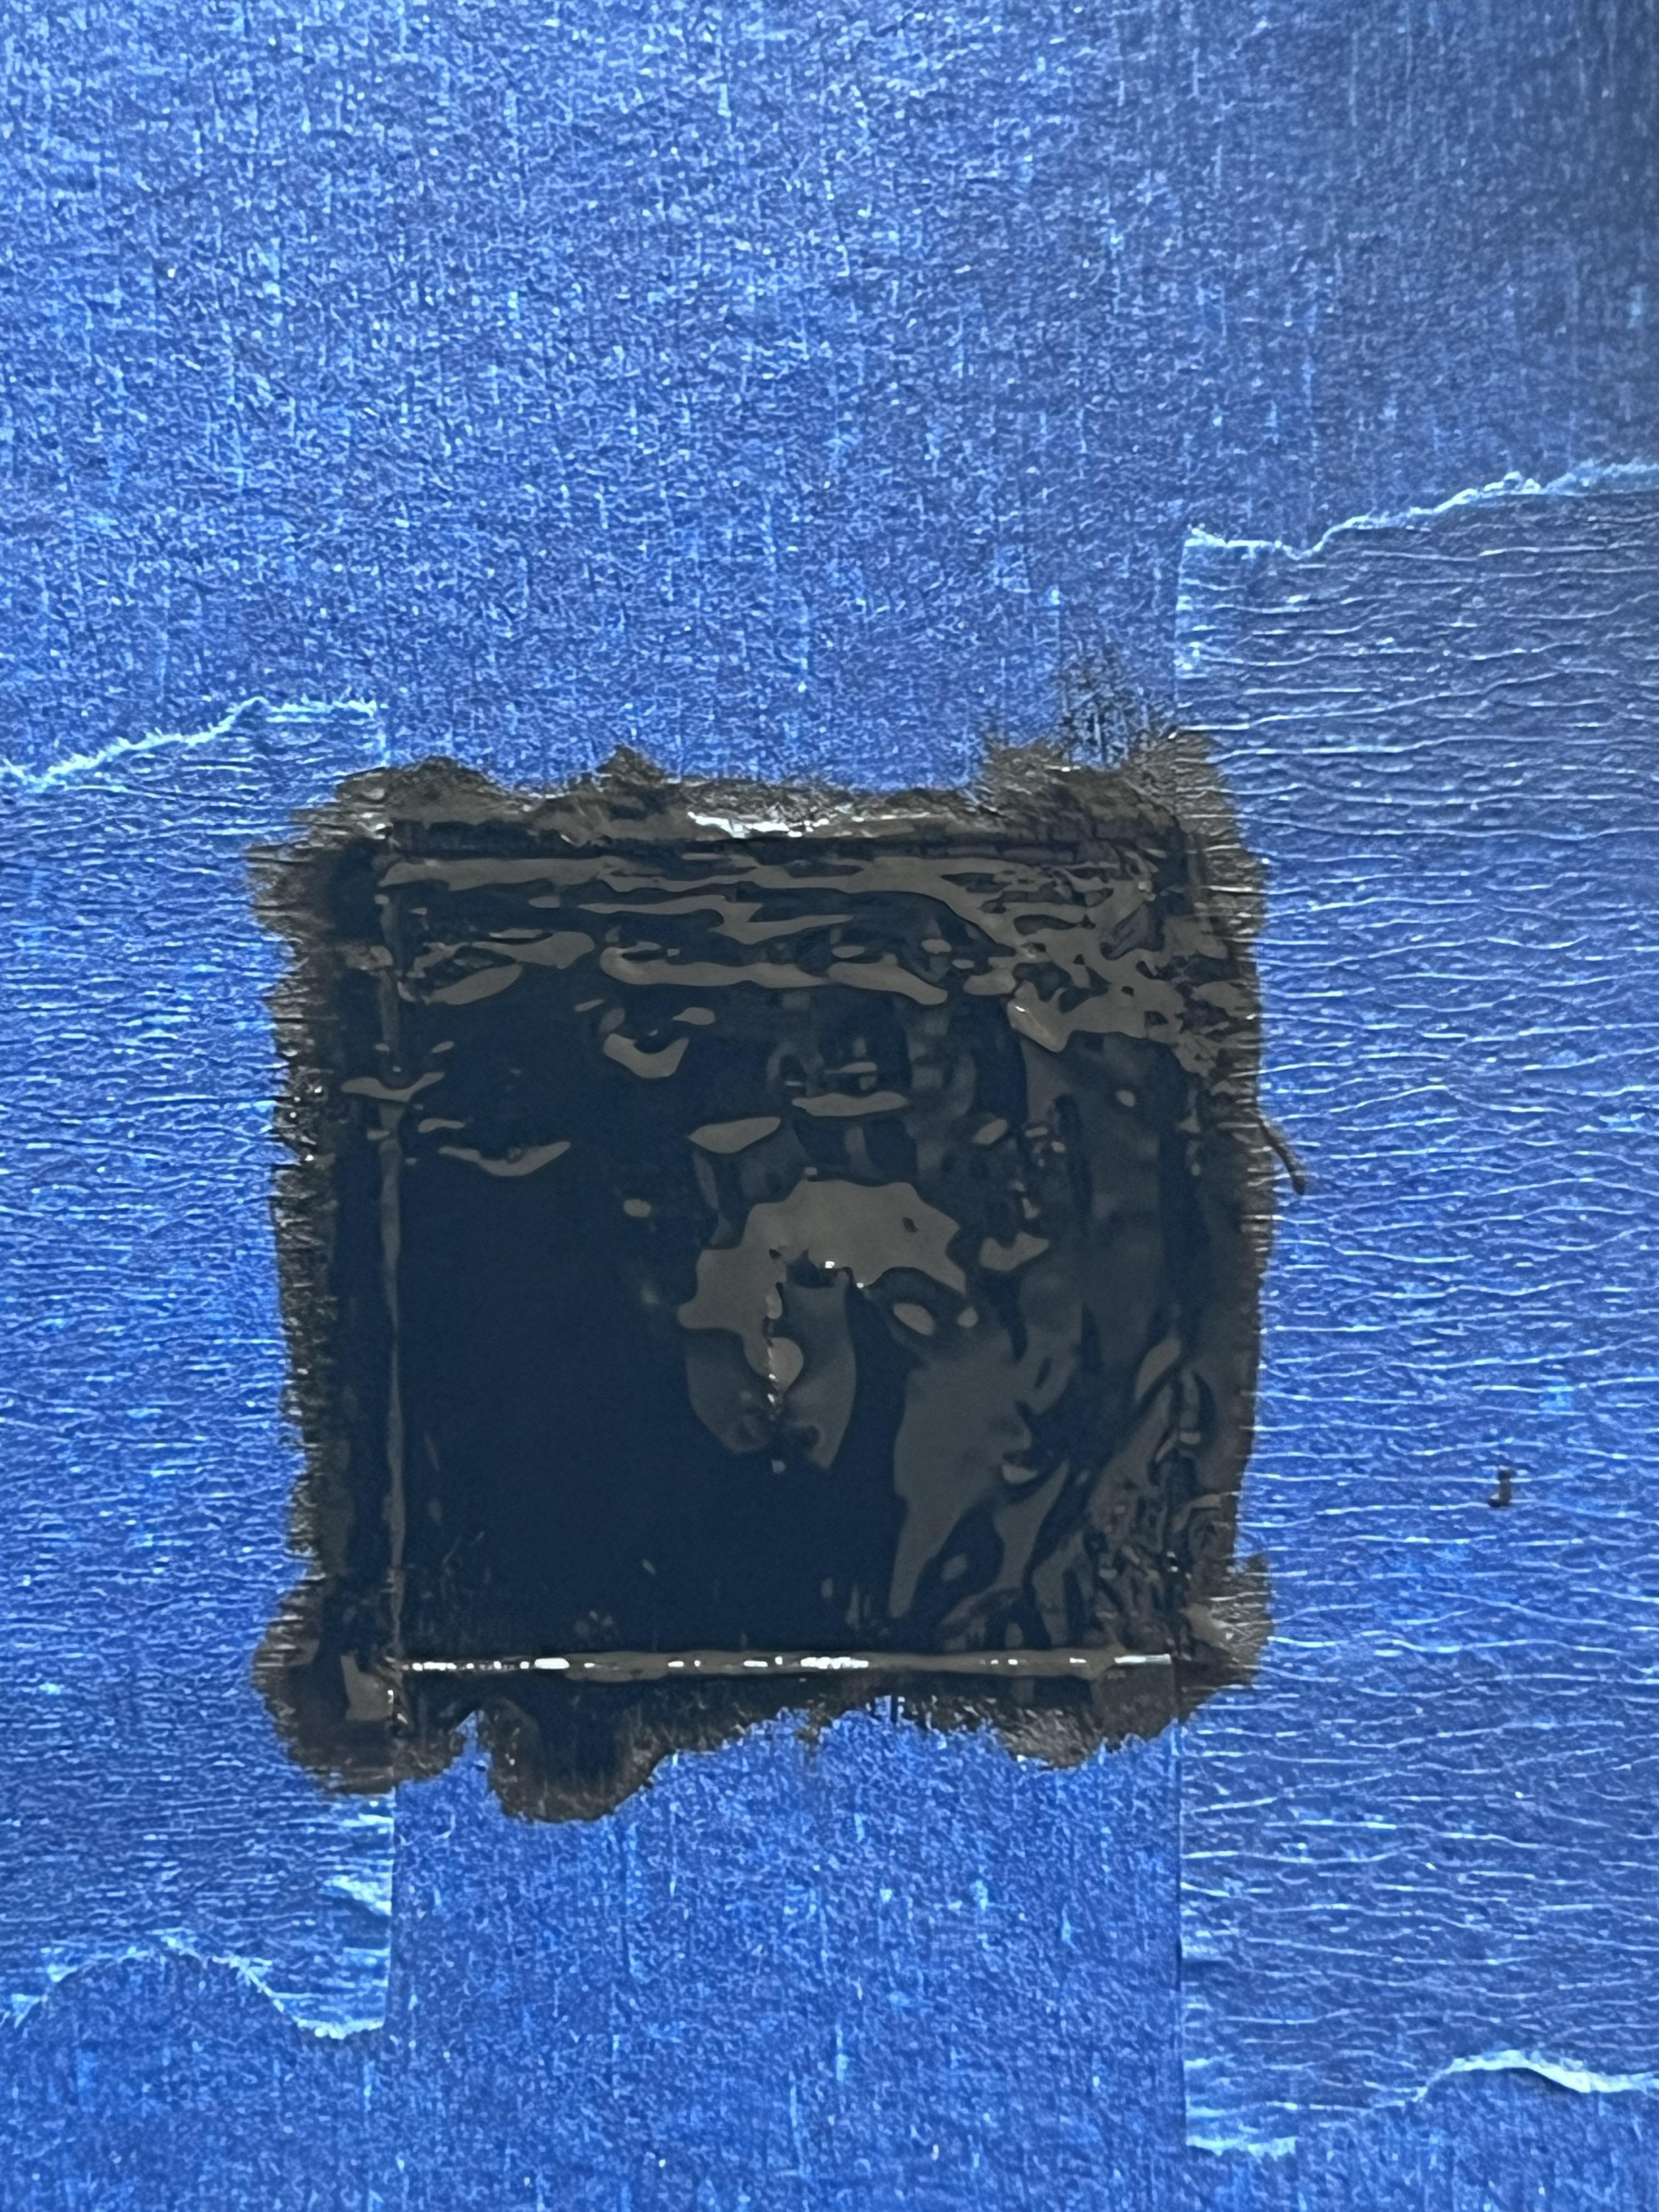
Paint the Conductive Touch Centers

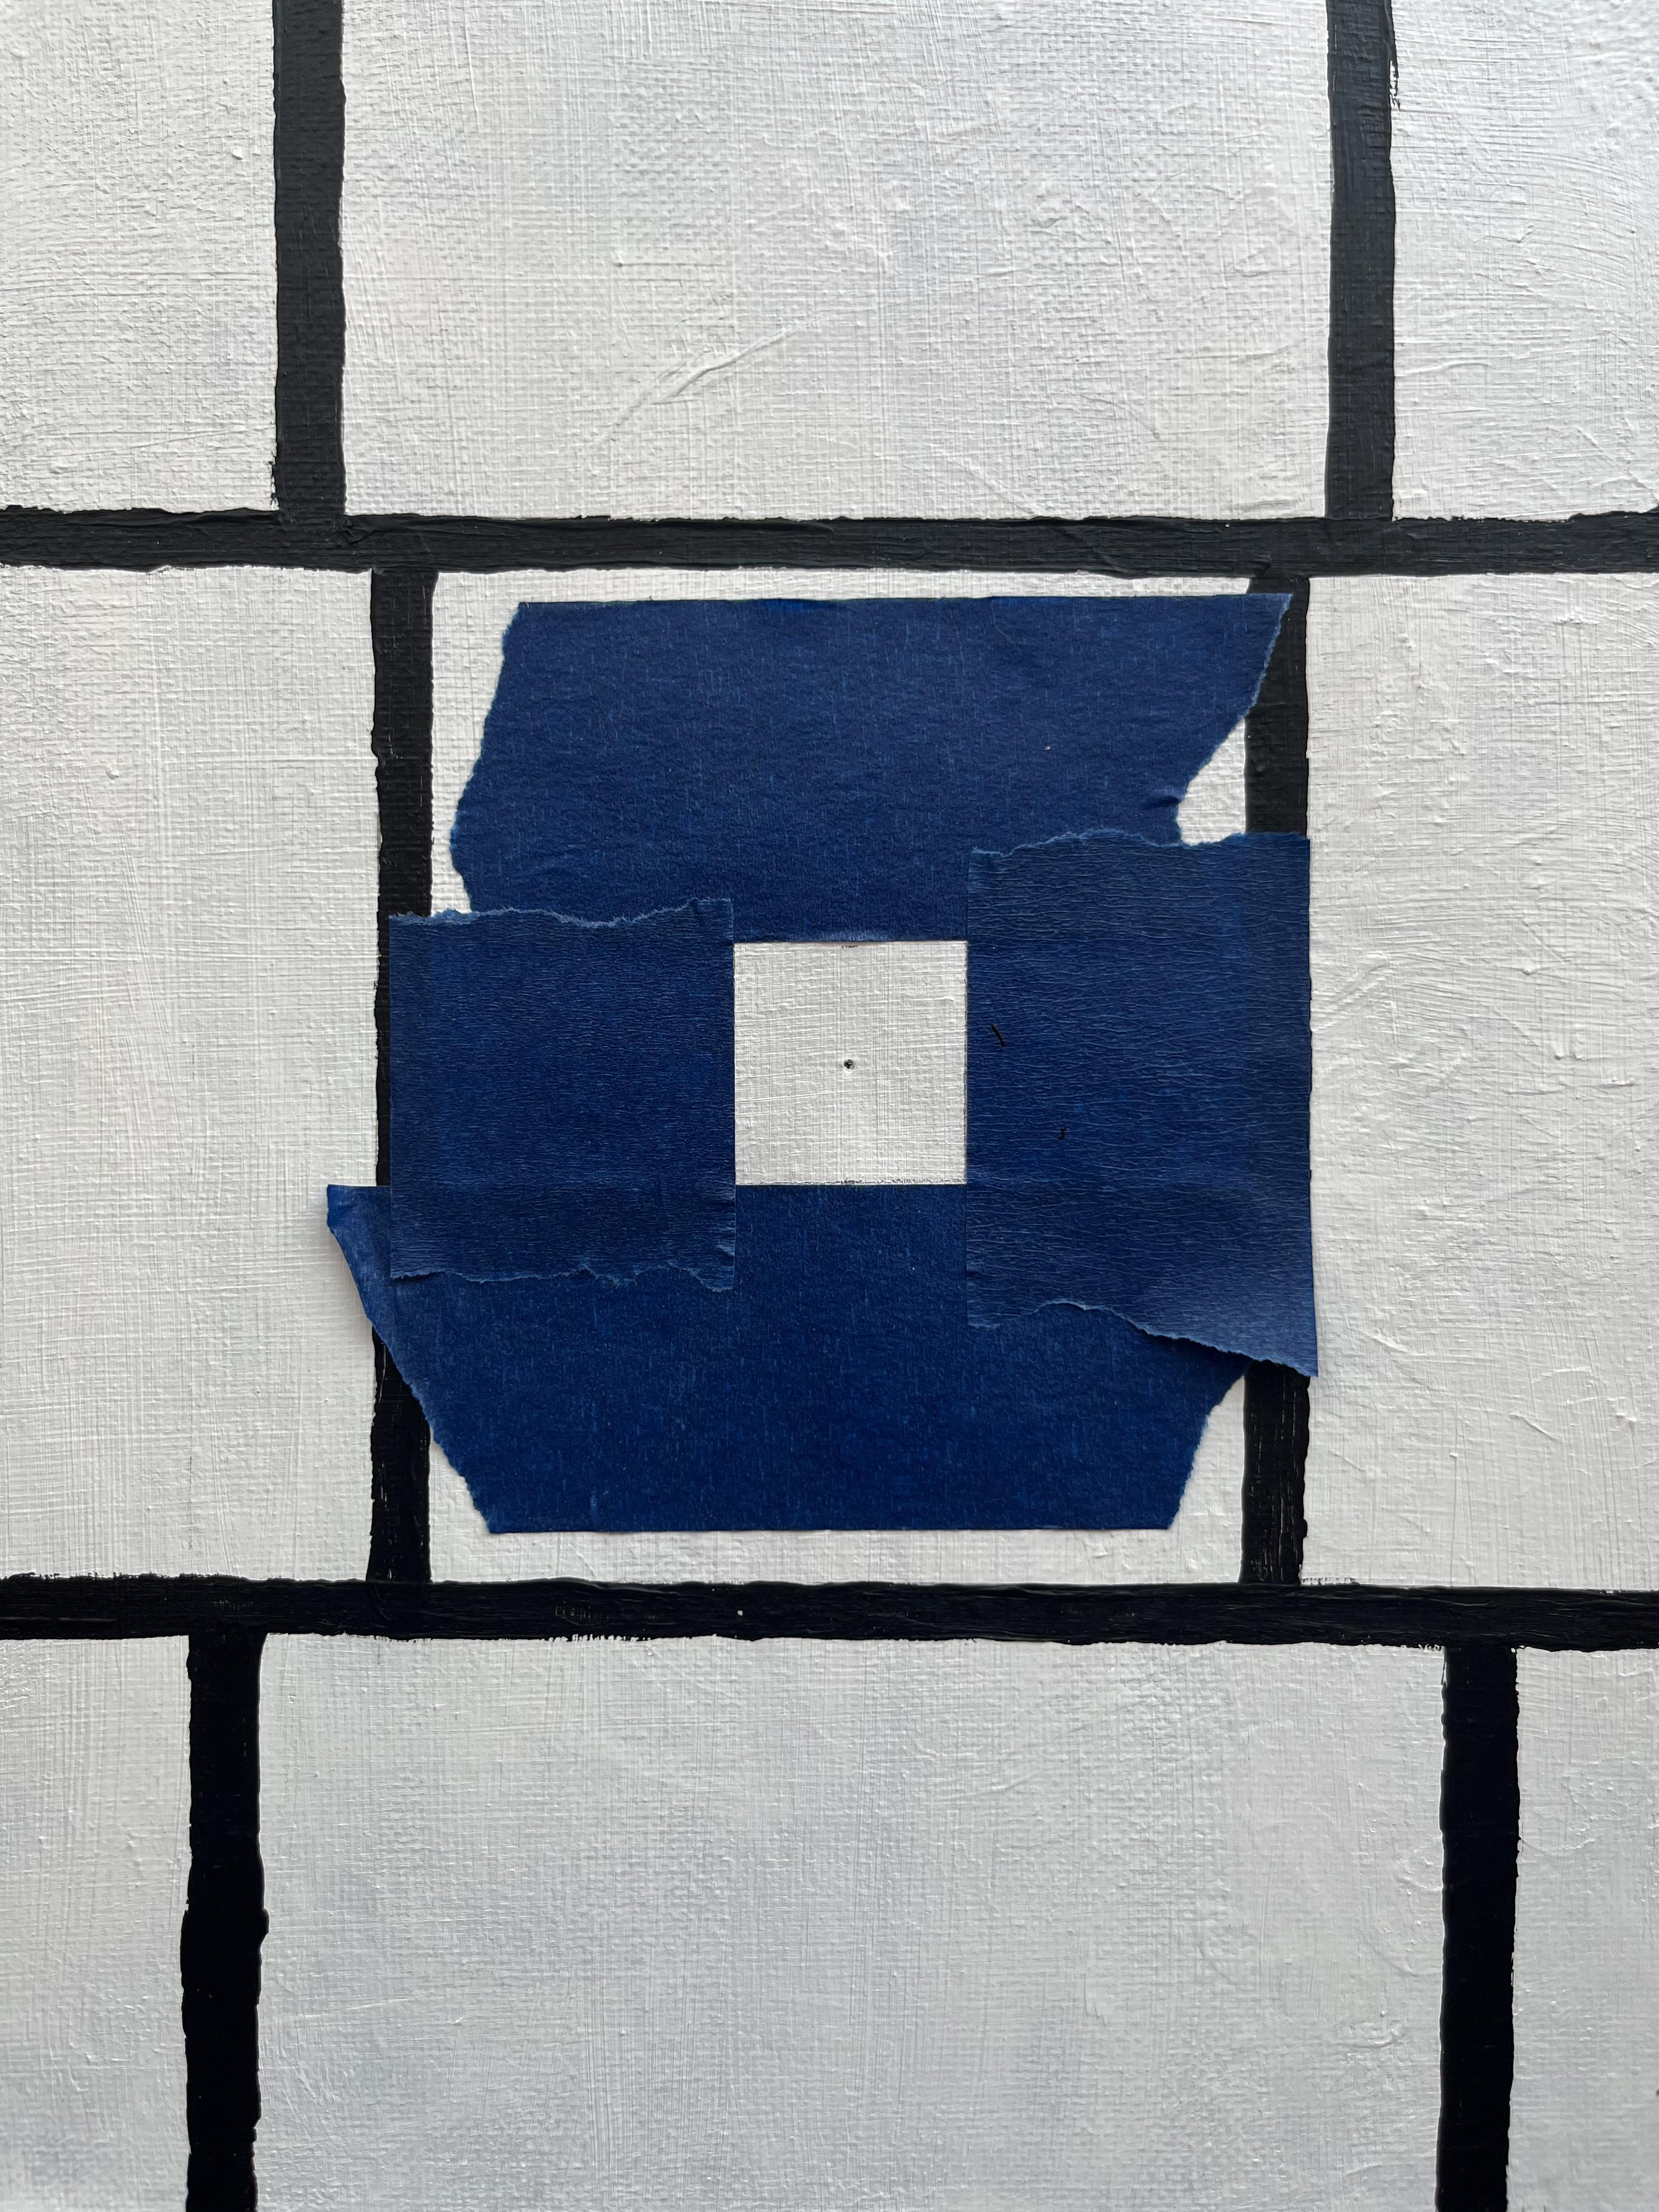

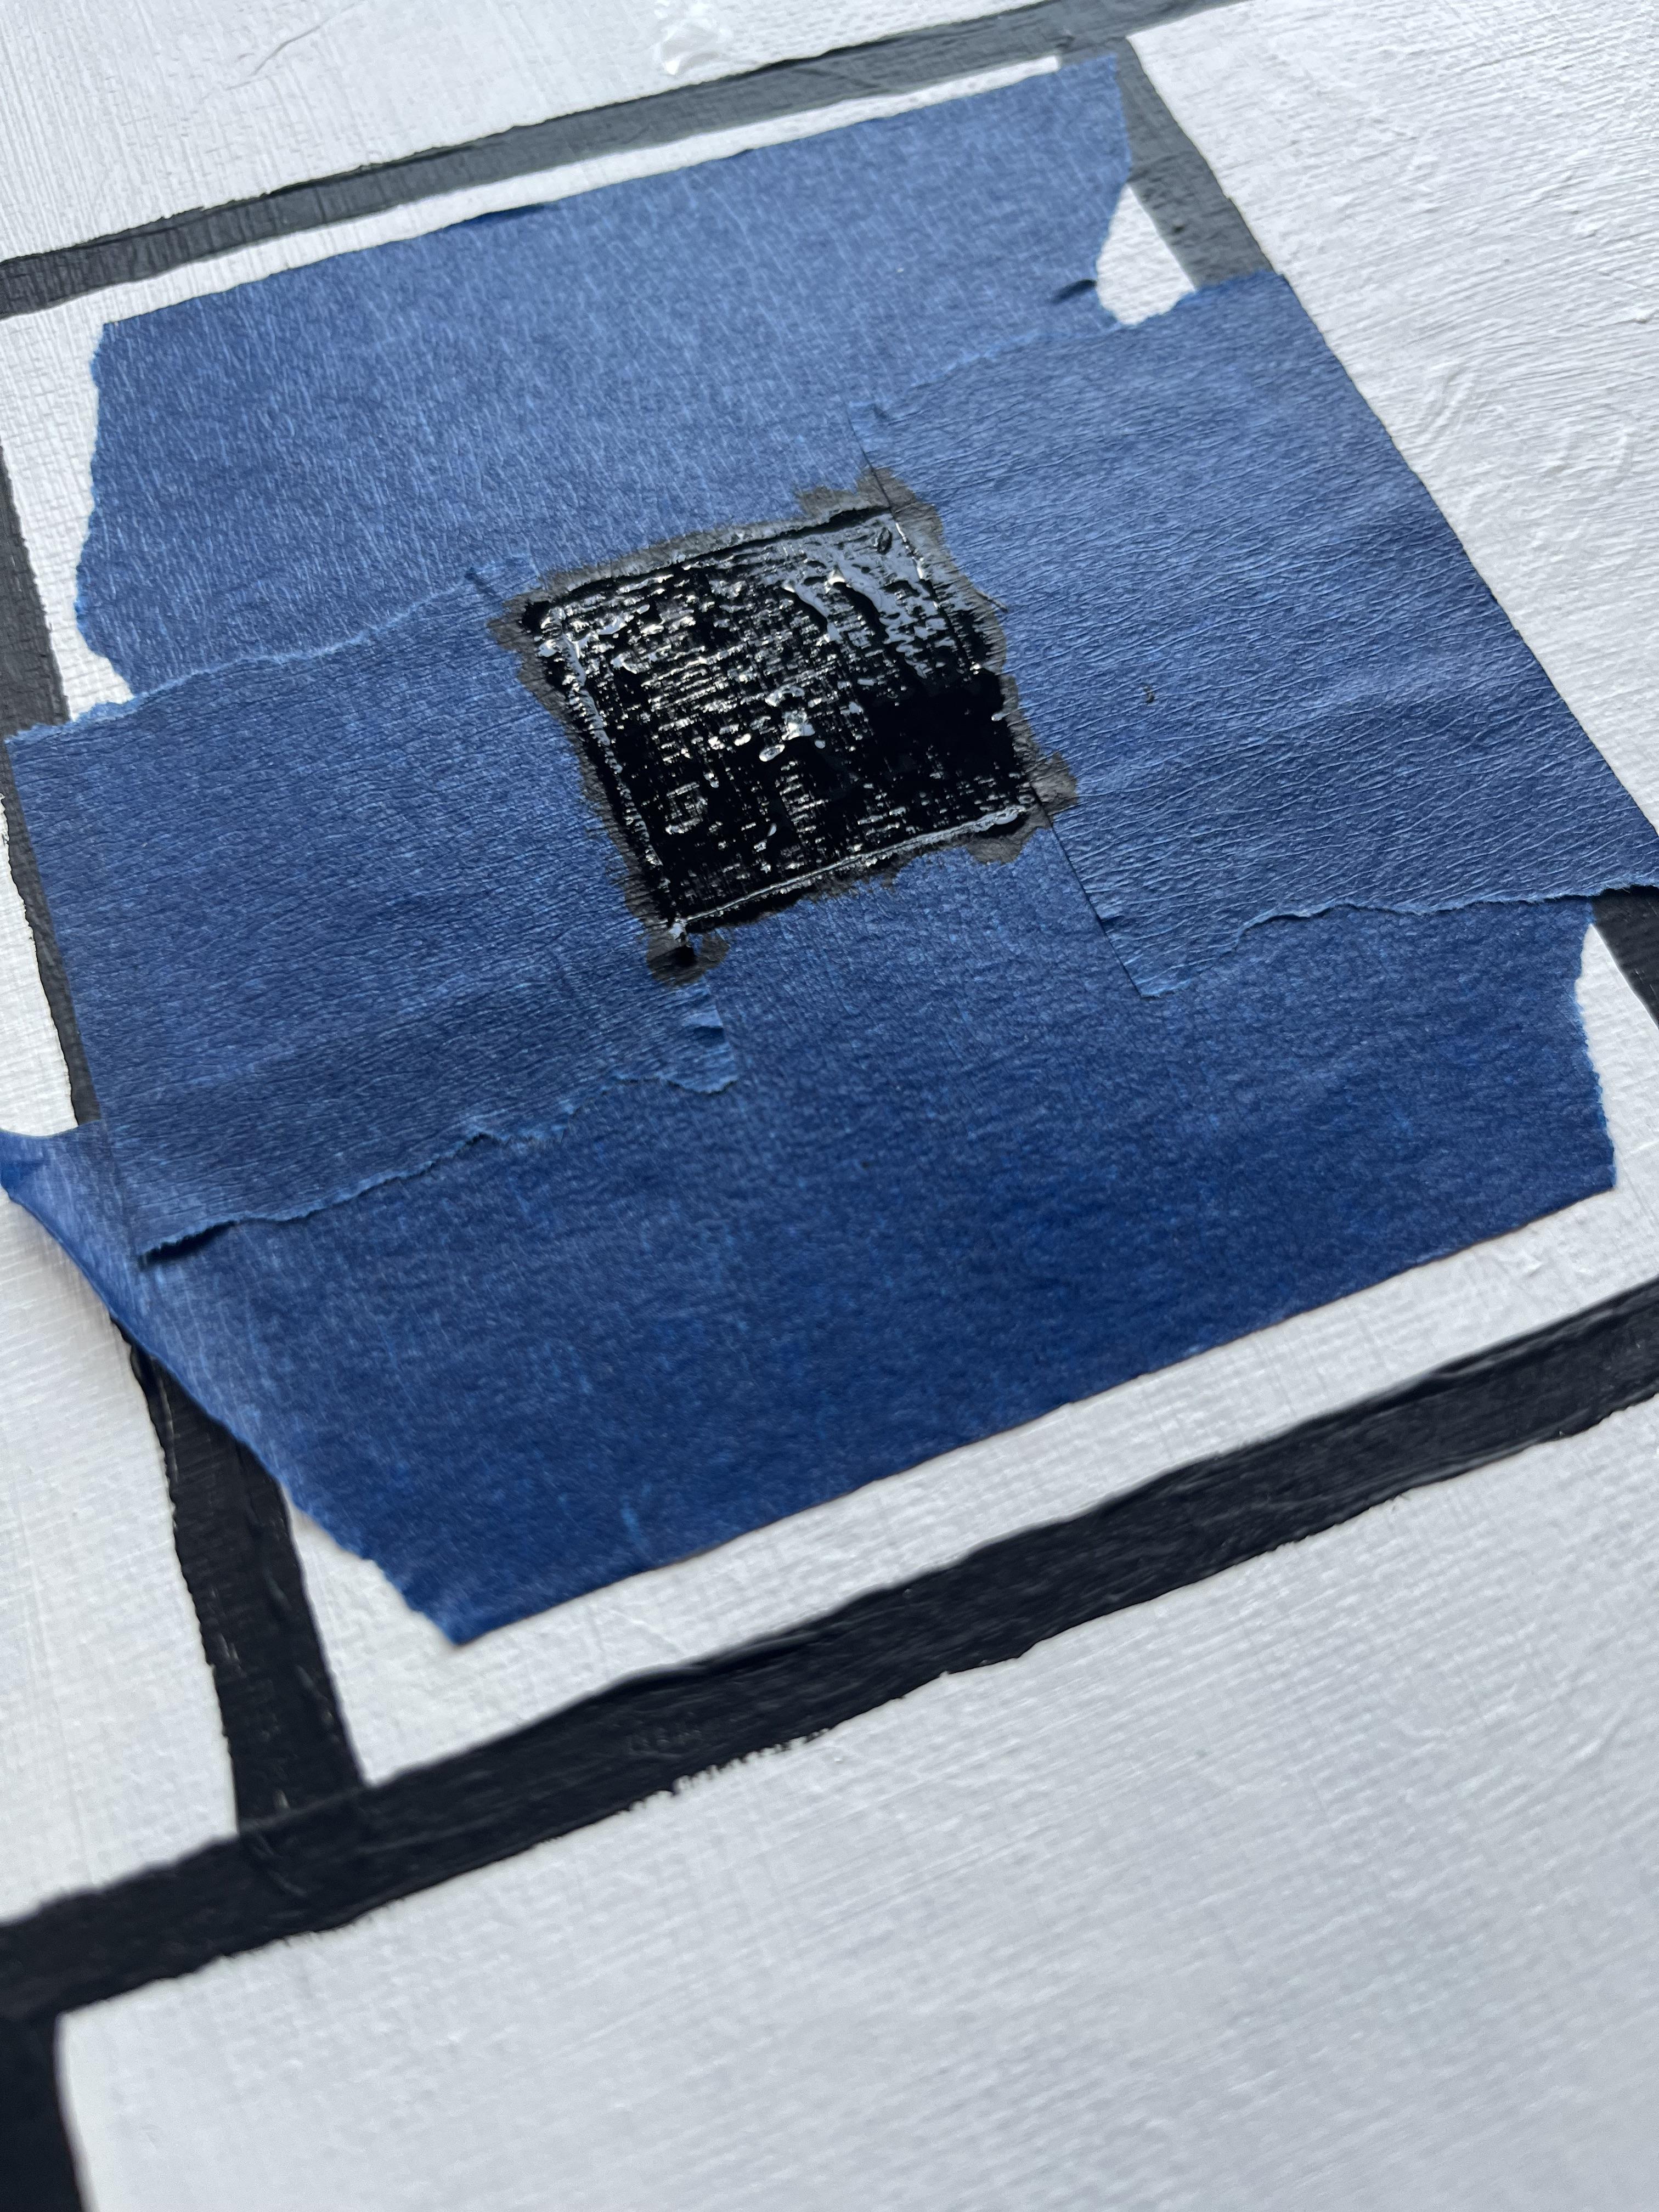
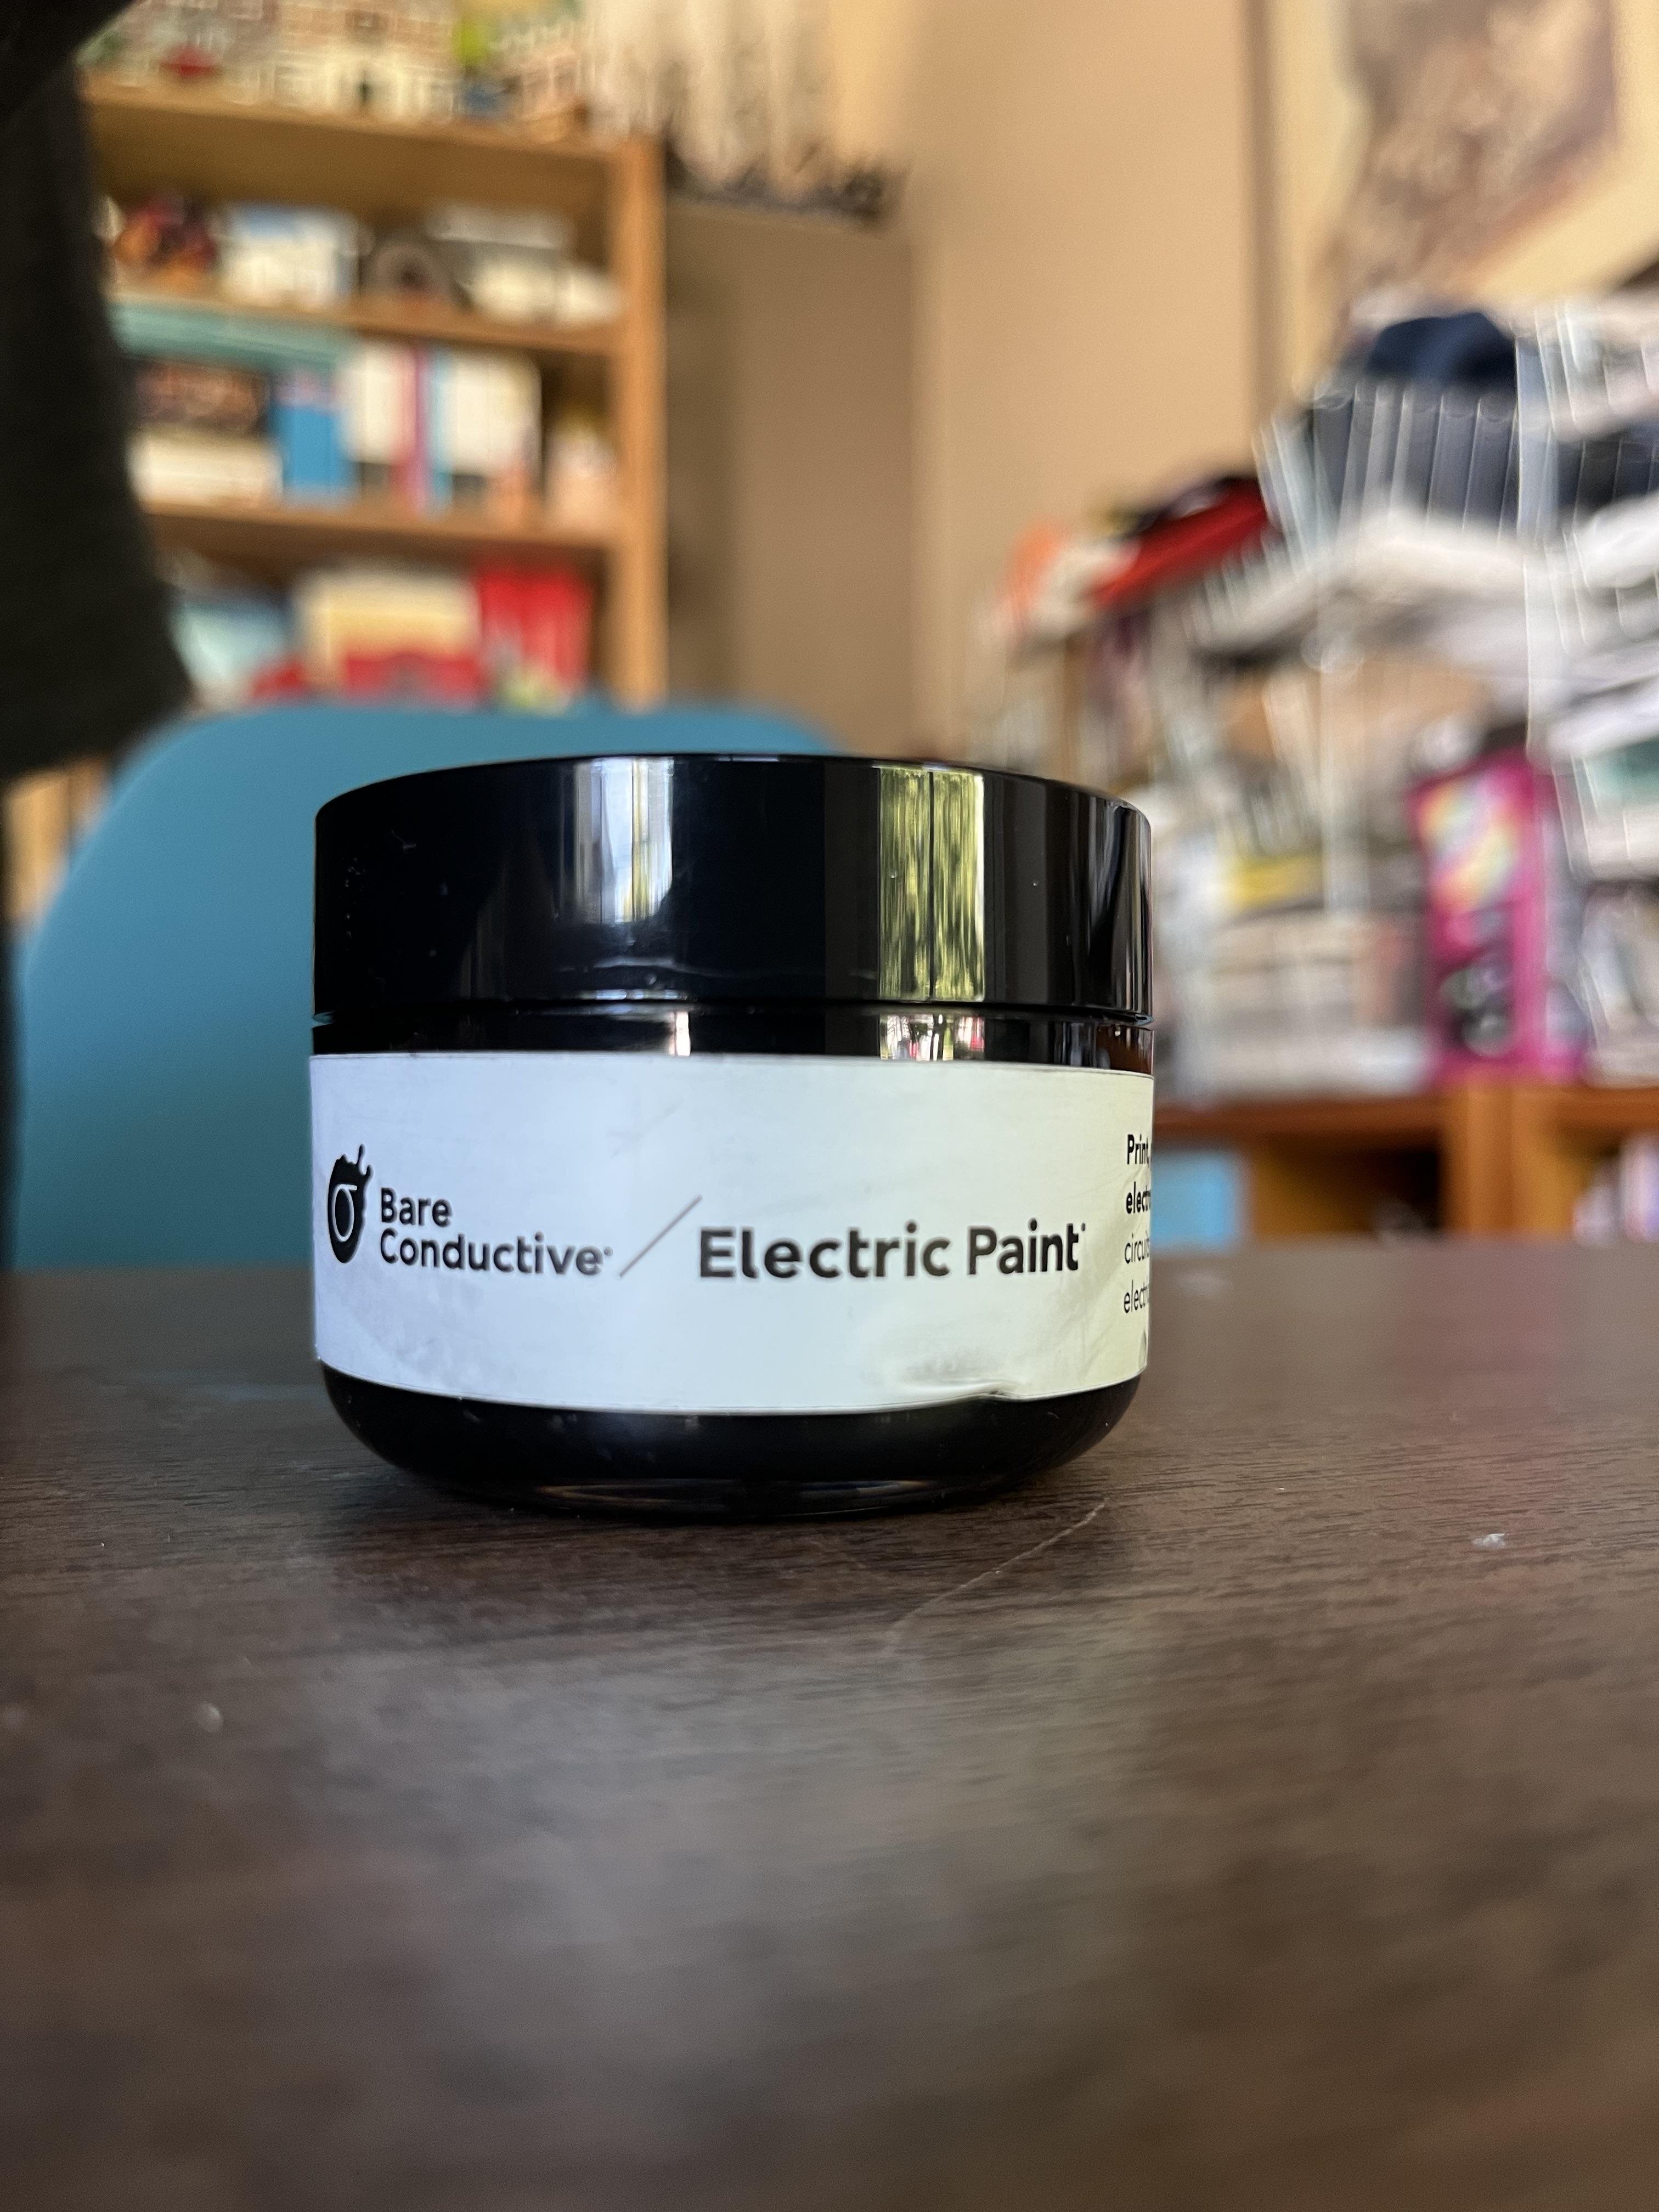
Now onto the canvas! On the front of the painting, outline your rooms with normal black acrylic (not conductive) paint lines. Using a push pin or a sharp needle, poke a hole in the center of each "room". Place painter's tape around the hole in a 1-inch by 1-inch square and coat the square in a layer of conductive paint. Believe me, you do not want to go larger than one inch by one inch or your painting will turn into a proximity sensor where you won't even have to touch the square for it to trigger the electrode. Which might sound neat until you realize all of the rooms will have this ability! The touch board will not know which room was triggered first/correctly and you will have tracks playing/not playing as it interferes with its sensing. Having the conductive paint squares somewhat visible under the painting is the trade-off for a correctly-playing microcontroller.
Repeat with all the places you want to trigger the painting. Remember, you have 12 audio electrodes so you can create 12 trigger spots on the painting. I know, too bad we couldn't have one more audio electrode . . . 13 in total.
Attach the Wires to the Backs of the Touch Squares
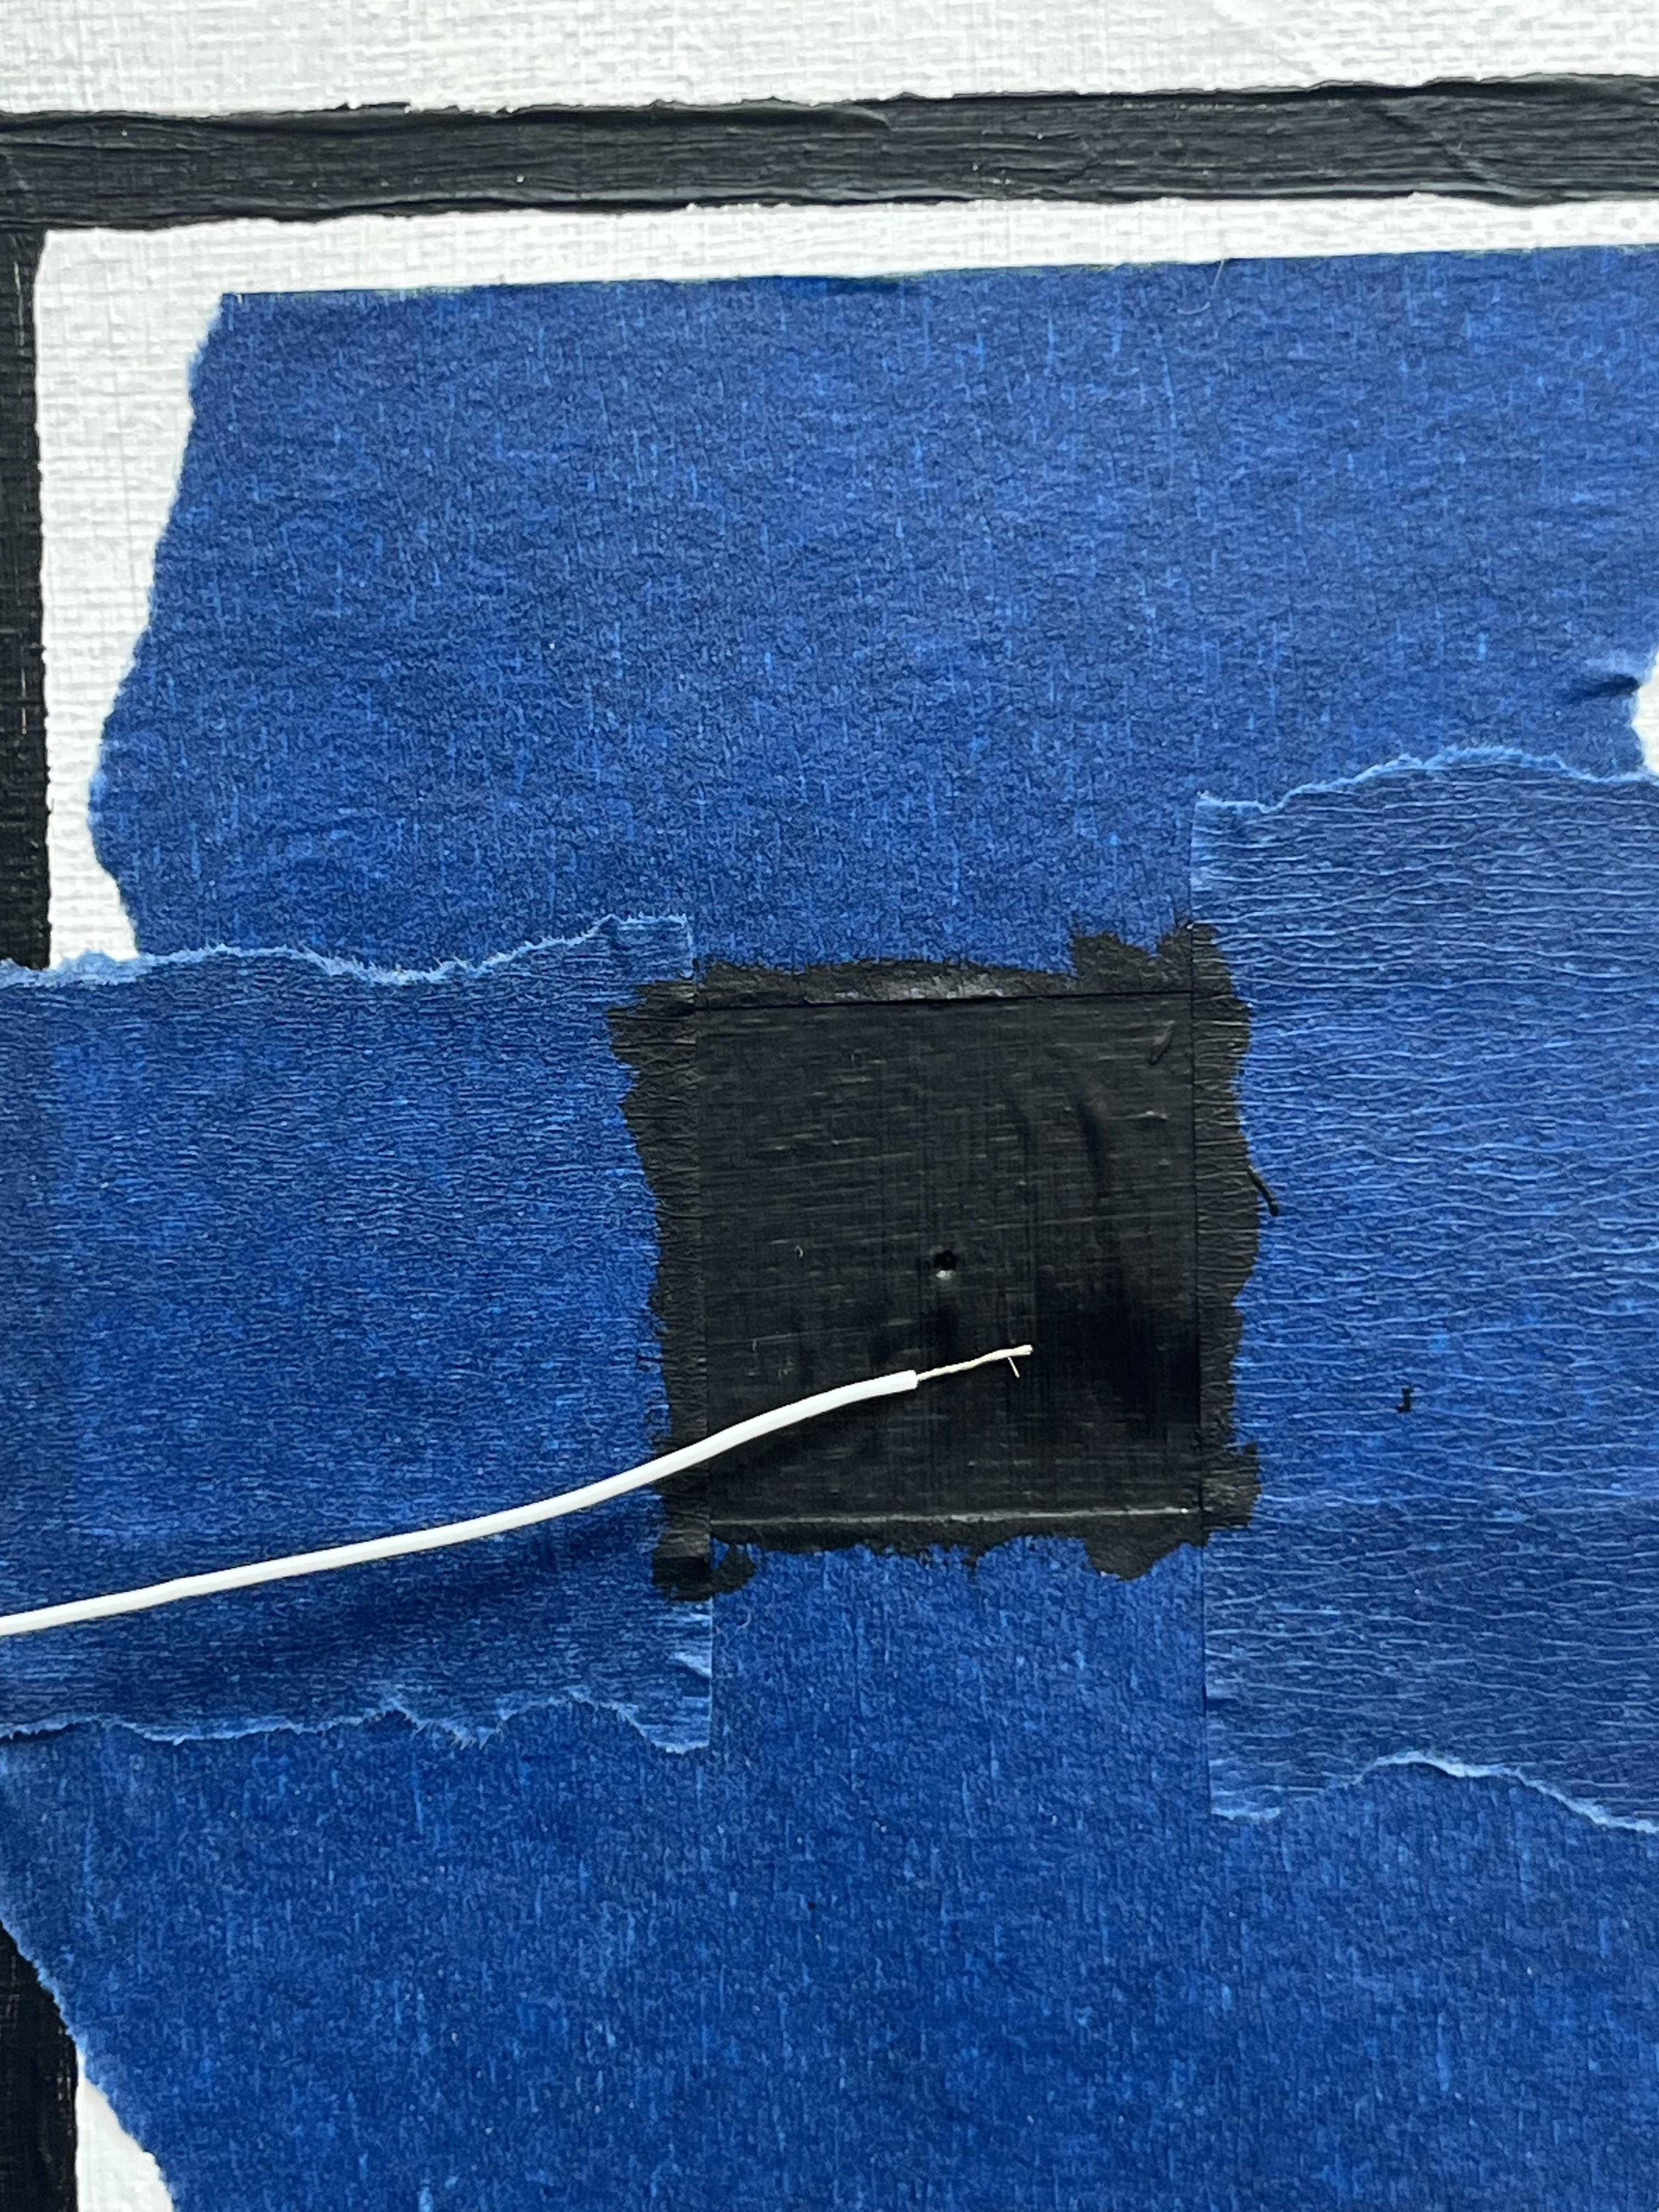


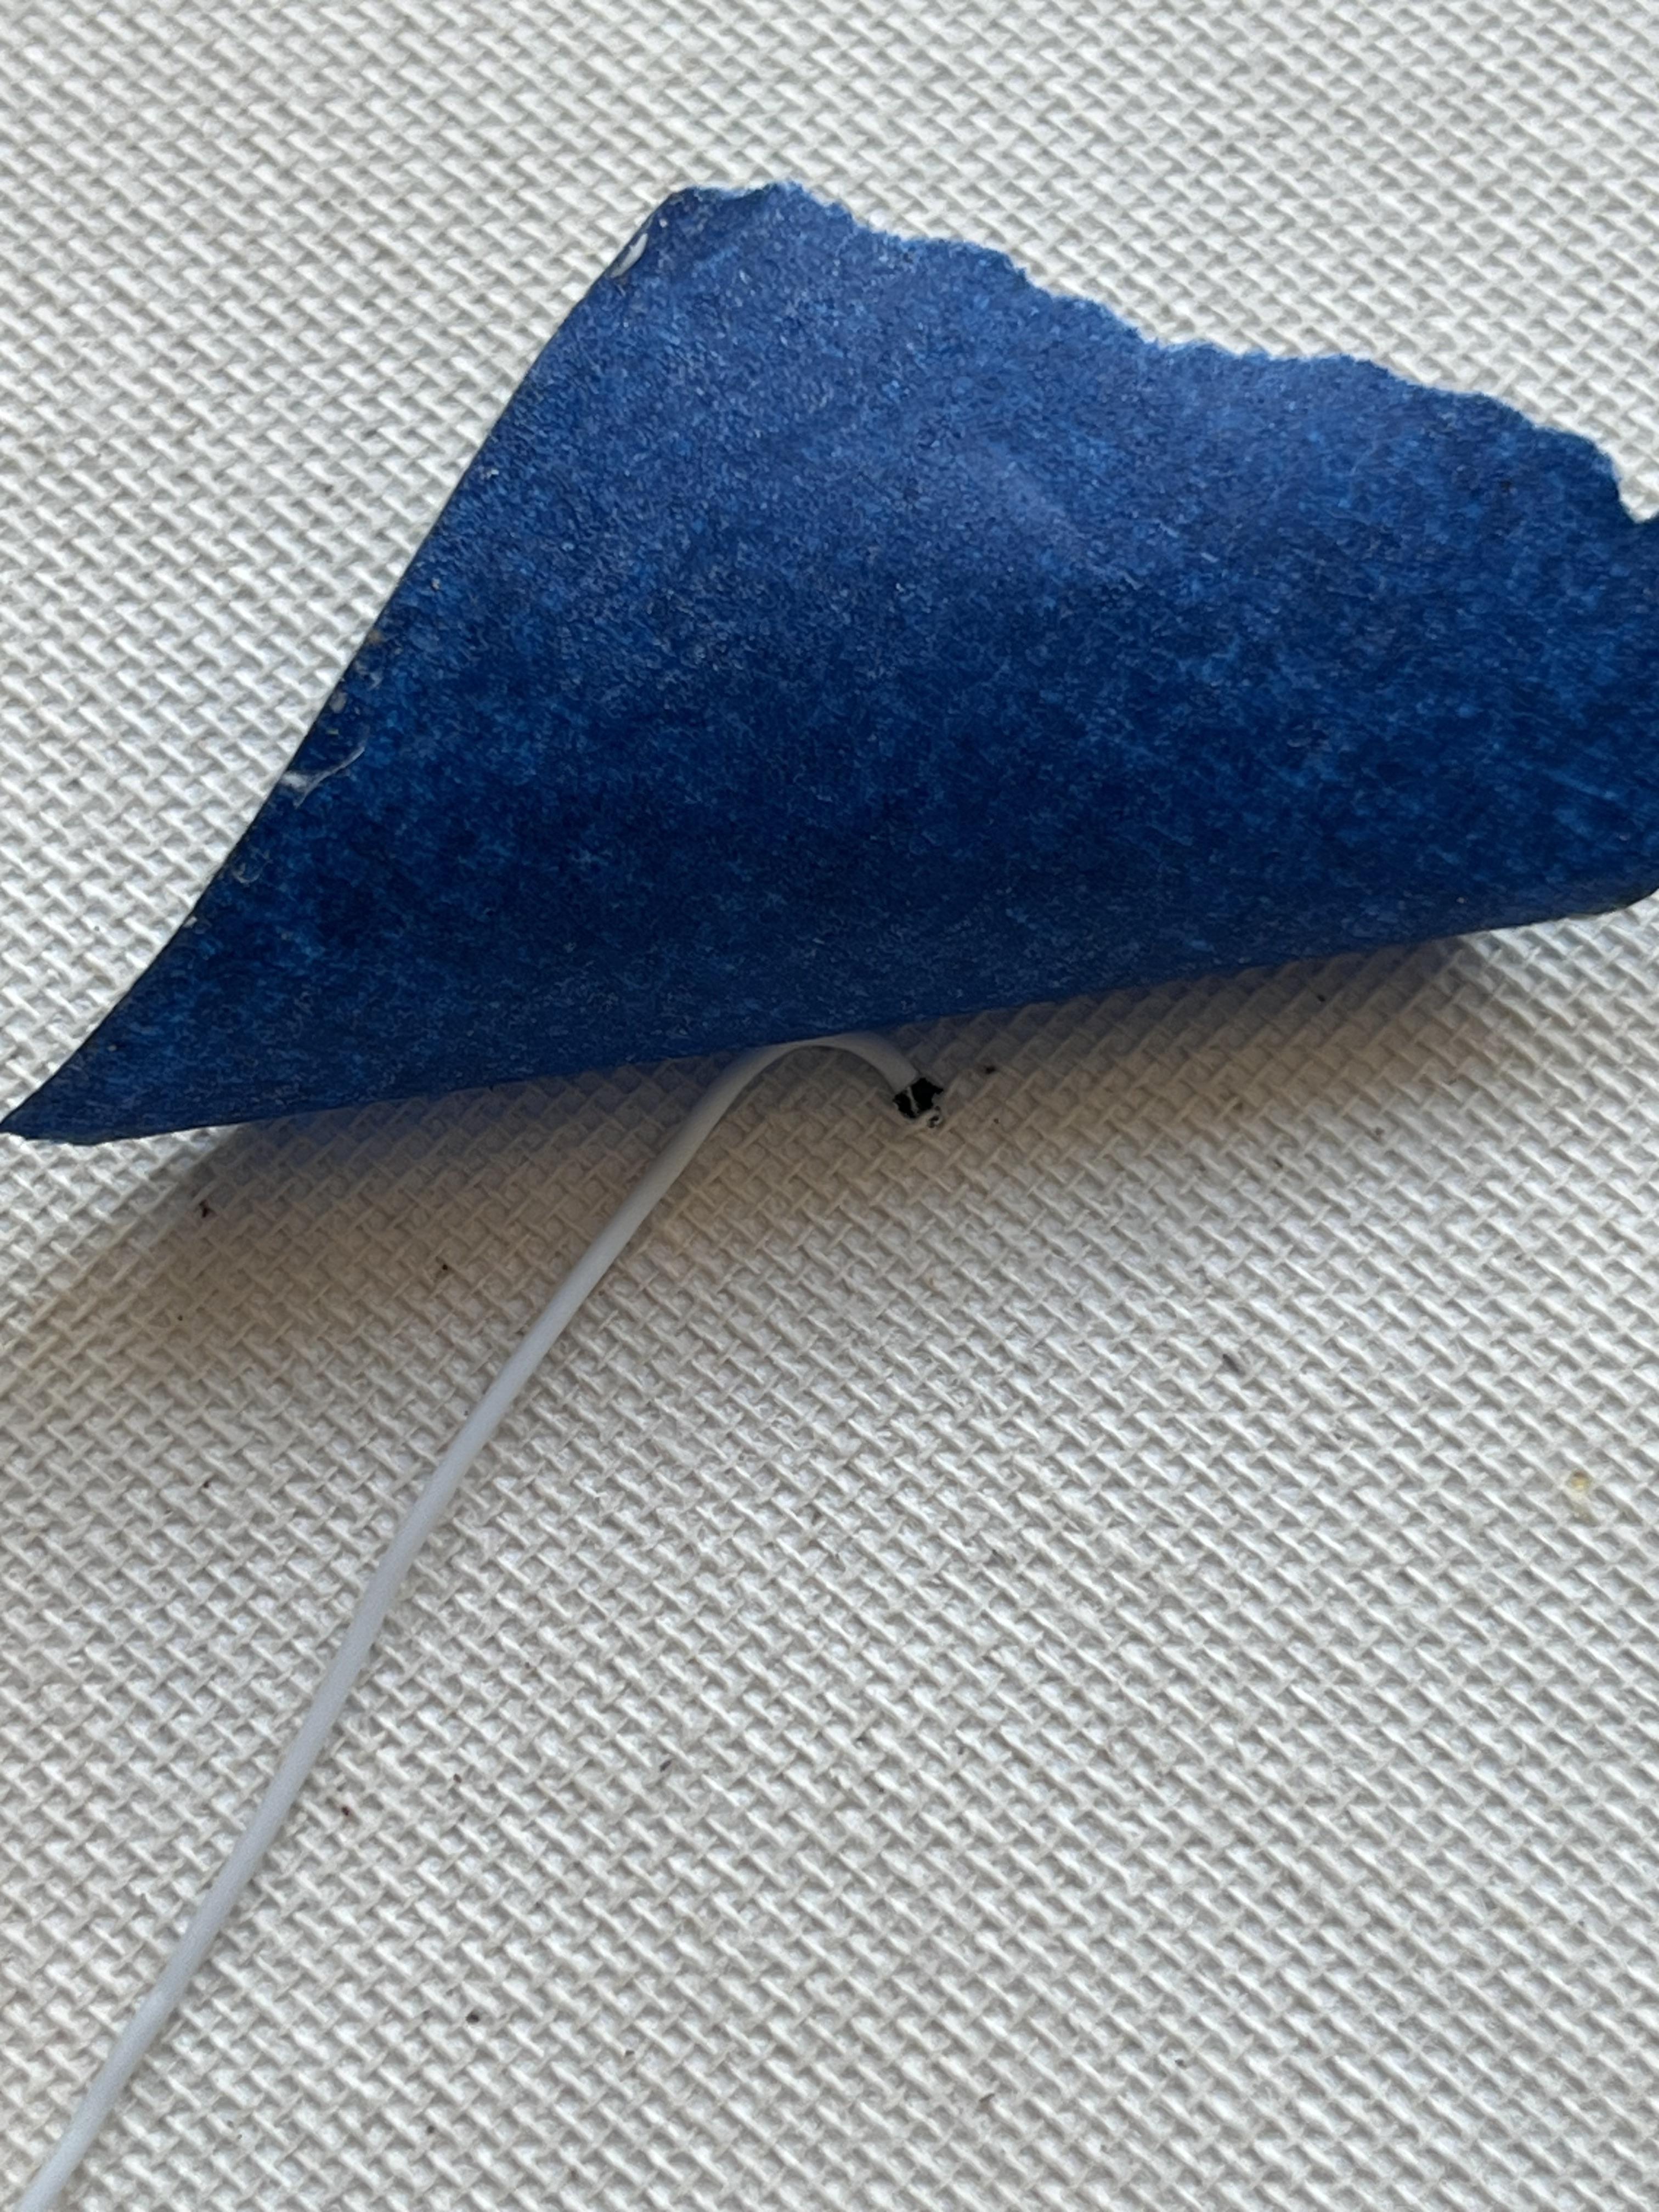
Cut 12 wires long enough to reach the touch board from their spot on the canvas with a little extra so they aren't pulled taut. Strip the thin 30 AWG wires 1/4 of an inch on one end so the metal cores are exposed. Poke one wire through the back of the canvas through the hole. Place a piece of painter's tape on the back so it is secure. Repeat with the other wires and squares.
Paint Over the Wires on the Front of the Canvas

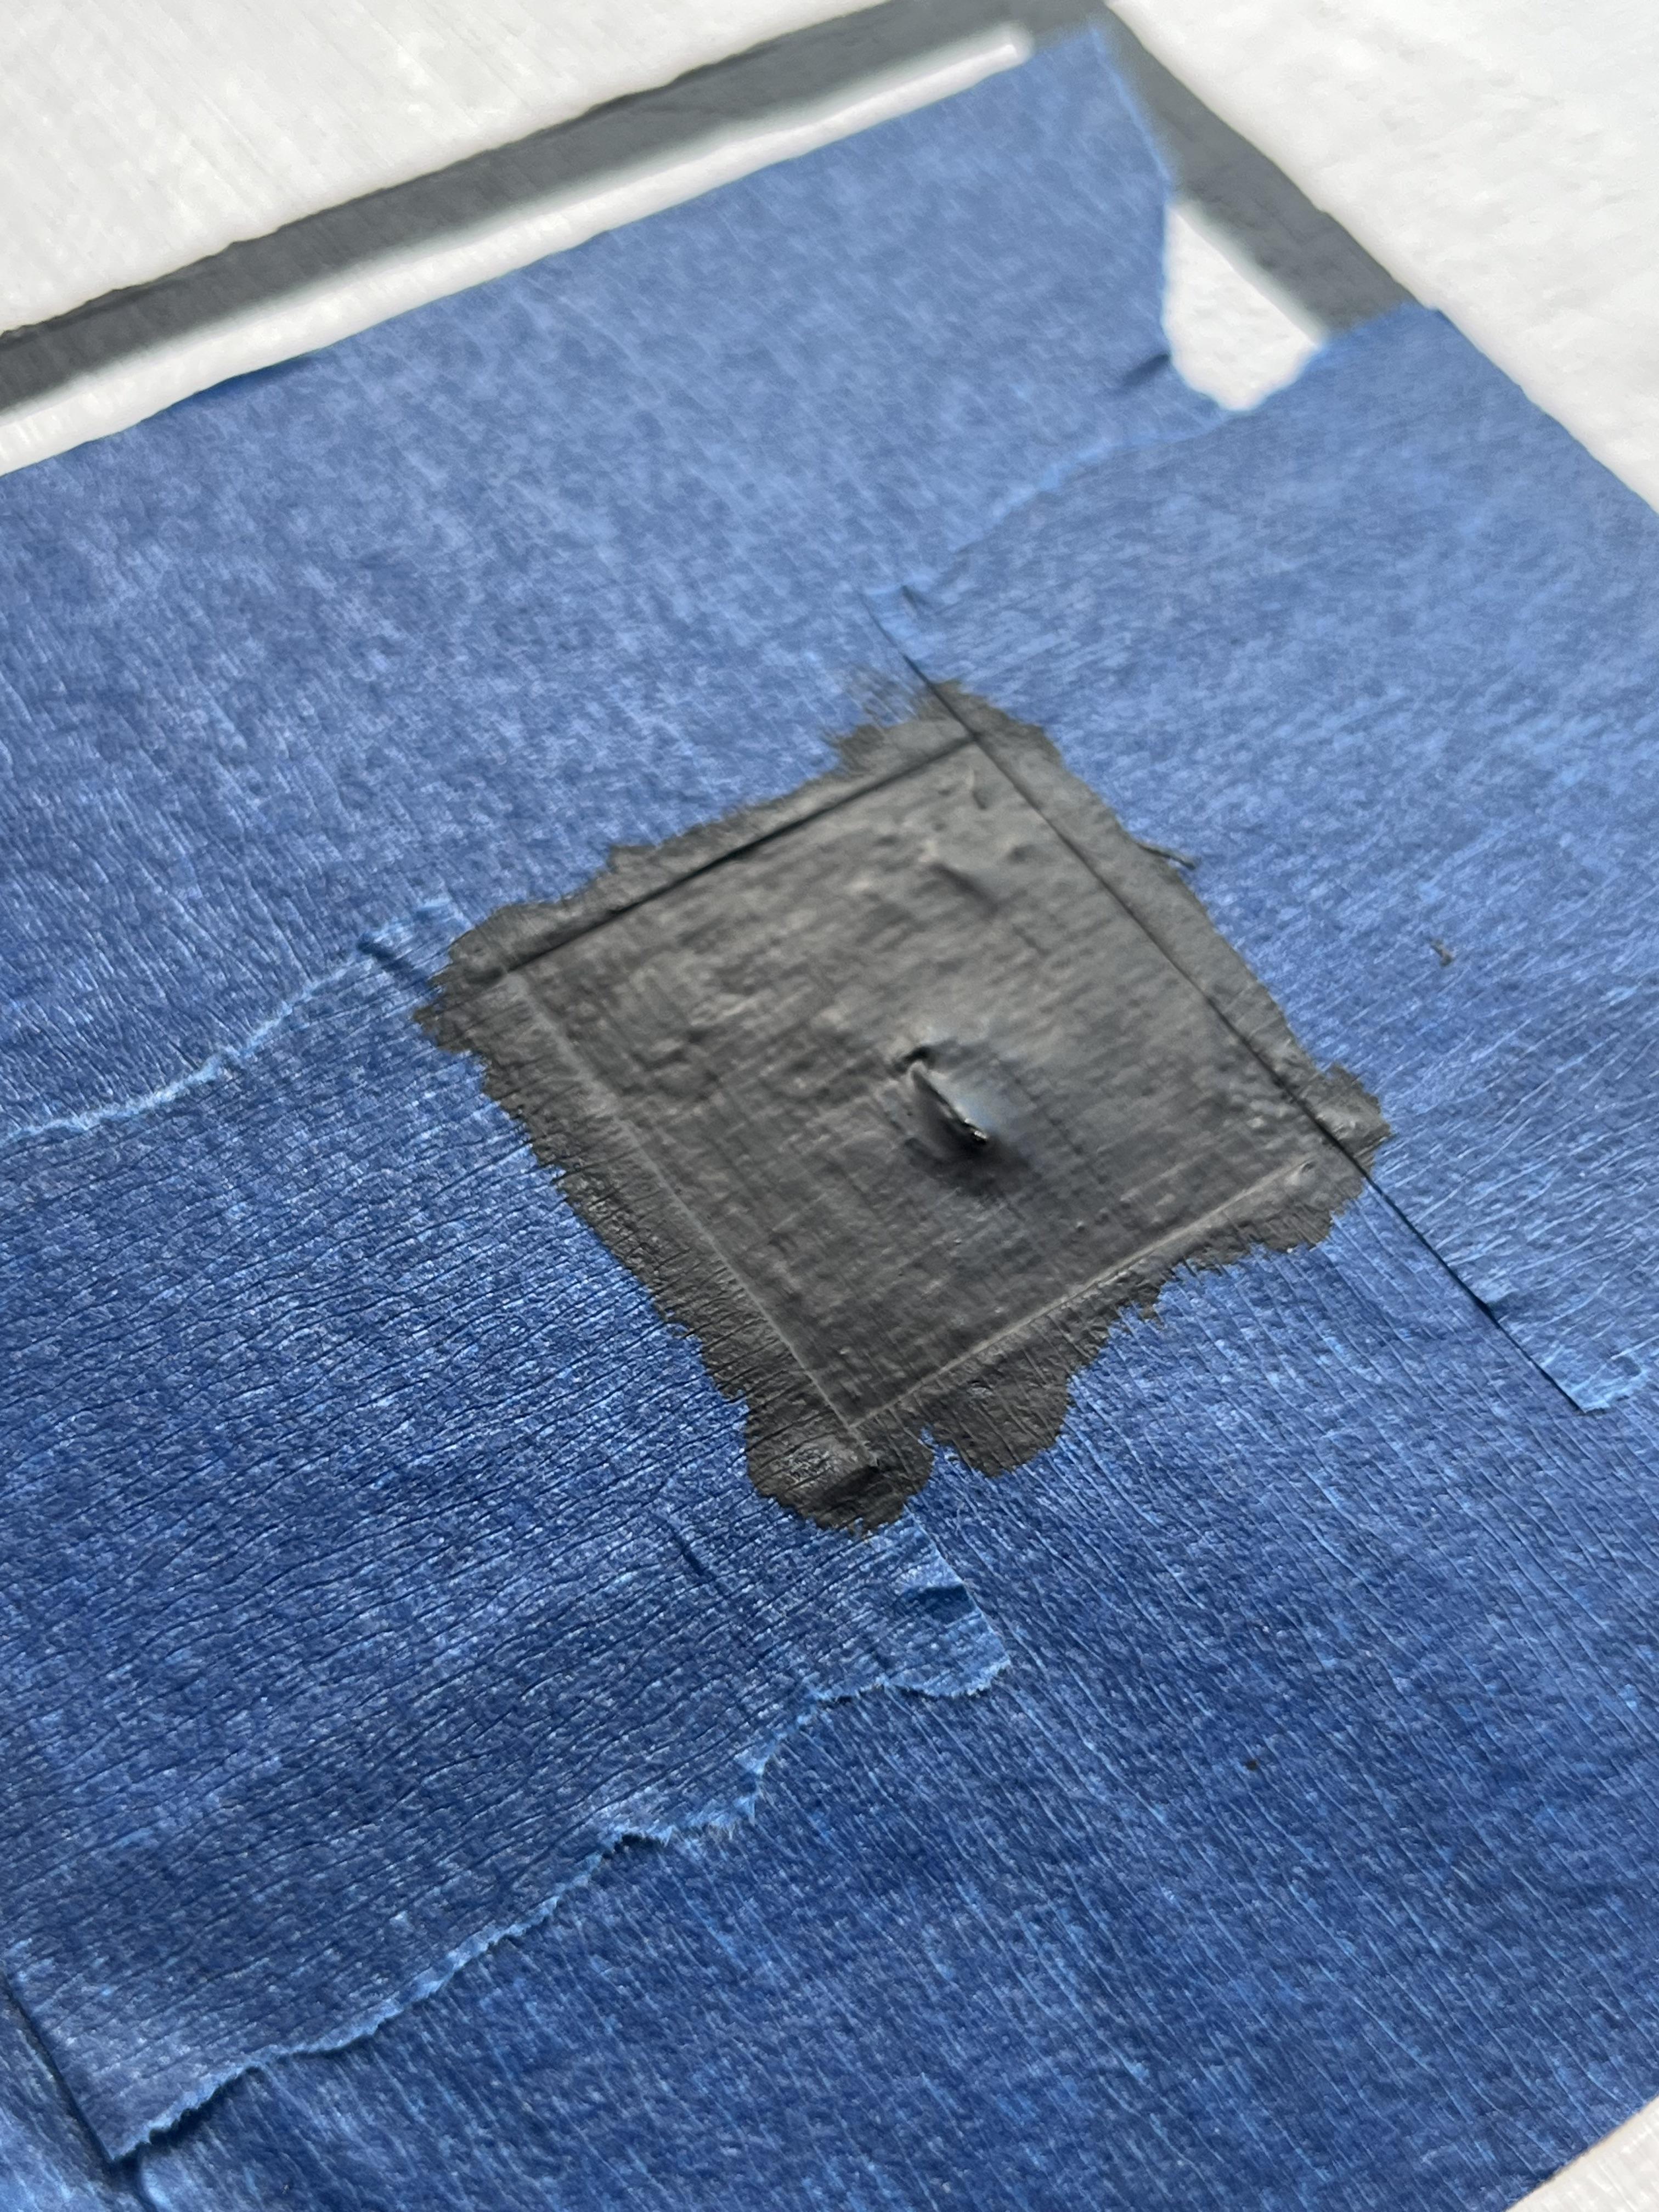
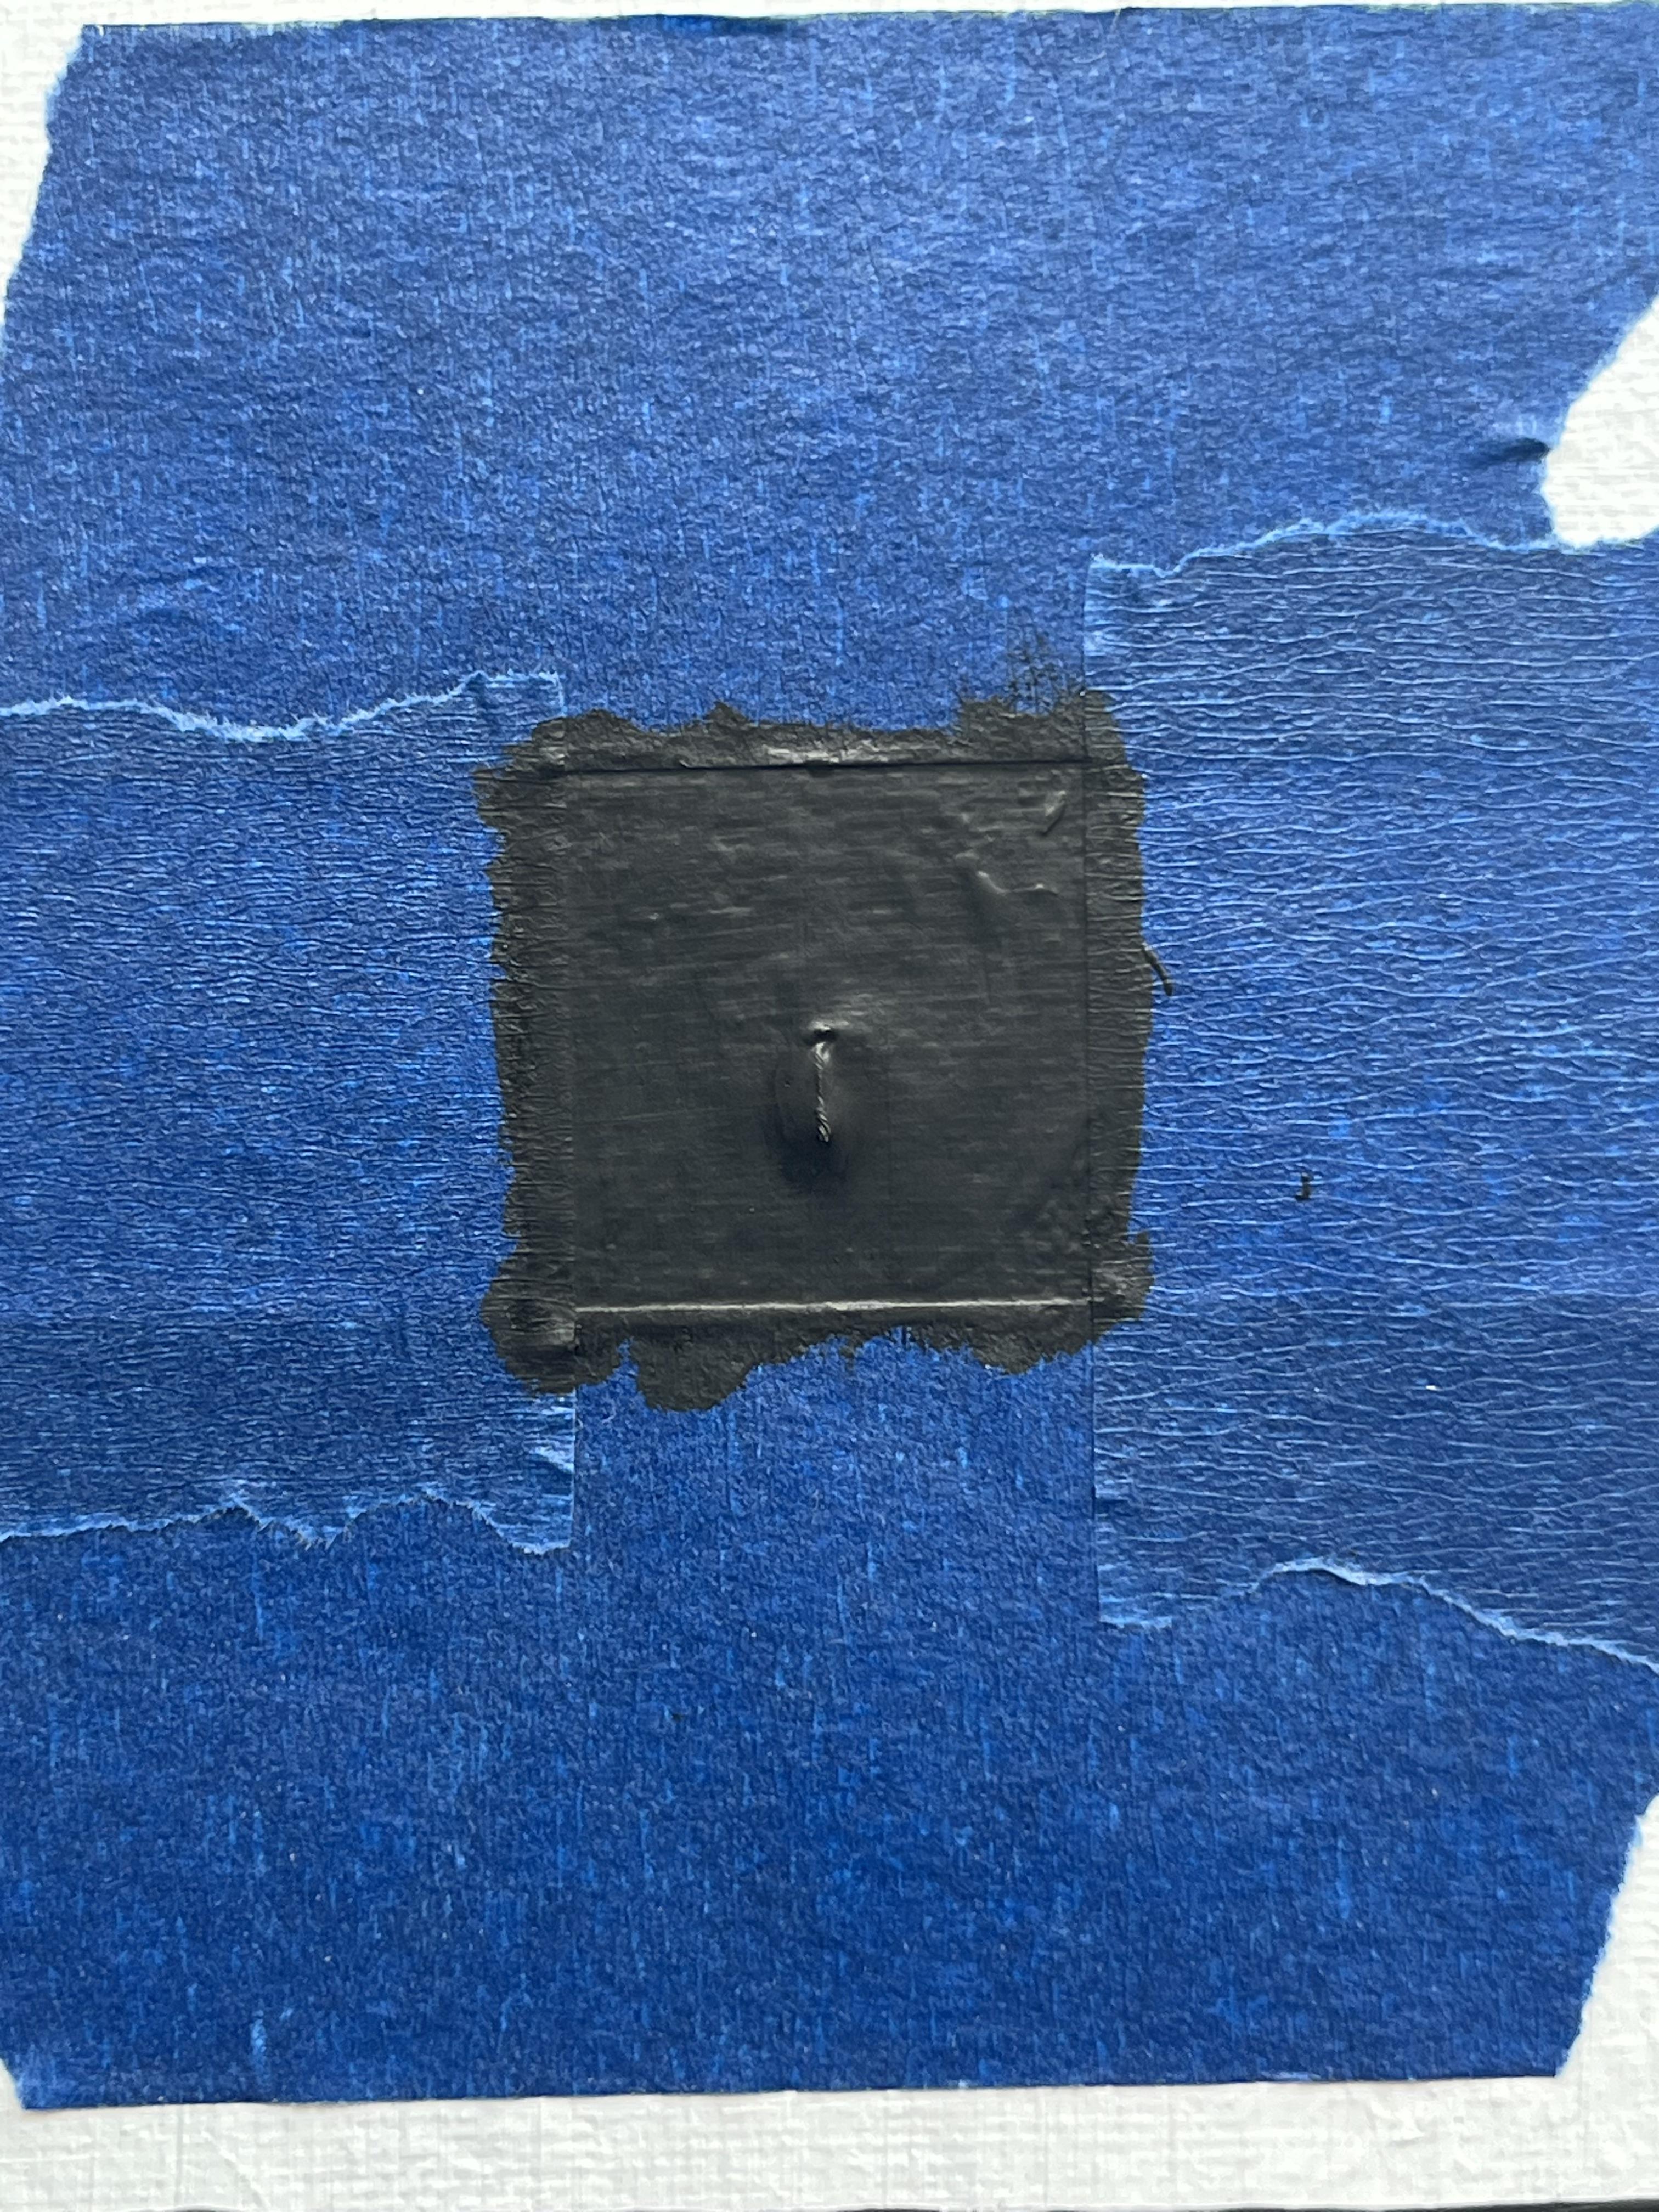
Flip the canvas over and bend the small wires onto the painted squares. Paint the wires with enough conductive paint to adhere the wire to the painting and also to smooth out the edges so you don't poke your finger on the sharp wires when touching the trigger spot. You might need to do a few layers of conductive paint on the wire itself with sufficient drying time in between. Don't worry if you can still see the wire under the conductive paint, we are only going for smoothness of the wire here. Once the top layers of acrylic paint go on top, the wire will be invisible.
Attach the Correct Wire to the Correct Electrode on the Board


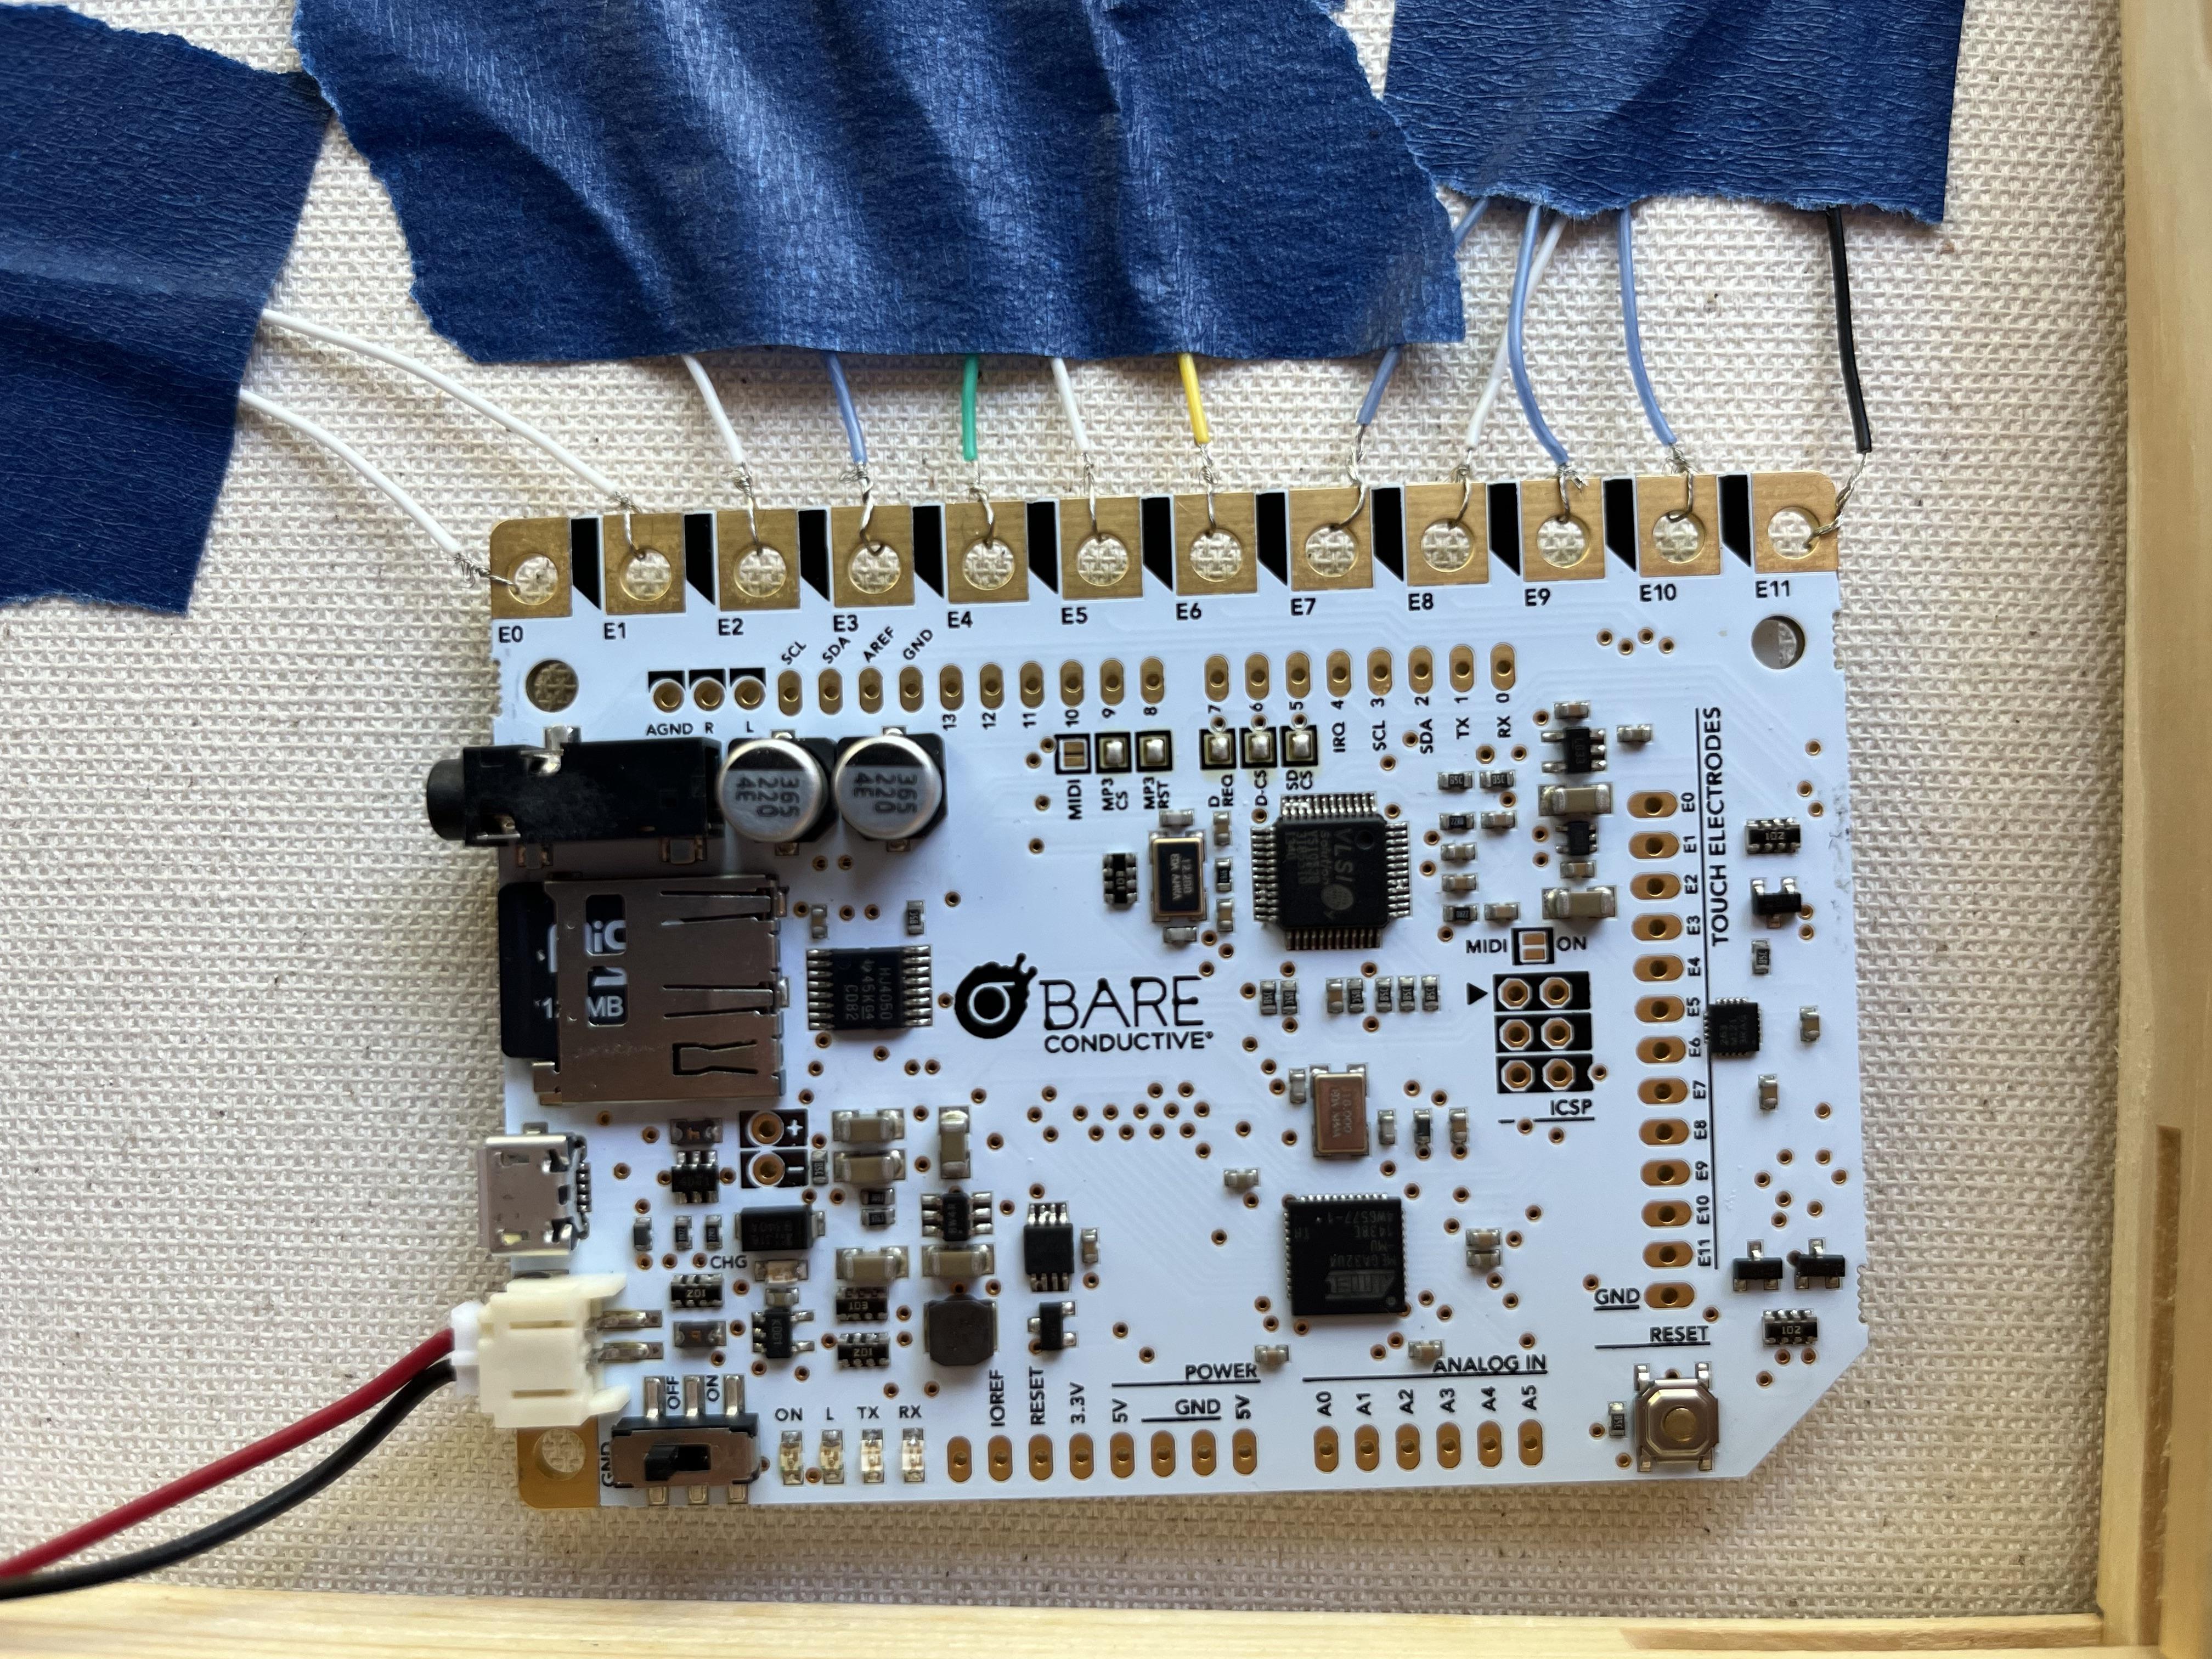
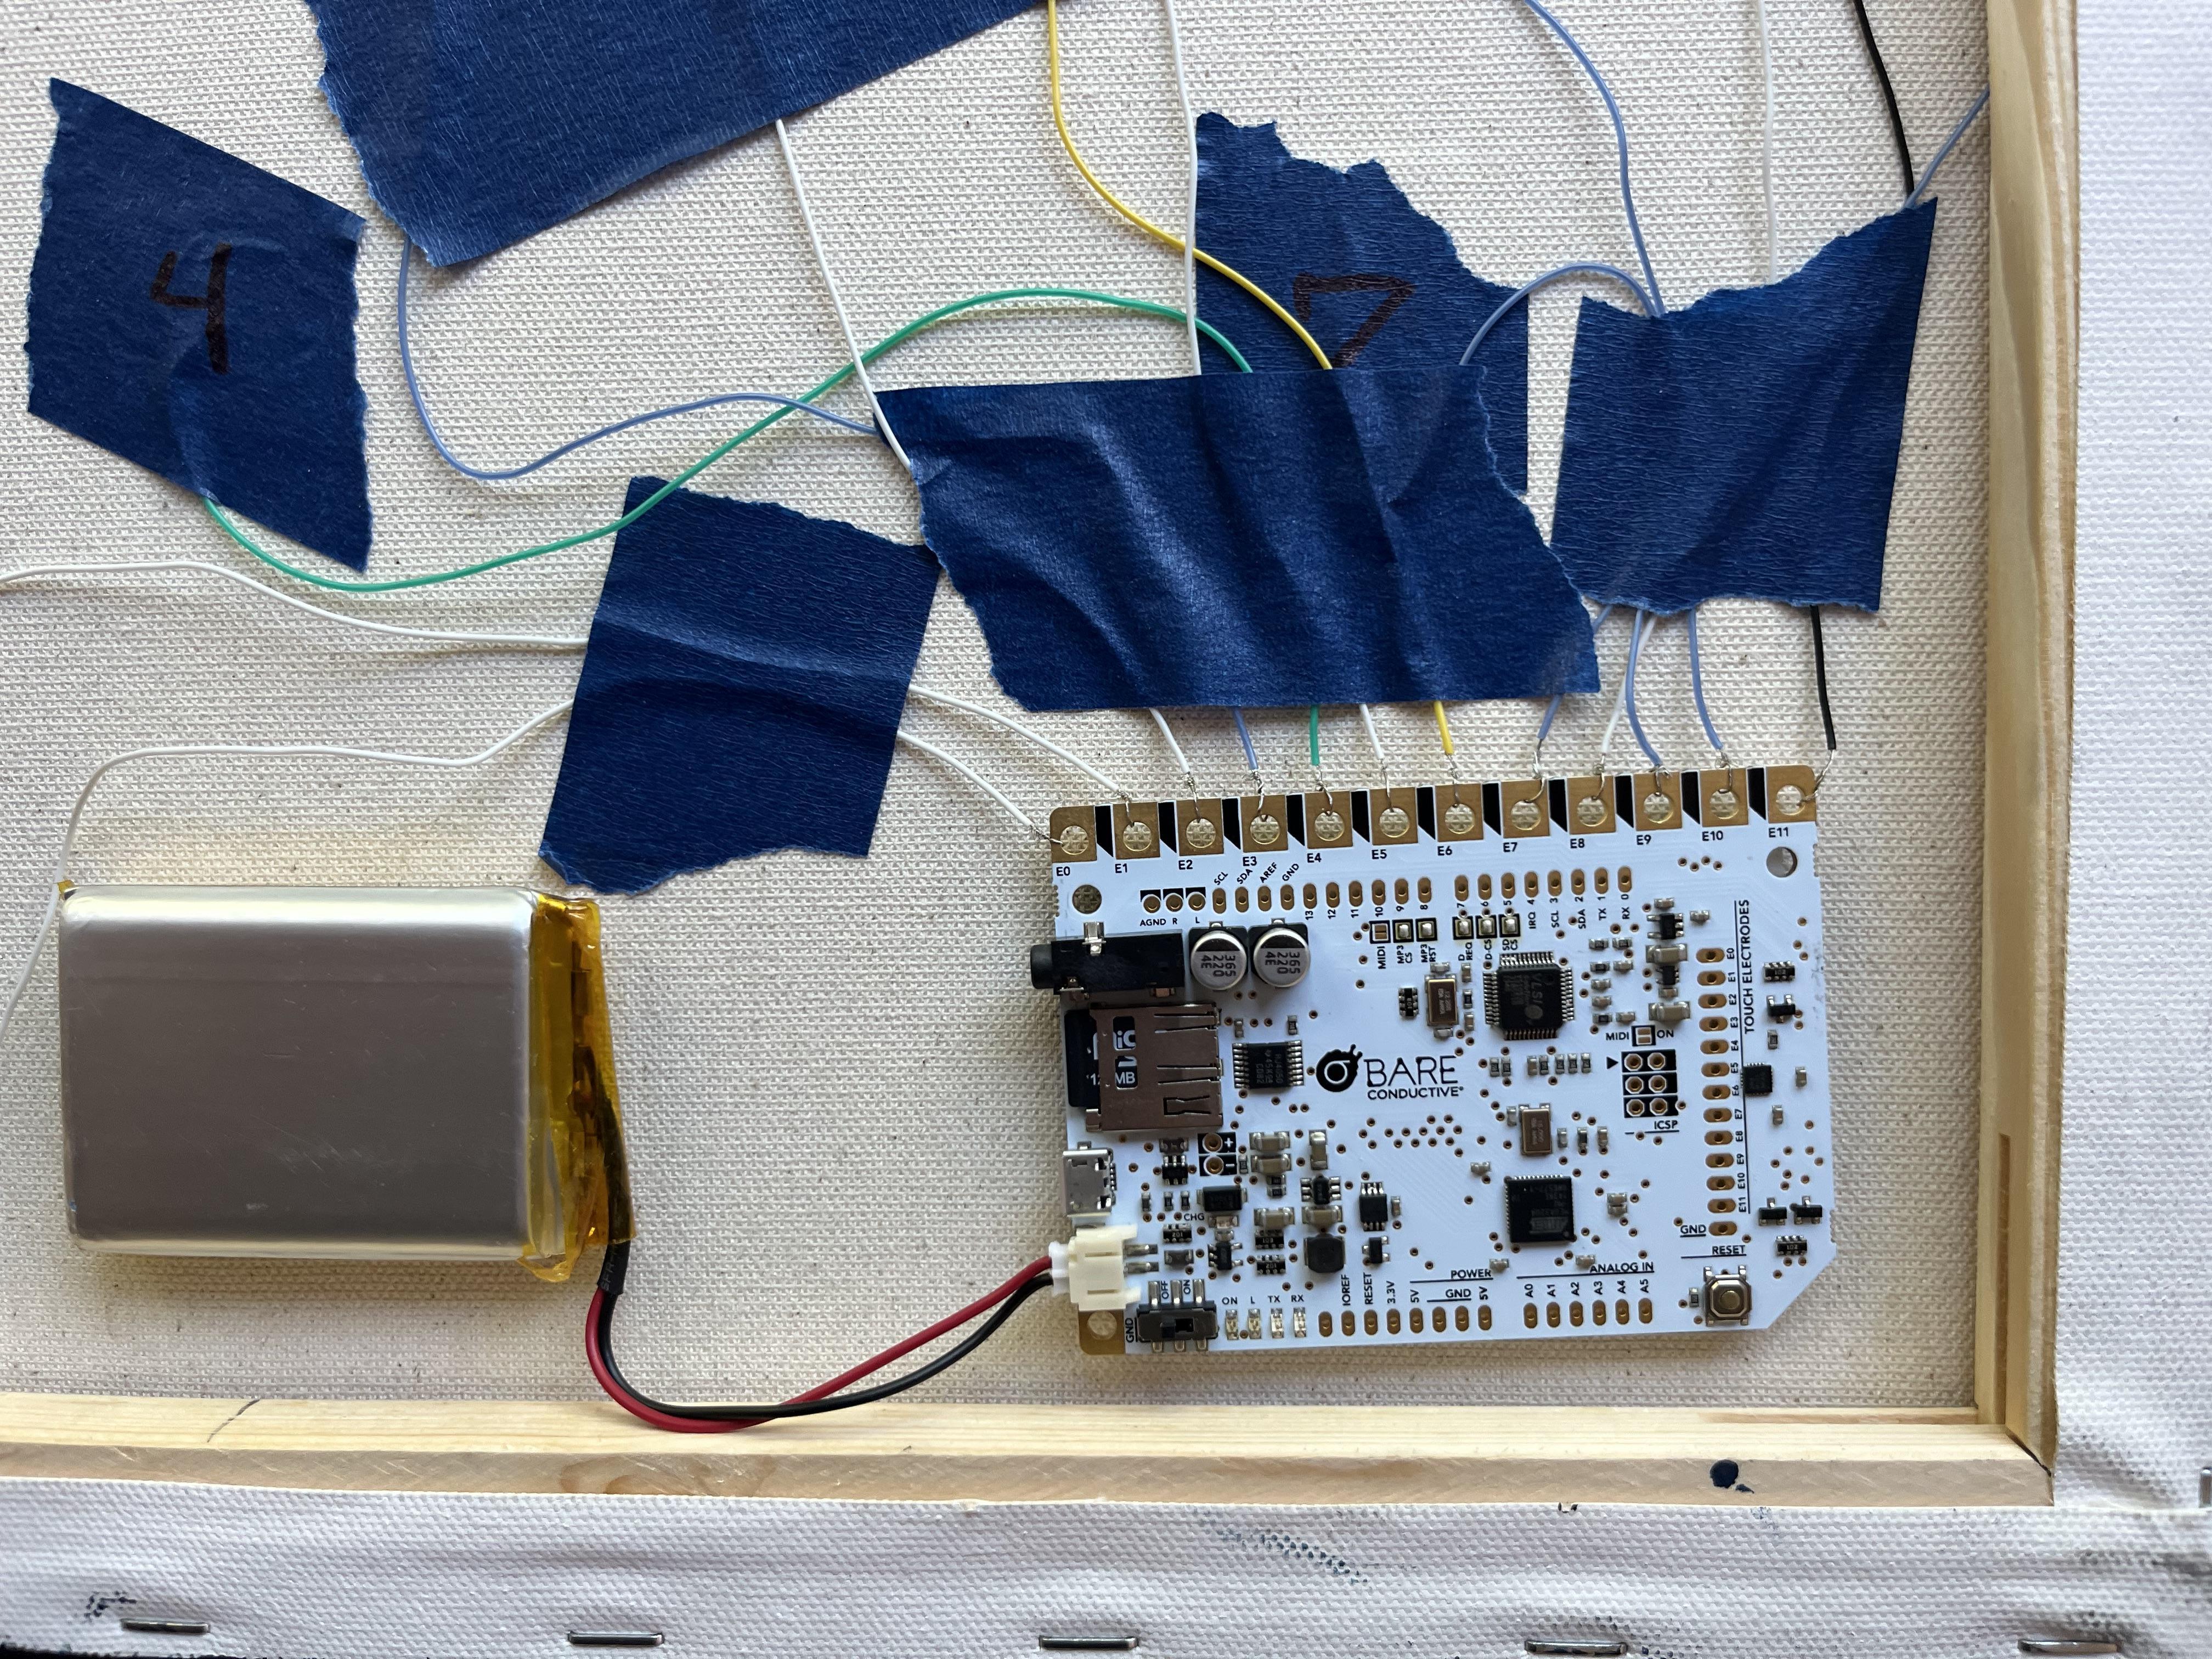


After all the conductive paint centers are dry--and I would give a good 24-48 hours for it to be completely dry before messing with it--let's run your wires to the touch board. I hope you left them long enough to reach it! Mount the board and the charged lithium polymer battery to the back of the painting where it won't interfere with the touch squares with strong velcro pieces. Strip the ends of the wires that are connecting to the electrodes on the board one-inch long. You can then twist the wires to themselves after looping through each hole on the touch board and trim off the extra tails. Make sure they are only touching their own electrode and nobody else's. Attach the already charged speaker to the microphone jack. Unfortunately, it won't power through the attached lipo battery so you'll need to charge it beforehand. Test the board and the conductive touch spots to make sure everything is working how it should. Secure the wires, battery, and board with more painter's tape to keep everything from moving and touching spots it shouldn't. You can always drop a dab of conductive paint onto each exposed wire twist and electrode for an extra secure connection if you were unable to tightly wind the wire so that it always stays in one spot. The painter's tape does a good job of keeping the wire/electrode connected, and I can always easily remove the board for another project in the future.
Paint the Front With Acrylic Paints of Your Choosing

The conductive paint is very water-soluable and it will re-wet under the acrylic paint when painted on if it hasn't dried for a day or two. Treat it like crumb-coating a cake so that the final frosting layer looks nice, but in this case, you'll want to "pre-paint" the squares first to lock in the conductive paint so it won't smear with subsequent layers of acrylic.
I enlisted the help of my very talented youngest daughter to paint the house background and the Taylor Swift album icons in the rooms. Let's just admire how awesome she is! Haha!
Hope you enjoyed reading about my project as much as I do always having Taylor Swift tracks at my fingertips when I walk past this painting! I think the 7th-grade girls at the conference enjoyed my presentation and I was able to showcase STEM in a way that they could relate to and see themselves creating fun crafty projects in the future.