The Heavy Hitter Popsicle Stick Catapult (Upgraded Firing Power)
by william_ckm in Outside > Launchers
548 Views, 4 Favorites, 0 Comments
The Heavy Hitter Popsicle Stick Catapult (Upgraded Firing Power)
.jpeg)
We all remember the classic popsicle stick catapult from summer camp or physics class. It's a great introduction to STEM concepts, but the standard 5-stick design tends to have some limitations—it usually launches a marshmallow only a few feet and can start to come apart after repeated use. As someone who enjoys tinkering and squeezing every bit of performance out of simple materials, I wanted to see if I could take this classic project to the next level.
I started experimenting with ways to make this mini siege engine more powerful and durable. One common approach is simply adding more sticks to the base, but I quickly ran into a frustrating problem: the rubber bands become so tight that it's nearly impossible to insert the final sticks without breaking them or snapping the bands.
To overcome this, I developed two major upgrades. First, I increased the core bundle from 5 to 8 sticks for a sturdier spine. Second, I tripled the launching rubber bands from 1 to 3 for significantly more tension. The real game-changer, however, was figuring out an innovative insertion technique that makes it easy to get those final sticks into an incredibly tight rubber band nest.
With this upgraded catapult, I decided to take things a step further and introduce my own sport: Catapult Golf! The concept is simple—set up a "green" (a sheet of A4 paper) and a "hole" (a tiny paper box) at varying distances. The goal is to launch your projectile (a pom-pom, marshmallow, or small ball) with just the right amount of force and angle to land on the green and roll into the hole. It's a fun way to test your aim, adjust for distance, and compete with friends—all while putting your upgraded catapult to the test. The extra power and precision from the 8-stick bundle and triple rubber bands make it perfect for this game, giving you the control and distance needed to sink that "putt" from across the room!
The end result is a catapult that delivers impressive launch power, holds up much better over time, and opens up a whole new way to play.
Supplies
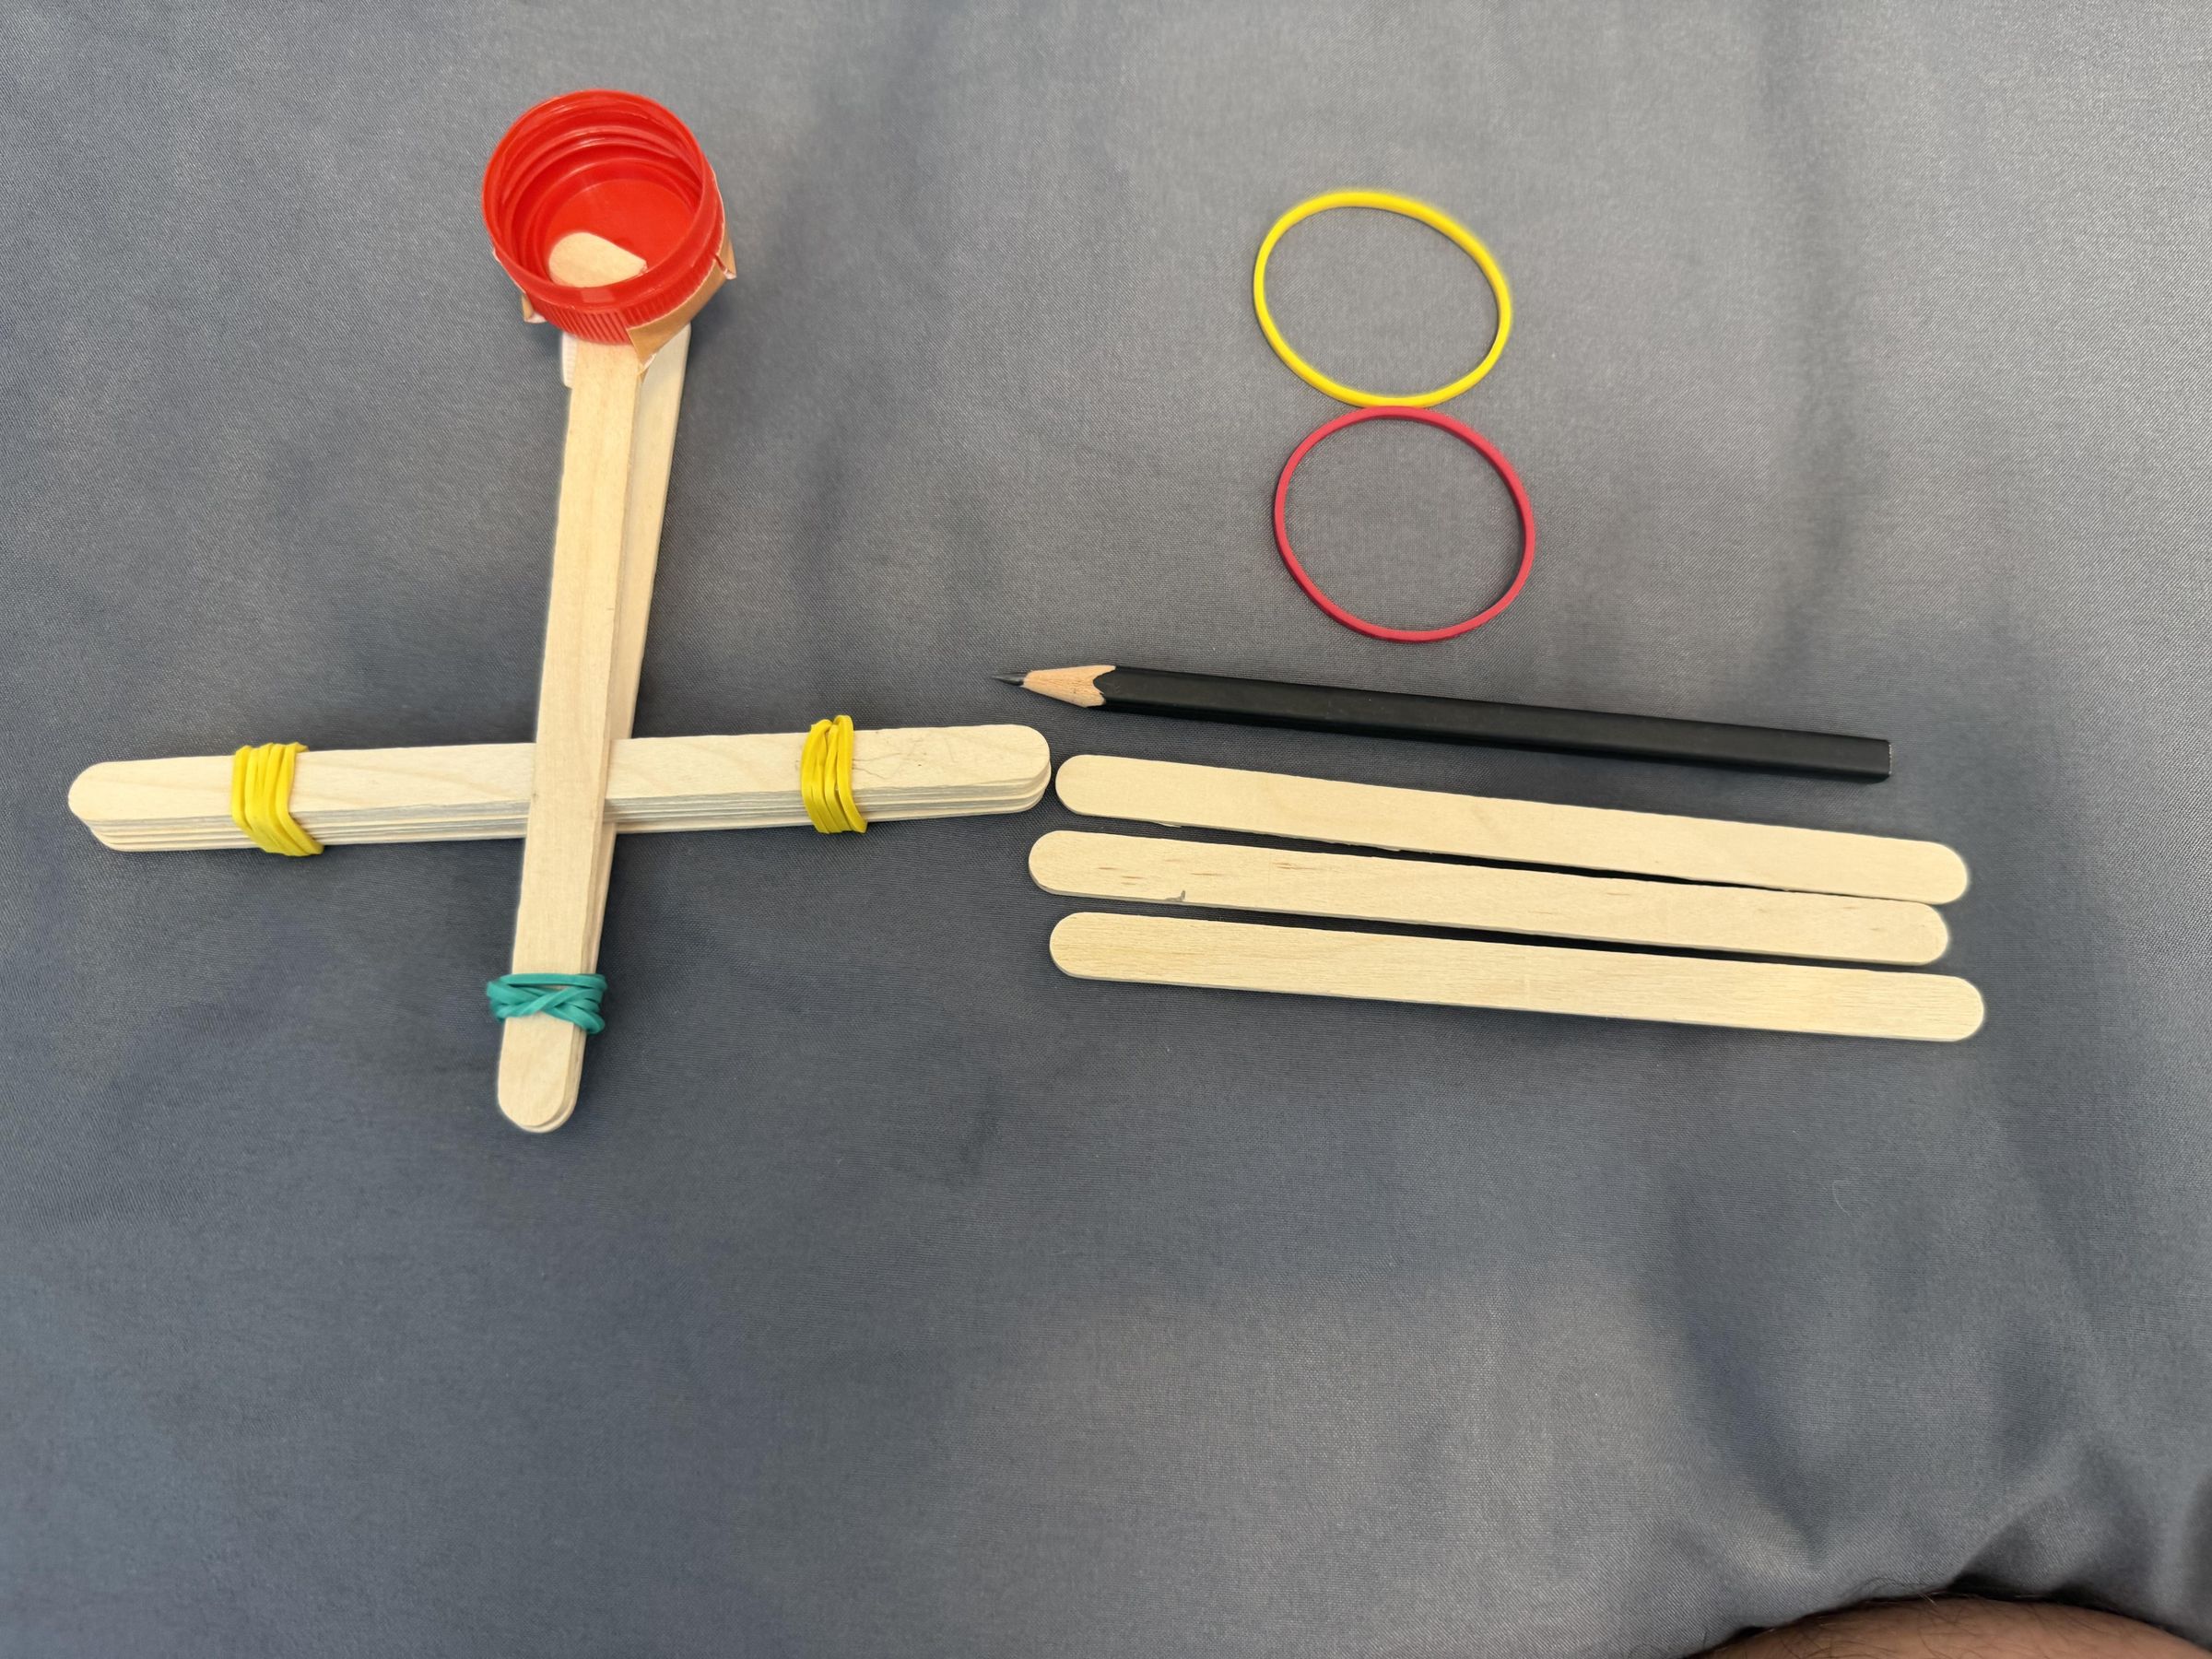
The supplies list is easy, accessible and affordable!
1) Your original popsicle stick model (my base model was based on: https://www.instructables.com/Making-a-Rubber-Band-Catapult/)
2) 3 popsicle sticks
3) 2 rubber bands
4) Sharp pencil
5) 2 sheets of A4
Insert the Three Popsicle Sticks (with Reliable Technique!)
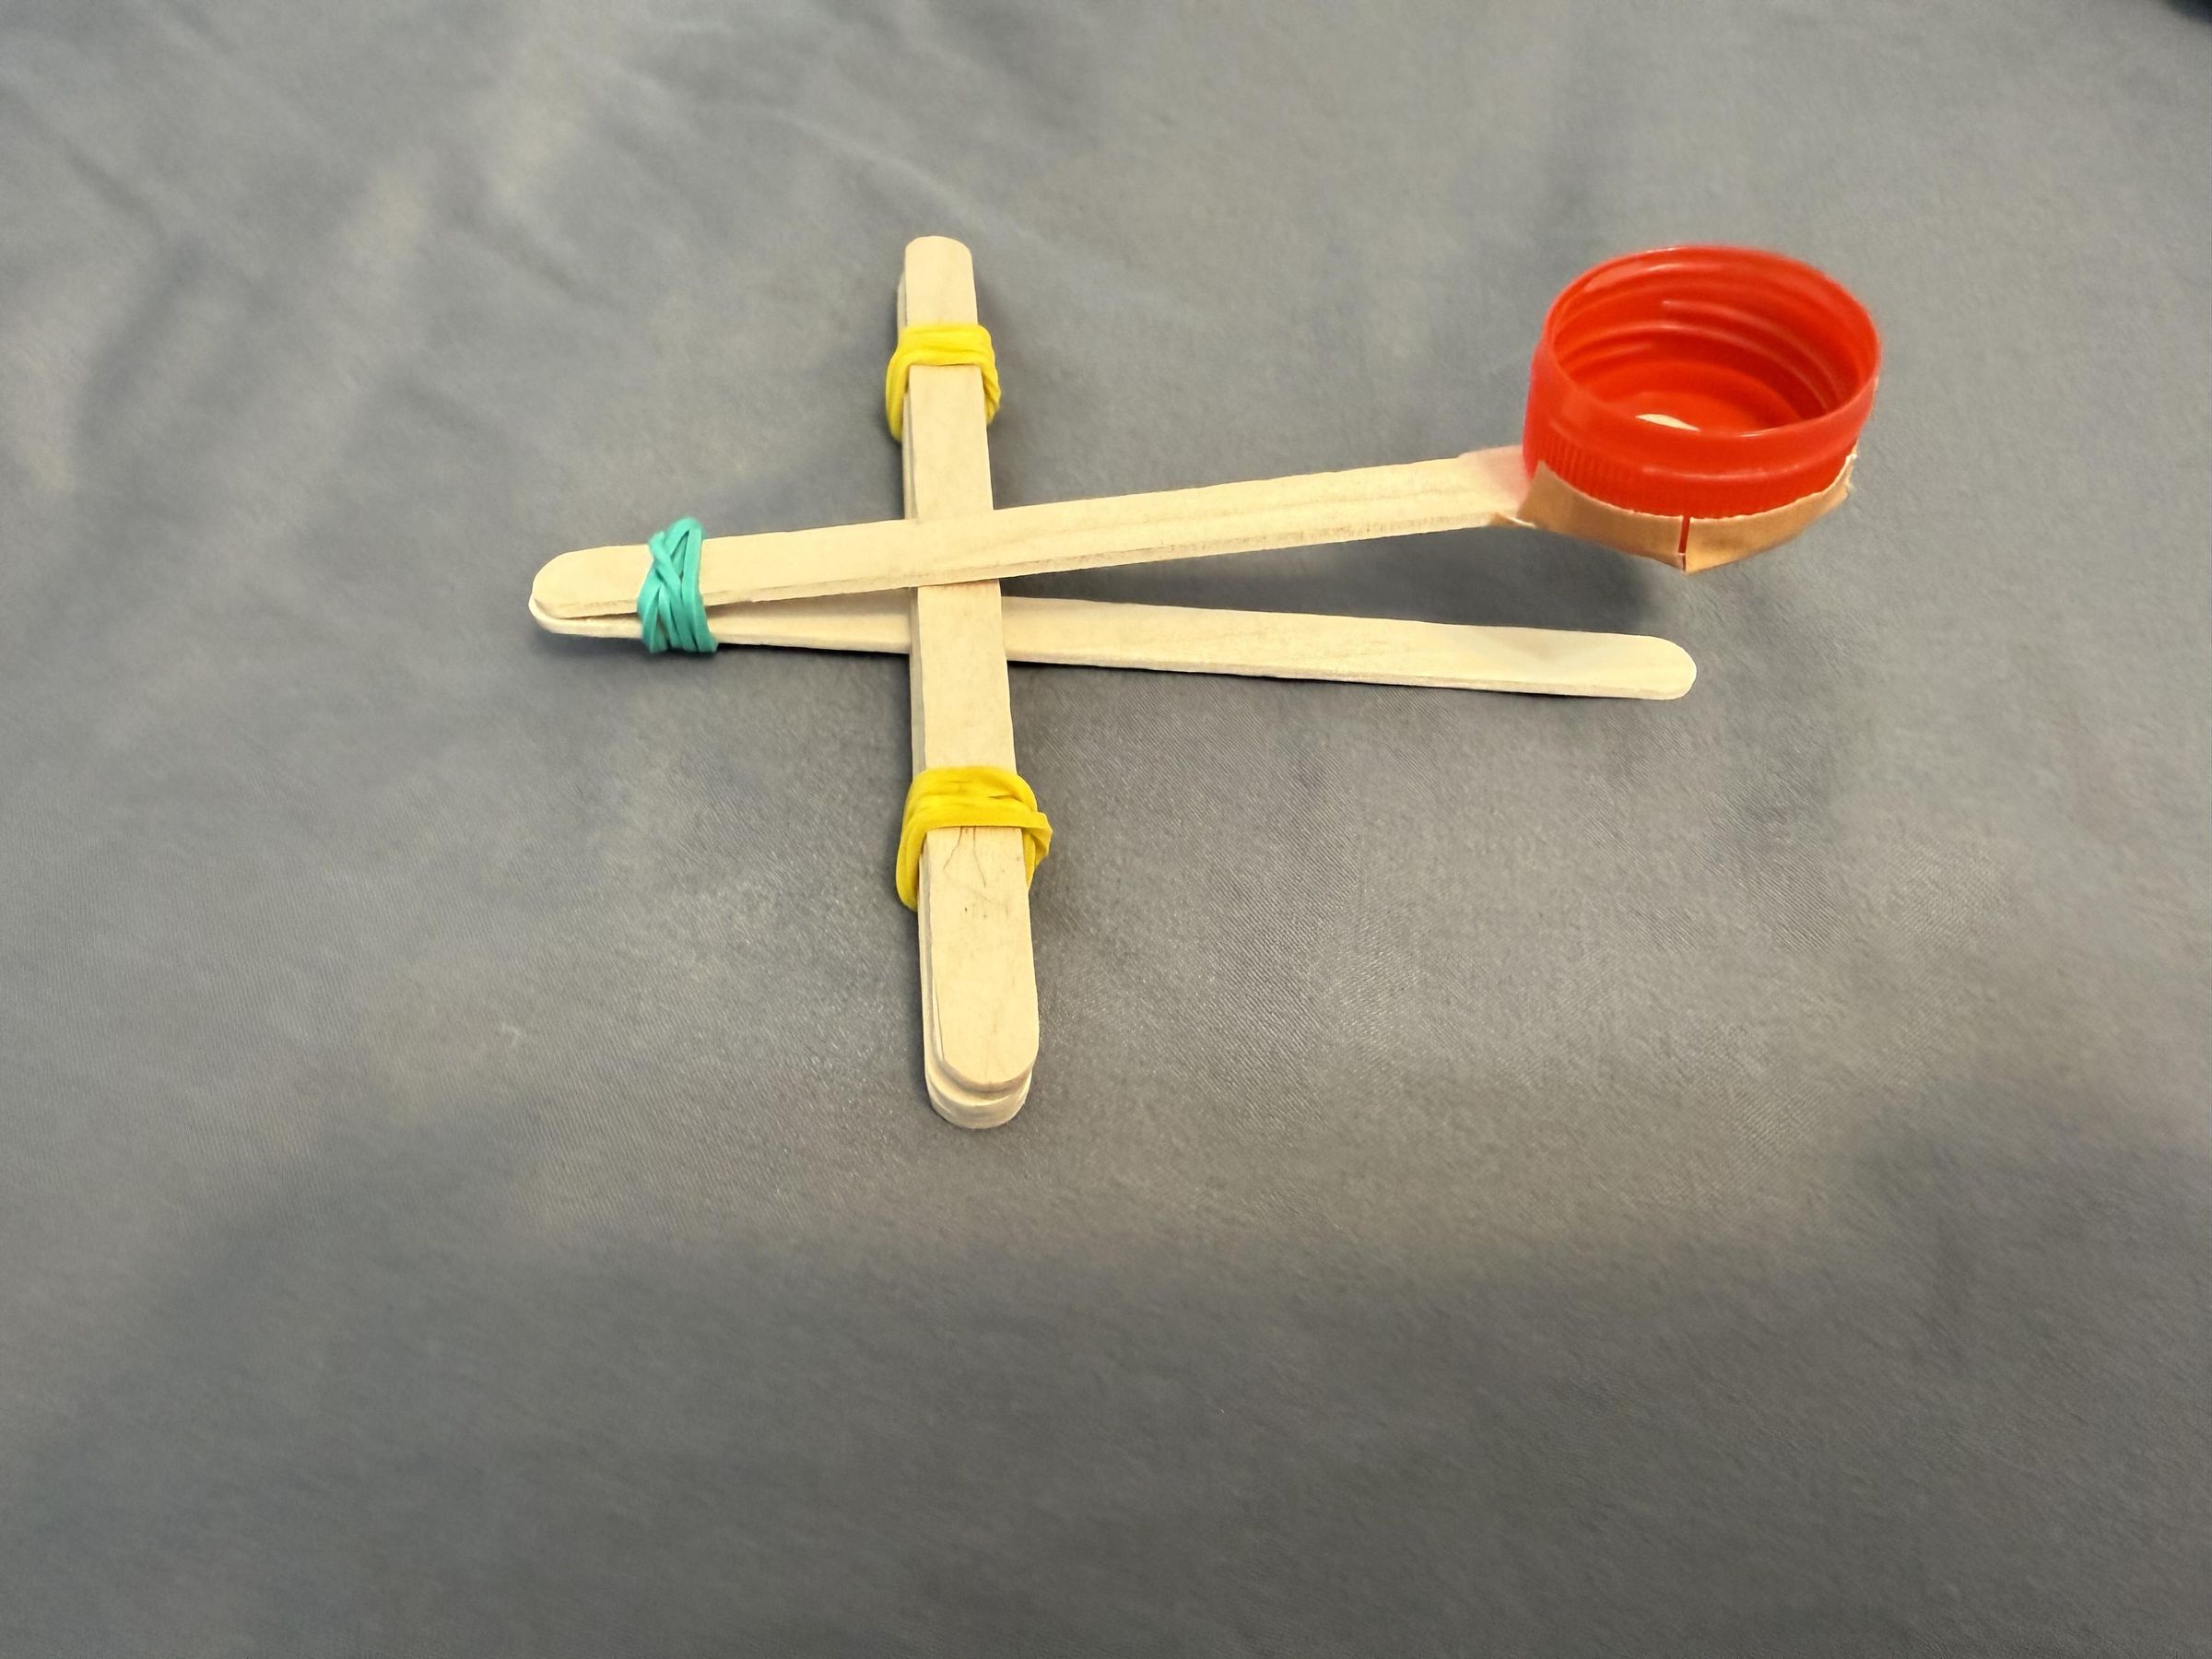
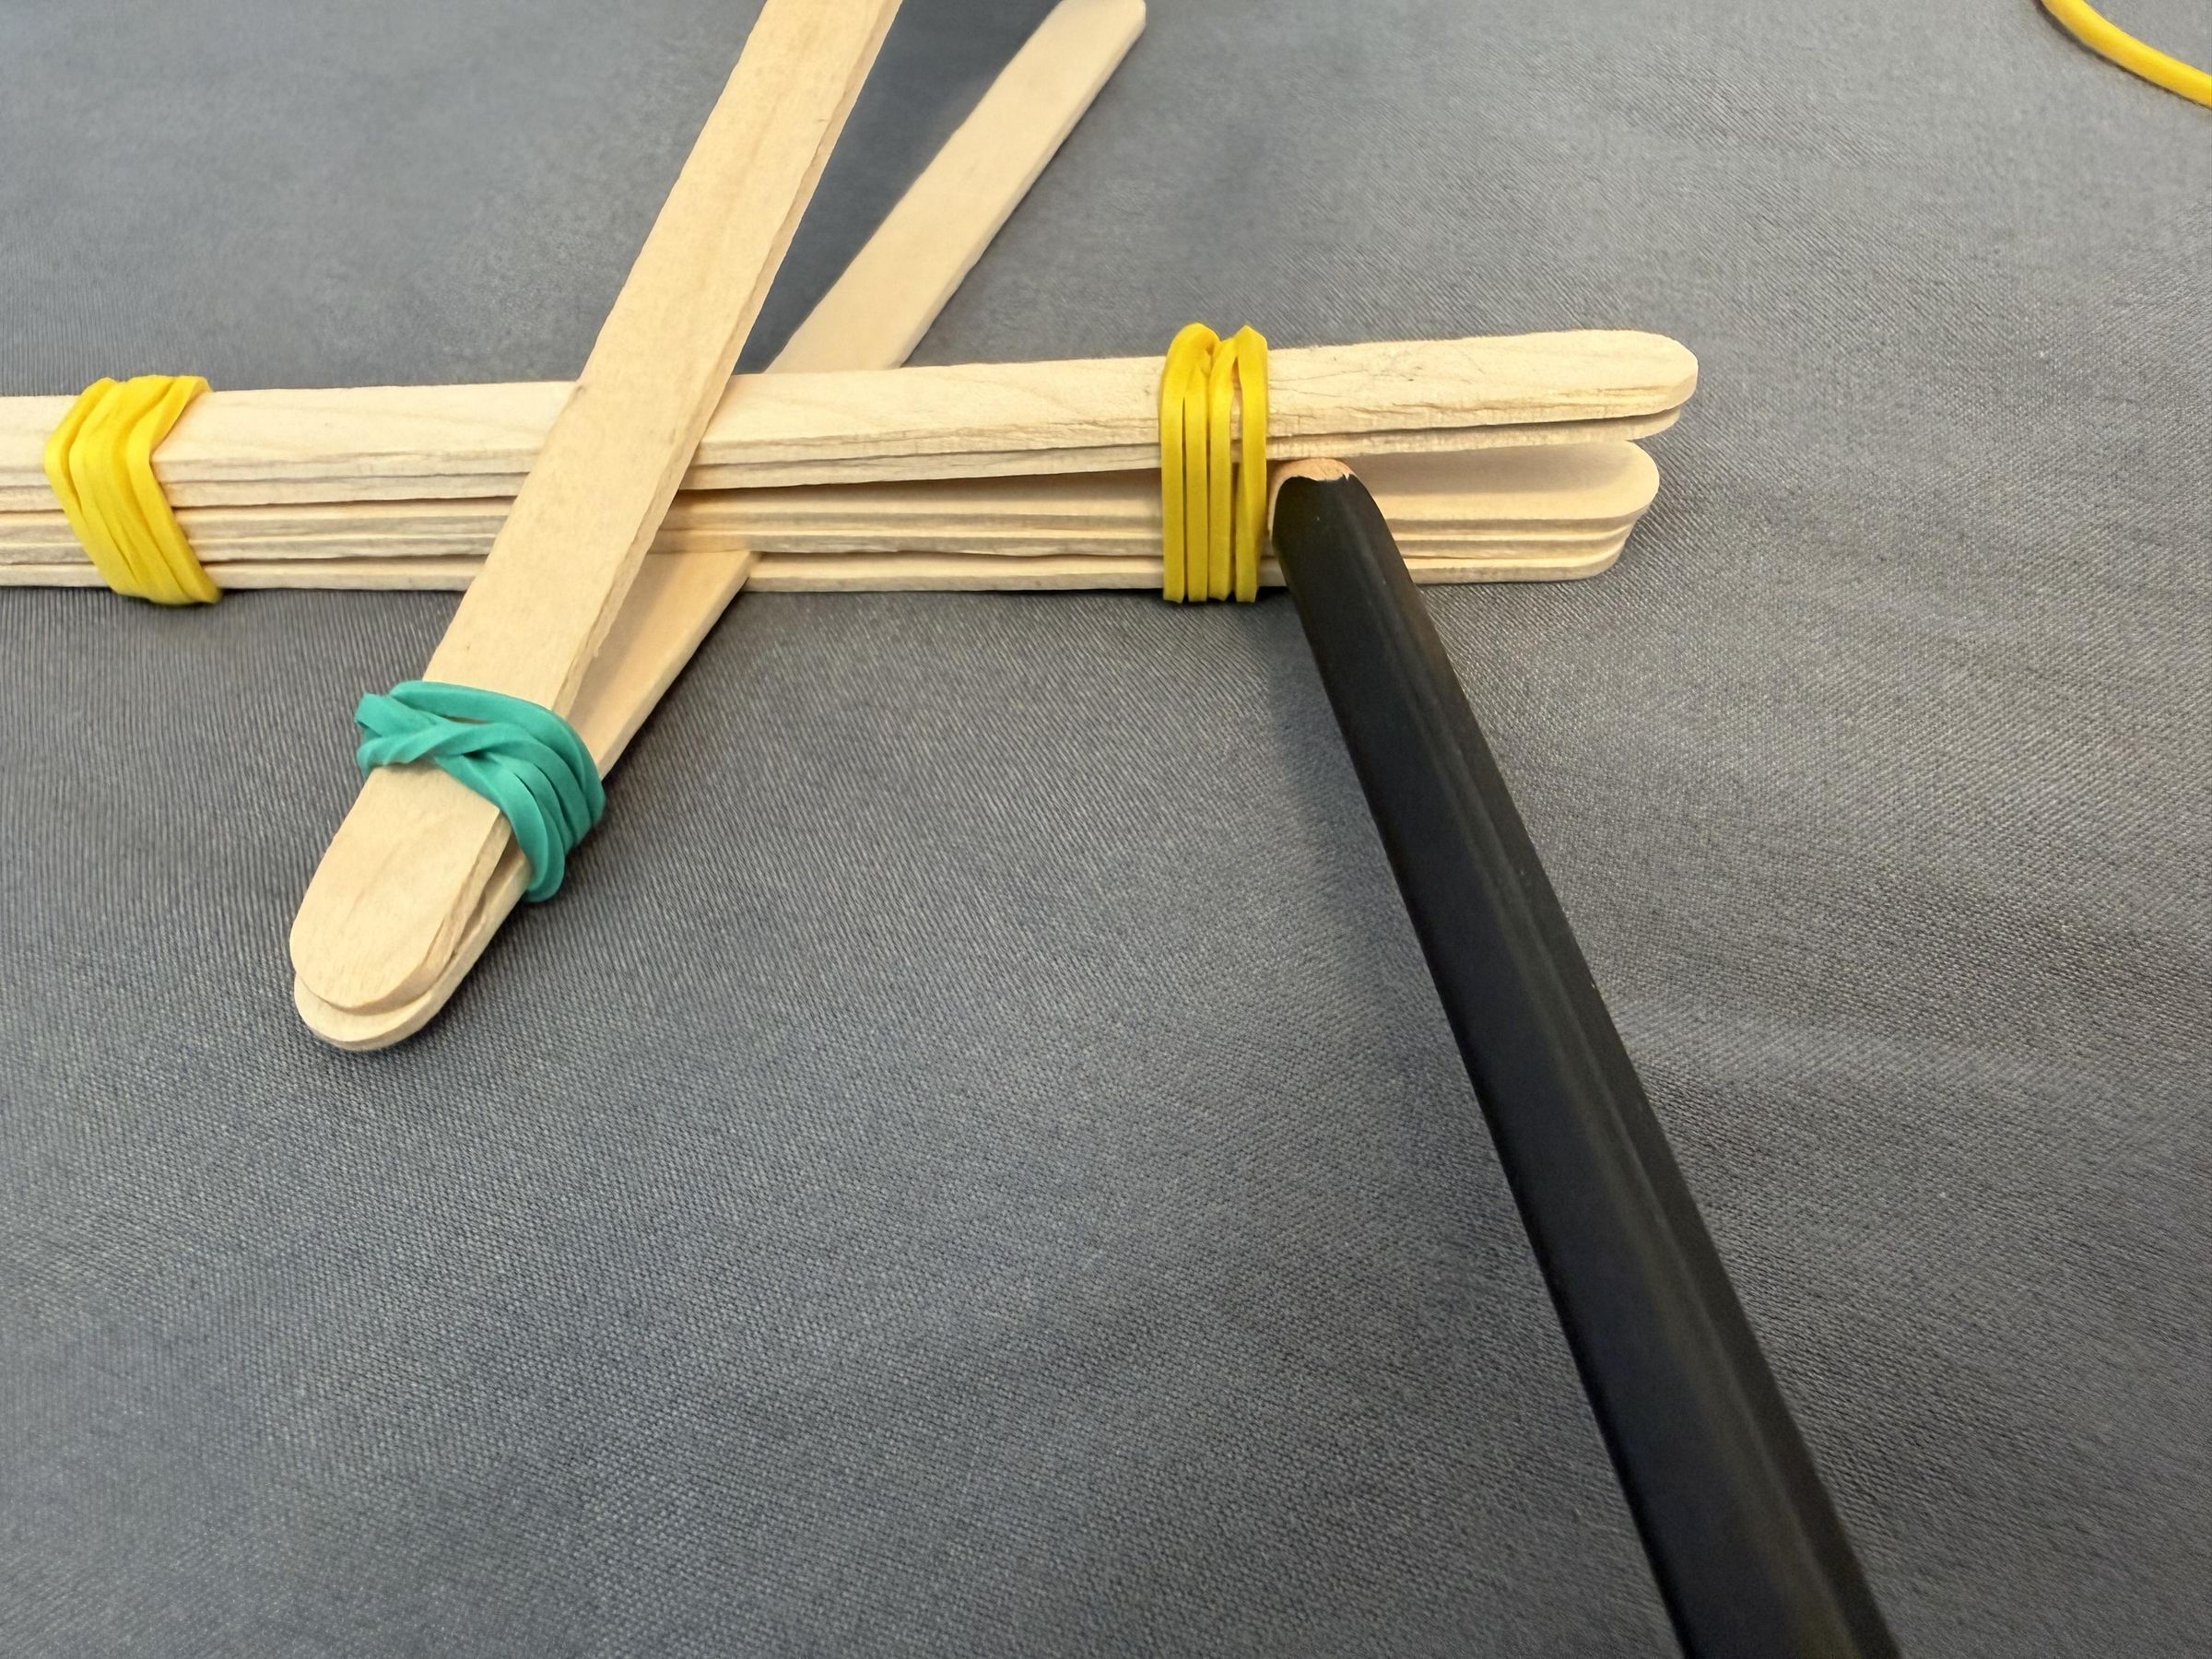
Using your original model (first picture), rotate the catapult until the main stack of popsicle sticks is facing you. Insert the tip of your sharp pencil near the centre of the stack (maybe a bit above the centre) until a visible gap appears. Then, insert one of your new popsicle sticks into the gap, and remove the pencil. Now, you can easily slot in the popsicle stick - it should slot in beautifully between your two rubber bands.
Prepare to Add New Rubber Bands
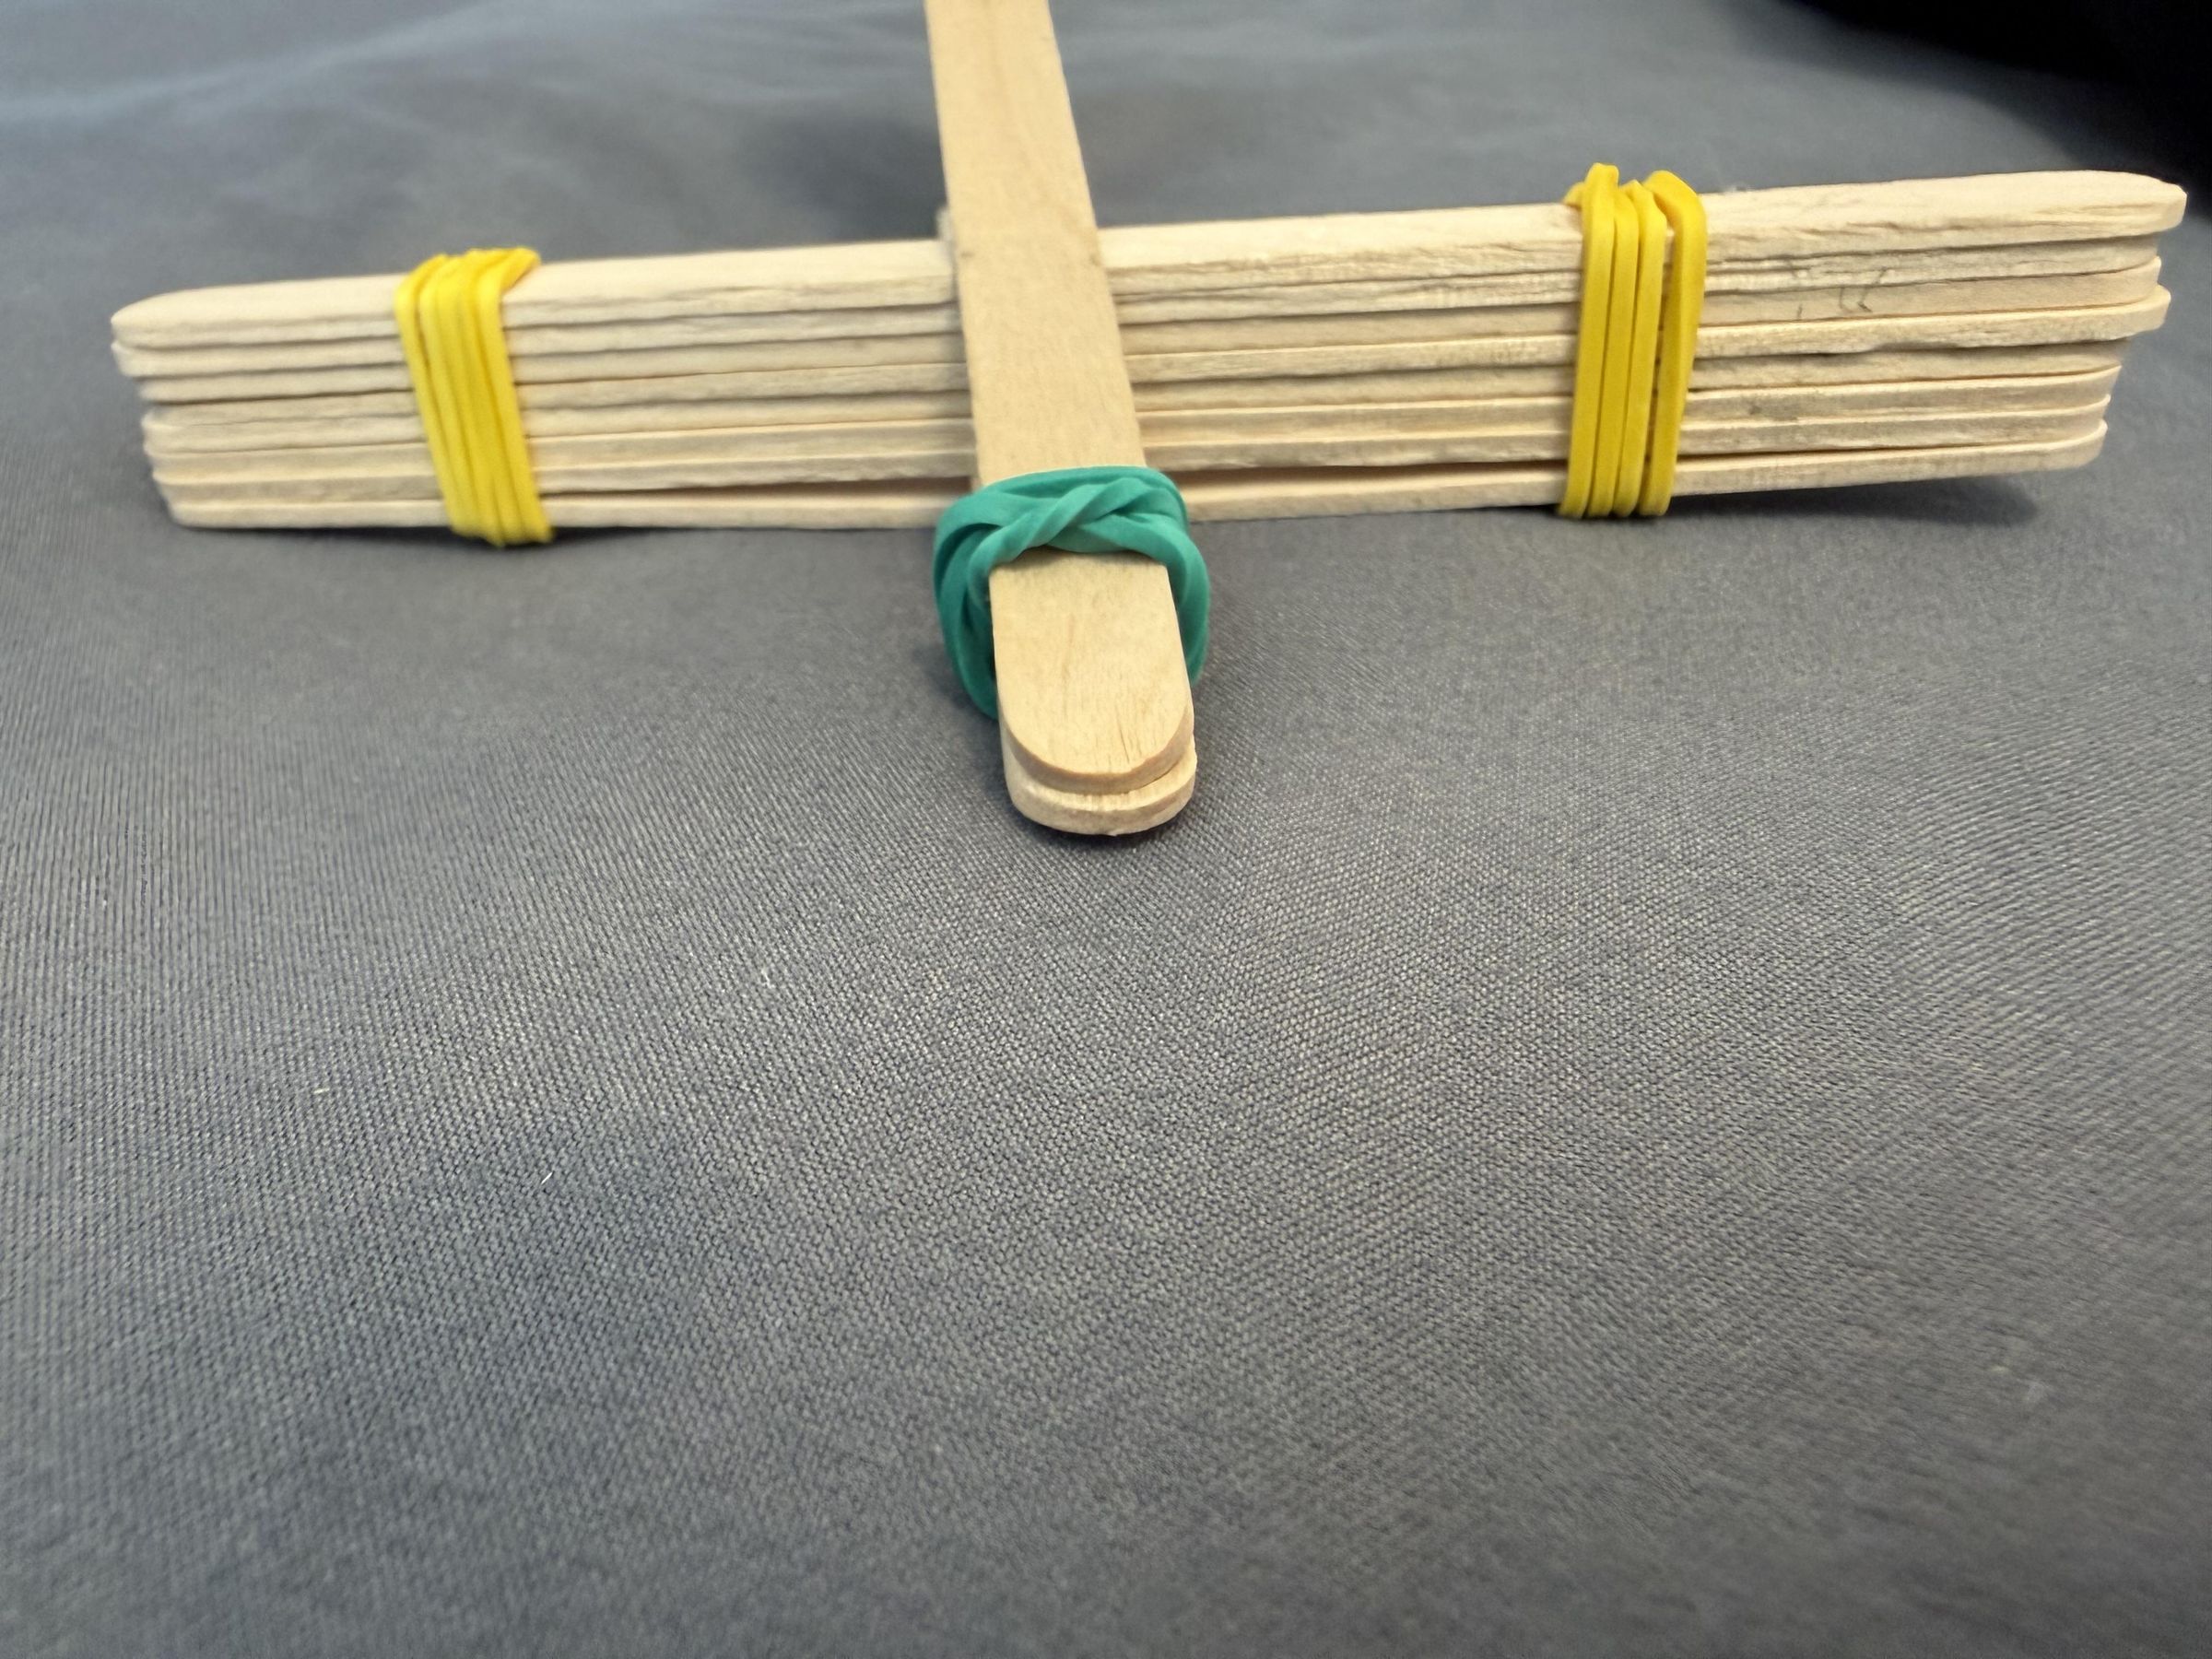
Your main stack should look like this now (8 sticks in total). In preparation for adding new rubber bands, slide the original rubber band dedicated to shooting (in green) up the popsicle stick (closer to the main stack). This gives more space for the new rubber bands.
Add the Rubber Bands
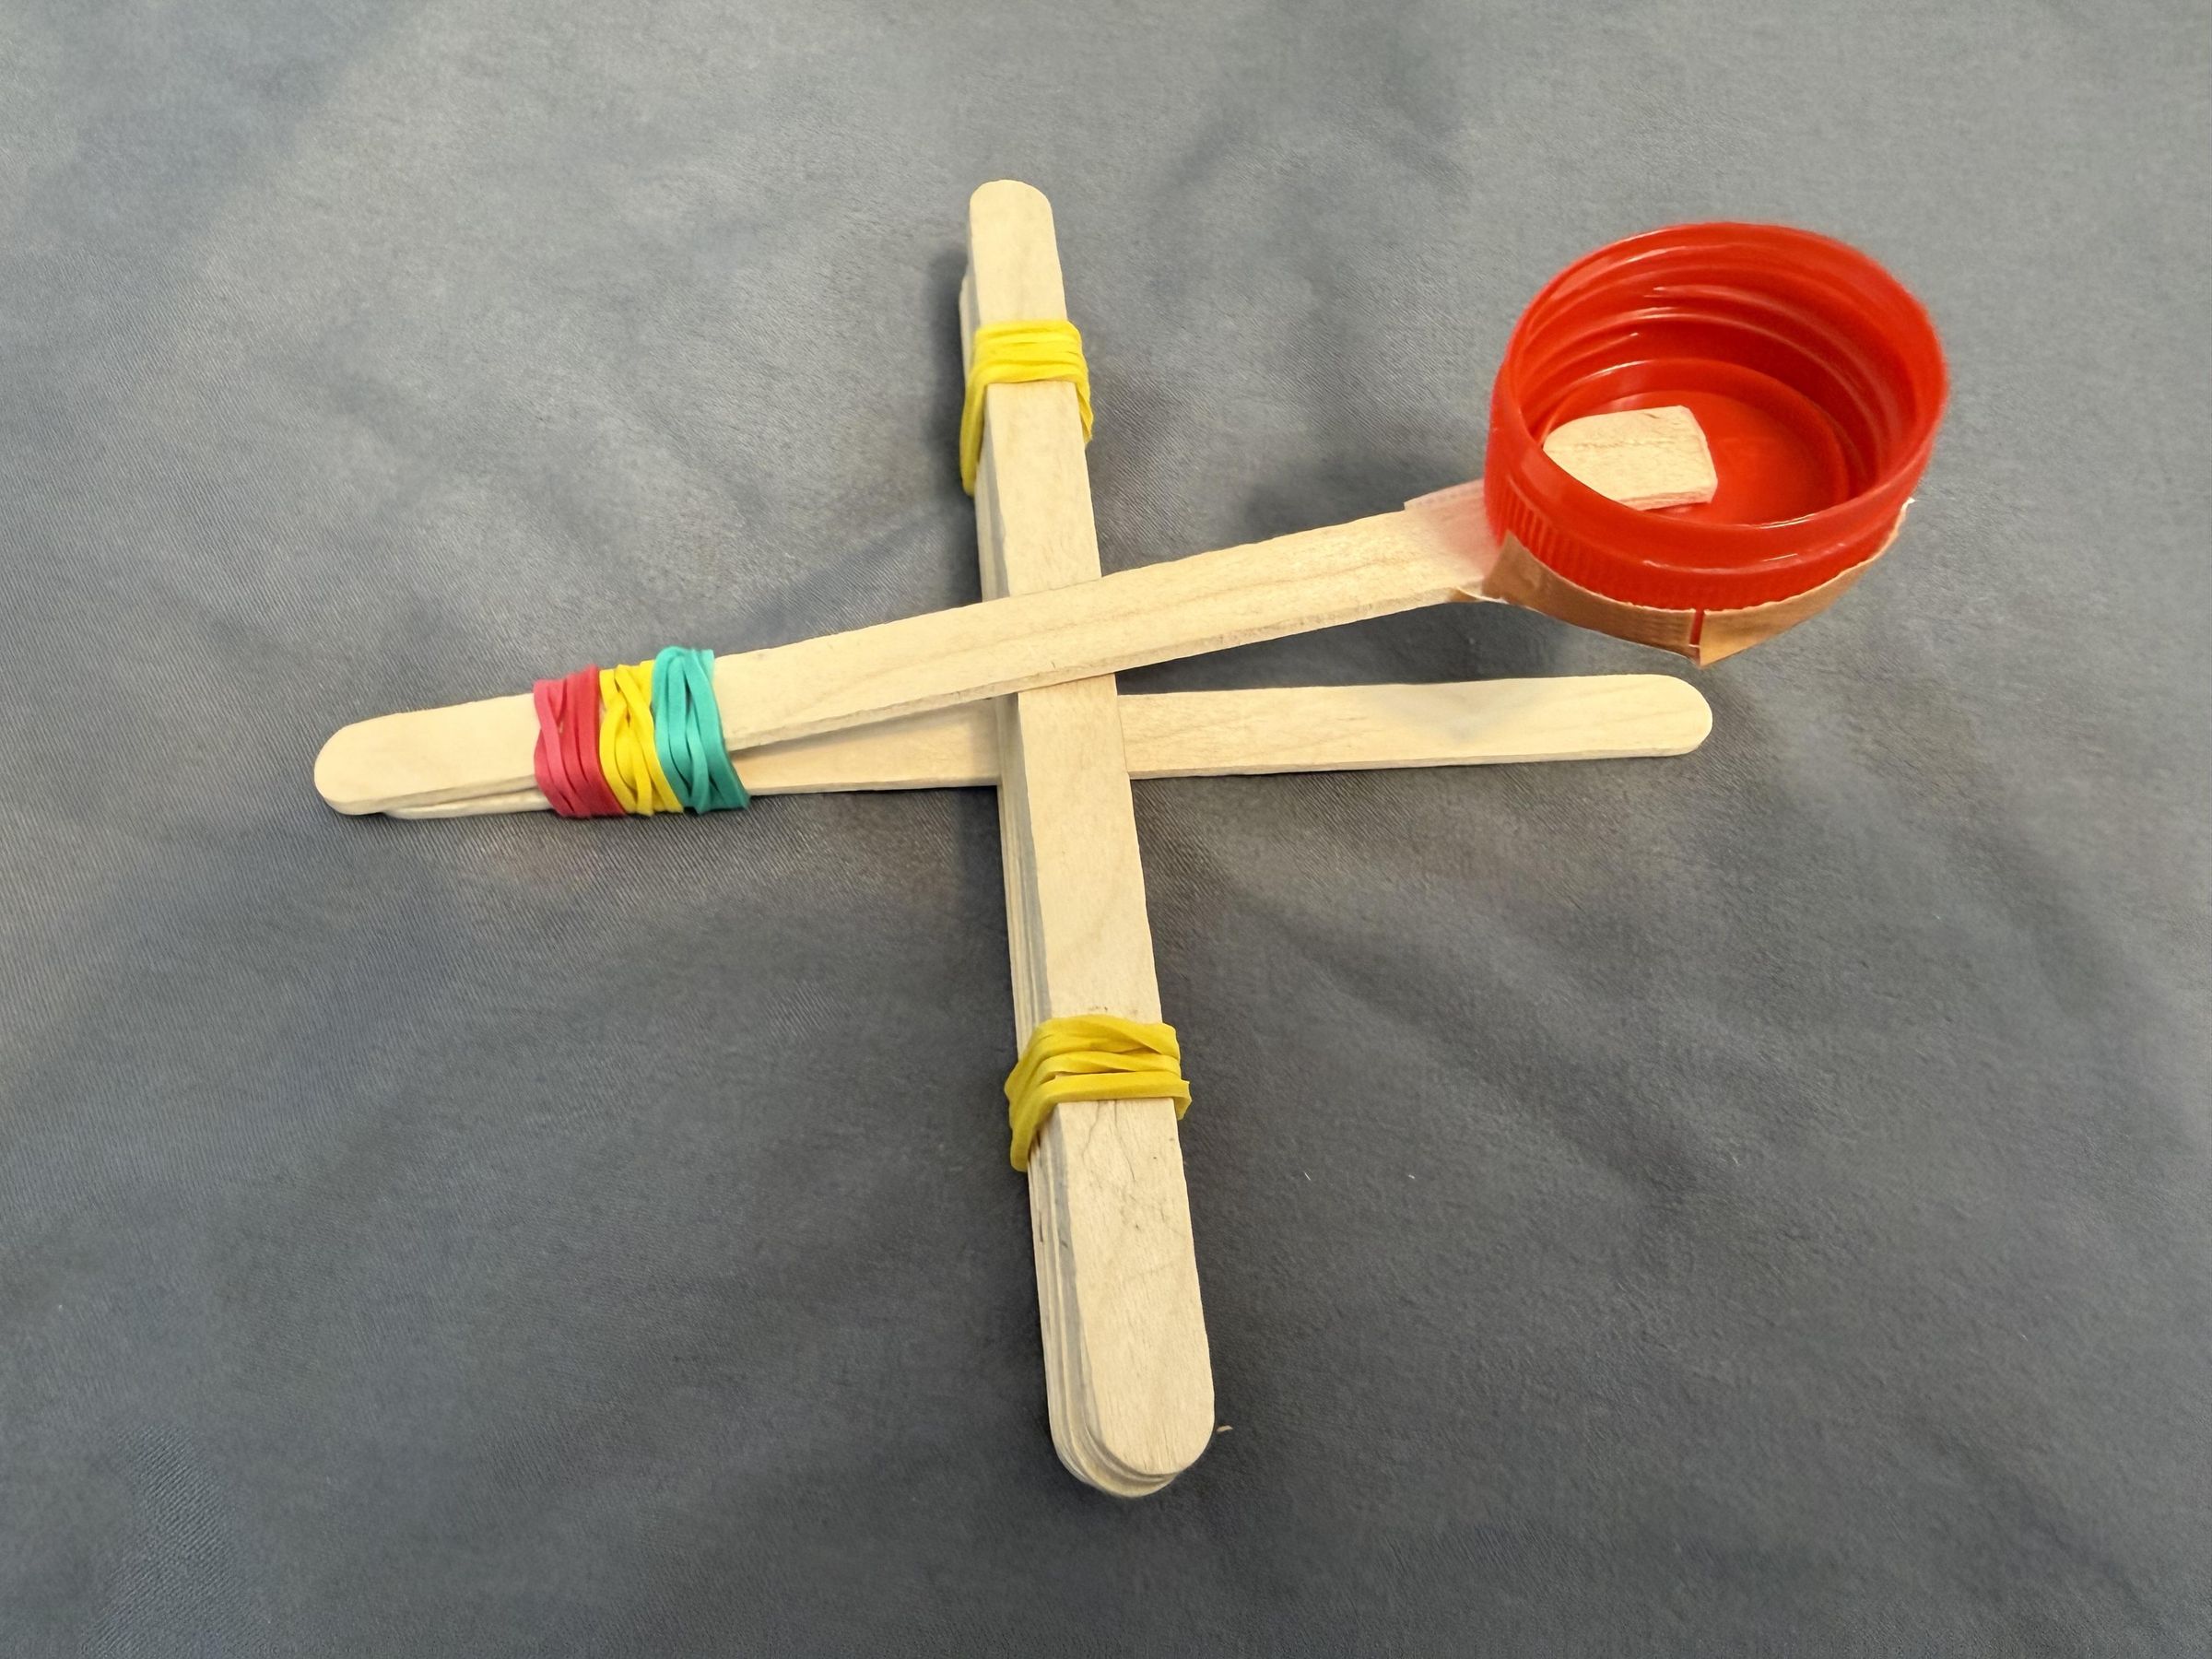
Now, tie your 2 new rubber bands one by one, as tight as possible (in the same way as your original rubber band). Slide them until all 3 rubber bands are as close to each other as possible. It should look like the image above.
Test Out the Range!
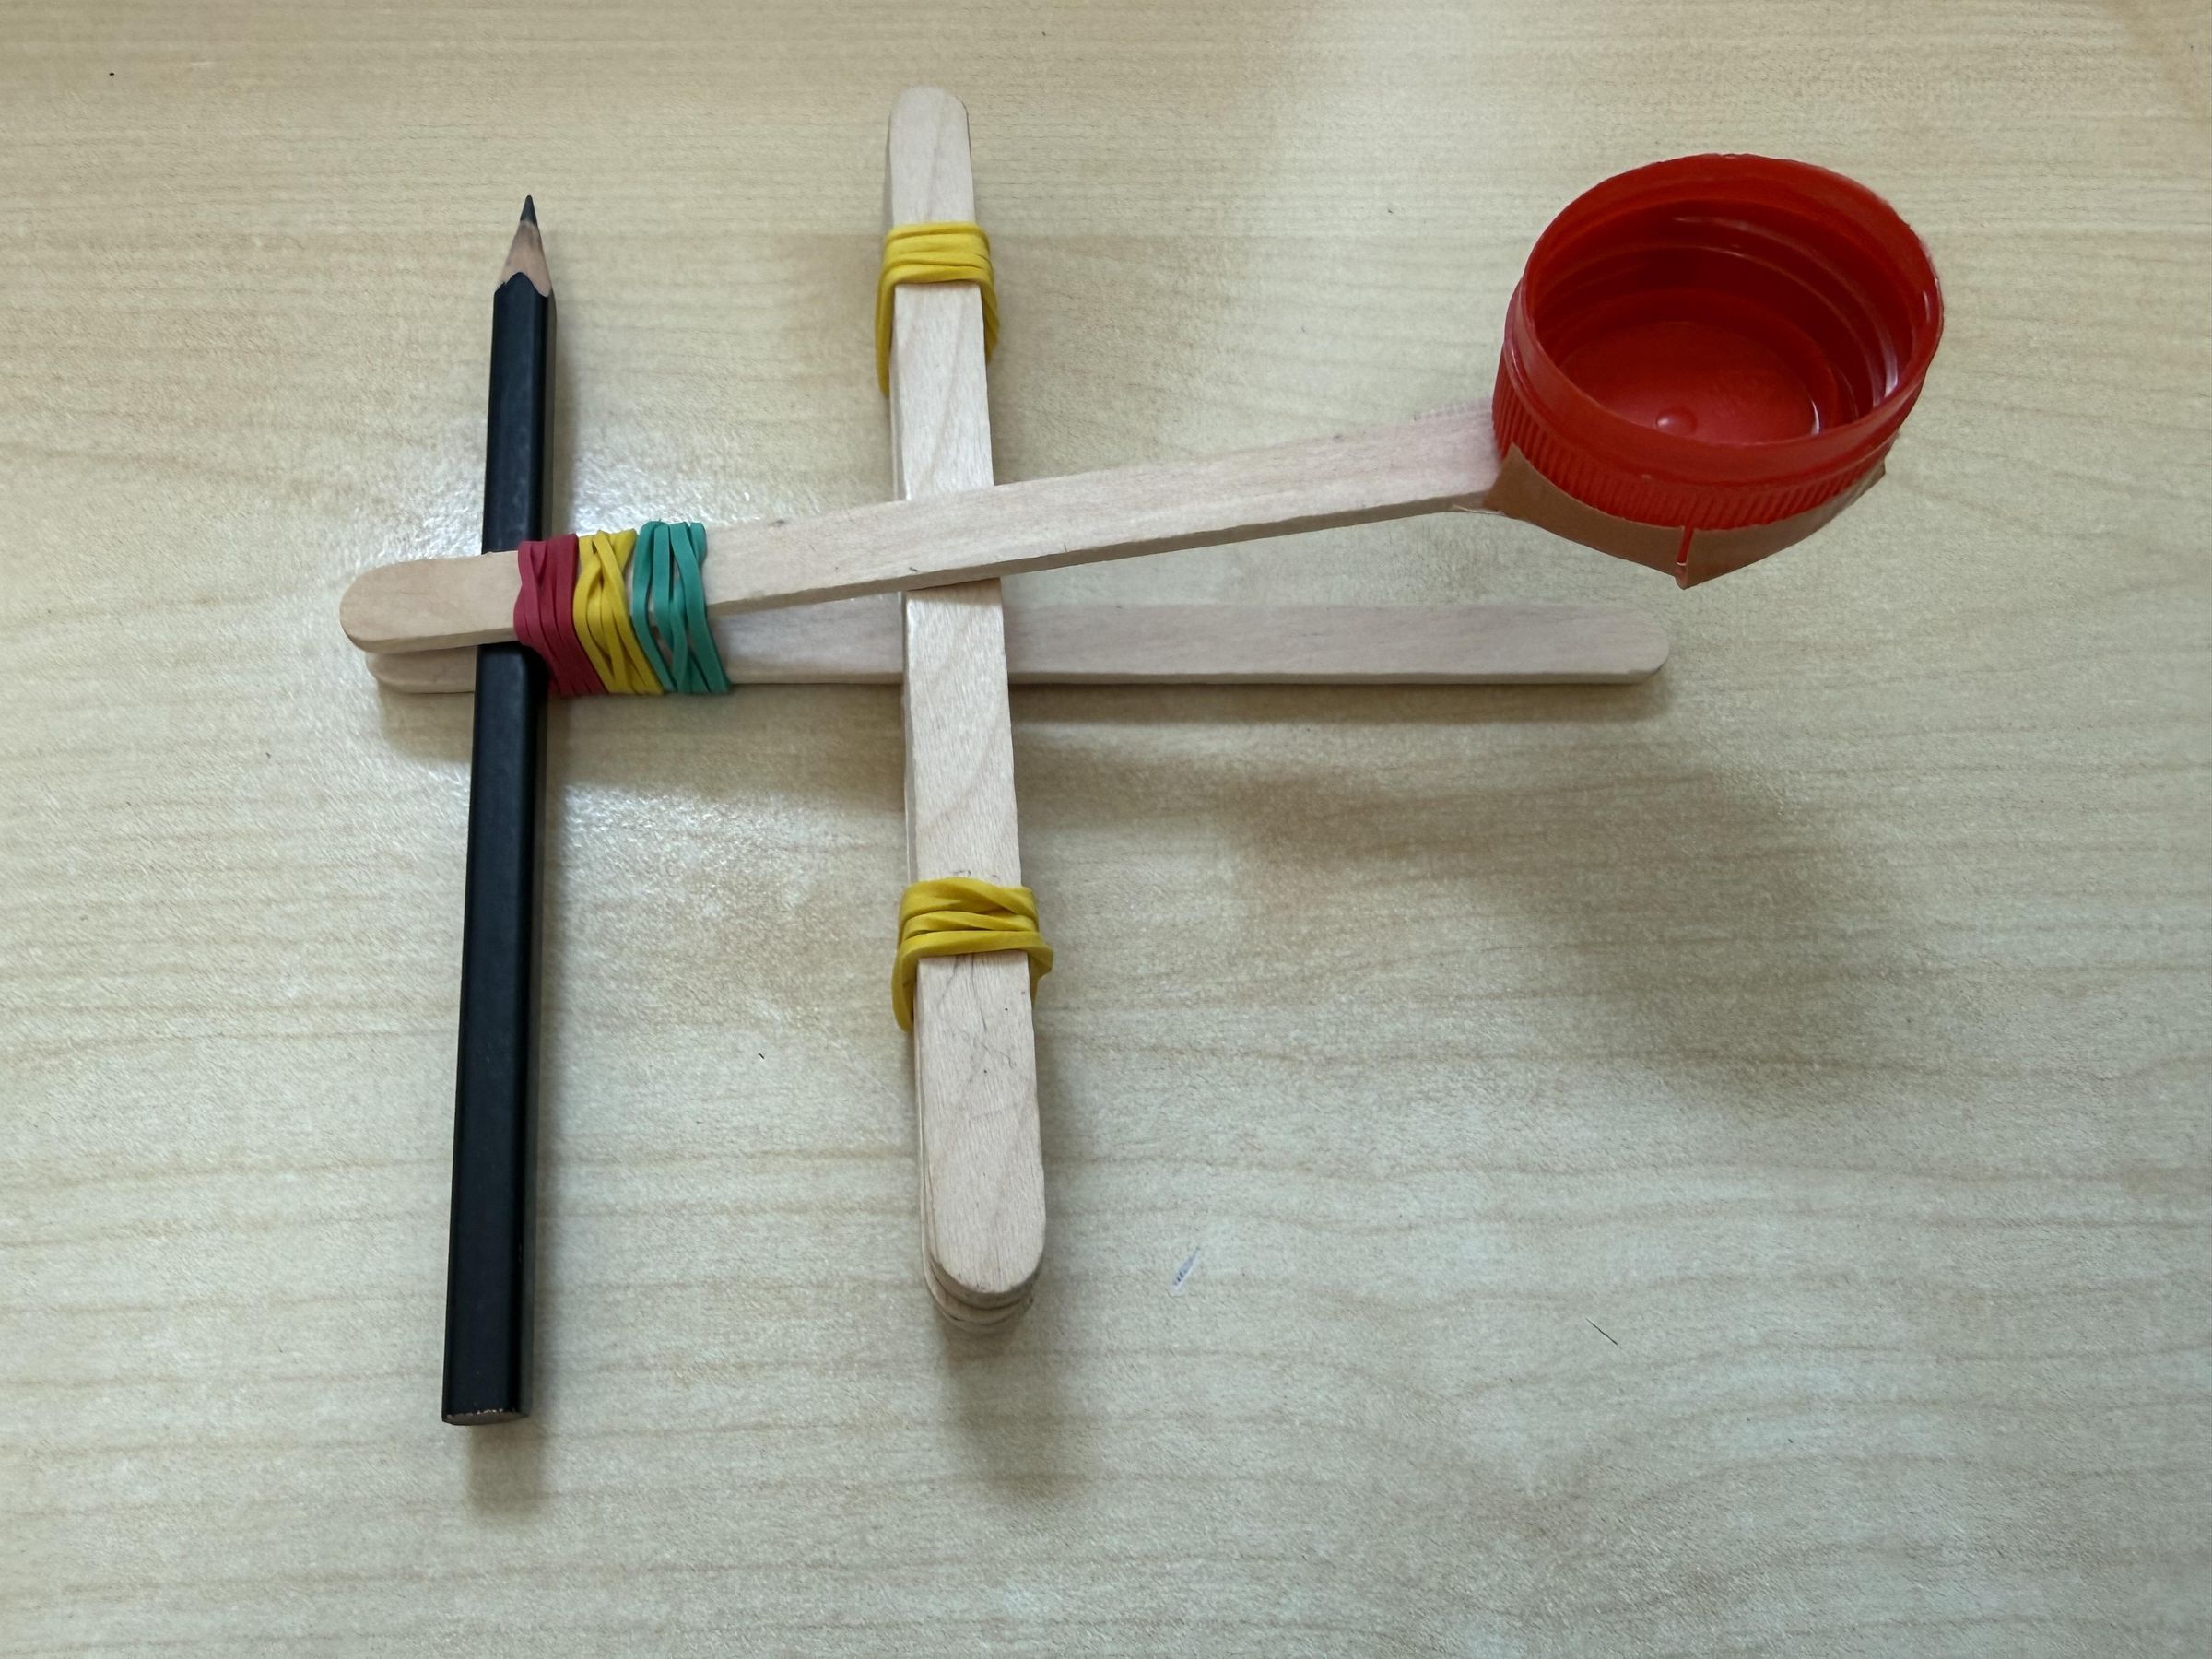
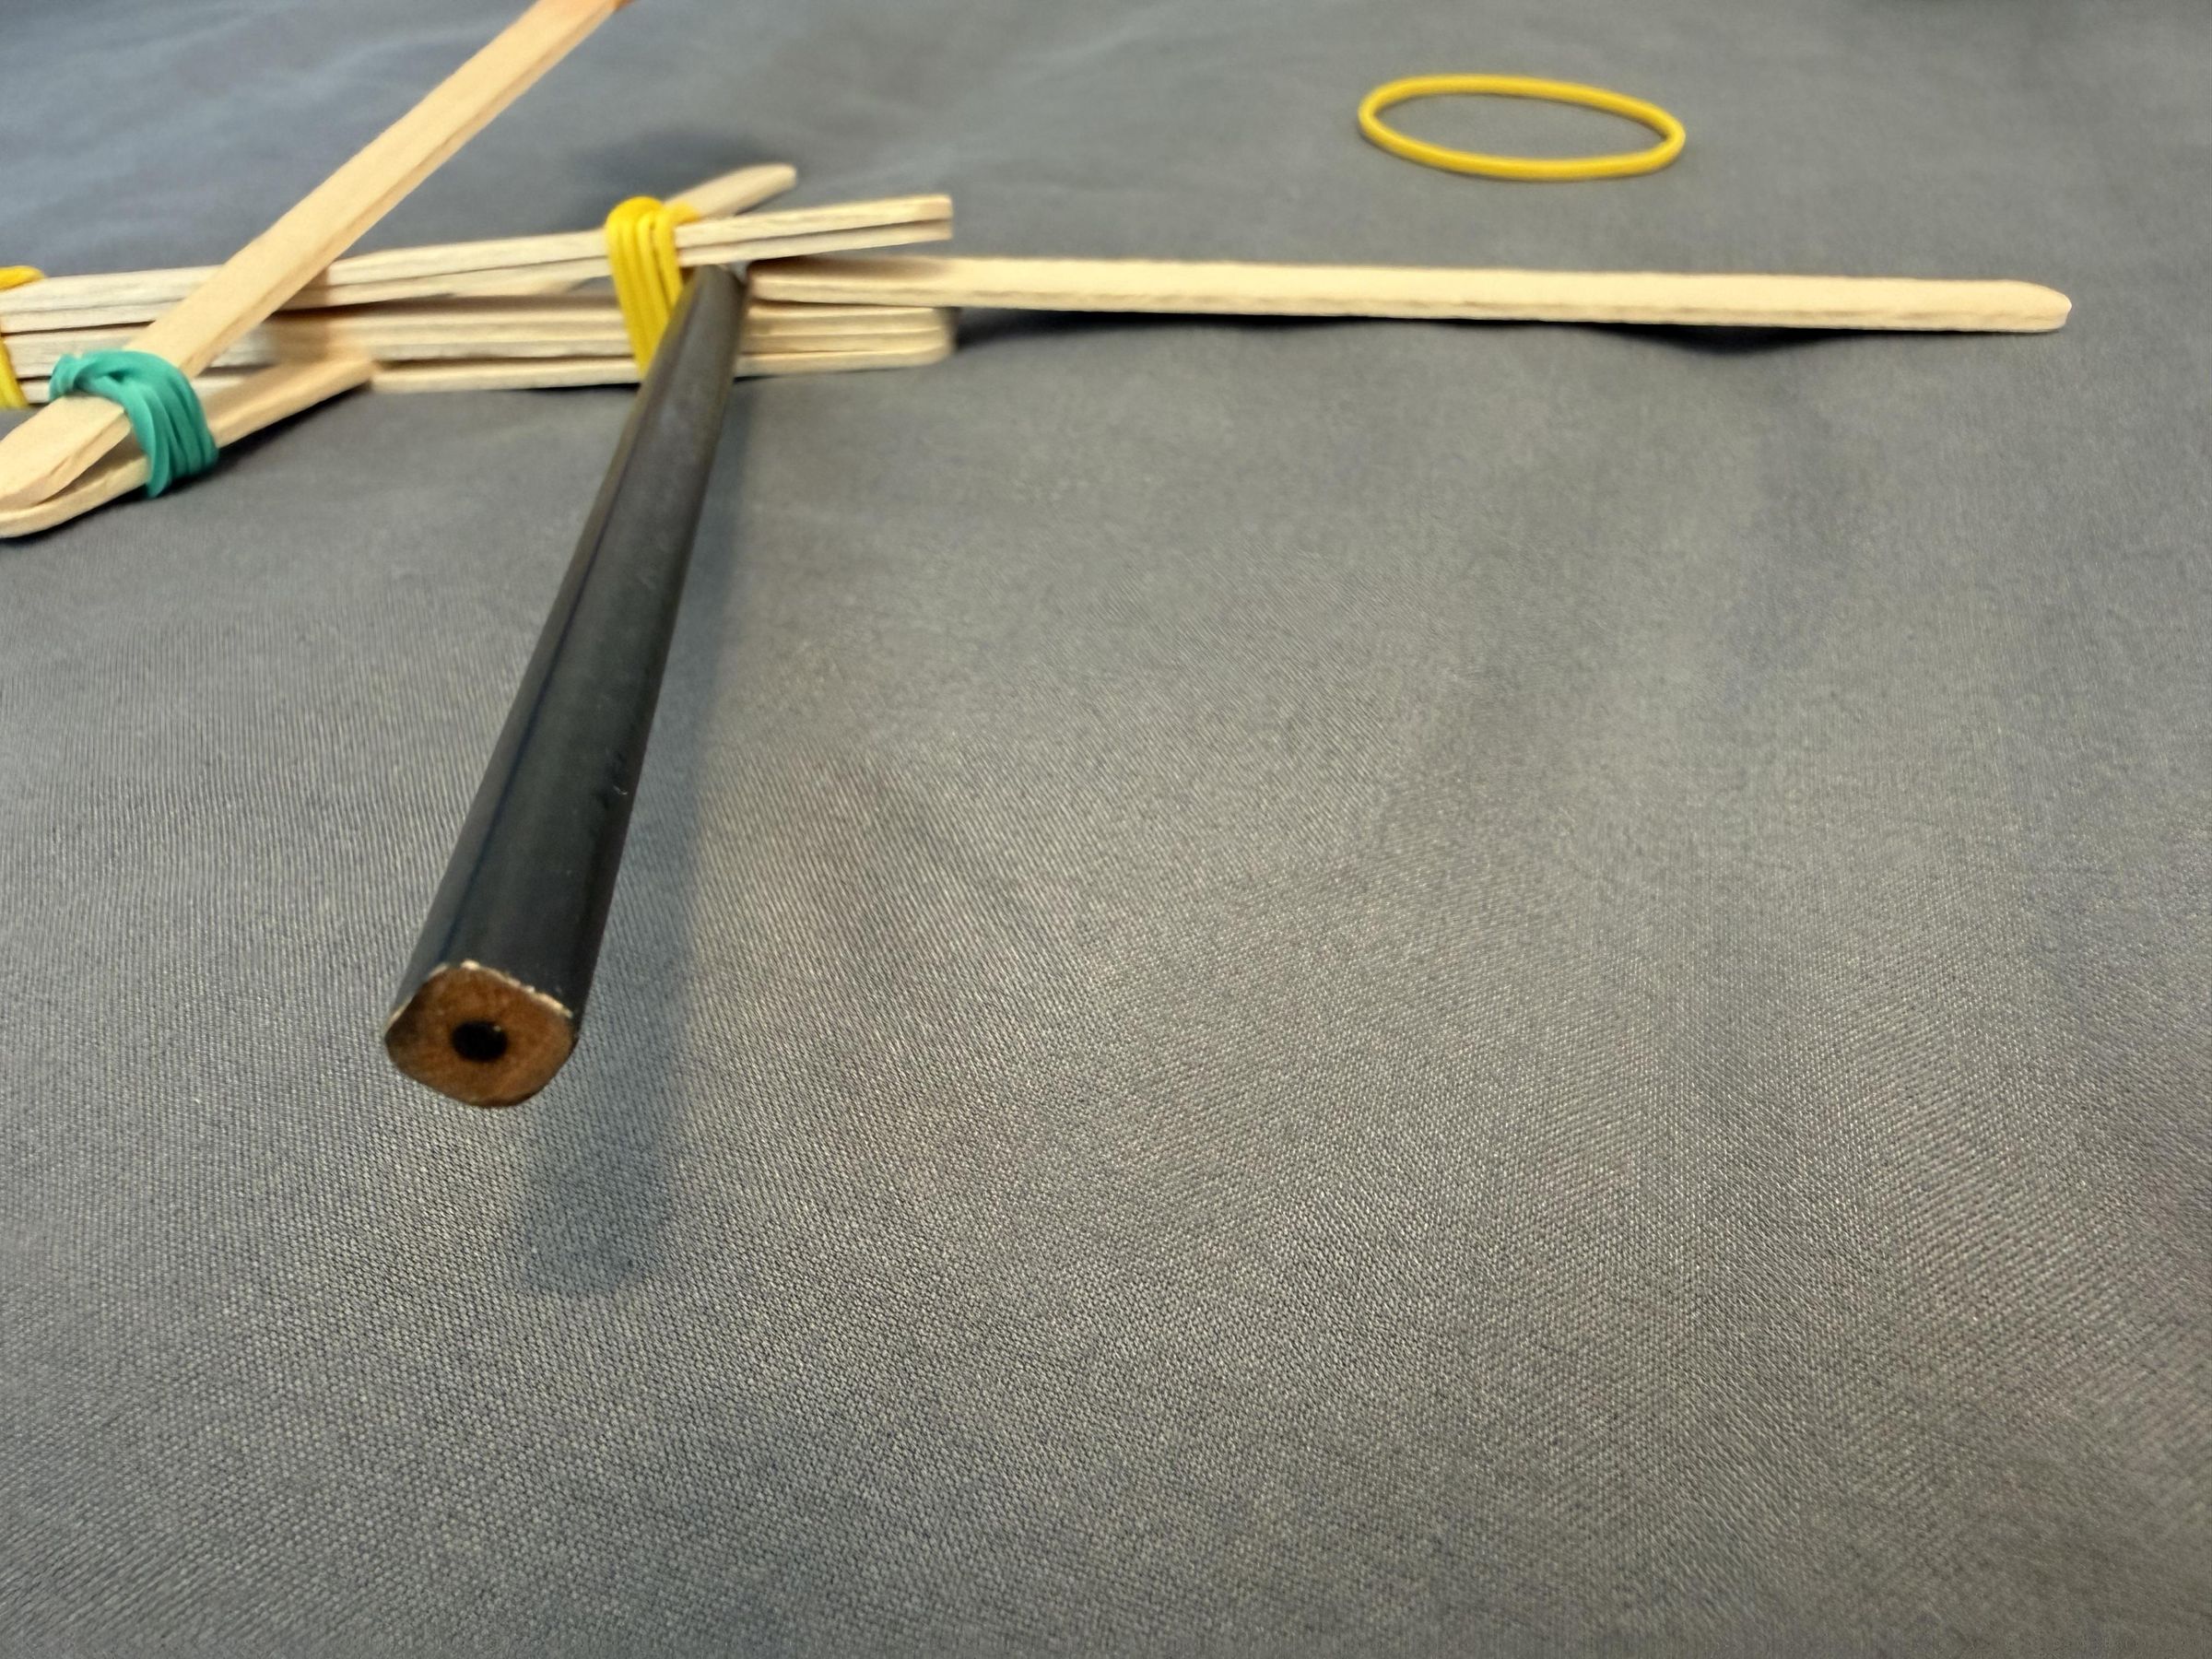
Now that your catapult is ultra-upgraded, feel free to test out how far your projectiles will go! You can fire either by pulling down on the bottle cap and releasing, or I have implemented an automated system. Simply insert a pencil between the two popsicle sticks as in the photo above, and quickly pull out the pencil (leftwards, not towards you).
Set Up the Catapult Golf Course
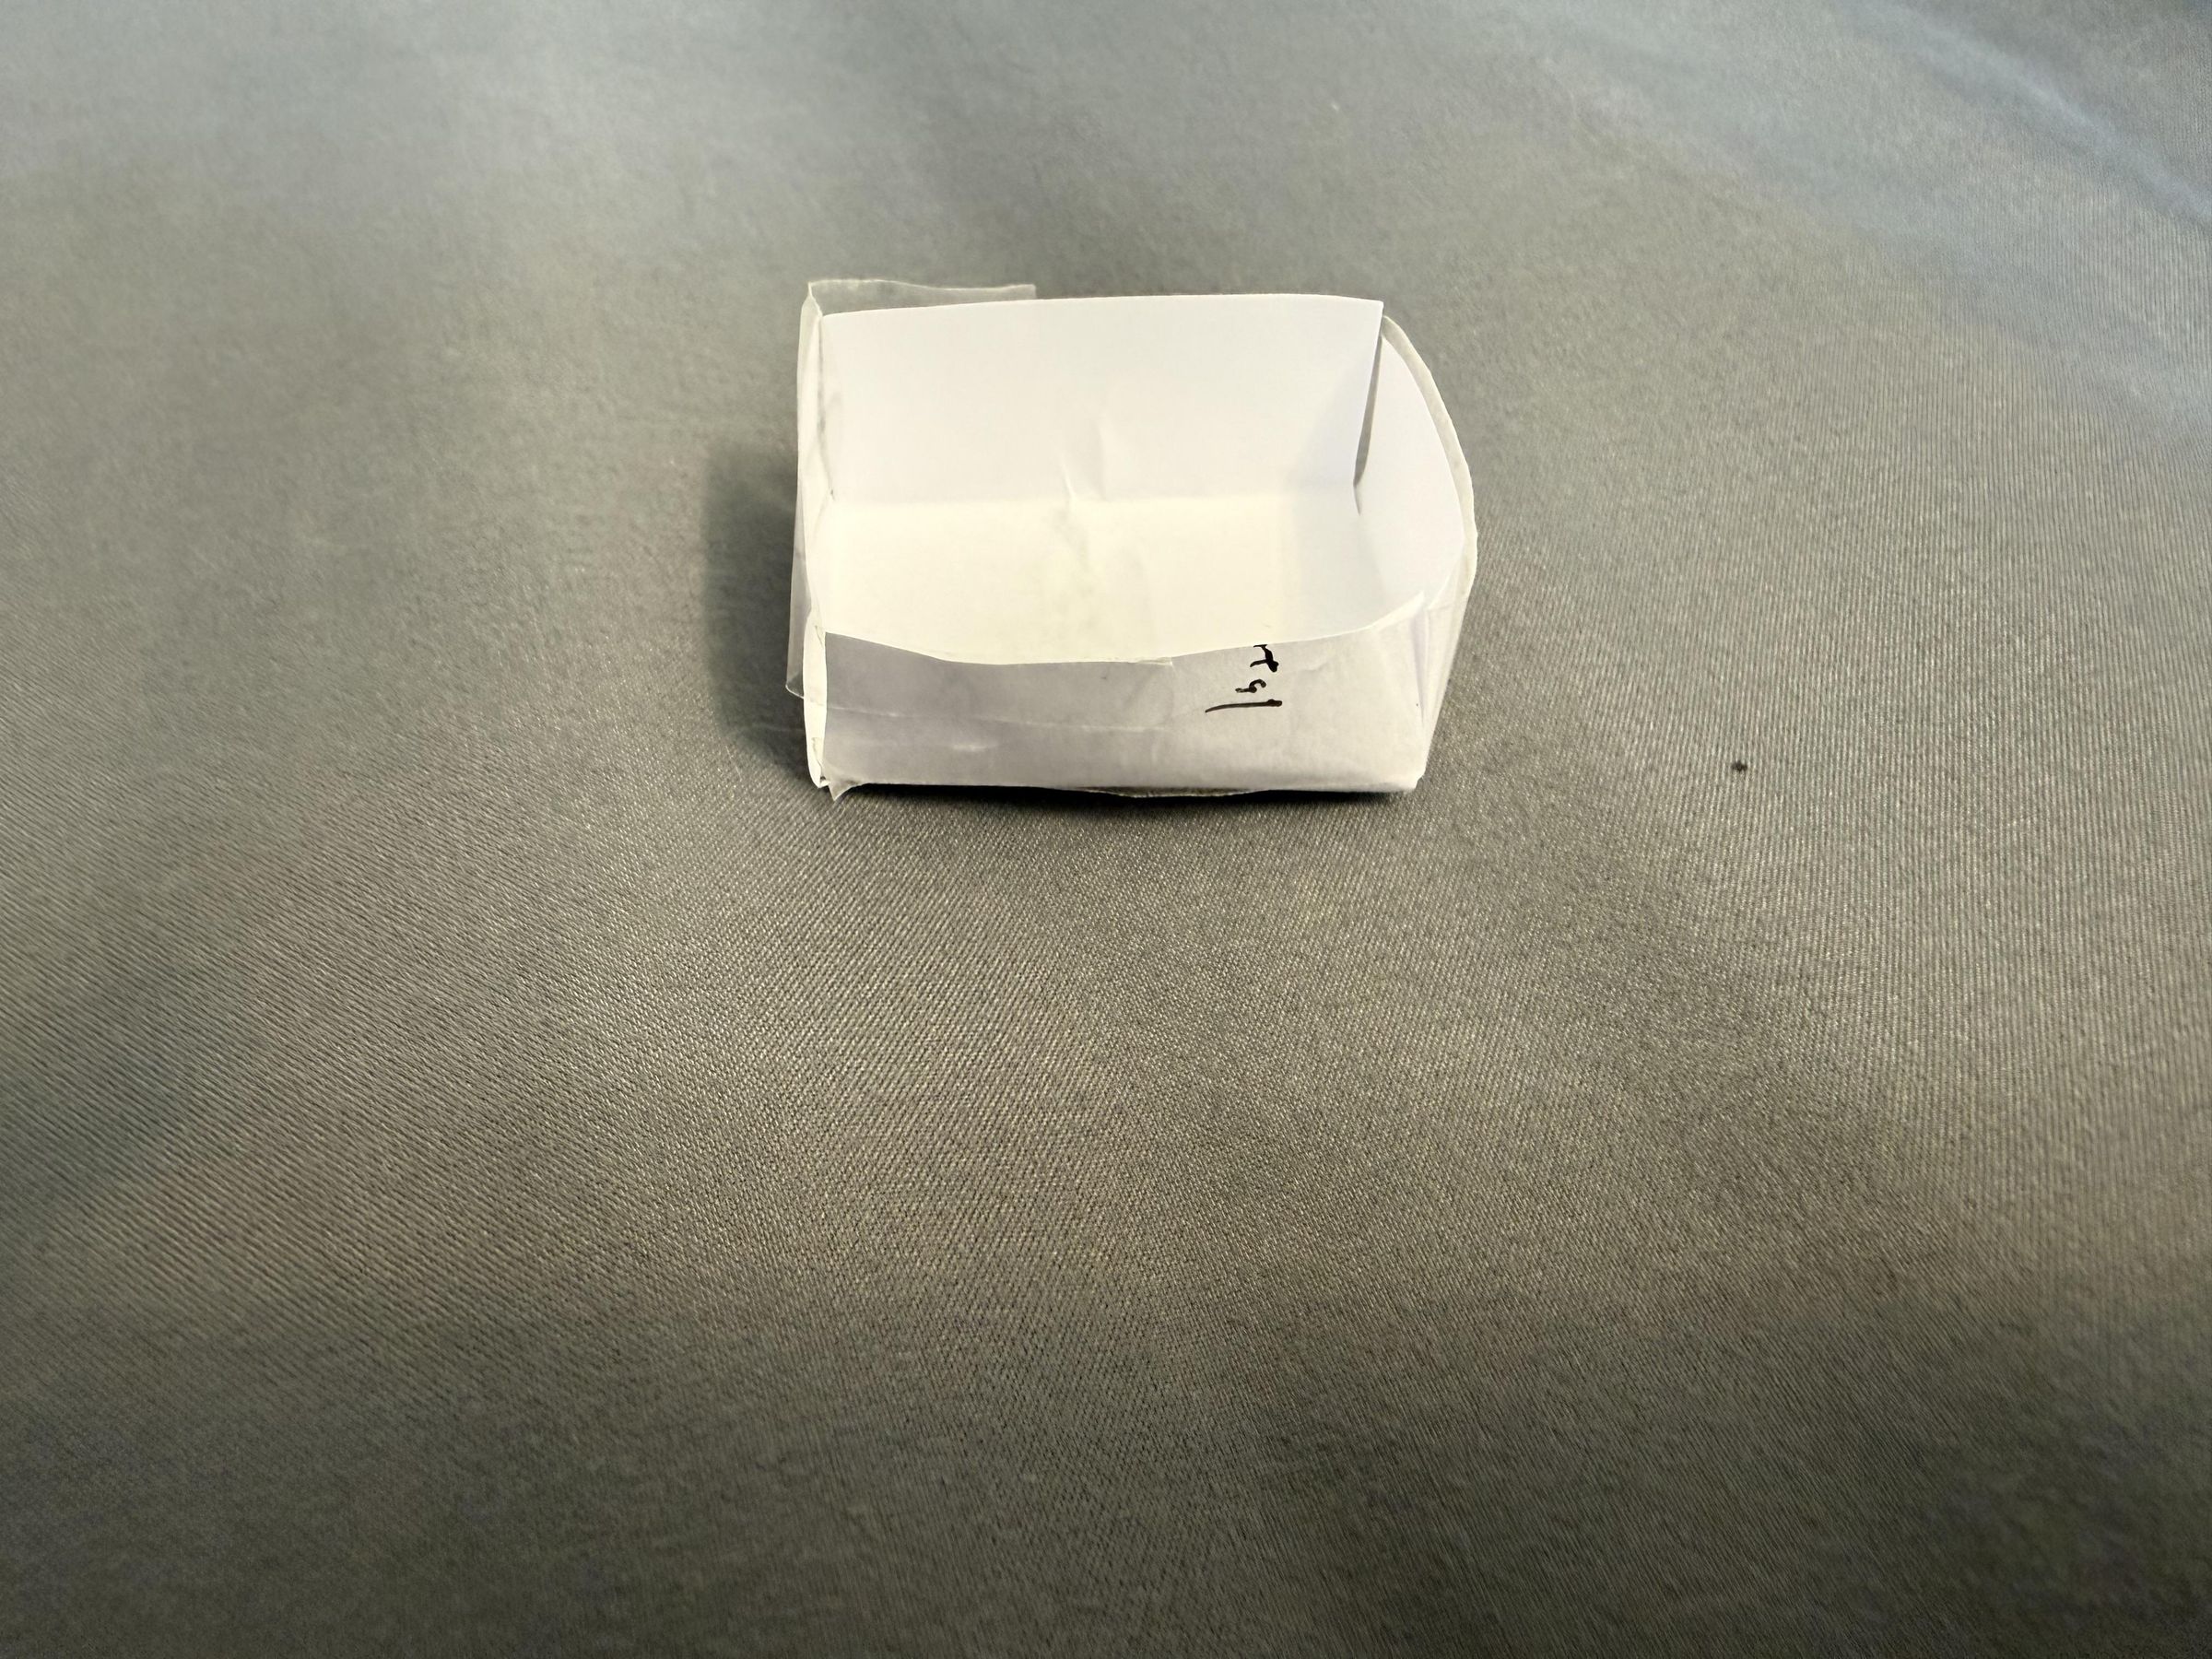
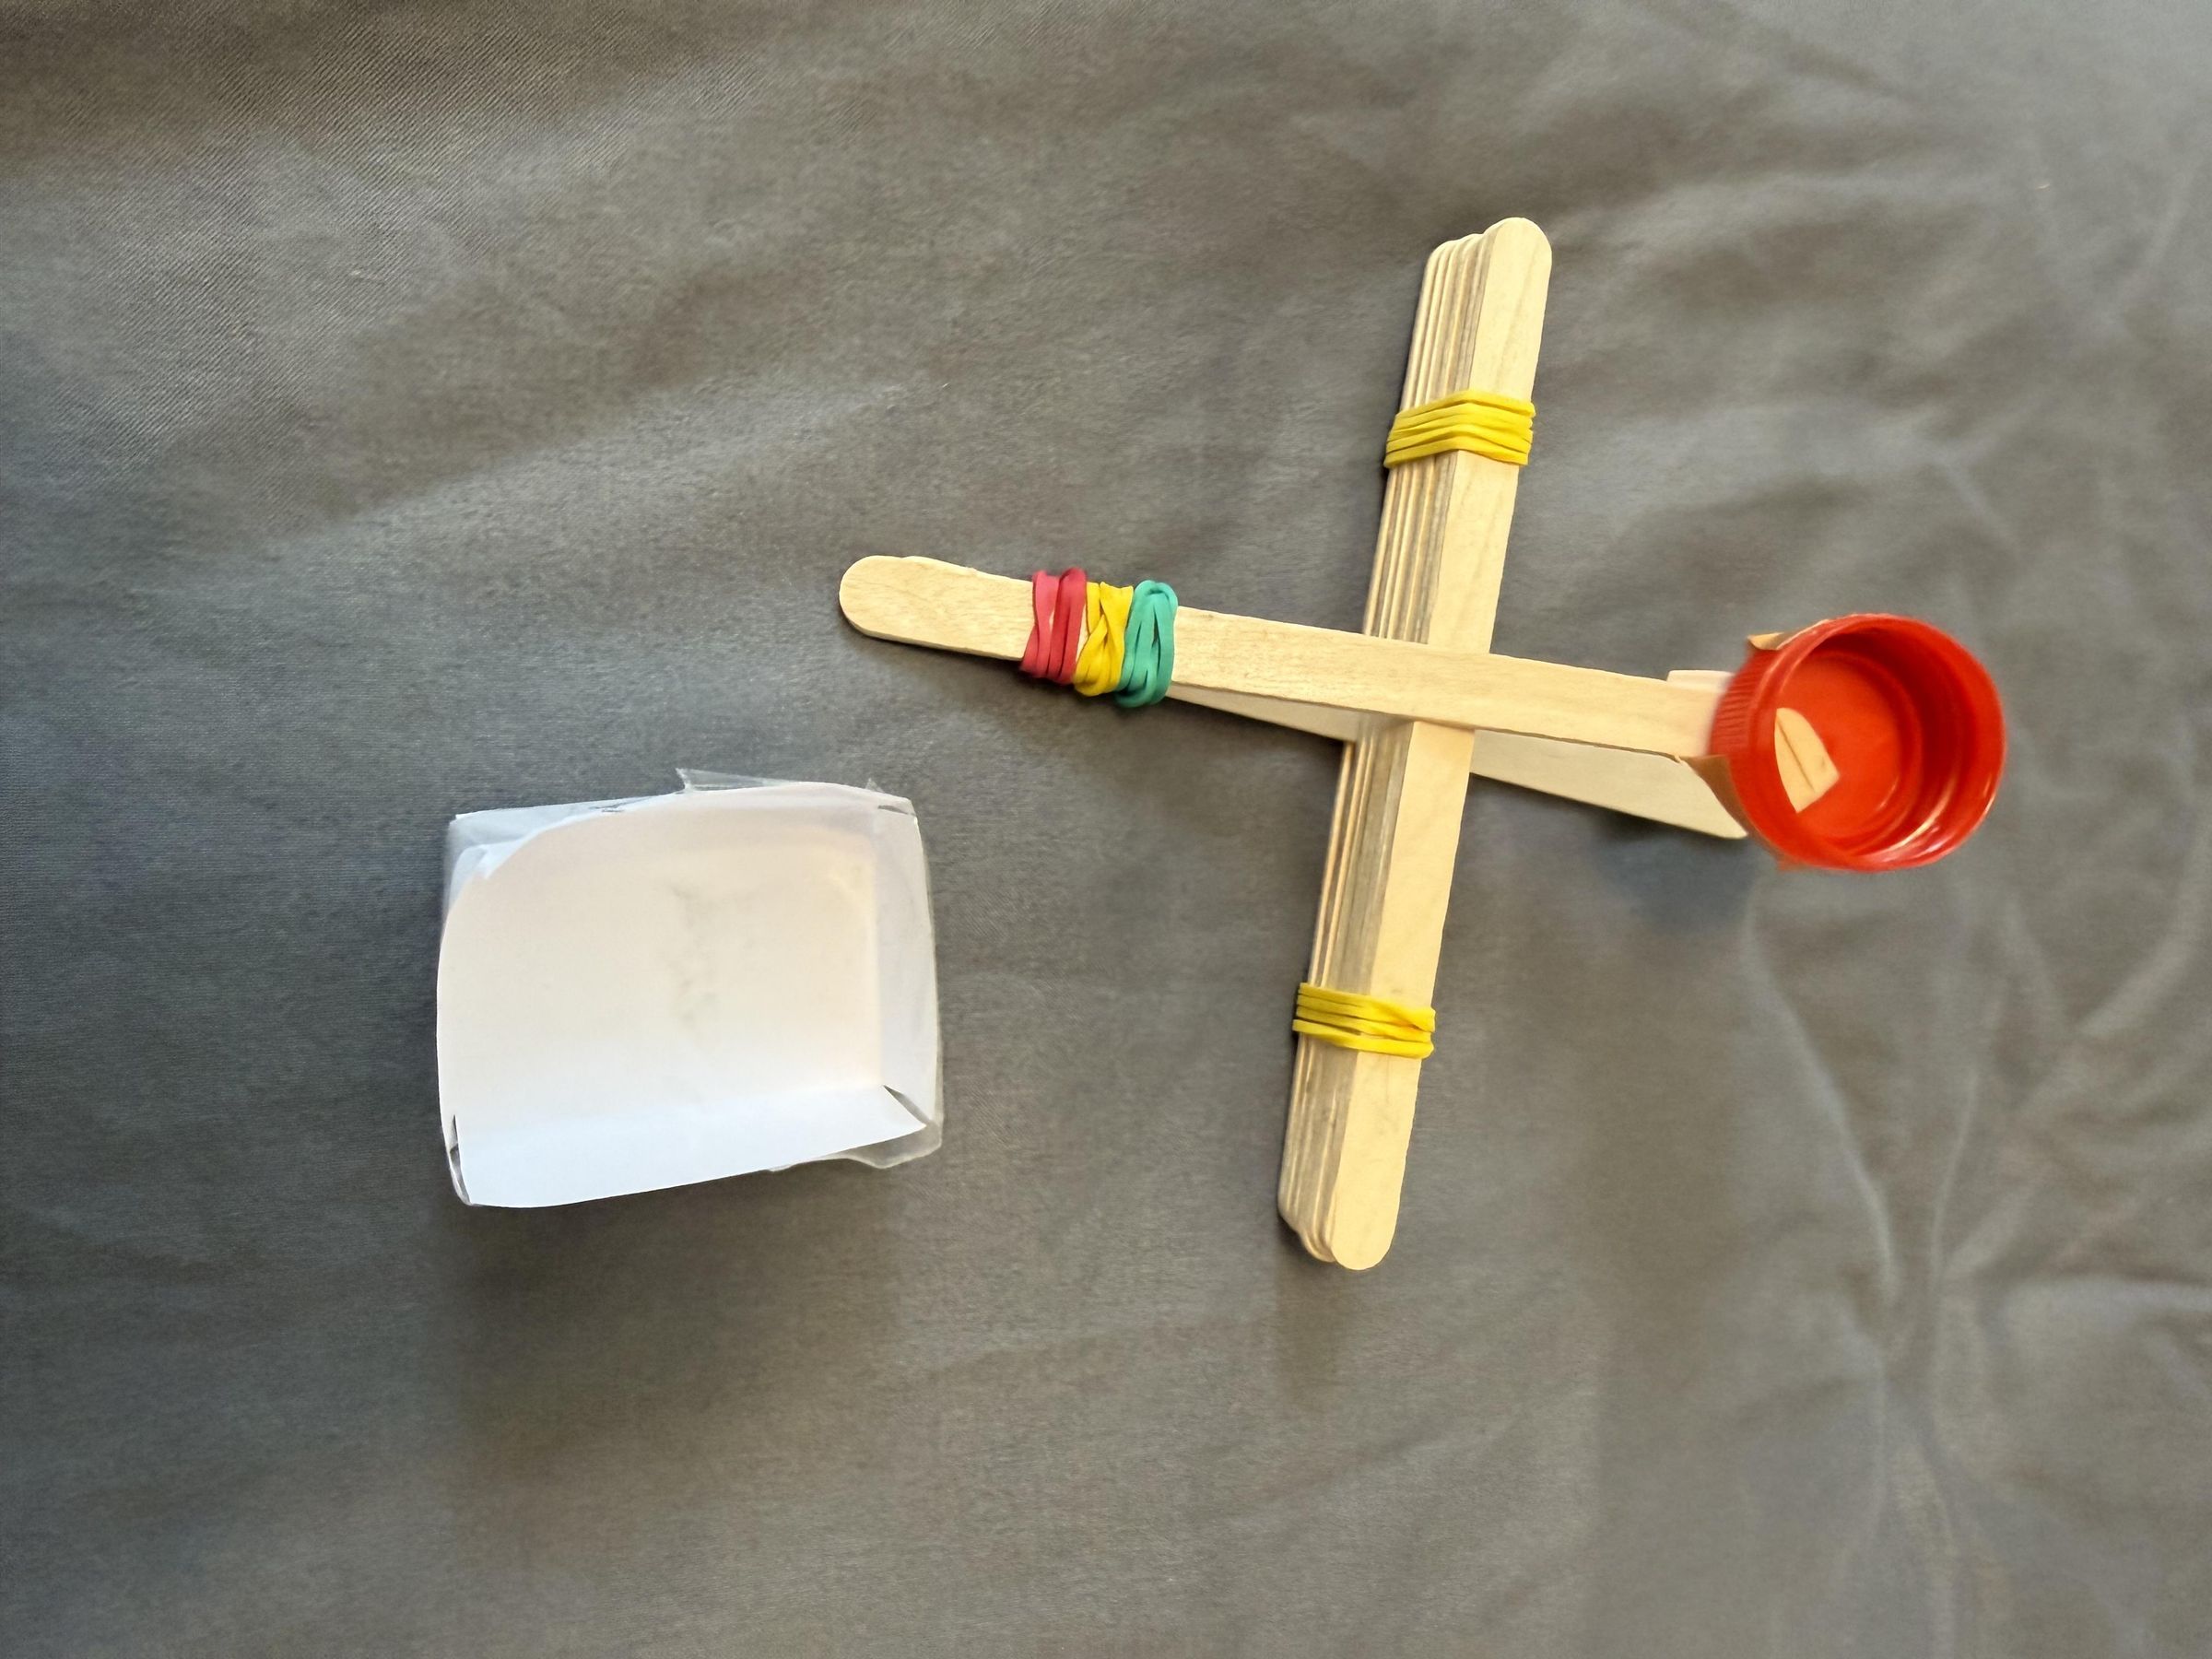
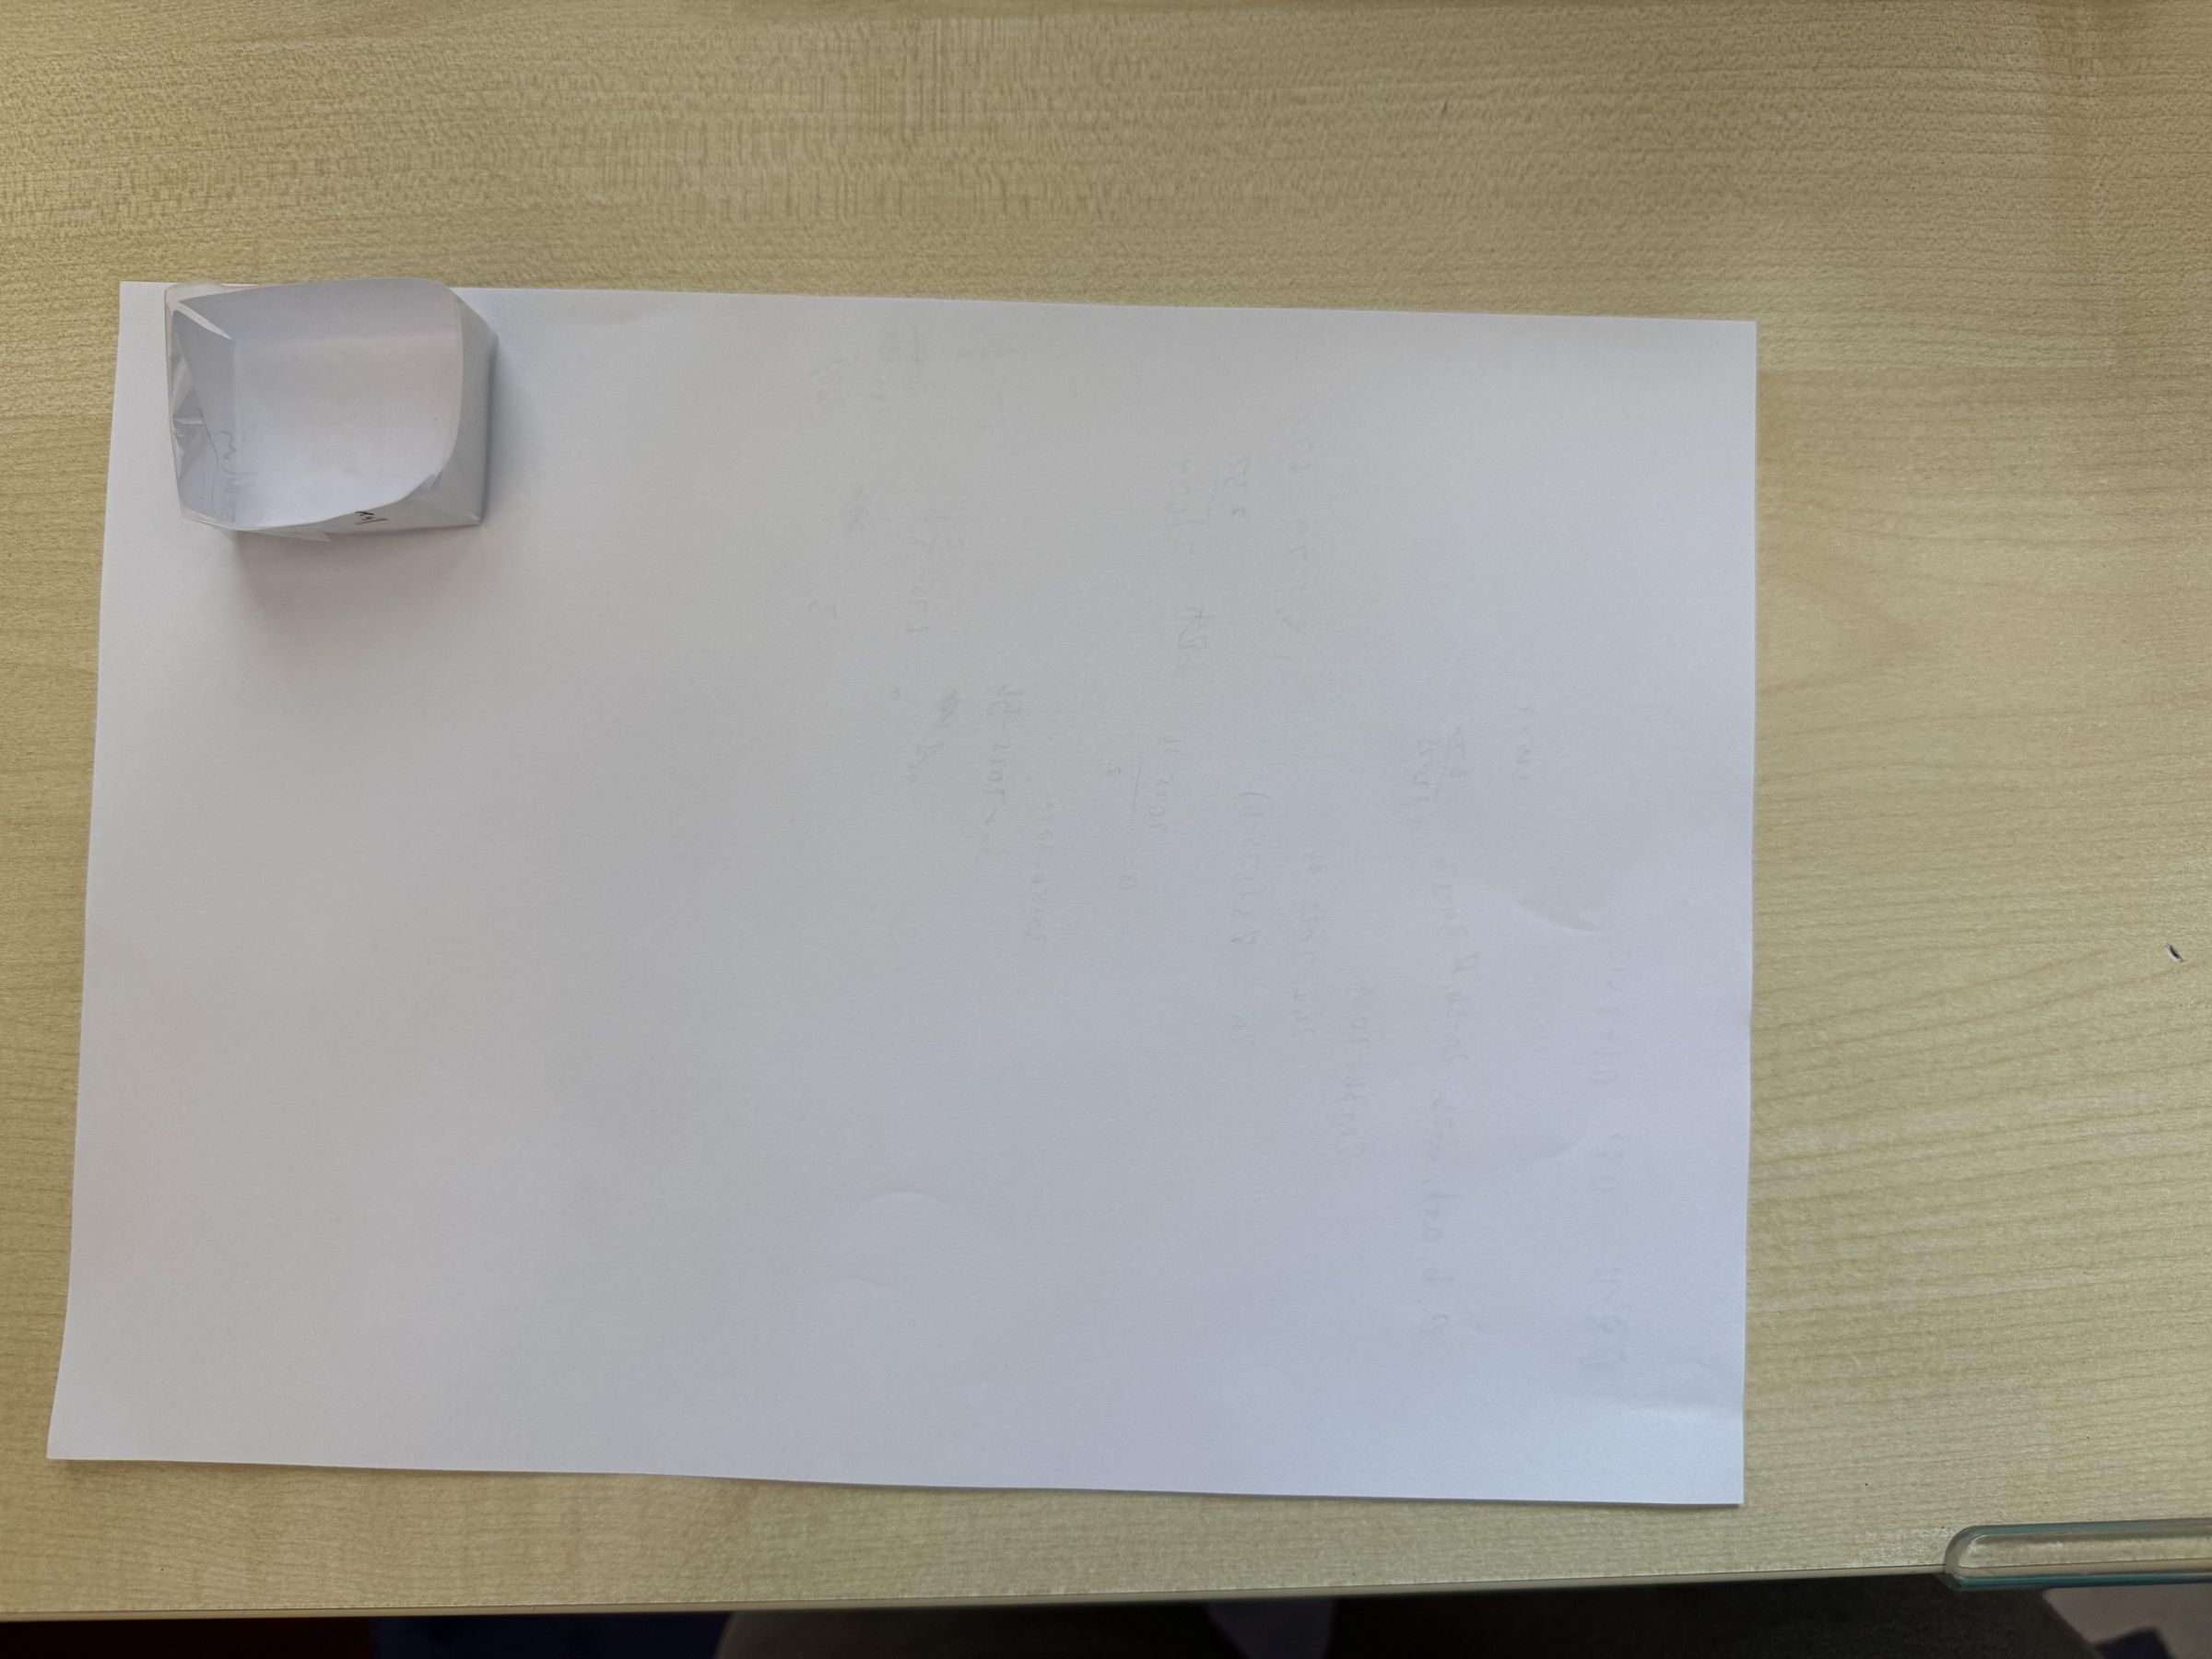
Now that you've built your upgraded catapult, it's time to put it to the test with a fun game: Catapult Golf! This game transforms your mini siege engine into a precision instrument, combining the power of your launcher with the finesse of putting.
The Course Setup:
- The Green: Take a standard sheet of A4 paper and lay it flat on the floor or table. This represents your green—the target landing zone. For an added challenge, you can place the paper on a slightly elevated surface or at a distance where you need to account for trajectory.
- The Hole: Find a small paper box (about a few centimeters in each dimension—think of a small jewelry box or a folded origami box). Place this box somewhere on the A4 paper. This is your "hole." You can position it in the center for an easier shot, or near the edge for a tougher approach.
- The Tee Area: Mark a starting line at a chosen distance from the green. This is where you'll take your "drive" shots to get the ball onto the green.
The Rules (Catapult Golf Edition):
The game follows standard golf rules with one unique mechanic for every shot:
- Objective: Get your projectile (a pom-pom, small marshmallow, or lightweight ball) from the tee area onto the green, and then into the hole, in as few "strokes" (launches) as possible.
- The Catapult Positioning Rule (Applies to ALL Shots): For every shot—whether it's a drive, approach, or putt—you must place your catapult so that the bottle cap (or spoon) is positioned directly above where the projectile was resting before the shot. This ensures consistent aiming and removes any advantage of "scooping" the ball from an unfair angle.
- Club Selection (Adjusting Power and Trajectory): One of the best features of this upgraded catapult is that you can adjust your shot type just like switching between irons and woods in real golf:
- For More Power (Like a Driver/Wood): Slide the main 8-stick bundle closer to the rubber band pivot point at the front. This shortens the lever arm, making the catapult stiffer and launching the ball further with a lower trajectory—perfect for long drives.
- For Less Power (Like an Iron/Wedge): Slide the main bundle farther away from the rubber band pivot point. This lengthens the lever arm, giving you a softer, higher-arcing shot—ideal for approach shots that need to land softly on the green.
- Experiment with different positions to find the sweet spot for each distance. You effectively have a full set of clubs built right into your catapult!
- Adjusting Launch Height: If you need to clear an obstacle or get the ball to stop quickly on the green, you can also angle the entire catapult upward. Simply use one of the base twigs as a pivot point—tilt the catapult to your desired angle and let it rest on that twig. This raises the launch trajectory without changing the bundle position, giving you even more control over your shot.
- Putting (The Catapult Twist): Once your projectile is on the green, it's time to putt. Using the same positioning rule (cap directly above where the ball was):
- Place your catapult next to the projectile, positioning it so the cap is directly above where the ball was resting.
- Carefully press down on the catapult to pick up the ball with the cap.
- You are allowed ONE pivot using any part of the catapult (the base, the bundle, or even the edge of the cap) to lift and nudge the ball toward the hole. Think of it like a gentle chip shot—you can adjust the angle and direction with this single motion.
- Important: You only get one pivot to make the putt. If the ball misses the hole on this single attempt, that counts as a "missed putt"—just like in real golf, you add a stroke and must reset the ball on the green for your next putt.
- Scoring: Count every launch (drive, approach, and putt) as one stroke. The player with the lowest score after completing the course wins!
Why It Works:
The upgraded 8-stick bundle and triple rubber bands give you the power to reach the green from a distance, while the sliding adjustment mechanism lets you fine-tune your trajectory just like choosing different clubs. The ability to pivot the entire catapult using a base twig adds an extra dimension of control, allowing you to clear obstacles or adjust for short-game finesse. The consistent cap-positioning rule ensures fair play and rewards skillful aim rather than luck. The "one pivot" putting rule adds a layer of strategy, forcing you to think about angle and leverage rather than just brute force. It's a fantastic way to test your engineering skills, practice your aim, and have a blast competing with friends—all with materials you already have at home!