Tim's Draw Bot

 fast speed)
This is a little drawing Robot.
- I made it quite a while ago, and it went through many iterations.
- If you want to see some info on the early ones, I did a blog.
My goal was to make one that could receive 'G' Code commands and draw what was sent to it.
- To make one that could draw accurately meant that the build needed to be accurate.
- Any slight miss alignment soon adds up.
This project needs a 3D Printer to build it.
Supplies




One Arduino Nano.
- ATmega328p
- A cheap Chinese with the Old Bootloader.
- The "X Loader" to upload the HEX file, only works with Arduino Nano with the Old Boot Loader installed.
One Arduino Nano CNC Shield
- I have used the Chines Clone CNC Shield.
- Note! Some mods need doing to the Clone CNC Shield, see: Fix Cloned Arduino NANO CNC Shield : 10 Steps - Instructables
- The firmware I have written is for the Clone CNC Shield.
Two Stepper Motor Drivers.
- I have used DRV8825.
- Others with similar pinout and voltage will do.
One homemade driver for the servo.
- It plugs into one of the stepper sockets.
- Tim's Draw Bot: Driver to control a servo from the NANO CNC Shield (tims-draw-bot.blogspot.com)
One Bluetooth Module.
- 6 or 4 pin module will do.
- I have done some details on Changing the configuration of Bluetooth Modules here:
- How to Use/configure a Bluetooth Module : 14 Steps (with Pictures) - Instructables
One 2 Channel Logic Level Converter.
- I have done a fritzing for the Module I made for this project in the Instructable above, Step 3.
- Needs to be at least 2 channel, communication goes both ways.
This Robot is designed for specific Stepper motors I had, I got them of eBay.
- 2 are required.
- If you can get some to the same specification it should be OK.
- See Sketch for dimensions.
- The Pinion has 15 teeth 2GT.
Two 2GT Timing Belts are required.
- These belts are a closed loop.
- Number of teeth = 200.
One Mini Servo.
- I have use a cheep SG90
- With a single horn, trimmed a little.
Three Li-Po Batteries.
- I use the flat type, with the dimensions shown. (The battery holder is designed for three of these)
One Voltage Stepdown Module.
- I have used the LM2956.
Two Barrel Jack Plugs.
- Some cable to go with them.
One Barrel Jack Socket.
- I have use the type that fits in a hole and held in place with a nut.
Two Tyres.
- Well they are not tyre as you would expect, I have used square rubber drive belts.
- They want to be a little less than 60mm diameter.
- Usually get them as a pack of assorted, for repairing cassette decks.
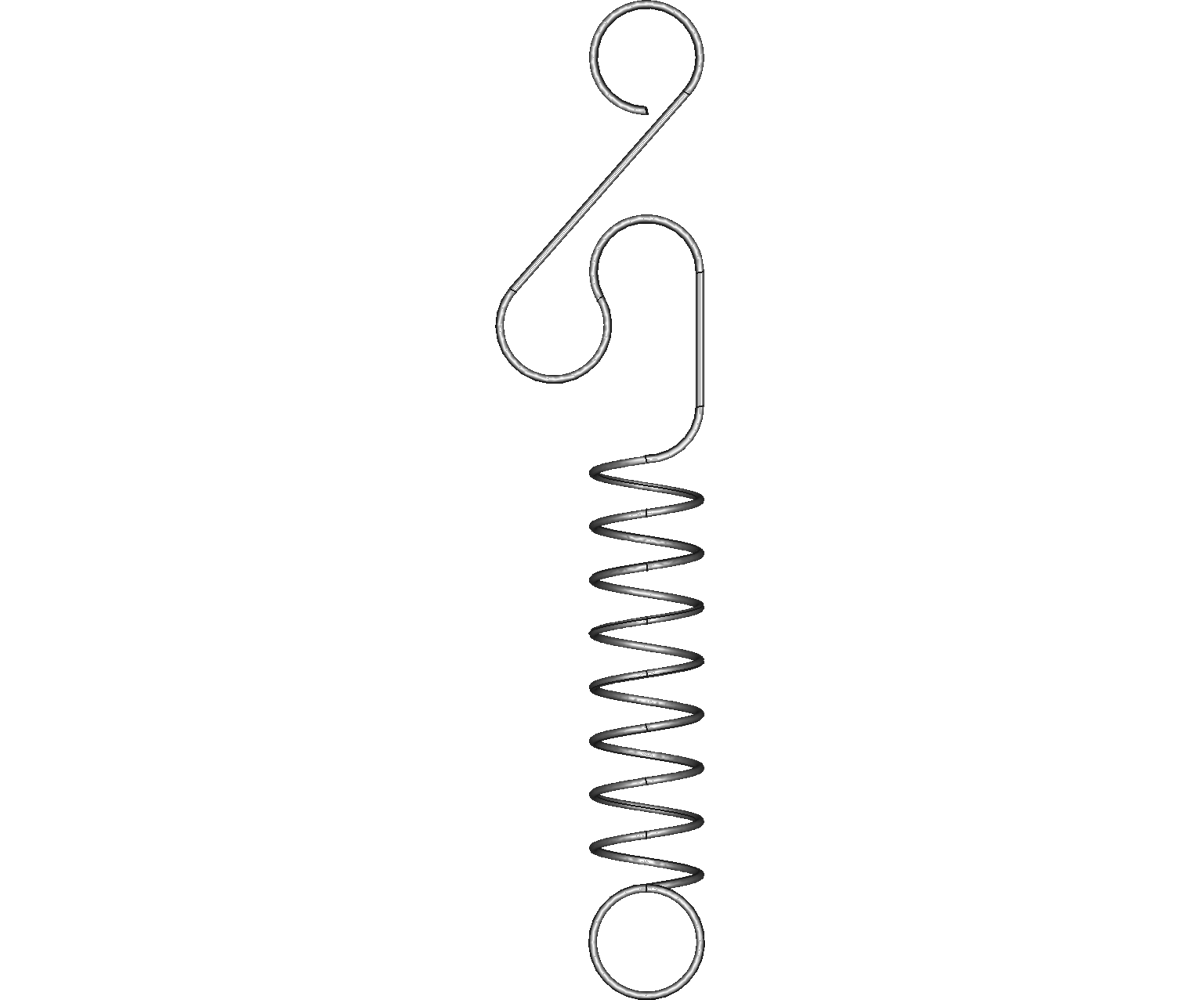
One Small Spring.
- Nothing too strong, About 4mm diameter 20mm long normally closed.
Four 3mm smooth linear rods.
- Two about 55mm long.
- Two 58mm long.
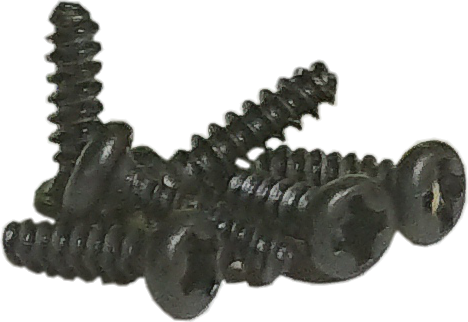
Lots of M3 Self-Tapping Screws, 10mm long.
- I buy these by the hundreds its cheaper.
- I have designed all parts of the robot to be secured using these screws.
Eight M3 flat metal Washers.
- These are used for the Stepper Motor Mounts.
One M3 Allen Set-Screw 25 mm long.
- This is for the caster wheel.
One M3 Self-Locking Nut.
- This is for the caster Wheel.
Seven Bearings.
- Hole 3mm, Width 4mm, Outer Diameter 10mm
Dupont type Cable and Connectors.
- Something to wire up all the components.
Three Battery connectors.
- These connectors need to match the connectors of the batteries.
As I mentioned a 3D Printer is required, all files needed are attached.
- The Frame_Low_Quality.stl is not to the quality I normally do, the max file size I can upload is 25Mb.
- Ask if you want the 71 MB version, all it has is more rounded edges. (Rounding edges increase the file size a lot)
- Some parts need printing twice.
Downloads
Printing

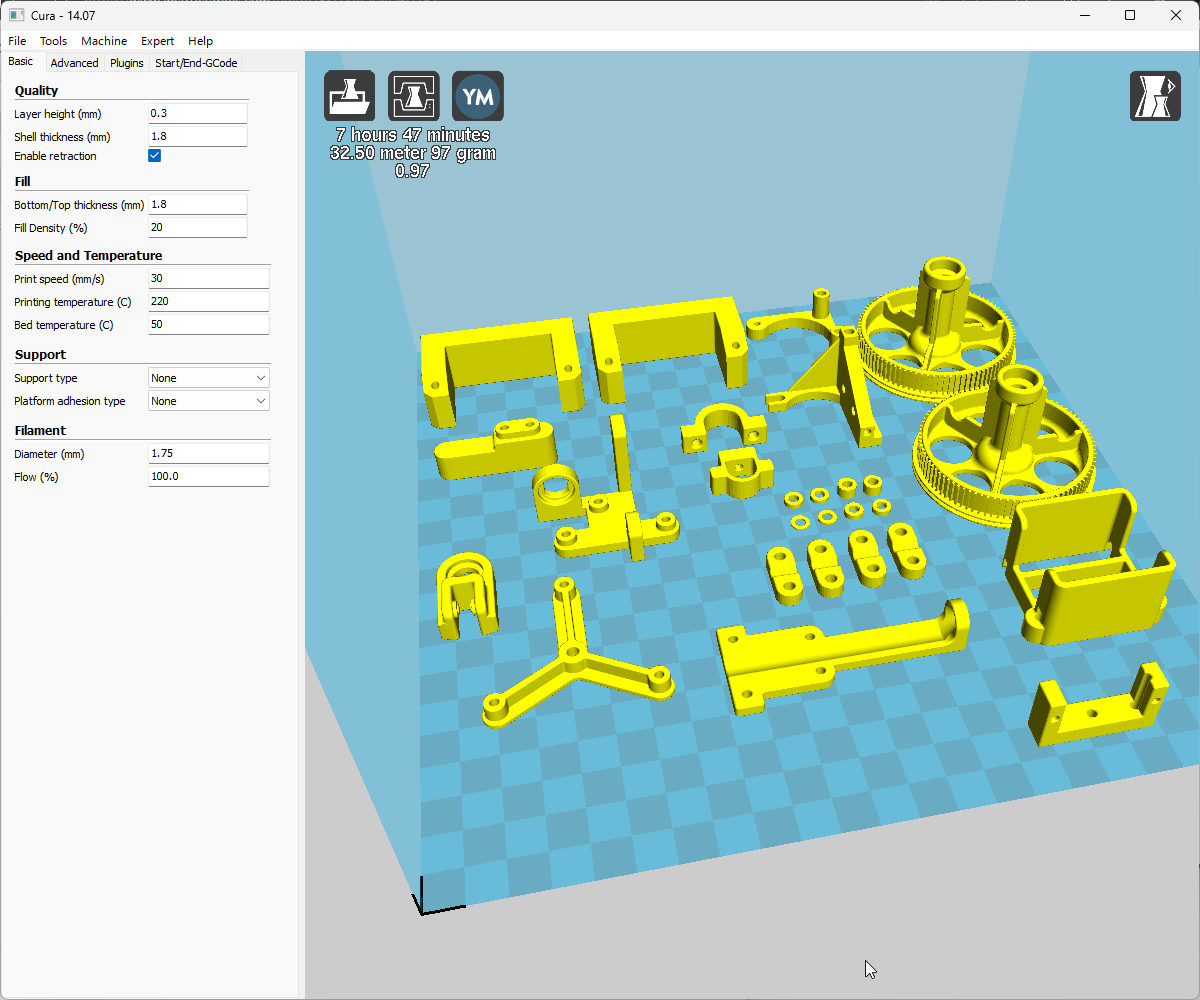
I have shown most of the parts all together.
- This is just to show the orientation that I printed them.
- You may want to print fewer parts at a time.
- You should notice I have the Layer Height set at 0.3mm, this speeds the printing time and still gives good quality.
- For the two wheels, you may want to print these at 0.2mm Layer Height. These have a groove for the tyres which are quite small.
List of Parts to be printed:
- 1 x Frame.
- 2 x Wheel_2GT.
- 2 x Axle_Spacer_2.25mm.
- 2 x Axle_Spacer_4mm.
- 4 x Axle_Stand_Caps.
- 2 x Stepper_Support.
- 1 x Linear Guide Support.
- 1 x Linear_ Guide.
- 1 x Pen_Support.
- 1 x Pen_Support_Clamp.
- 1 x Pen_Clamp.
- 1 x Servo_Support.
- 2 x M3_Washer_2x6.
- 1 x Battery_Holder.
- 1 x Caster.
- 1 x M3_Washer_1x6.
- 1 x Jockey_Wheel_Support.
- 1 x Bluetooth_Converter_Mount.
- 1 x DC-DC_Mount.
In the steps to build, I will write all Printed Parts Bold.
Assembly [Wheels Pre.]


The Wheel_2GT have a bearing (3x4x10) inset at each end.
- These should be a good press fit.
The tyre (Small Motor Pulleys) also needs fitting to each Wheel_2GT.
- Although these are in fact rubber bands and should grip fairly well on the rims.
- It is a good idea to put 3 or 4 small drops of super glue a round the rim to stop the rubber walking around the rim.
Assemble the two wheels as shown.
Assembly [wheels]


Before fitting the wheels insert the Axle (3mm Round Bar 58mm long) into the bearings.
- There are two spacers that need fitting to the ends of the Axle.
- The Axle_Spacer_2.25mm is fitted on the small diameter end of the wheel.
- The Axle_Spacer_4mm Is fitted on the Large diameter end of the wheel.
Also prior to fixing the axle in place make sure the Timing Belt is fitted around the wheel.
Each wheel is held on to the Frame using a Axle (3mm round bar) and two Axle_Stand_Caps.
- Each cap is fixed with Two M3 screws.
Assembly [Stepper Motor Pre.]

Attach each Stepper Motor to a Stepper_Support.
- Use two screws on each.
Assembly [Stepper Motor]

Each Stepper Motor is fixed to the Frame using Four Screws and M3 metal washers.
- When you fit the Stepper Motors fit and adjust the Timing Belt.
- It is a Timing Belt so it does not need too much tension on it.
- Just adjust so the parts of the belt between the pinion and wheel look straight.
Spring


It's a good time to fit the Spring at this stage.
- It could be a bit fiddley and hard to fit later on.
- I have just used a bit of 1mm diameter copper wire to hold it to the Frame.
- I hope the Image shows how I have done it for you to repeat.
- Anything similar will do.
Un-stretched the spring centres are about 15mm.
- I just found a spring I had and reshaped it to resemble what you see in the sketch.
Assembly [Pen Support Rods Pre.]
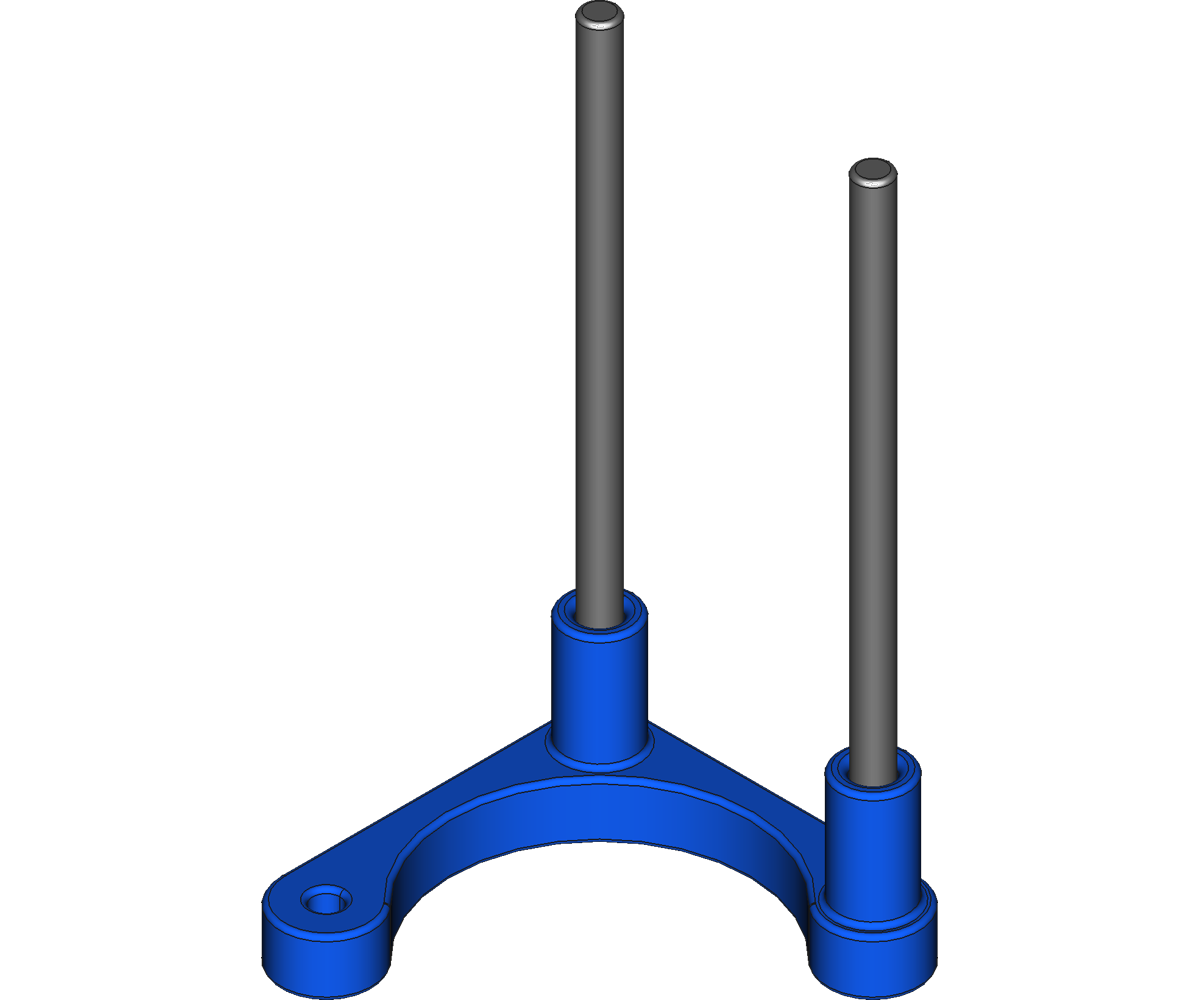

The two Linear Rods (3mm diameter rod) about 55mm long, need to be polished smooth.
- They should be a tight fit into the Linear Guide Support.
- If slack, glue. (They should be parallel, but I have designed the Linear_ Guide so it is not too important)
It is a good time once the Linear Rods are fitted, to make sure that the Linear_ Guide slides easily up and down the Linear Rods.
- Look carefully at the sketch you will see that the centre part of the Linear_ Guide has a wider hole to that it reduces the friction.
- You may need to reem the hole for it to slide freely.
- I have a longer piece of polished 3mm rod I use to make the hole a good fit. If you run the rod back and forth through the hole quickly, it causes friction and heats up the plastic, when the plastic softens it forms the perfect size.
Assembly [Pen Support Rods]

Fit the Linear_ Guide to the Frame using three screws from underneath,
Assembly [Pen Holder]


Start with the Linear_ Guide and fit a screw in the side.
- This is to fix the loose end of the spring when in use.
Next fit the Pen_Support from the back as shown.
- Use two screws.
Next fit the Pen_Support_Clamp.
- Use two screws.
Fitting a Pen or Pencil
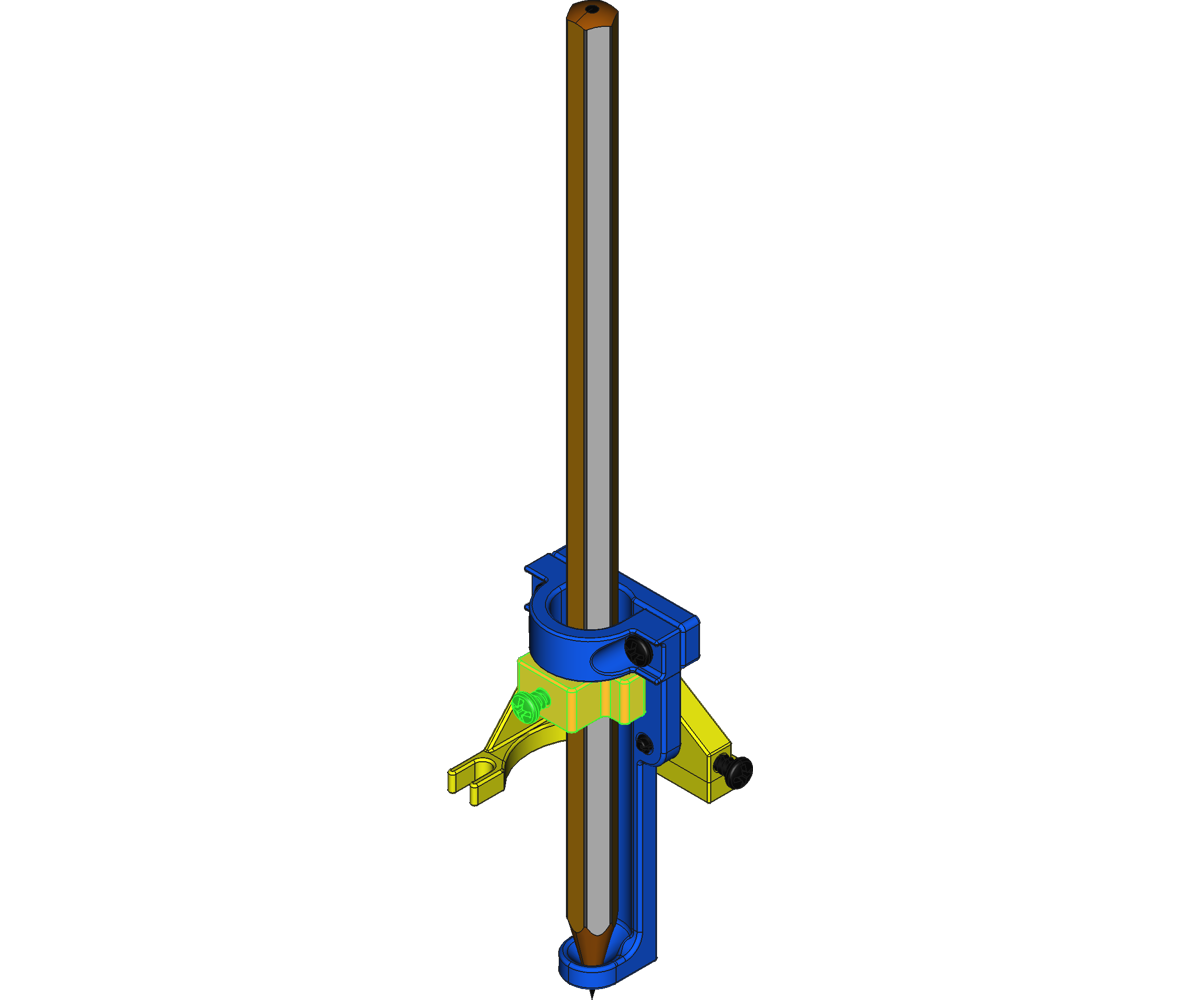
To fit a Pen or Pencil.
- The pen/pencil is placed in the holder from the top.
- There is a Pen_Clamp with a screw that the pen/pencil runs through.
- The screw in the Pen_Clamp is tightened against the pen/pencil to stop it from lifting out of the pen/pencil holder.
There was some madness a reason behind the way I designed this :)
Keep this assembly until later.
- It just slides onto the Linear bars and held in place by the spring.
- You will have seen from the Spring detail, it is designed to lift on and of this, so to make changing Pen/Pencil easy.
Assembly [Servo Pre.]


Fit the Servo to the Servo_Support.
- Use the two screws that came with the Servo.
- Take note of the orientation of the off-set holes in the Servo_Support.
- The Horn will also need trimming. count the number of holes left in the horn as a guide.
- The servo horn is rotated to the Centre position shown.
Assembly [Servo]

Fit the Servo Assembly to the Frame.
- This requires you use M3_Washer_2x6 to space off the screws.
- Use two screws.
Assembly [Battery Holder]

Fix the Battery_Holder to the front of the Frame.
- Use two screws from underneath.
Assembly [Jockey Wheel Pre.]


A Bearing (3x4x10) needs to be forced into the Caster.
- A little grease ma help.
- Warming the plastic to make it soft may also help.
I hope the the exploded view shows how the rest goes together. The sequence from bottom upwards is:
- M3 Allen Set-Screw x 25 mm long.
- Bearing (3x4x10)
- Caster
- Bearing (3x4x10)
- M3_Washer_1x6
- Jockey_Wheel_Support
- M3 Self-Locking Nut.
Assembly [Jockey Wheel]

Fit the Jockey Wheel Assembly to the Frame.
- Use three screws from underneath.
Assembly [Bluetooth Support]

Fit Bluetooth_Converter_Mount to Frame.
- Use two screws from underneath.
Assembly [DC-DC Power Pre.]


Its best to assemble the DC-DC Power regulator and Wire it before fitting it to the Frame.
The circuit is simple:
- Using a short length of Cable, attach a Barrel Jack Plug to the output of the LM2596 (Long enough to reach the CNC shield Barrel Jack Socket when fitted).
- Fit a Barrel Jack Socket to the DC-DC_Mount.
- Wire the Barrel Jack Socket to the Input of the LM2596.
I have done actual Photos of mine to show how it should look.
Assembly [DC-DC Power]

Fit the DC-DC Assembly to the Frame.
- Use three screws from underneath.
CNC Shield


If you are using a Chinese CNC Clone, check my Instructable how to fix it.
- Fix Cloned Arduino NANO CNC Shield : 10 Steps - Instructables
- We won't be using grbl, I have written my own firmware.
Fit the CNC Shield to the Frame.
- Using four screws.
After fitting the CNC Shield.
- Plug the Barrel Jack Plug from the DC-DC Power Regulator into the Barrel Jack Socket on the CNC Shield.
- The Servo Plug is fitted to the 'Y' axis output pins normally used to connect a Stepper Motor. (Note the position and orientation)
- The two Stepper Motors are connected to the outer two outputs of the CNC Shield Axis X and Axis Z.
If you look at one of the Photos, you will see I have bent the 3.3 volts pin out slightly.
- This is to a plug can fit to the pin once the Arduino Nano is fitted.
- Not a very clever place to have it.
Stepper Motor Drivers


I am using DRV8825 Drivers.
- The Micro-Stepping Jumpers on the CNC-Shield should have one Jumper set in the centre for the two outer Driver Sockets.
- The Centre Driver Socket does not matter, the Centre Driver Socket is not used for a Stepper Motor.
- This equates to 1/4 Step for the DRV8825, If you you an equivalent then set the jumpers accordingly.
Fit the two Stepper Motor Drivers to the CNC-Shield.
- Make sure you have the correct orientation.
Here is a good video on how to set the current limit of the DRV8825 driver I used.
Special Modules


I have made my own Modules for the Logic Voltage Conversion and driving the the Servo.
Details of the Module I made for the Logic Level Conversion can be found here:
- How to Use/configure a Bluetooth Module : 14 Steps (with Pictures) - Instructables
- See Step 3.
- Also see this Instructable about changing the speed of the Bluetooth Module.
- The Bluetooth Module will be connected to the RX and TX pins of the Arduino Nano.
- My firmware for the Arduino Nano assumes that the UART speed of the Bluetooth Module is set to 15200 baud.
For driving the Servo I made a Little Module that fits in the Centre Driver Socket on the CNC-Shield.
- It is not a driver as such, It has a voltage regulator for the Servo and transfers the pins needed to the Centre Output Pins of the CNC-Shield.
- Details of how I made this can be found Here:
- Tim's Draw Bot: Driver to control a servo from the NANO CNC Shield (tims-draw-bot.blogspot.com)
Fit the Logic Level Converter to Bluetooth_Converter_Mount.
- Use two screws.
Fit the Servo Driver into the CNC-Shield.
- Take note of the orientation.
I have made Bespoke Cable to connect the Logic Level Converter to the CNC-Shield.
- I have made it from five core flat ribbon cable.
- The overall length (including connectors) is about 150 mm.
- One end has a 5 x female connector (This connects to the Logic Level Converter).
- One end has 4 x female connector (This connects to the TX/RX Four Pin Header) and a 1 x female connector (This connects to the Bent 3.3 volts Header Pin).
- Take Note that the arrangement of the cable on the 4 x Connecter is mixed.
- Connect the Cable as shown.
Fit a Bluetooth Module to the Logic Level Converter (4 x Female Header)
- Be sure to get the correct orientation.
Batteries


I have used three flat Li-Po Batteries to power the Robot.
To connect the batteries I have made a cable.
- One end has three connectors that match the Battery connectors.
- One end has a Barrel Jack Plug (This plugs into the Input of the DC-DC Module which we attached a Barrel Jack Socket).
- Make the overall length of the Cable about 200 mm.
The schematic show the wiring of the cable.
- The connections are wired in Series.
Fit the Batteries into the Battery_Holder.
- Connect the Cable to the Batteries.
- I have not put a switch on the Robot, so Plug the Cable into the Input of the DC-DC Converter when you want the Power On.
Arduino Nano


Before fitting the Arduino Nano we may as well upload the firmware first.
- The Arduino Nano can be programmed while it is fitted. BUT Not with the Bluetooth module fitted at the same time.
- The Bluetooth module is connected to the TX and RX Pins of the Arduino Nano when fitted.
To upload the Firmware we use "X Loader"
- "X Loader" is an old Application and was made to upload firmware HEX files to the Old Arduino Boards.
- The latest Arduino Nano bords now have updated Bootloaders.
- The cheap Chinese clones however usually (Haven't checked recently) come with the Old Bootloader.
- The Arduino IDE (1.8.19) does give you the choice of installing either Bootloader if you have a programmer. An Arduino (AVR) can be programmed to be a programmer.
Here is a link to X Loader on my Google drive.
Plug the Arduino Nano (Old bootloader) into you computer via USB.
- Start "X Loader"
- Download the attached HEX file: Tims_Draw_Bot_5 (Old BL).hex
- Set the path in "X Loader" to where you saved the file.
- Set the Device to: Duemilanove/Nano(ATmega328).
- Set the USB to the one the Arduino Nano is plugged into.
- Set Baud Rate to 57600
- Click Upload.
After the Upload has finished.
- Fit the Arduino Nano to the CNC-Shield.
- Make sure of the correct orientation.
Downloads
Pen Holder

The Pen Holder just slides onto the two Linear Rods.
- Attach the spring to the screw on the Linear_ Guide.
- This will hold it down against the Horn of the Servo.
We are ready to go, we just need an application to control it.
Control


Control is done via Bluetooth.
- The Application I use is my own: Tim's XY Plotter: Tim's XY Stepper Controller (tims-xy-plotter.blogspot.com)
- Other Applications may work with it. Any that can send a command string and handshakes when "ok" is returned.
The commands are basic G-Code:
- G00 [X(steps)] [Y(steps)] - go to X Y.
- G01 [X(steps)] [Y(steps)] - travel to XY.
G02 and G03It was an early phase of my coding, I didn't get around to do Arcs.- G04 [P(ms)] -Pause.
- G92 [X(steps)] [Y(steps)] - change logical position.
- M03 - Tool On / Pen down.
- M05 - Tool Off / Pen Up.
- M18 - Motors Off.
- R01 - Reset Plotter.
- All commands must end with a Carriage Return and Newline.
Basically make all commands straight lines.
Using G-Code commands means you can write scripts to draw things.
- I usually draw things in CAD and save the files as DXF.
- I use my Application to convert the DXF file to G-Code.
- The DXF files have to saved as a flat 2D DXF in the old R14 format for my application to read it.
Hope the video is enough to show the process.
- Not a fan of editing videos, don't get paid to do it. All my videos a raw, I hit start and cross my fingers it all comes out as expected.
- This one ended short as I didn't pay attention to taping down the paper haha.
Some Notes!
- The surface on which the Draw bot Draws, Must be Level.
- If the surface the the robot draws on slopes, it will drift and you end up with a bad result.
- Also the speed plays a factor to it's accuracy, too fast and errors incur.