Trammel of Archimedes Via 4 Machines
by andoleson in Workshop > CNC
14094 Views, 80 Favorites, 0 Comments
Trammel of Archimedes Via 4 Machines

If you have never heard of a trammel of Archimedes they were originally used for drawing ellipses. The original models had only two slides and could be adjusted to change the shape of the drawn ellipse. I find them to be neat trinkets and I have always been somewhat fascinated in their mechanics! For more in-depth info: Trammel of Archimedes
I work in the engineering department at a local University where I am responsible for the engineering lab. The lab houses many different machines where I assist students in creating class and personal projects.
Some of the components of this project could be made on one CNC machine, however, I have been specifically developing this project for the sake of educating students on various machines while also giving them a final assembly to showcase their work. The machines used in this project are a CNC wood router, CNC lathe, CNC mill and a laser engraver. This is my first prototype for this project and it has plenty of room for improvement!
Each component for the trammel has been drawn in Fusion 360 and the files are attached to each step. For the CNC mill, router and lathe there are also tool paths in the files. These tool paths can be exported as programs for your machines if you have the correct post processor. If you do not have Fusion 360, I was able to export the drawings as blueprints in PDF format that could be used as well.
As a final note, please always use caution when running CNC machines. They cut material at very high speeds and can be very dangerous. Always verify your work piece is secure and your work offsets are set correctly. Enjoy!
Downloads
Supplies
I have listed the materials and equipment I used for the project below. Note that I used scrap pieces of aluminum for the pins and the slides. If you were to purchase the material I would recommend buying material closer to the finish dimensions so there is less stock to remove!
Equipment:
1. A computer with Fusion 360. (optional, but may make things easier for you)
2. CNC Mill and simple tooling (a manual mill could also be used)
3. CNC Lathe and simple tooling (a manual lathe would also suffice)
4. CNC Wood Router and simple tooling
5. Laser Engraver
Material:
1. One inch diameter aluminum round stock at least 6 inches in length.
2. Aluminum bar stock, 1.5" wide, 2" long, .75" thick
3. 3mm MDF board, a piece that is 5" x 5" minimum.
4. A 6" x 6" piece of 3/4" thick medium density fiber board. (Any 3/4" thick wood would work)
Component 1, Handle


For this step you will need the 5" x 5" piece of 3mm MDF board or something similar that can be cut with a laser engraver. Start by downloading the Handle-Complete file. This is an Adobe Illustrator file of all the individual pieces of the handle, it can also be opened with Inkscape which is a free software! You can upload the files into your laser's control interface and adjust your power settings. I used a 60 watt epilog laser which also supports color mapping. This file is in RGB red and RGB green. I set both colors to 20% speed and 60% power at a frequency of 300. Have the laser cut green first to ensure clean cuts on those pieces!
Once you have cut out the pieces, simply super glue them together! I have also attached a word document with pictures and step by step instructions for how to assemble the handle.
Component 2, Base


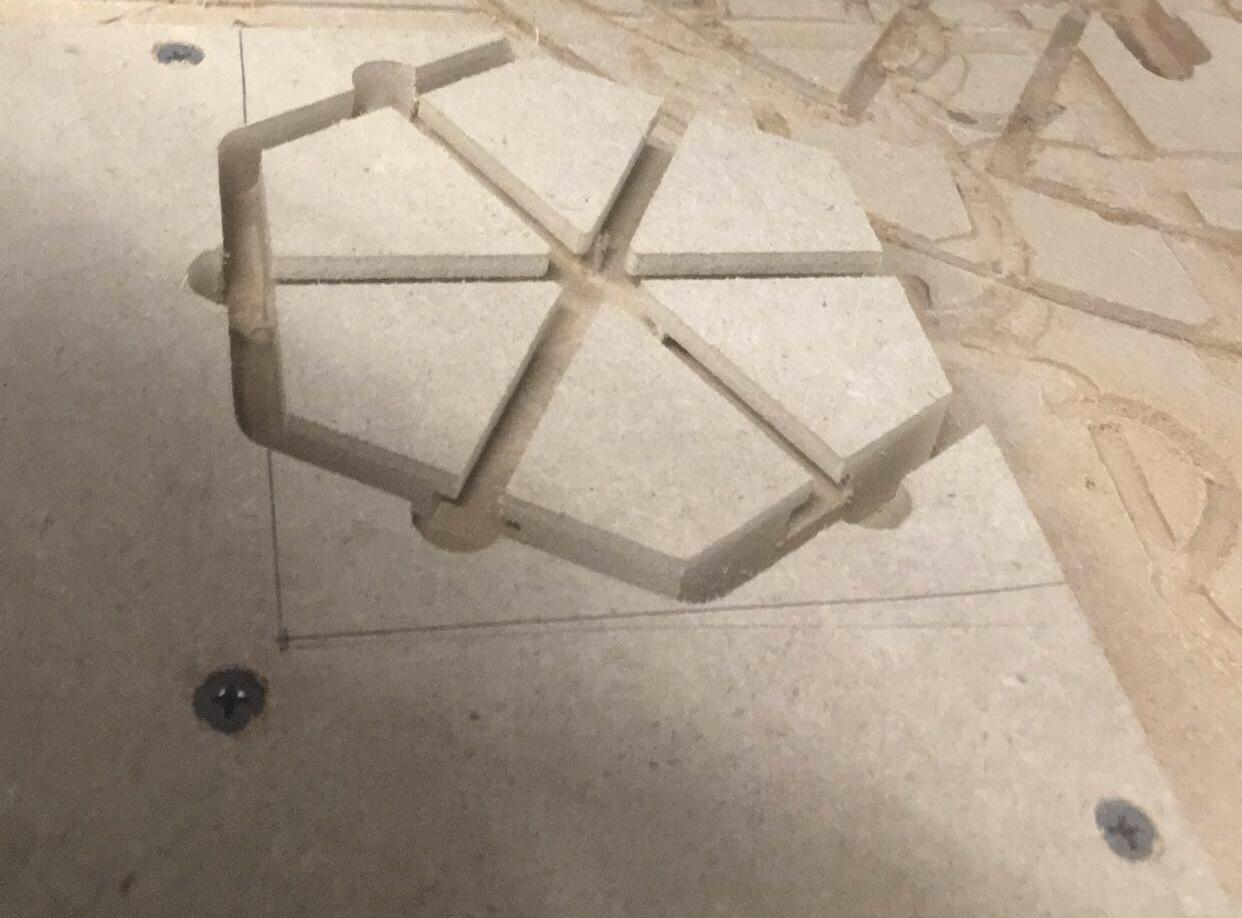
I made the base component out of 3/4" medium density fiber board (MDF), any type of wood will work, however, I find MDF to be very easy to cut and work with. A piece that is at least 6" x 6" should suffice. The biggest concern is making sure there is enough extra material to secure the work piece in the router. You can see from the picture that I simply used the corner of a larger piece by sketching out the overall width and length of the part and setting my X and Y coordinates appropriately.
The bits you will need for your router are a .25" endmill and a 1/2" T-slot cutter. I used the .25" endmill to rough out the perimeter of the part as well as the grooves. The T-slot cutter is used last to finish off the grooves. Here is a link to the exact T-slot bit I purchased and used without complaint. T-slot cutter
There are two Fusion 360 files for this step. The first one is the completed part, while the second one is the tool path. If you open the files you will notice that the tool path file does not have the T-slot. I am not an expert in Fusion and I was having trouble getting the tool path to run correctly with a slot cutter and .25 end mill to create the shape I needed. My solution was to simply remove the slot from the drawing and run the same program for the grooves at final depth only with the slot cutter. The program also leaves small tabs to ensure the piece does not move during machining. They can easily be broken off with a chisel and sanded smooth.
As a bonus step, I have included the templates I used on the laser to engrave the screw pattern on the base. I thought it could use a little more flair! I set the laser to center engraving and aligned the part appropriately.
Component 3, Pins


For this step, depending on the tooling and equipment at your disposal you may want to modify this process somewhat to suit your needs and skill set. The pins could also be substituted for bolts if you do not have the time or equipment available to you. I also found in my first design it may be better to put a larger diameter/taper on these pins so that they can be pressed into the slides (something I am still working on)
This is what I did for the first prototype: I used a piece of aluminum round stock that was 1 inch in diameter and several feet long. This was all that I had available, it would be more effective to use a piece closer to the finish diameter of the pins! I put the aluminum into the chuck of the lathe roughly 1.25" past the face of the jaws. After setting the work piece coordinates and running the program. I removed the piece from the lathe and used a band saw to cut the piece off leaving just enough stock remaining to put it back into the lathe and turn the second side. You could also use a part off tool for this step and eliminate the second operation, however, I did not have one at my disposal!
The Fusion 360 file includes tool paths for both the first and second operation. I used a Tormach 15L to turn the parts. You may need to alter the tool data before posting the process to ensure it works for your specific machine. I used hard jaws for both ops, which you can see from the marks on the pins. Be sure to secure the pin well on the second side while it faces off the excess material!
Component 4, Slide


Similar to the pins on the lathe, this process could be modified based on the equipment and tools you have. These slides are also in need of some redesigning. You may notice in the video that they don’t slide smoothly at times and get stuck transitioning in the center. I believe if these could be made longer it may help solve this problem!
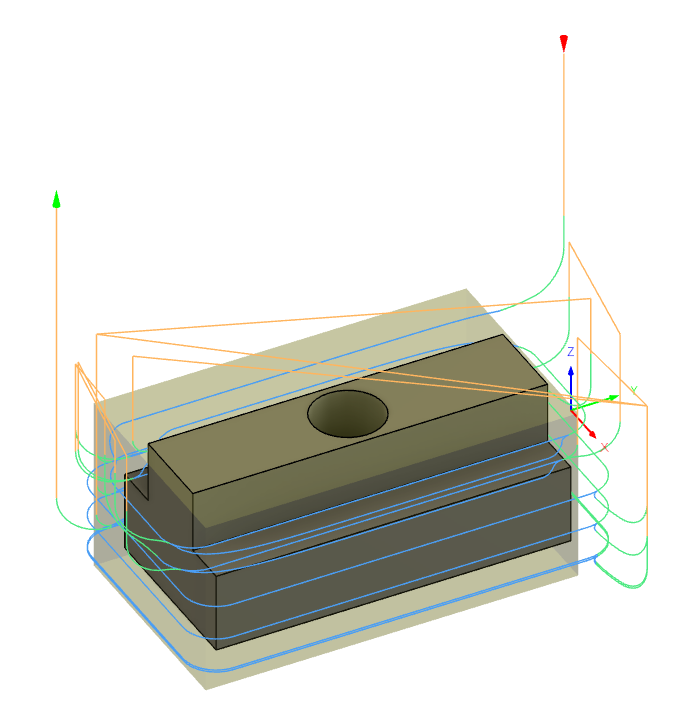
This is how I made the current slides: I started with a piece of scrap aluminum and squared it down into a block that was 1" wide, 2" long and .75" thick. The program uses a .1875 endmill to cut out the entire slide on the first operation. The origin for the program is the top right hand side of the block. After exporting the program I copy and pasted it two more times and set coordinates using G54, G55 and G56 so I would get three slides from one program. You could also simply run the program three times moving the work piece offset each time. The Fusion 360 file has tool paths for milling only. I was using a CNC Supra mill which does not have a tool changer and uses standard manual mill R8 collets. I chose to center drill the hole locations manually on the mill using the original work piece offsets from the milling operation. I then took the part to the drill press and drilled the holes because I do not have a way to put a #7 drill into the mill!!
One error I made by cutting all the pieces from one block is that the cutter leads in just on the corner of the previous slide which cut a small corner on two of them(the red arrow on the tool path picture). This could be fixed by adjusting the lead in before post processing the program.
Final Assembly


Now that you have created all the pieces it is time to assemble them together!
I used a little drop of loctite to secure the pins into the slides. Be sure to not use too much! I made that mistake and it oozed out of the holes all over the place and made some ugly spots on the base.