Transformable Instructables Robot Cake
by SayaNIGHT in Workshop > 3D Printing
606 Views, 0 Favorites, 0 Comments
Transformable Instructables Robot Cake


Is this a birthday cake? Nope—don’t eat it! It’s the Instructables Robot!
To celebrate Instructables’ 20th birthday, I designed this transformable action figure: a birthday cake that turns into the iconic Instructables Robot. The frosting becomes a poncho the robot can wear!
Why not make your own Instructables Robot and celebrate together?
Supplies
- 3D printer and filament (PEGT, PLA)
- Acrylic painting set
- Acrylic coating
- 3D printed ball joint tool (You can download free STL files from here.)
No glue required, everything snaps together!
3D Printing
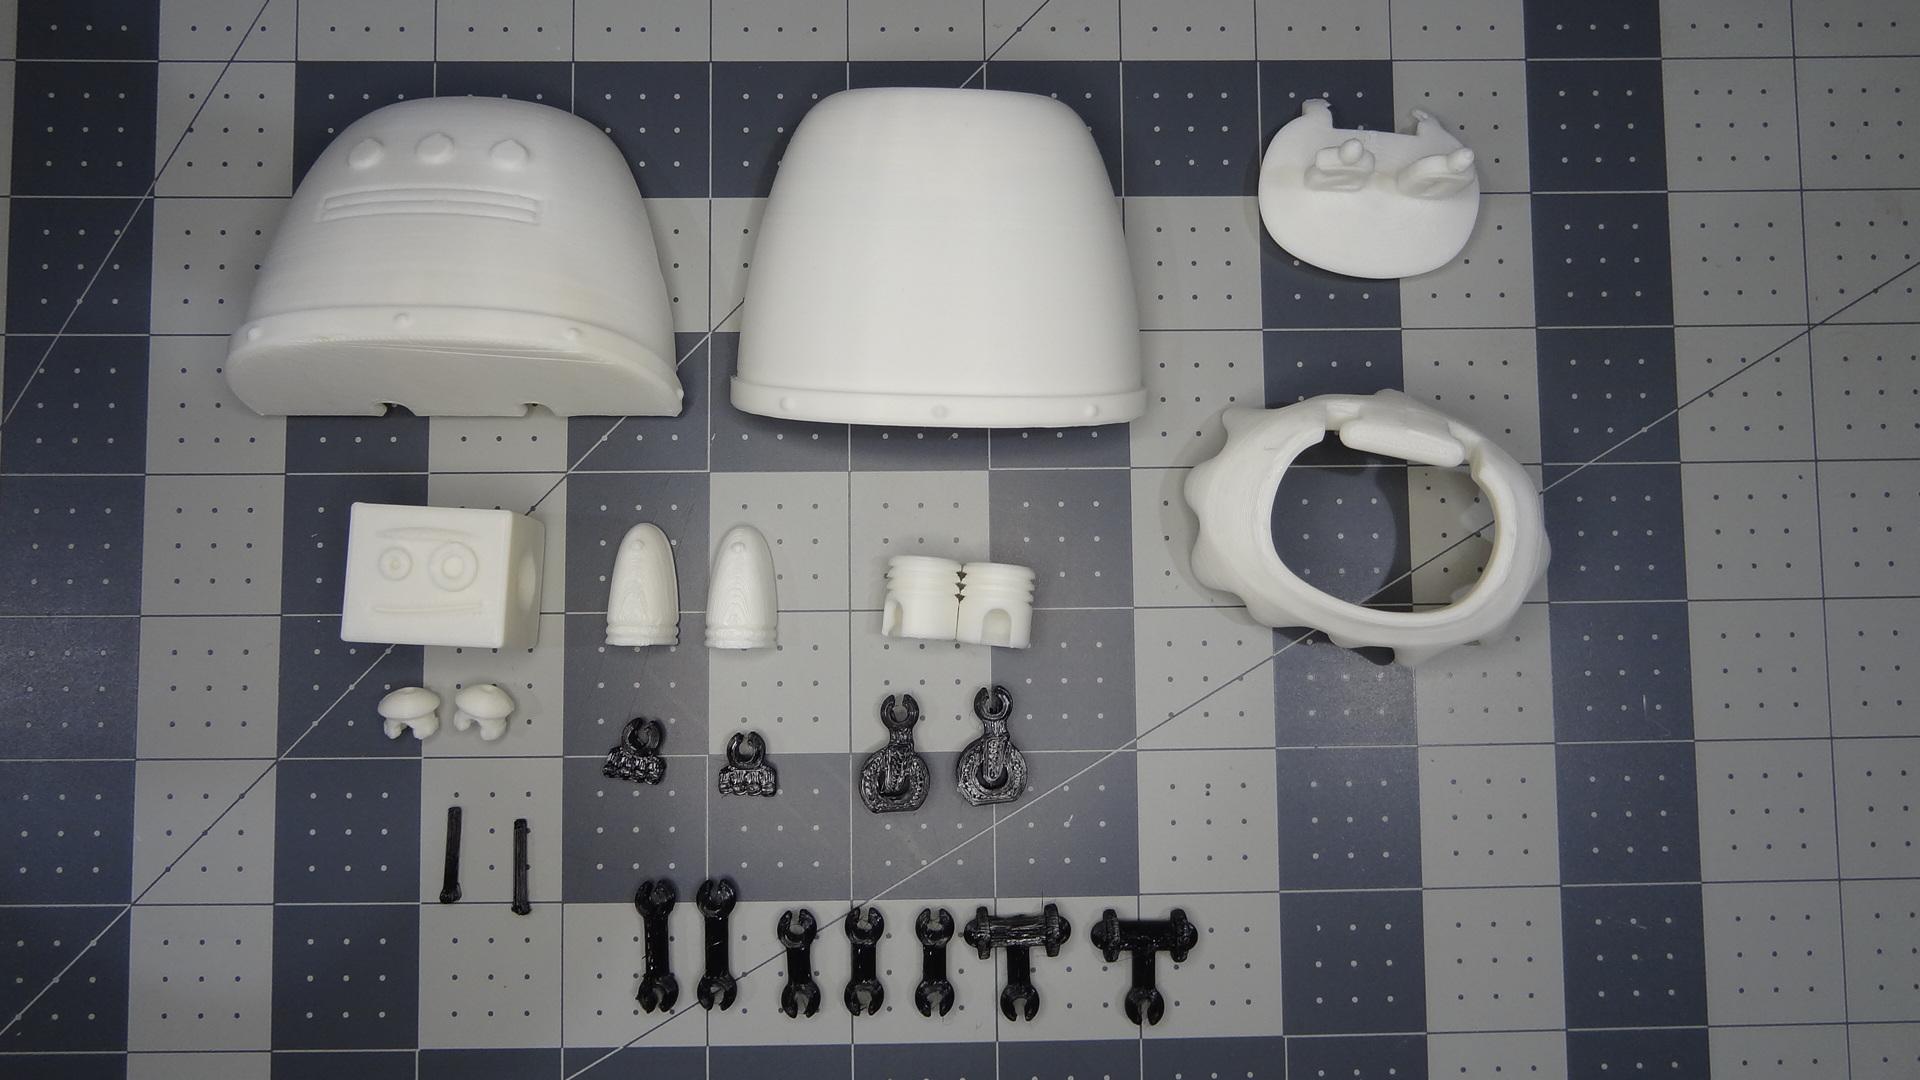

All parts can be printed without supports if properly oriented. Recommended print orientations are shown in the attached figure.
Printing everything in PLA is totally fine. However, PLA tends to deform under load, which can loosen the ball joints over time. To maintain joint stability longer, consider using PETG or ABS for the ball joint components. For this project, I used white PLA+ and black PETG filament.
Here are the main 3D printing settings:
- Material: PLA, PETG, ABS, etc.
- Nozzle Size: 0.4 mm
- Supports: None
- Layer Height: 0.2 mm (default)
- Infill Density: 15–20% (default)
- Shell Count: 2 (default)
- Raft/Brim: Depends on bed adhesion. Joint parts have small contact areas, so rafts help improve adhesion, prevent elephant foot, and are easier to remove than brims. I personally prefer rafts.
The models were designed using Autodesk Fusion.
Painting

There are three ways to color the robot.
- Paint all parts with acrylics and finish with a clear acrylic spray.
- Use a multicolor 3D printer with colored filaments.
- Use a single-color printer with colored filaments, then add details using Sharpies or paint.
I chose the first method. Based on my experience, I recommend to avoid painting the joint connection areas. Paint can make them harder to insert and less smooth to rotate.
You’ll notice the joints are painted in my photos or video. I gave it a try, but honestly, leaving them unpainted works better!
Assembly
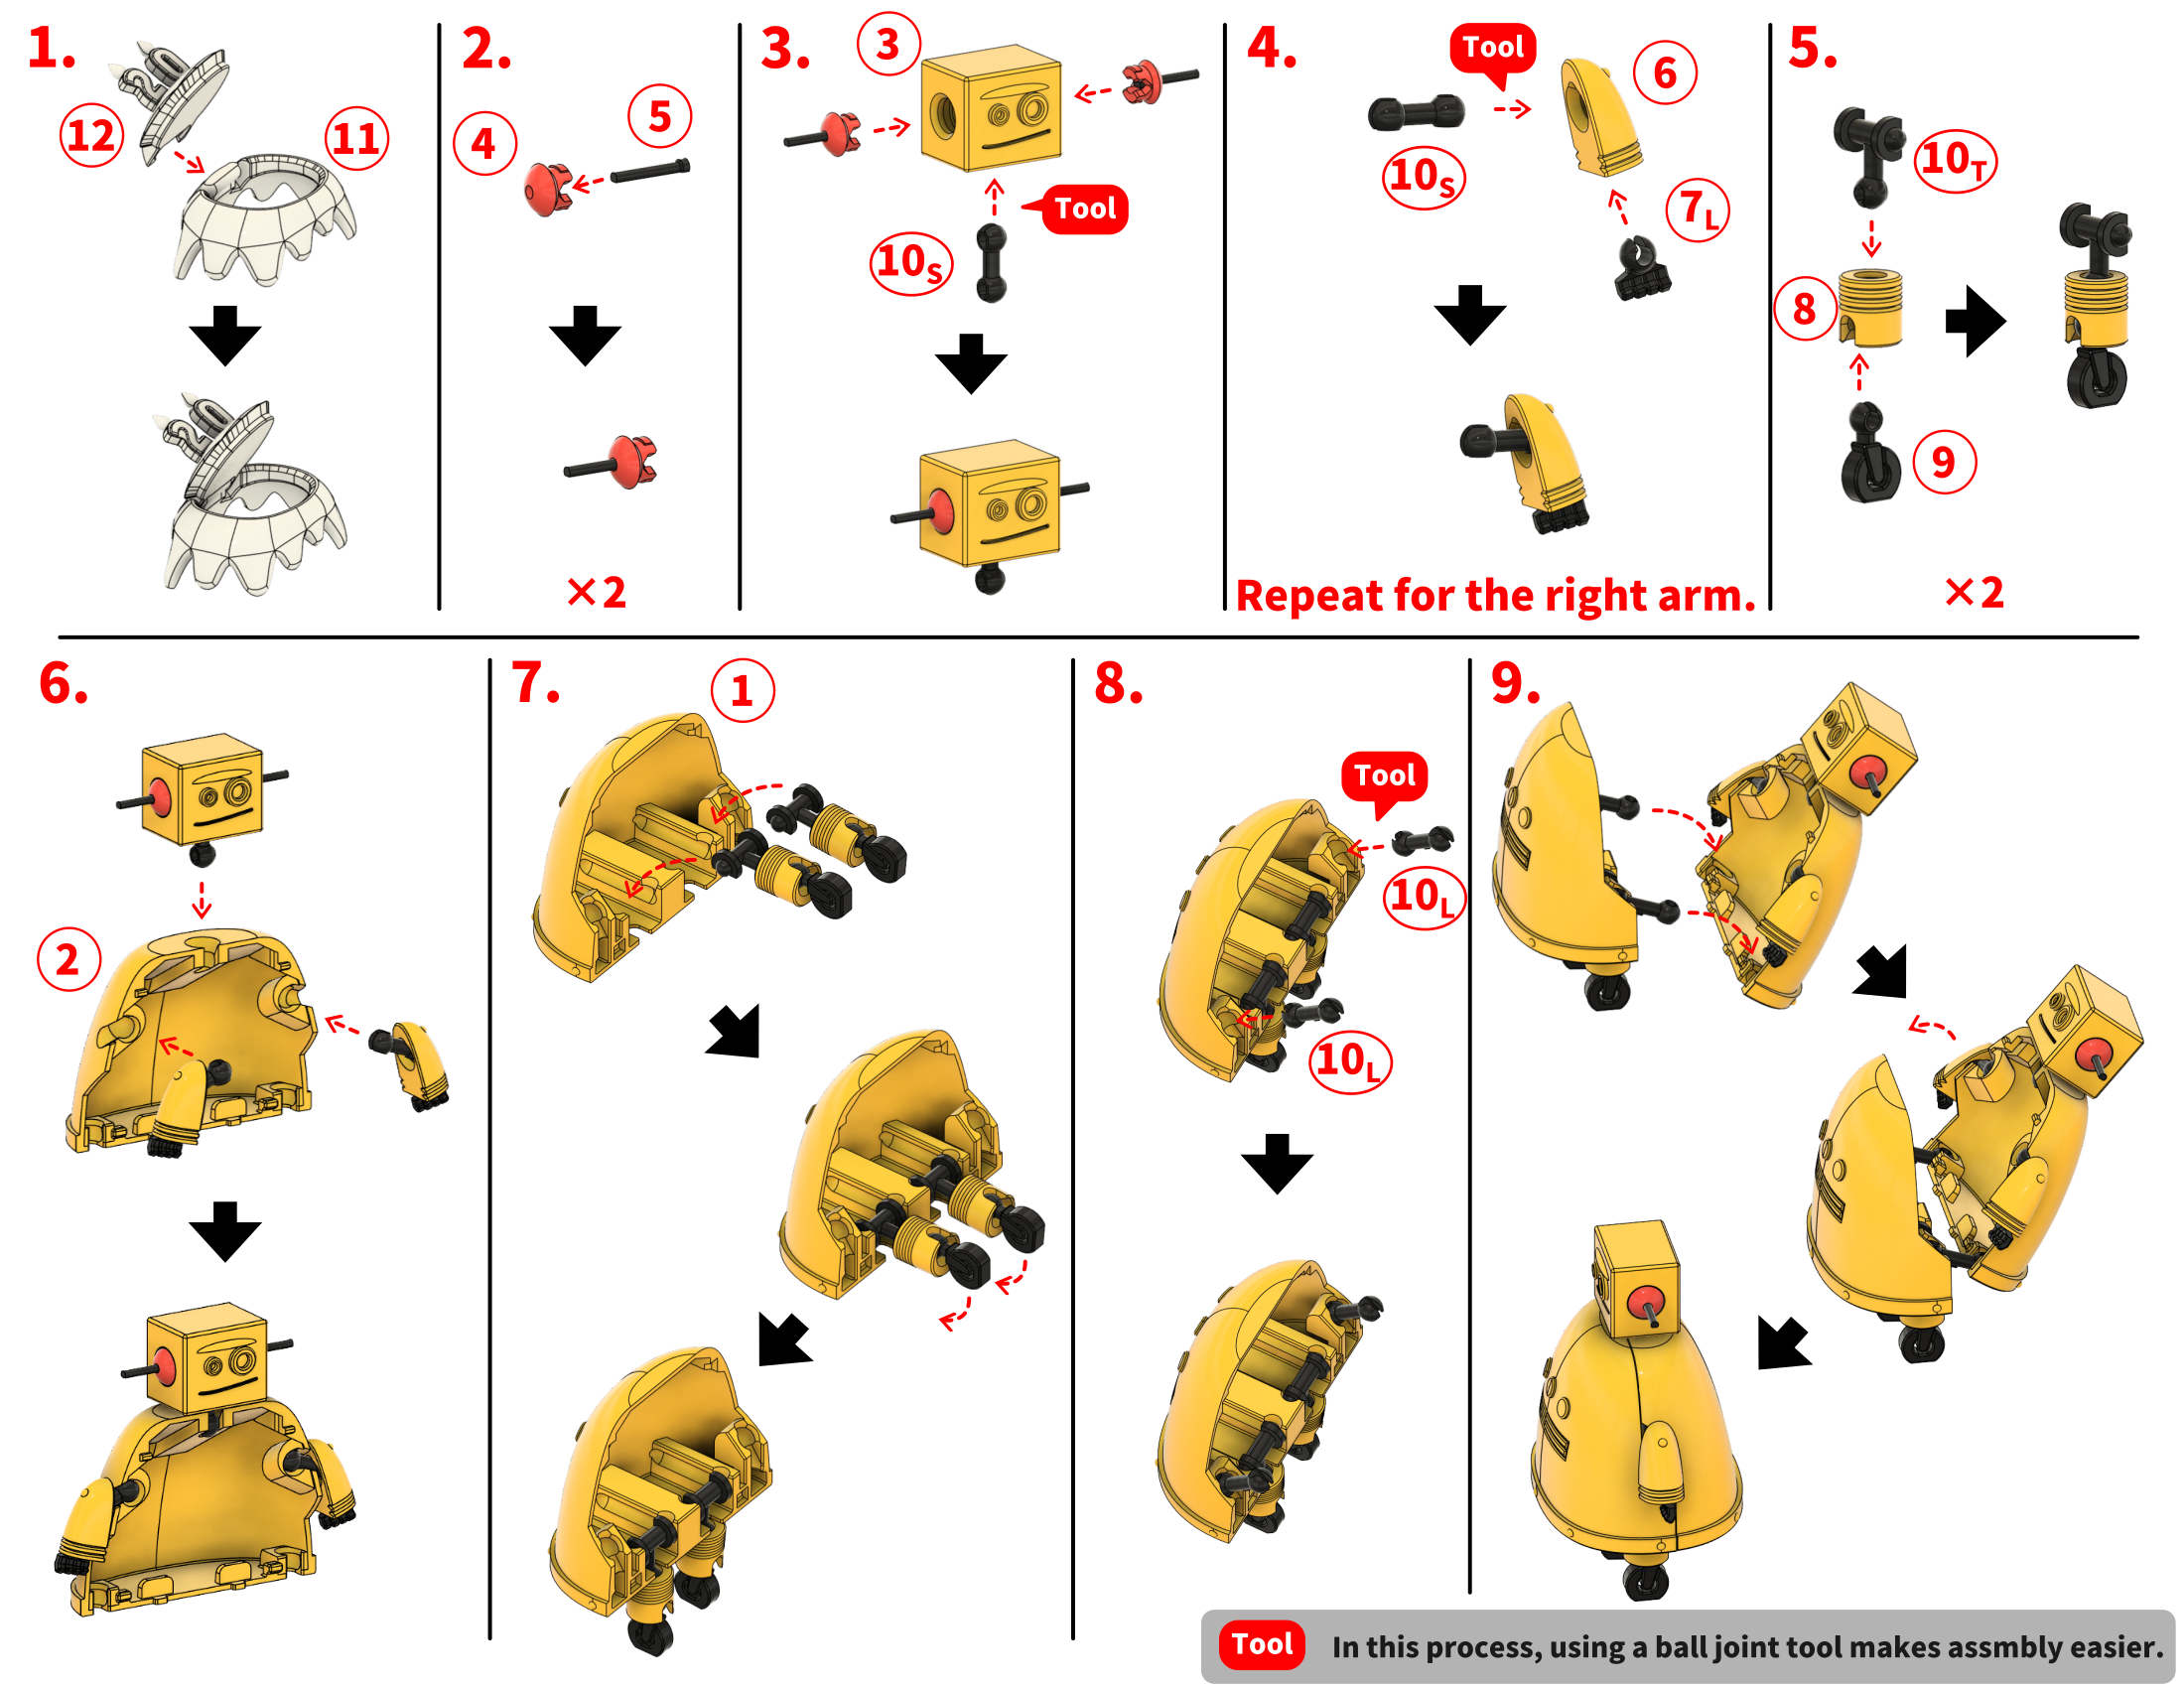
Assemble the parts as shown in the attached figure. You can also follow the assembly process in the YouTube video linked in the Introduction section.
Using a ball joint tool is optional—but it definitely makes assembly easier!
Celebrate the Birthday!
Did your robot turn out the way you hoped? If you ran into any trouble, feel free to leave a comment. I’d be happy to offer advice or even update the model if needed.
Now let’s celebrate together with your own Instructables Robot!
Will you transform it back and forth? Admire it on your desk? Create a stop-motion animation?
Whatever you choose—have fun, and happy 20th birthday to Instructables!