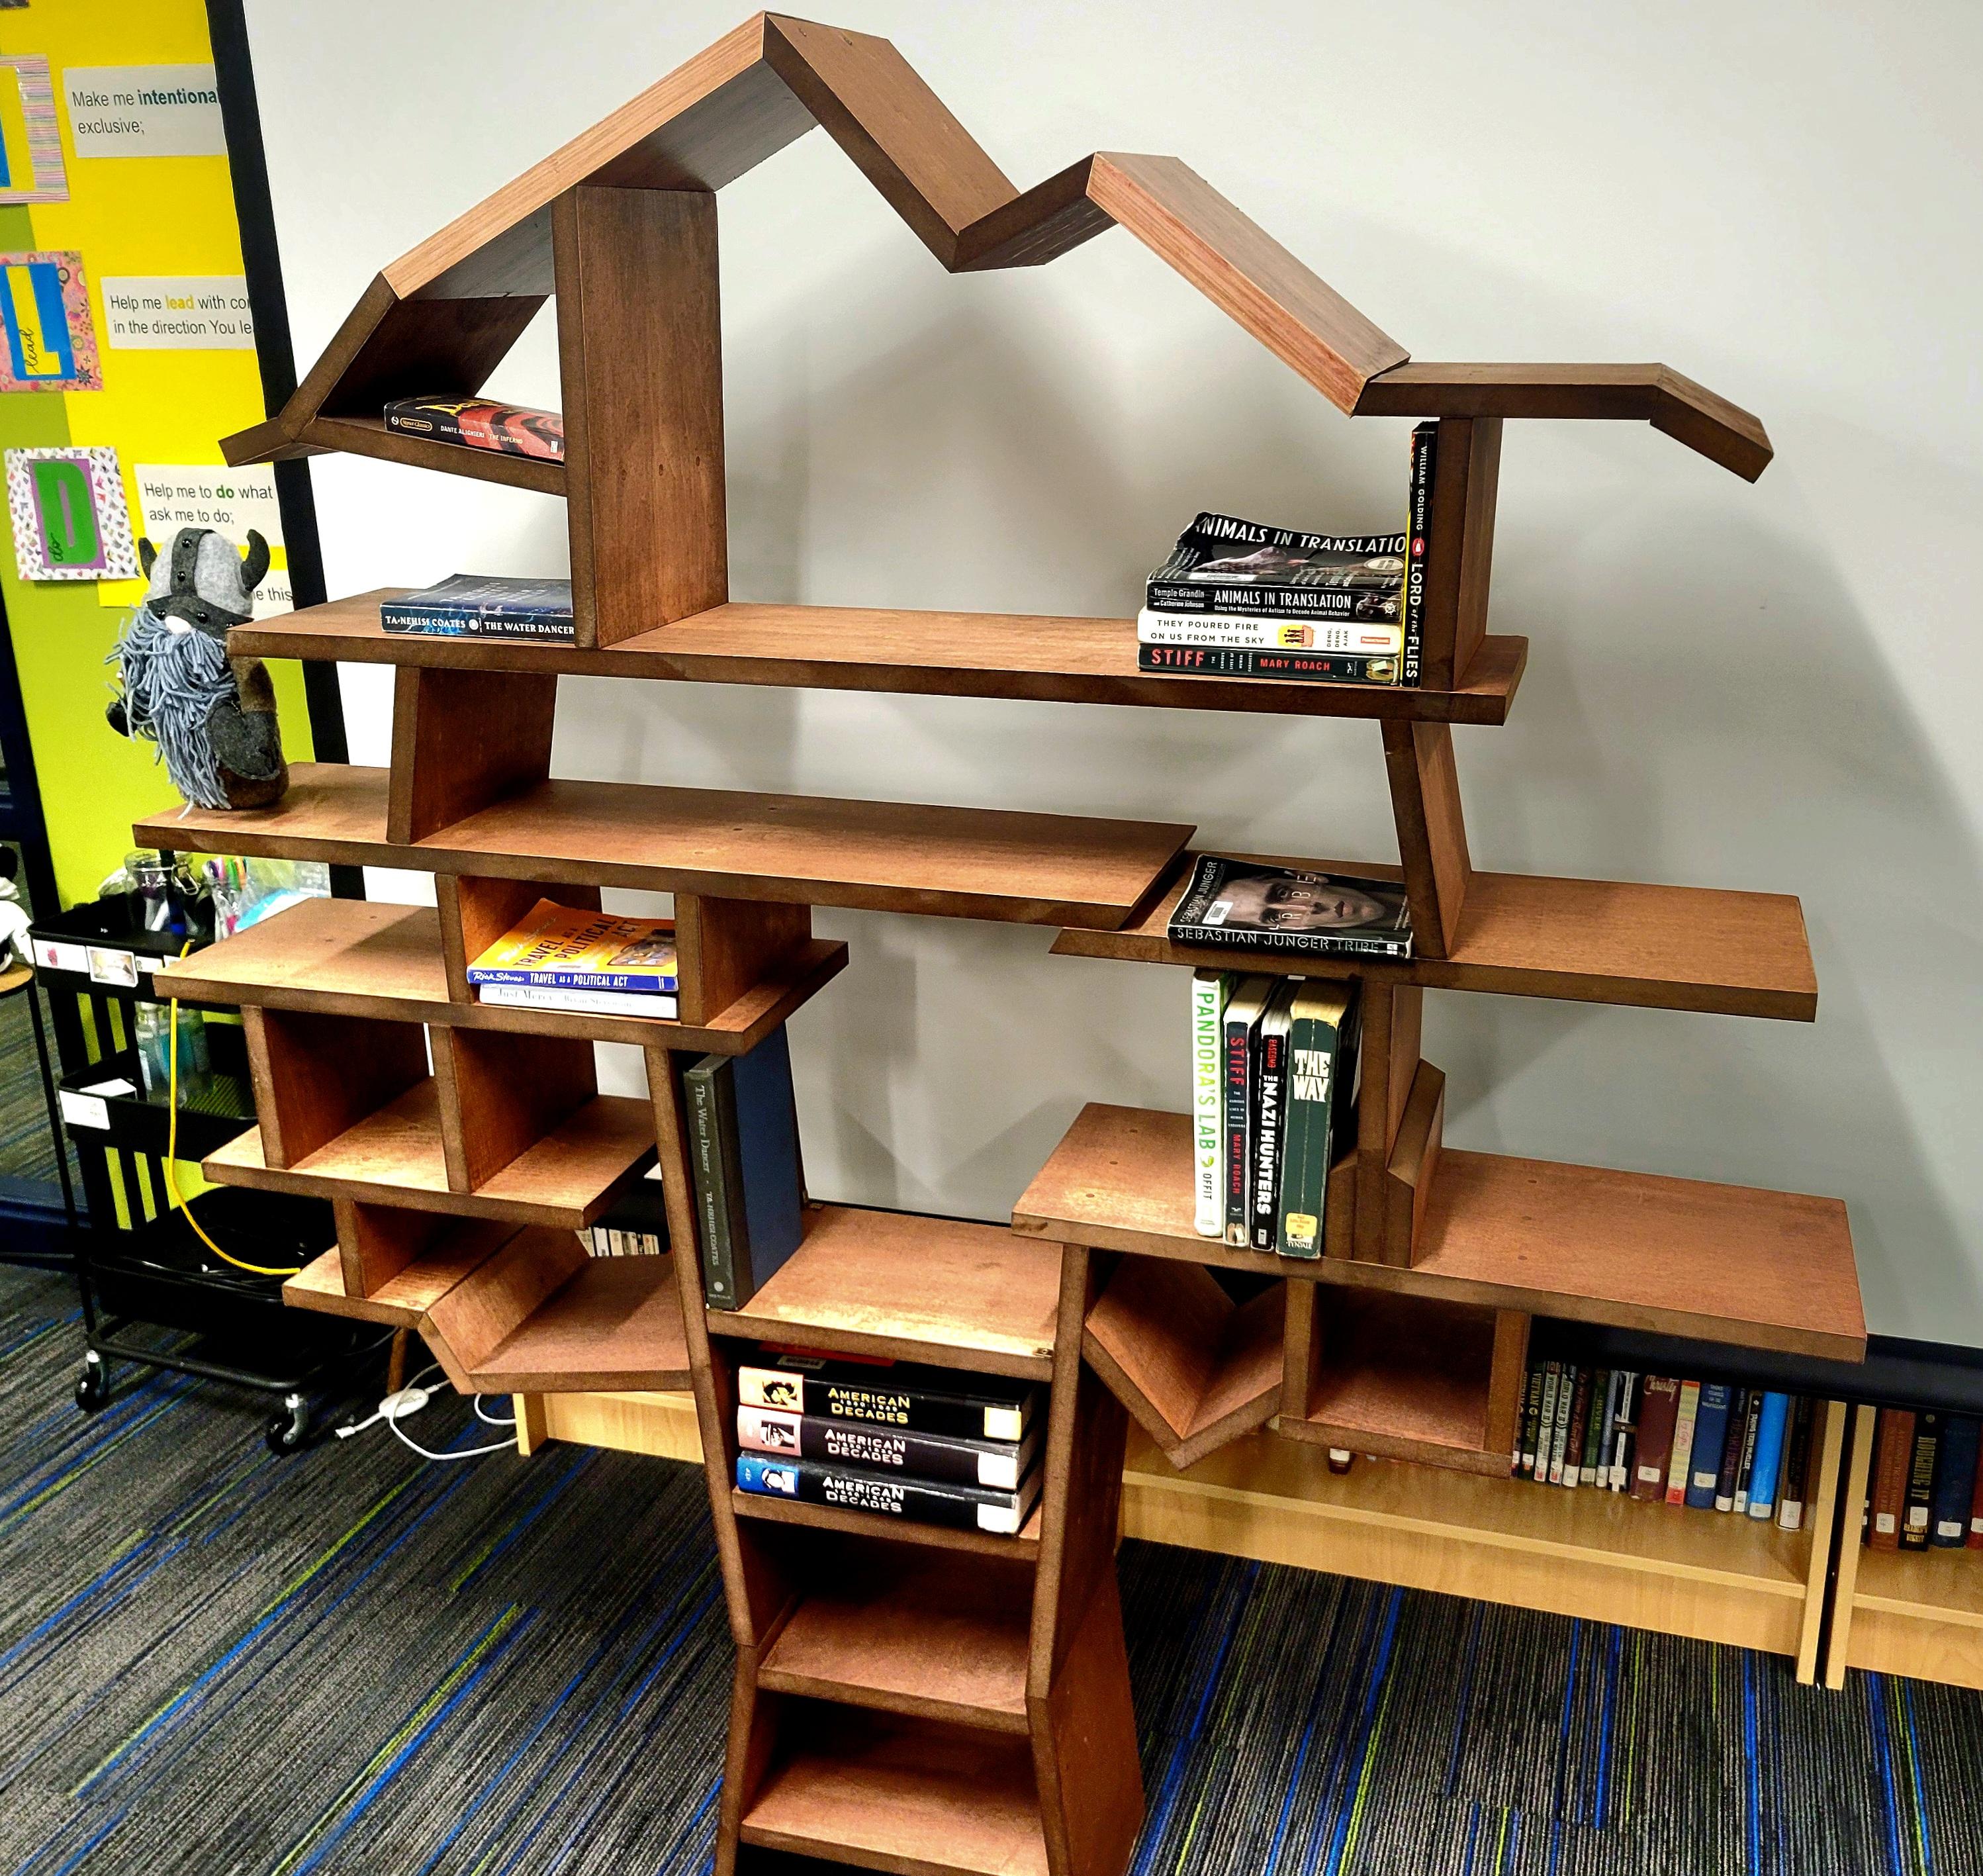
Tree of Wisdom
 (1).jpg)
Howdy, we are Samuel Franco & Caden Evers. We are from Illiana Christian High School. We wanted to make a bookshelf that was both useful and looked super cool. We decided to land on this idea because we liked the idea of how trees can hold knowledge and books are the key to learning new things.
Supplies
Supplies:
- L Brackets
- T10 torx screws 1.5 in.
- Stain ( New America)
- MBF core (Burch Finsih)
- Level
- Wood clamps
- Wood Filler
Tools:
- Ruler
- Tape Measure
- Fusion
- Engineering Notebook
- Computer ( Able to Run Fusion )
- Mouse (computer)
- Brace drill
- Impact driver
- T10 torx bits
- Table Saw
- Miter Saw
Brain Storm

Our first Idea was to have a bookshelf that looked like a tree with hanging bookshelves coming from the branches (like playground swings). But this proved to be difficult in practice. We thought about doing a hexagonal design with little cubbies for your books. However, this had looked too simple and we wanted to do something more complex. We finally landed on the idea of the tree with many cubbies for your books and it looks very nice.
Designing the Book Shelf


When we designed our Ideas we chose to base our project on a picture we found online. Firstly we sketched out a basic picture of the finished product. This would give an idea of what the product would look like. After that, we went to Fusion 360 to get the specific measurements of all our wood pieces.
Once we had finished making the bookshelf in Fusion we labeled all our pieces with letters and numbers to make it easier to assemble after we cut our pieces. After we labeled the pieces we then wrote in all the measurements of the pieces and the angles in our engineering notebooks so that we could cut the wood with our specific measurements.
Cutting Out the Wood


We first took our three 4x8 ft wood sheets of MBF core (berch Finish) wood and cut them up into 10in x 8ft slabs to make all the wood shelves have the same depth. After we cut those we marked the measurements of our pieces in our Engineering notebooks.
Once we did that we could cut out every piece with their specific measurement. We used the table saw to cut out the lengths of all the wood pieces, and also we used the table saw to cut out our angles. Sometimes however sometimes the table saw would be crowded so we had to start using the miter saw to cut our angles. After we had cut out everything we checked to make sure that we had the correct angles on every piece. Once we felt good about all of our pieces we started to prepare to start putting the project together.
Assemble the Pieces


When we first started to put the pieces together we thought they would go together perfectly. To our surprise, none of the pieces came together as easily as we thought.
To begin we started to build from the bottom to the top. For the first bottom pieces we had to use wood clamps to force the pieces into the specific places we needed them to be so we could fasten them in.
Then once the base was done we got started on the middle section. Here we started to put sections of the bookshelf together so we had larger pieces.
Finishing the Bookshelf


After we had finished construction on the bookshelf we noticed it was a bit too wobbly for moving. So what we did was we put L - Brackets on all the key structure points to make the bookshelf more stable. Once we felt good about how the bookshelf felt we put wood filler in all the drill holes so everything would look flush. Once that was done we finally put stain on it to make the wood look spectacular. The stain was called New America