Turn Iconic Cereal Boxes Into Airtight Food Containers || Fun & Functional Props You Can Actually Use!
by travisderose in Living > Kitchen
1121 Views, 18 Favorites, 0 Comments
Turn Iconic Cereal Boxes Into Airtight Food Containers || Fun & Functional Props You Can Actually Use!
)
.png)


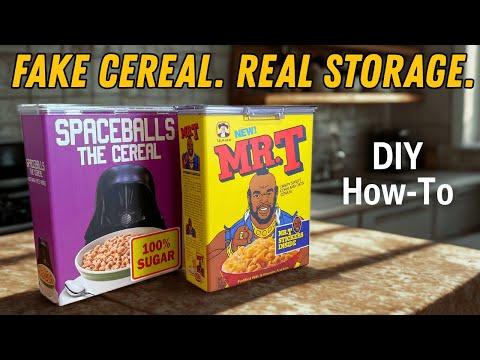
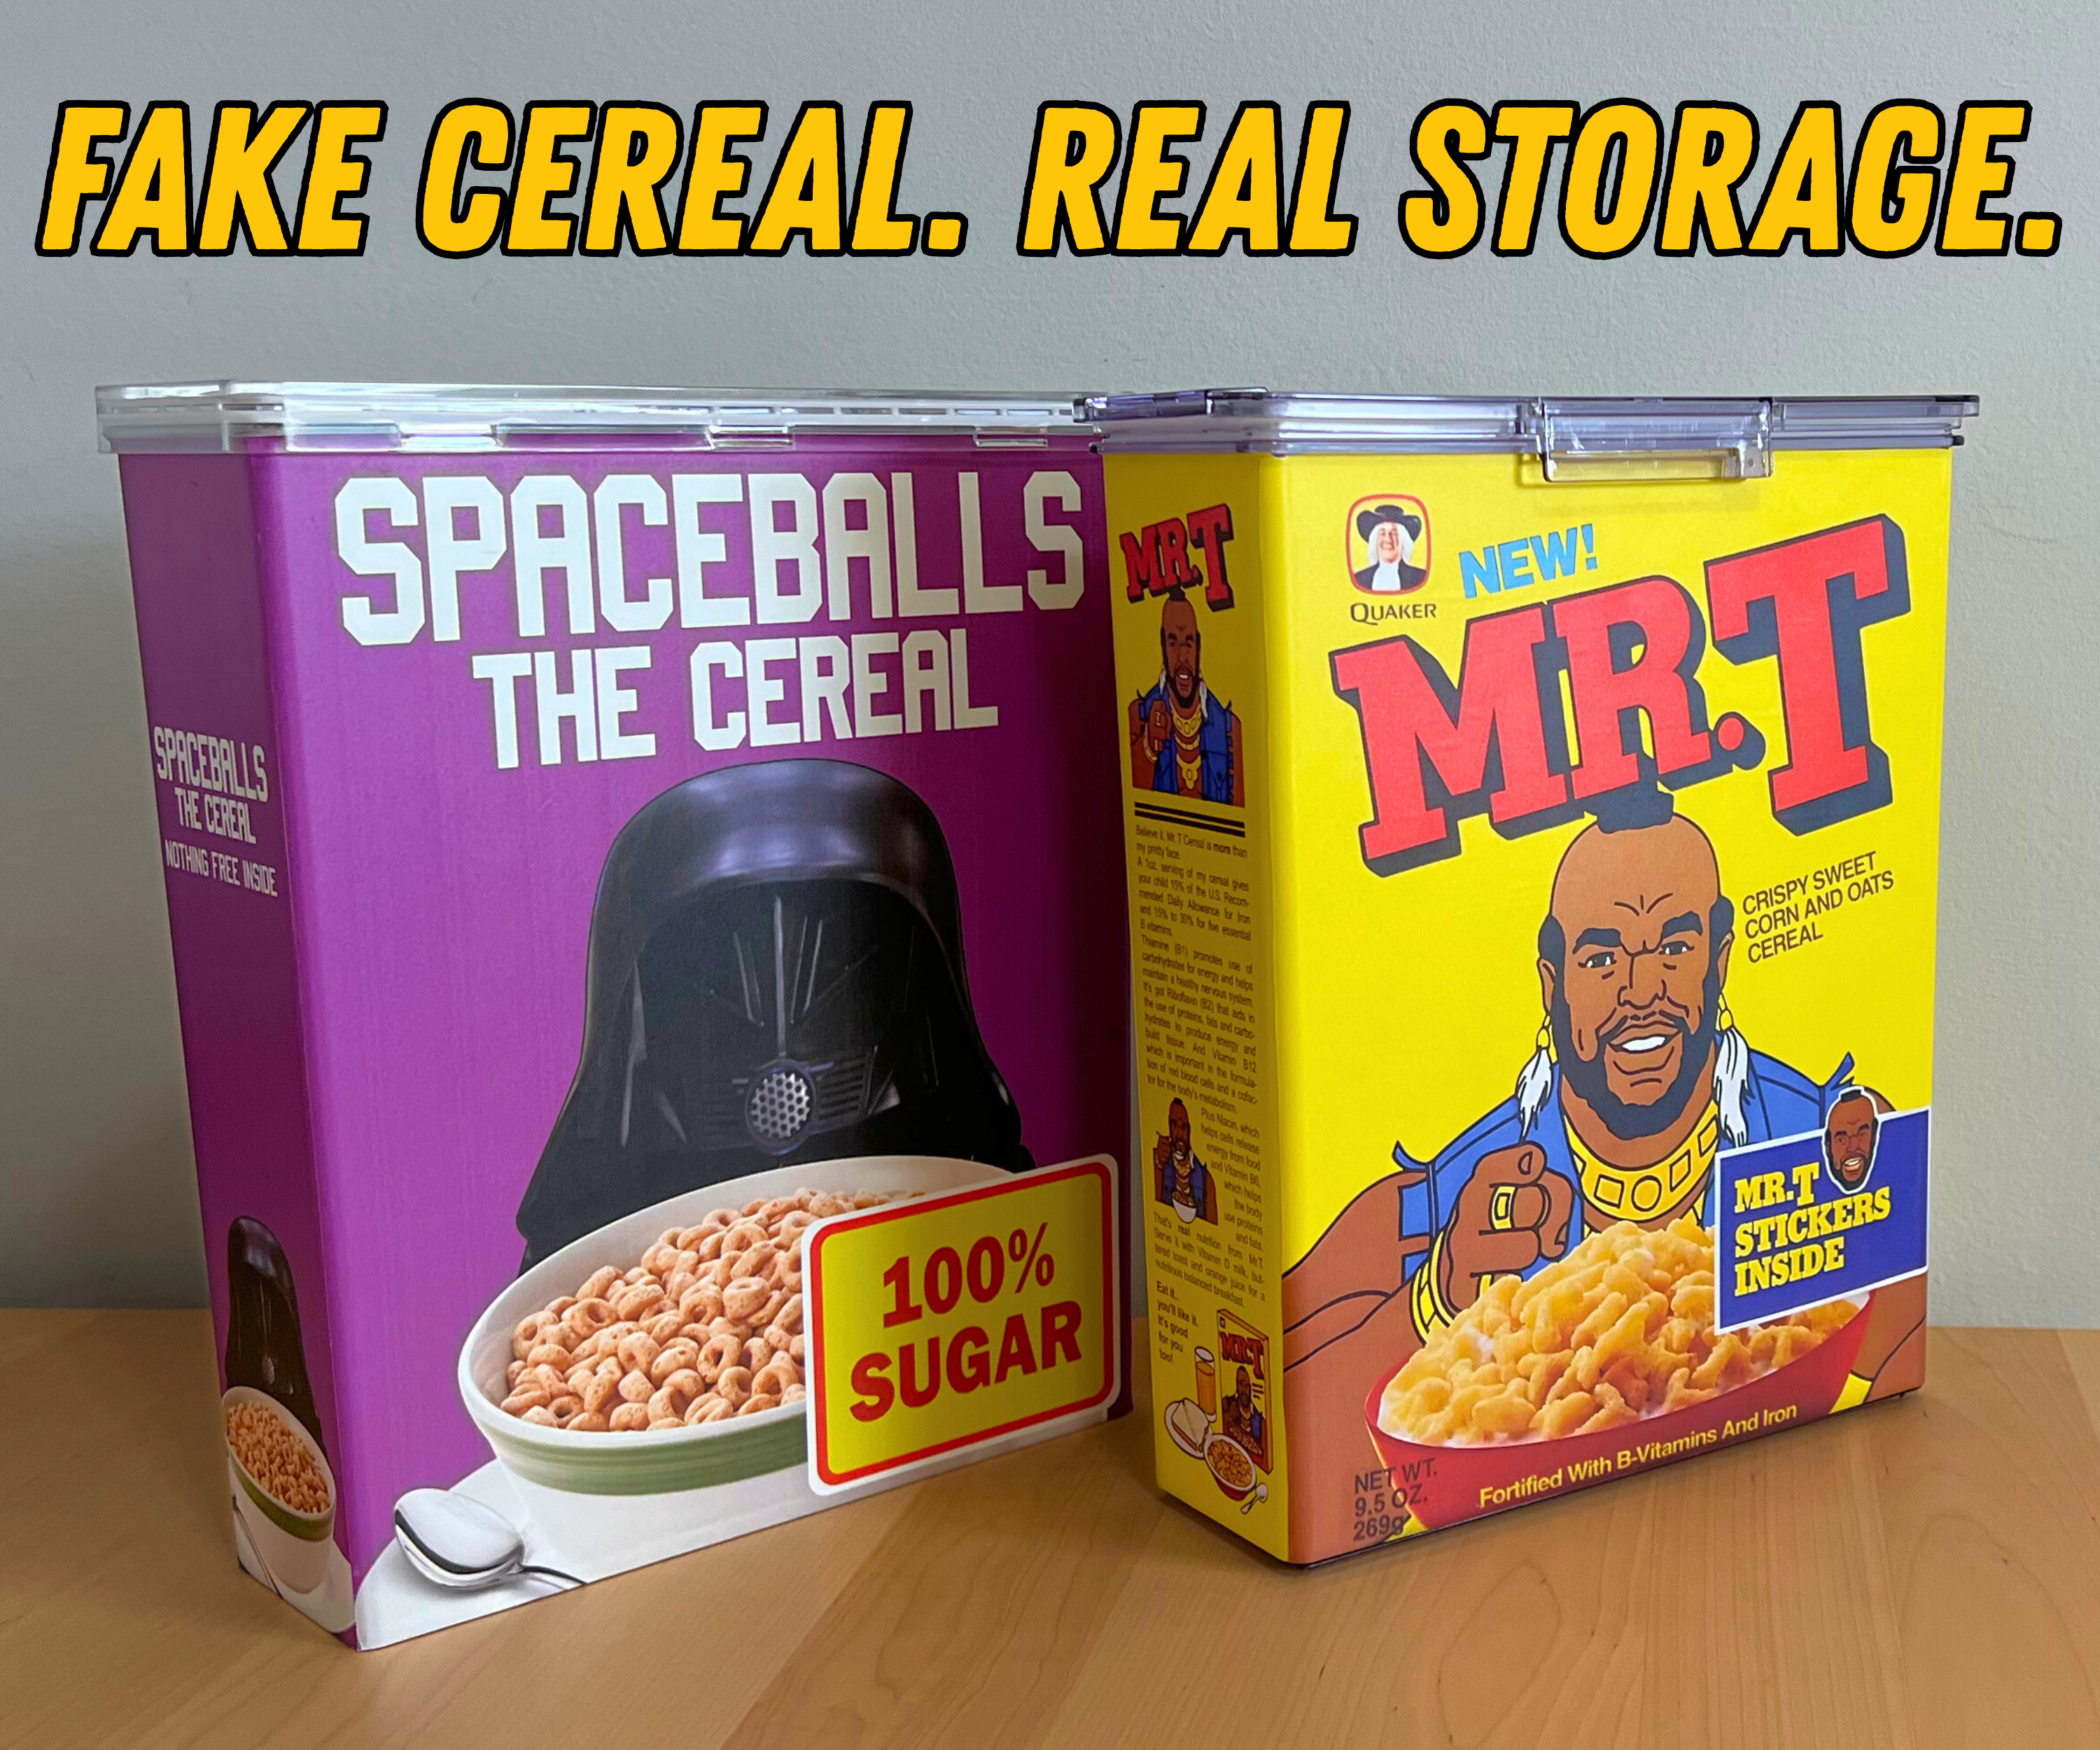
Bring iconic cereals from movies and pop culture straight into your pantry! With this fun and functional DIY, you’ll turn airtight food containers into replicas of cult favorites—like Mr. T Cereal from Pee-wee’s Big Adventure and Spaceballs: The Cerealfrom Spaceballs.
I've got a variety of different kits available on my shop:
- Mr. T Cereal
- Spaceballs: The Cereal
- Count Chocula & Franken Berry Cereal
- Happy Gilmore Shooter McGavin’s “Pieces of Sh*t for Breakfast” Cereal
Whether you’re organizing your pantry, storing pet food, or looking for a one-of-a-kind gift for a film buff, this easy project adds a dash of nostalgia and style to your kitchen.
Supplies


Airtight cereal container (either works, just your preference):
Vinyl cereal box label: (You can design your own and have it printed, or I have some designs available on my shop)
- Mr. T Cereal
- Spaceballs: The Cereal
- Count Chocula & Franken Berry Cereal
- Happy Gilmore Shooter McGavin’s “Pieces of Sh*t for Breakfast” Cereal
X-Acto knife or precision blade
Ruler or measuring tape
Cutting mat or cardboard scrap
Pencil or pen
Straight edge or cutting guide
Squeegee or credit card (for applying vinyl)
Choose and Clean Your Container
Start with a clear cereal container. Clean it to remove any dust or oil, which helps the vinyl stick better. Dry completely.
Cut Your Vinyl Decal Into Panels


Your vinyl decal will have four main pieces: two side panels and two larger front and back panels.
My designs include cutting guides, but otherwise, aim to:
- Cut the side panels wide enough to wrap around the corners—about 1 inch of overlap works well.
- Leave a bit of extra width on the front and back panels so they fully cover the container and overlap slightly onto the side pieces.
Don't worry about making everything perfect—precise trimming will come later once the vinyl is applied.
Apply the Side Panels


Measure and mark the center of your vinyl side panel and the center of the container’s side using a pencil or pen.
Peel back a small section of the vinyl backing and align the center marks.
Slowly press the vinyl down, working from the center outward to smooth out any air bubbles.
➤ Important: Do not press the vinyl around the corners yet.
Place the container face-down on a cutting mat or piece of cardboard.
Use an X-Acto knife to carefully trim the vinyl flush with the container’s edge.
➤ You want the vinyl to wrap just slightly around the corner—about 1/4 inch—for a clean finish.
Once trimmed, press the edges down firmly around the corners.
Repeat the process for the second side panel.
Apply the Back and Front Panel


Measure the center of the back graphic and mark the center of your container to align it properly.
If the design comes too close to the top edge, trim about 1/4 to 1/2 inch off the bottom to keep it centered and clean.
Apply the vinyl the same way as before: start in the center and press outward, smoothing out any air bubbles.
➤ If needed, gently lift and reposition the vinyl to fix air pockets. The material is forgiving but can stretch—so go slow.
Once applied, trim any excess from the sides just like with the side panels.
➤ This time, wrap the vinyl just barely around the corner—about 1/8 inch—for a seamless edge.
Finally, trim any excess from the top of the container to ensure a clean fit beneath the lid.
Care & Maintenance
Cleaning: Wash the inside of the container with warm, soapy water using a soft brush or sponge. Rinse and let it air dry.
Avoid soaking: Do not fully submerge the container in water, as it may affect the adhesive over time.
Surface care: It’s okay if the outside gets slightly wet—just avoid scrubbing directly on the vinyl. A damp cloth is fine for light cleaning.
Longevity: With regular, gentle care, the vinyl holds up extremely well. Some of my own containers have lasted over 4 years with regular use.
Enjoy!
.jpeg)
That’s it! You now have a functional, airtight food container that looks like it came straight off a movie set. Use it to store cereal, dog food, or snacks—or just display it proudly as a piece of pop culture decor. With a little care (spot clean only, no full submersion), your custom container can last for years!
Want to skip the DIY part? I also offer fully completed cereal boxes in my shop:
- Mr. T Cereal
- Spaceballs: The Cereal
- Count Chocula & Franken Berry Cereal
- Happy Gilmore Shooter McGavin’s “Pieces of Sh*t for Breakfast” Cereal
If you make one yourself, I’d love to see it! Tag me or send pics—I'm always inspired by your builds and ideas.
Got a favorite movie cereal you'd love to see next? Drop me a message!
You can find me at @travisderose on Instagram, YouTube, and TikTok for more projects like this!
-Travis