Tutorial - Using HC06 Bluetooth to Serial Wireless UART Adaptors With Arduino
by pmdwayhk in Circuits > Arduino
48863 Views, 7 Favorites, 0 Comments
Tutorial - Using HC06 Bluetooth to Serial Wireless UART Adaptors With Arduino

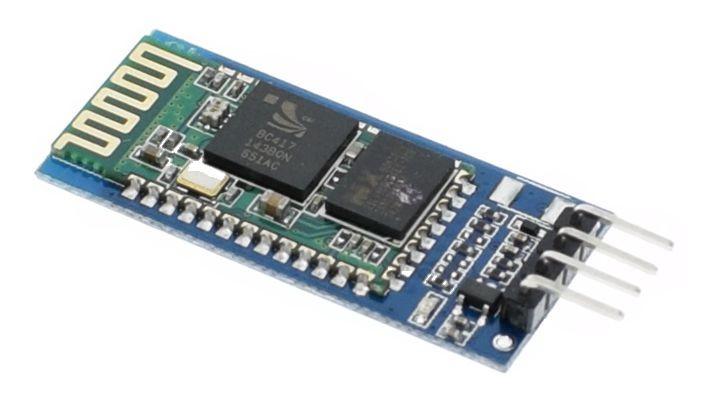
Sending data between an Arduino or compatible board and a Bluetooth-equipped device such as an Android smartphone or tablet is very easy thanks to the inexpensive HC06 Bluetooth module we have in stock at PMD Way.
This tutorial will explain how to setup communications between an Arduino and a Bluetooth device running serial terminal software - in this case an Android smartphone. Please note that the Bluetooth module used in this tutorial is not compatible with iOS devices - instead, you will need a Bluetooth LE (Low Energy) module or an Arduino-compatible with onboard BLE.
So let's get started. Our end goal is to control a digital output pin on the Arduino by sending text commands from the smartphone, and also sending text from the Arduino back to the smartphone.
Hardware

Apart from the Bluetooth module you will need:
- an Arduino Uno or compatible board
- a matching USB cable
- four male-female jumper wires
- ...and of course your Android device.
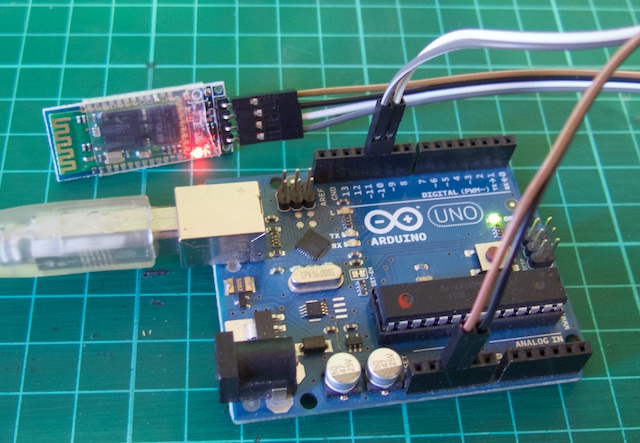
The connections are very simple:
Arduino <---> Bluetooth Module
- 5V to Vcc
- GND to GND
- D10 to TXD
- 11 to RX
And are shown in the photo of the hardware in this step.
Once the Bluetooth module has been connected and power applied, the LED will blink rapidly. This means that it has not been "paired" with another Bluetooth device. The LED stays on continuously when paired.
Software (aka the Arduino "sketch" and Android App)

Once you have connected the hardware, enter the sketch below into the Arduino IDE and upload it to your board.
The sketch is quite simple, it uses a software serial port to communicate with the Bluetooth module in the same way that you would normally do so with normal Arduino serial port.
You can see in line two of the sketch that the software serial port has been defined with the name "BT", and that any references to the module for serial communication in the sketch are now BT.begin, BT.println and so on.
The sketch waits for a character of text to be sent from the Bluetooth module to the software serial port, and this is stored in the variable char a at line 22. This is then interrogated using the if functions starting from line 23. You can see how simple it is for the Arduino to take action based on the character received - but where does this text come from?
In our demonstration we'll use terminal emulation software on the Android smartphone. We used "Bluetooth Terminal" by qwerty as it was free and worked, however you can choose your own.
Once the app has been installed, you will need to pair your Bluetooth module to the smartphone. To do this, enter the Bluetooth menu inside Settings, then search for new devices. After a moment the device "HC06" will appear, for example - see the image in this step.
#include "<softwareserial.h>" // remove the inverted commas after you copy the code to the IDE
SoftwareSerial BT(10, 11);
// creates a "virtual" serial port/UART
// connect BT module TX to D10
// connect BT module RX to D11
// connect BT Vcc to 5V, GND to GND
void setup()
{
  // set digital pin to control as an output
  pinMode(13, OUTPUT);
  // set the data rate for the SoftwareSerial port
  BT.begin(9600);
  // Send test message to other device
  BT.println("Hello from Arduino");
}
char a; // stores incoming character from other device
void loop()
{
  if (BT.available())
  // if text arrived in from BT serial...
  {
    a=(BT.read());
    if (a=='1')
    {
      digitalWrite(13, HIGH);
      BT.println("LED on");
    }
    if (a=='2')
    {
      digitalWrite(13, LOW);
      BT.println("LED off");
    }
    if (a=='?')
    {
      BT.println("Send '1' to turn LED on");
      BT.println("Send '2' to turn LED on");
    }
    // you can add more "if" statements with other characters to add more commands
  }
}
Getting Connected and Control

Tap the HC06 in the list, and you will then be asked for the PIN - it is 1234. Finally, open your terminal app on the smartphone, and select "Connect a device" from the app menu. Select the HC-06 option and then wait a moment. The LED on the Bluetooth module should stay on and the app will show "connected: HC-06" .
Now send the number 1 through the terminal and the onboard LED on the Arduino should turn on. Send 2 and it should turn off. The Arduino will also respond and send the status back to the app, for example see the image in this step.
That's All for Now.
At this point you now have the framework to control your Arduino from another Bluetooth-enabled device with simple serial data. Android users may also be interested in creating their own apps - if so check out the free MIT App Inventor.
Otherwise we hope you enjoyed reading this tutorial and can make use of it. If you have any questions about the content in this tutorial, please ask here or email support@pmdway.com. And please visit PMD Way Limited.