Tutorial to Interface OLED 0.91inch 128x32 With Arduino UNO
by mybotic in Circuits > Electronics
111726 Views, 47 Favorites, 0 Comments
Tutorial to Interface OLED 0.91inch 128x32 With Arduino UNO

This tutorial is going to teach you some basics on using OLED 0.91inch LCD128x32 with Arduino UNO
Introduction
Description:
OLED 0.91 inch is a monochrome graphic display module with a built-in 0.91 inch, 128X32 high-resolution display. OLED 0.91inch is able to work despite the absence of backlight. In a dark environment, contrast of OLED display is higher than LCD display. This device is I^2C or SPI compatible. Due to its capability in displaying, it is often used in various application for instances, smart watch, MP3, function cellphone, portable health device and many others.
Specifications:
1. OLED display, no need backlight, self-illumination,
2. The display performance is better than the traditional LCD display, also lower consumption.
3. Driver IC: SSD1306
4. Size: 0.91 inch OLED
5. Resolution: 128 x 32
6. IIC interface
7. Display Color: white
8. Description:
GND: Power Ground
VCC: Power + (DC 3.3 ~5v)
SCL: Clock Line
SDA: Data Line
Pin Definition

Hardware Installation


Sample Source Code
To get the result, please download the sample source code attached below.
*Kindly download the U8g2 library which is written for many types of LCD display.
Include U8g2 Library
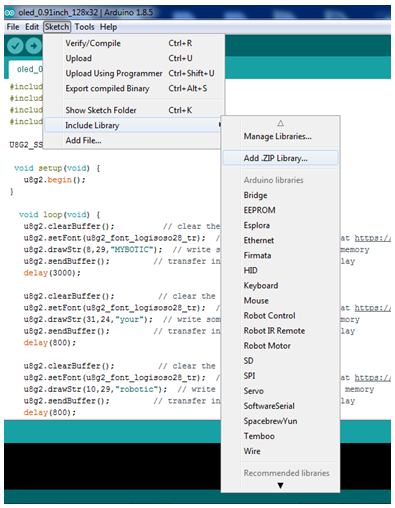
Click skecth and then click include library. Next, click add .Zip library and select the U8g2.zip file.
Upload Source Code


Open the source code. Make sure com of arduino UNO and com port is same and please select the board is Arduino UNO.
Click upload.
Result


