USB NES Controller With an Arduino!
by Prodigity in Circuits > USB
72028 Views, 78 Favorites, 0 Comments
USB NES Controller With an Arduino!


UPDATE 22-12-2014
Instructables user mattpbooth has updated the code and is hosting it on github:
https://github.com/mattpbooth/ArduinoNESController...
Thanks Matt!
UPDATE 03-12-2011
Replaced a println with print (derp).
UPDATE 01-12-2011
Remade all code from scratch.
Remade 'ible code section; Now includes a 'Processing COM port config for dummies'
Ladies and gentlemen, I proudly present 8bit pleasure.. yours for the grabbing! Whether you use GNU/Linux, Mac OS X, or Windows the USB NES controller is compatible.
Will this in any way alter the controller?
Nope, the controller will stay the same so you can still use it on a real NES
But I don't have an arduino ;_;
You can use the parallel port: http://hellalame.com/nes/nes_controllers.html
Buy an arduino: http://hellalame.com/nes/nes_controllers.html
Or a retrozone NES kit: http://hellalame.com/nes/nes_controllers.html
Ingredients for Some Awesome Controller Soup

A NES controller
An Arduino
A USB cable type B
Something you can use as a Casing
and some wire..
Optional: NES port http://www.parallax.com/Store/Components/Other/tabid/157/CategoryID/32/List/0/SortField/0/Level/a/ProductID/522/Default.aspx
Arduino software http://arduino.cc/
Processing http://processing.org/
How to Connect the Arduino to the Nes Controller
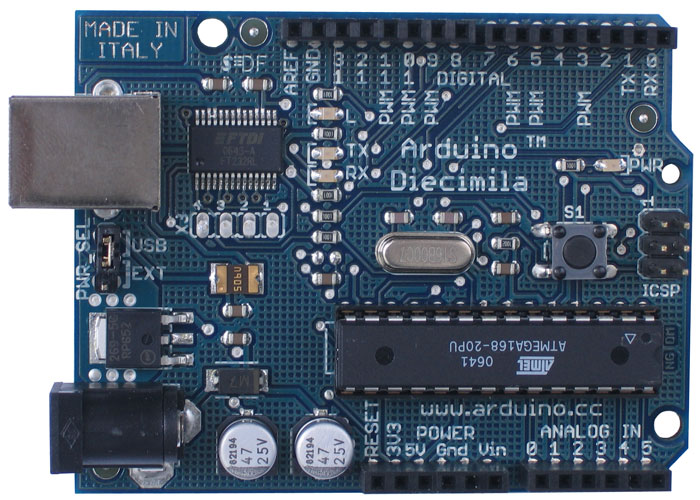

You could also use the controller port from a NES (a broken one, don't waste a working one).
You want something vaguely similar to the last picture.
Code
UPDATE 22-12-2014
Instructables user mattpbooth has updated the code and is hosting it on github:
https://github.com/mattpbooth/ArduinoNESController
Thanks Matt!
Hey guys, I've completely rewritten the code and it should work now flawlessy.
The only adjustment you might need to make is to the Processing Sketch; you need to adjust which COM port it should use.
To do this please follow these steps carefully!
Steps
1 ) Disconnect the Arduino if it's connected.
2 ) Run the Processing sketch, it WILL(!) display an error.
3 ) Check the console (black box with text at the bottom of processing)
4 ) In the console will be a list of active COM ports;
Serial list
WARNING: RXTX Version mismatch
Jar version = RXTX-2.2pre1
native lib Version = RXTX-2.2pre2
[0] "COM3"
End of serial list
5 ) As you can see currently COM3 is active and is the first COM port at the moment (denoted by "[0]")
6 ) If the Processing sketch ran without displaying an error, press the stop button.
7 ) Hook up the arduino.
8 ) Run the Processing sketch again.
9 ) Check the console for active com ports;
Serial list
WARNING: RXTX Version mismatch
Jar version = RXTX-2.2pre1
native lib Version = RXTX-2.2pre2
[0] "COM3"
[1] "COM5"
End of serial list
10 ) As you can see COM5 suddenly appeared in the list after we connected the arduino.
11 ) We now know that the arduino has COM5 and is the second COM port (denoted by "[1]")
12 ) We know adjust our code;
Replace:
arduino = new Serial(this, Serial.list()[?], 9600); // ATTENTION!!!
With:
arduino = new Serial(this, Serial.list()[1], 9600); // ATTENTION!!!
13 ) Save the program.
14 ) Load the arduino sketch unto the arduino.
15 ) Start the Processing sketch!
Making a Case
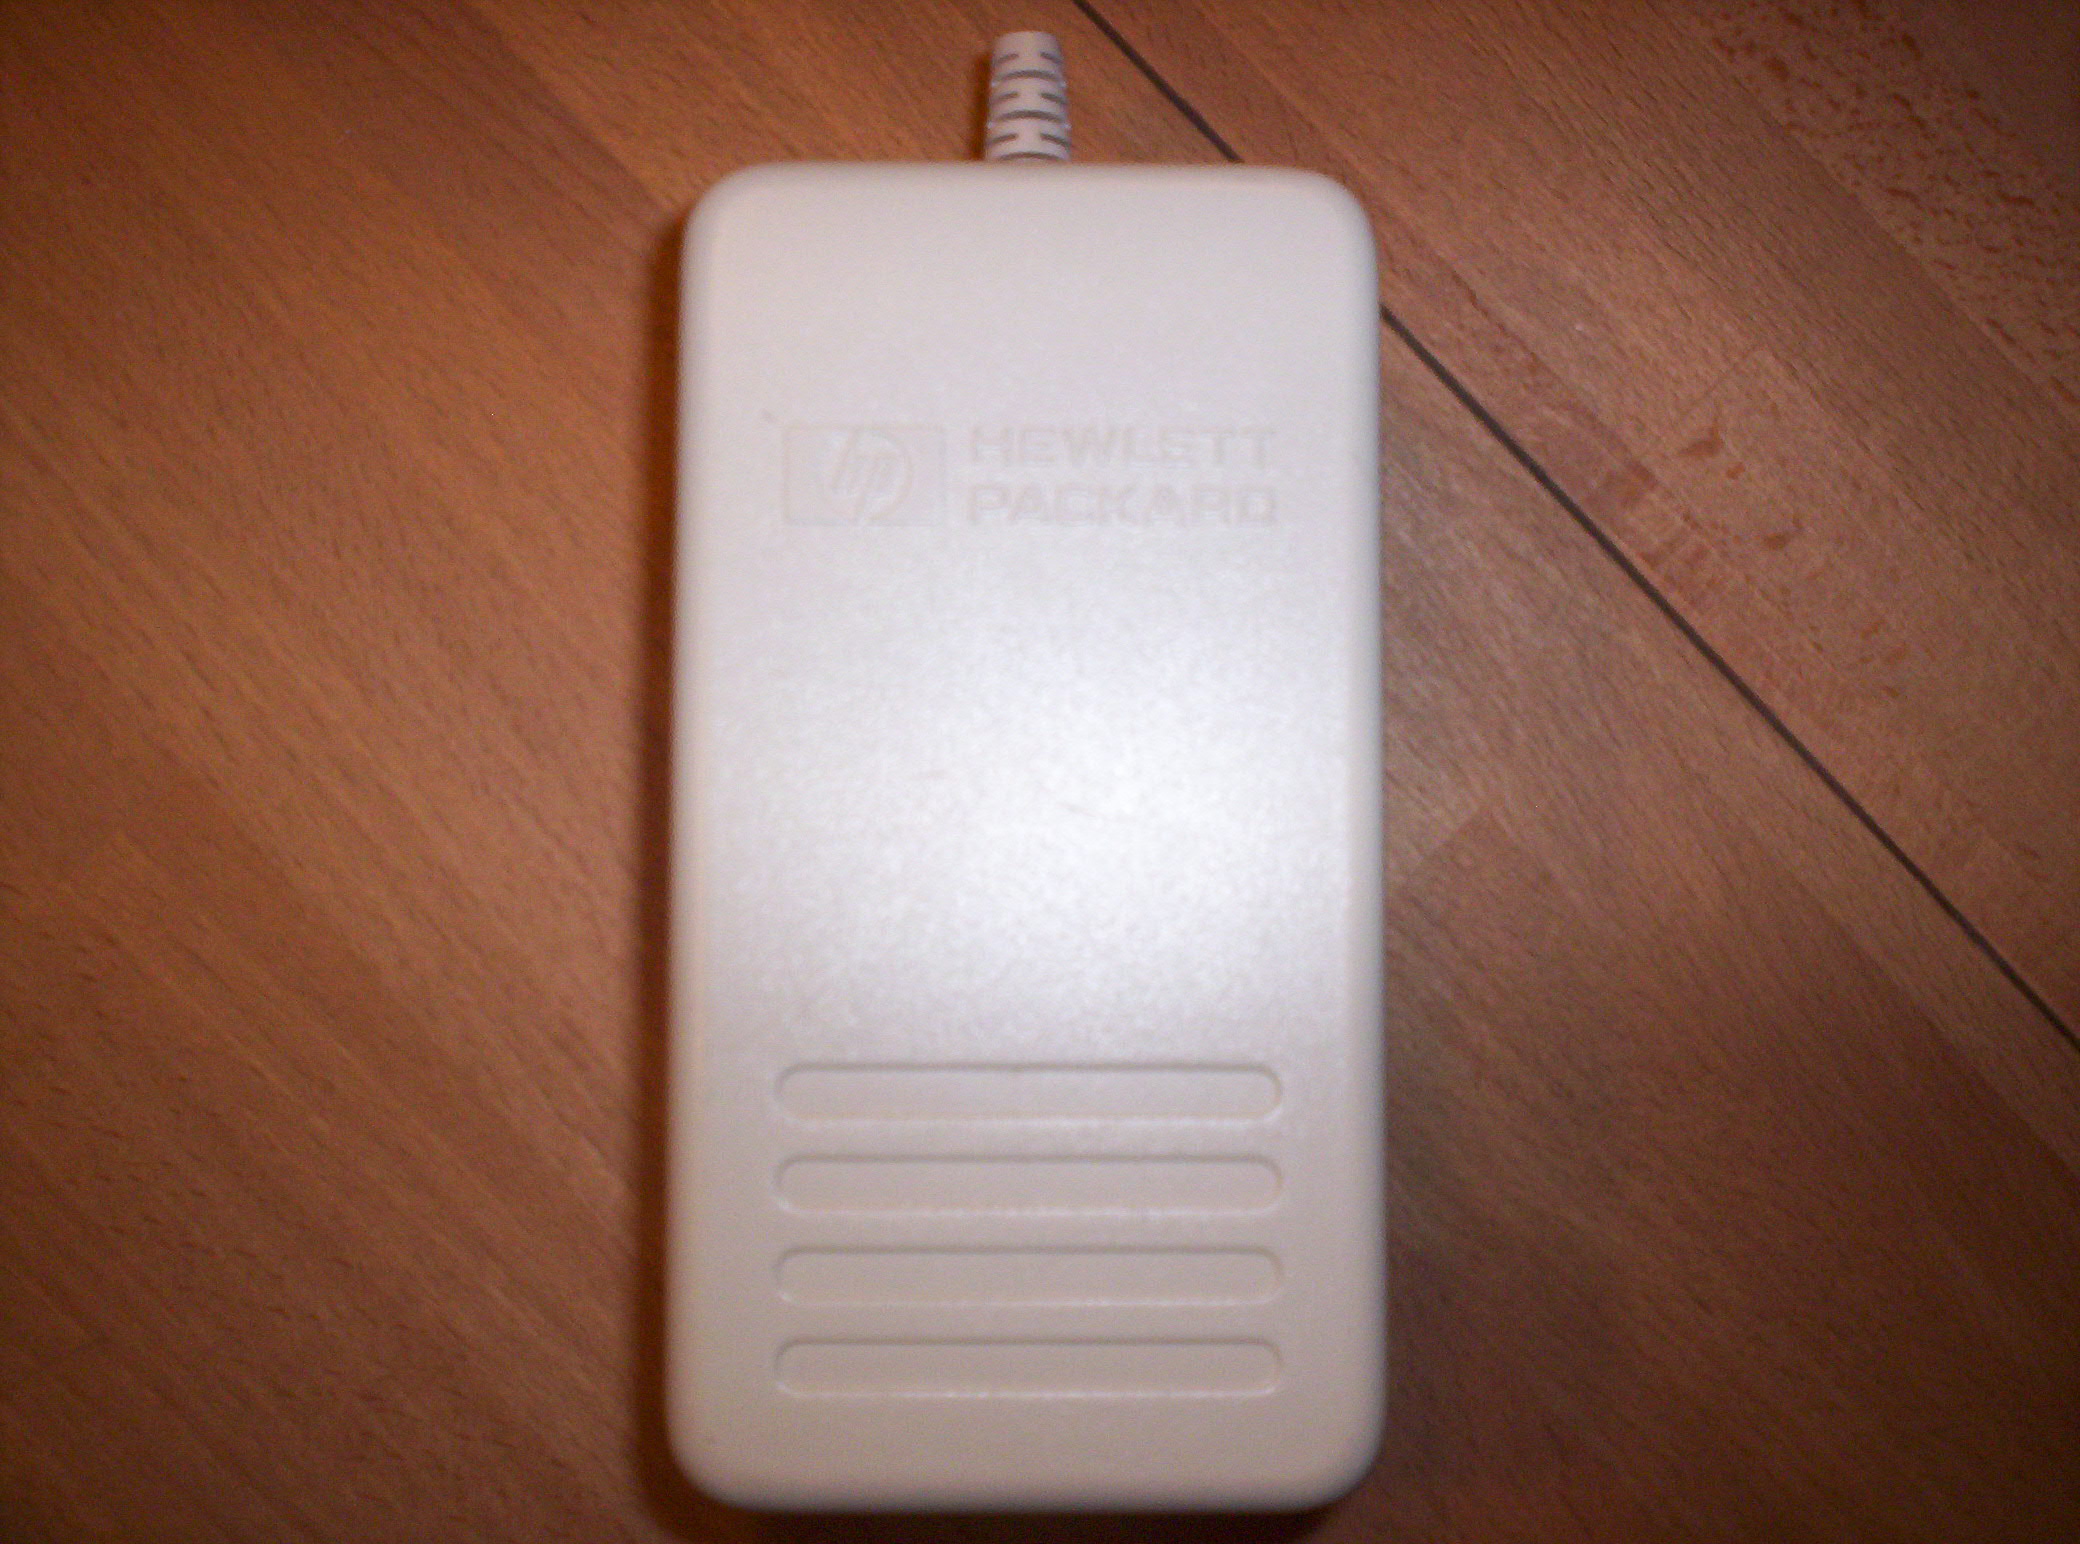


I put my arduino into an old printer adapter I found and I think it looks pretty good =)
I did this by gutting the adapter and only saving the 'nipple'.
I removed the 'nipple' from the cable by cutting into one side with a knife, after which the original cable could be pushed out and replaced by my USB cable.
The adapter had a small hole (which I used for the usb cable) and a big hole which I used for the NES controller.
The big hole however wasn't big enough so I cut some away with a saw (very sloppy) after which it was too big, I temporarily fixed this by putting some sticky tape around the controller plug.
I've currently ordered a broke NES to harvest the controller port from in order to make it more.. sexy.
It's Alive!
If you get an error file saying java wasn't found you'll need to install it (again) http://java.com/
In case anyone is wondering why I made a batch file; I was too lazy to reinstall java and made a small manual fix.
Btw,
to play a NES game on your computer you will need an emulator:
[windows] http://www.emulator-zone.com/doc.php/nes/ (If you're running vista, use FakeNes)
[Mac] http://www.zophar.net/macintosh/nes.html
[Linux] http://www.zophar.net/linux/nes.html
And you will need some games(ROMS) ofcourse but these are illegal to download (Yes, even if you own the original) so whatever you do don't download them and especially not from this site http://vimm.net/ because that one is the most illegal of all *GASP*
Downloads
Additional Info
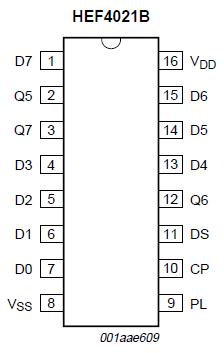
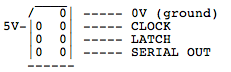
Inside the NES controller is an 8bit shift register.
By putting the latch pin high for a few microseconds I'm telling the chip to start spitting data at me.
When it does this, the first byte becomes available to read over the serial pin.
If I want to receive the next byte I'll have to set the clock pin high for 200 microseconds.
I need to 'flash' the clock pin 7 times to get all bytes
/*
Latch high
Wait 200 microseconds
Latch low
Read serial
Wait 200 microseconds
Repeat 7 times
[
Clock high
Wait 200 microseconds
Read serial
Clock low
Wait 200 microseconds
]
*/
SNES controller
The code I've written can also be used with a SNES controller!
If someone makes a request I can expand this 'ible to also show how to do that
Original code
http://little-scale.blogspot.com/2007/07/nes-controller-to-arduino.html'
and finally..
This is my first instructable, so go hard on me =P (yes hard, not soft =P)