Using Adobe Capture to Make a Color Palette
by fullwoc in Teachers > Engineering
963 Views, 4 Favorites, 0 Comments
Using Adobe Capture to Make a Color Palette

This instructable is designed to help individuals in my Engineering Design class get started with Adobe Capture Colors.
Supplies
Smart Phone, Adobe Capture app.
Find Capture in App Store


- Go to the App Store on your phone
- Search for Adobe Capture
- Download it to your Phone or Click open if already installed
Loggin in to Capture

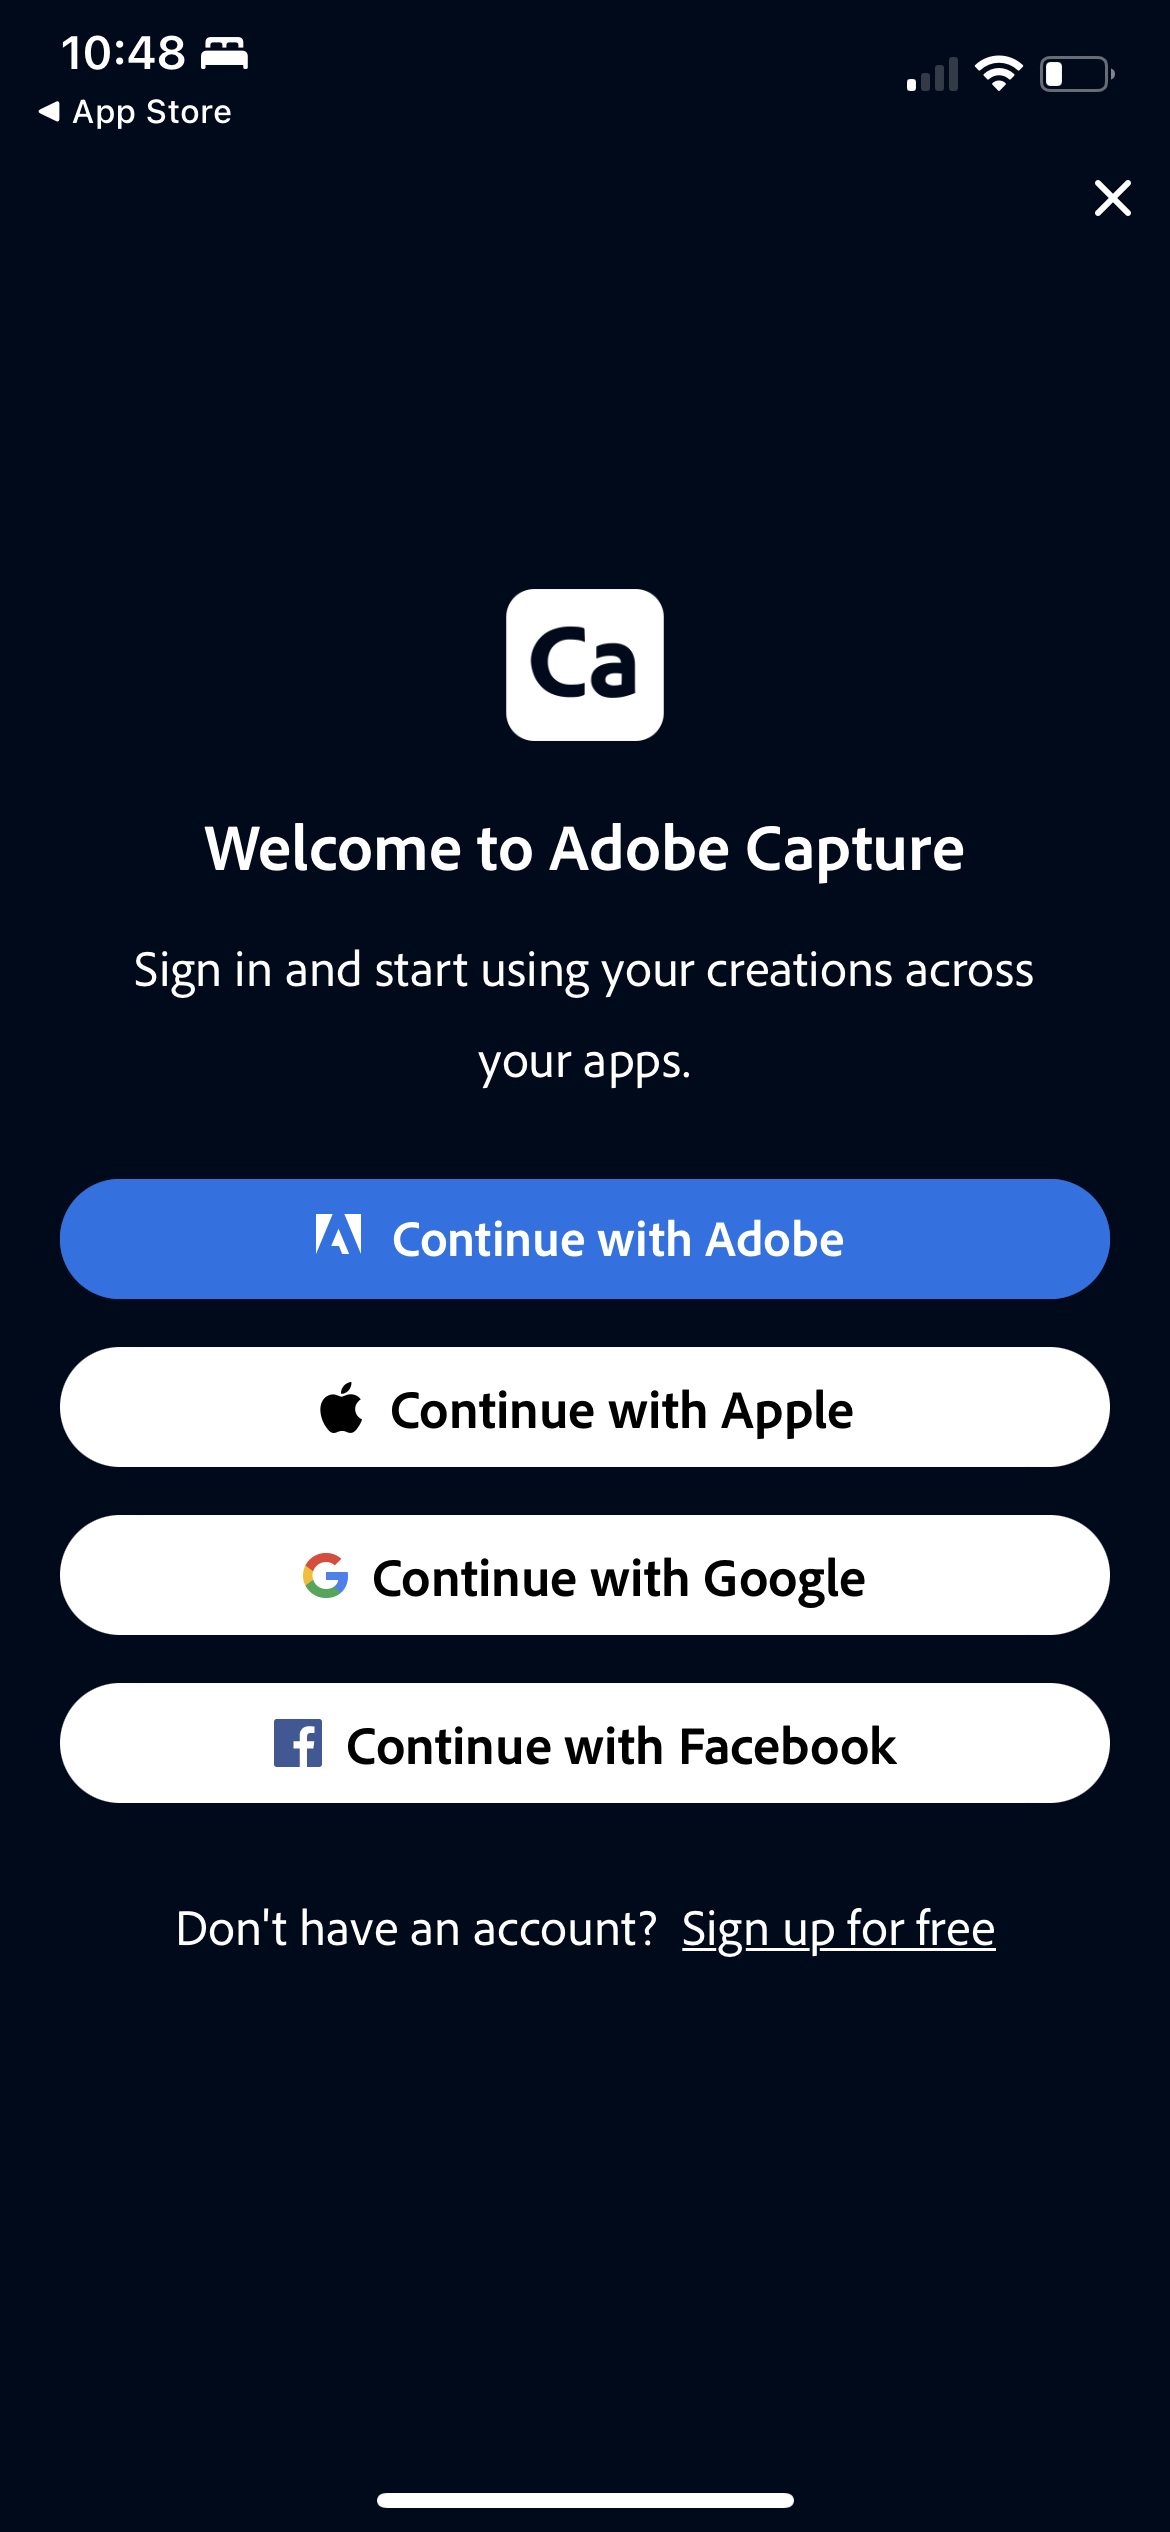


- When it opens click Sign In.
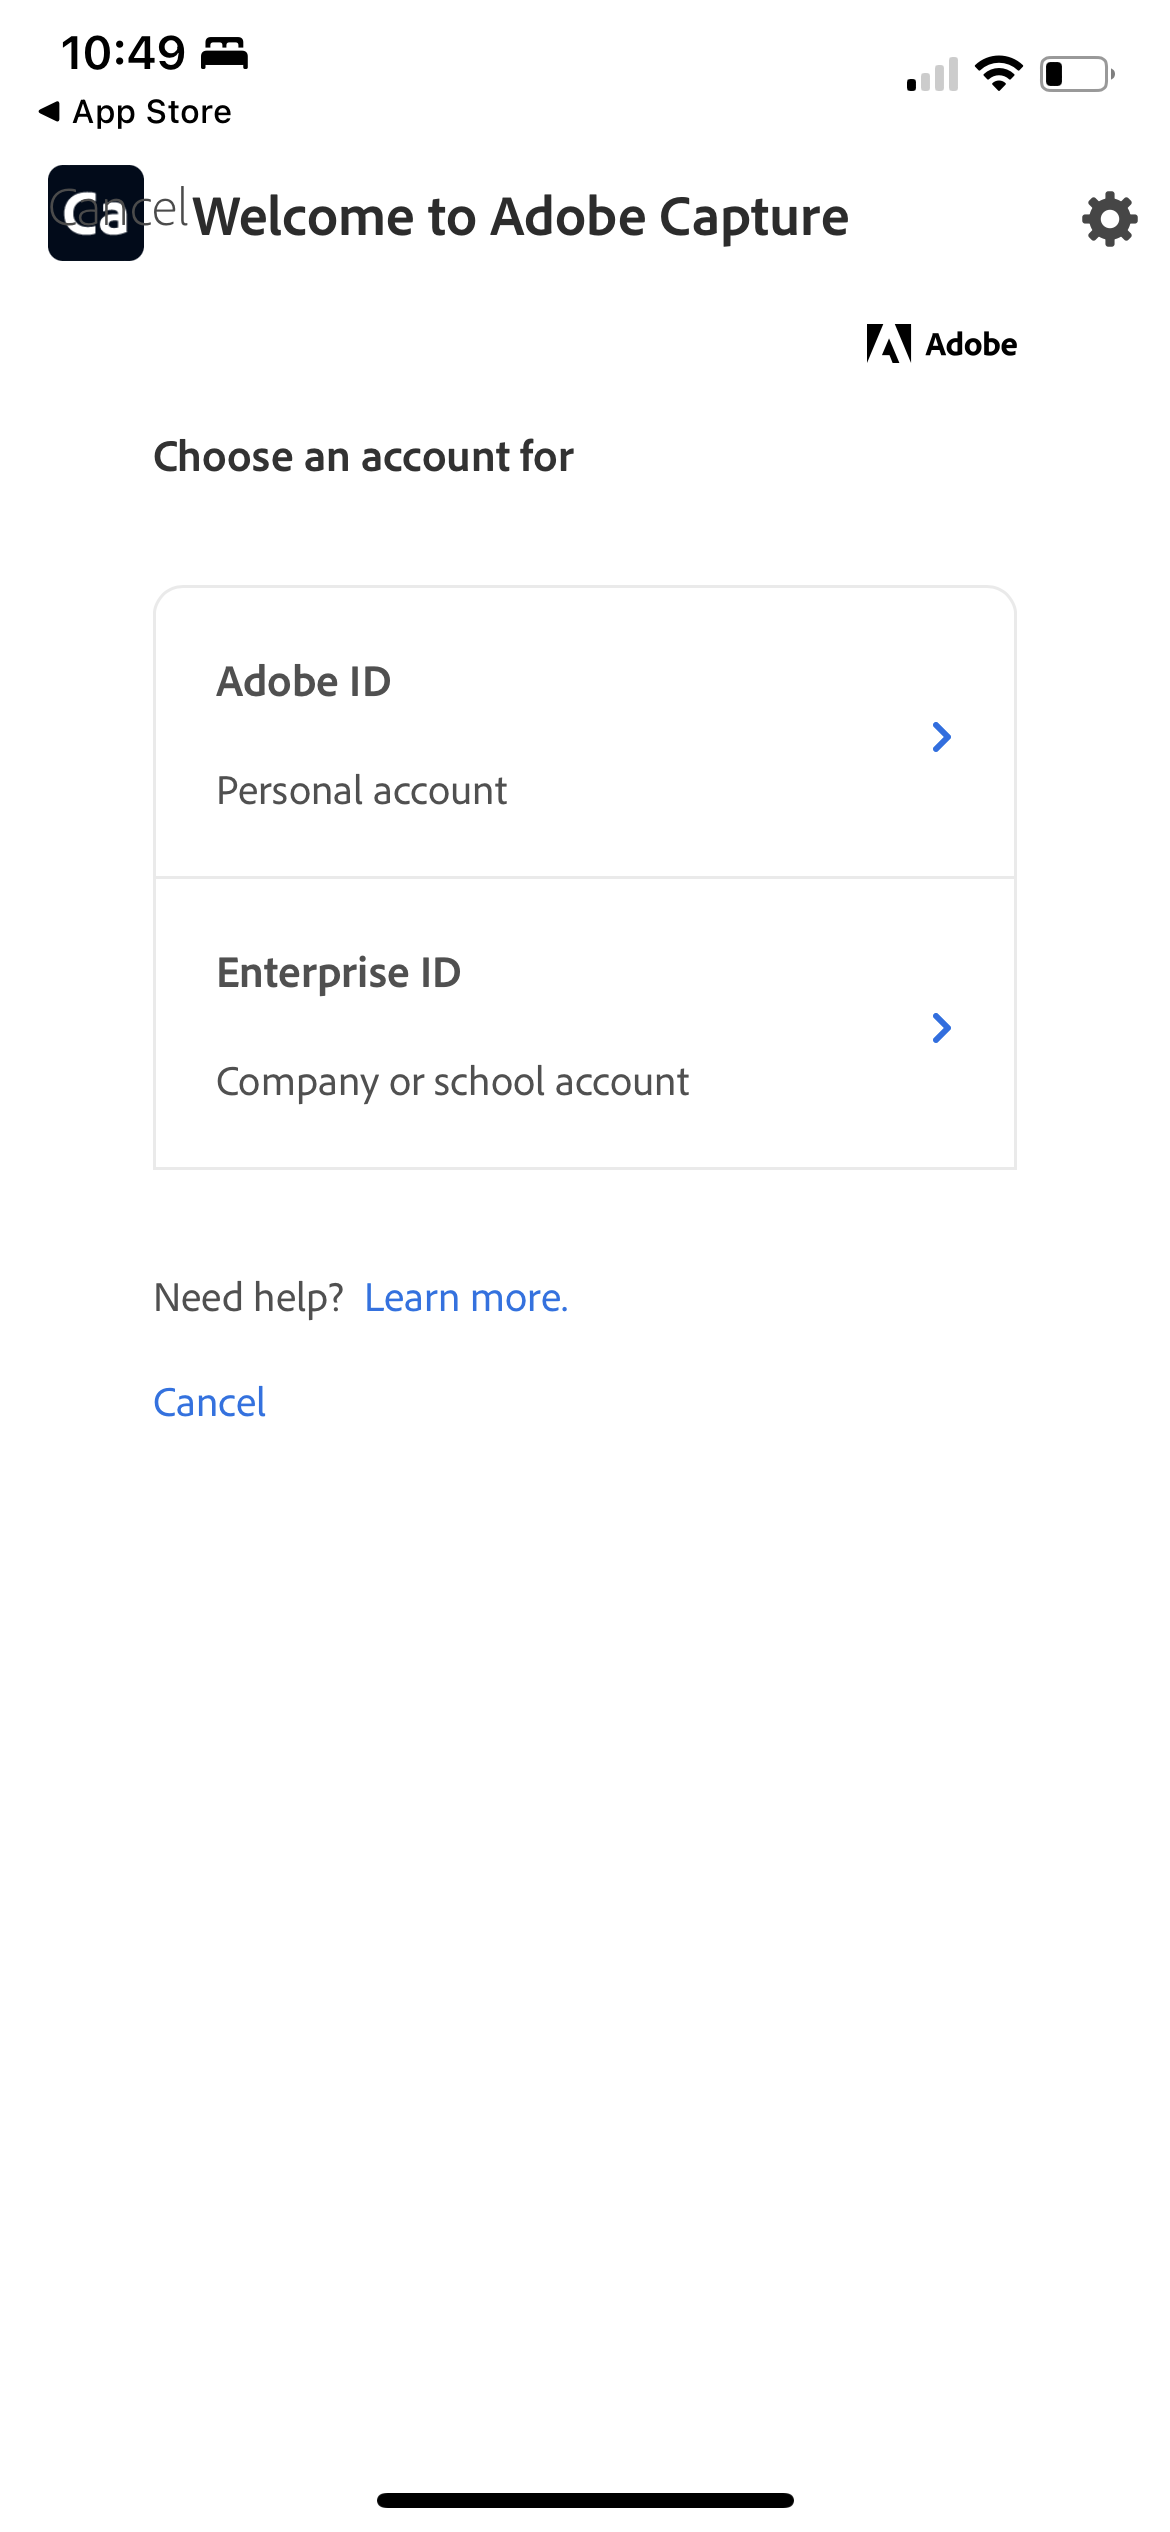
- Select Continue with Google.
- Choose your school account.
- Click continue
- Then Click Enterprise ID
- Once logged in you will see your libraries. You may not have any.
Capturing Colors


- Click on the camera at the bottom.
- Allow Access to all images.
- While in the camera make sure and select Color at the bottom of the window.
- Point the camera at the area where you want to capture and image then tap the screen to freeze your selection.
- Then press the circle with the check in it.
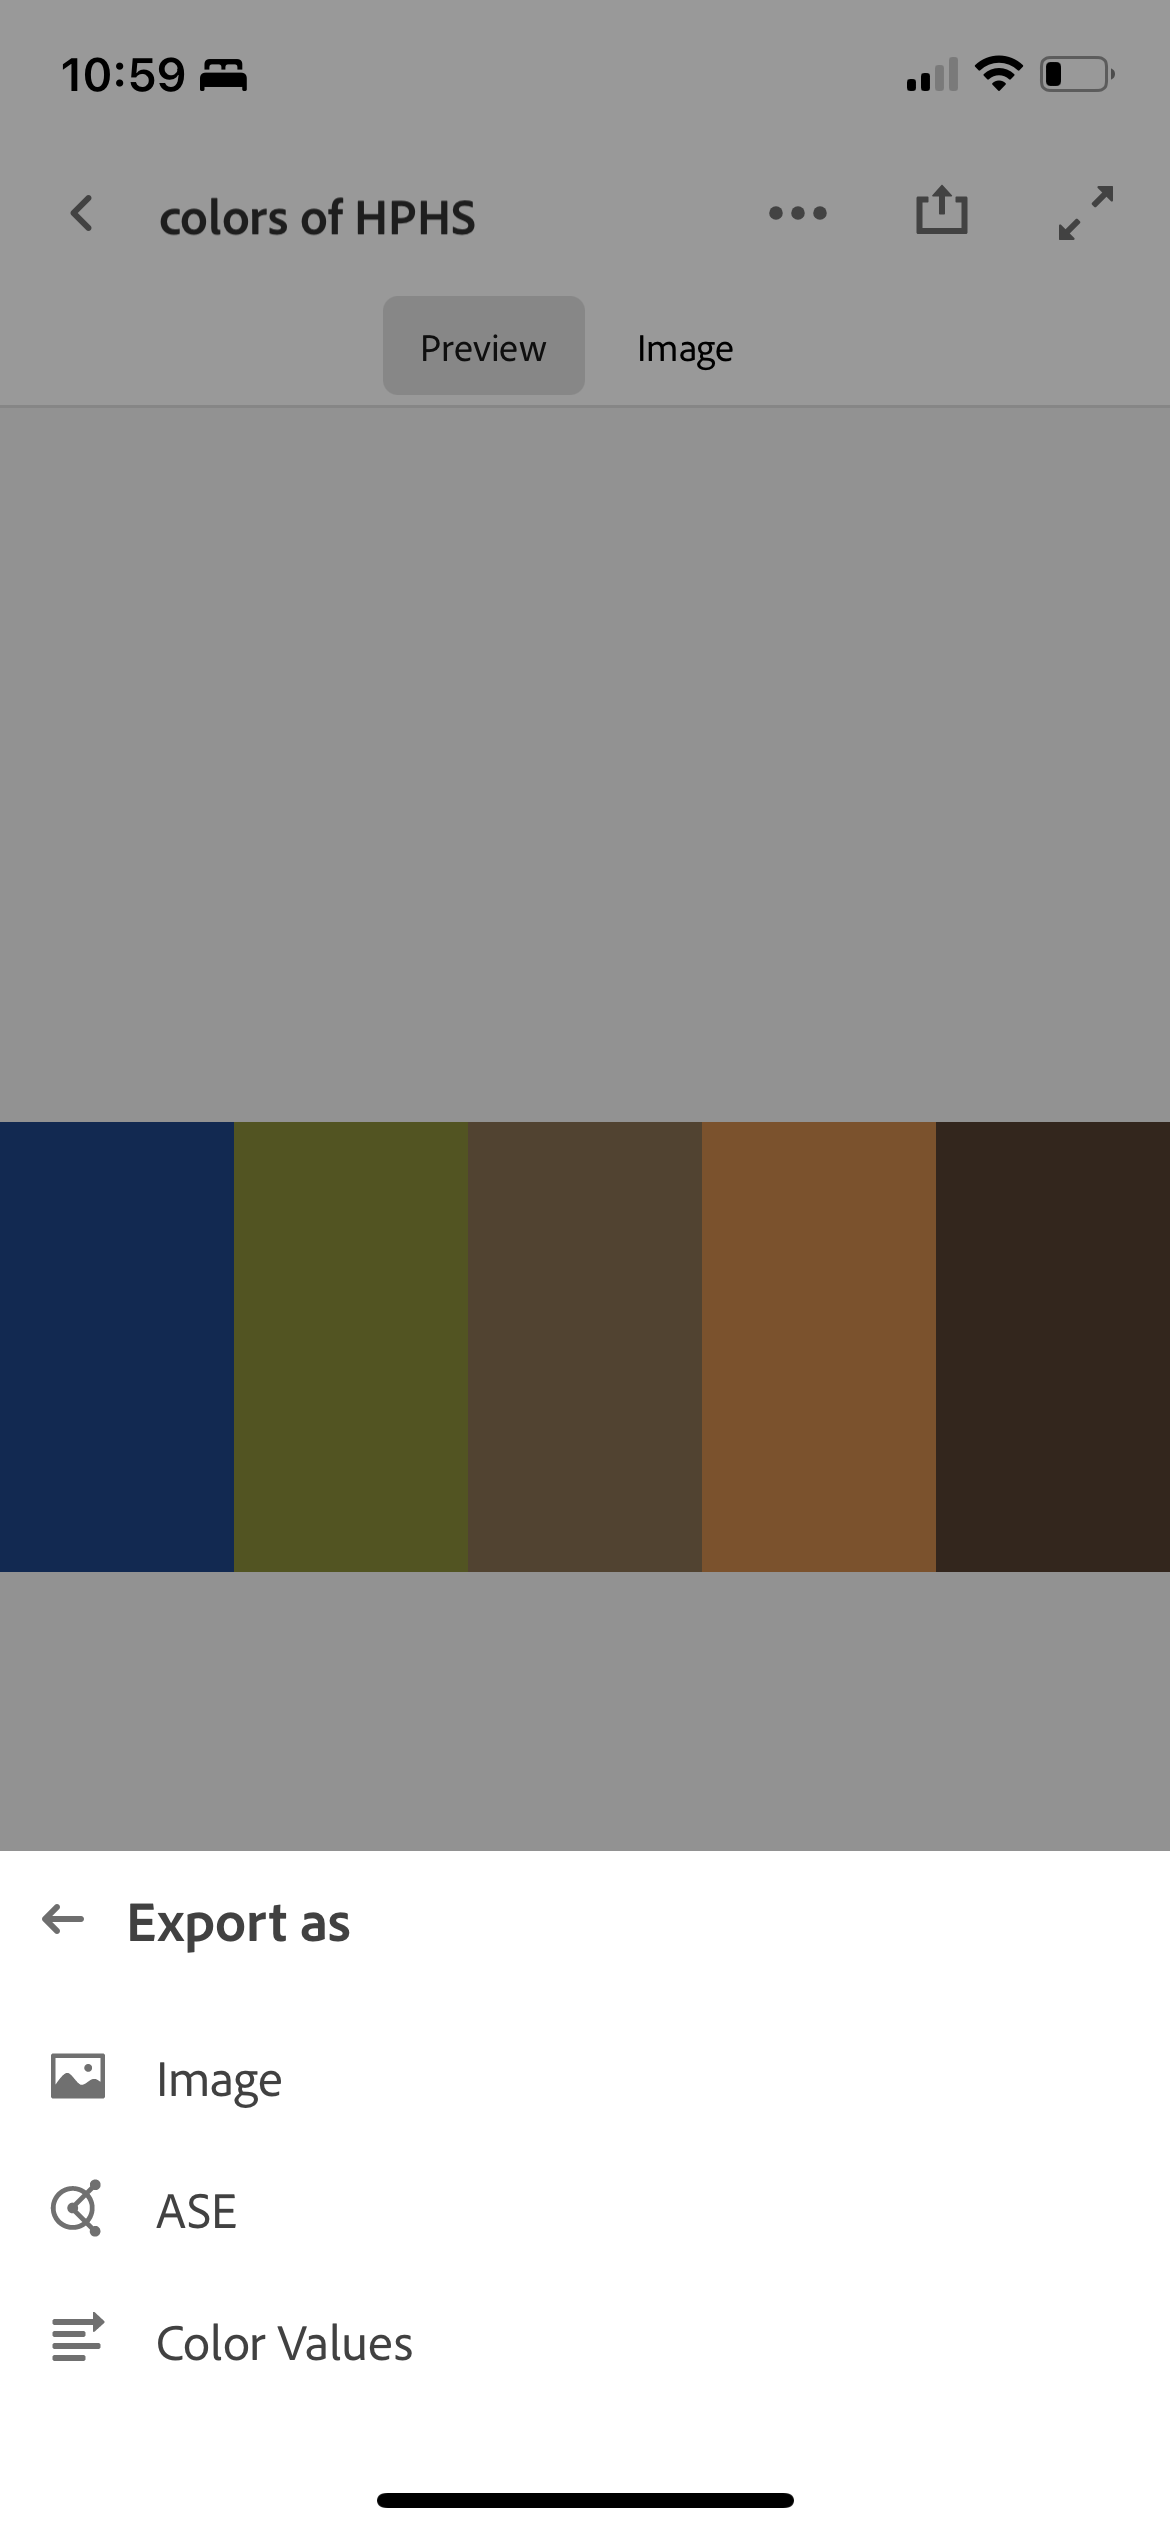
- Once you have clicked the check a new window will come up with your colors and you can click on each individual color to see the HEX & RGB number. You do not need to do anything here just click save and it will take you to a new page where you can Save the colors to a library. Name your color theme as Your Name and then save it to a library by clicking save at the bottom of the page.
Turn in Items in Classroom

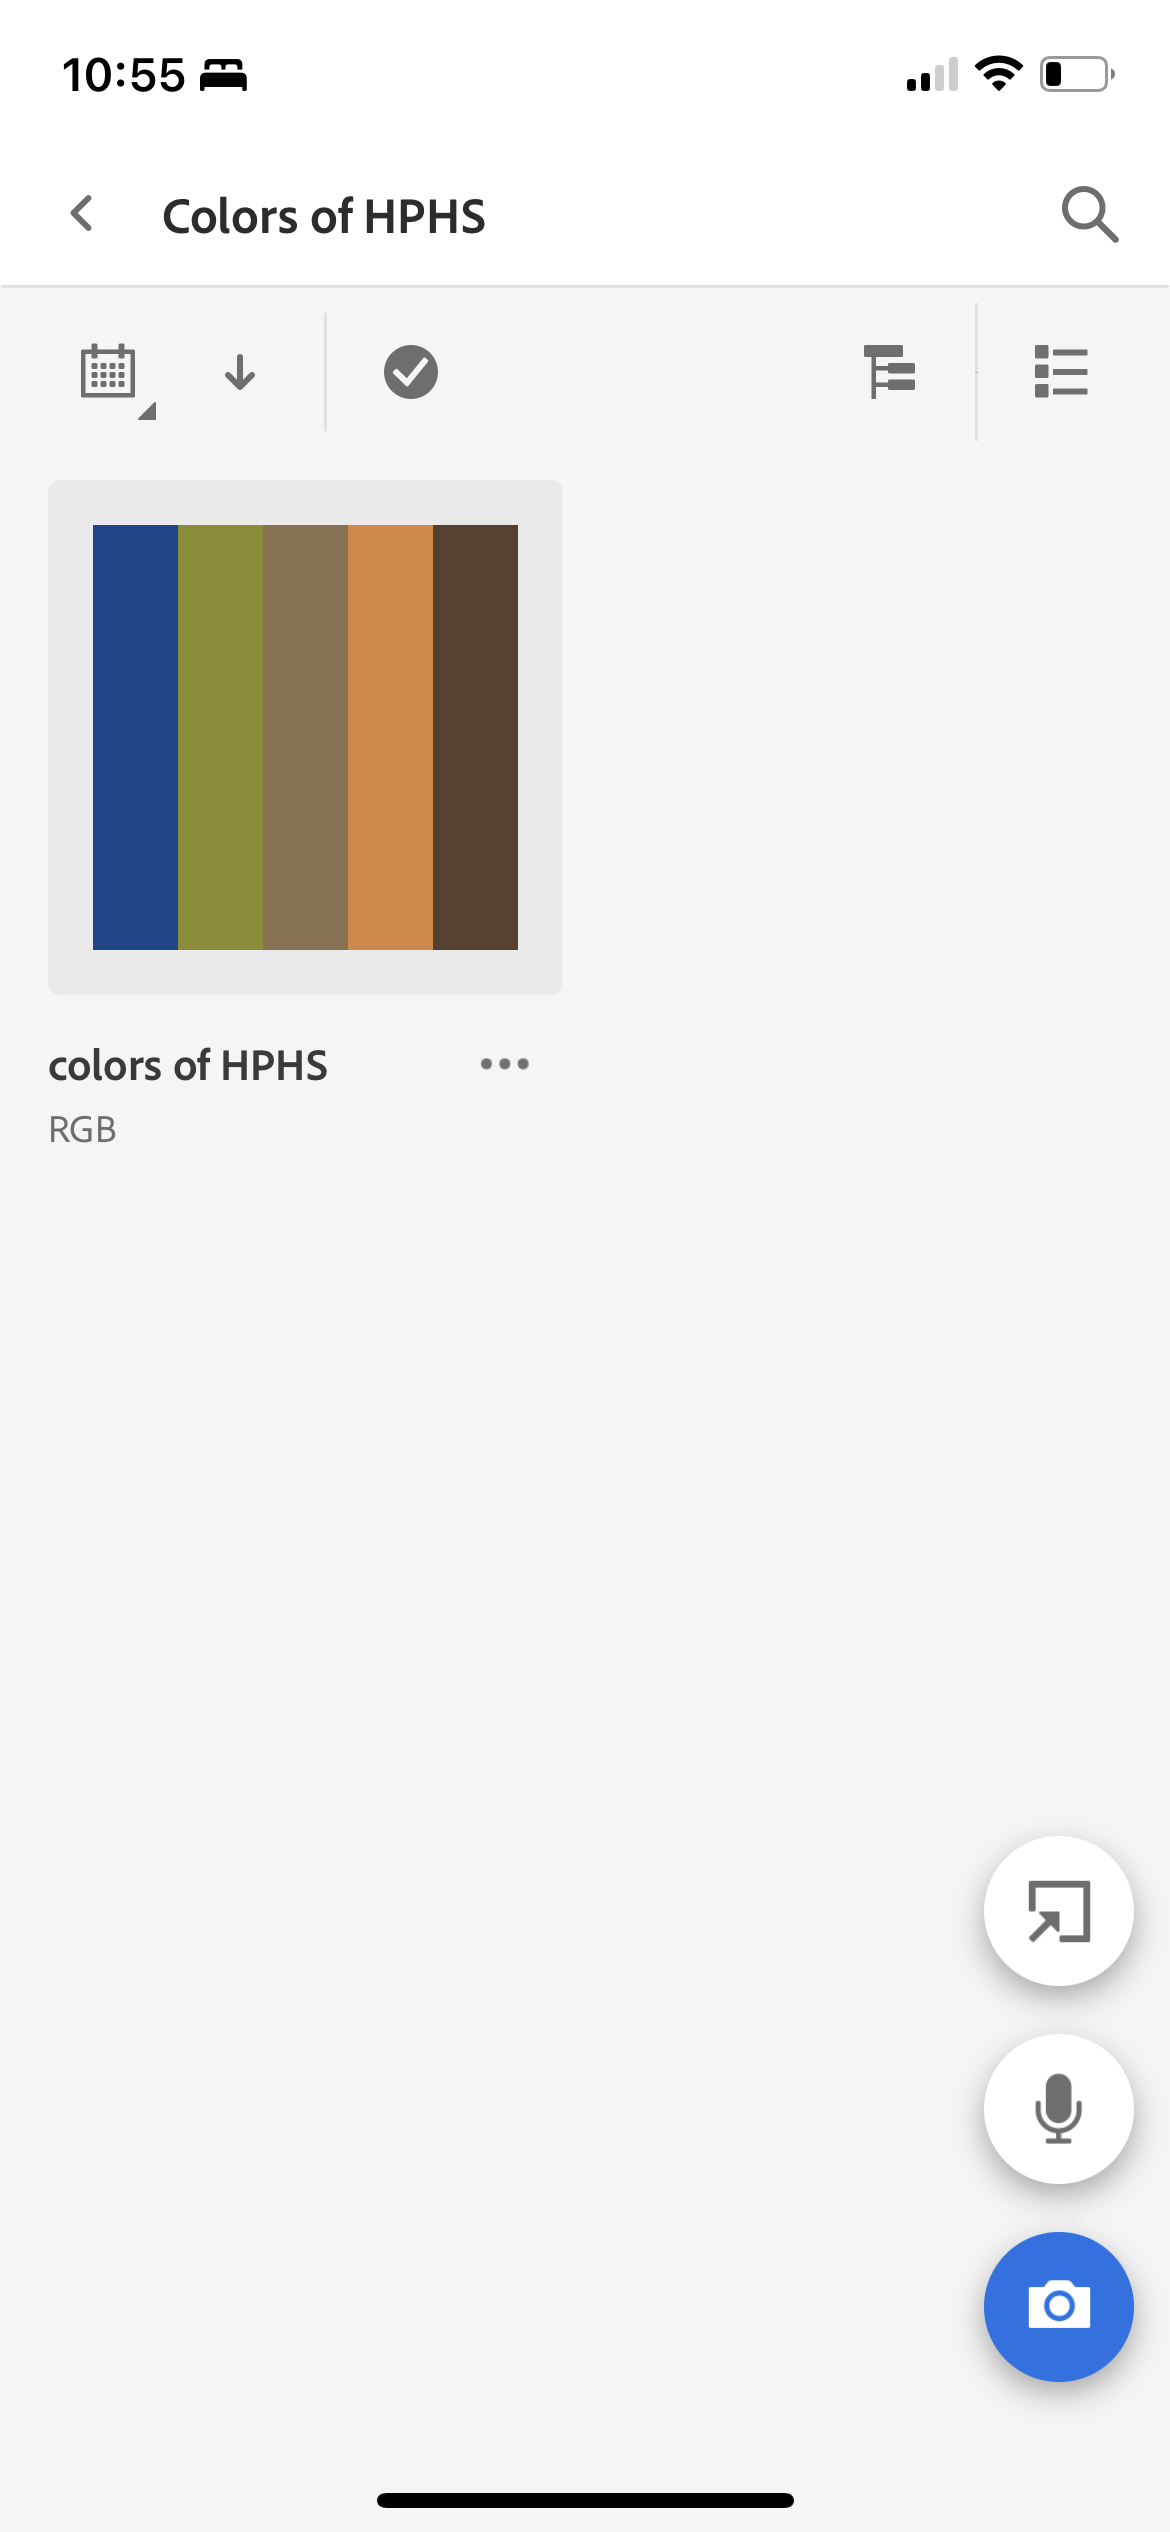


- You will then be back at the library page.
- Click on your library. This will take you to the theme page
- Click on the color theme you want.
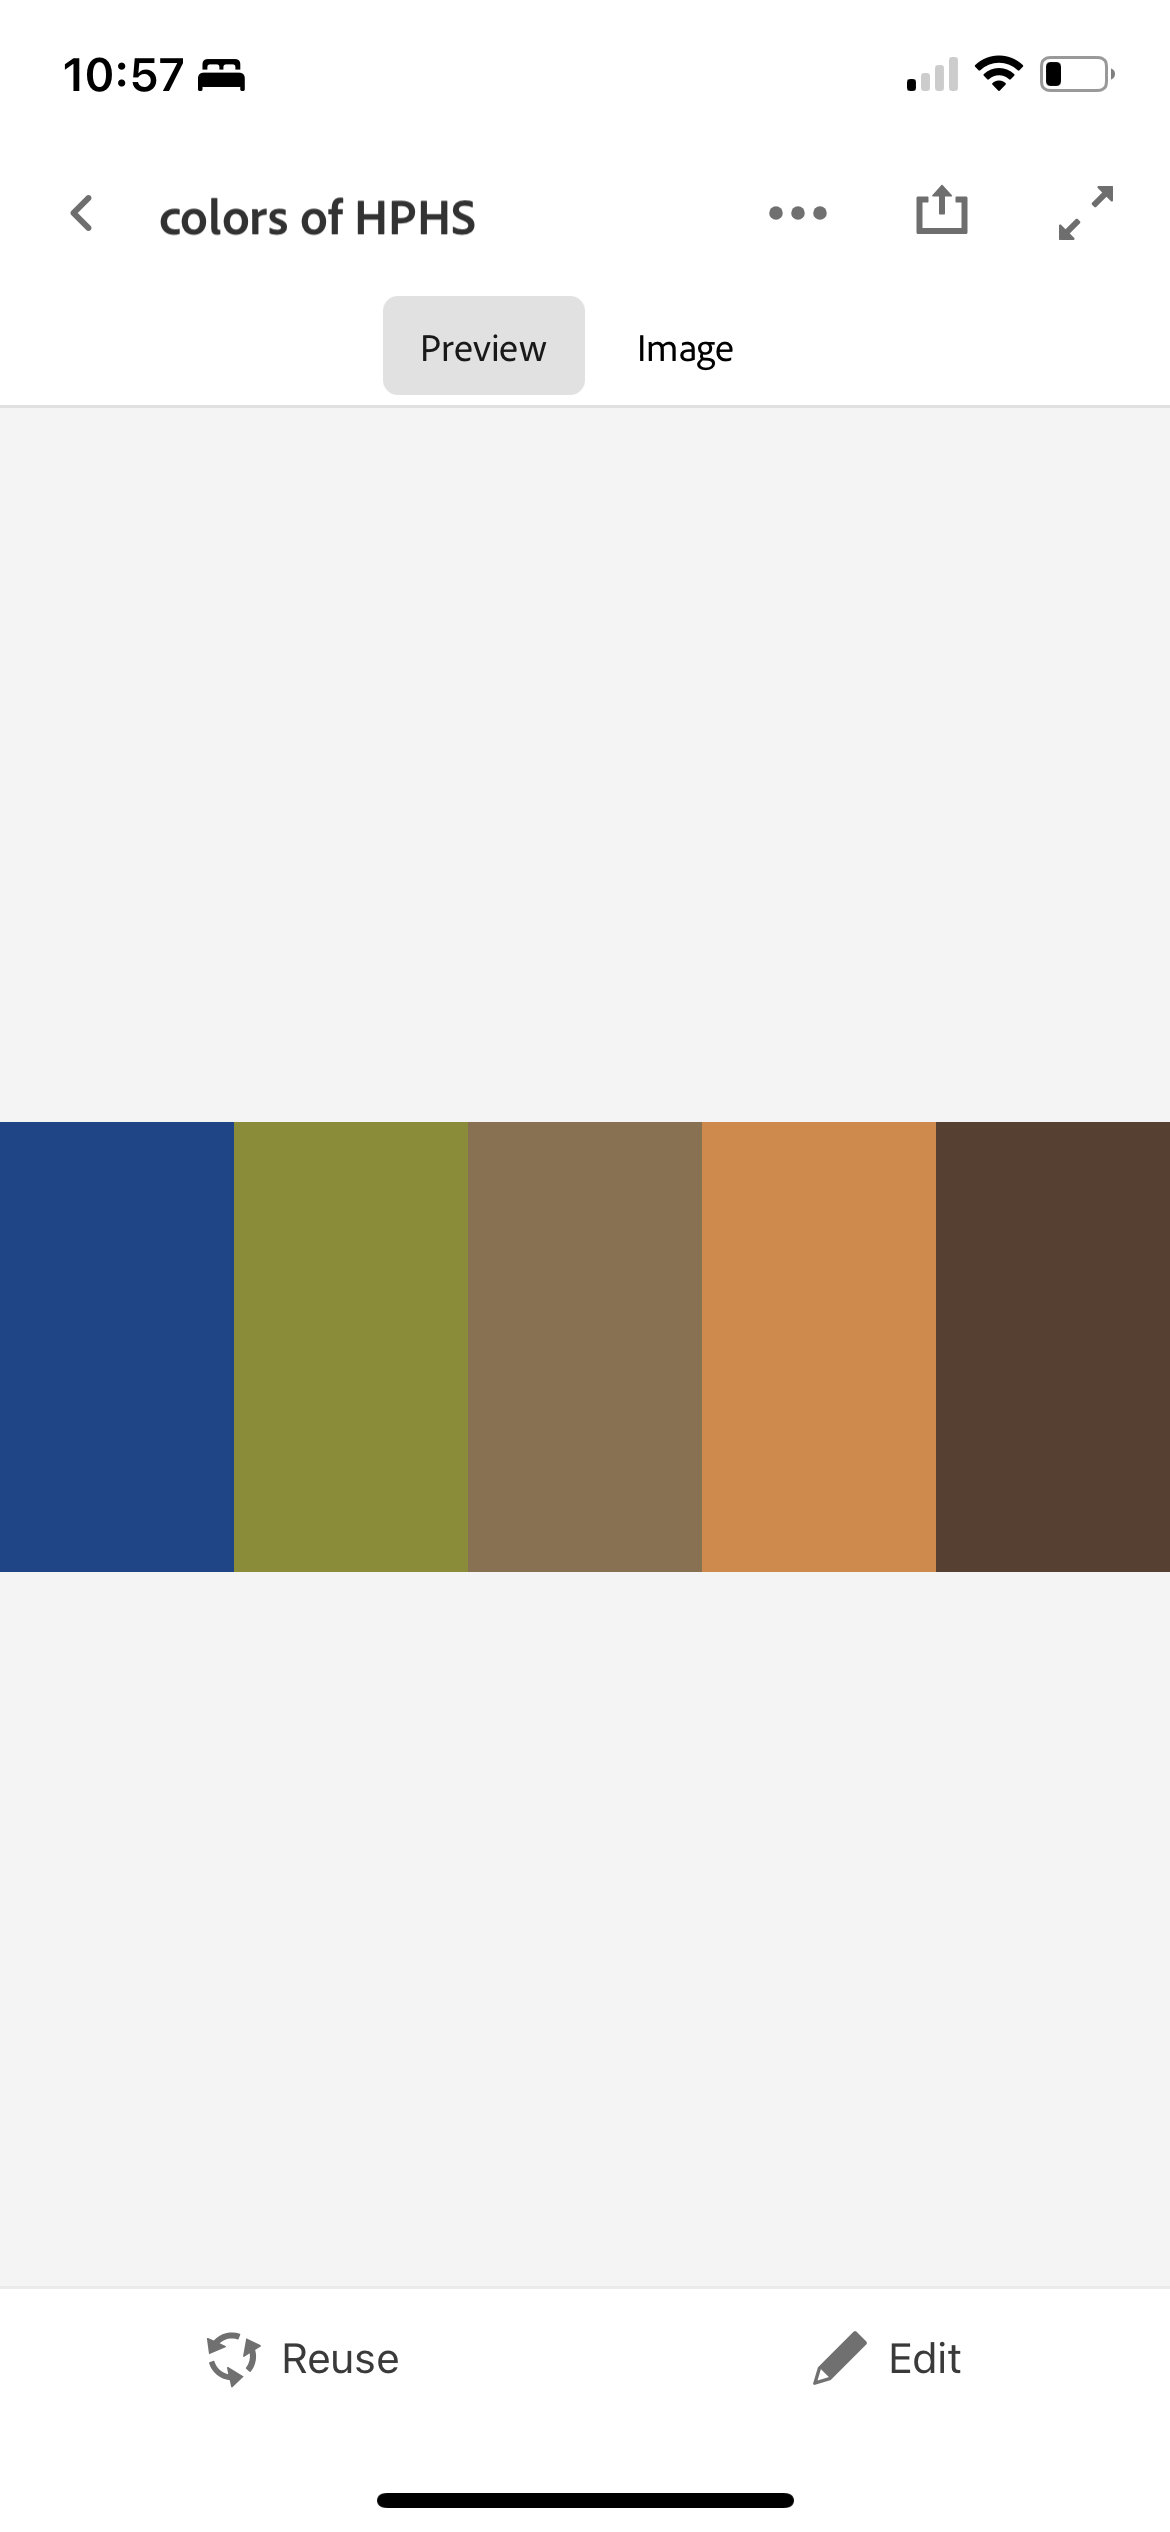
- Click the share button at the top of the screen.
- Click Export As and click image.
- find classroom then upload it to the assignment.
- It will say Saved.
- Do these same steps 2 more times saving the ASE and Color Value files to your classroom assignment. It will say save each time. The last thing I want you to upload a copy of the image you captured.