Voice Lift Pi: Turn a USB Conference Mic Into a Plug-and-Play Network Microphone
by ciroque in Circuits > Raspberry Pi
29 Views, 0 Favorites, 0 Comments
Voice Lift Pi: Turn a USB Conference Mic Into a Plug-and-Play Network Microphone
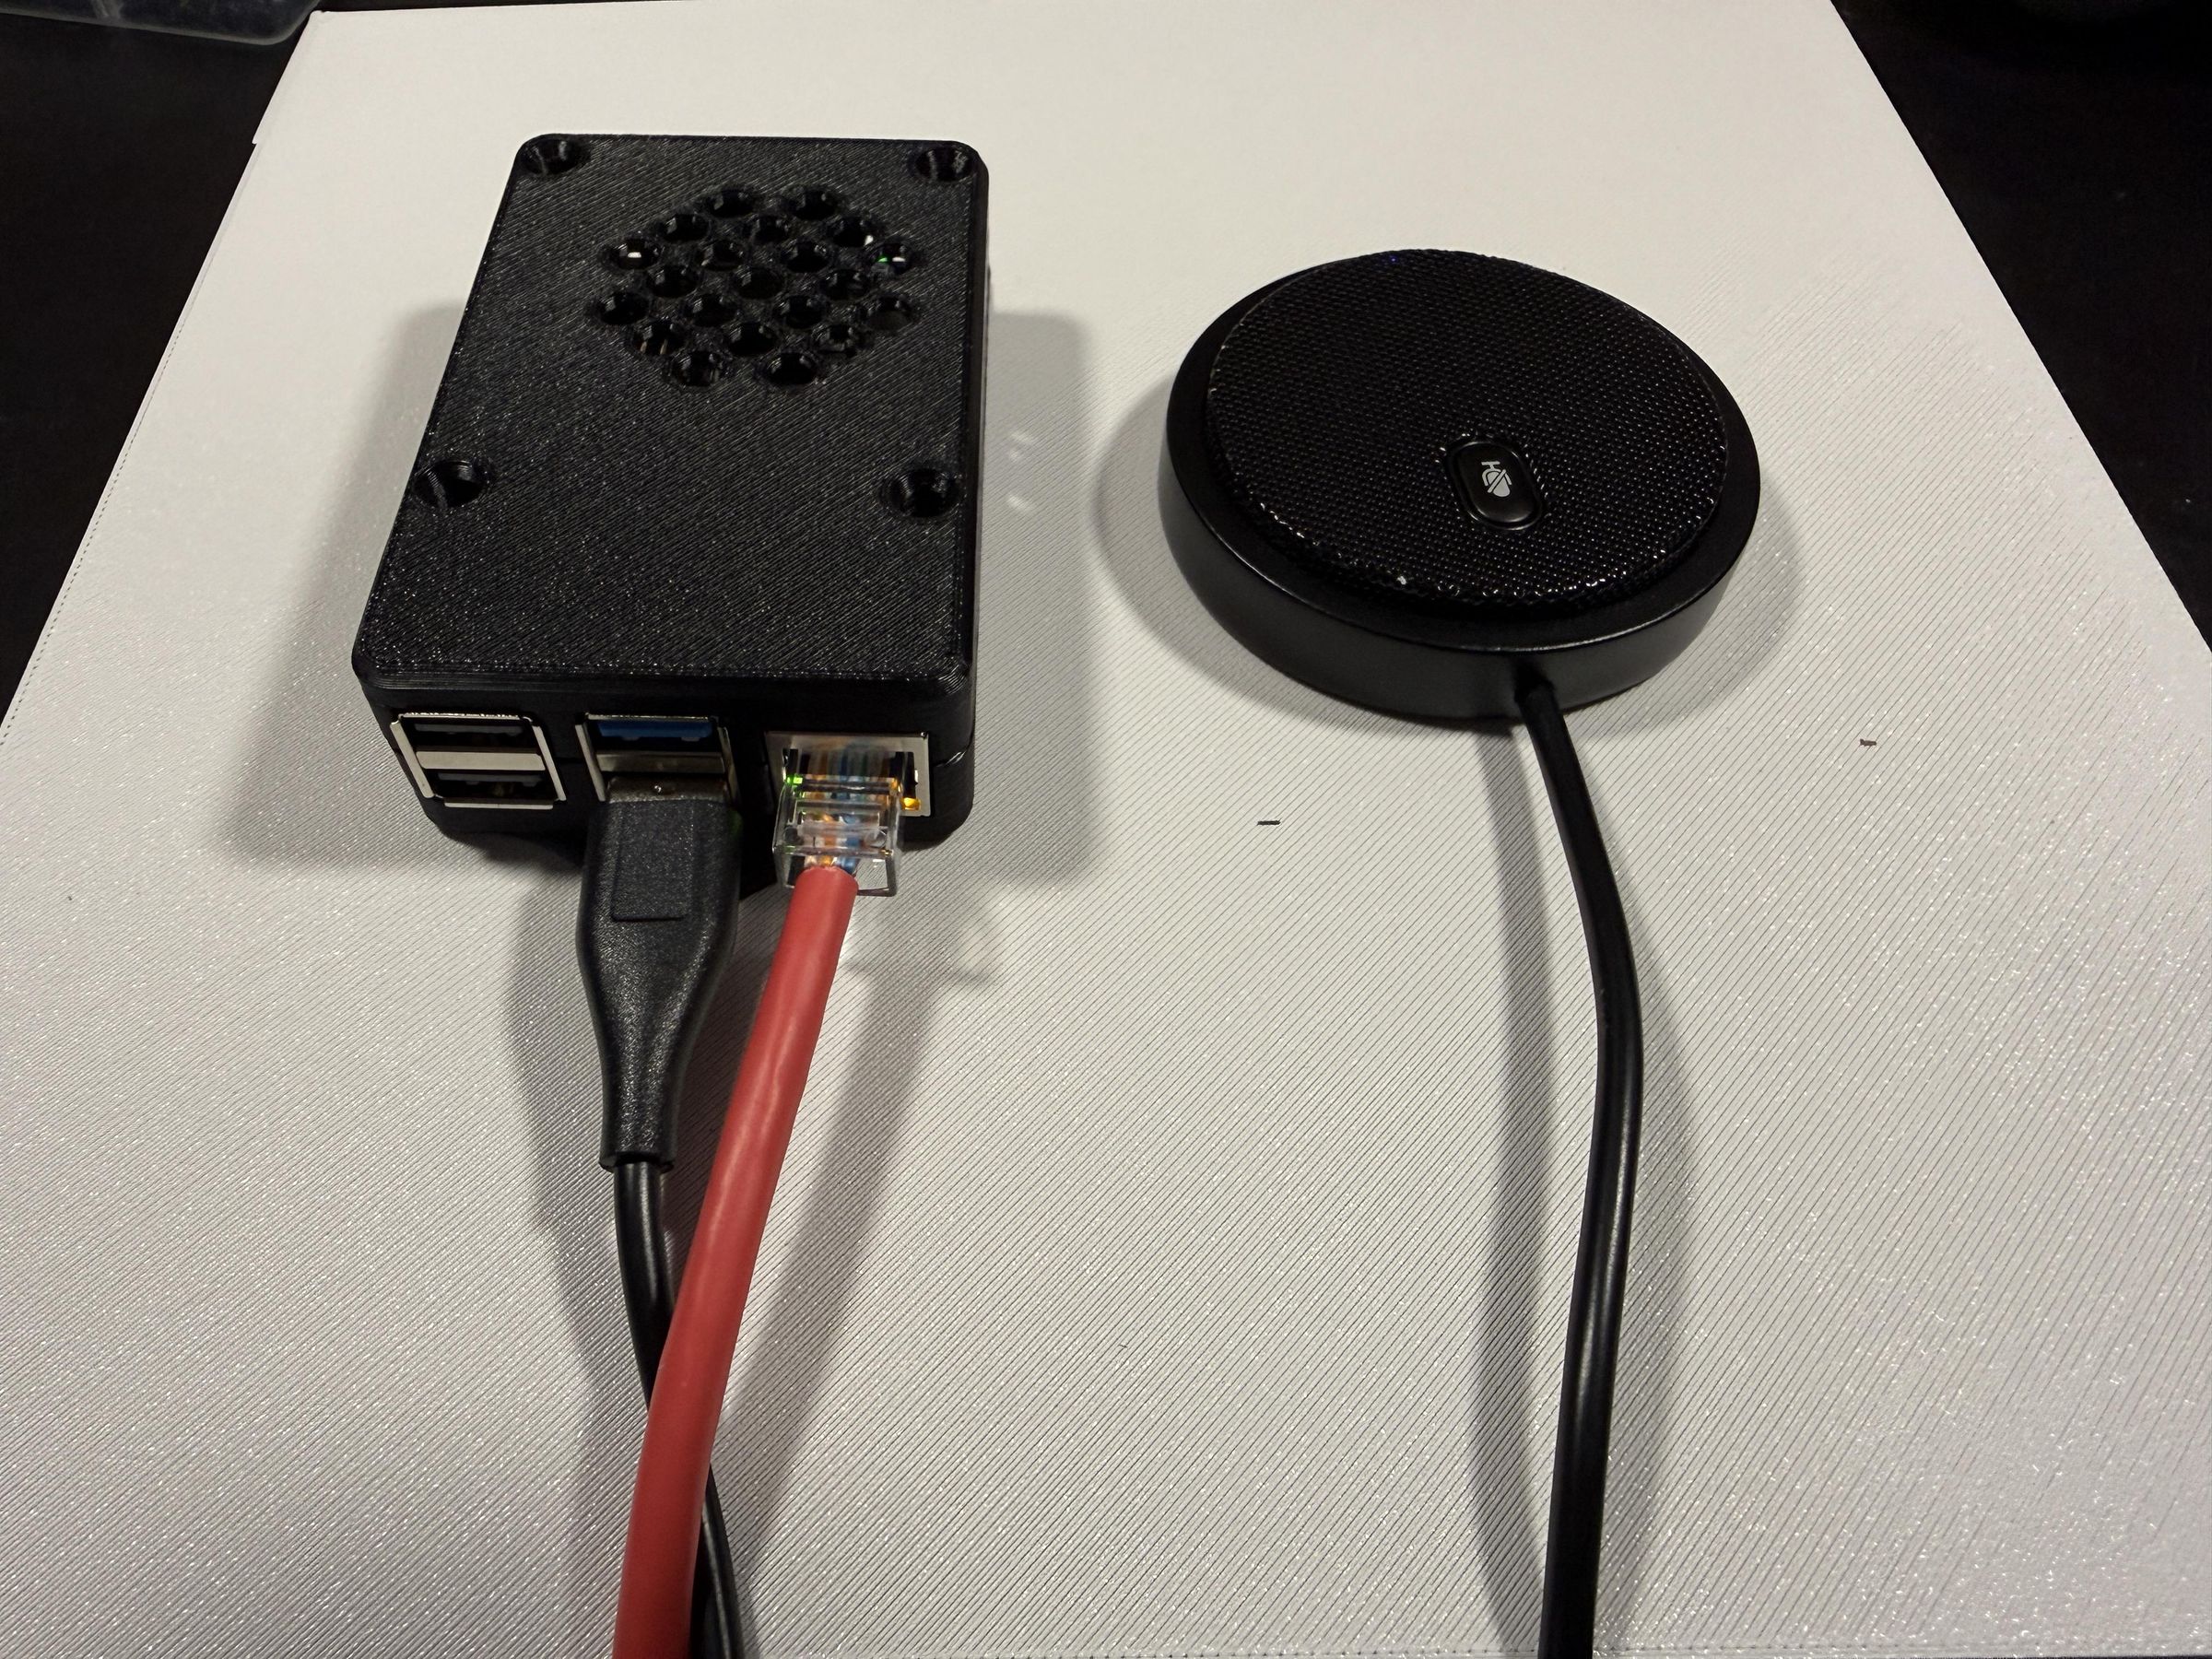
A low-cost Raspberry Pi appliance that takes a USB omnidirectional conference microphone and publishes a low-latency RTSP audio stream you can open in OBS, VLC, or anything else that speaks RTSP. Power it with PoE, plug it into Ethernet, and it comes up by itself.
Good for room sound reinforcement, hymn/congregation pickup, overflow rooms, or any space where you want a table mic without running USB across the floor.
Why this exists
USB conference mics (the 360° puck style) work surprisingly well for picking up a room. The catch is the cable: USB wants to live next to a computer.
This project turns that same mic into a network source:
- One Ethernet cable (PoE) for power and data
- Automatic start on boot
- Stream URL like rtsp://voice-lift-pi.local:8554/mic or rtsp://<ip>:8554/mic
- Multiple listeners at once
- No custom app to write
Hardware I used: Raspberry Pi 4 Model B (2 GB), a LoveRPi isolated PoE HAT, a generic USB conference mic that shows up as UM02, and a 32 GB microSD card. A Pi 4 with 2 GB is enough for audio-only.
What this is not
This is a network microphone, not a full DSP mixer. It does not replace a proper analog snake, beamforming array, or automatic mixer. It does replace “USB mic tied to one laptop.”
It is also not a hidden listening device you should plant on networks you do not control. Same LAN (or a VPN you explicitly set up) is the intended use.
Notes and credits
- Audio capture: ALSA + FFmpeg
- Distribution: MediaMTX
- Inspired by the gap between cheap USB conference mics and expensive AoIP endpoints
- Name: Voice Lift Pi — “voice lift” / sound reinforcement, running on a Raspberry Pi
If you publish this, add your own photos of the assembled Pi, the mic, the OBS Media Source dialog, and the printed case.
You can drop that straight into Instructables as the intro plus steps. Add photos and your actual hostname/card number where it helps. If you want, I can turn this into a shorter “Supplies + 5 steps” version or a Markdown file in your workspace.
Troubleshooting
arecord -l is empty
Mic is not seated or not recognized. Reseat it and try another USB port. Prefer a black USB 2.0 port.
FFmpeg says Connection refused on rtsp://0.0.0.0:8554
FFmpeg is not an RTSP server by itself. Start MediaMTX and publish to rtsp://127.0.0.1:8554/mic.
MediaMTX logs path 'mic' is not configured
Create /etc/mediamtx.yml with a mic: path and point the MediaMTX service at that file.
systemd shows status=217/USER
The User= line in the service file does not match a real account. Run whoami and put that name in both unit files.
The stream is laggy
Use the low-delay Opus settings and UDP transport (-application lowdelay, -fflags nobuffer, -flags low_delay, -rtsp_transport udp).
It sounds fine when run by hand, but laggy as a service
The service is still using the old FFmpeg command. Update voicelift.service and run sudo systemctl daemon-reload && sudo systemctl restart voicelift.
hostname.local does not resolve
The venue network is blocking mDNS/Bonjour. Use the Pi’s IP address instead (hostname -I).
Undervoltage or flaky USB with extra devices
The PoE HAT plus several bus-powered USB gadgets can exceed the power budget. Unplug extras; keep just the microphone.
Warning - lawful use only
This project is a networked microphone. It must be used only on networks and in spaces where you have clear authorization to capture and distribute audio. Do not deploy it to listen to people without their knowledge or consent, do not place it on a network you do not control or are not permitted to use, and do not use it to intercept, record, or monitor private conversations. Unauthorized interception or recording of communications may violate criminal and civil law. The author publishes this write-up for legitimate sound-reinforcement and streaming purposes only, provides no warranty, and accepts no responsibility or liability for misuse, illegal deployment, or any damages, claims, or legal consequences that arise if someone chooses to use this design for unlawful surveillance or any other prohibited purpose. If you cannot use it openly and lawfully, do not build it.
Supplies
Required
- Raspberry Pi 4 Model B (2 GB is fine)
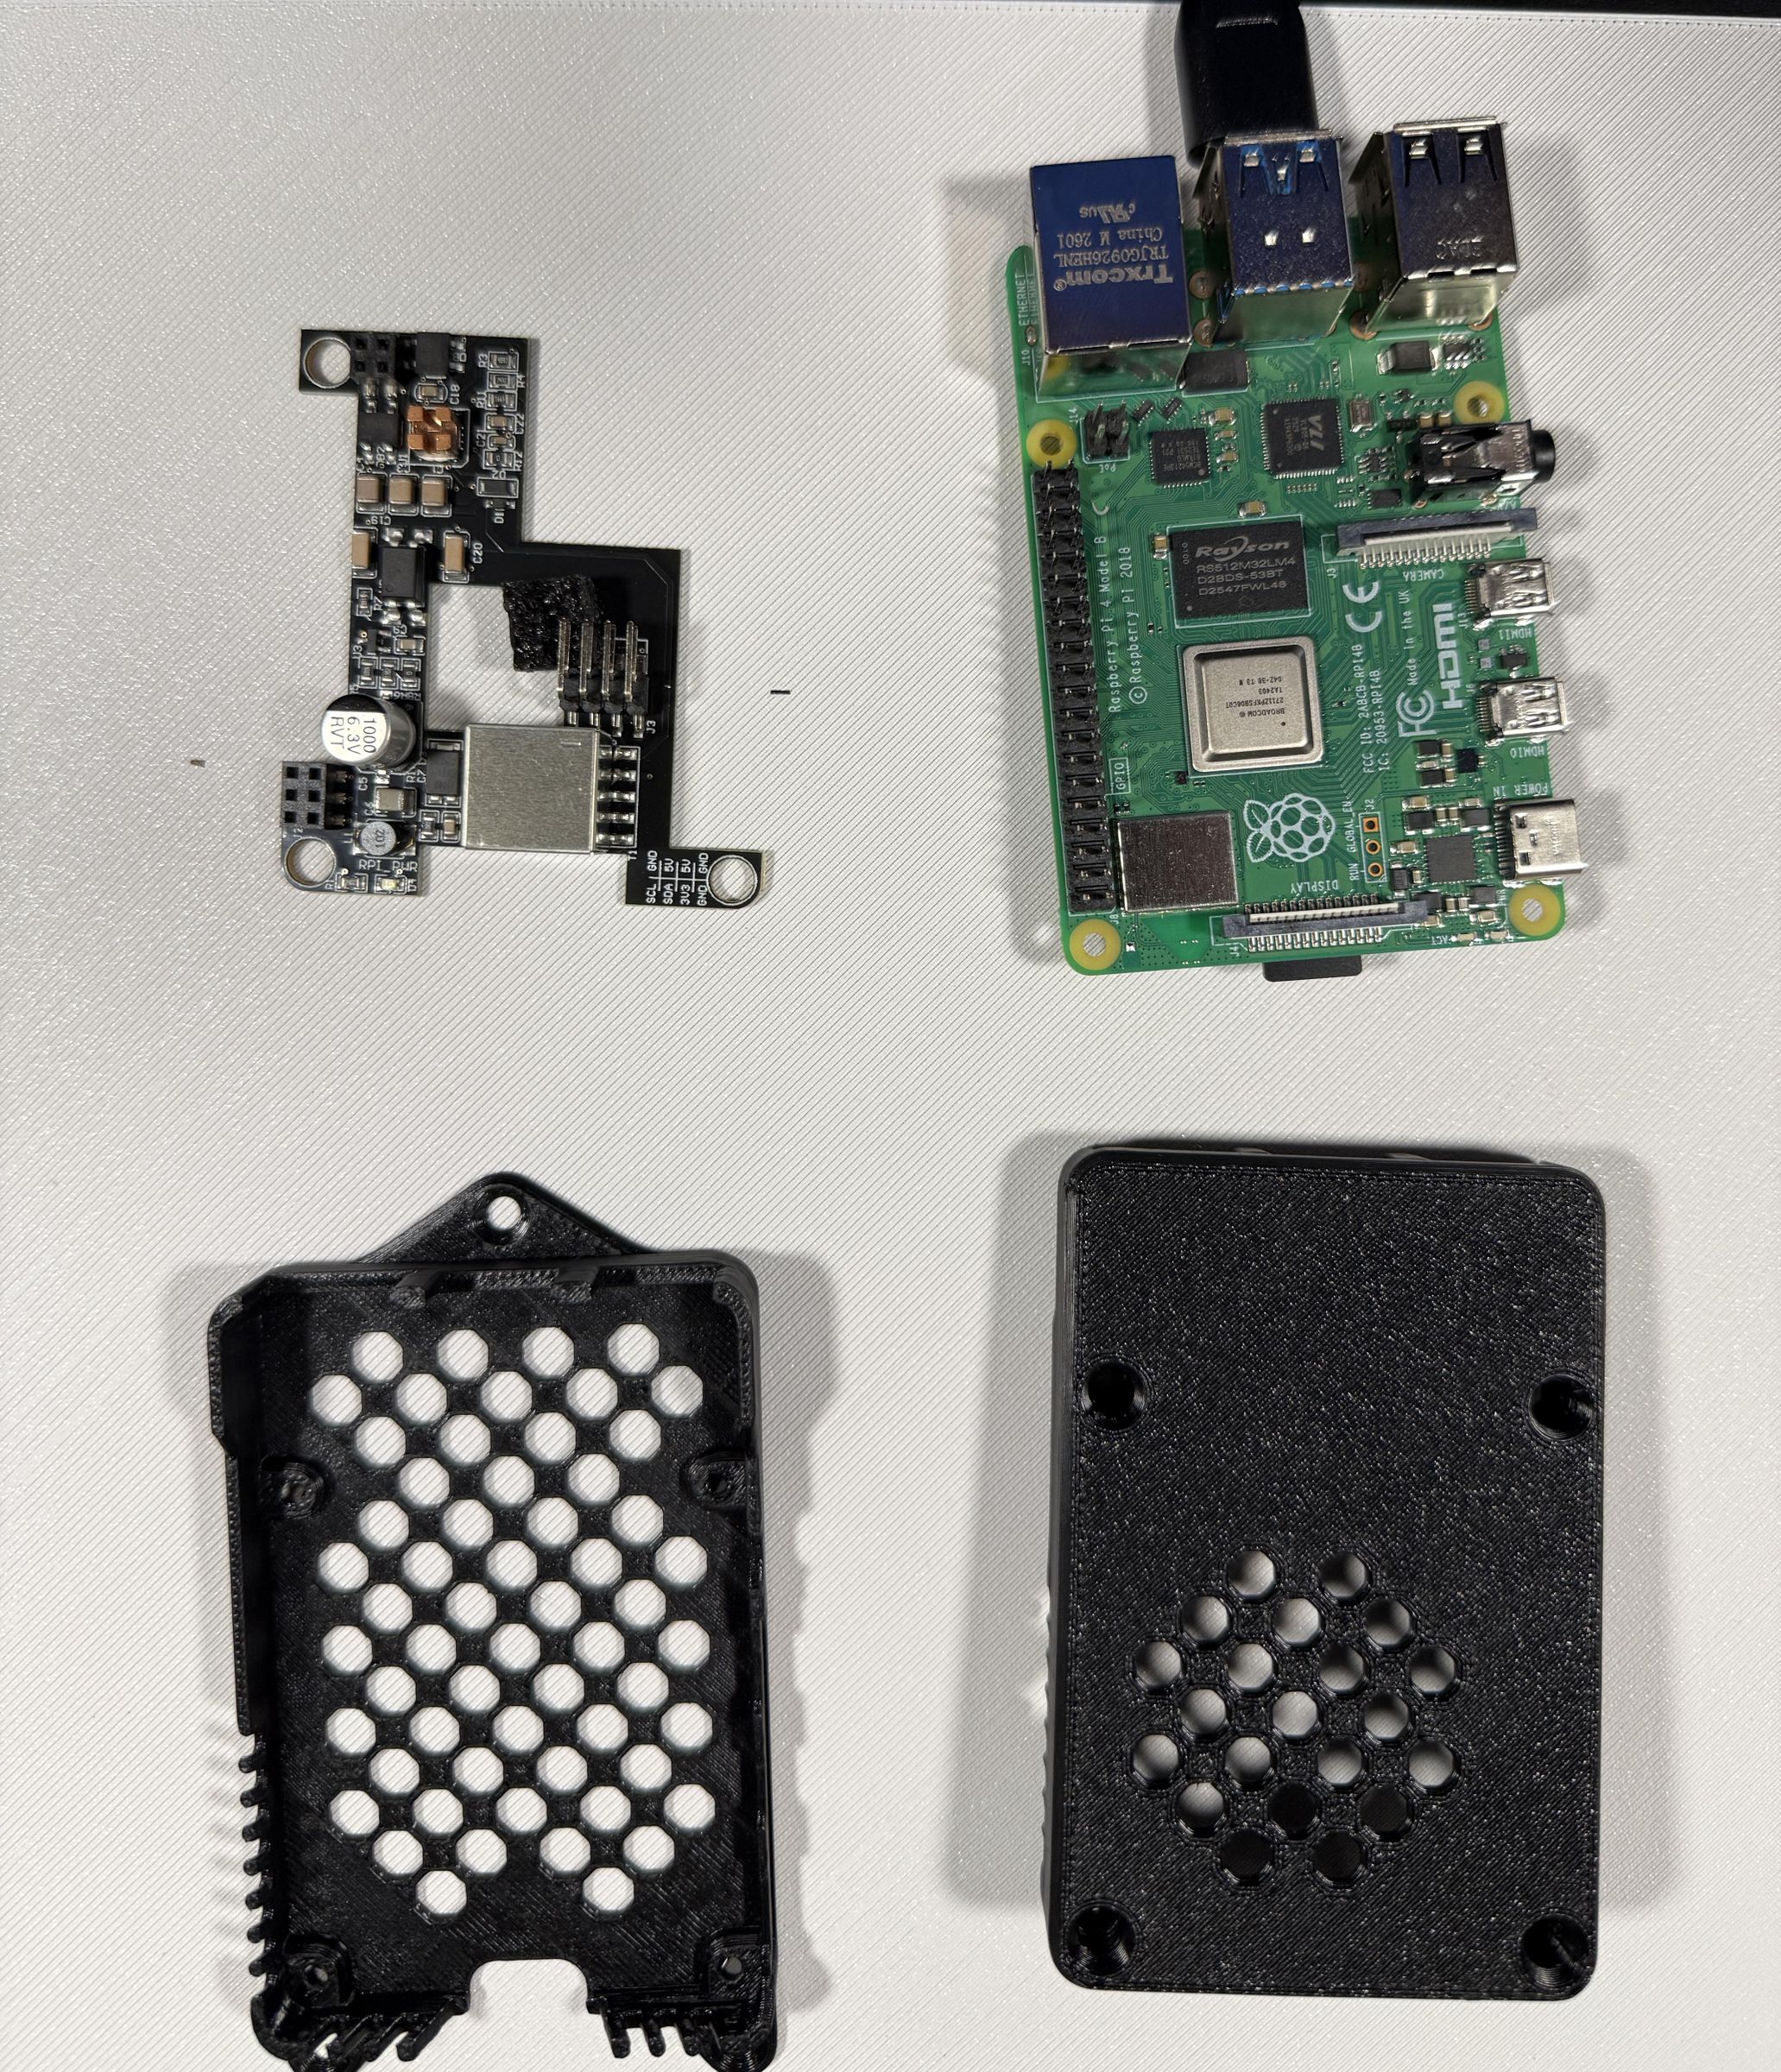
- Official or third-party PoE HAT compatible with Pi 4 (I used LoveRPi Professional Isolated 3 kV)
- USB omnidirectional conference microphone
- microSD card (16 GB+; 32 GB is plenty)
- PoE injector or PoE switch (802.3af is enough)
- Ethernet cable
Optional
- 3D-printed case sized for Pi 4 + PoE HAT (Slaur’s “Raspberry Pi 4 & 5 PoE Case” on Printables works; use the original Official PoE top for many third-party isolated HATs)
- M2.5 or #4-40 screws, about 5/8" (16 mm) for the case
- ASA or PETG filament if you print the case
Software
- Raspberry Pi Imager
- Raspberry Pi OS Lite (64-bit)
- FFmpeg (in the OS repos)
- MediaMTX (standalone ARM64 binary)
Image the Card
- Open Raspberry Pi Imager.
- Choose Raspberry Pi OS Lite (64-bit).
- In OS Customization:
- Set hostname, e.g. voice-lift-pi or voice-lift-pi-01
- Enable SSH
- Set username and password
- Configure Wi-Fi only if you need it; Ethernet/PoE is the intended path
- Write the card, insert it, attach the PoE HAT and mic, boot.
Use a black USB 2.0 port for the microphone. USB 3.0 is unnecessary for a conference mic and can be noisier.
If you will deploy several units, give each a unique hostname at image time (voice-lift-pi-01, voice-lift-pi-02, …).
First Login and Confirm the Mic
SSH in (or use a local console).
Bash
You want something like:
text
Card numbers vary. Note yours. Test capture:
Bash
aplay may fail on a headless Lite image. That is normal. Capture is what matters.
Install FFmpeg if it is not already present:
Bash
Install MediaMTX
FFmpeg cannot be an RTSP server by itself. MediaMTX listens on port 8554 and fans the stream out to clients.
On a 64-bit Pi 4:
Bash
Check the MediaMTX releases page if you want a newer version. Use the linux_arm64 tarball, not arm64v8.
Create a minimal config so the mic path is allowed:
Bash
Test the Stream by Hand
Terminal 1:
Bash
Terminal 2 (adjust plughw:3,0 if your card number differs):
Bash
On another computer on the same LAN, open:
text
Get the IP with hostname -I. If mDNS works on that network:
text
OBS: Add Source → Media Source → uncheck Local File → paste the URL.
VLC: Media → Open Network Stream → same URL.
The default FFmpeg Opus settings without -application lowdelay and UDP can feel laggy. The flags above are what made it usable for live listening.
MediaMTX will serve multiple clients from one encode.
Make It Start on Boot
Replace YOURUSER with the account you created in Imager (whoami). Newer Raspberry Pi OS images often do not use the username pi. If systemd reports status=217/USER, the username in the unit is wrong.
Bash
You want active (running) and a MediaMTX log line similar to:
text
Reboot and confirm the stream comes back with no login.
Using It in the Room
- Plug Ethernet (with PoE) into the Pi.
- Place the USB puck where it already worked as a USB mic — typically a table in the middle of the space you want to pick up.
- On the mix/stream computer, add the RTSP URL in OBS or listen in VLC.
If mDNS/Bonjour is blocked on the venue network, use the IP instead. Many locked-down building networks break .local names.
One omnidirectional mic is usually enough. Extra omnis on the same Pi mostly add noise and cables unless they are far apart. Several small appliances with unique hostnames beat a nest of USB extension cables.
Case (optional)
Cloning More Units
When one card is proven:
- Shut the Pi down.
- Clone the microSD (Raspberry Pi Imager, dd, Balena Etcher, etc.).
- On each clone, change the hostname so they do not collide:
Bash
System Options → Hostname.
ALSA card numbers can change if you plug a different mic. Check arecord -l and edit the plughw:X,0 in voicelift.service if needed.