WiFibonacci Clock

I have been inspired by the awesome Fibonacci Clock (designed by Philippe Chrétien) and I decided to make it wireless using Wifi, hence the name of WiFibonacci Clock =D
The main enhancement is the replacement of the Atmega328 with an ESP8266 providing WiFi capability. This is game-changing as we can now virtualise part of the physical UI having the ESP acting as a Websocket server. Furthermore, the dematerialisation of the UI allows more tuning options.
The list of existing modes that Philippe included in his design are:
- Current Time
- Rainbow Cycle
- Rainbow
- Error Code Display
I chose to remove the Error Code Display mode and add the following list of new modes:
- Random
- Pulse
- Constant Light
For each mode, several settings can be tweaked.
There are only two momentary buttons in my design:
- Mode button
- Brightness button
The brightness is also an enhancement. The time adjustment can be done via the virtual UI.
In this Instructable I won't explain how to make the enclosure as it is covered in Philippe's instructable, I will only explain how to make it Wireless / Wifi connected.
If you like this instructable please vote here:
https://www.instructables.com/contest/wireless2017/
Parts

To build the wireless circuit you will need:
- 1 x ESP8266, version esp-07 is my favourite
- 1 x DS3231 RTC, or equivalent
- a strip of 9 LED pixels (WS2811)
- 1 x prototyping board
- 3 x momentary push buttons
- 1 x rocker switch
- 6 x male straight headers
- 2 x male 90° headers
- 3 x female headers
- 1 x LM1117 3V3 Voltage regulator
- 1 x 10µF capacitor
- 1 x AC/DC wall adapter (12V 1A for instance)
- 1 x barrel female connector (same size as the wall adapter connector)
- some wires/jumpers
- some heat-shrink tubing
To upload the firmware in the ESP you will need a FTDI RS232 programmer and some jumpers.
Build the Electronic Circuit

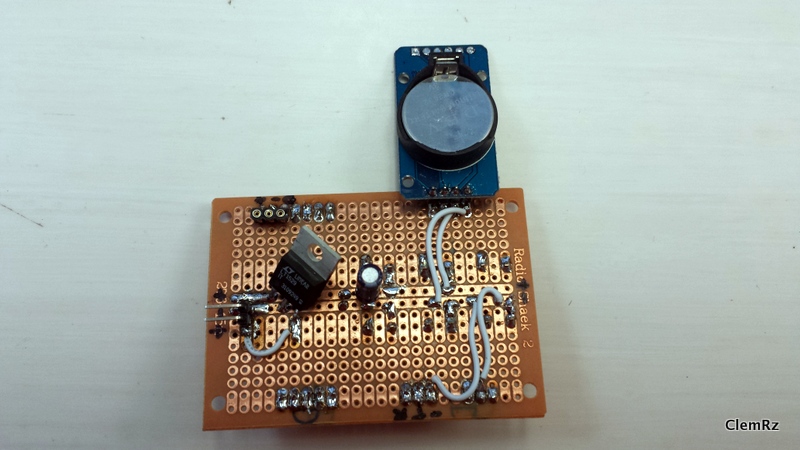
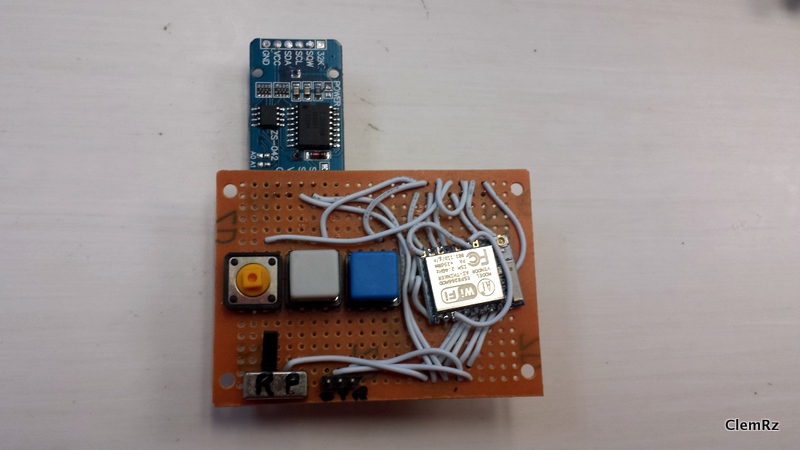
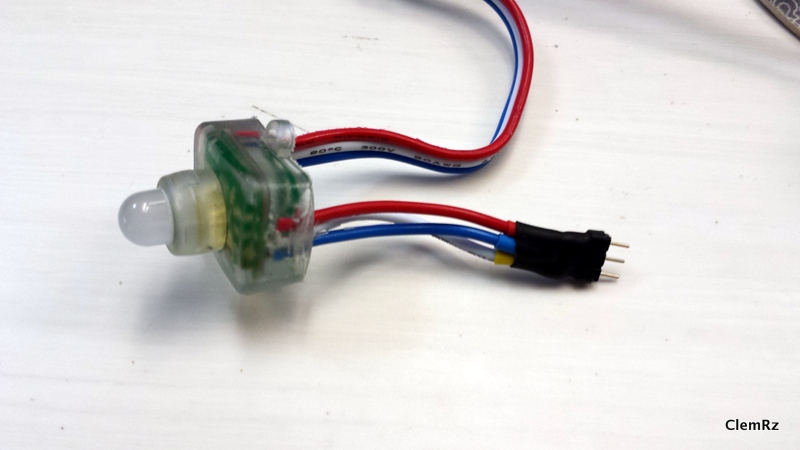
Connect all the parts together as show on the electronic representation. The Fritzing file can be downloaded from my git repository: https://github.com/ClemRz/WiFibonacci-Clock/tree/master/Hardware%20design
Take into account that the final circuit needs to be flat enough so it fits in the original enclosure.
Also I chose to use male/female headers as a connector for the LED strip, this will help during the assembly in the enclosure.
I exposed 3 pins for the ESP programming: GND, RX and TX and also a reset button.
Upload the Firmware
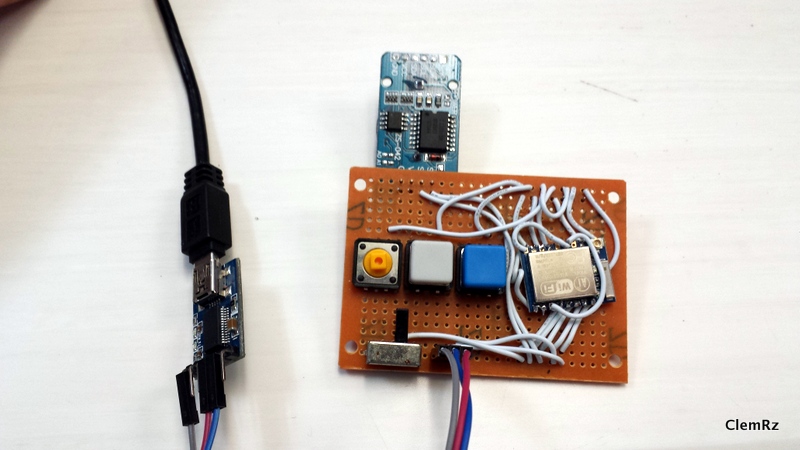
Download the firmware from my git repository: https://github.com/ClemRz/WiFibonacci-Clock/tree/master/WiFibonacciClock
Connect the FTDI to the ESP using the 3 exposed pins (GND, RX and TX) and use the Arduino IDE to upload the firmware. If you never did that before, just follow step 1 of a previous Ible. I wrote: https://www.instructables.com/id/IoT-Door-Alarm-UPGRADED/
If everything went well you should just be able to see it working!
How to Use It
First thing is to power up the clock.
Next, using any internet device such as a laptop, a tablet or a smartphone, connect to the network called WiFibonacciClk, the password is fibonacci.
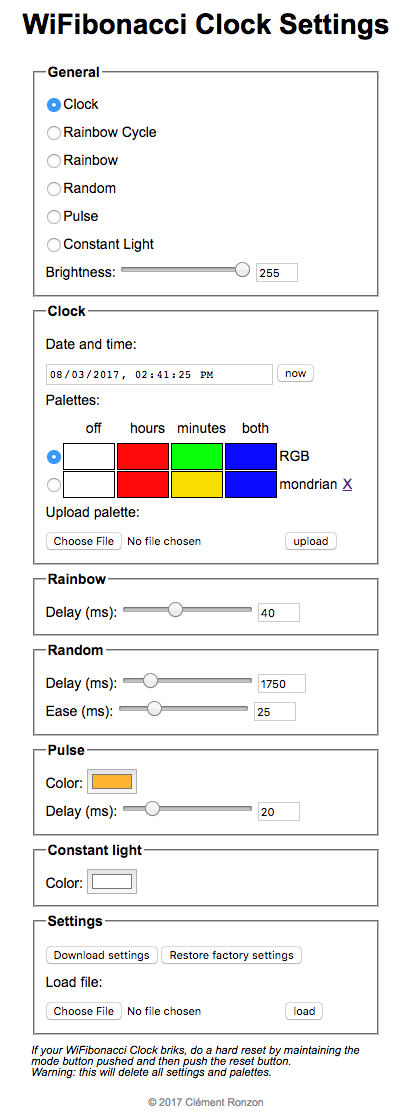
Once your device is connected to the clock, open the url http://192.168.4.1 in a browser. You should see approximately the same UI as in the picture.
There you can setup almost everything.
In the General section there are several modes. Each mode has its own set of settings:
- Clock: this is the original clock display, the settings are in the Clock section:
- Date and time can be adjusted manually by capturing it. You can also simply click on the "now" button, it will use your device's date and time!
- The palette of colours can be changed. By default there is only one palette but you can make and upload your own palettes, some examples can be found on my github: https://github.com/ClemRz/WiFibonacci-Clock/tree/master/palettes
- Once you have several palettes in the list you can choose which one will be used
- To read the time looking at the clock please read Step 1 of Philippe's Ible here: https://www.instructables.com/id/The-Fibonacci-Clock/
- Rainbow Cycle and Rainbow: those are beautiful colour changing modes, they share only one setting in the Rainbow section:
- The delay between each colour can be adjusted by dragging the bar or changing the number. The bigger the number the "slower" the rainbow effect.
- Random: the quadrants of the clock light up randomly with a random colour. This mode can be adjusted in the Random section:
- Delay: the delay between each new random quadrant can be changed
- Ease: the time the lighten quadrant fades off can be changed
- Pulse: all the LEDs light up with the same colour fading on and off alternatively. The settings are in the Pulse section:
- You can change the colour of the LEDs by using the nice colour pickup box
- You can also change how "fast" the LEDs fade on and off
- Constant light: this is like a flashlight, always on. The only setting for this mode is in the Constant Light section:
- You can change the colour of the LEDs.
Besides all those settings you can adjust the brightness of the LEDs in the General section. The brightness setting won't have effect on modes that use fading like the Random mode or the Pulse mode.
You can also save your settings if you want to share them or have a backup, simply click on the Download button of the Settings section (you can upload it back from that same section)! The clock can be restored to its "factory" settings as well, this will interrupt temporarily the wifi signal and you will have to reconnect and reload the page.
Note: your settings will be kept in memory even if you power the clock off.
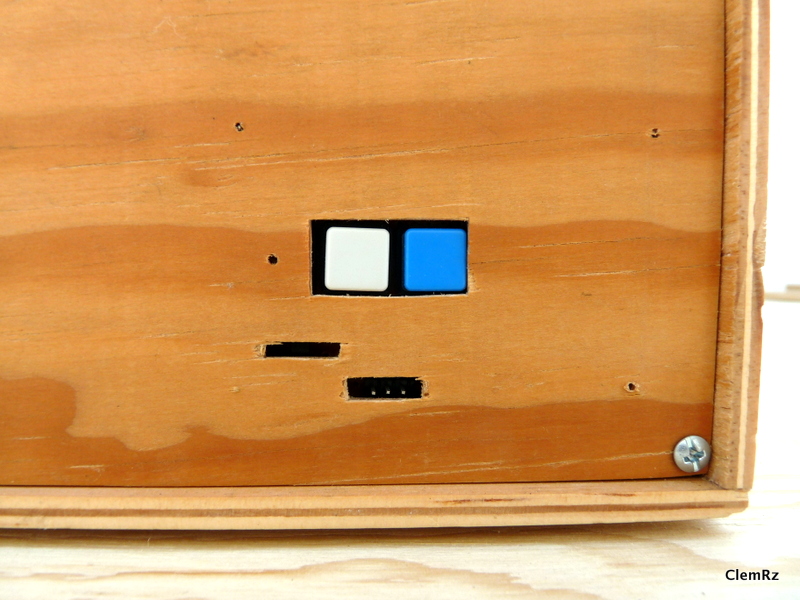
Of course there is also a physical interface on the back of the clock that will allow you to perform basic changes easily:
- Reset button: push it to reset/restart the micro-controller without loosing the settings.
- Brightness button: maintain pushed this button to dim down the LEDs. When you reach the lowest intensity, release the button and push it again to dim up the LEDs. The opposite happens when you reach the highest intensity.
- Mode button: push sequentially this button to cycle through the existing modes.
- Rocker switch: for expert only ;) this switch allows you to set the ESP in programming/run mode
- Programming headers: this is where you want to connect your FTDI in order to flash the ESP
You can connect several devices to the clock, any change will be reflected on everyone's device thanks to the websocket technology!
What Should I Do If the Clock Won't Respond?
Sometimes, because of a bad formatted palette or Murphy's law happening, the clock gets "bricked" / stuck / not responding.
In that case the Wifi interface might be useless and the only way out is to manually reset the clock to its factory settings.
To manually reset the clock to its factory settings do as following: maintain the Mode button pressed and press the reset button, then release both buttons.
Caution: this will definitely erase your settings and the palettes you might have uploaded to the clock.
Optional: Customise the UI

If you want to change the UI, remove modes, add modes etc. you will find a small how to on my github: https://github.com/ClemRz/WiFibonacci-Clock
Conclusion

This clock is fun and its inventor is brilliant!
You will notice that I'm not as skilled as Philippe in terms of woodworking :D
I had a great time building the UI for this clock and it is definitely worth it!
If you have any comment or suggestion feel free to share it below!
Thank you for reading.