Wizard Quest - 3D Board Game
by starman13 in Living > Toys & Games
1587 Views, 31 Favorites, 0 Comments
Wizard Quest - 3D Board Game


Hello! I am a rising ninth grader at Jefferson Forest High School in Virginia. This is a board game called Wizard Quest. It is based off a fun video game I used to play called Prodigy Math Game. I have outgrown the game but I still really really like the concept of it and decided to make a board game based off of it for my brothers to play. The video game is targeted for elementary school kids but I wanted to make a board game for the whole family to enjoy. I have always enjoyed making card or board games so this was a super fun project for me.
Supplies

- 3D Printer
- 3D Printer Filament
- Computer
- Printer
- Paper
- Cardboard
- Paper Cutter
- Paint
- Clear Finish
- Laminator
- Sharpie
- Knife
Idea

The most important step of a board game is the idea. Without a good idea, the game will be pointless and boring. For my idea, I took inspiration from quite a few things. I got the main inspiration from a fun wizard video game I used to play. When I started designing this game, I followed the pattern of the video game. As time has progressed, I have been able to develop more of my own ideas.
My idea for this game just hit me one day and I grabbed a notebook and filled up 3 pages of what my brain was giving me. It was so much fun. The general idea was that the characters were students of a wizard boarding school that had gotten attacked so they needed to find things around the island to get their school back. The in-depth story has evolved a lot but has used that same basis.
I also knew I wanted to have magical combat as part of the game. At first, I wanted players to collect pets to help them with their battles but I later decided to have spells the players could use.
I also spent a very long time thinking of names for all of the locations on the game board. I couldn't decide on what style of names to go with but eventually decided on more generic landscape names such as Duneridge Desert.
The final product of the game is where players are racing to find 8 magical potions needed to create a spell to save the Academy. They do this by completing quests where they move around the board and roll the dice to see if they can get a potion from a certain area. Players can also battle each other if they pass each other on the board. I am very happy with the final product of Wizard Quest.
Story

I kind of already explained the story in the idea but this is the real story:
Dear Wizard,
I regret to inform you that a dark wizard launched an attack on Crestwood Academy overnight. While you and all of the other apprentice wizards slept, other wizards and I were busy trying to defend the attack, but we were not successful. This means that all of your classes will be suspended until further notice. If we want to take back the academy, we will need to cast a very powerful spell on it. There are 8 very important potions that are needed for this spell. They are hidden all around the island and it is your job to find them. Whichever wizard finds all 8 of the potions and delivers them to me will go down in history as the rescuer of Crestwood Academy.
Sincerely,
Willard the Wizard
Downloads
Rough Draft of Board

I used 4 pieces of paper to draw a rough draft of the board. I did this so I could accurately scale everything to fit together like I wanted it to and it is also a lot easier to make edits to the board on paper than it is in digital format.
Scan in Rough Draft


Once I drew the rough draft, I scanned all 4 papers on to the computer, using the scan feature on my printer. I loaded the images into Canva to trace, but they were not aligning like they did in the drawing. I was going to try to rescan everything but decided not to because the point of the rough draft is an estimate so it was not that important.
Trace Rough Draft


Because Canva didn't work, I loaded the images into the image editor on Scratch, a fun coding website that I like to use (scratch.mit.edu). There I traced the board into what it was on the paper. It was a lot easier than other platforms because I am very familiar with it.
Add Text to Game Board


After I got everything traced on Scratch, I uploaded the images back onto Canva and added text. I started by naming all of the locations (Silver Springs, Duneridge Desert, Fernwood Forest, and Mistwood Mountains) then moved on to the board spaces. I wanted to keep this more of a positive game, so 4 out of 5 of the labeled spaces in each game location are positive actions.
Design Waterfall


I designed this waterfall feature in Fusion360. I used a loft to create the waves and the waterfall. It took me over 4 tries to get everything to line up, but it worked in the end.
Design Sand Dune


Next, I designed the sand dune and cactus. I didn't know originally what to do for the desert area, and was thinking either a dune or a cactus, but then after I designed the dune, I accidentally left a perfect spot for a cactus to go. It all came together in the end design. For the dune, I again used the loft tool. For the cactus, I made a sketch and extruded.
Design the Mountain


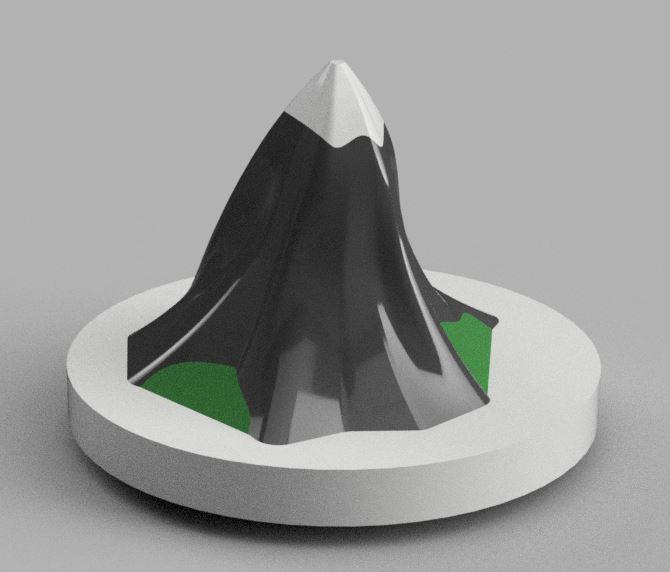
Next, I designed the mountain. I got inspiration for this from an image online but it was very hard to replicate so I just made my own. I once again used the loft tool to make a surprisingly realistic looking mountain. I added the grass with a simple sketch.
Design the Forest


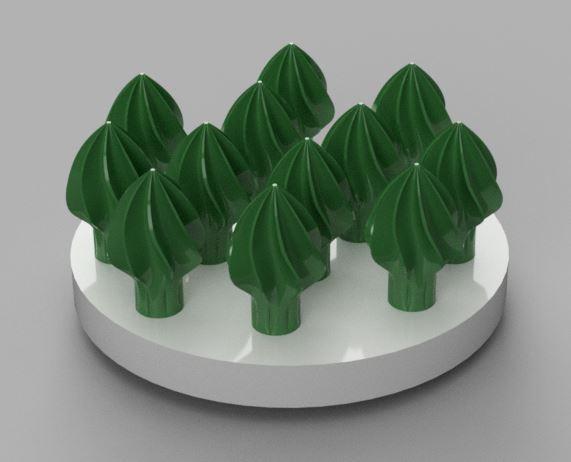
Next, I designed the forest. I was expecting this to be very hard to design, but it was surprisingly easy. I was planning on using a loft to create a realistic looking pine tree, but when I tried it, I accidentally created what you see in the picture. I was able to spiral it to make it look better. I simply copied and pasted the trees around the base.
Design the Academy


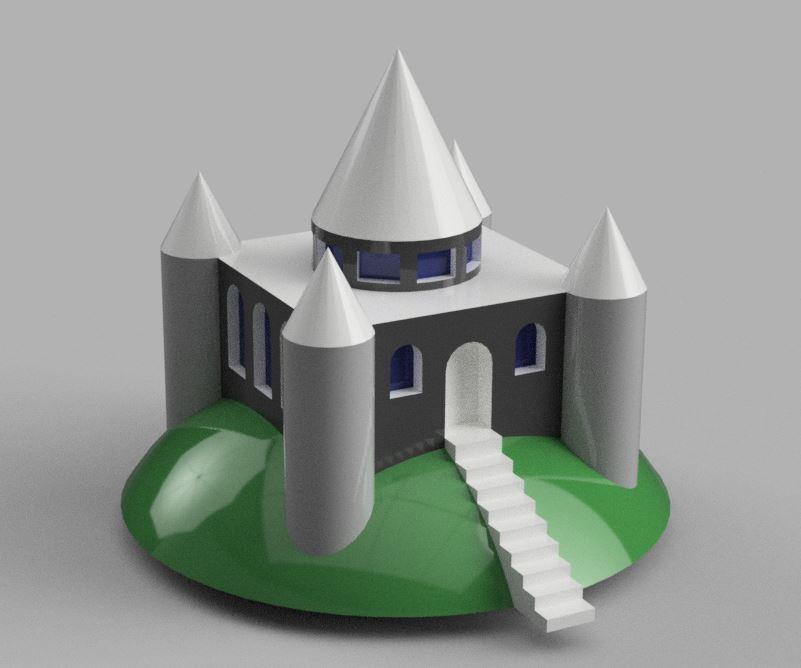
The last major board piece to design was Crestwood Academy. I intentionally made this one without the base like the others. It is situated on a hill overlooking the entire rest of the island. I opted to keep the design simple so that is why I have a main tower with 4 corner towers, and I think it turned out pretty good.
Design Potion Jars

In the game, obtaining the different potions is the way to win the game. Designing these was very simple. I simply used the revolute tool to create them. It is the same design for each different color.
Design Characters

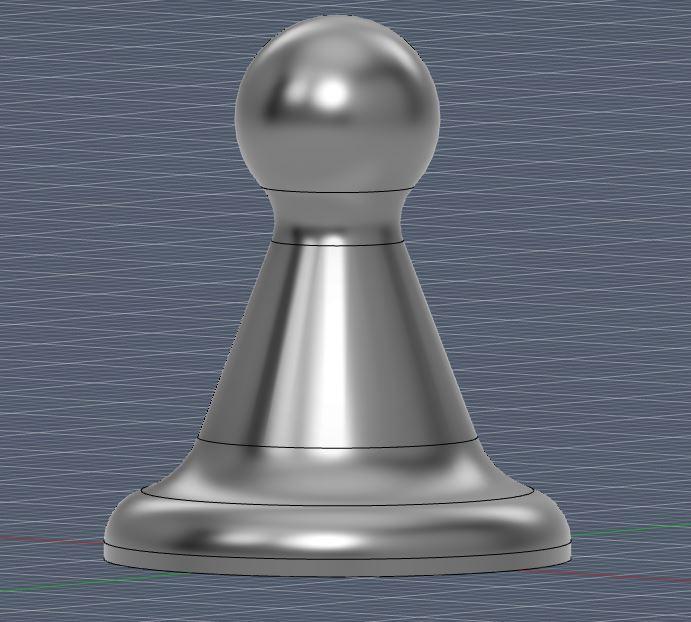
I was originally going to create miniature wizards for all of the characters, but then figured that they would likely be complicated to design and may not look the best when they are 3D printed. For this reason, I opted to use a simple board game pawn that I designed.
Design Health Bar


In the game, the health bar is the way to track your health level during a battle. If your health reaches 0, then you lose a potion. This piece is designed to slide in and out easily but snugly so that the score can be easily tracked during the battle.
3D Print the Board Pieces


For printing these files, I used white PLA+ filament. I used 2 shells and 10% infill. I had to use supports when printing due to the peg at the bottom used to attach each piece to the game board. They each took around 1.5 hours on my Adventurer 3 Printer. The forest took over 3 hours due to the complexity of each part.
3D Print the Potions and Potion Holders


The potions need to be printed in 8 different colors, or printed and painted later on. I printed mine 4 at a time and it took about 50 minutes per group. They need to be light blue, dark blue, brown, green, pink, red, orange, and white. The holders can be printed in any color. I chose black for mine.
3D Print the Health Bar


The health bar is two separate pieces, the colored piece that corresponds with the player pawn piece, and the white piece that has the numbers to track the player's health. The colored pieces printed in a very short amount of time whereas the white pieces took a bit longer. I printed the colored pieces in a vertical orientation but I kept the white ones flat without supports and removed any excess filament the was in the way. I ended up coloring the numbers on the white part with a black sharpie so that they were easier to read and stood out more.
3D Print the Player Pawns and Houses


These should be printed to correspond in the same colors as the health bars. I chose the colors yellow, red, green, and blue for my pieces. Each of these prints took about 10 minutes to print.
Painting the Potion


If you didn't print all of your potions with different colored filament, now is the time to paint them. I needed to paint two of mine, the light blue and the brown.
Painting the Forest


The forest was the hardest thing to paint because of the complex design. However, it was not as hard as I originally thought it would be. I used acrylic paint. I stuck the paintbrush down the groove between each tree and the paint covered it nicely. After I did the tops of the trees, I painted the tree trunks brown and then painted the base of it white to cover up spots that got on it.
Painting the Mountain


The mountain was easier to paint than the trees. I painted the mountain, then the grass at the bottom, then the snow white top to cover any gray that got on it.
Painting the Waterfall


Next, paint the waterfall. I used blue for the water and gray for the rock around it. I had to do two layers for the blue to make the waves look more realistic.
Painting the Desert


The desert was the easiest one to paint. I used yellow for the sand dune and green for the cactus. I touched it up with white when I was done to cover up the yellow that got on the base.
Painting the Academy


I spent a long time thinking about how to paint the Academy. I ended up settling on a brown for the main building, gold for the tower and spires, green for the grass, and black for the stairs and blue for the windows. I have also included pictures of the final products from all of the pieces.
Clear Coating the 3D Pieces


Once all of the pieces have been painted and are dry, it may be a good idea to add a clear coat. I used a Rust-oleum clear finish. It made everything look shiny and feel much better. I believe it will make it last a lot longer as well.
Design the Spell Cards


I once again used the Scratch website to create the spell cards. The cards are organized by color with the yellow cards being the strongest, the blue is middle, and the gray is the weakest. When you are in a battle in the game, you roll a dice to see how much damage you will do according to your spell card. I had a lot of fun designing these and creating the names for the spells.
Design the Quest Cards


The Quest cards took a very long time to design. I had to layer all of the artwork for the images multiple times and for each individual card. Each card was custom made and there are no duplicates for any of the cards. In game play, the Quest cards are used to obtain potions by going to locations on the gameboard that correspond with the card, then successfully rolling a dice to the number being shown on the Quest card.
Design the Mystery Cards

The Mystery cards also took a very long time to design. I had to go into Scratch and manually draw all of the artwork for these cards. In the game, these cards are action cards that must be done as soon as a player draws the card.
Design the Potion Identifier Card


This card is not officially part of the game, but it is a helpful tool to help remember the names of the potions and their corresponding color. I used the same potion images that I used from when I designed them for the Quest cards.
Write the Instructions

The instructions are another very important step because without them, it is very difficult for other people to play your game. This is why I spent a lot of time revising the instructions and adding visuals (as shown at the top of this instructable). I drafted the instructions in Google Docs.
Print Off the Cards and Map


Once everything is complete, it is time to print them off. I printed the cards onto a cardstock paper so that they were more durable and less see through. I printed the game board on regular paper.
Printing Off the Instructions and Potion Identifier Card


I printed the instructions off double sided so they were on one paper, front and back. Then the last thing to print is the Potion Identifier Card if you would like to use it.
Laminating the Cards


Once everything is printed, to make it more durable, I laminated the cards. I ran each page of cards through the laminator twice, once before cutting them out, and again after. This helped them to be more flat and more durable.
Cut Out the Cards


I used a paper cutter to cut out the cards so that the cuts were precise and straight. I cut them all one page at a time so that I didn't mistakenly cut a page where I wasn't supposed to.
Mounting the Board to Cardboard


I cut down the papers so there wasn't excess around the edges, then used a glue stick to mount it to a thick piece of strong, flat cardboard. Once that was done, I got a knife and cut out all of the holes in the board where the game pieces go so that the pegs in the bottom of the 3D printed board pieces fit inside. Then I used that same knife to make a cut down the center of the back of the board that didn't go all the way through so that it could bend and fold in half easily, making it more compact like other game boards.
Thanks!!!!!

Once your board is mounted, you are all set and ready to set up the board and play! The instructions will tell you everything you need to know for assembly and game play. Good luck gathering your potions! Be sure to share this game with all of your friends and family.