Wooden Name Display
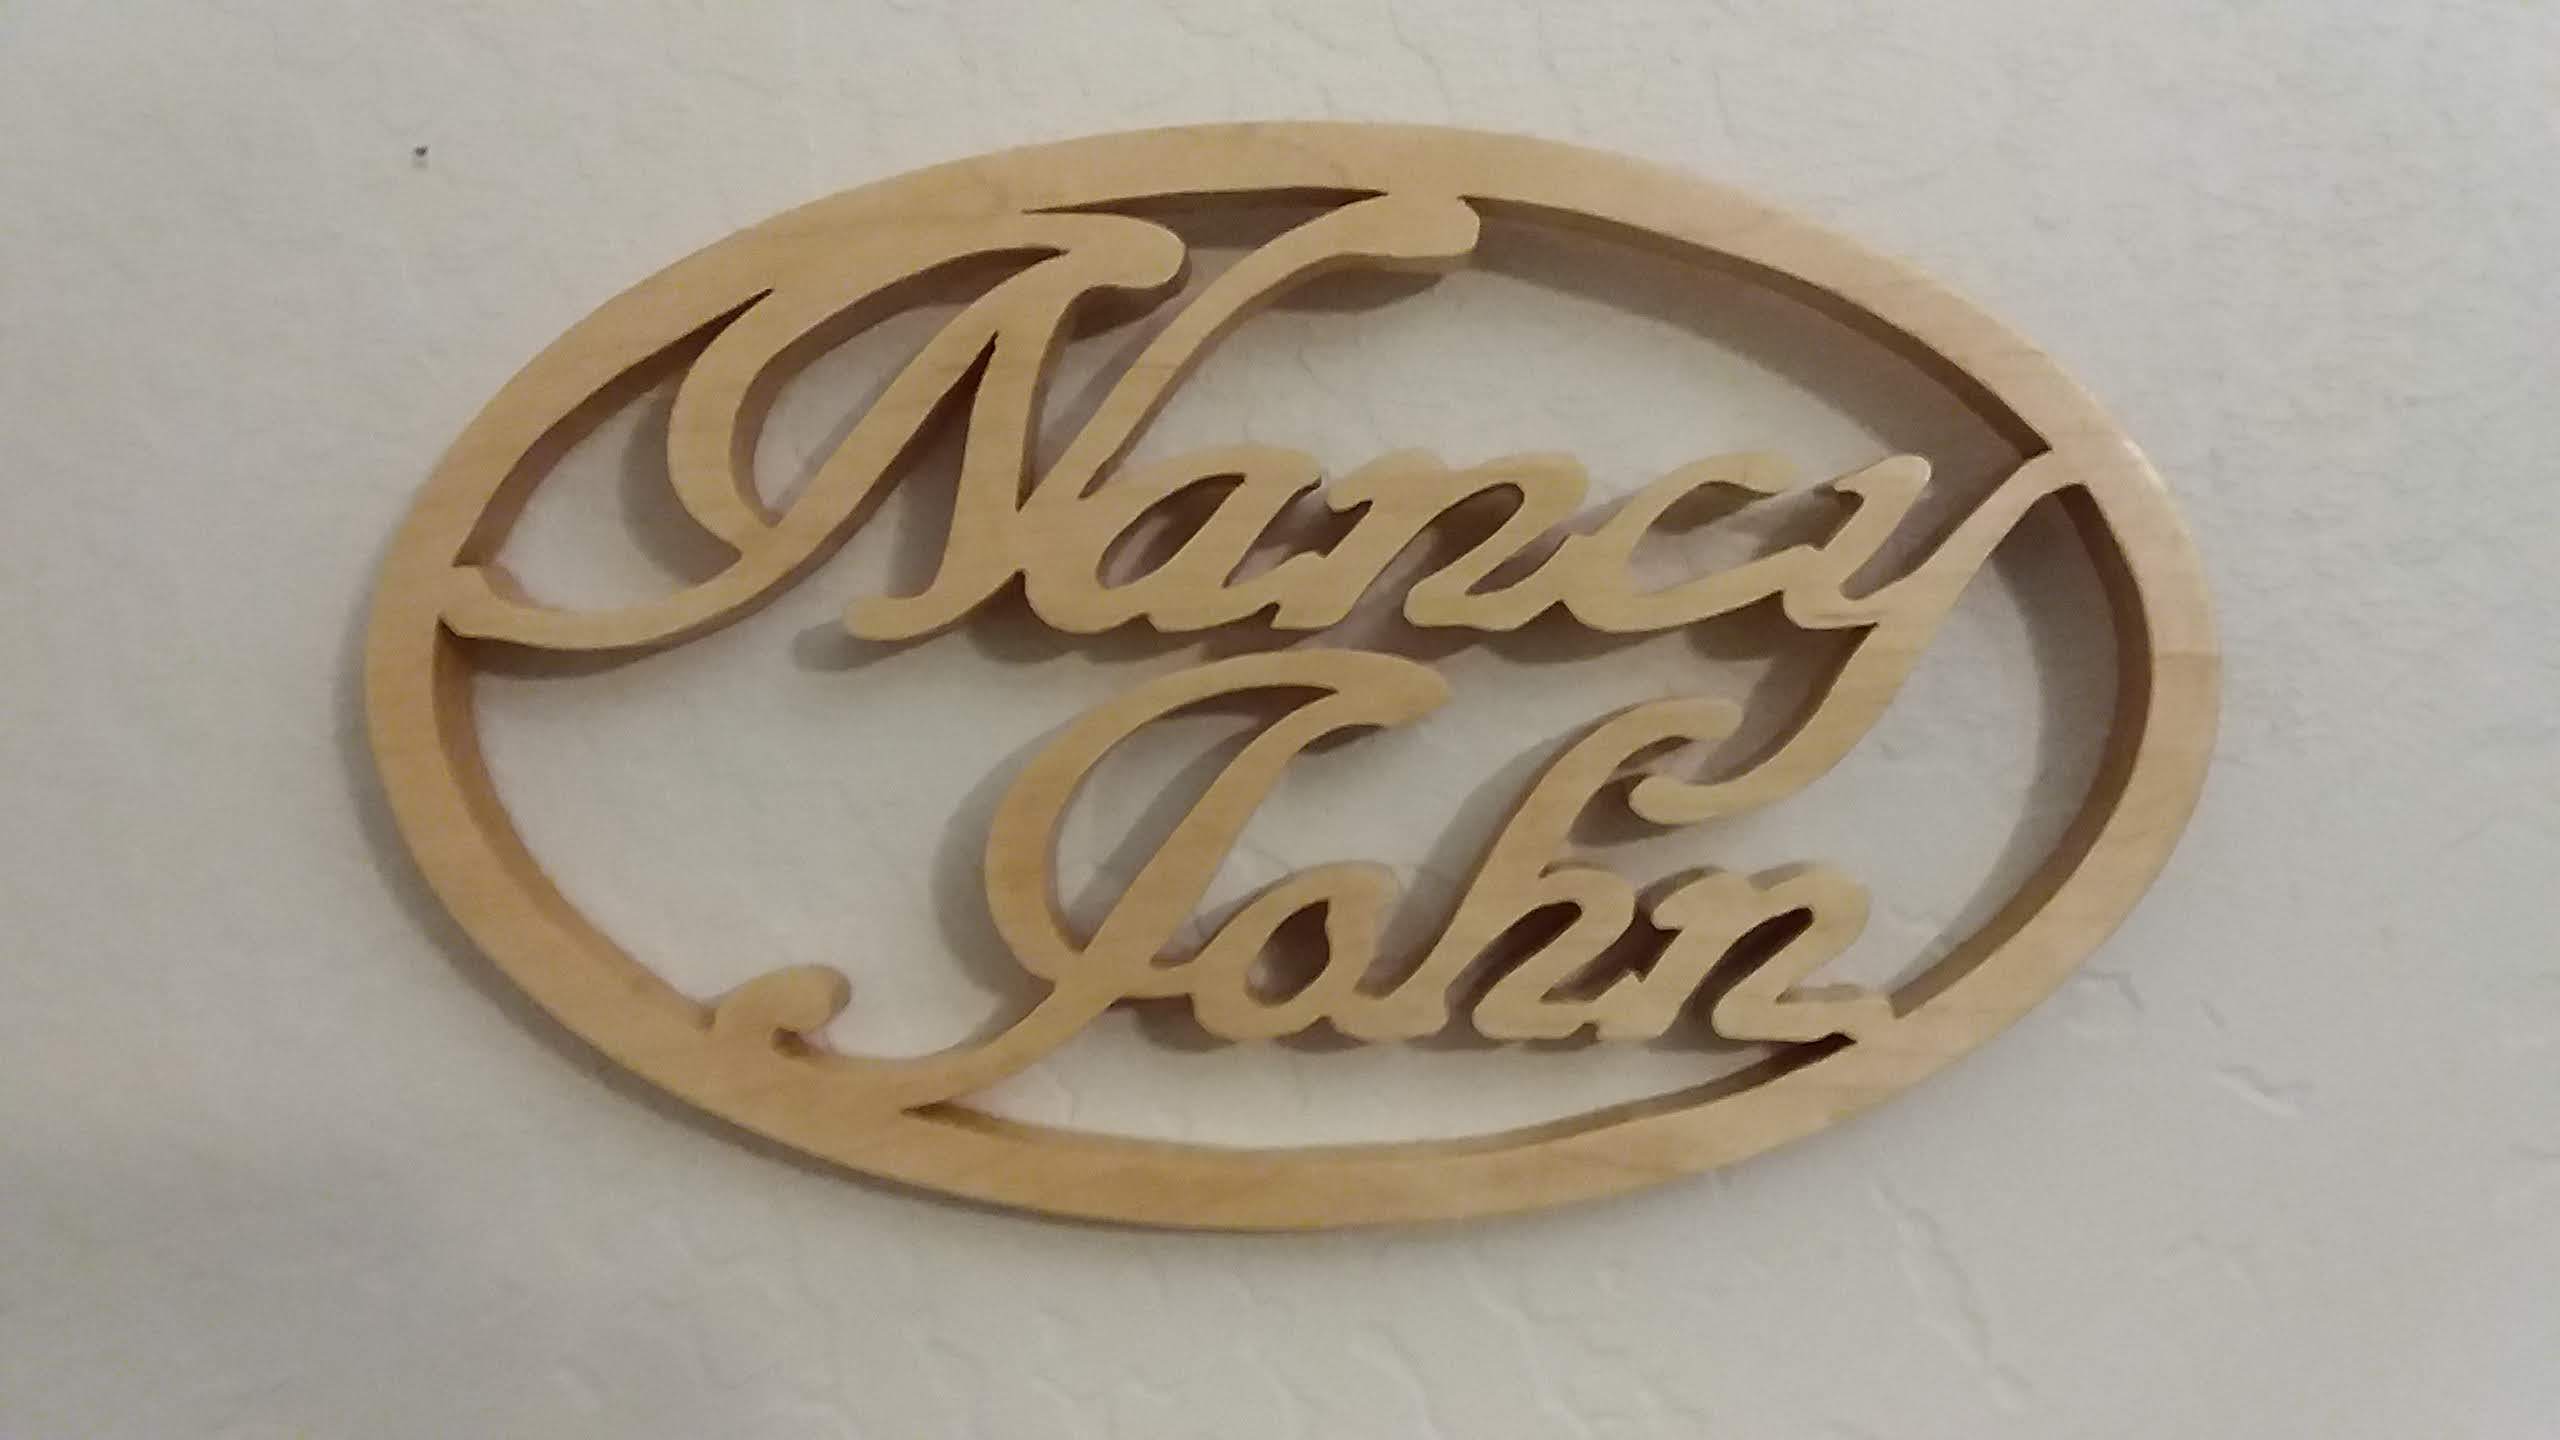

These are instructions for designing and making a name display from a single piece of wood. You can make a display using one or two names. Both kinds are shown above. These instructions are for a name display with two names.
Safety First
If you make a name display you will be using power tools. Make sure that you are completely safe in every action. No final product is worth an injury. Remember, SAFETY FIRST.
Various recommendations:
*** If putting two names into an ellipse, the longer name should go on top.
*** I use inkscape for designing but I believe that other design programs would also work. If you are able to prepare a freehand design that would work, too.
*** I recommend hardwood such as oak, maple or walnut. Be careful about the wood you use. You want the final product to be strong. Example: I once made a name display from poplar but it shattered into five pieces when I accidentally dropped it. I like working with poplar, but do not recommend it for this project. I have never used pine, fir, hemlock or any other soft wood for this kind of project. I believe those would be more prone to break.
*** I use an ellipse for the outside, usually about 7" high by 11" or 12" wide. Different dimensions would work and so would different shapes. Inkscape is very flexible in working with different shapes.
Supplies
Tools: scroll saw, band saw (optional), drill press or drill, disc sander (optional).
For sanding: files, small flat wood, small dowel, sandpaper
Design With Inkscape
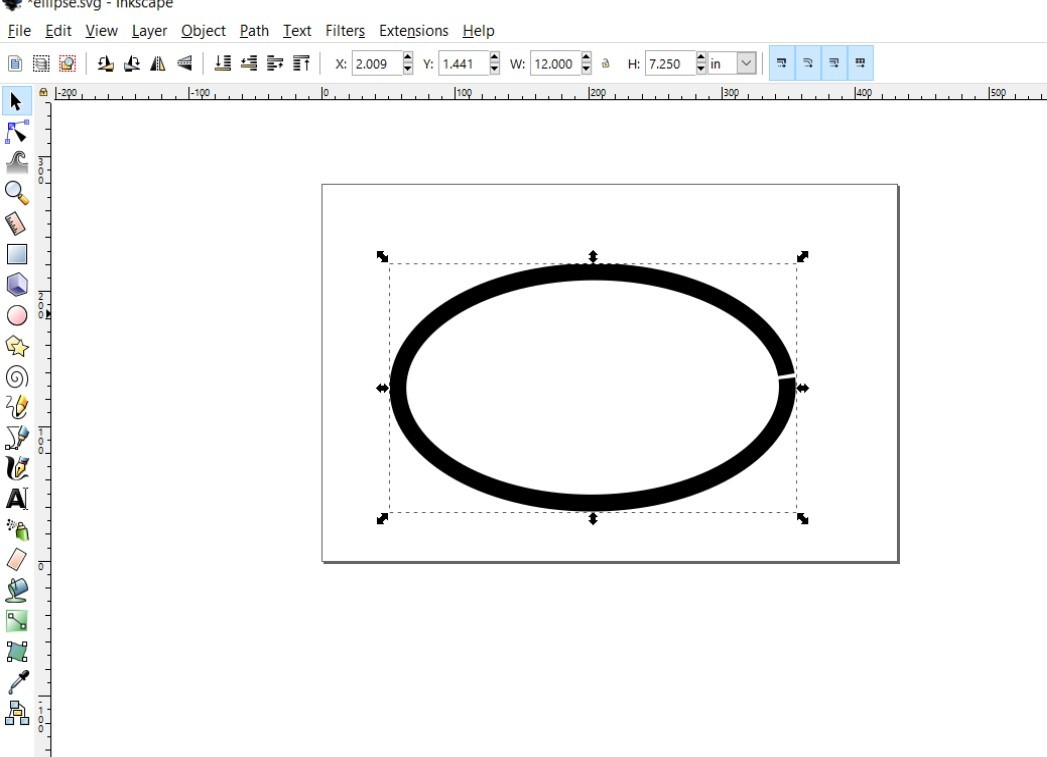
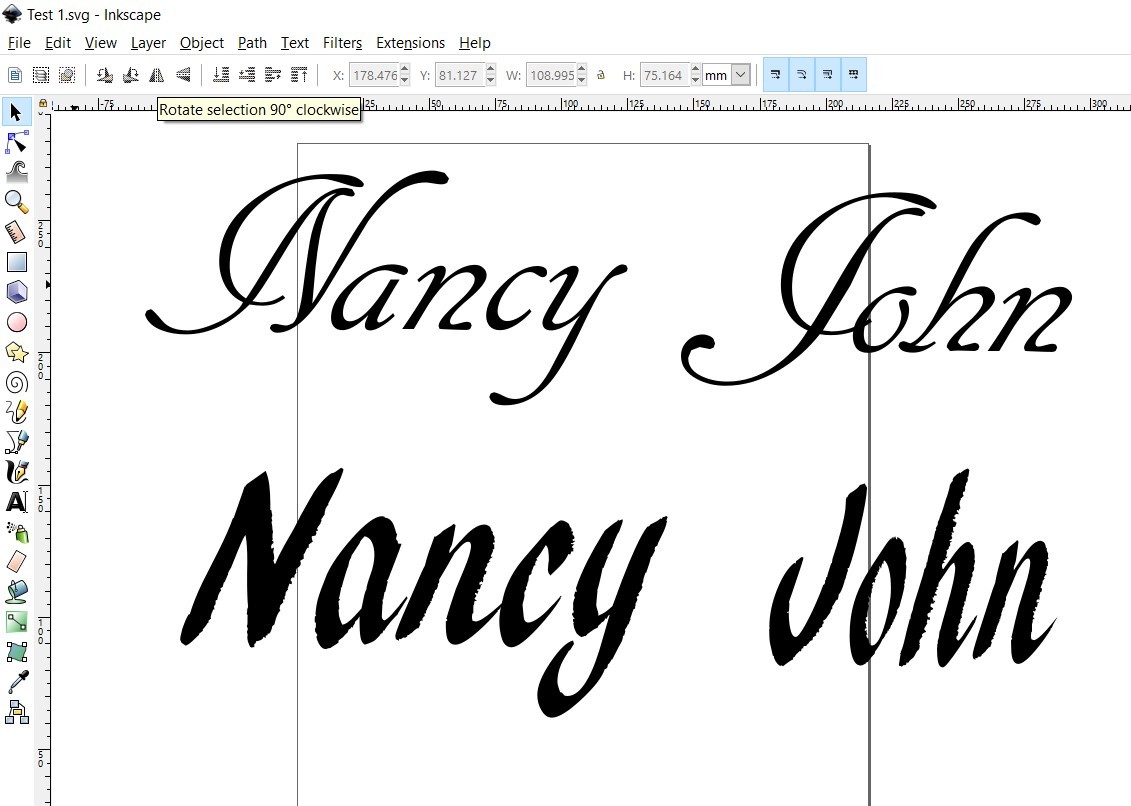


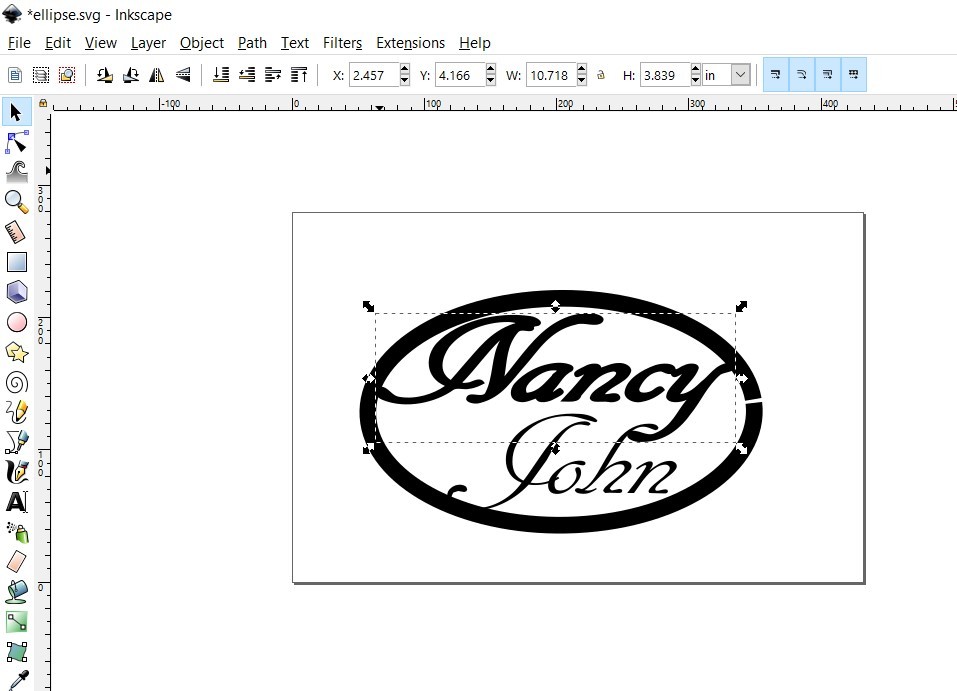
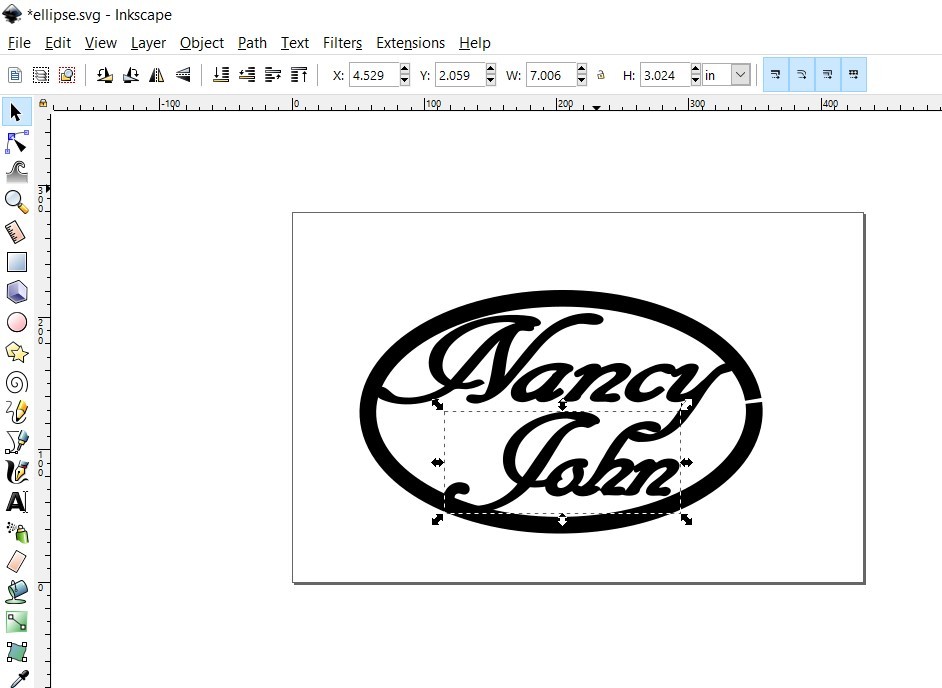
Note: This section is not an inkscape tutorial. You should have at least a basic knowledge before you start. There are many fine inkscape tutorials in YouTube.
You will need at least two inkscape windows open.
a. Make an ellipse in one inkscape window. (I refer to this as the 'ellipse' window.) I made the ellipse 7.25" high by 12" wide because that was the size of the oak I had on hand. Using the fill and stroke tool, make the ellipse one-half inch thick.
b. In a different inkscape window, put the names, separately, so that each can be moved individually. (I refer to this as the 'names' window.) Please note that in the second photo I put two copies of the names, using different fonts, just for comparison. I prefer a font which looks like script, so I decided to use the first. Potential problem is the first font is very thin. If letters were cut that thin, the final product would break. We will deal with the thickness problem in step g, below.
c. At this point, it is a good idea to move the letters closer together, because they will have to be connected in the final product. You can move letters closer or further apart with the horizontal kerning tool. On the left side of the inkscape screen, there is a vertical toolbar; choose the 'text' button (the 'A' button) in that toolbar. That will modify the second horizontal toolbar at the top, just under the main toolbar. In that horizontal toolbar, there are five tools for text modification: spacing between letters, spacing between words, horizontal kerning, vertical shift, and character rotation. Use the horizontal kerning feature to move letters close together so it is easier to connect them later on. This will take some practice.
d. Copy one name from the 'names' window into the 'ellipse' window.
e. Move the name into the ellipse and expand so that the name touches the inside of the ellipse at several places.
f. Copy the second name from the 'names' window into the 'ellipse' window.
g. Move the second name into the ellipse and expand so that the name touches the inside of the ellipse at several places. Don't worry if the names do not touch the ellipse at every point you want. Both names will be adjusted later on.
h. Make the first name thicker using outset in inkscape. How to use outset:
***** Select the name
***** In the toolbar at top, click on path.
***** In the drop-down list, click on outset.
i. Make the second name thicker using outset.
NOTES about outset.
******* I found that doing outset just once gave sufficient thickness for final design and cutting, but you can do outset as many times as you like.
******* Now that you have done outset, the name should touch the ellipse a little more.
******* Once you have outset a name, it is difficult to re-position the name within the ellipse. It might be a good idea to never do outset when the name is in the 'names' window. Instead do outset after you have moved the name to the 'ellipse' window.
******* When I was dissatisfied with results of the move, enlarge and outset, I found it easiest to delete names from the 'ellipse' window and recopy them from the 'names' window. That is why I recommend you never outset a name until the name is in the 'ellipse' window.
Print and Adjust Pattern, Prepare for Scroll Sawing
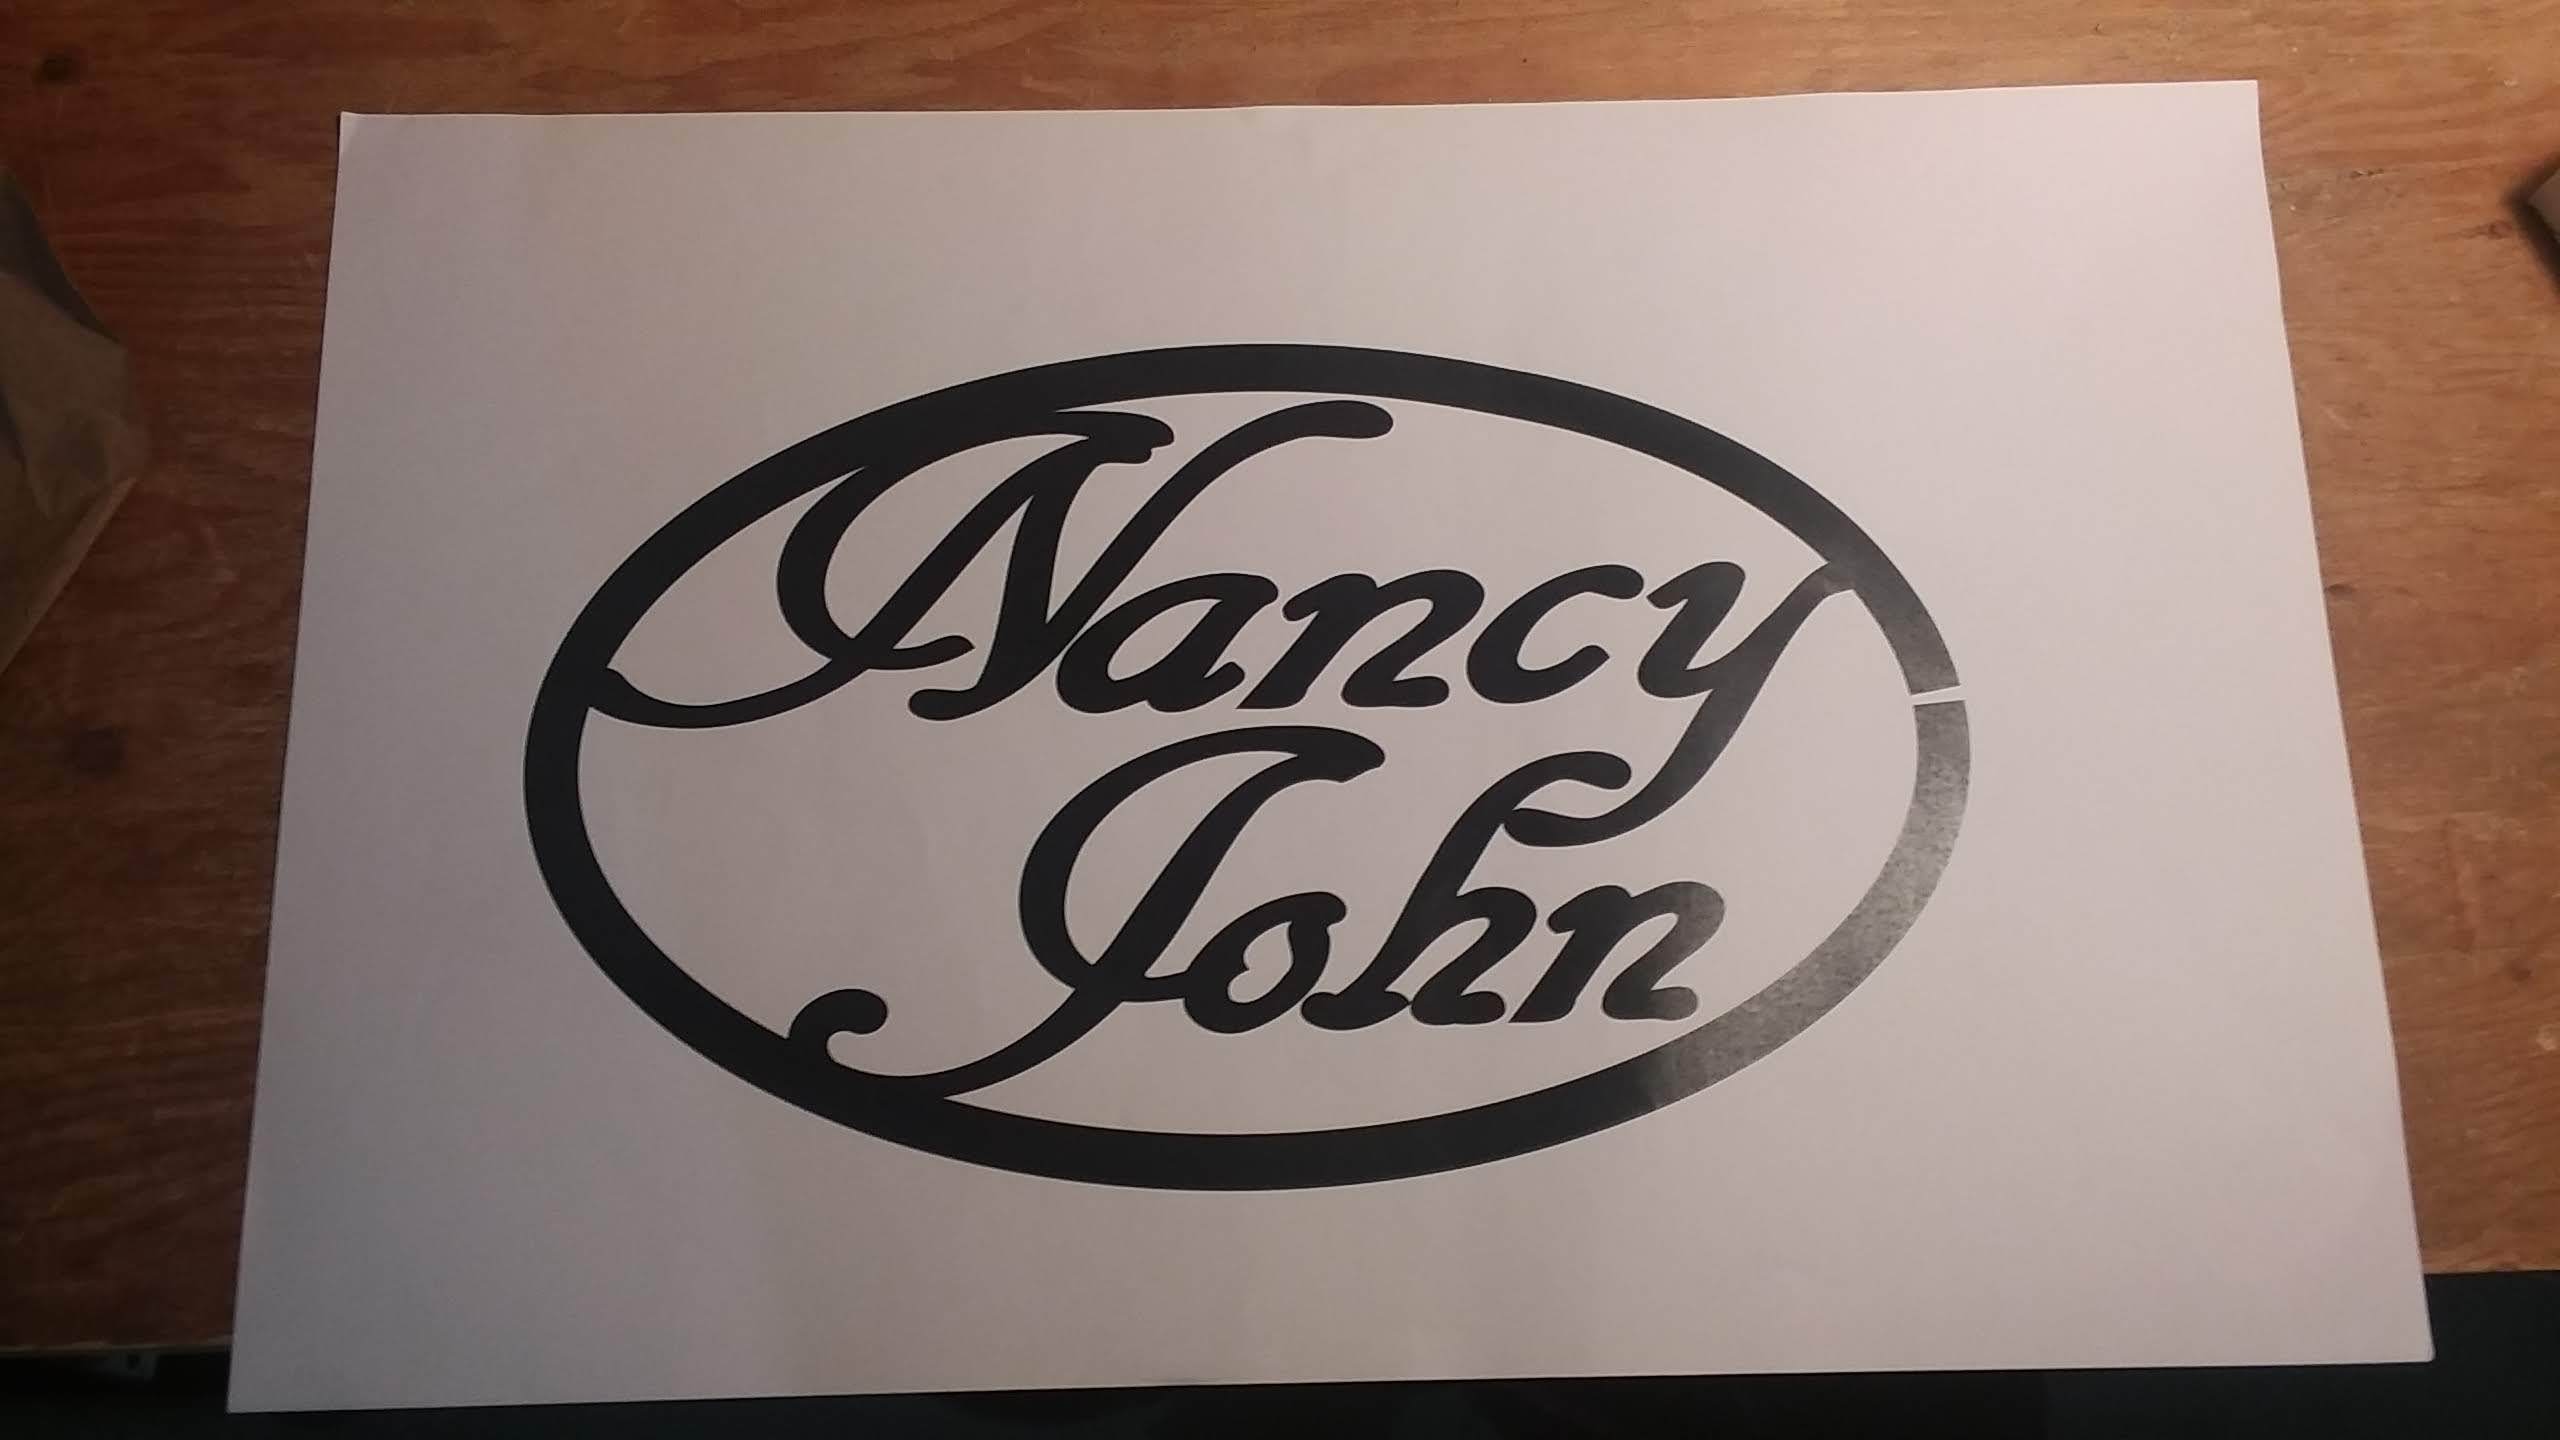



a. When satisfied with the design, print the pattern on 11' x 17' paper. My home printer has no capacity for 11" x 17", so I saved the inkscape image using File, Save a Copy, pdf. I copied the pdf to a usb stick, took it to a store which has copy machines and printed on 11" x 17" paper.
You can see the printed design in the first image above.
b. Cut the ellipse.
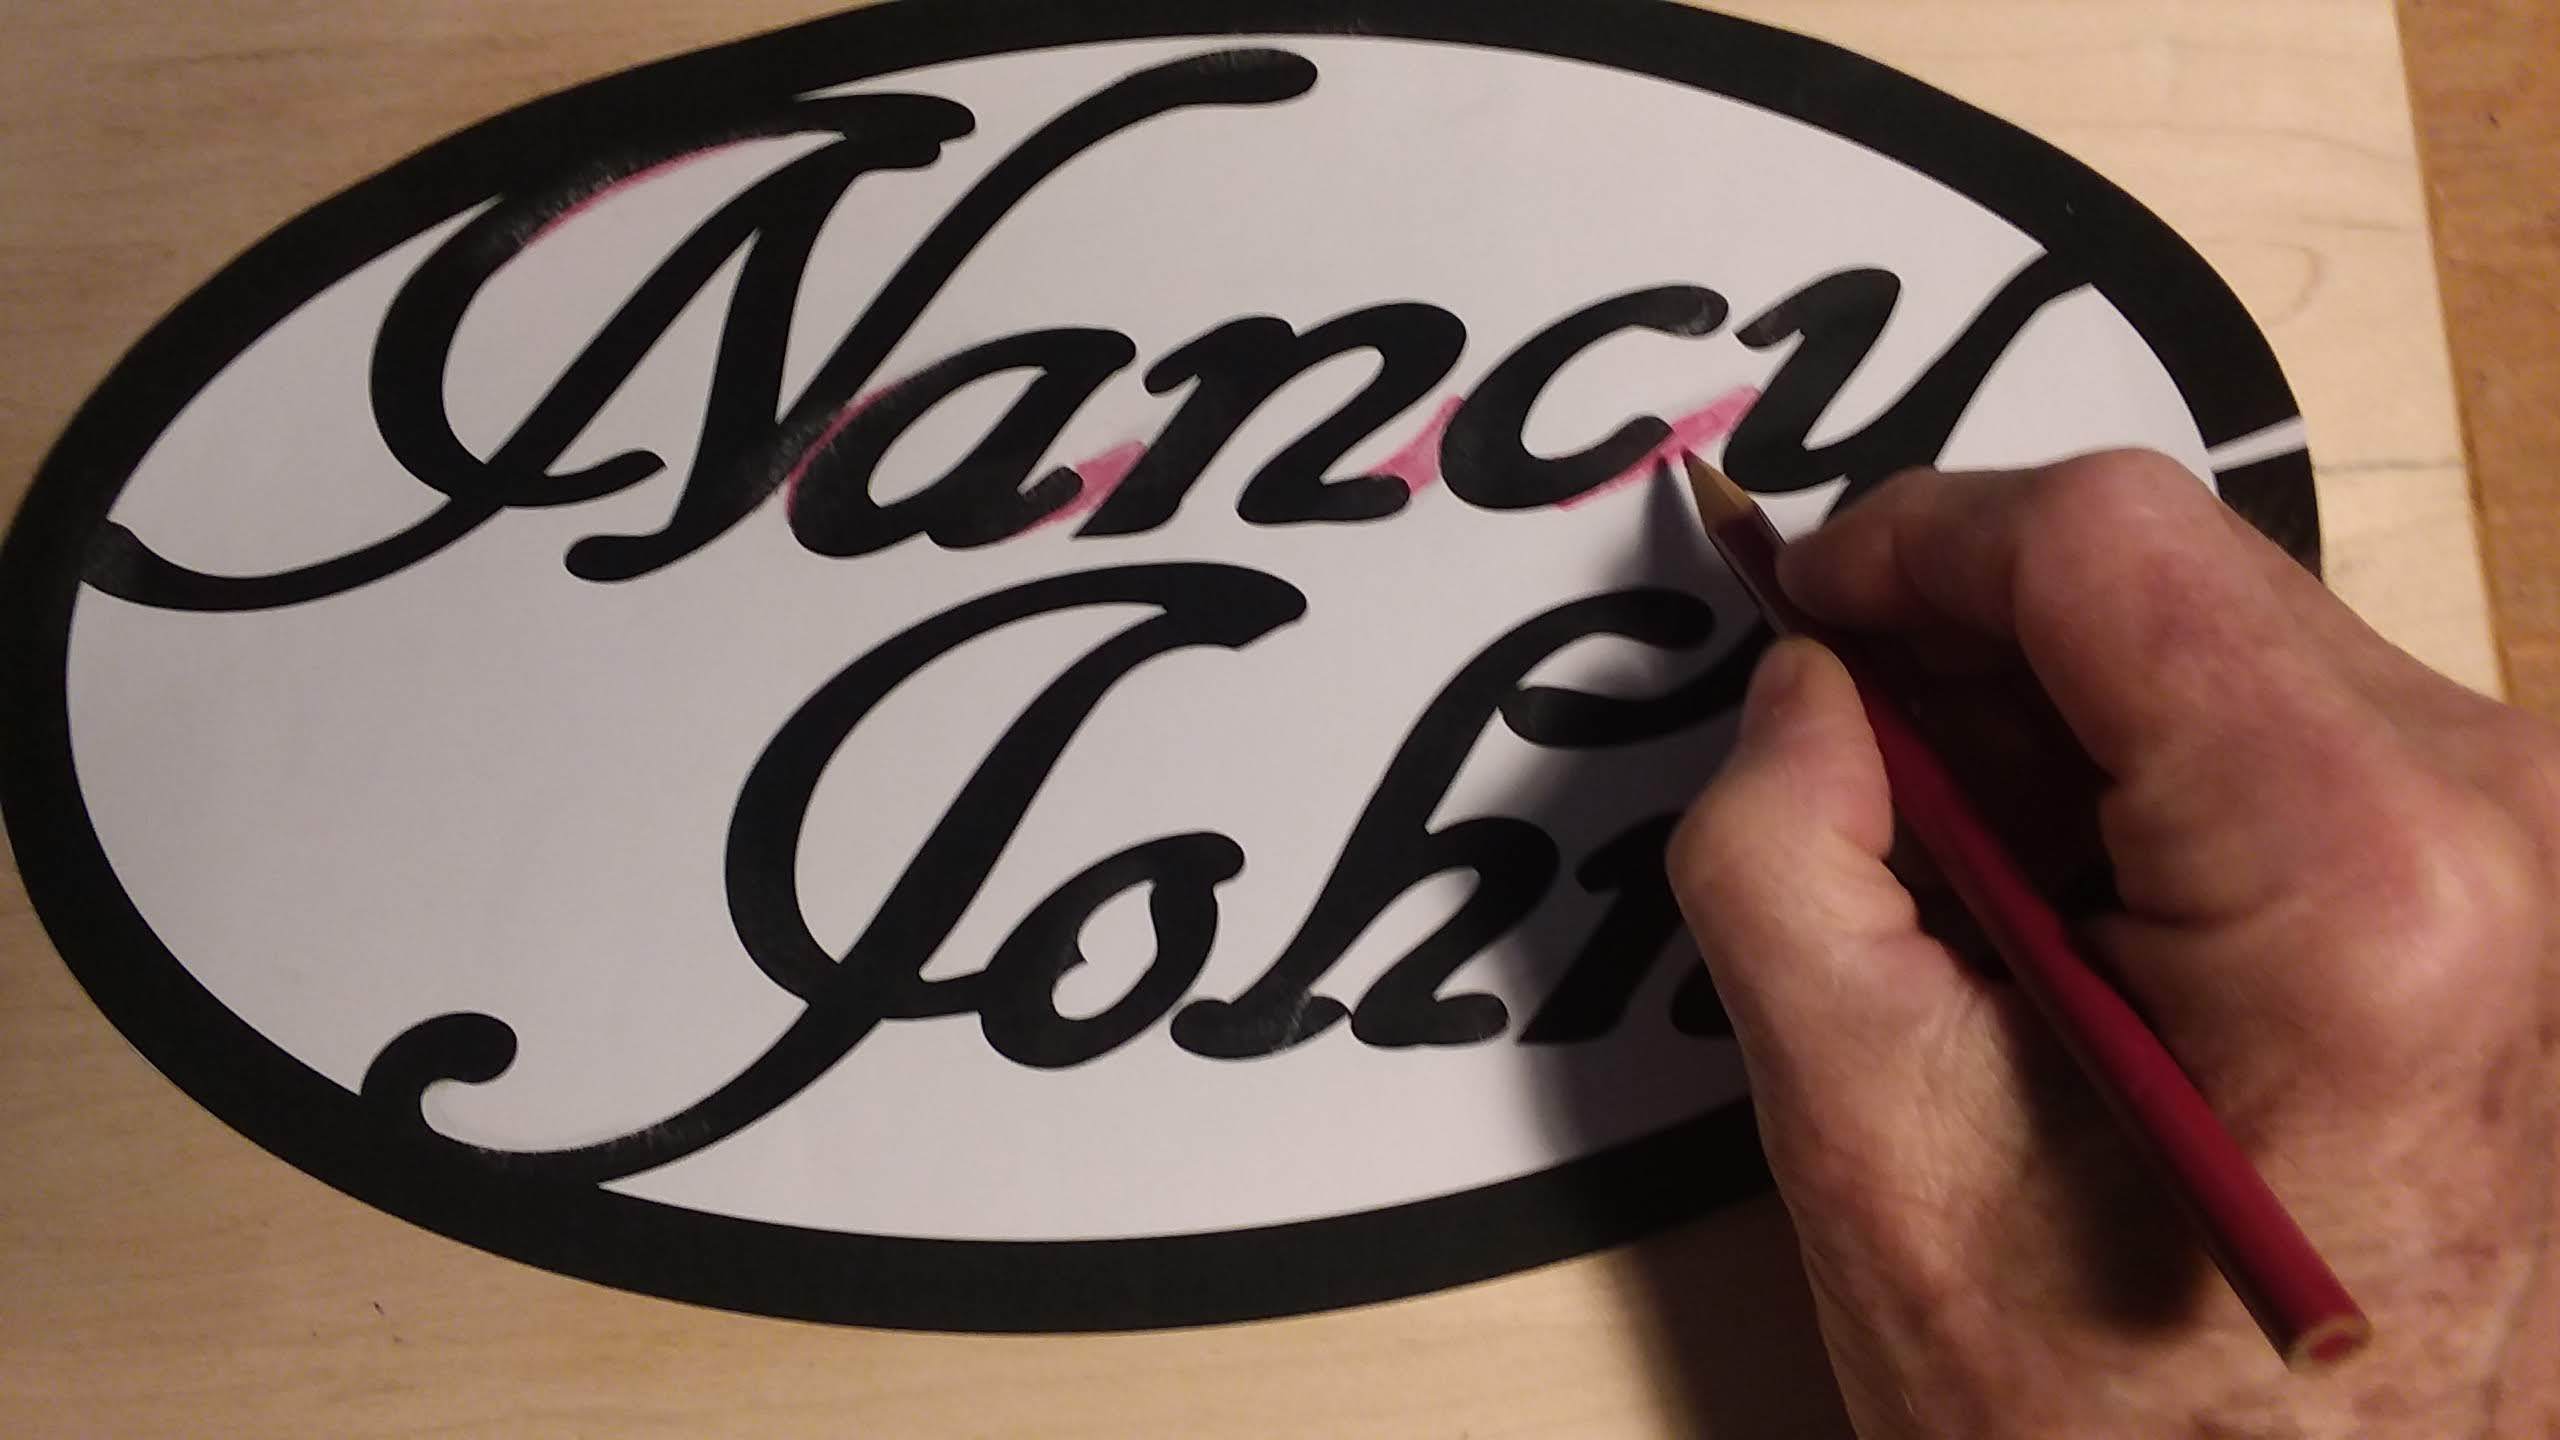
c. Using a pencil, draw connections so that all letters of a name are connected and each name is connected to the ellipse at suitable points. Here I used a red pencil so connections can easily be seen.
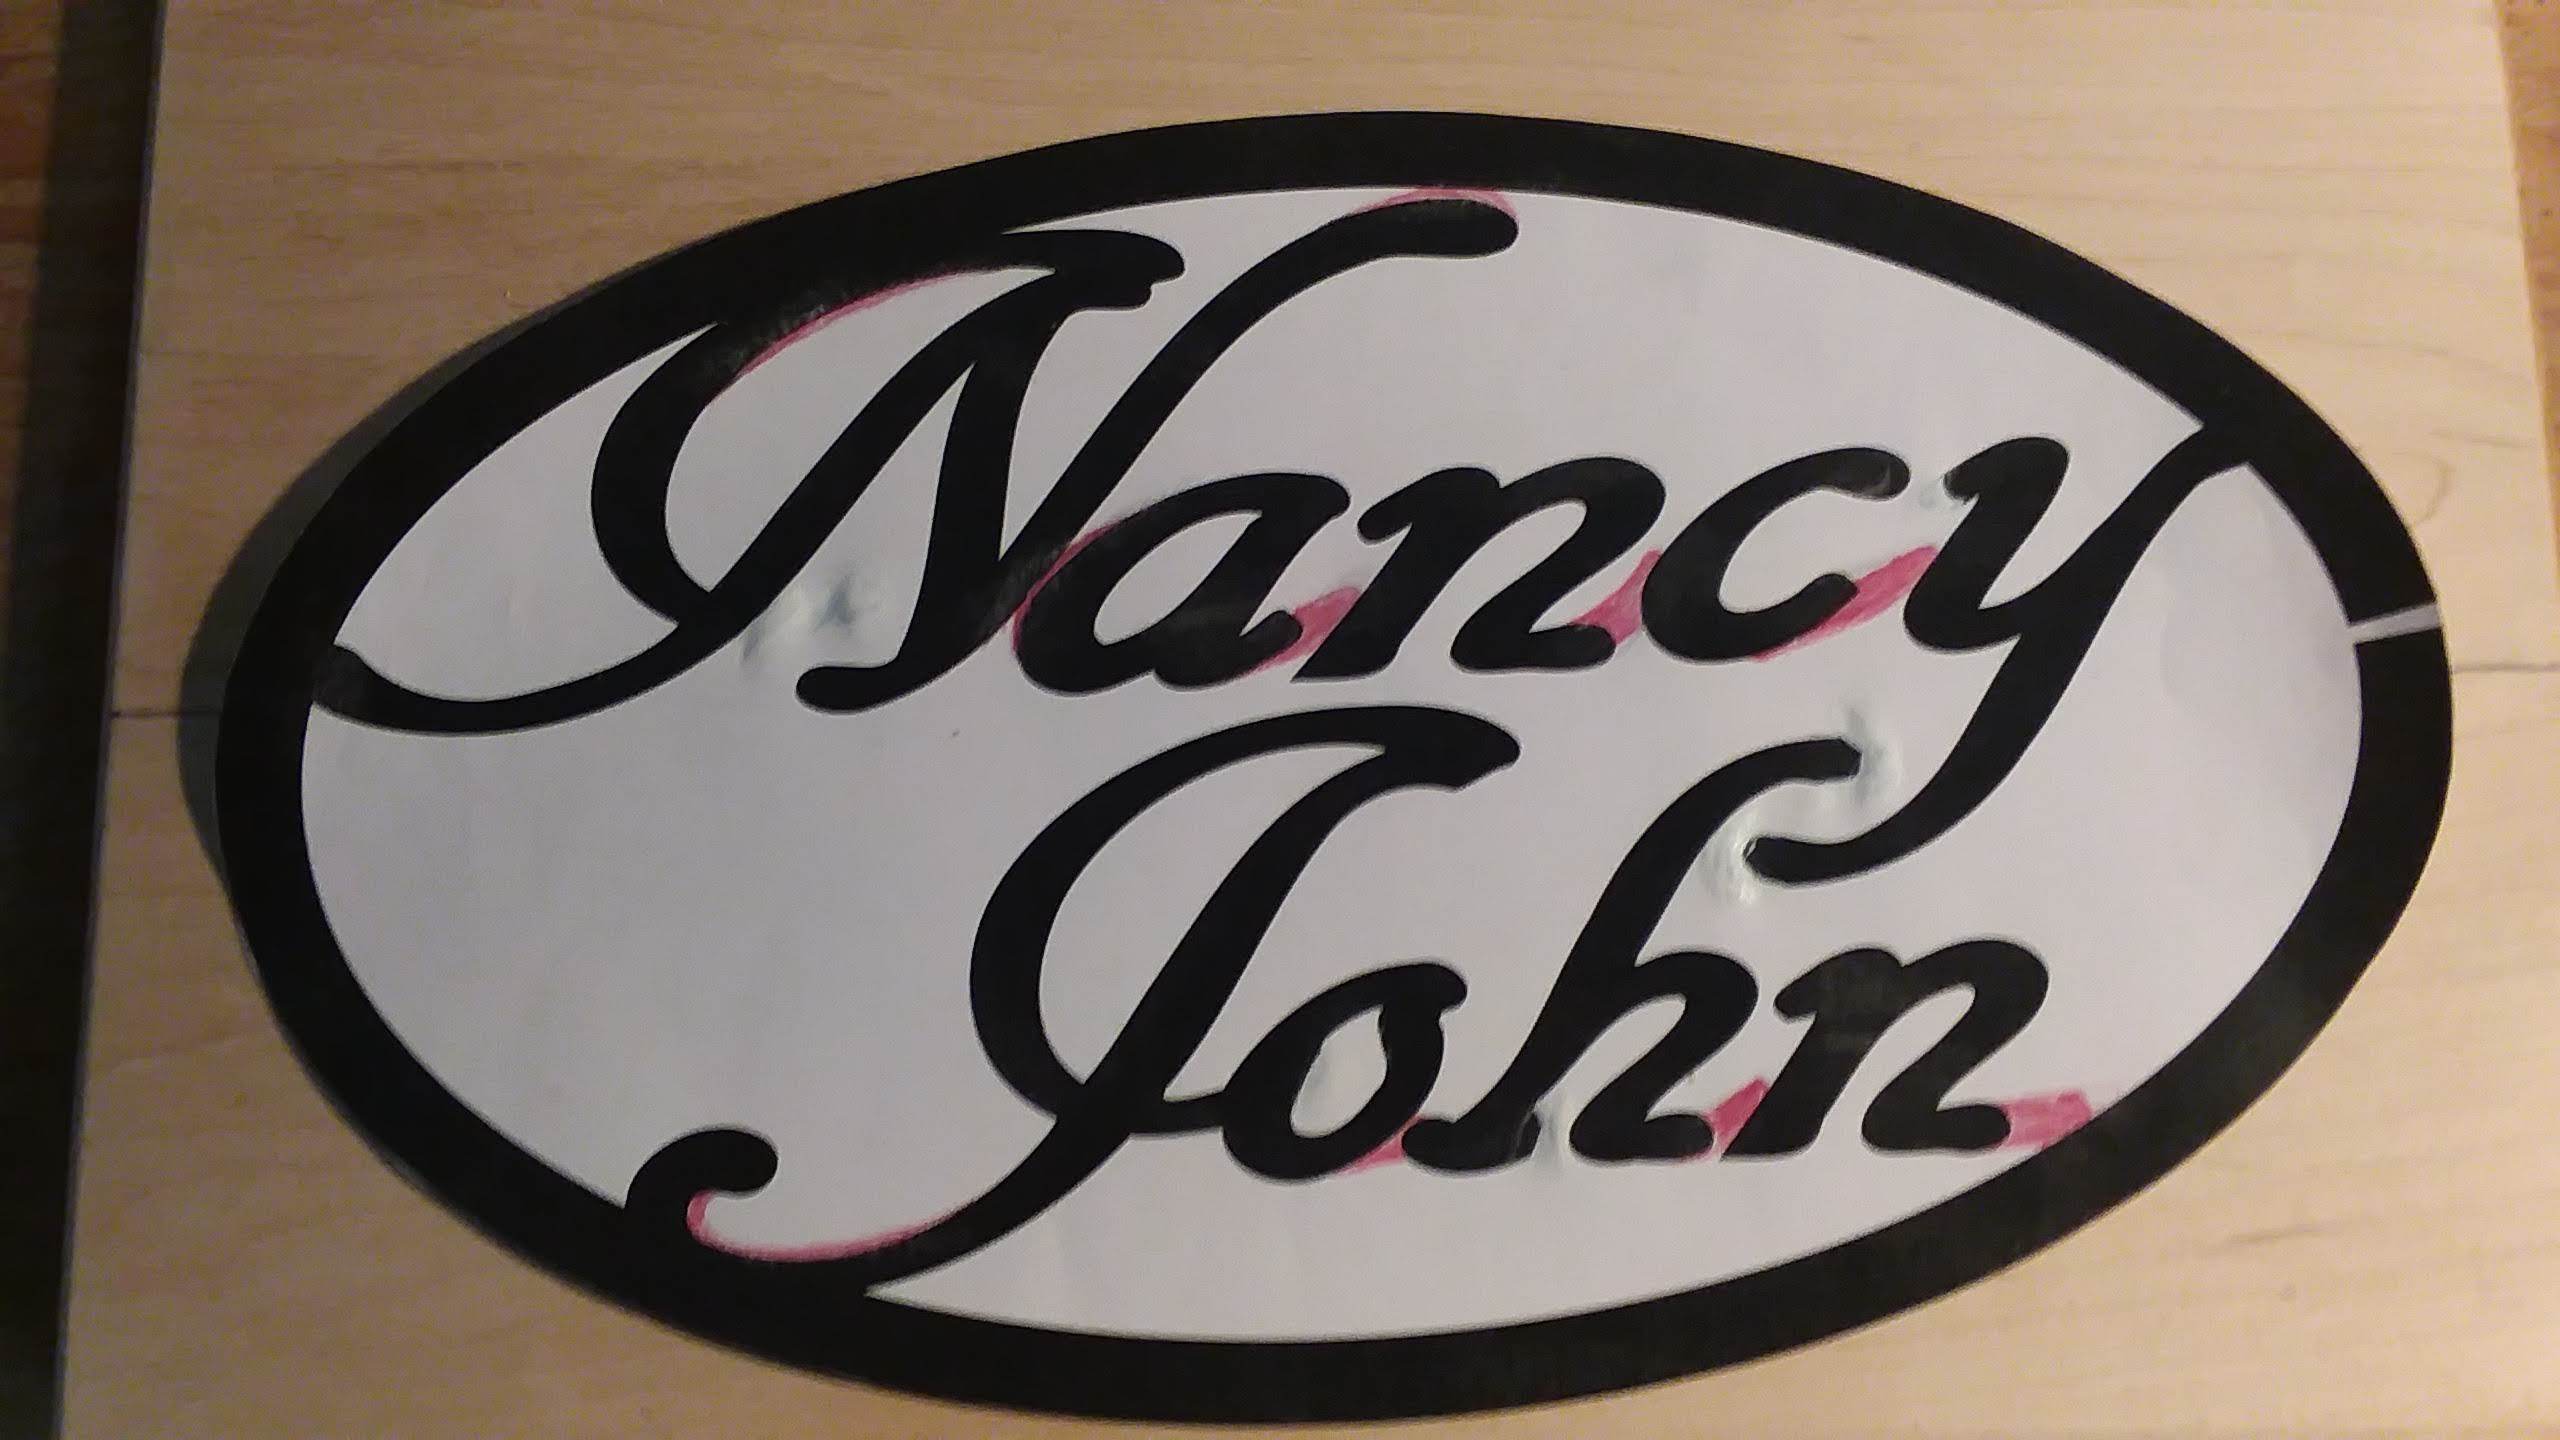
d. Using white craft paint or a white pencil, adjust letters so they are not too close. Notice I increased the distance between the 'h' and the 'y'. The fourth photo above shows the resulting pattern after using red pencil to connect and white craft paint to add distance.
e. Using light duty adhesive, apply the pattern to the wood. Please ignore the two holes in the oak. I was using re-claimed wood. Those two holes will not appear in the final product.
f. Prepare for scroll sawing by drilling holes where necessary.
g. The seventh photo above shows design adjusted, pattern attached to wood and holes drilled.
Cut and Sand

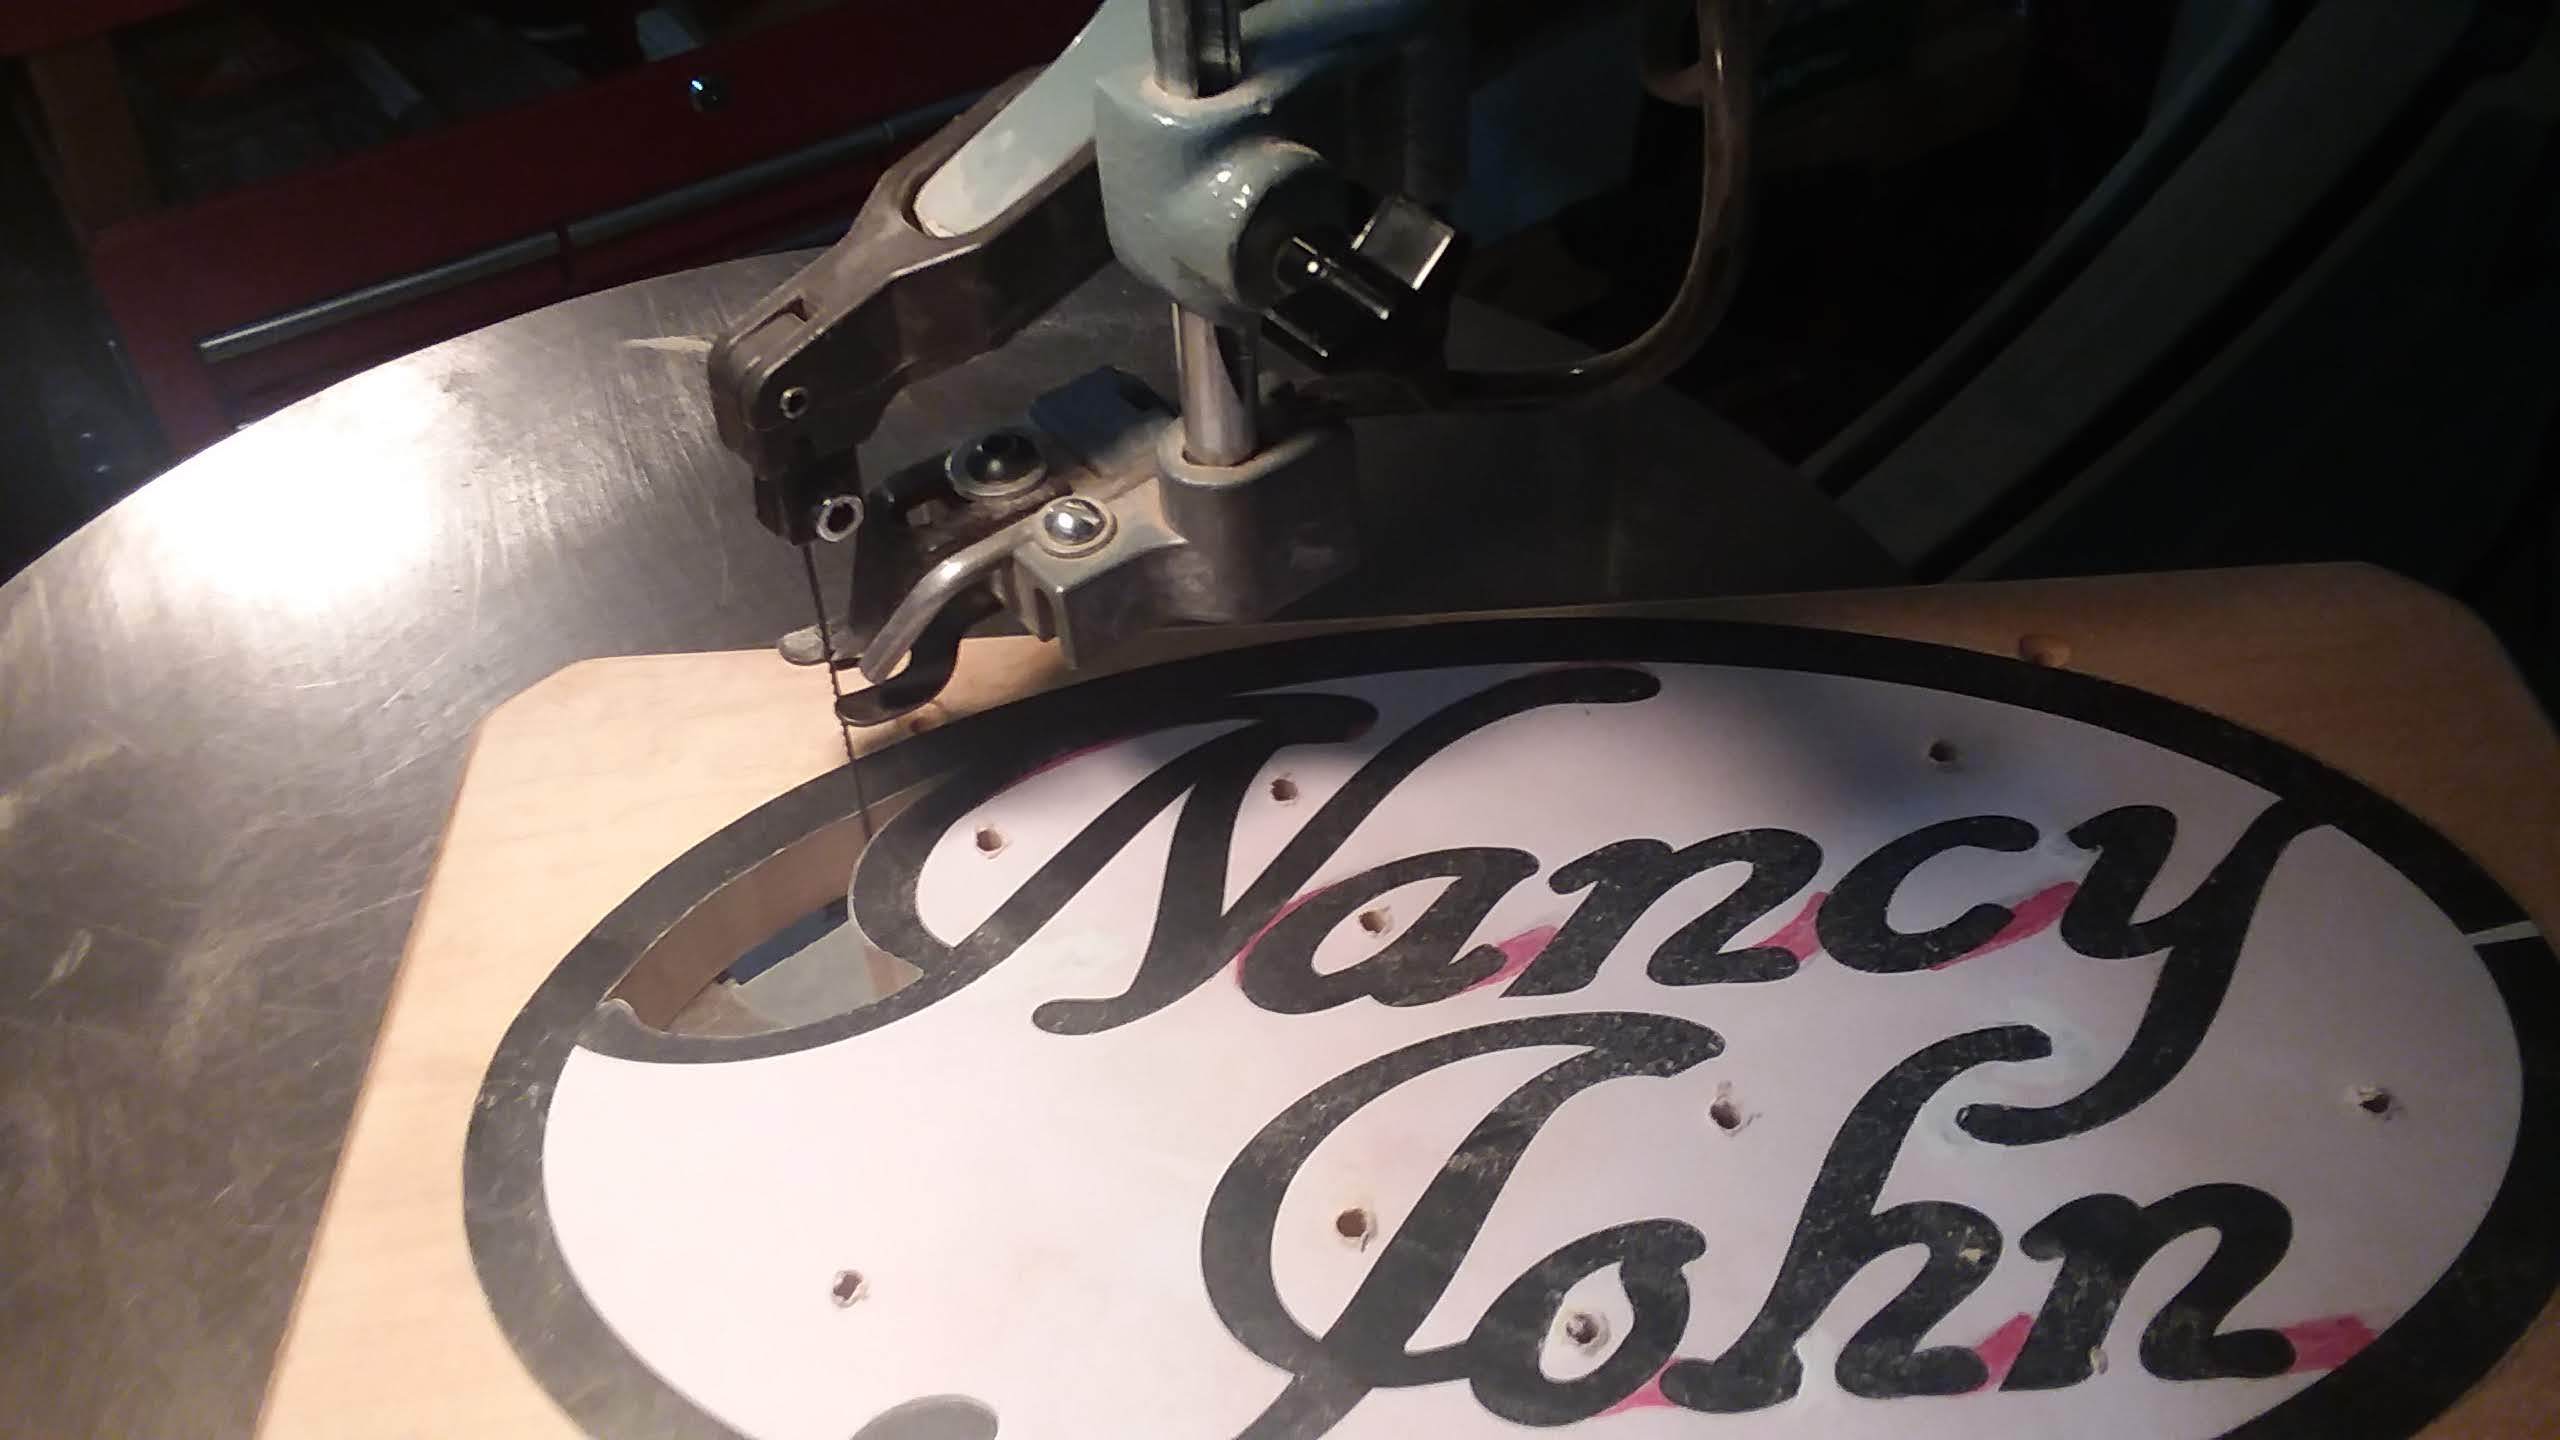


Cutting and Sanding are challenging. It is important to avoid breaking small pieces during cutting and sanding. The more cutting you do, the more difficult it is to sand. In order to reduce the possibility of breakage, I cut a section, sand that section, then cut another section and sand that section. The purpose is to do as much sanding as possible while there is plenty of surrounding wood to strengthen the section being sanded.
a. The first photo shows tools I use for sanding: small files, sandpaper, small flat stick and small dowel. All sanding in this step is manual. I have not found any motorized sander which can effectively smooth interior surfaces of the letters without risk of breakage.
b. Cut the insides of letters, such as 'a' and 'o'.
c. Sand and file the places just cut.
d. Cut a larger section.
e. Sand and file.
f. Cut another larger section. Sand and file.
g. Cut another larger section. Sand and file.
h. Cut the outside of the ellipse. This can be done on a scroll saw or a band saw.
i. Outside of ellipse must be sanded.
j. Sanding outside of ellipse can be done on a disc sander.
k. Sanding outside of ellipse is complete.
l. Paper pattern and glue residue must be carefully removed. Paint thinner or alcohol may be useful. For me the best way was carefully tearing the paper with fingers and using a putty knife or a single edge razor blade.
m. After pattern is removed all glue residue must be removed. Careful sanding worked for me.
n. Wooden front is clean.
Final Steps





a. If desired, add your initials and date to the back. I do this by wood burning.
b. Apply topcoat of your choice. I usually use shellac. This photo shows first coat of shellac partially applied. Allow to dry then apply shellac to back.
c. Very light sanding then apply second coat of shellac, first to front then back.
d. When installing hanger, be very careful to avoid splitting wood. Do not install nails or screws vigorously. If you drill, be careful to drill only partway through the ellipse. I usually drill a hole partway through the ellipse that is larger than needed and set in each screw or nail with a tiny bit of epoxy.
e. Finished product.