Woodwork Bench Vise From Scrap
by SpiritandBear in Workshop > Woodworking
4771 Views, 65 Favorites, 0 Comments
Woodwork Bench Vise From Scrap

I have needed a vise for woodwork for sometime and having made a new bench I thought it was time to take a look at what I could make without spending too much.
this may not be the best of instructables as I lost a lot of the pictures that should have been included but you should get the idea
Materials


- Two Lengths of Hardwood for the jaws
- two lengths of hardwood for the mounts
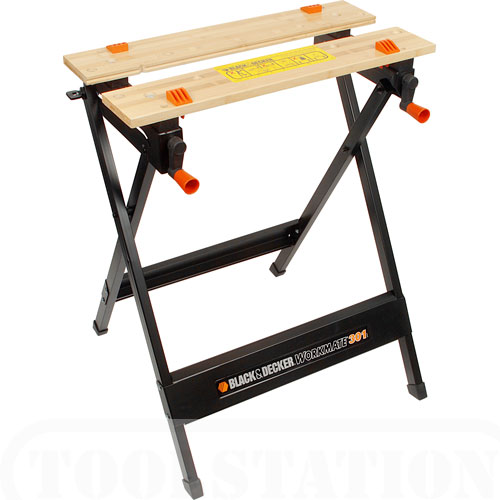
- vise screws,handles and threaded fittings from a scrap workmate
- two lengths of steel bar diameter to suit the vise (stainless steel would be better)
- two metal pieces of flat metal (steel or aluminium is fine)
- two blots that fit the threaded fittings from the workmate ( mine were 8 mm)
- screws to mount the vise and fit the metal plates
Joints and Layout


the first step is to decide what joint to use to join the mounts to the rear or fixed jaw, this could be a halflap joint or as in my example a mortise and tenon joint.
I started this by creating a tenon on both the mounting pieces, followed by marking the mortise on the fixed jaw so that the top of the jaw would be flush with the top of the bench, while marking this out it's a good idea to extend the mortise center line passed the mortise a little way towards the center so the holes for the vise screw are centered with the mounts.
With the mortises cut to fit the tenons we need to drill the two holes for the vise screws to pass through, you will need to measure the fittings to find the center for the hole as they vary between brands.
with the holes in the fixed jaw drilled clamp the front jaw to the fixed jaw and drill the front jaw through the fixed jaw so the holes align.
once drilled remove from the fixed jaw and enlarge the holes so the flared section of the vise screw can pass through comfortably (don't make it too tight or the flared section of the vise screw will bind against the jaw during operation).
Metal Plates and Fittings


it's now time to turn our attention to the fittings.
for the vise to operate we need two metal plates with one hole in the center for the vise screw to pass through and at least 2 mounting holes, these can be either mounted on the front of the vise or recessed so the plate is flush with the front surface of the vise depending on your personal choice, I chose to recess mine but could have done a better job of it.
With the metal plates fitted, and the mounts push fitted into the mortises put the vise screws through the fixed jaw and wind the vise screws all the way into the threaded fittings removed from the workmate, then place your front jaw in position, you should now be able to mark the center line for the fixing bolt through the rear mount.
at this point once assembled you would have a working vise but it would bind up very easy and the jaws would not stay inline very well, to combat this I added the two steel bars to act as guides the ones i chose to use were 16 mm plain steel which used to be a axle taken from an old sack truck (stainless steel would be better), these i have placed on the outer edges of the vise with one end fixed to the front jaw using epoxy resin and the other end passing through the fixed jaw
Assembly


with all the parts made it's time to assemble
Apply you preferred wood glue to the tenons of the mounts and fit to the fixed jaw once dry you can further reinforce the joint by adding dowels from the bottom should you choose
fix the guide bars to the front jaw using epoxy resin and leave to cure, once cured (usually over night) you can complete the assembly of the vise then all's left to do is apply your favorite finish and fit to your bench
Improvements

While this vise is working very well for me I think it could open and close a little smoother so I have ordered some bearings as in the picture above these are used on cnc machines and can be picked up from ebay quite cheaply, these I will fit them into the fixed jaw for the guide bars to pass through.
Conclusion

Once again my apologies for the lack of pictures but I hope this helps someone to build their own.
The hardwood used in this project was from a machine pallet, the vise screws were from an old workmate and the guide bars were an axle from a sack truck so this cost me nothing to build and 100% recycled