World's First Spatial Computer: See and Photograph Sound Waves With a Low-cost Home-made S.W.I.M.
by SteveMann in Teachers > University+
6693 Views, 51 Favorites, 0 Comments
World's First Spatial Computer: See and Photograph Sound Waves With a Low-cost Home-made S.W.I.M.
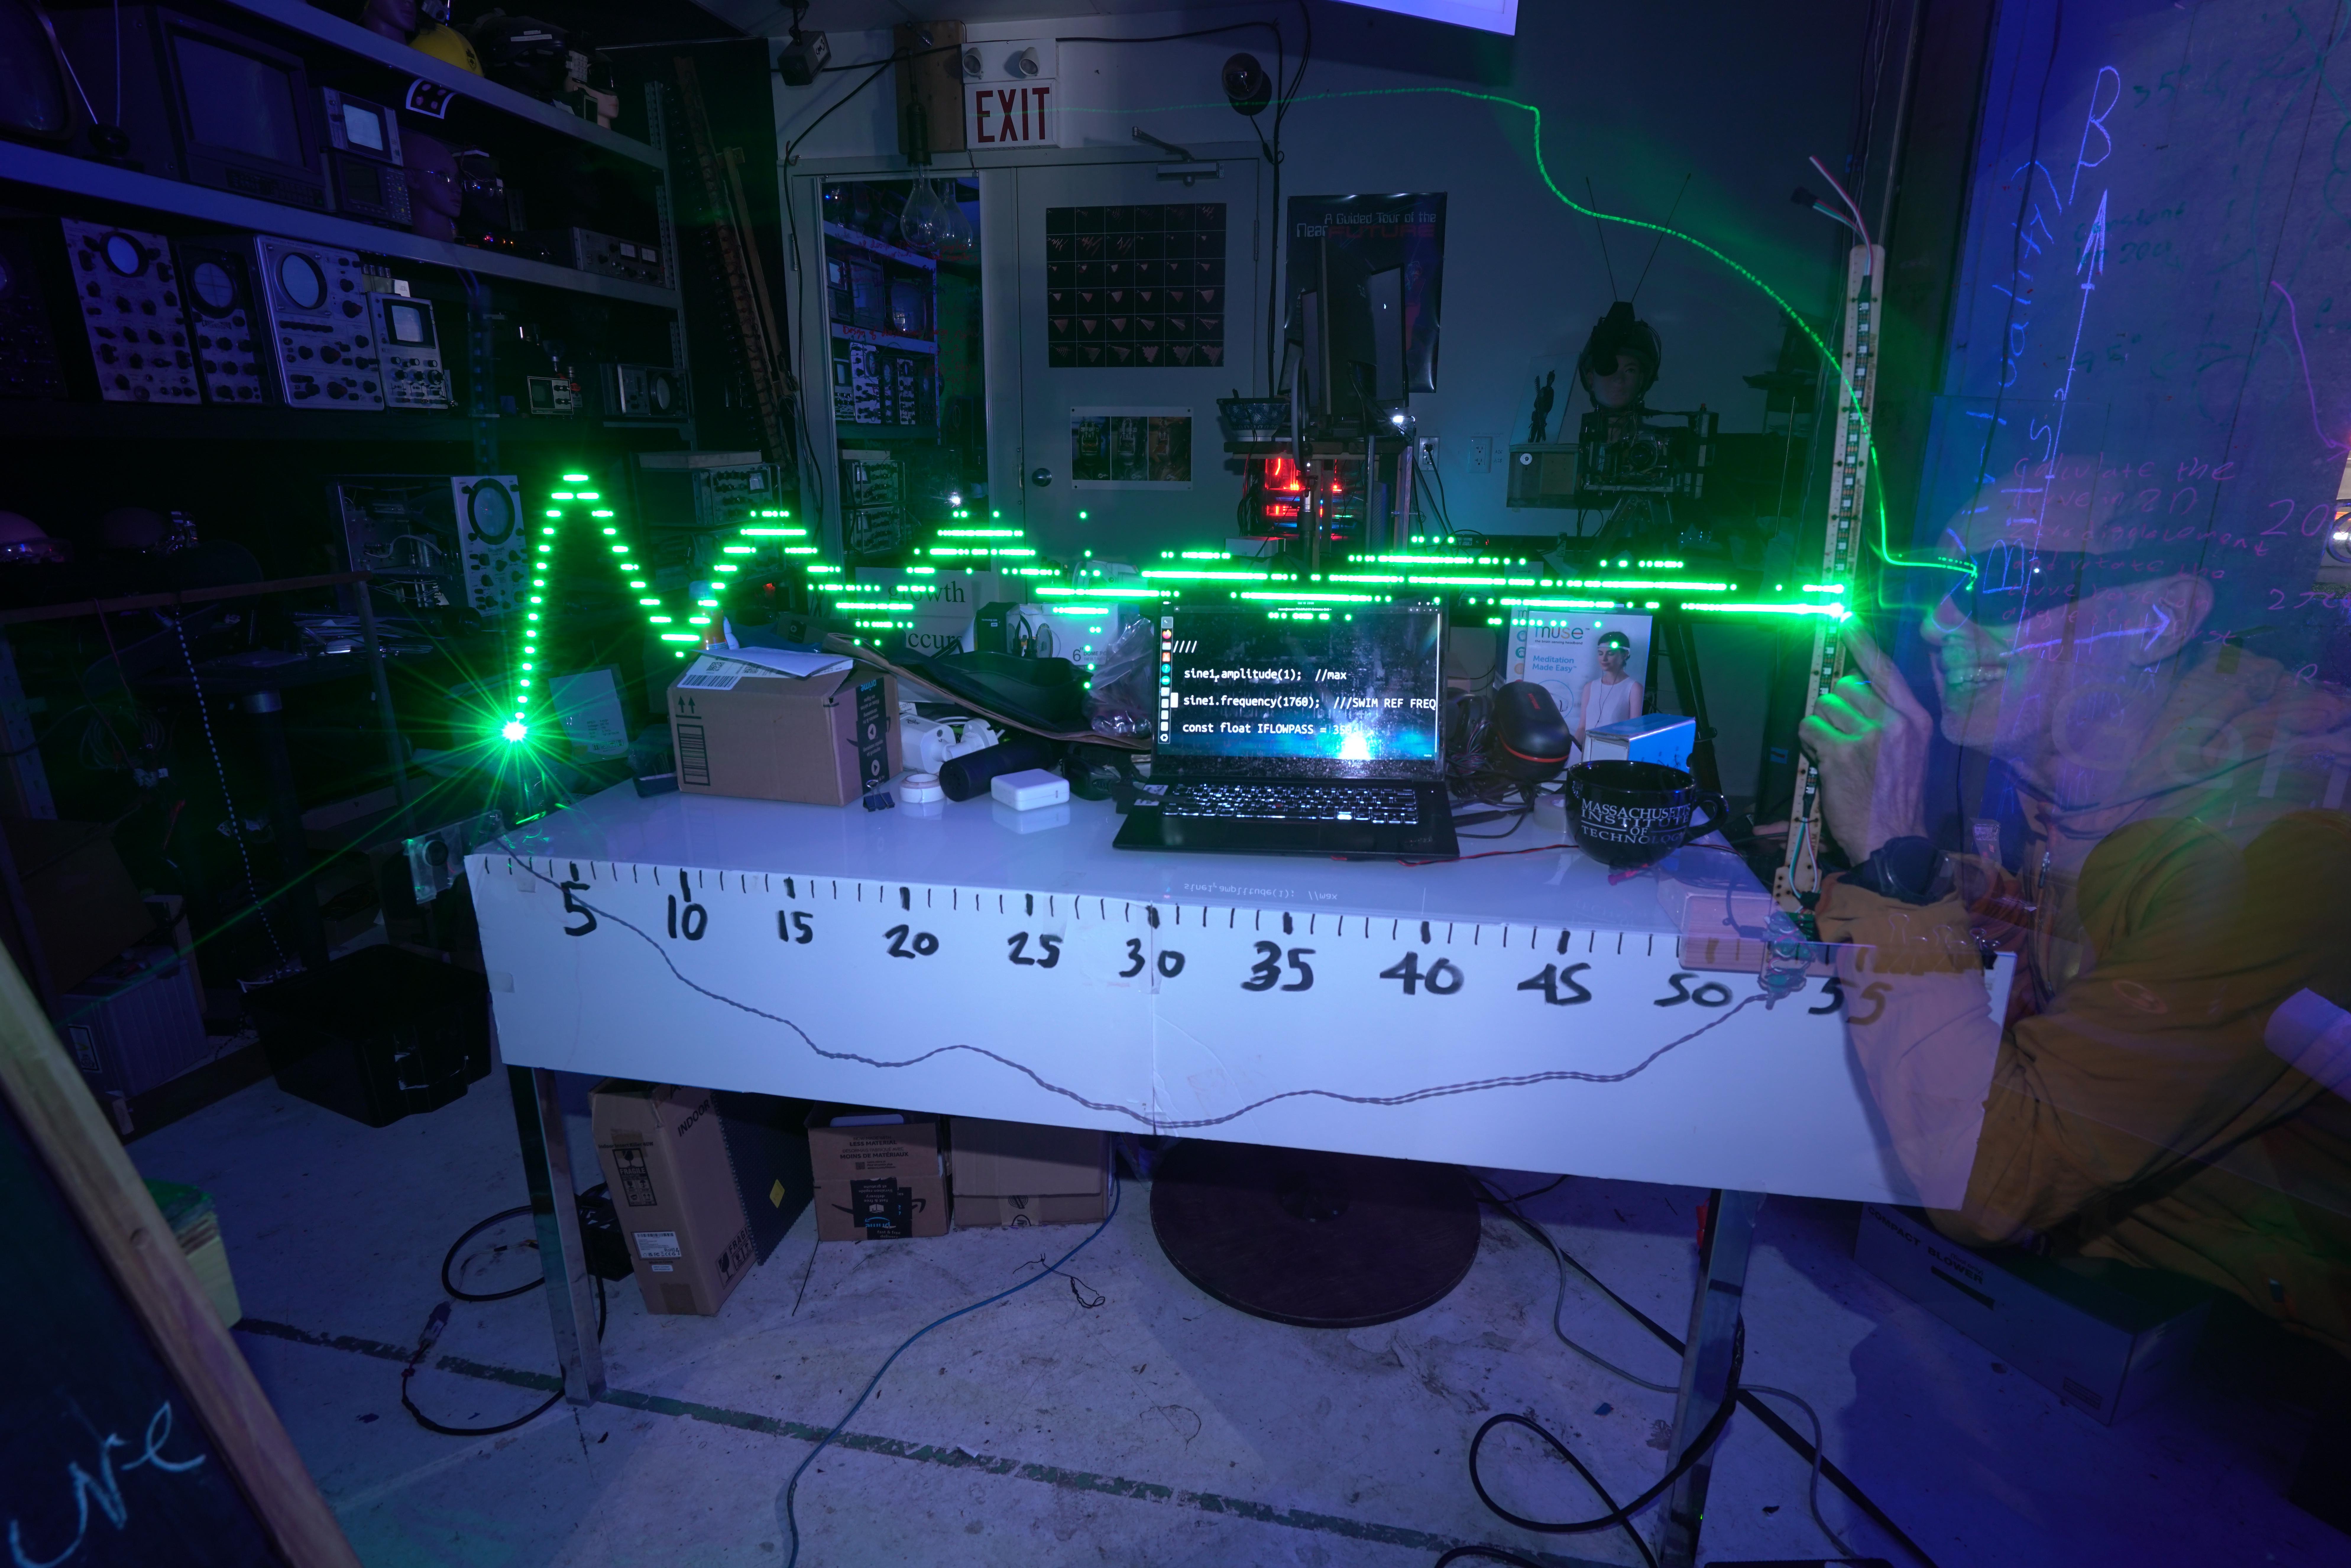
See and photograph sound waves with this replica of the SWIM (Sequential Wave Imprinting Machine), invented in Canada in 1974. It was the world's first spatial computer, and the predecessor of the metaverse. SWIM is a form of XR (eXtended Reality) allowing you to see and capture sound waves aligned perfectly with physical spatial reality. Whereas an oscilloscope displays sound waves as a function of time, the SWIM displays sound waves as a function of space. Here we use the simple Teensy-based audio system of the previous Instructable as a lock-in amplifier connected to an addressable strip of LEDs.
For an historical account of this invention, see "Phenomenological Augmented Reality with the Sequential Wave Imprinting Machine (SWIM)", Steve Mann, 2018 IEEE Games, Entertainment, Media Conference (GEM), 15-17 August 2018, DOI: 10.1109/GEM.2018.8516502, Galway, Ireland. If you have trouble logging into IEEE Xplore, you can see a preprint in http://wearcam.org/gem2018.pdf
See also Mann and Wyckoff 1991 (http://wearcam.org/xr.htm)
Supplies
You'll need the lab kit from my previous Instructable (Teensy with Teensy sound card), together with large-print ruler, a table, a slider (e.g. blocks of wood or other material that can slide along the table), a long stick to attach to the slider so it slides at right angles to the table, and an addressable LED strip. When I built the original SWIM in 1974 there was no such thing as an addressable strip of lights, so I had to invent, design, and build the world's first addressable strip of lights for this project. See http://wearcam.org/swimvention.htm
Fortunately for you, today, there are lots of addressable light strips available on the market. Here a short strip of 24 LEDs is sufficient, although you can get strips that have higher density and higher number of LEDs.
Make a Large-print Ruler That Is Easy to See in Pictures

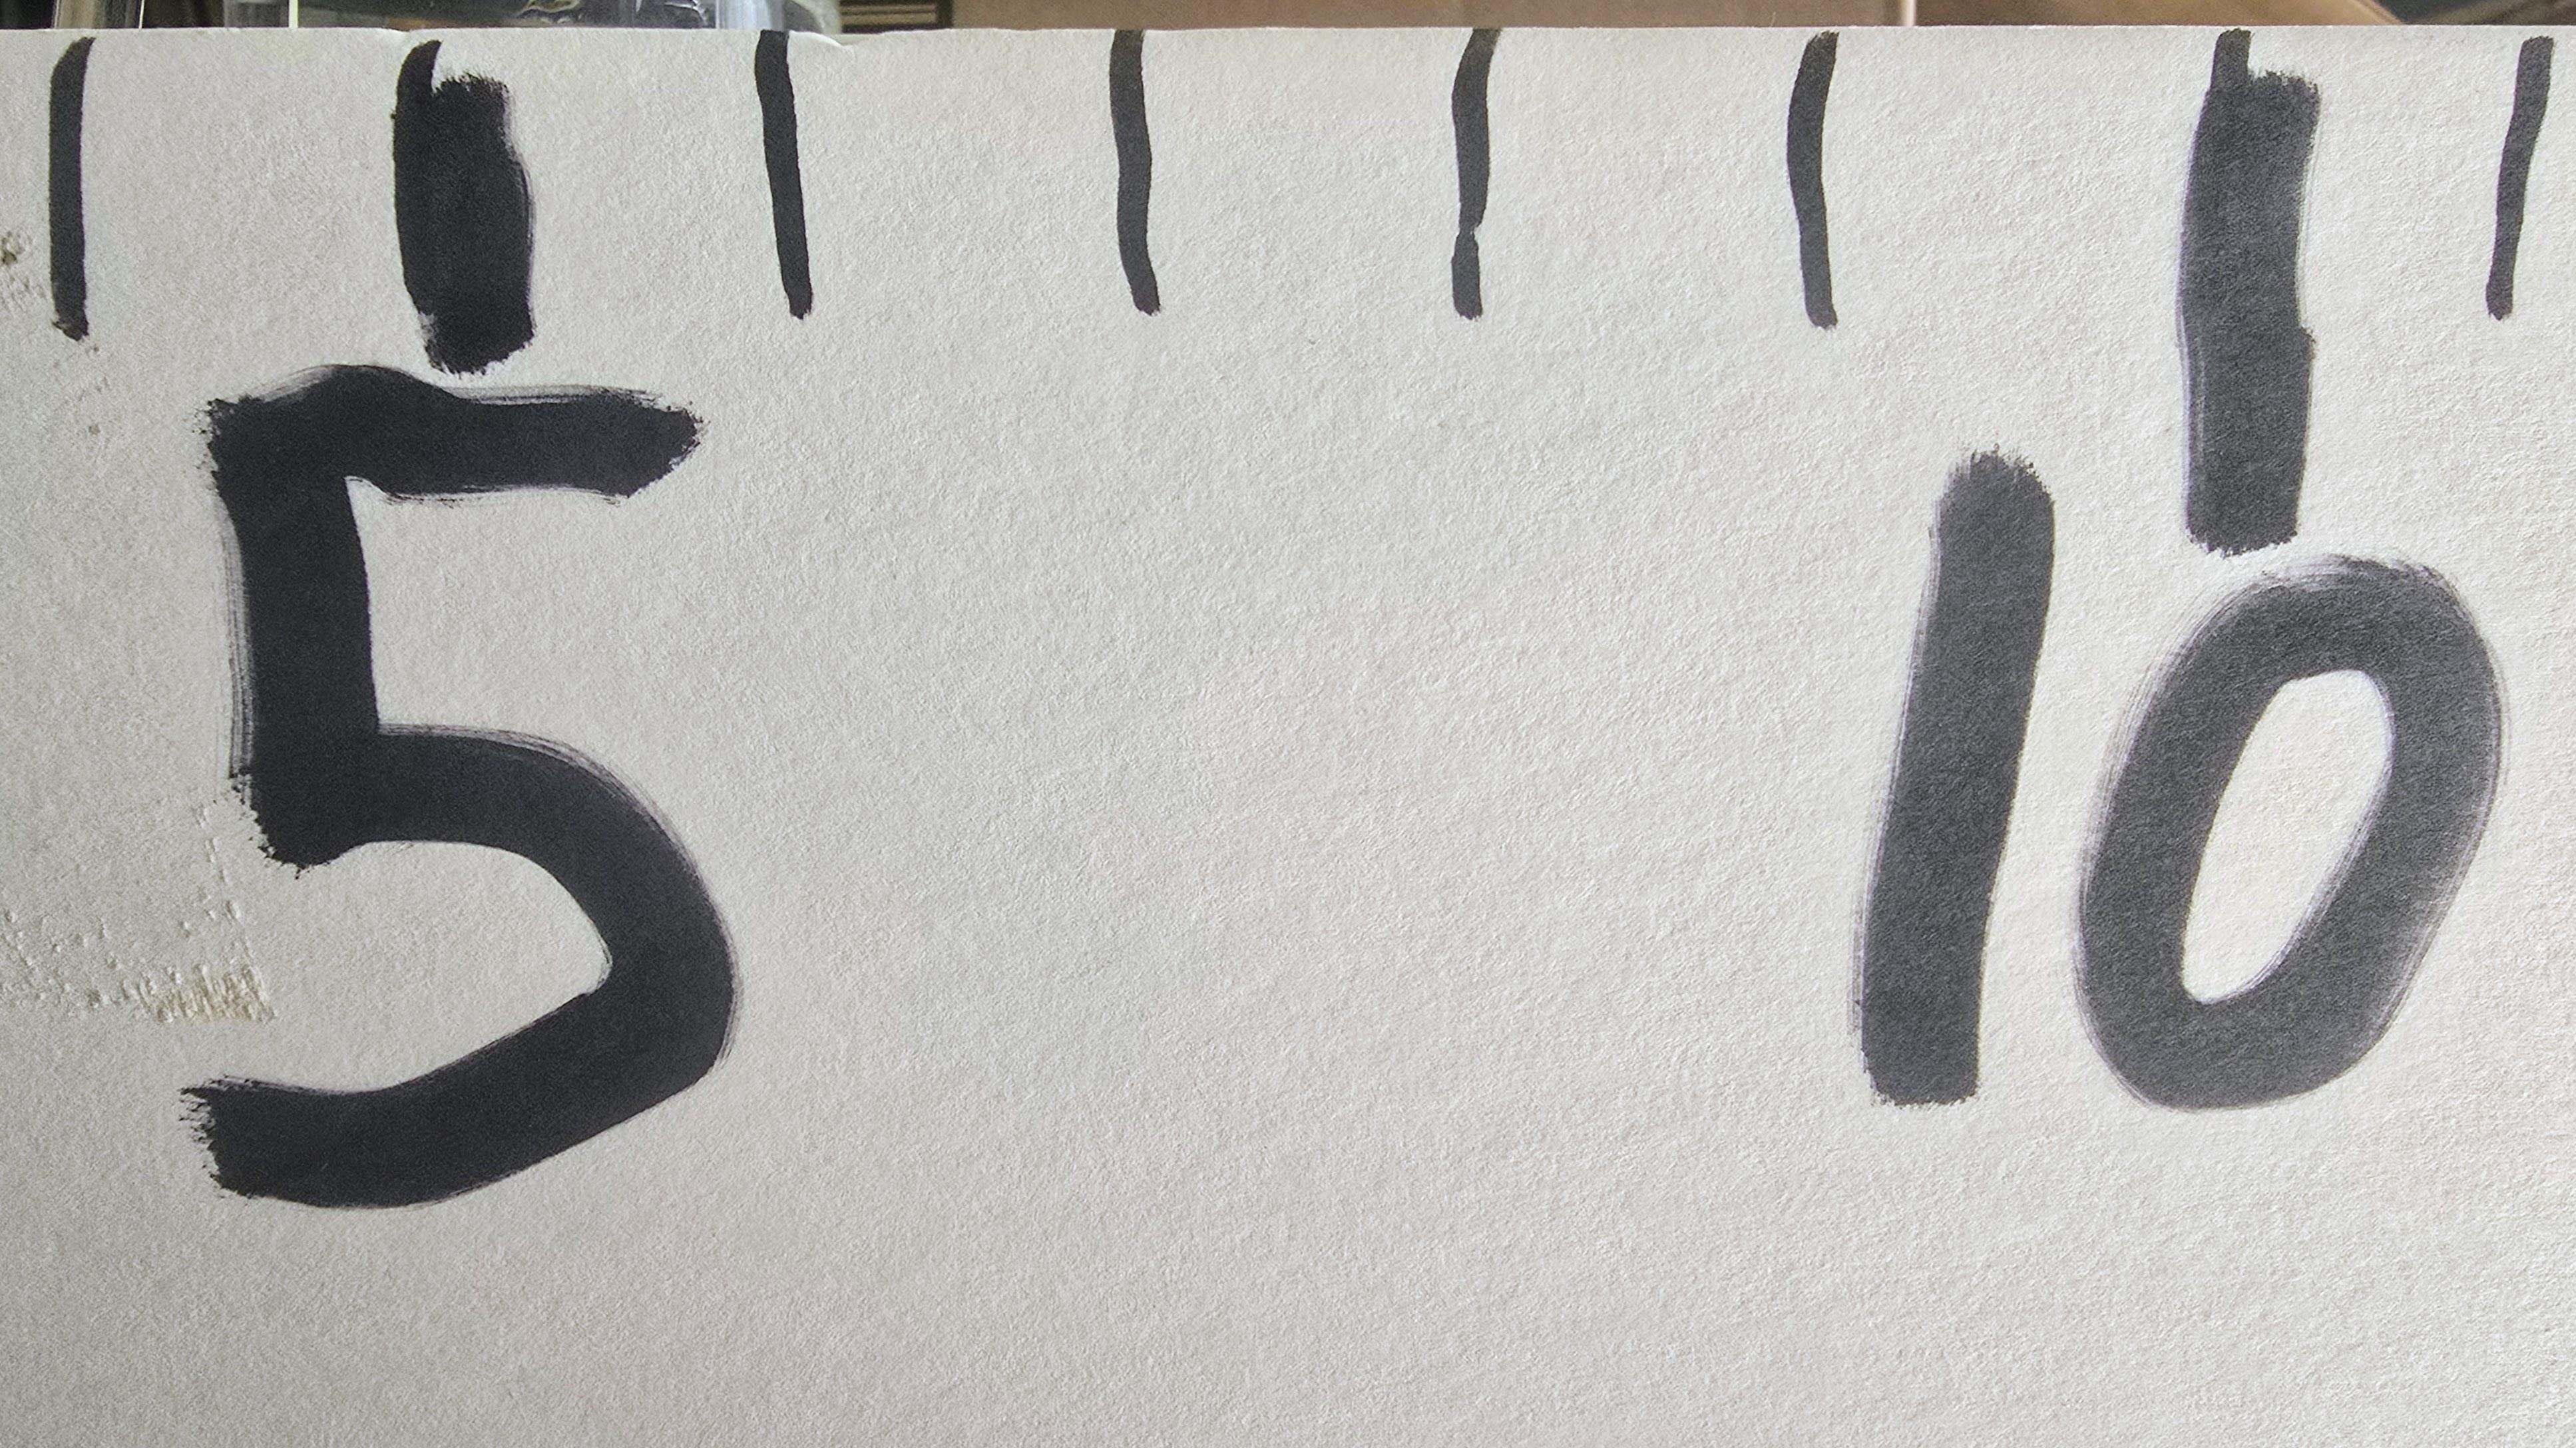
The first step is to make a large-print ruler that is visible to see in pictures. Use an existing yardstick, and put a tick-mark every inch. You don't need to number every inch, just make a really big number every 5 inches. Make nice thick legible lines every inch and number every 5th line with a nice large-print number that will be easy to read in your photos. I made my ruler out of a piece of white foam core cardboard that was 20 by 30 inches. I cut it in half along the midline that made it into two pieces each 10 by 30 inches. Putting the two together I made a ruler that was 60 inches long (5 feet long). This will work well for a table that is about 5 feet long.
Make a SWIM Slider

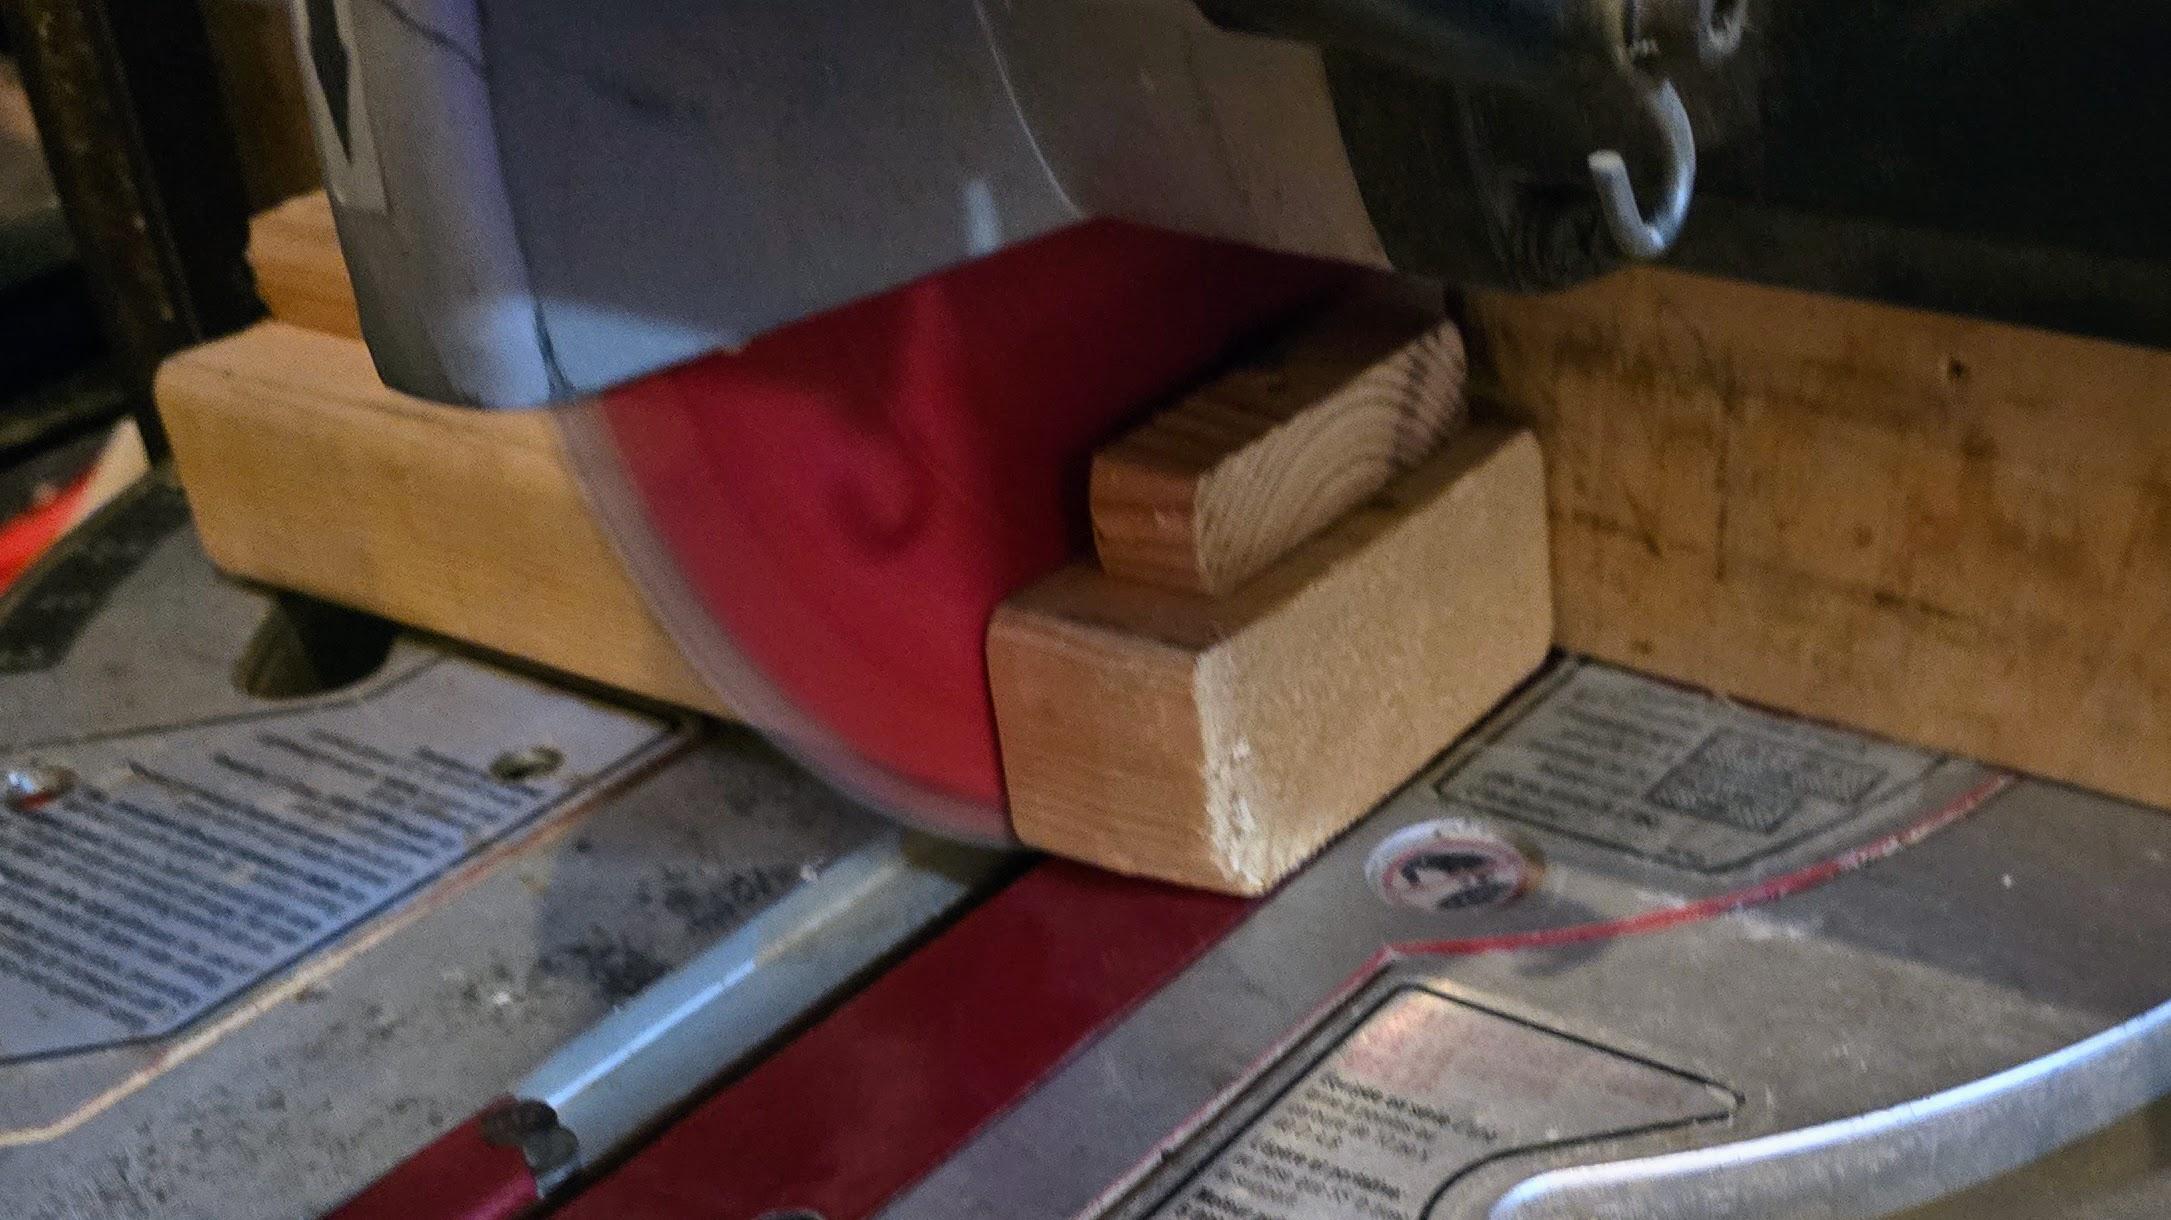

Now we'll make a SWIM slider. Think of the edge of your table as a slide rail, and your slider will be a railcar that rides on the rail. Alternatively you can make any other form of rail and slider for it, but the easiest is simply to use the edge of a nice long table.
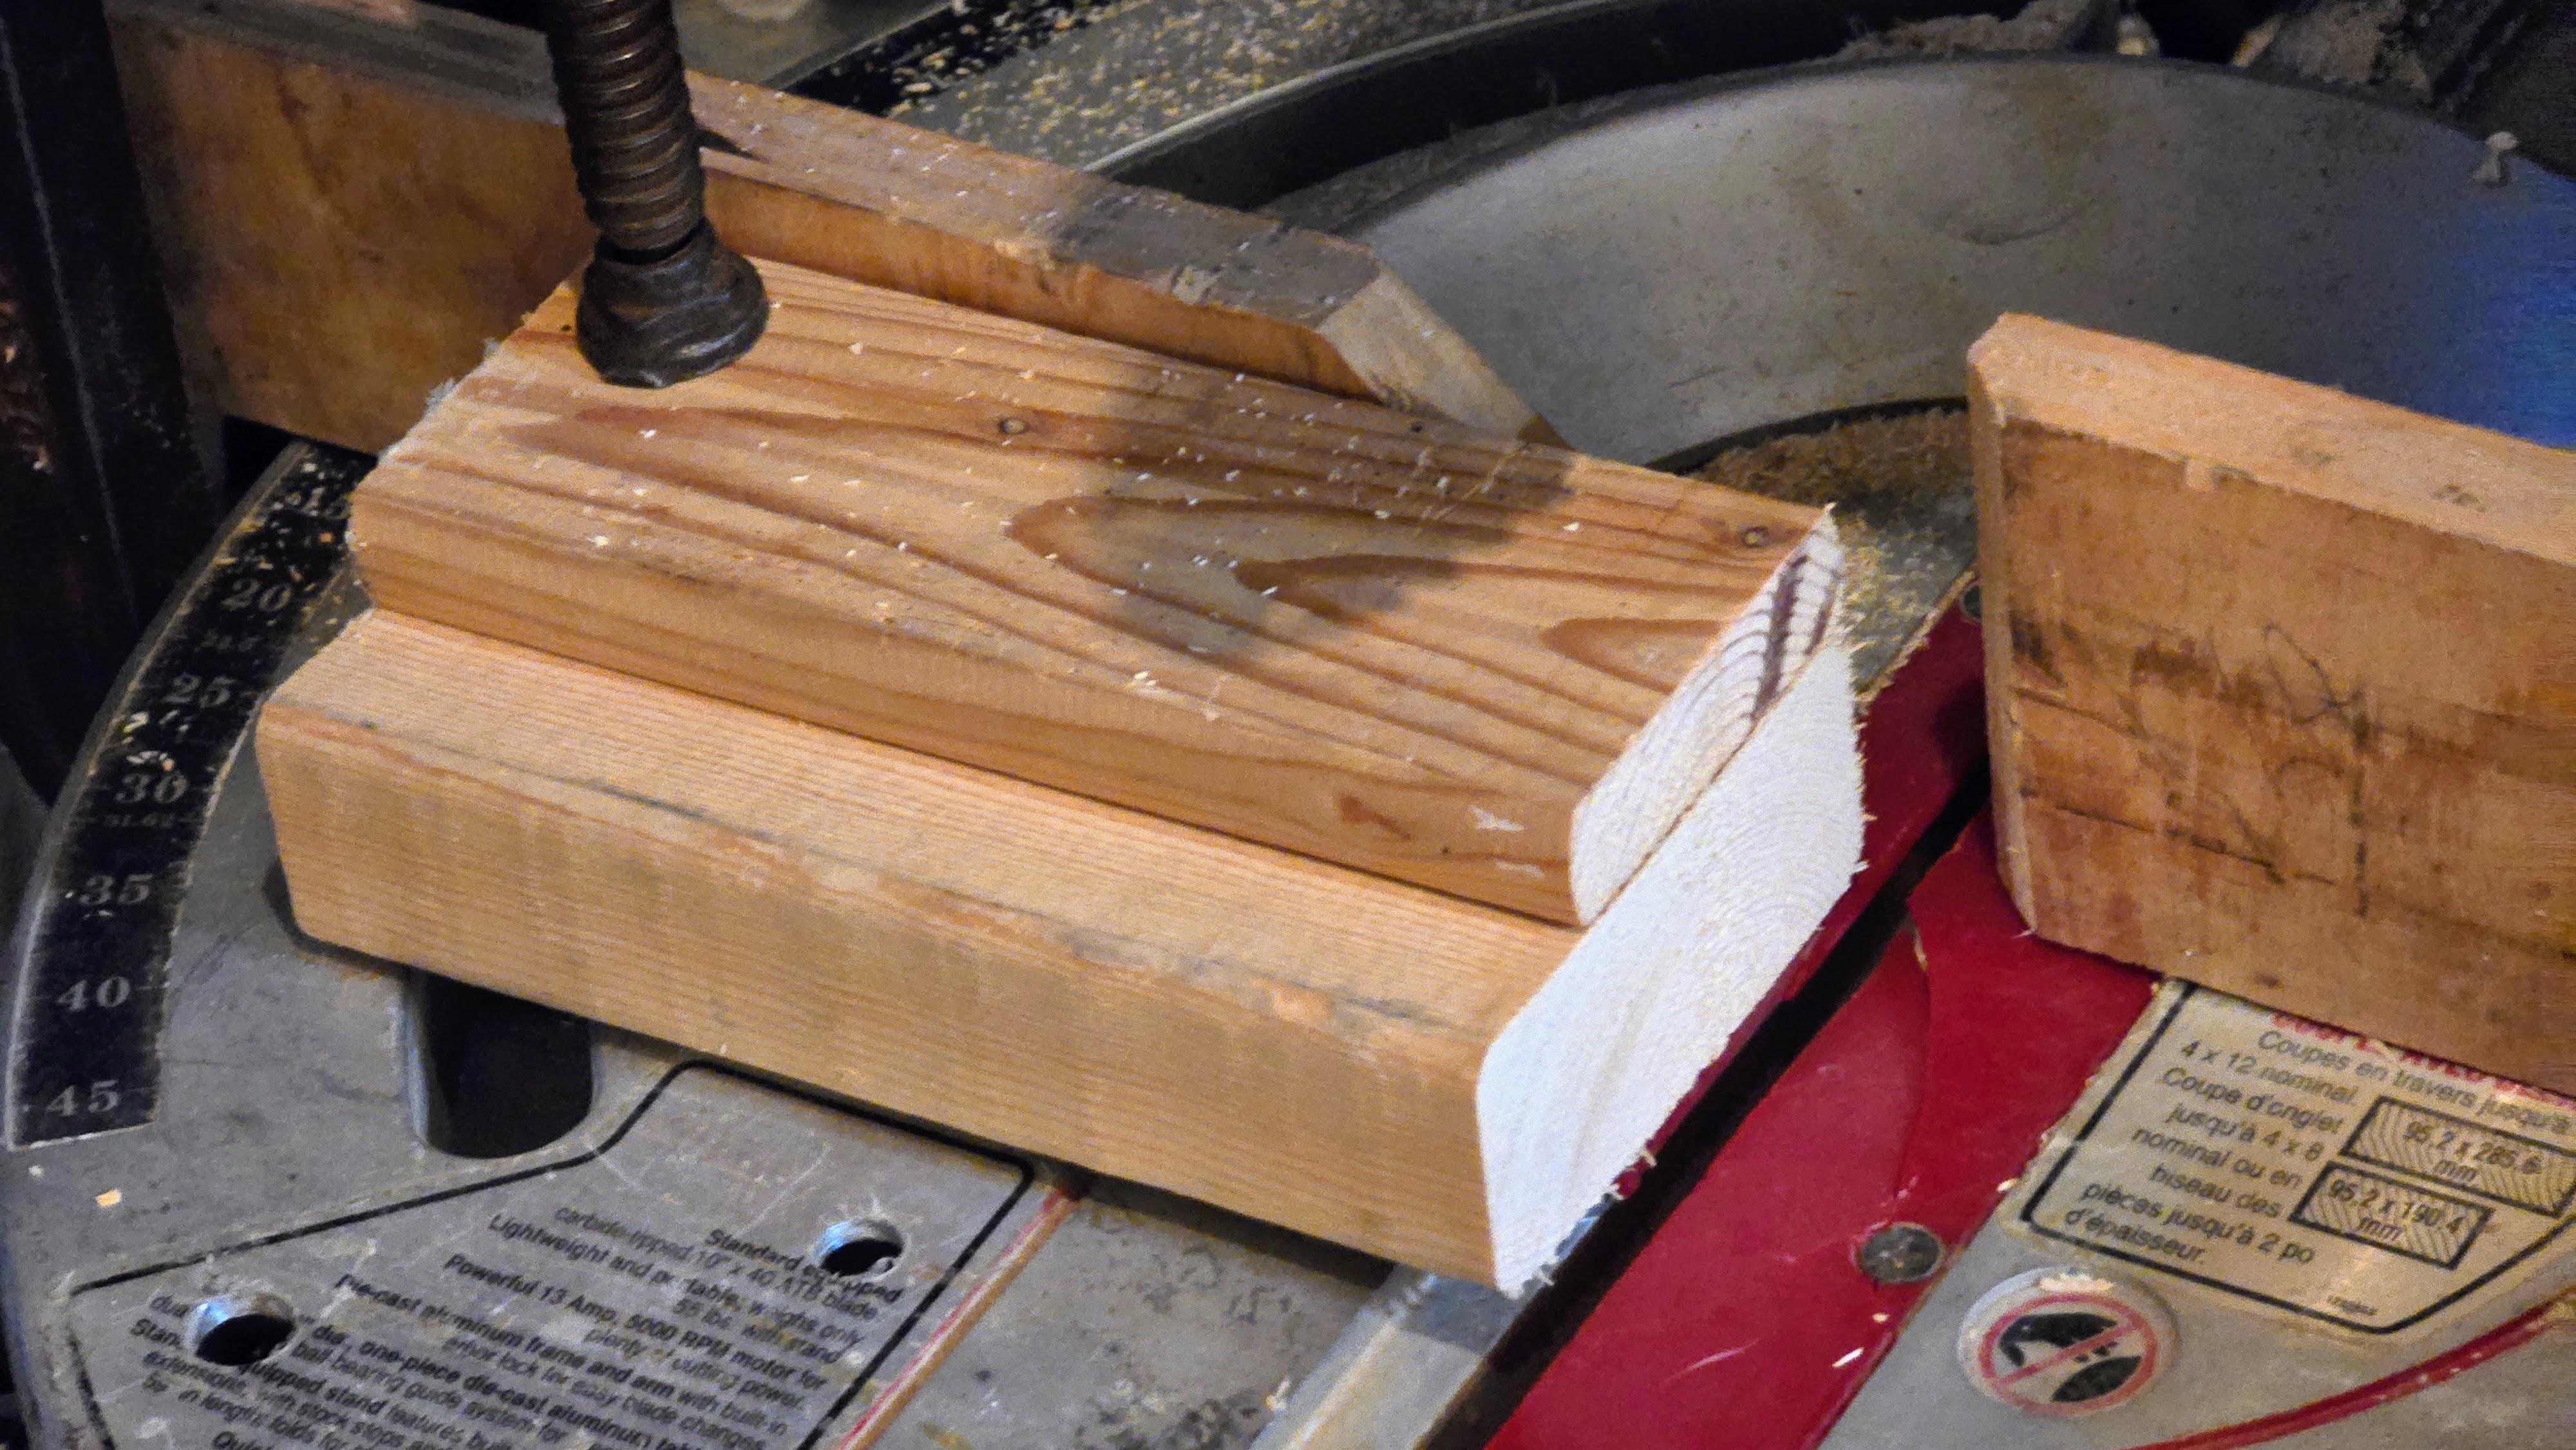
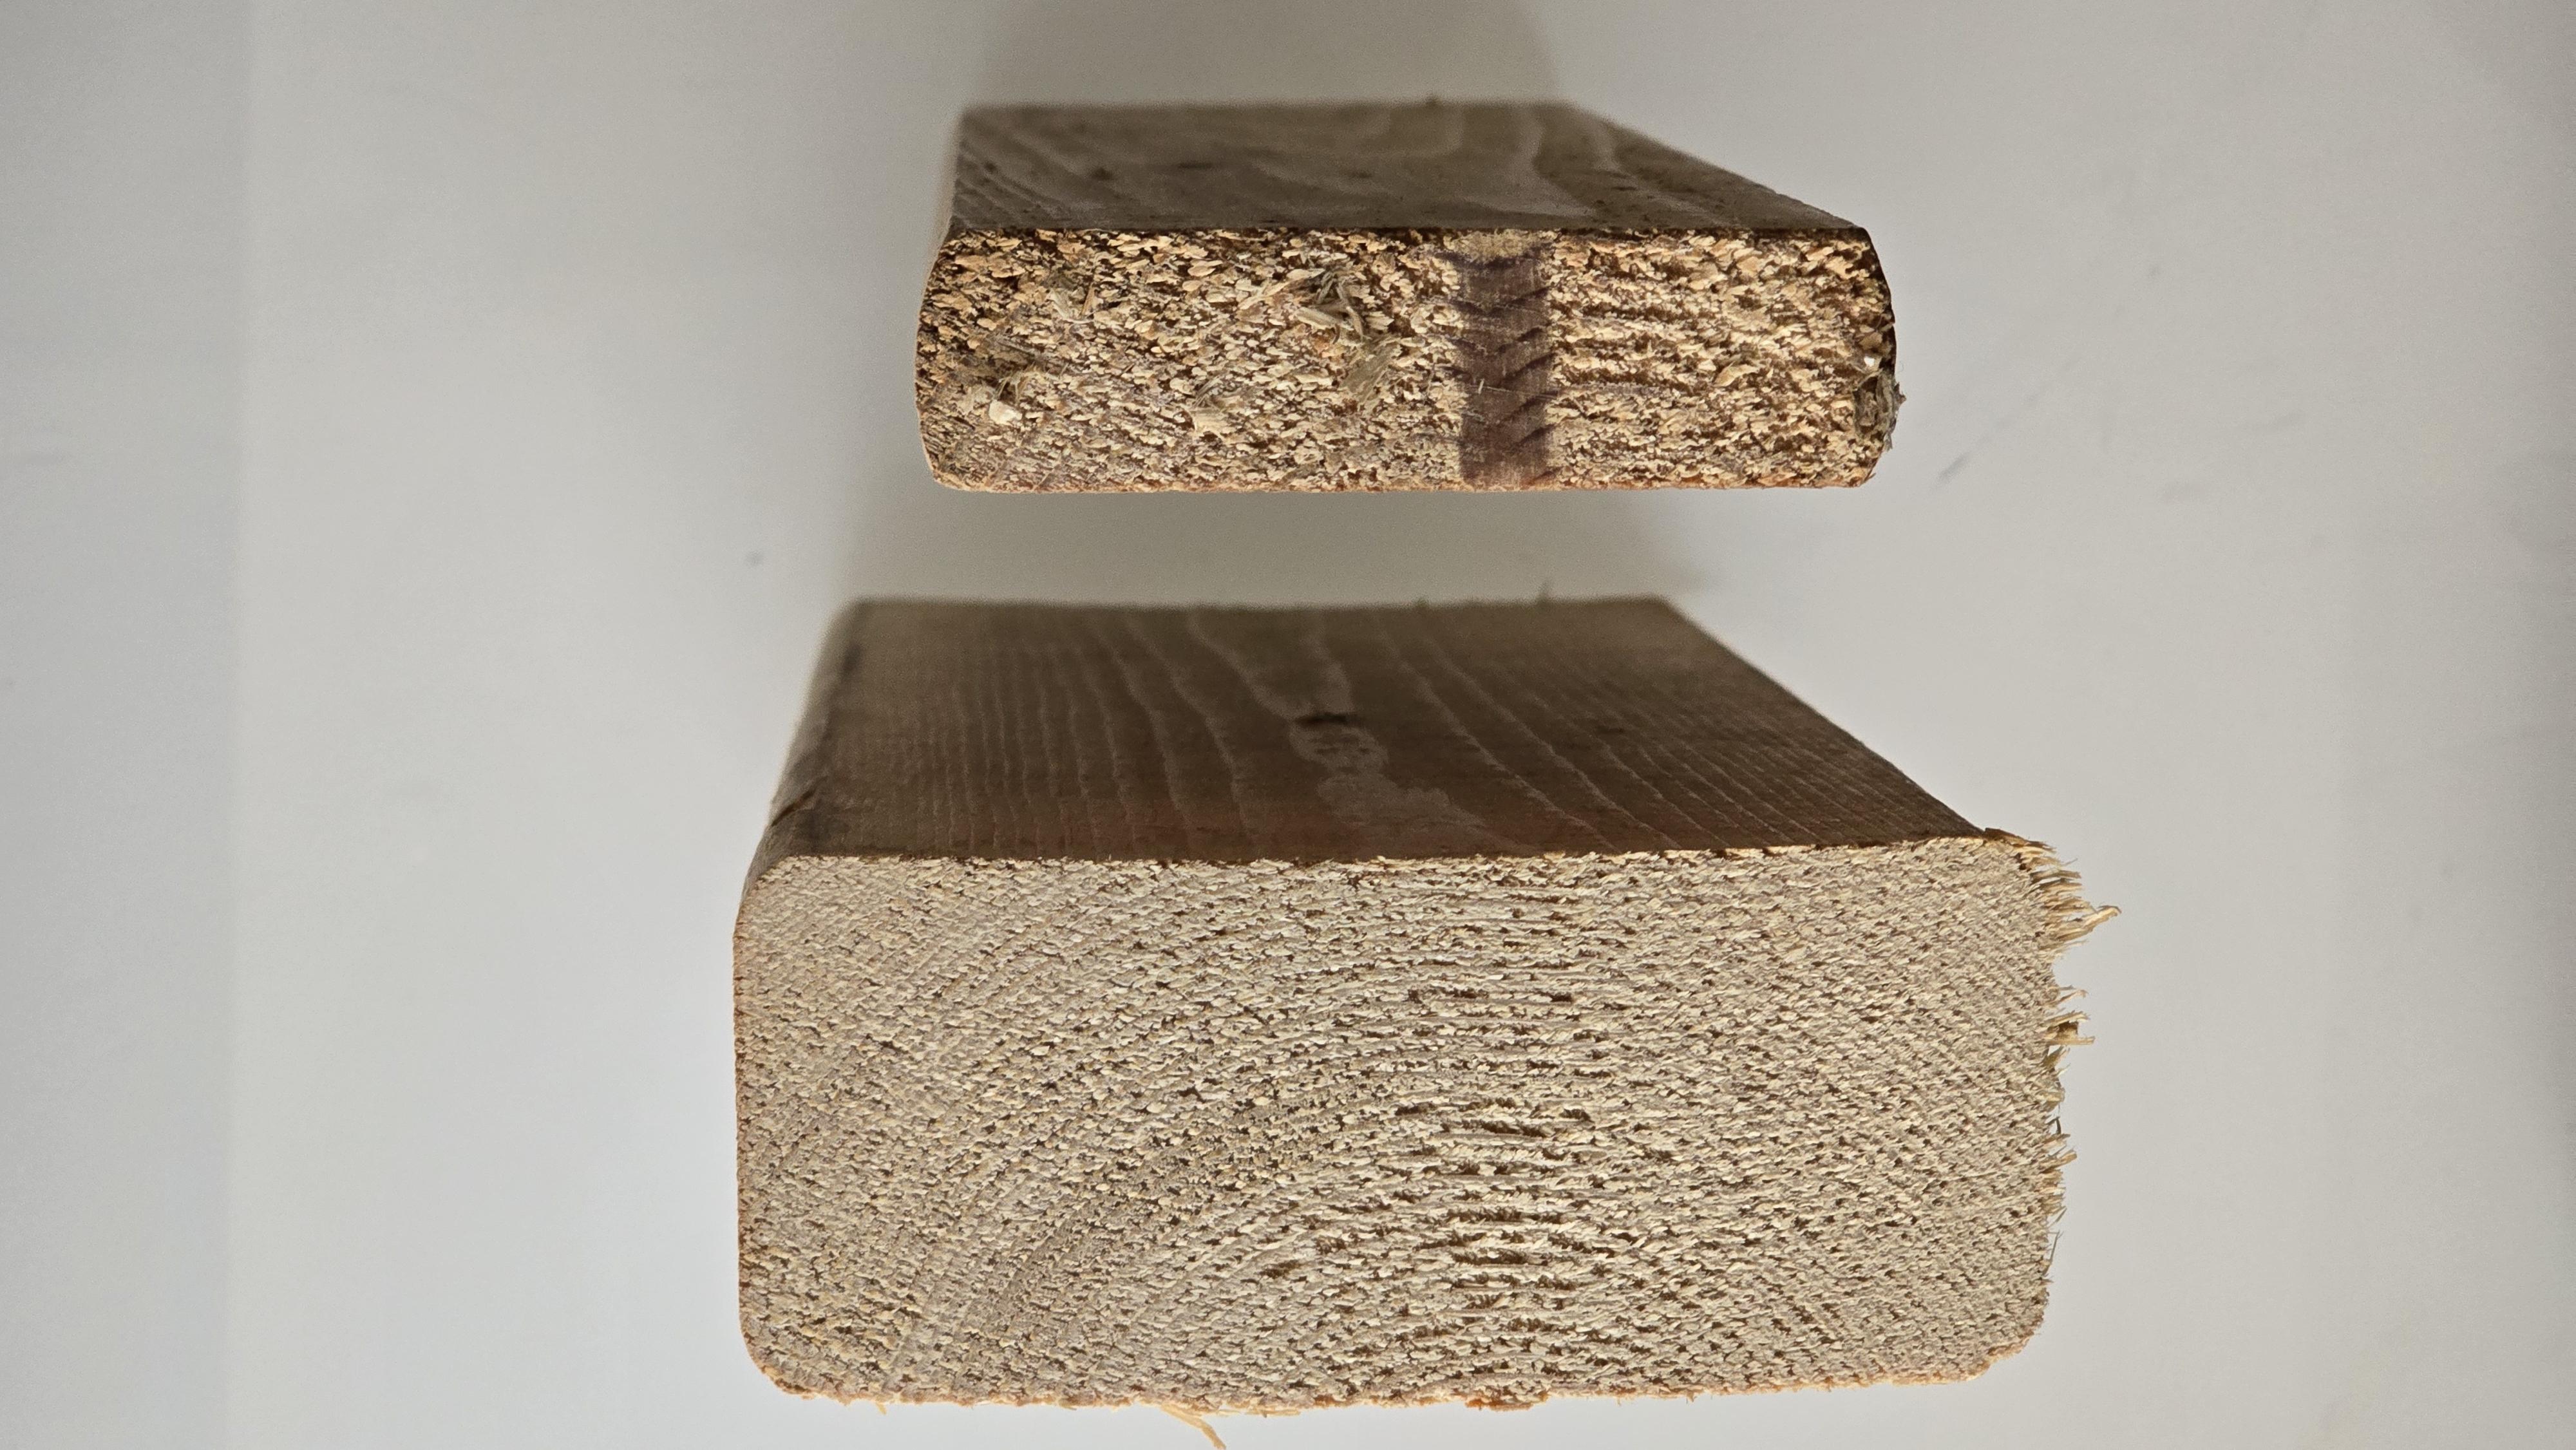
I made the slider out of a piece of 2x4 wood and another piece of 1x3 or the like.
If you have a saw, you can cut the two pieces to the same length. If not, you can find scraps that are approximately the same length.
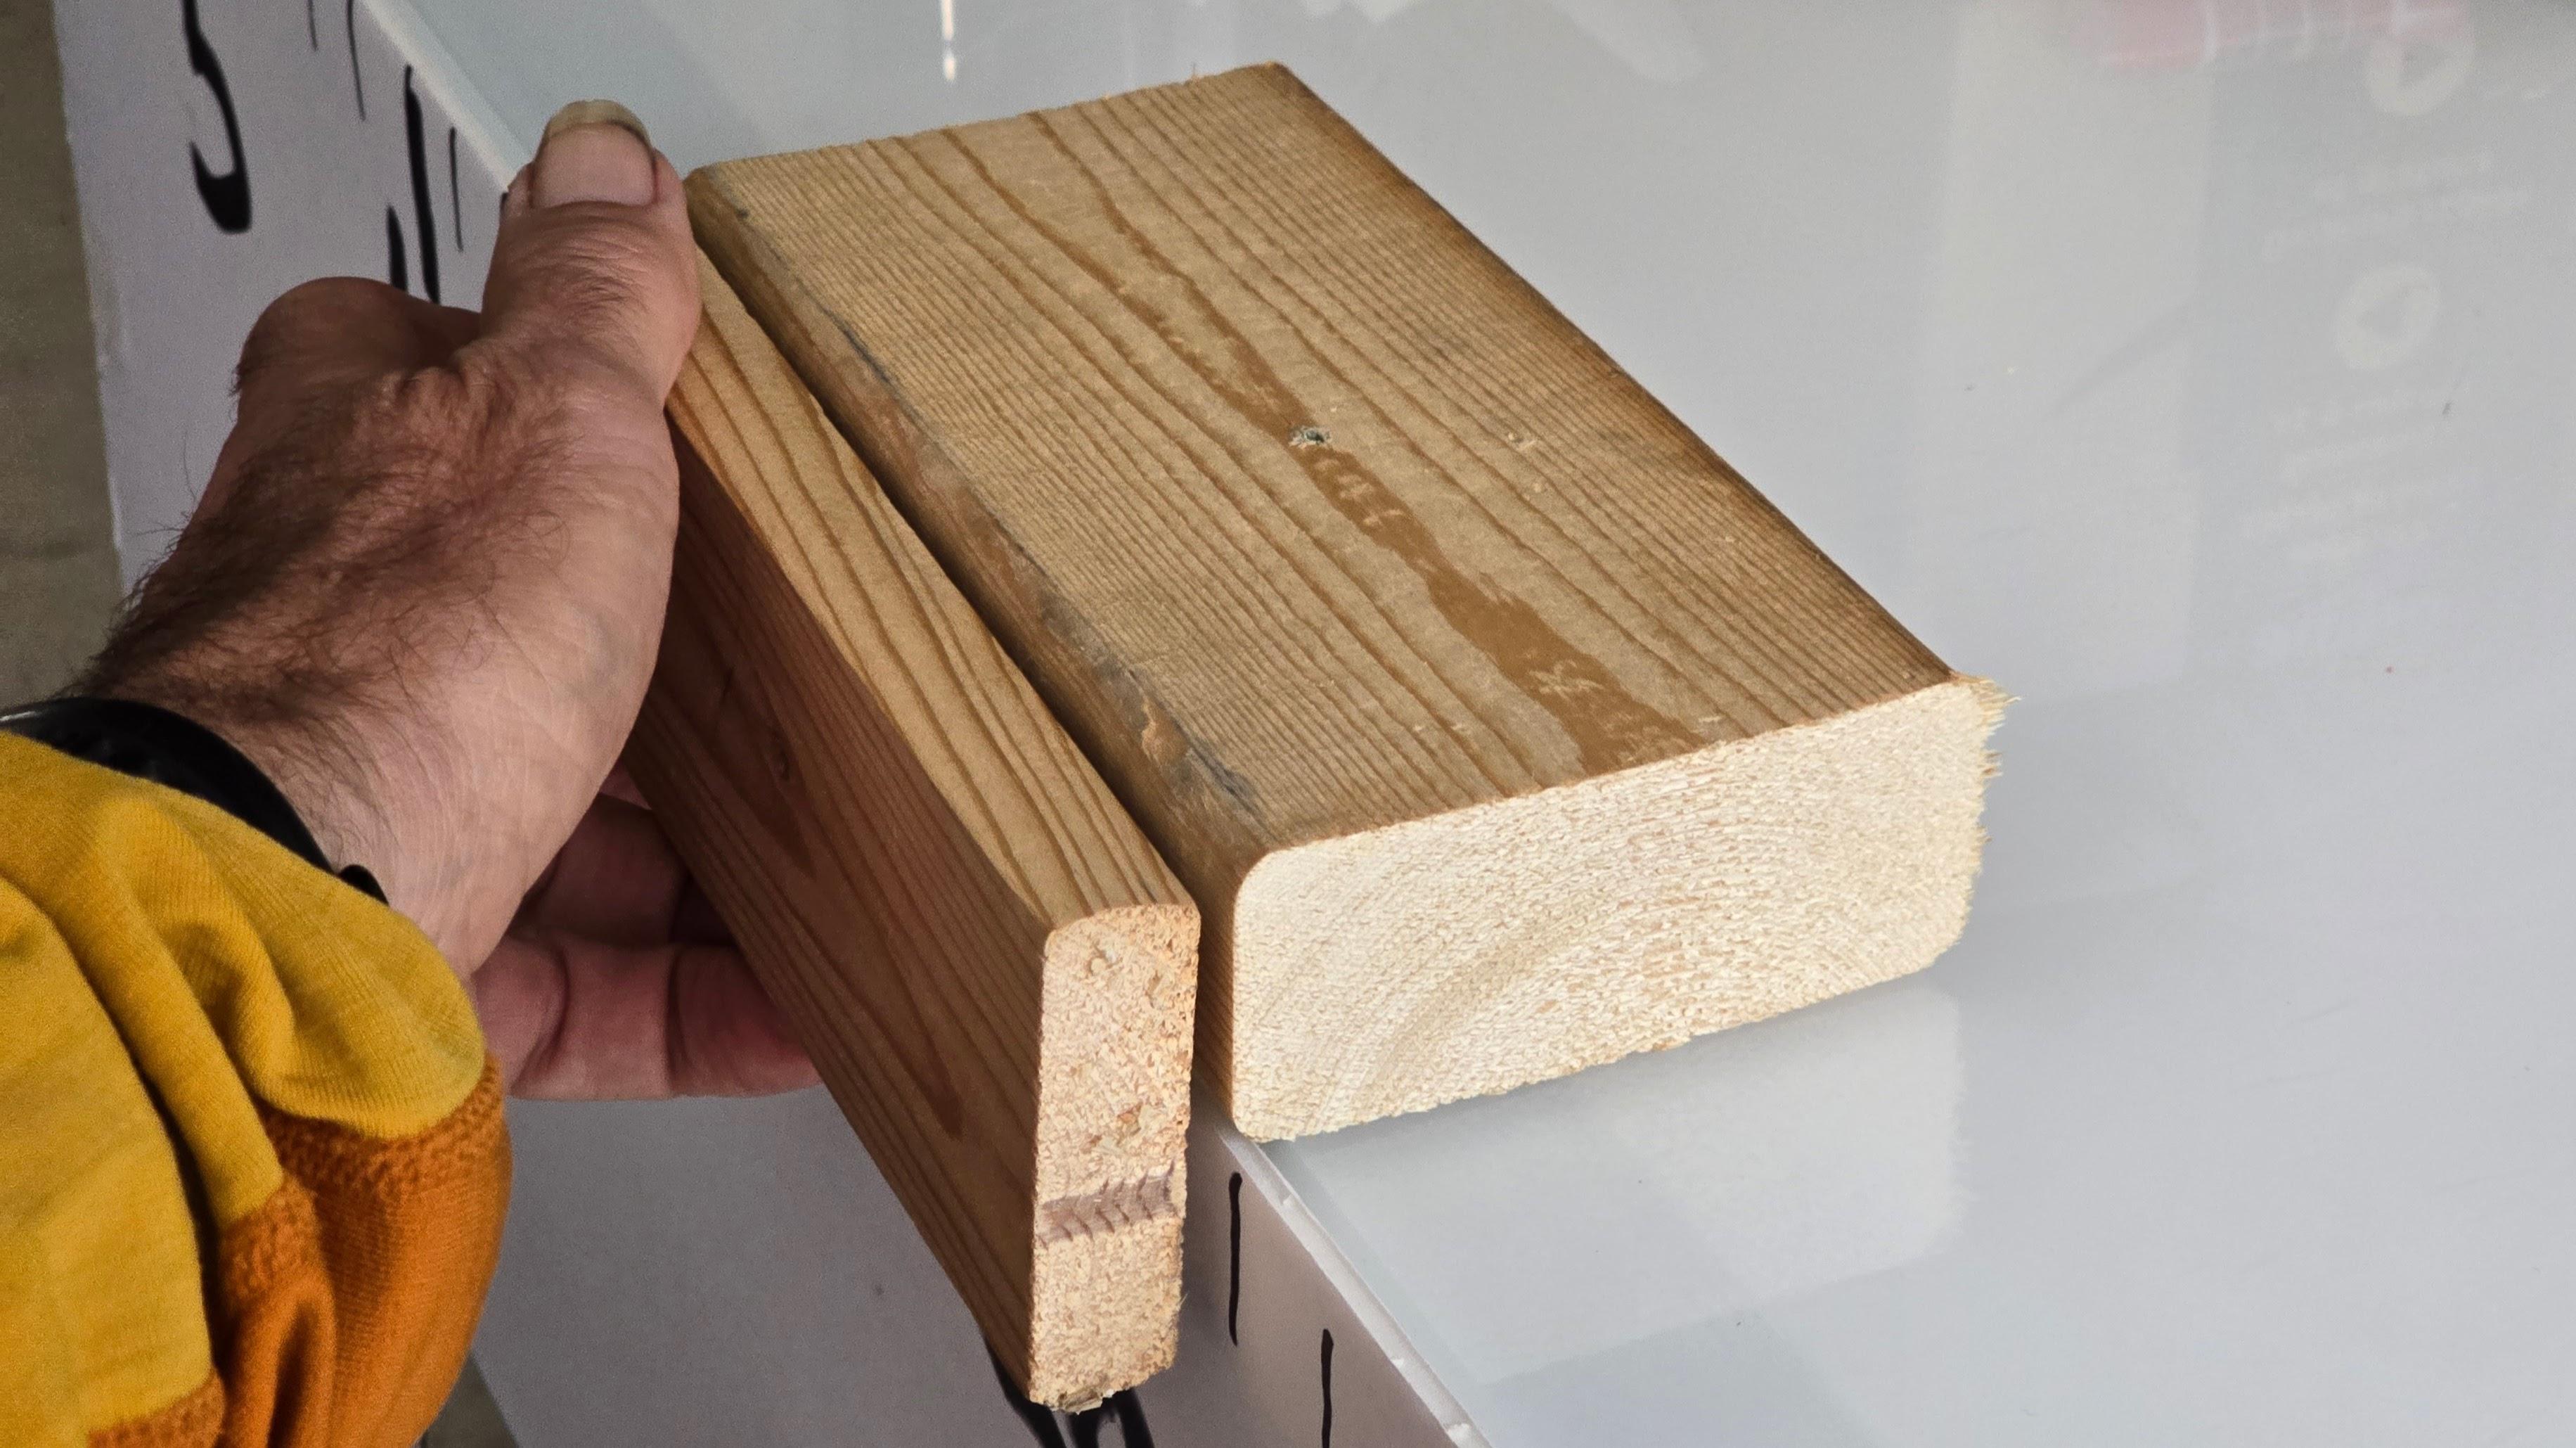
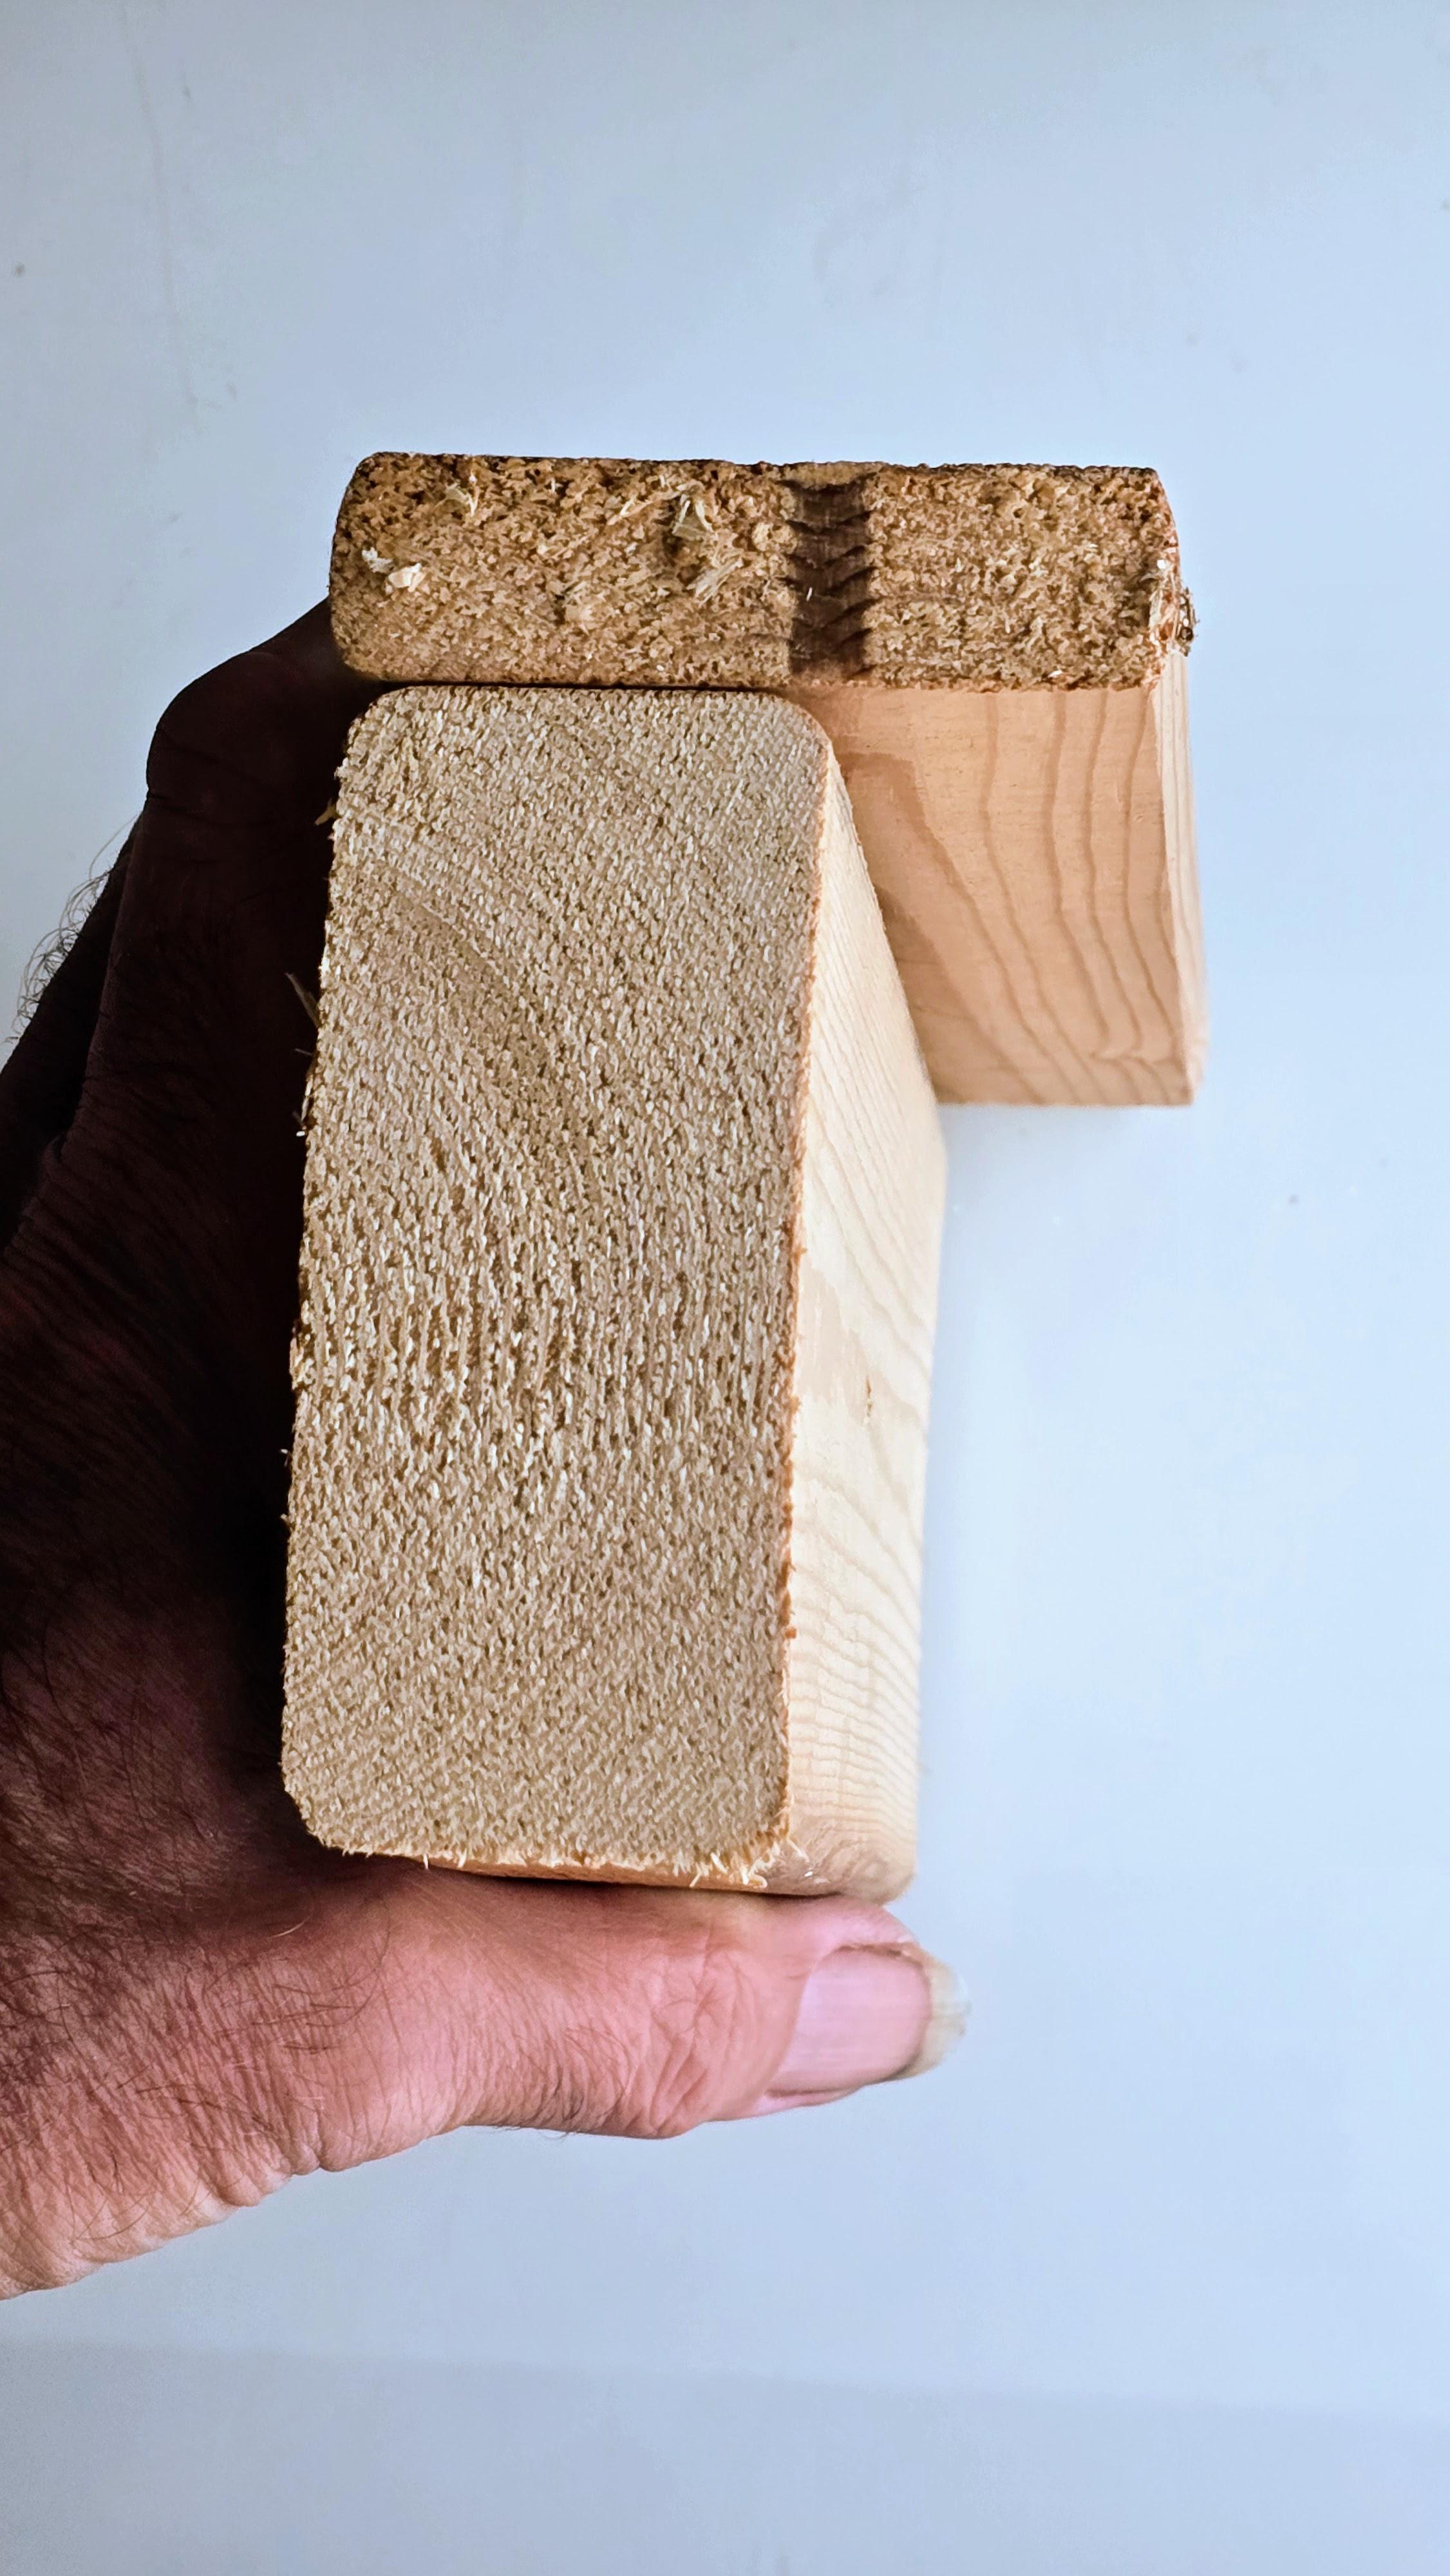
Next put them at a 90 degree angle and screw them together. You end up with a slider that has a lip or edge that will hug the table and slide along while it holds the LED strip at right angles to the table. You can also add some felt or cloth underneath to make a smoother ride deending on what kind of table you're using this may not be needed....
Fix the length by inserting end-stops. Here I have some binder clips at the rightmost end (see photos in Step 1) to stop the slider just after the 55 inch mark and another stop around the 1 inch mark, giving the 6.5 inch long slider exactly 48 inches of travel.
Connect Addressable LED Strip to Lock-in Amplifier Board

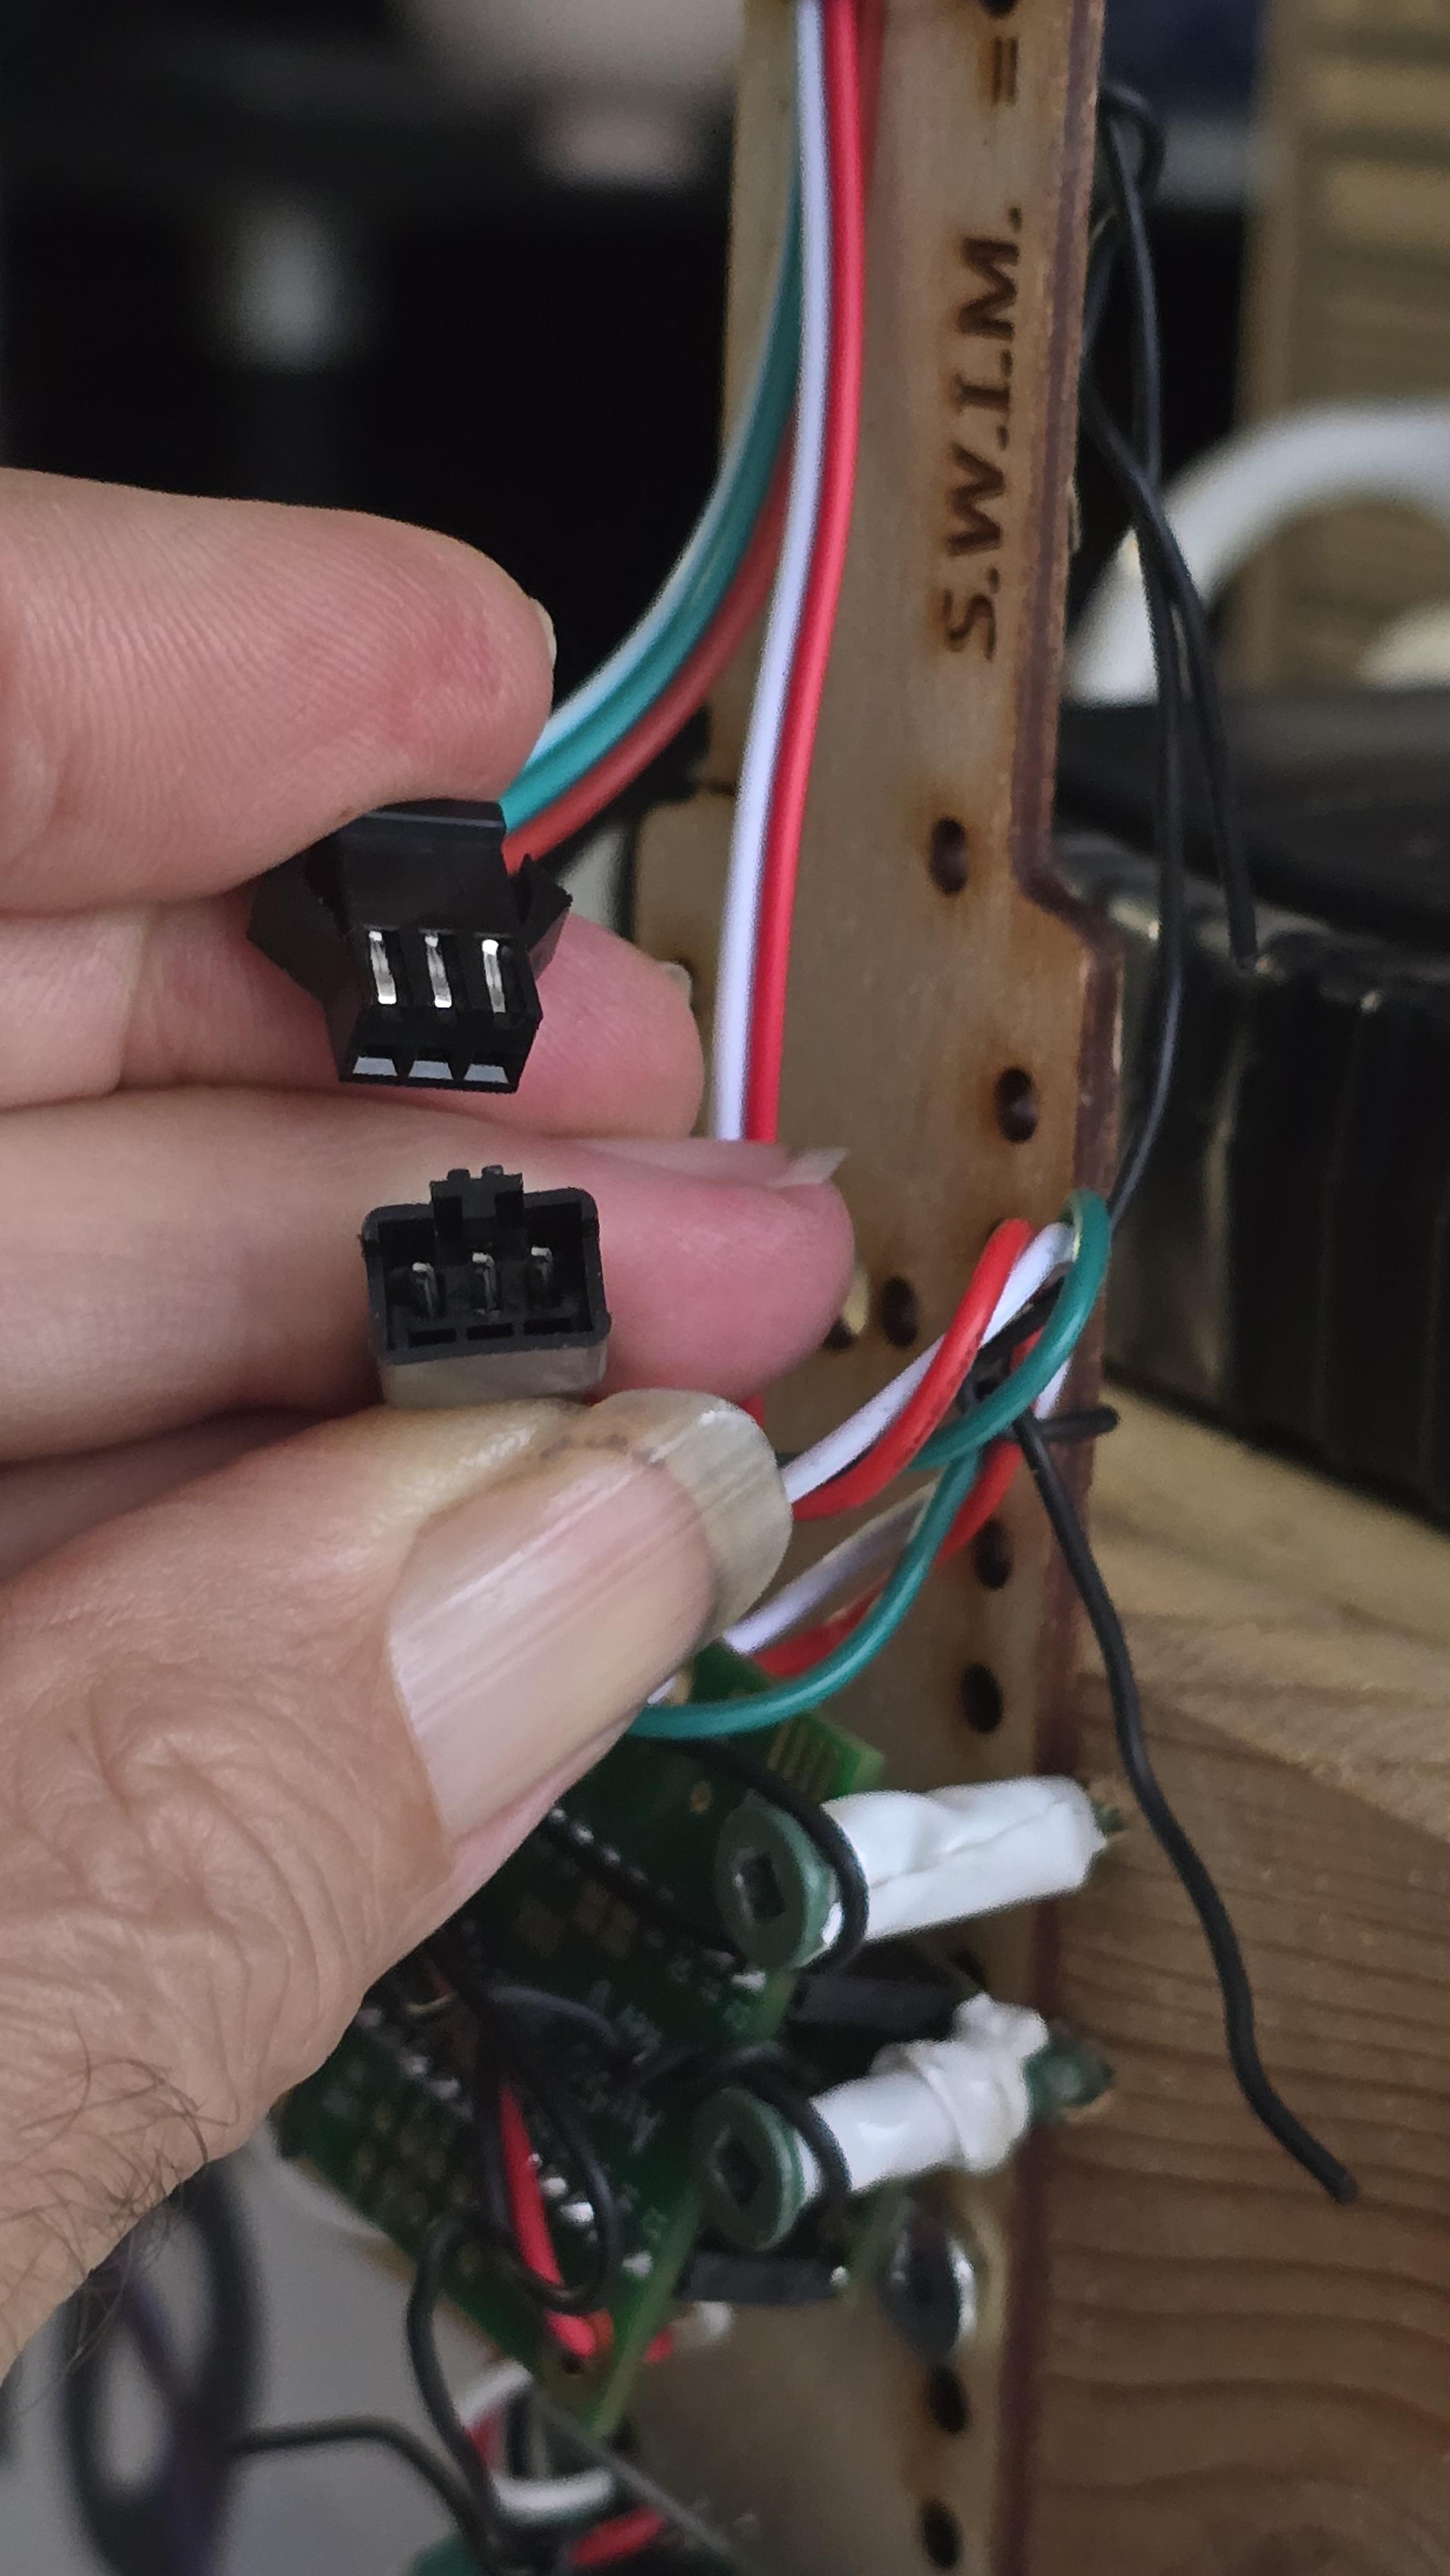
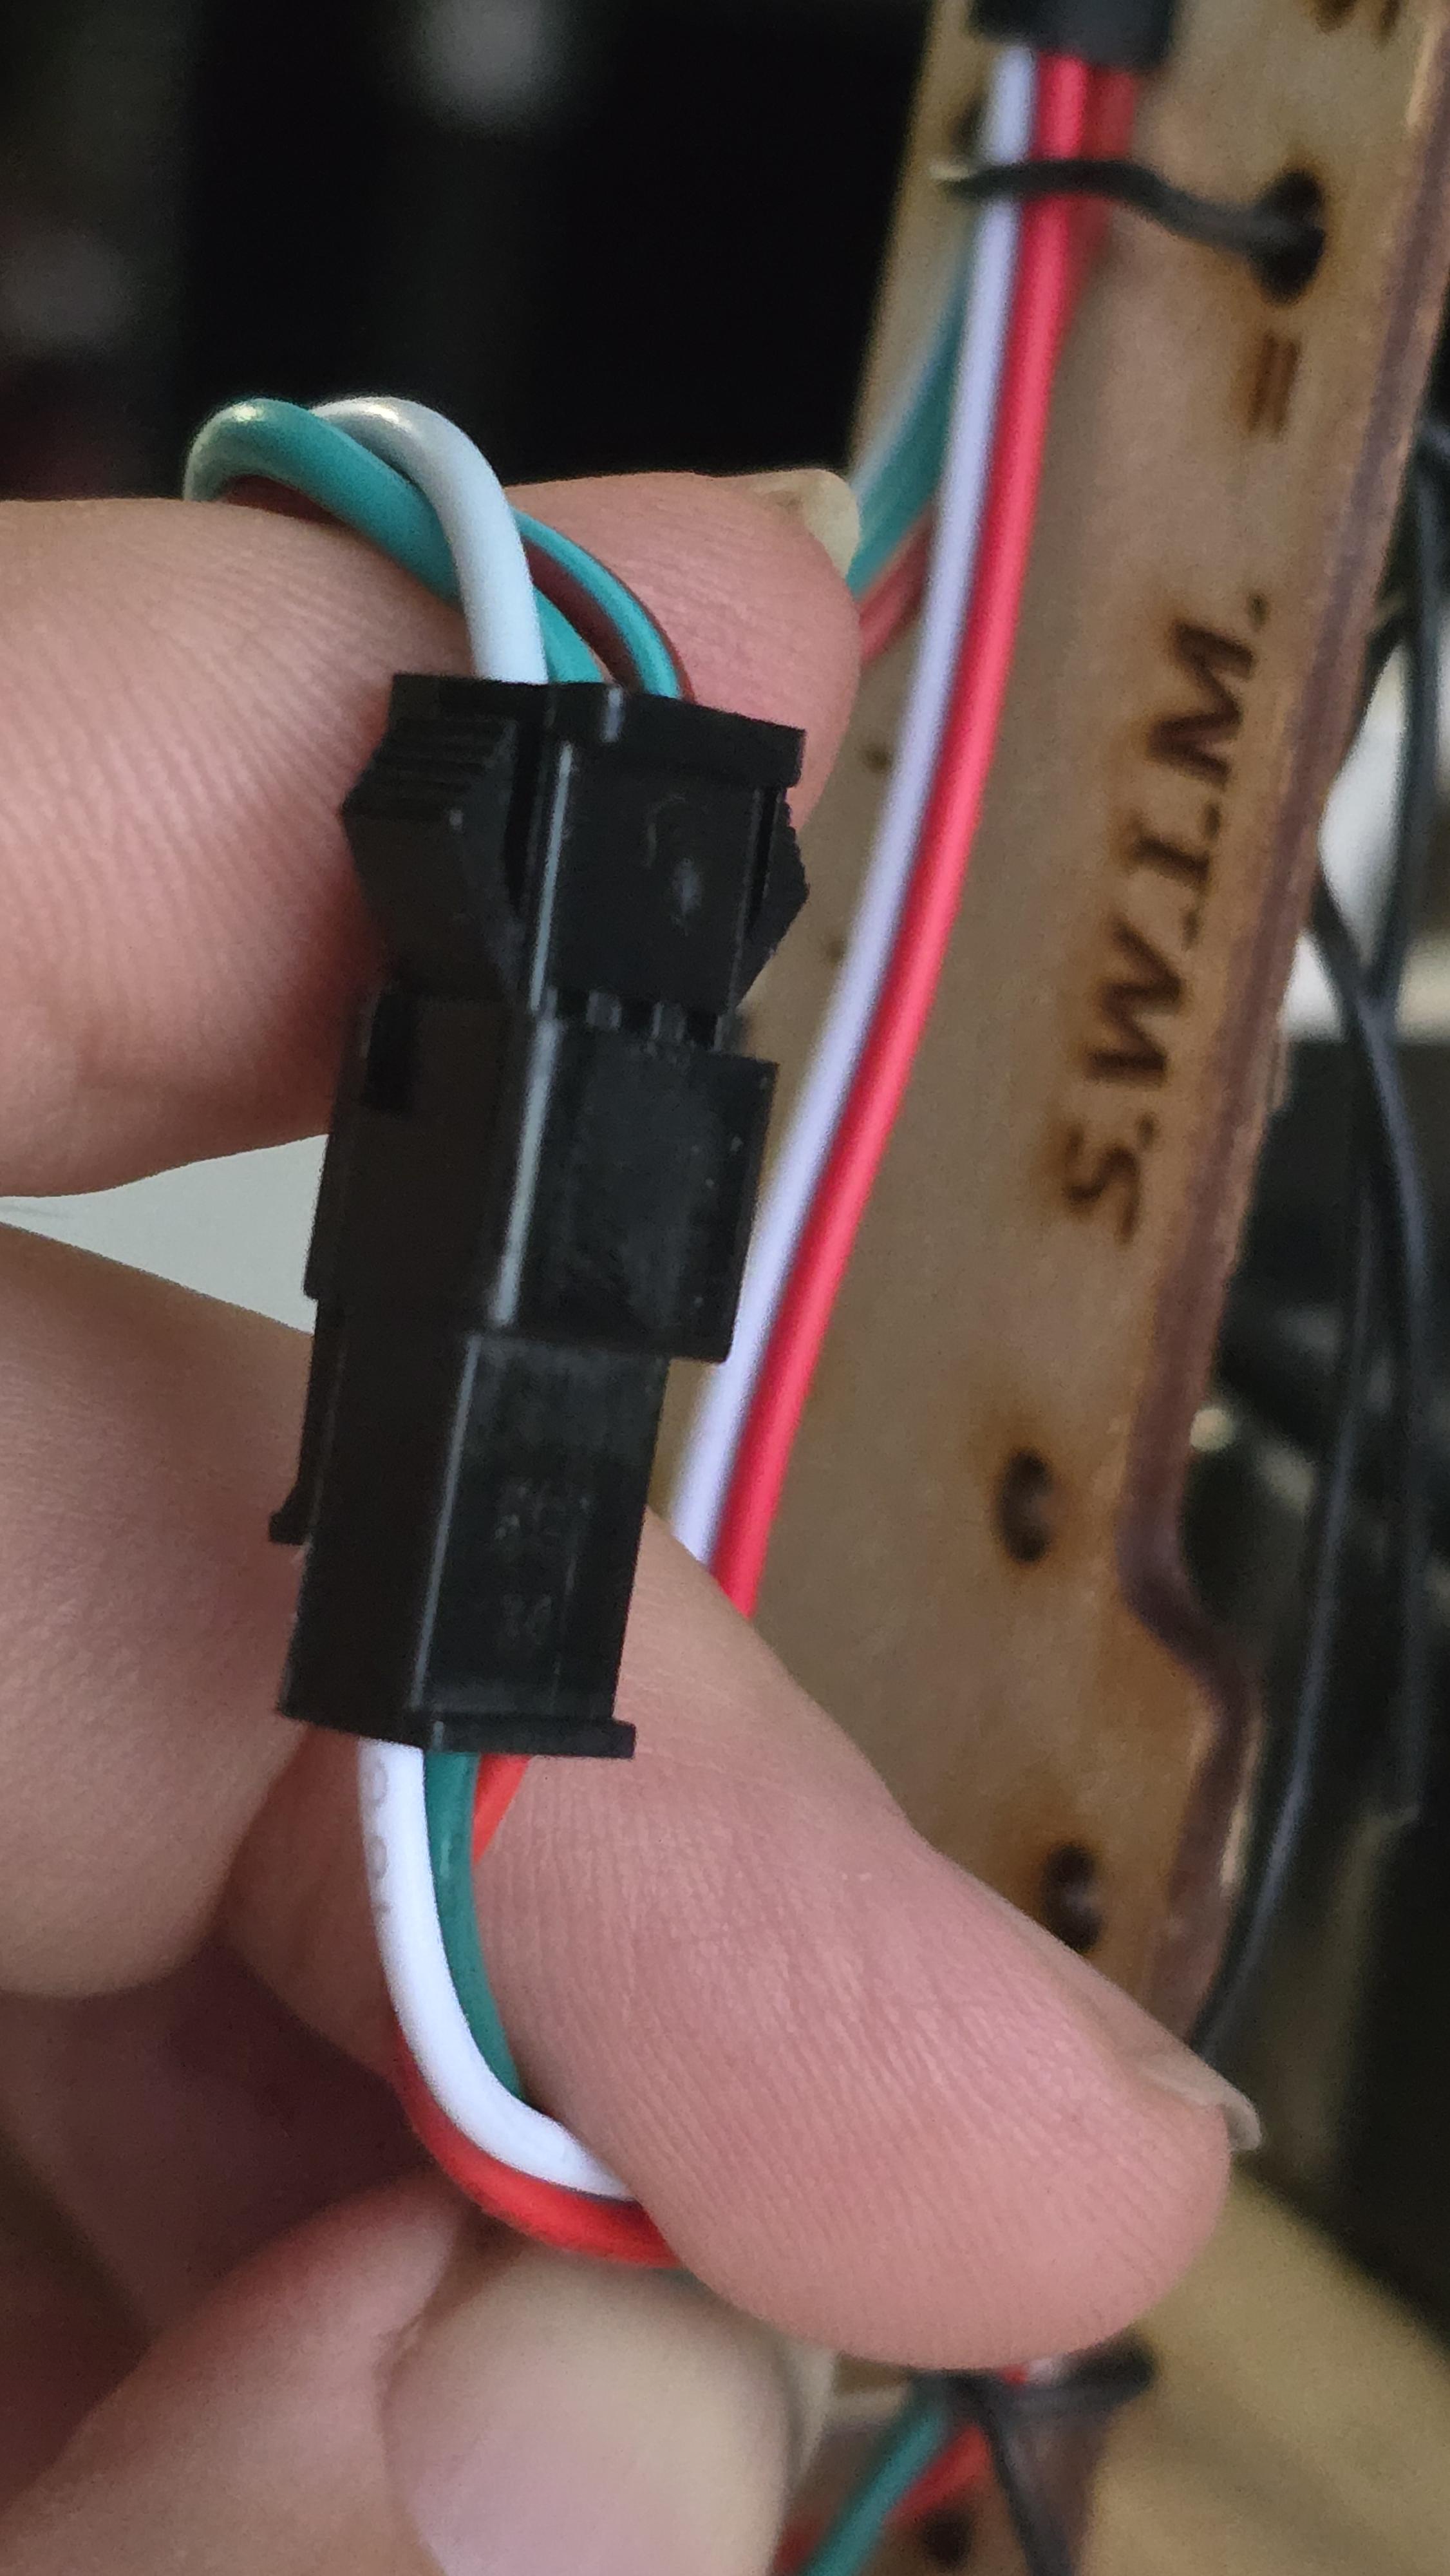
Connect an addressable LED strip to the Teensy stack that forms the lock-in amplifier. First connect a standard male 3-pin connector (plug) to the board. Typically there are 3 wires on the plug, one which is red or is different than the others which is usually +5v and the one opposite the red (often white) is ground, and the one in the middle (often green) is usually "signal" (combined clock and data). Strain-relief the wires (e.g. you can run some of them trough a hole on the circuit board).
Connect +5 and ground of the male connector to the Teensy stack, and connect signal to pin 2 of the Teensy at the bottom of the stack as shown.
Now you can plug the female end (input end which is the socket end) of the LED strip to the male connector that you now have on the board.
Mount Teensy Board and LED Strip to the Slider
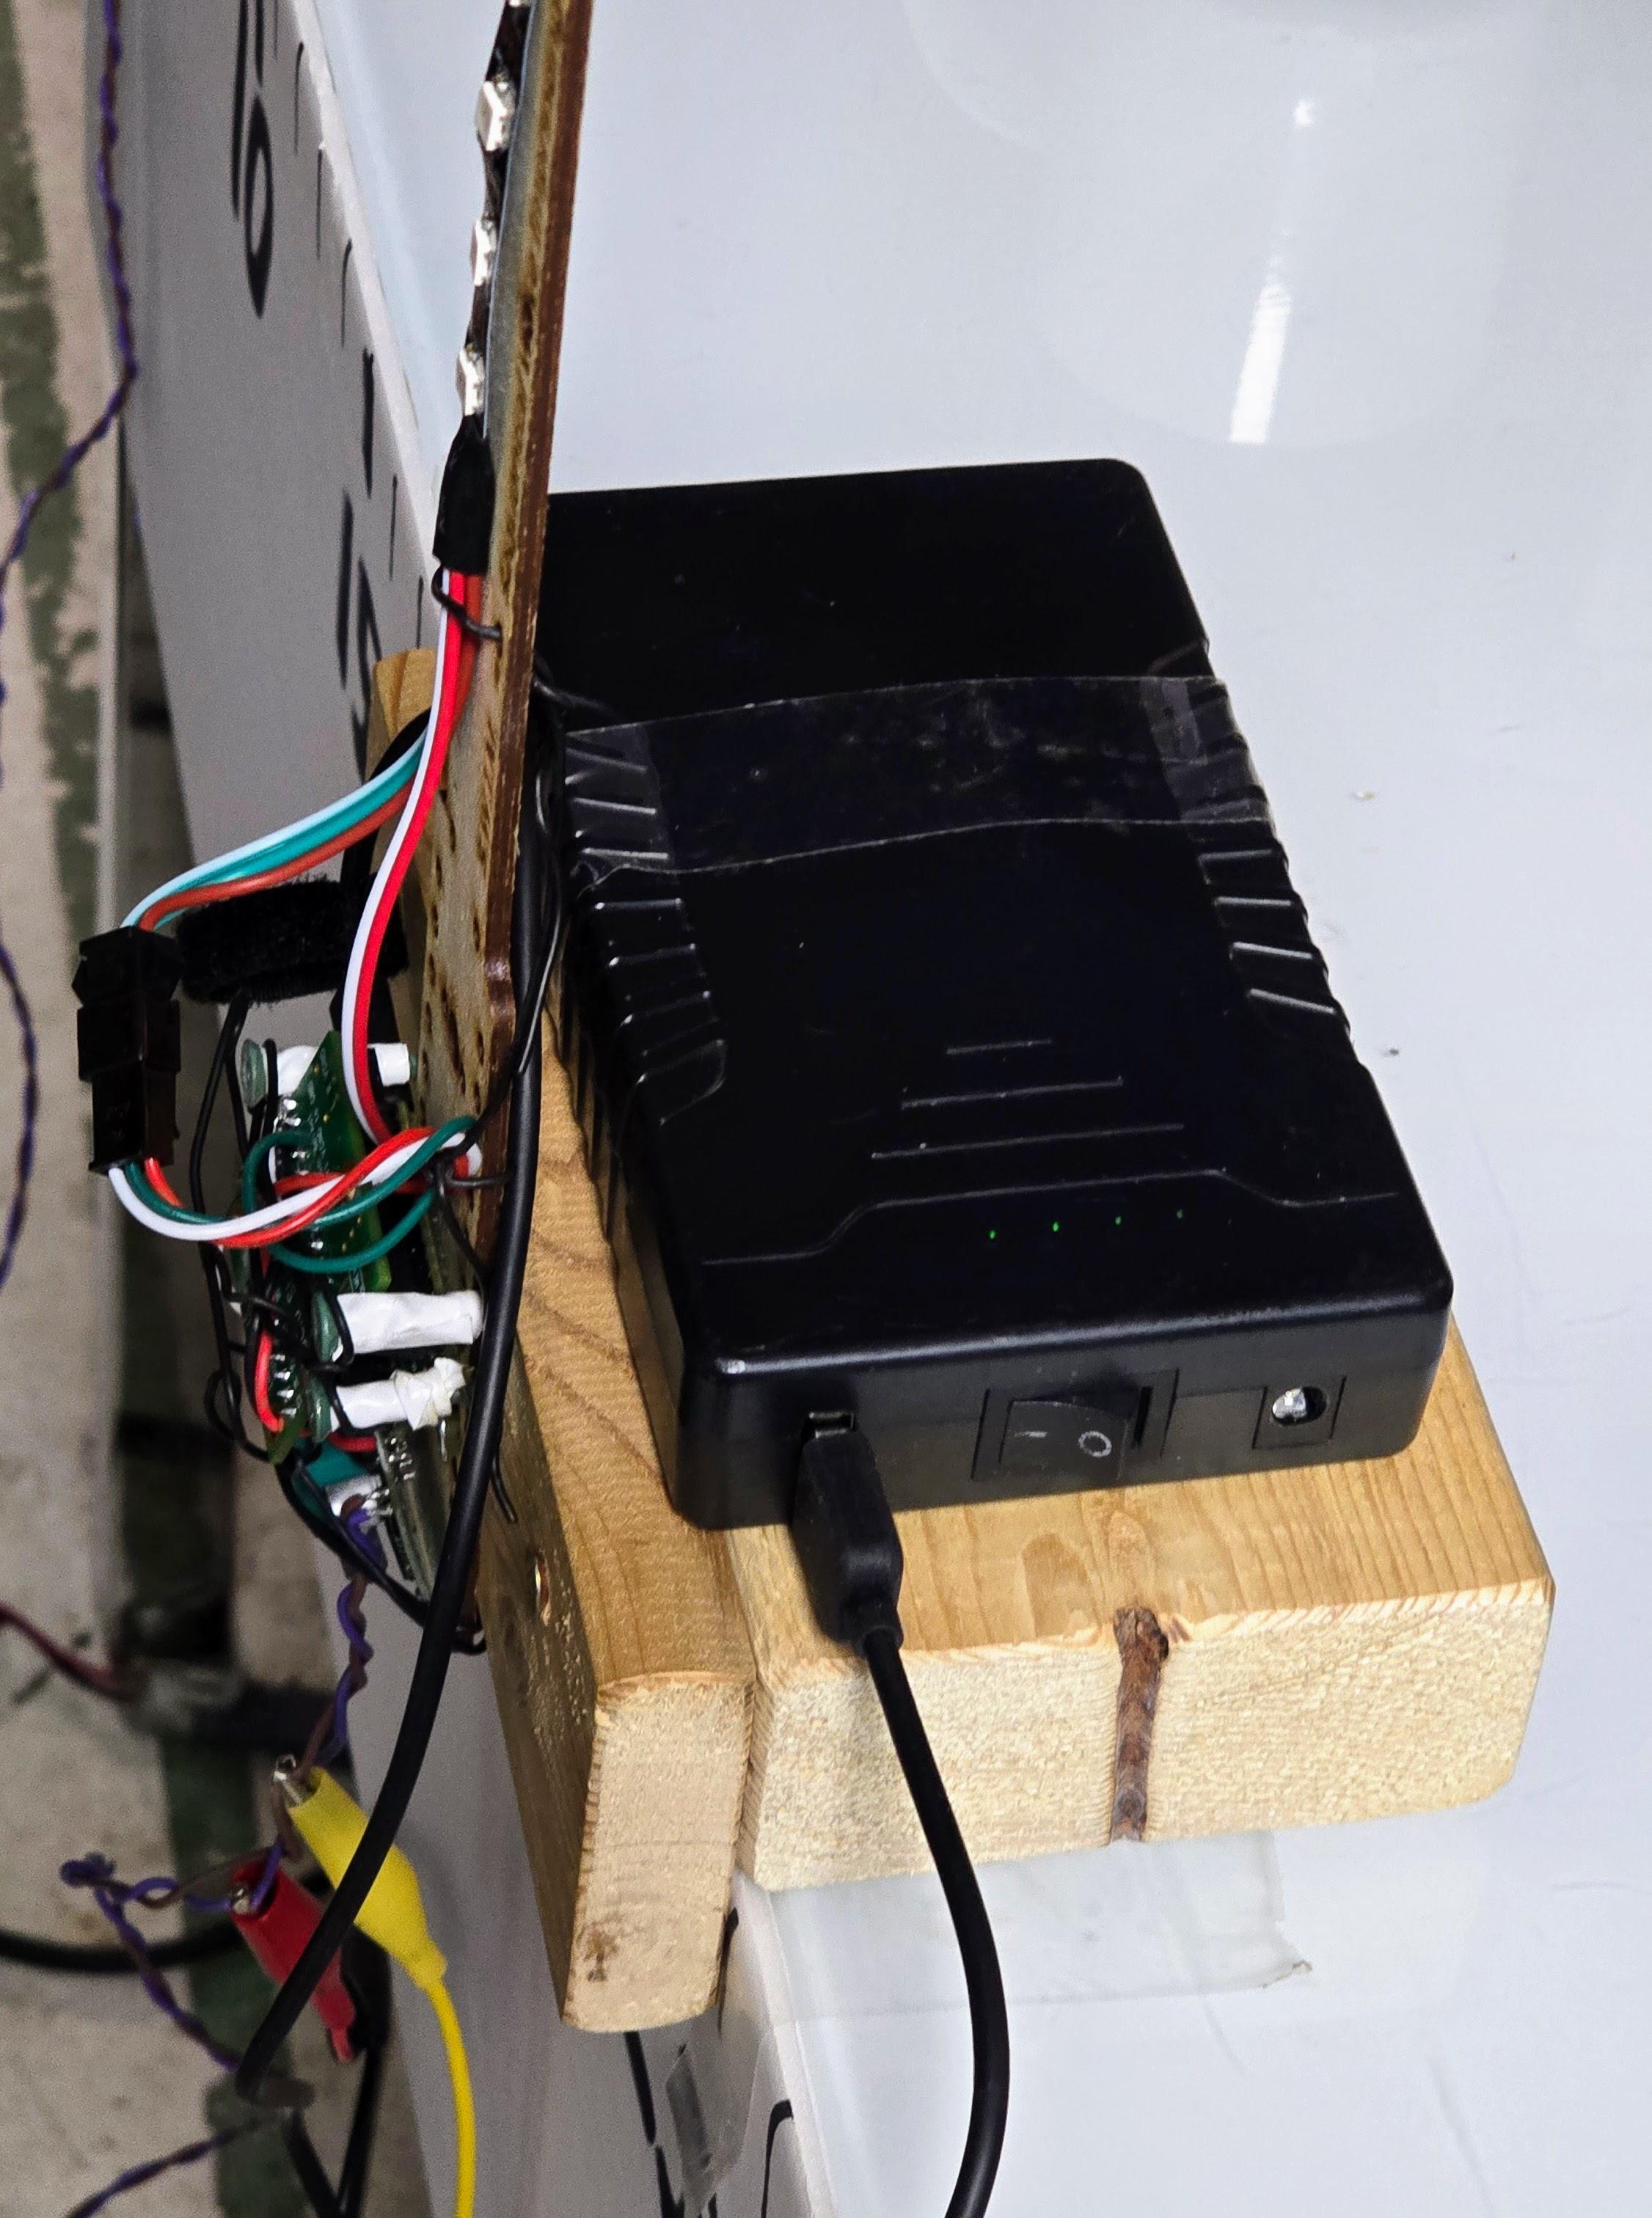
Mount the Teensy board and SWIM to the slider so you can move it across nicely together with the microphone.
Mount the speaker at the left edge of the table with the sufficiently long cord.
I also used a nice heavy USB powerbank as some additional ballast to weigh-down the slider so it is less likely to tip over. The battery powerbank slides along with the Teensy and powers it while the slider is moving.
Photograph Some Sound Waves


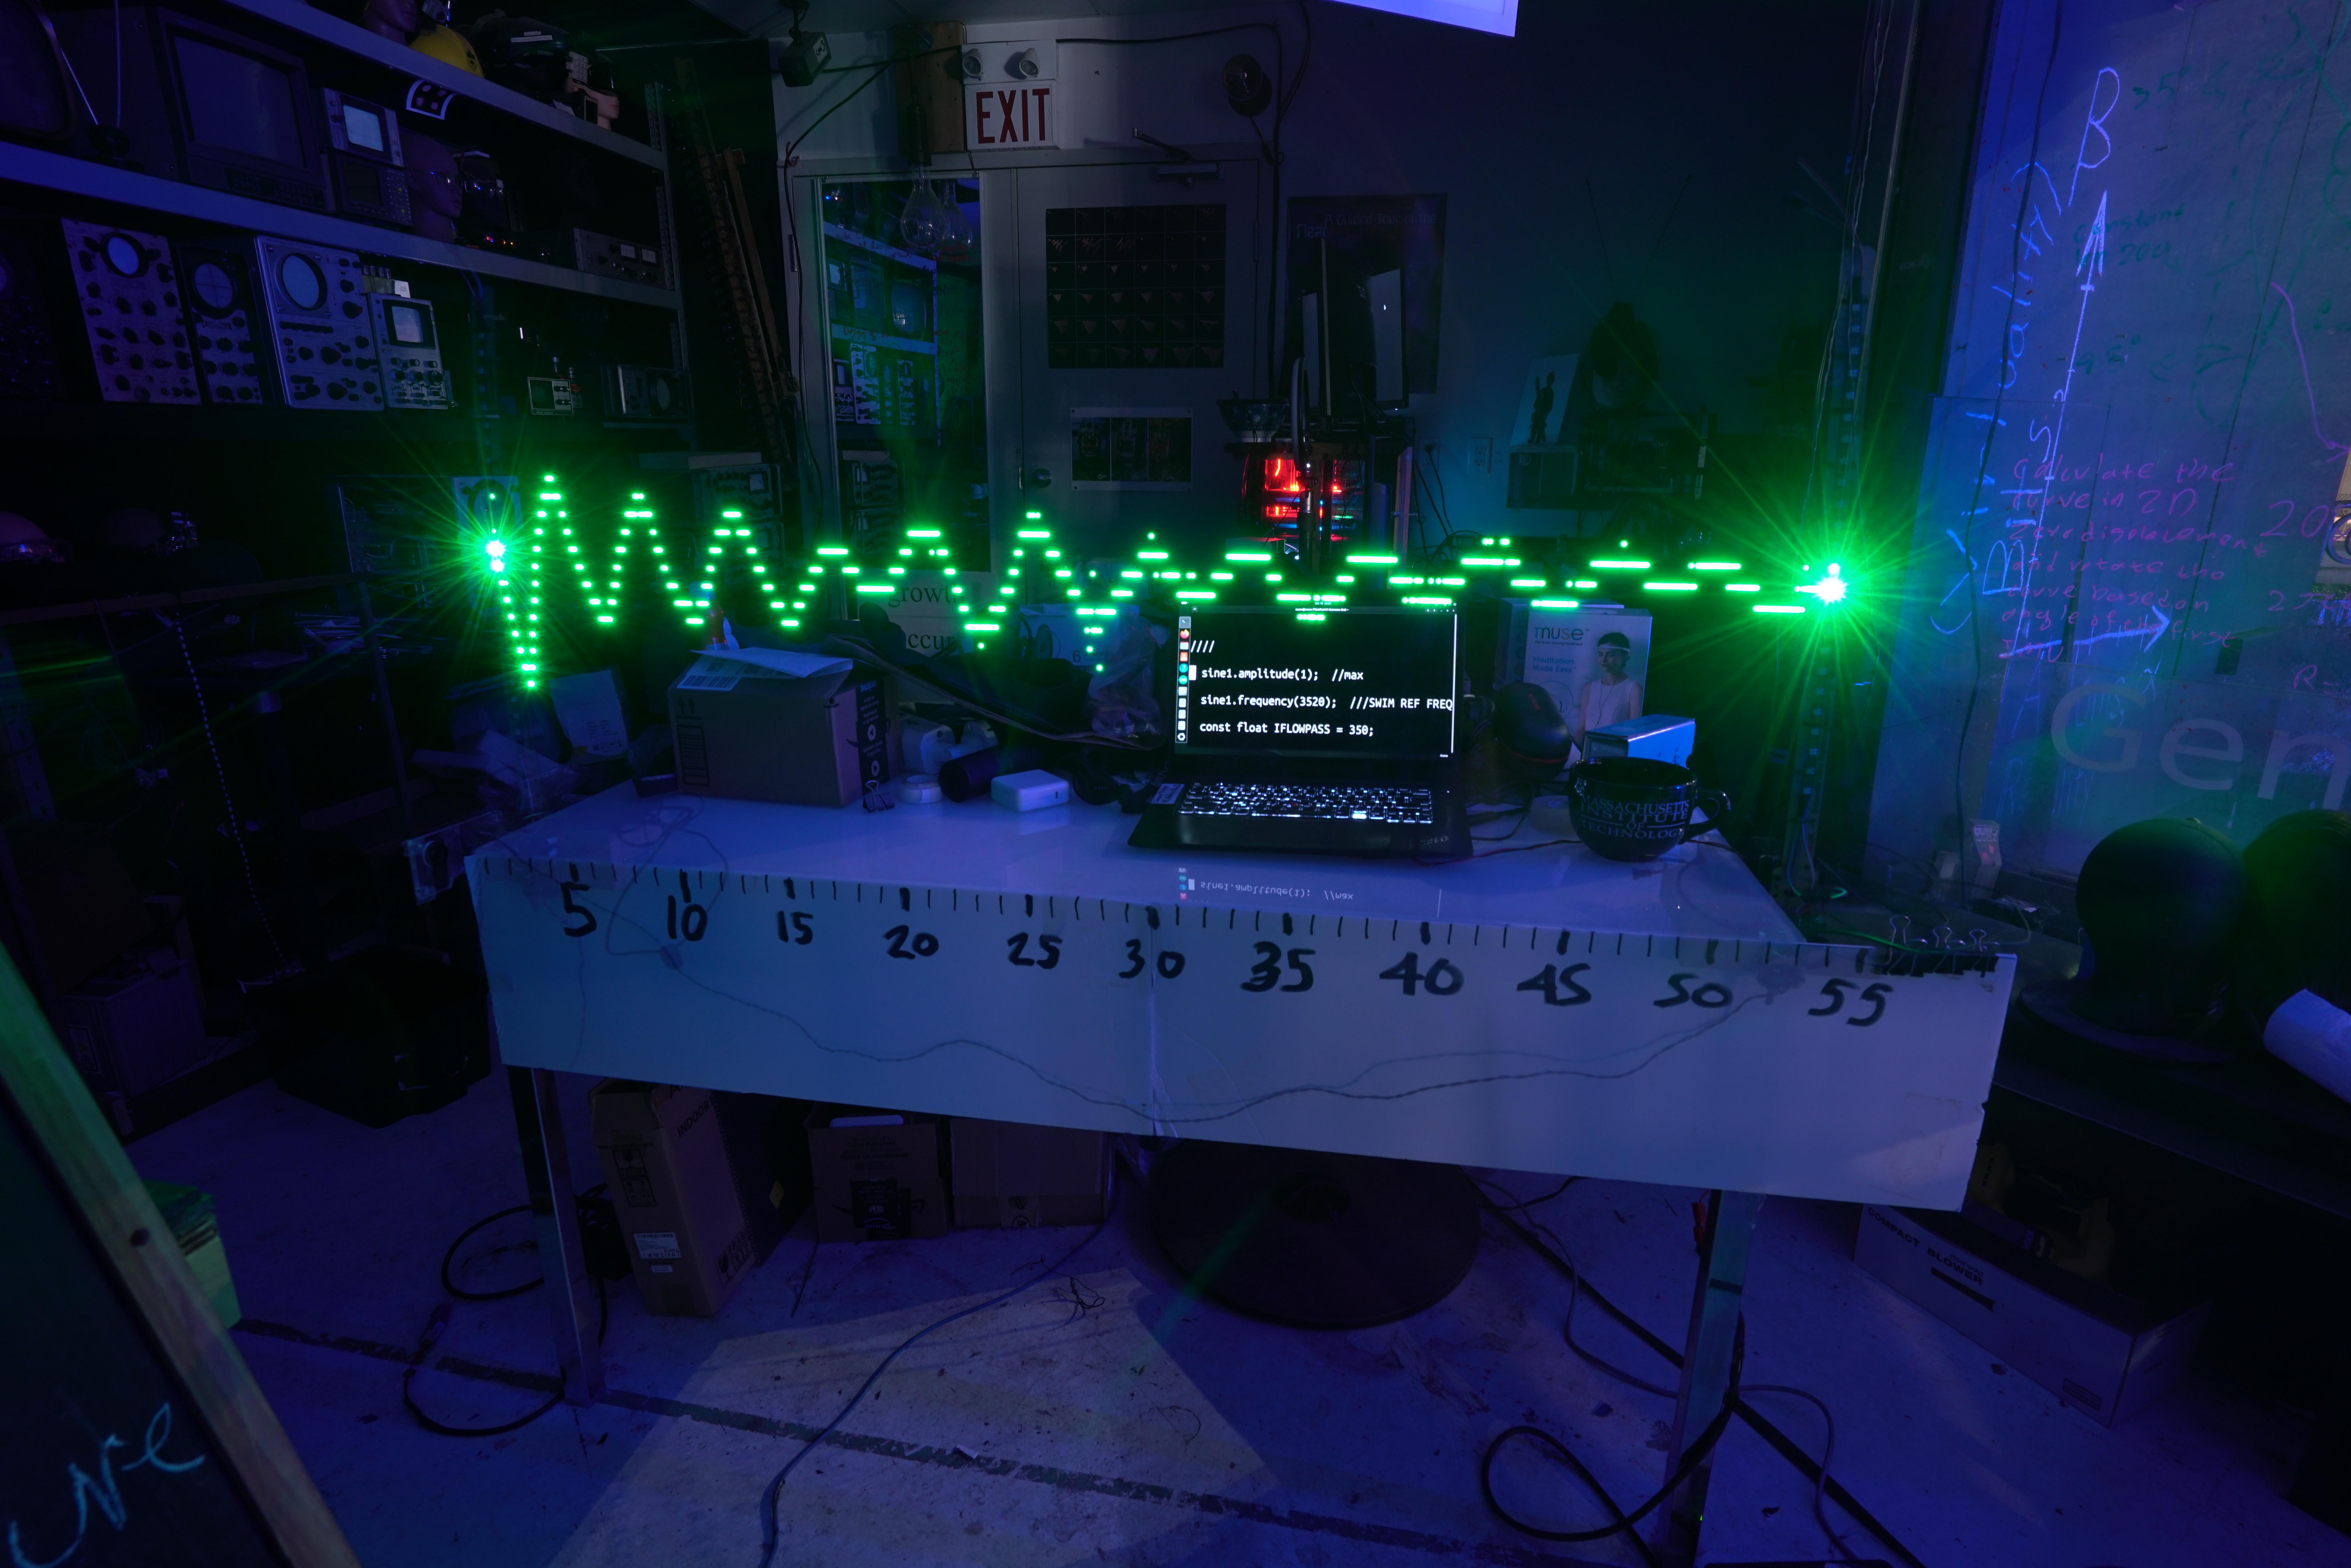
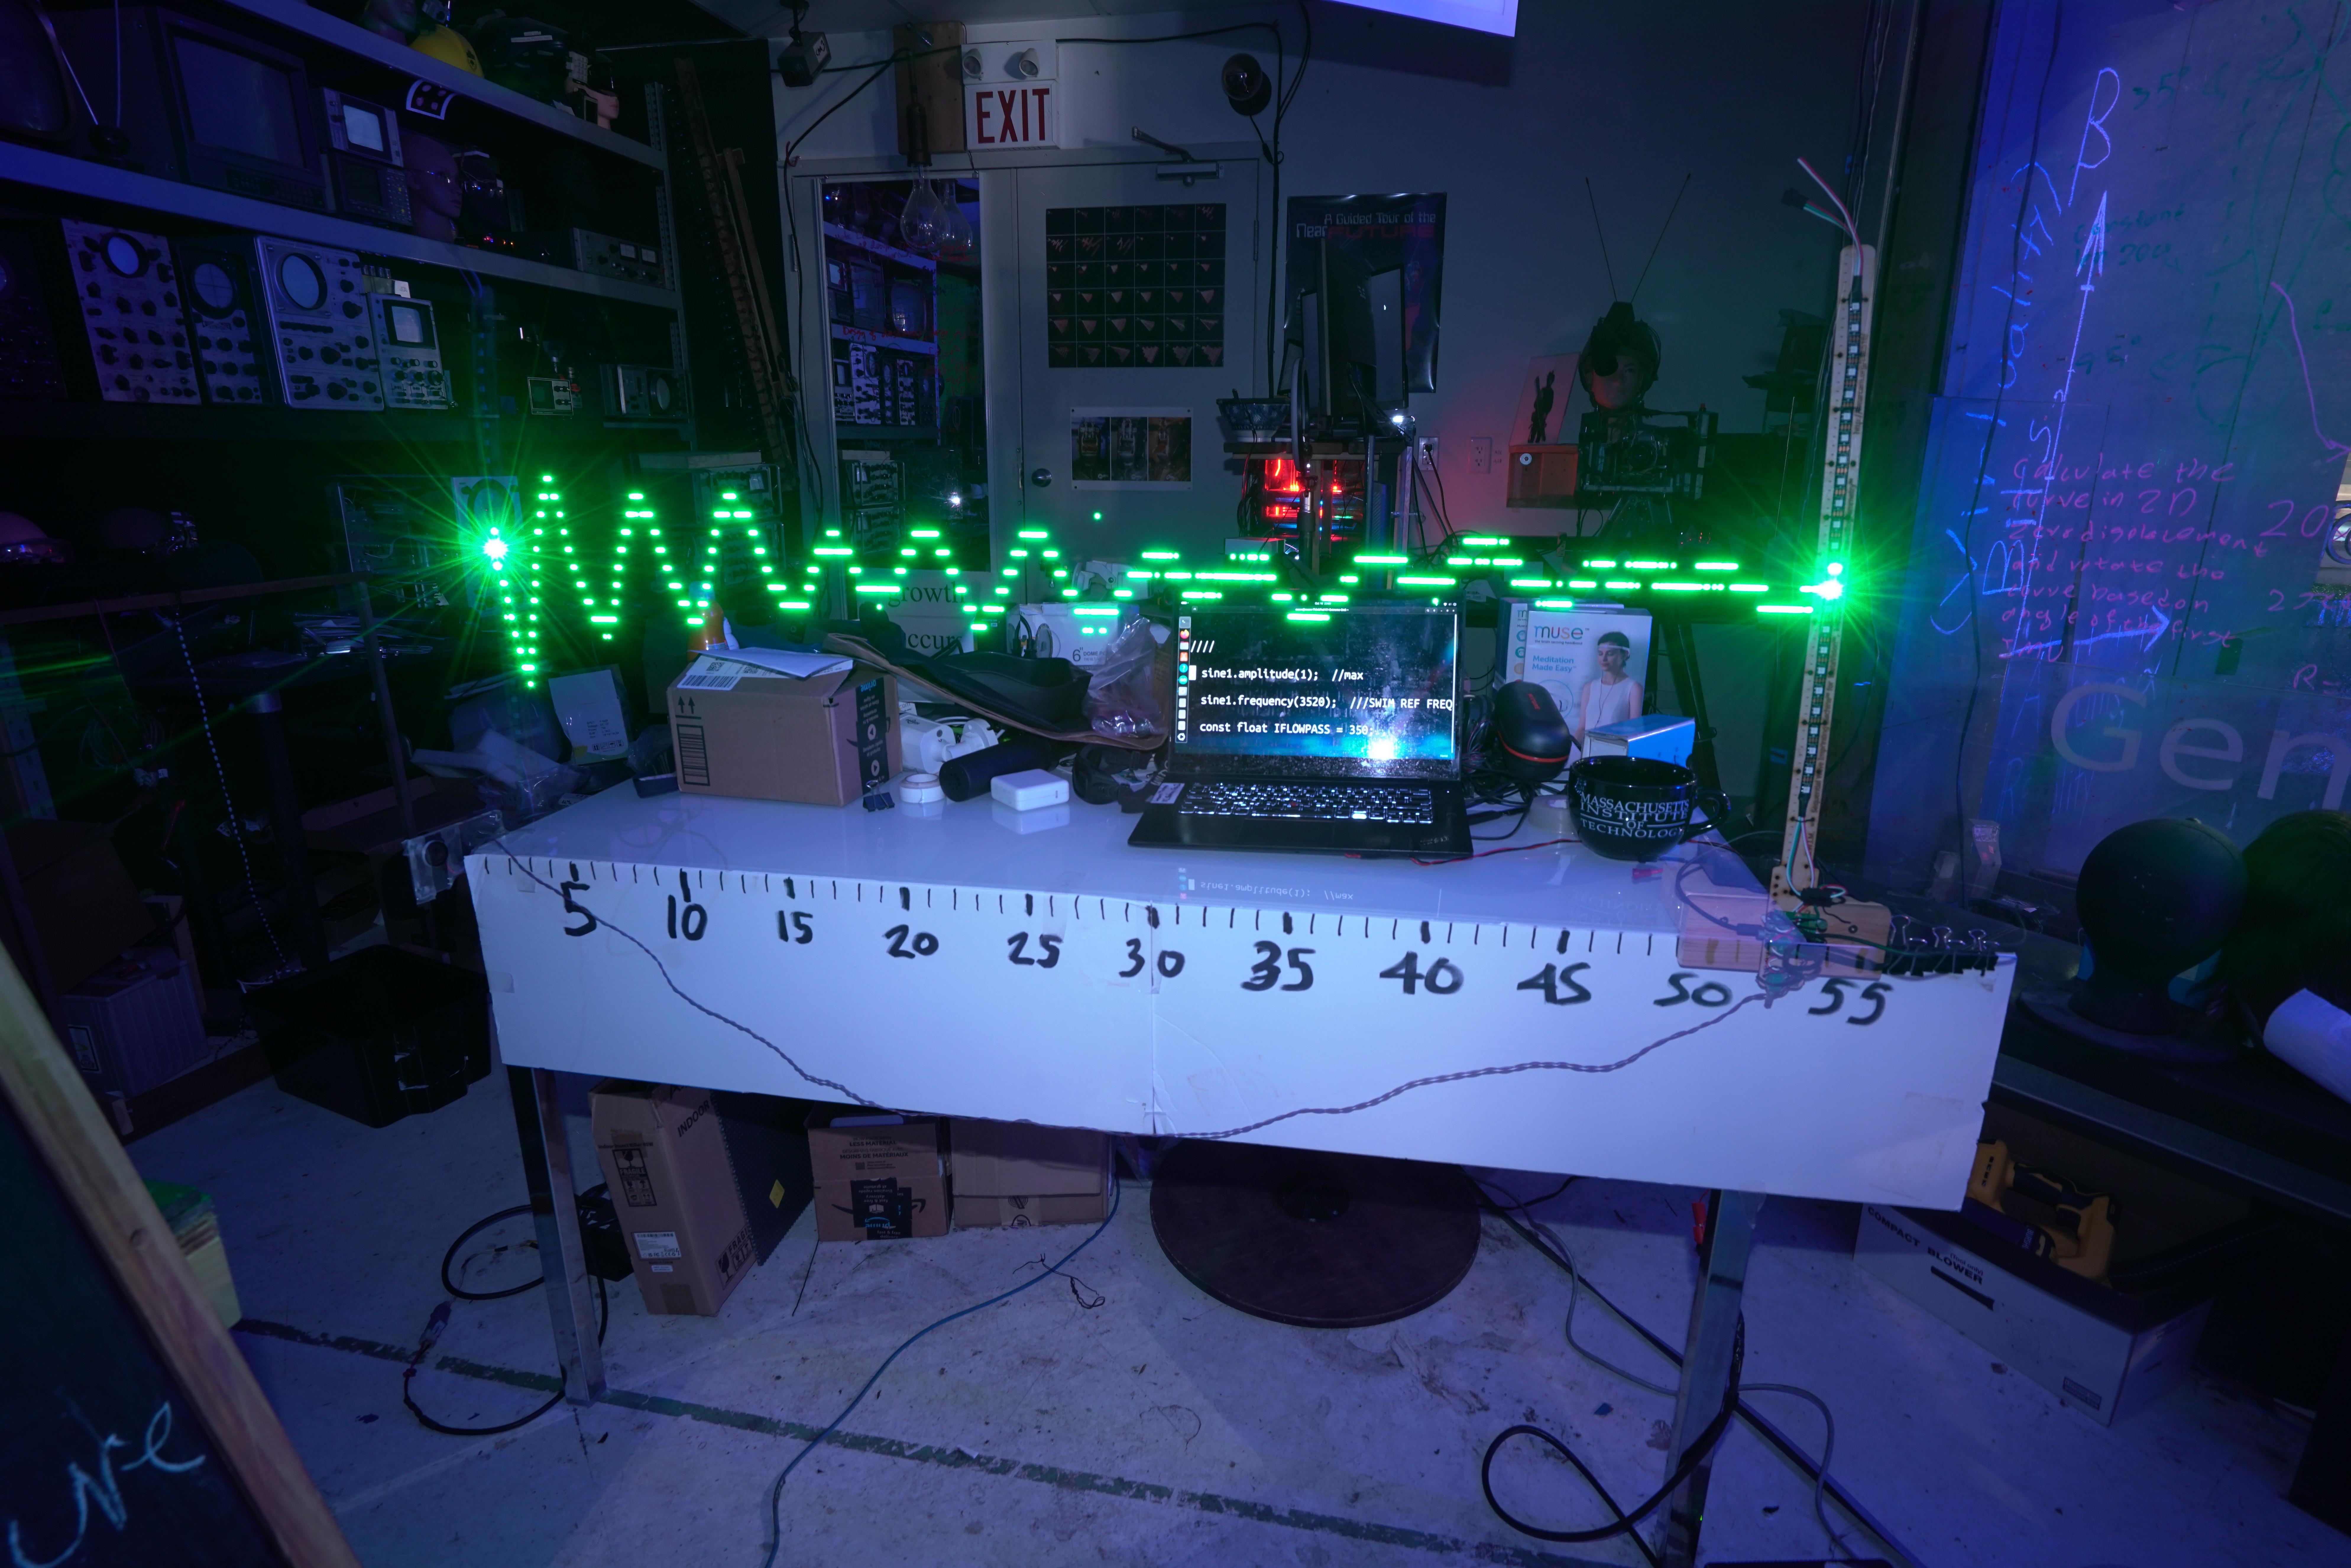
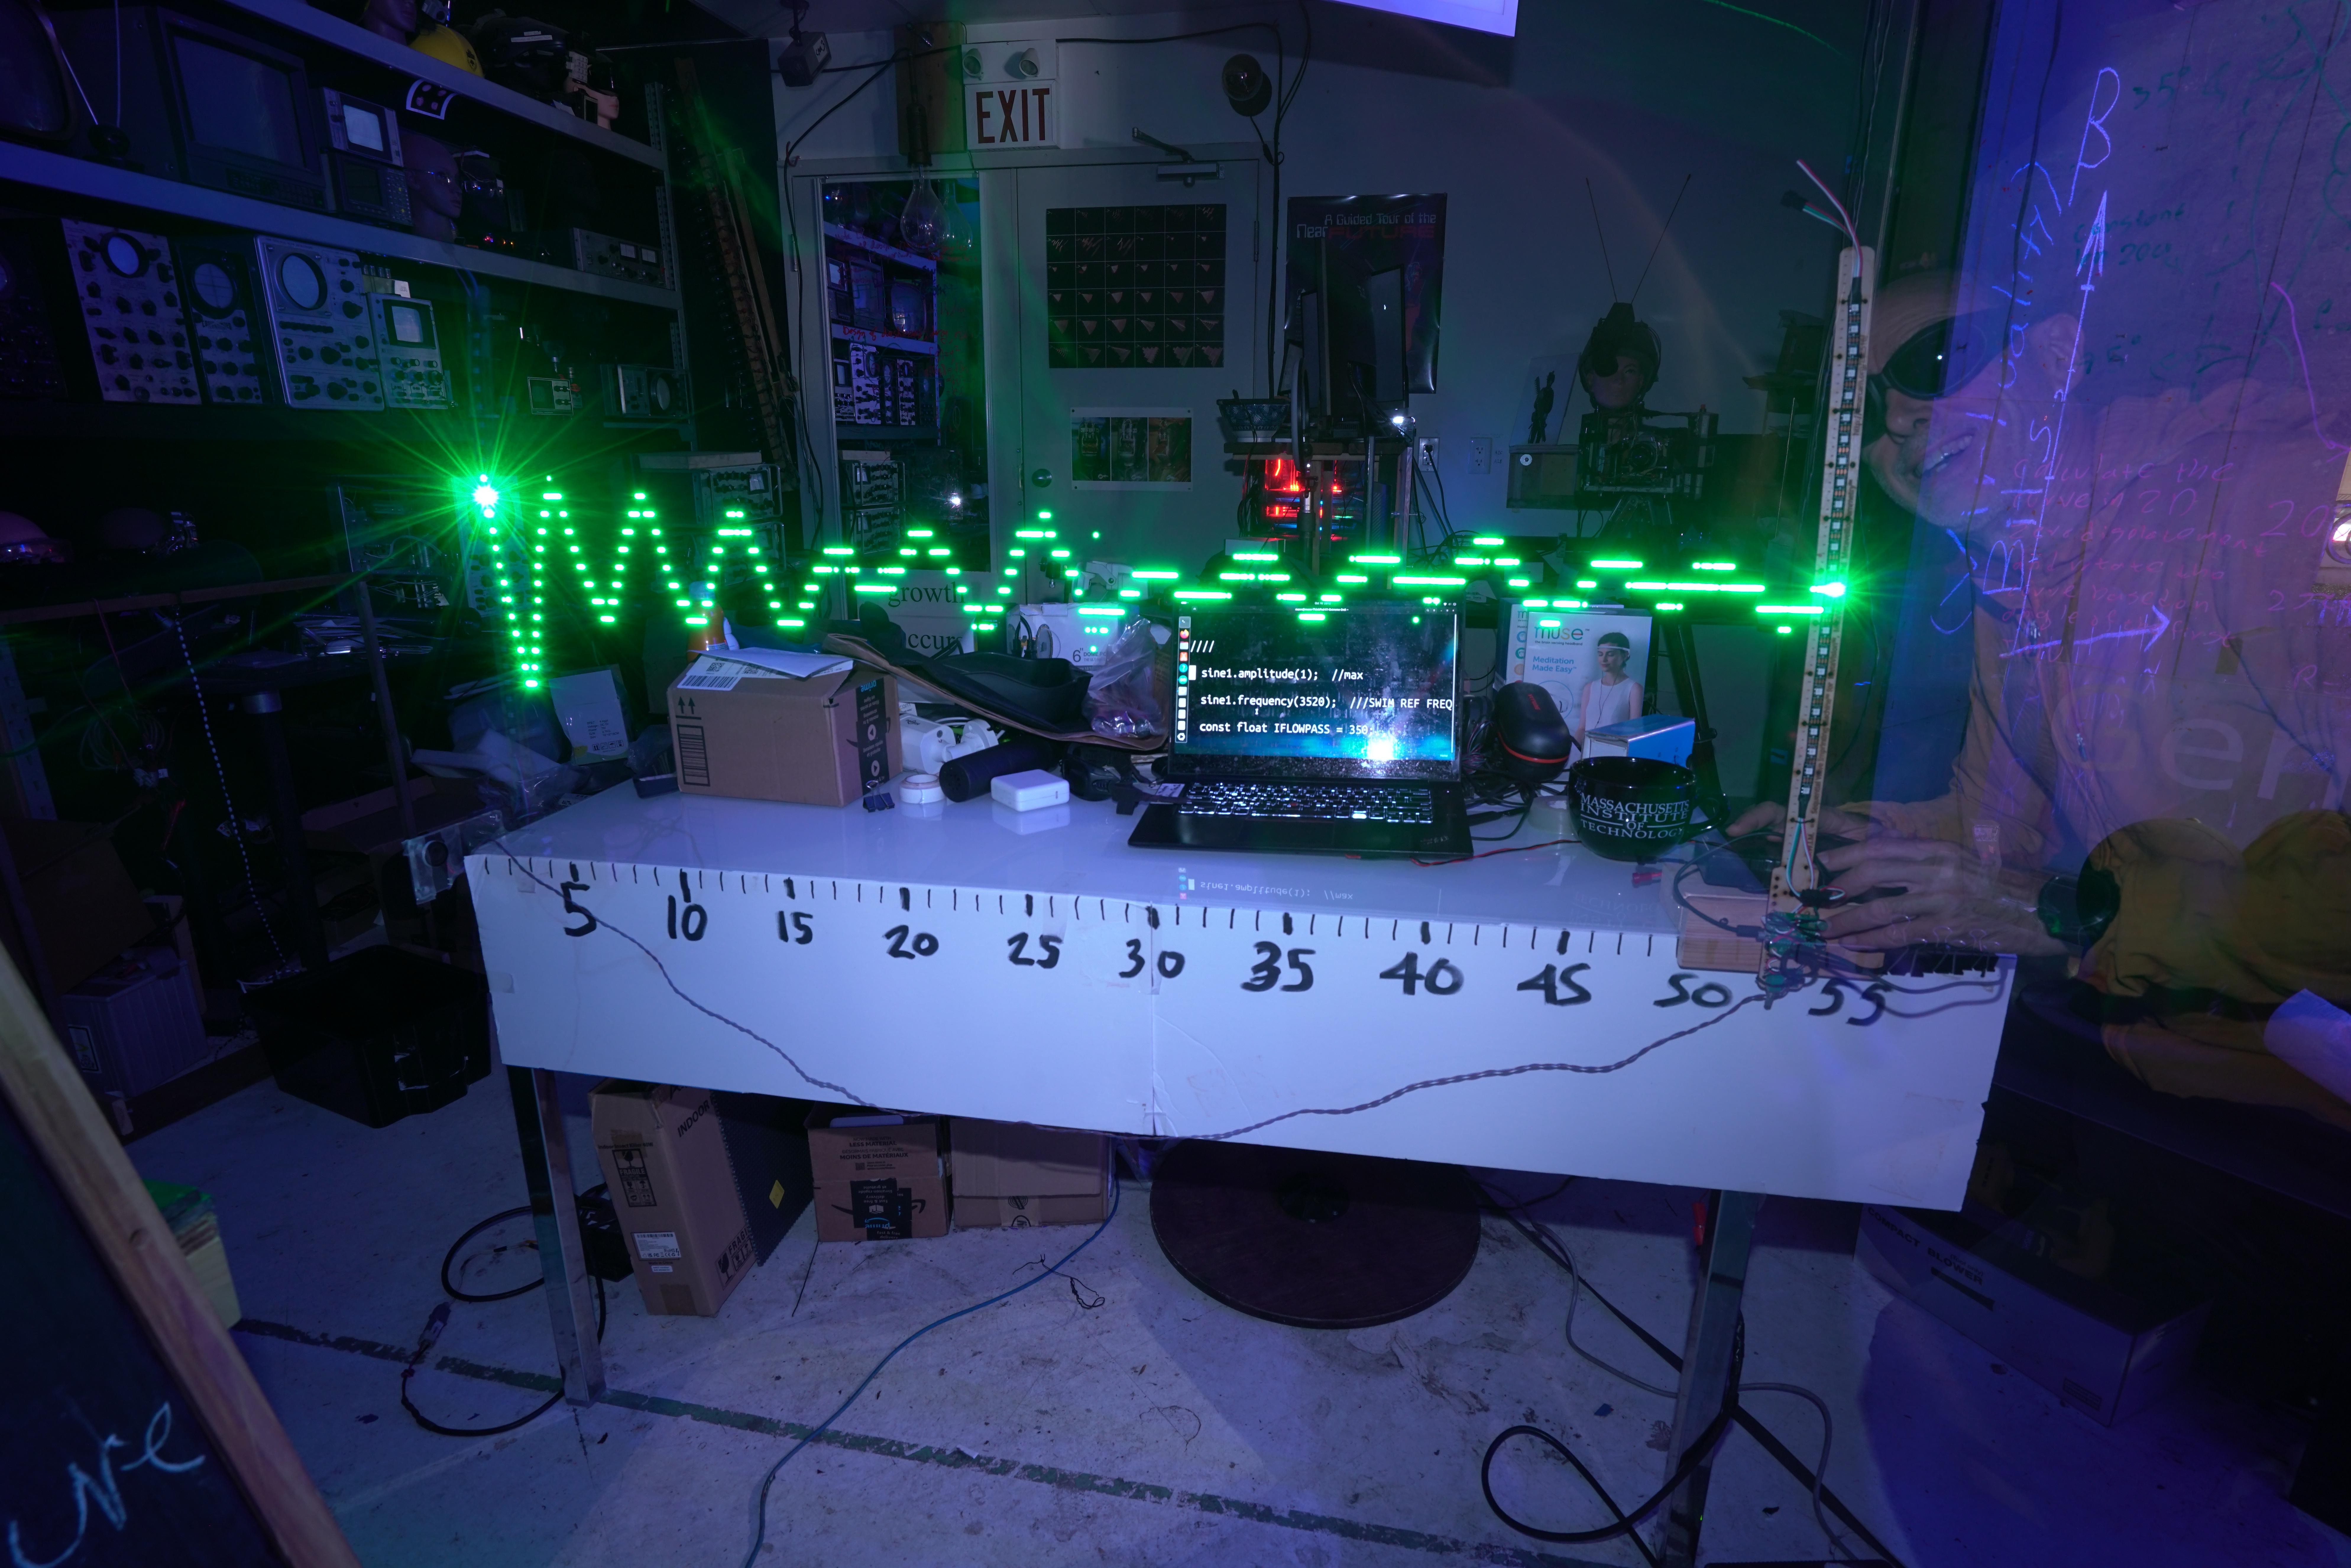
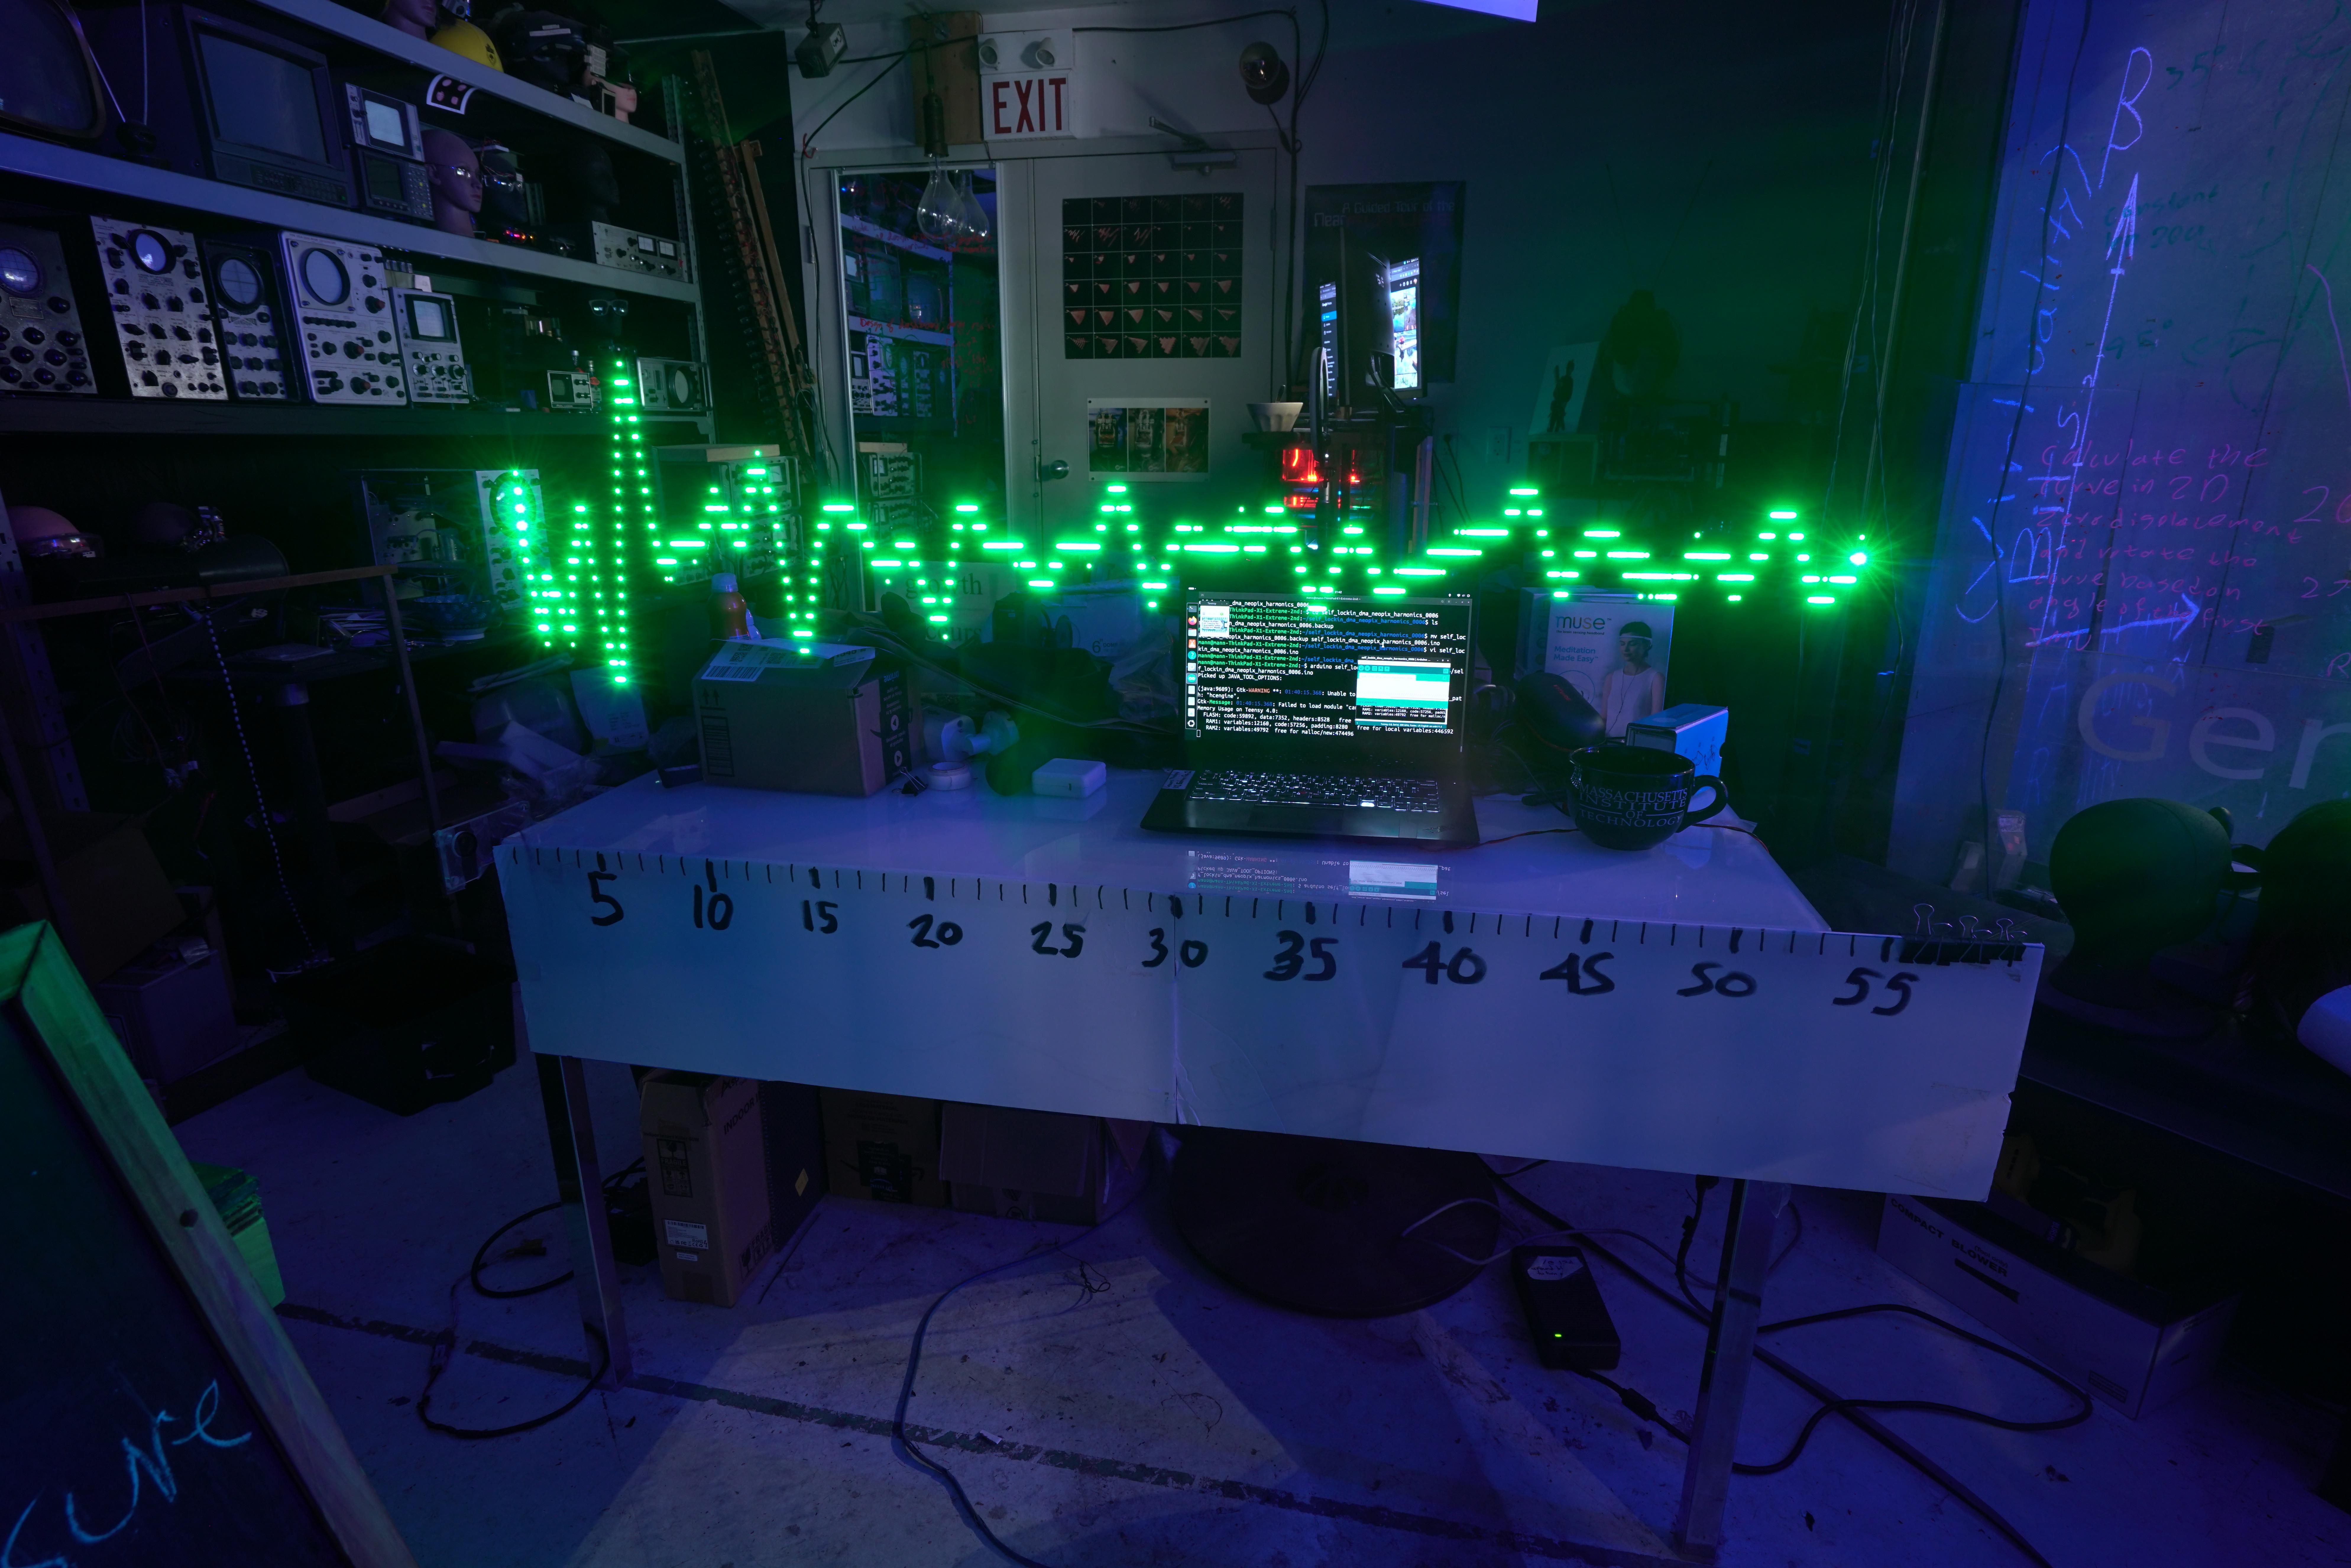
Take some photos of sound waves, setting the frequency to known values.
Record the frequency using Natural Pitch Notation (preferable to International Pitch Notation).
1A=27.5 CPS (Cycles Per Second) = lowest note on piano
2A=55 CPS
3A=110 CPS
4A=220 CPS
5A=440 CPS
6A=880 CPS
7A=1760 CPS
8A=3520 CPS
9A=7040 CPS
See
"User-Interfaces Based on the Water-Hammer Effect: Water-Hammer Piano as an Interactive Percussion Surface", Steve Mann, Ryan Janzen, Jason Huang, Matthew Kelly, Lei Jimmy Ba, Alexander Chen, TEI'11, January 22-26, 2011, Funchal, Portugal. ACM 978-1-4503-0478-8/11/01
6A=880 CPS (first of the series of pictures above) is about the lowest you can get good results with the small speaker.
Next are a couple of photos at 7A=1760 CPS.
Use a large-font on your screen set dim in the background so you can see the frequency setting.
Compare with expected theoretical results, e.g. calculate the speed-of-sound, e.g., square root of the ratio of air pressure to density at the temperature in the room, in my case 20 deg. C, but check the temperature of your room and adjust accordingly:
c=sqrt(1.4*101325/1.204);%speed of sound air per (m/s), 101325Pa;1.204kg/m^3,20c
(Octave)
Count cycles and compare your photographs with the theoretical results.
Going Further
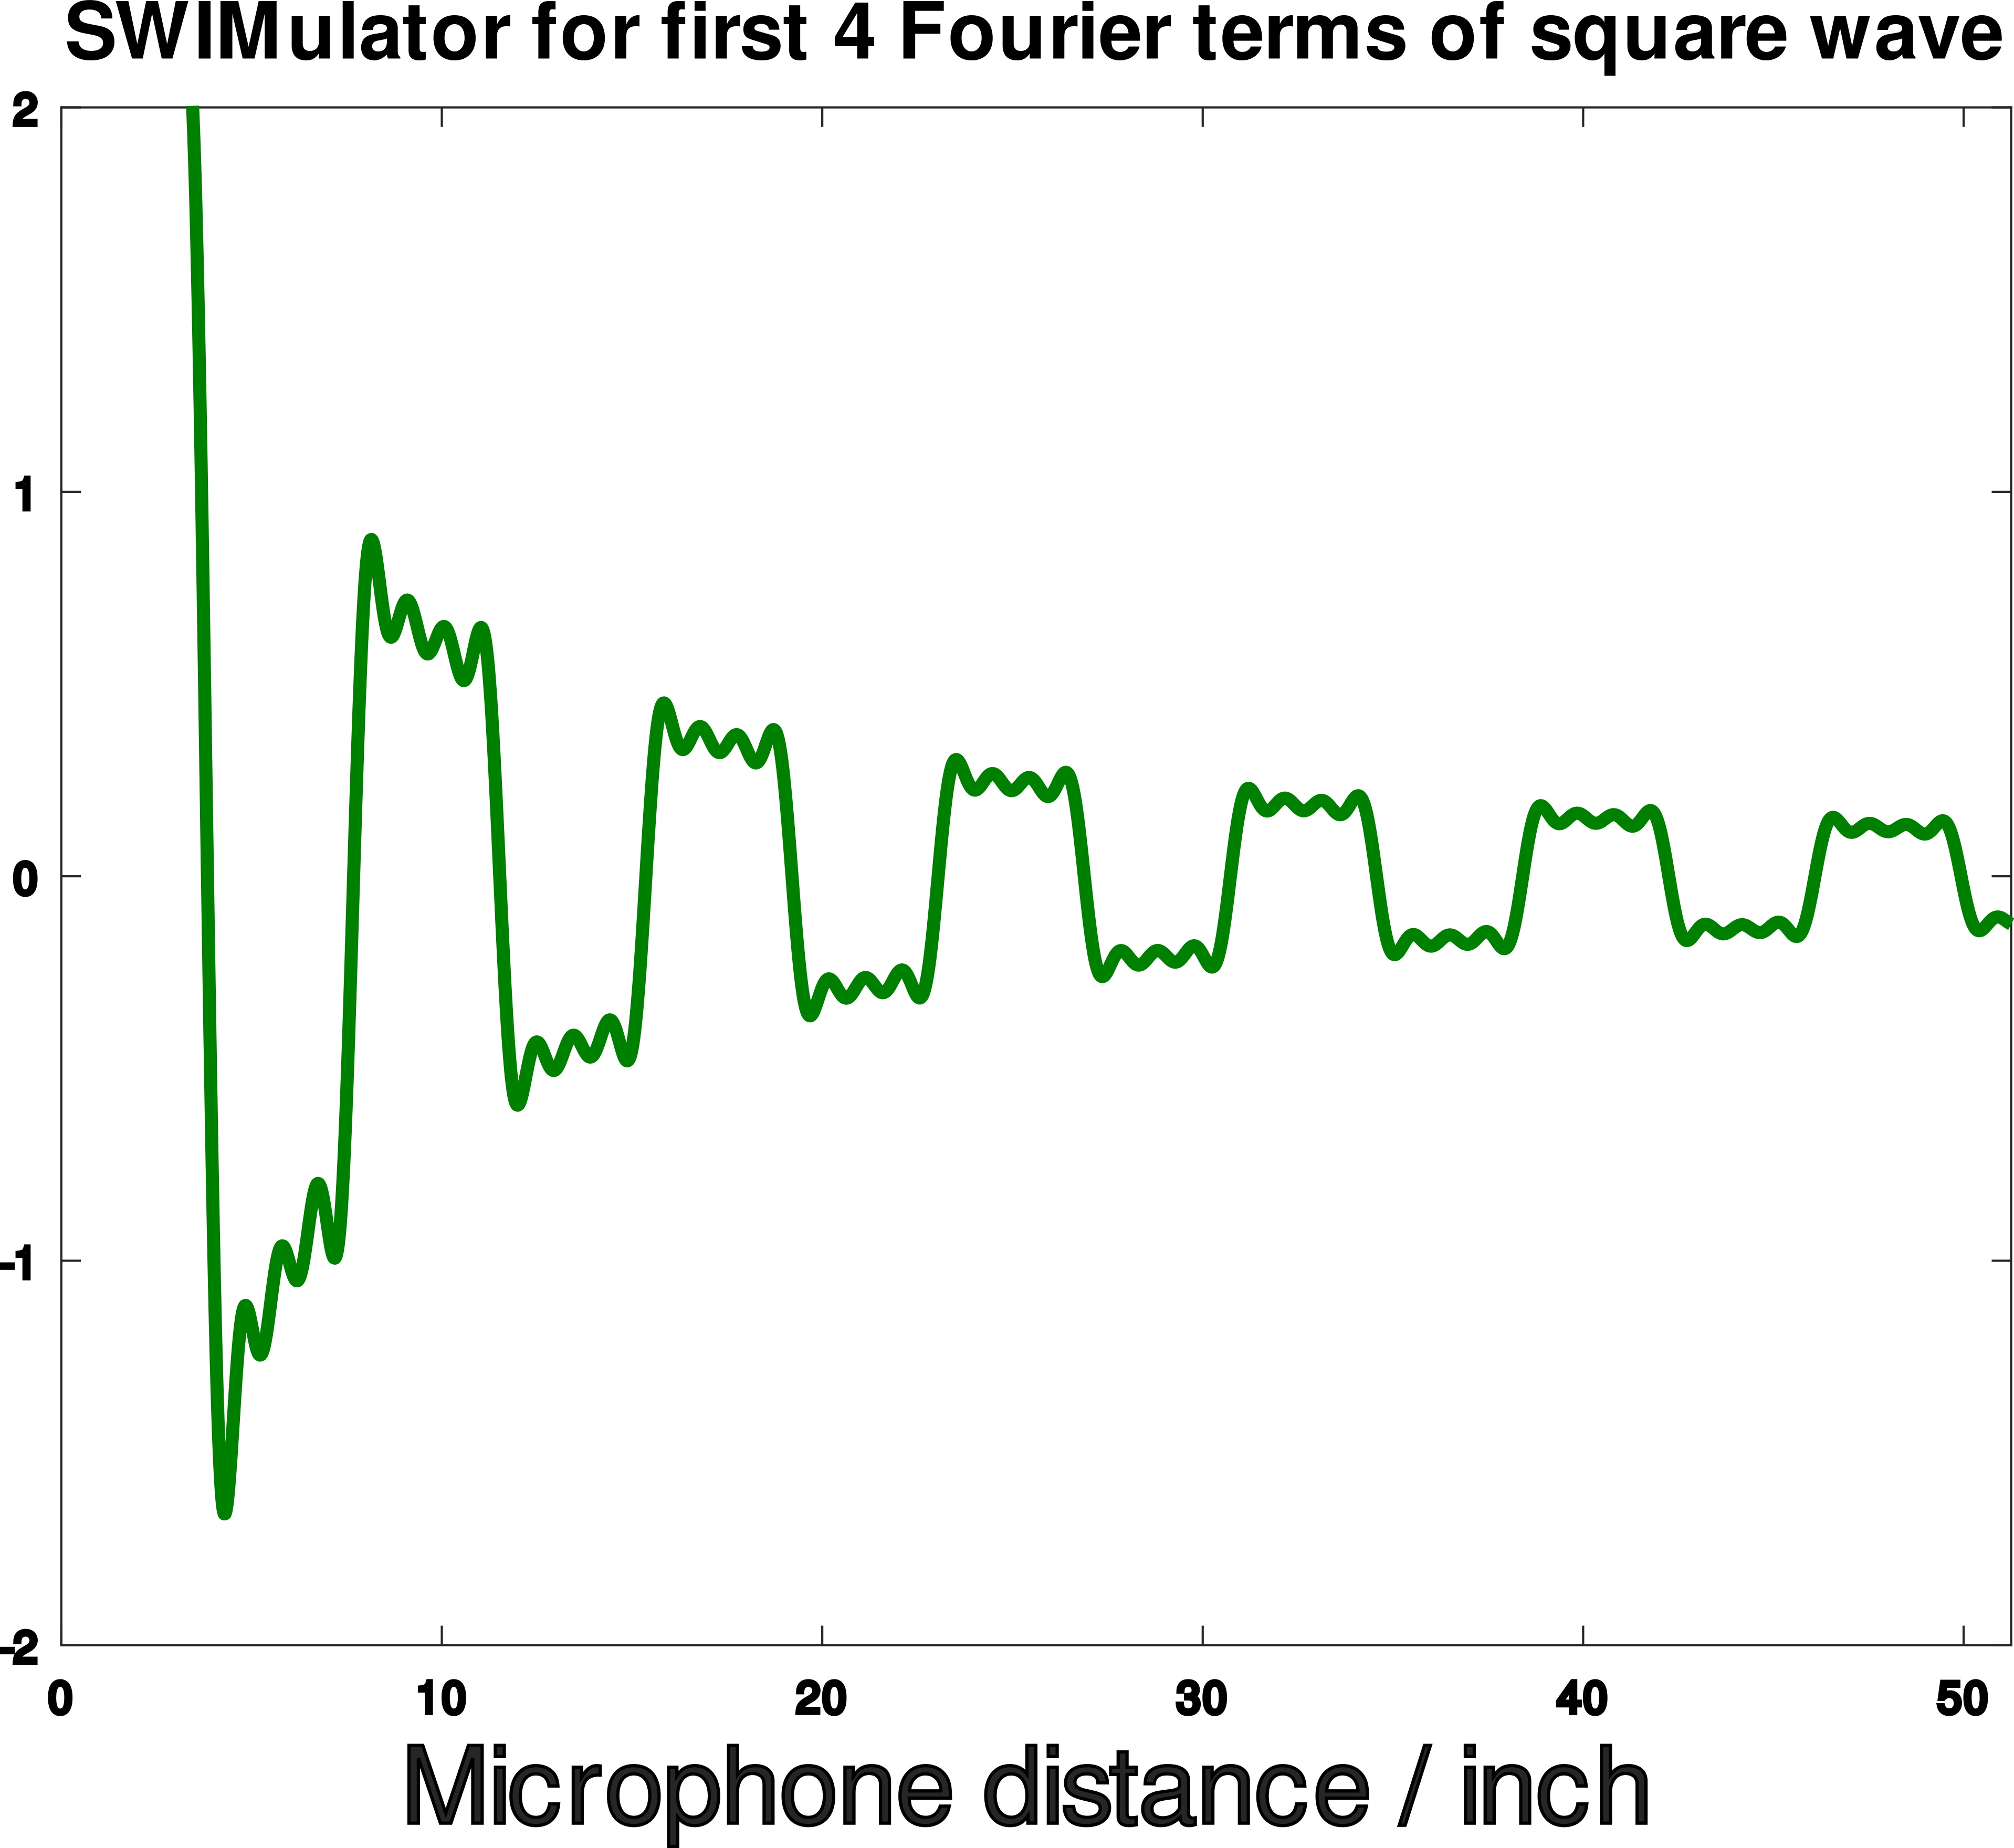
Try multiple sine waves in a Fourier series such as for a square wave, and compare with theory. Consider for example the first 4 odd terms, as in the following SWIMulator (SWIM simulator) Octave file (with PDF plot printout example attached).
f=1760; % fundamental is A440*4 (known as 7A in Natural Pitch Notation)
c=sqrt(1.4*101325/1.204);%speed of sound air per (m/s), 101325Pa;1.204kg/m^3,20c
L=48*2.54/100; % rail length per meter (4 foot = 48 inch table rail travel).
t=L/c; % time per second for sound to travel along rail travel length
n=f*t; % number of cycles per rail length
x=(0:2047)/2048 * n; % number of cycles
wavelinch=48/max(x); % wavelength per inch
x0=3.25; %closest the mic gets to the speaker is 3.25 inches
x=x+x0/wavelinch; % x goes from 3.25 inches to 3.25*48 inches
s1=sin(1*2*pi*x);
s3=sin(3*2*pi*x)/3;
s5=sin(5*2*pi*x)/5;
s7=sin(7*2*pi*x)/7;
s=(s1+s3+s5+s7)./(x); % sound falls off as 1/x^2 but speaker is directional /x
d=x*wavelinch; % distance per inch
plot(d,s);
axis([0 d(length(d)) -2 2])
xlabel("Microphone distance / inch")
title("SWIMulator for first 4 Fourier terms of square wave")
Downloads
Acknowledgements
I'd like to thank all those who helped, including Kyle, Aiden, Nishant, Rocklen, Alex, Mitchell, and many others, as well as those who helped in previous years, including, but not limited to my many co-authors and colleagues of past research on this and related topics. Thank you in advance to all those in my future courses and classes who will help spread this knowledge by building and using a SWIM.