Yose Hailong EBike Battery - Dismantling, Due to Charging Problem
by qthurtle in Workshop > Electric Vehicles
144 Views, 0 Favorites, 0 Comments
Yose Hailong EBike Battery - Dismantling, Due to Charging Problem
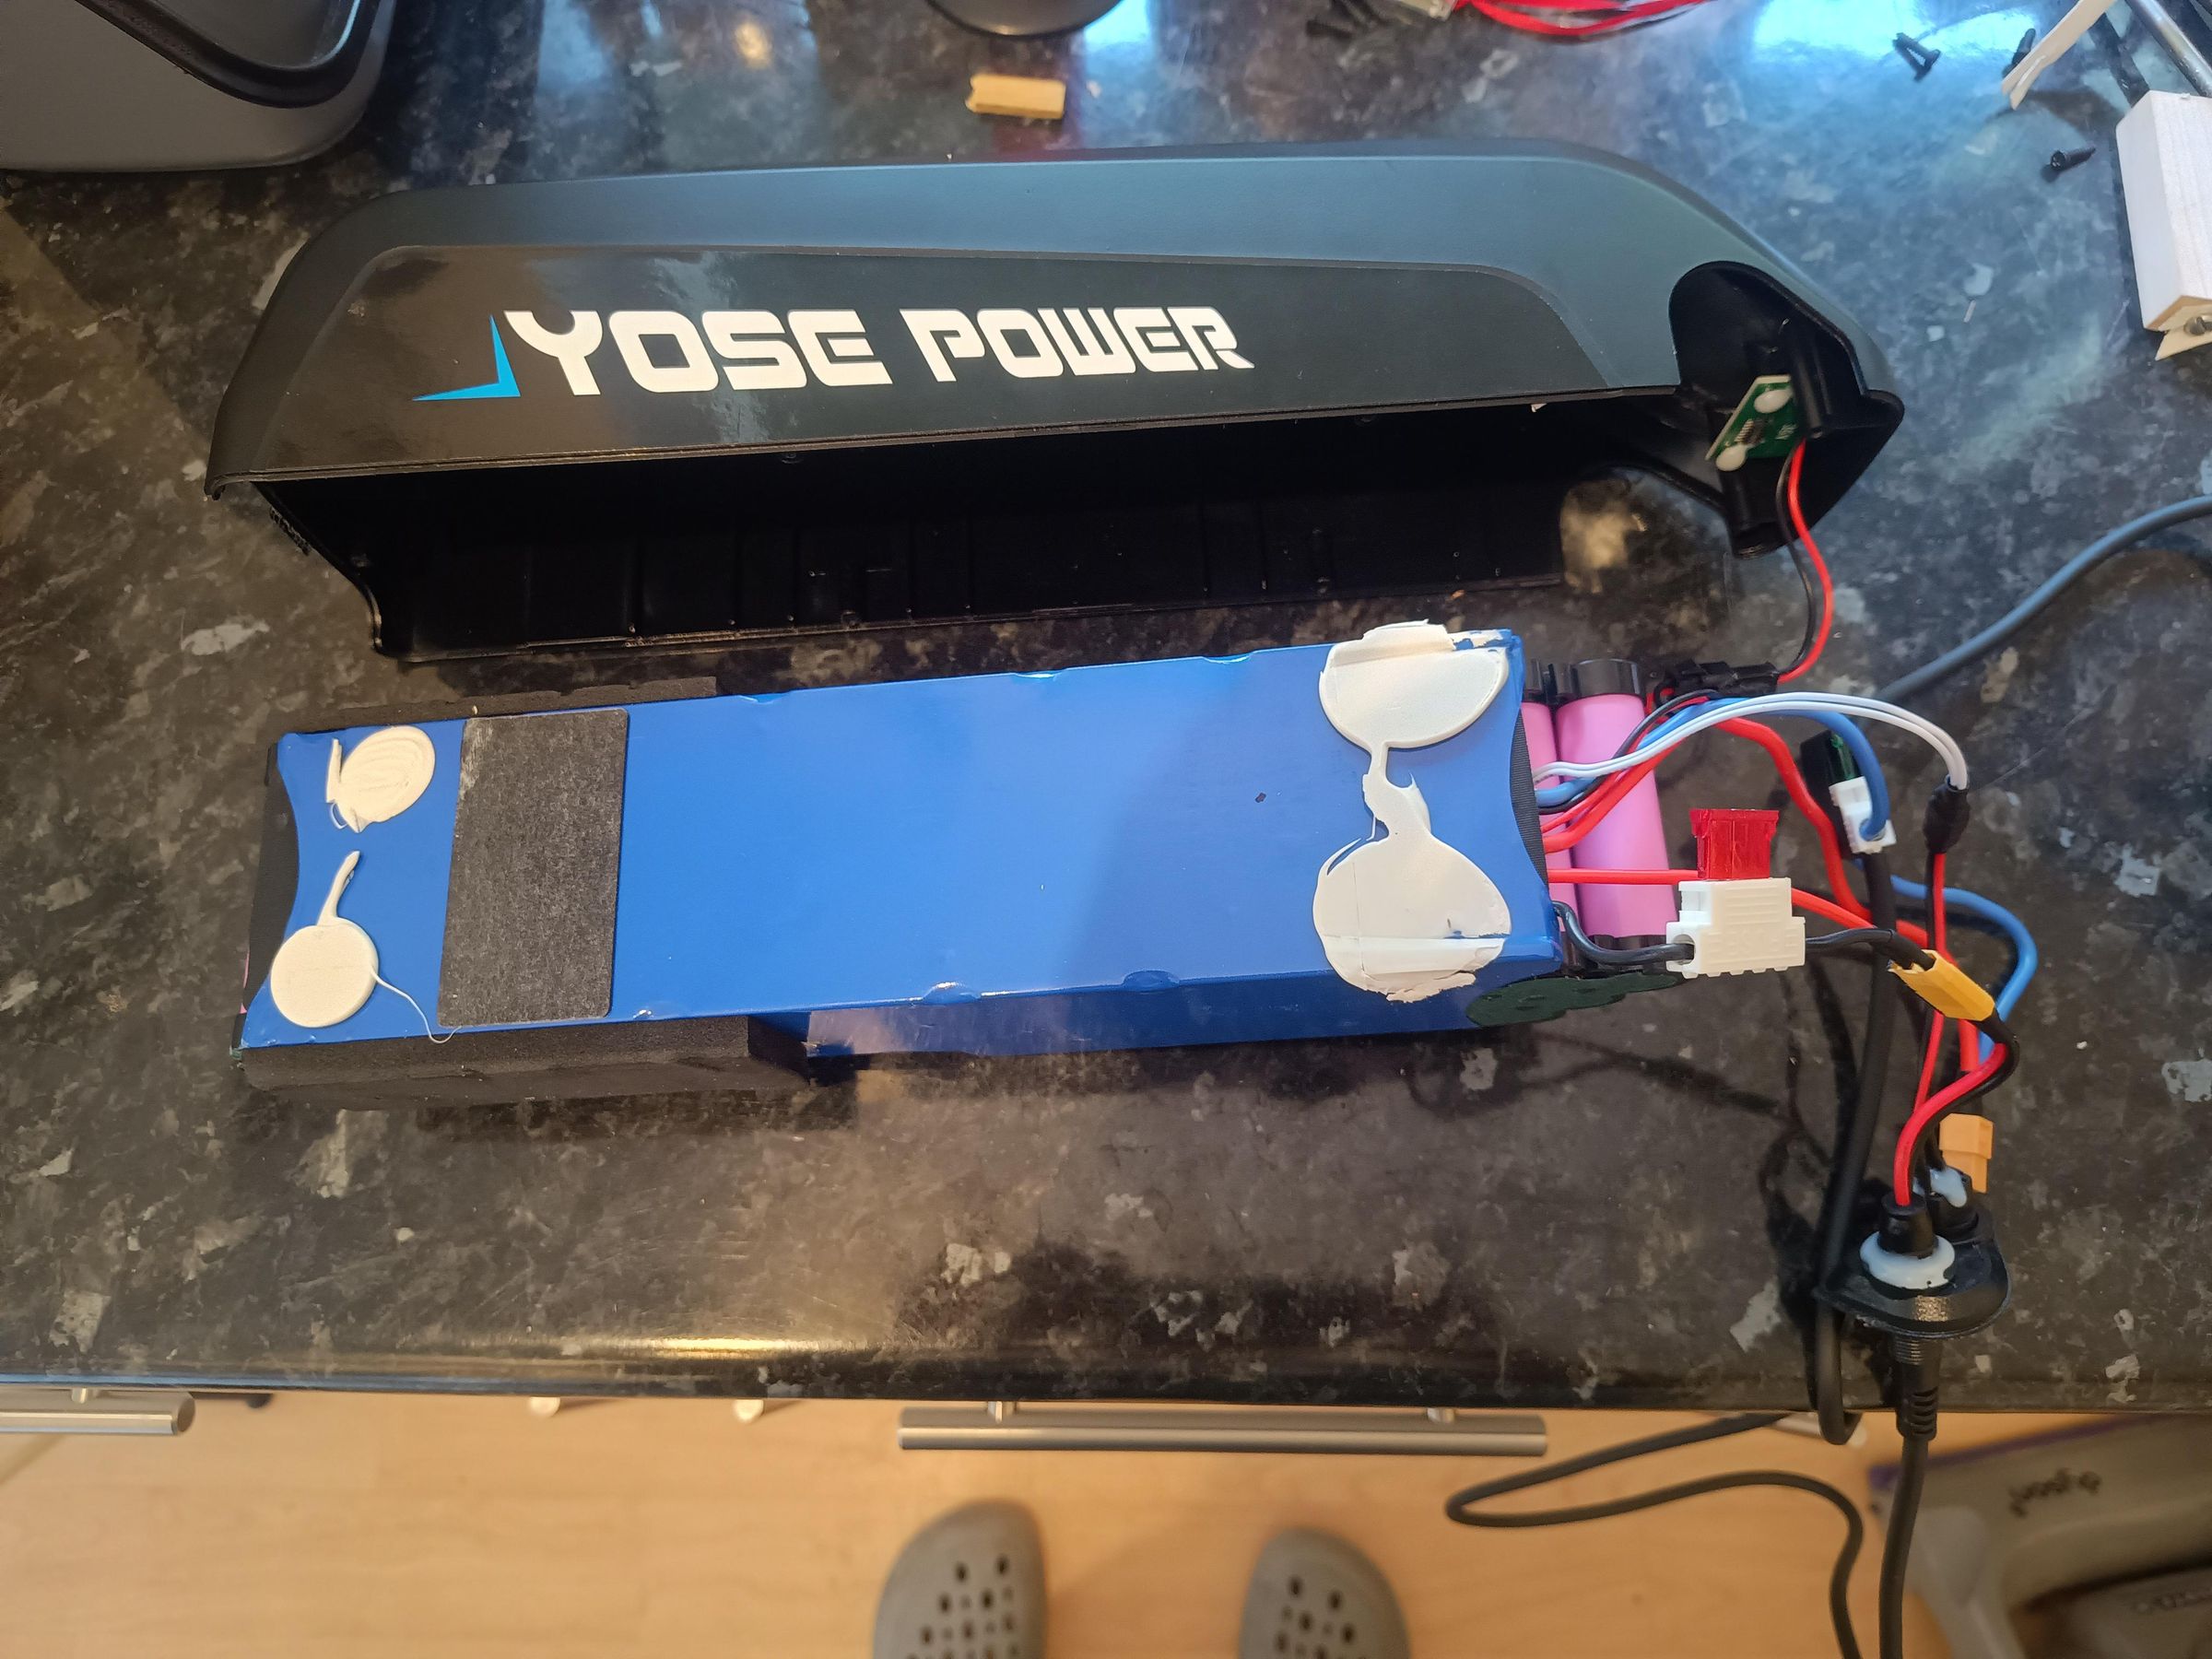
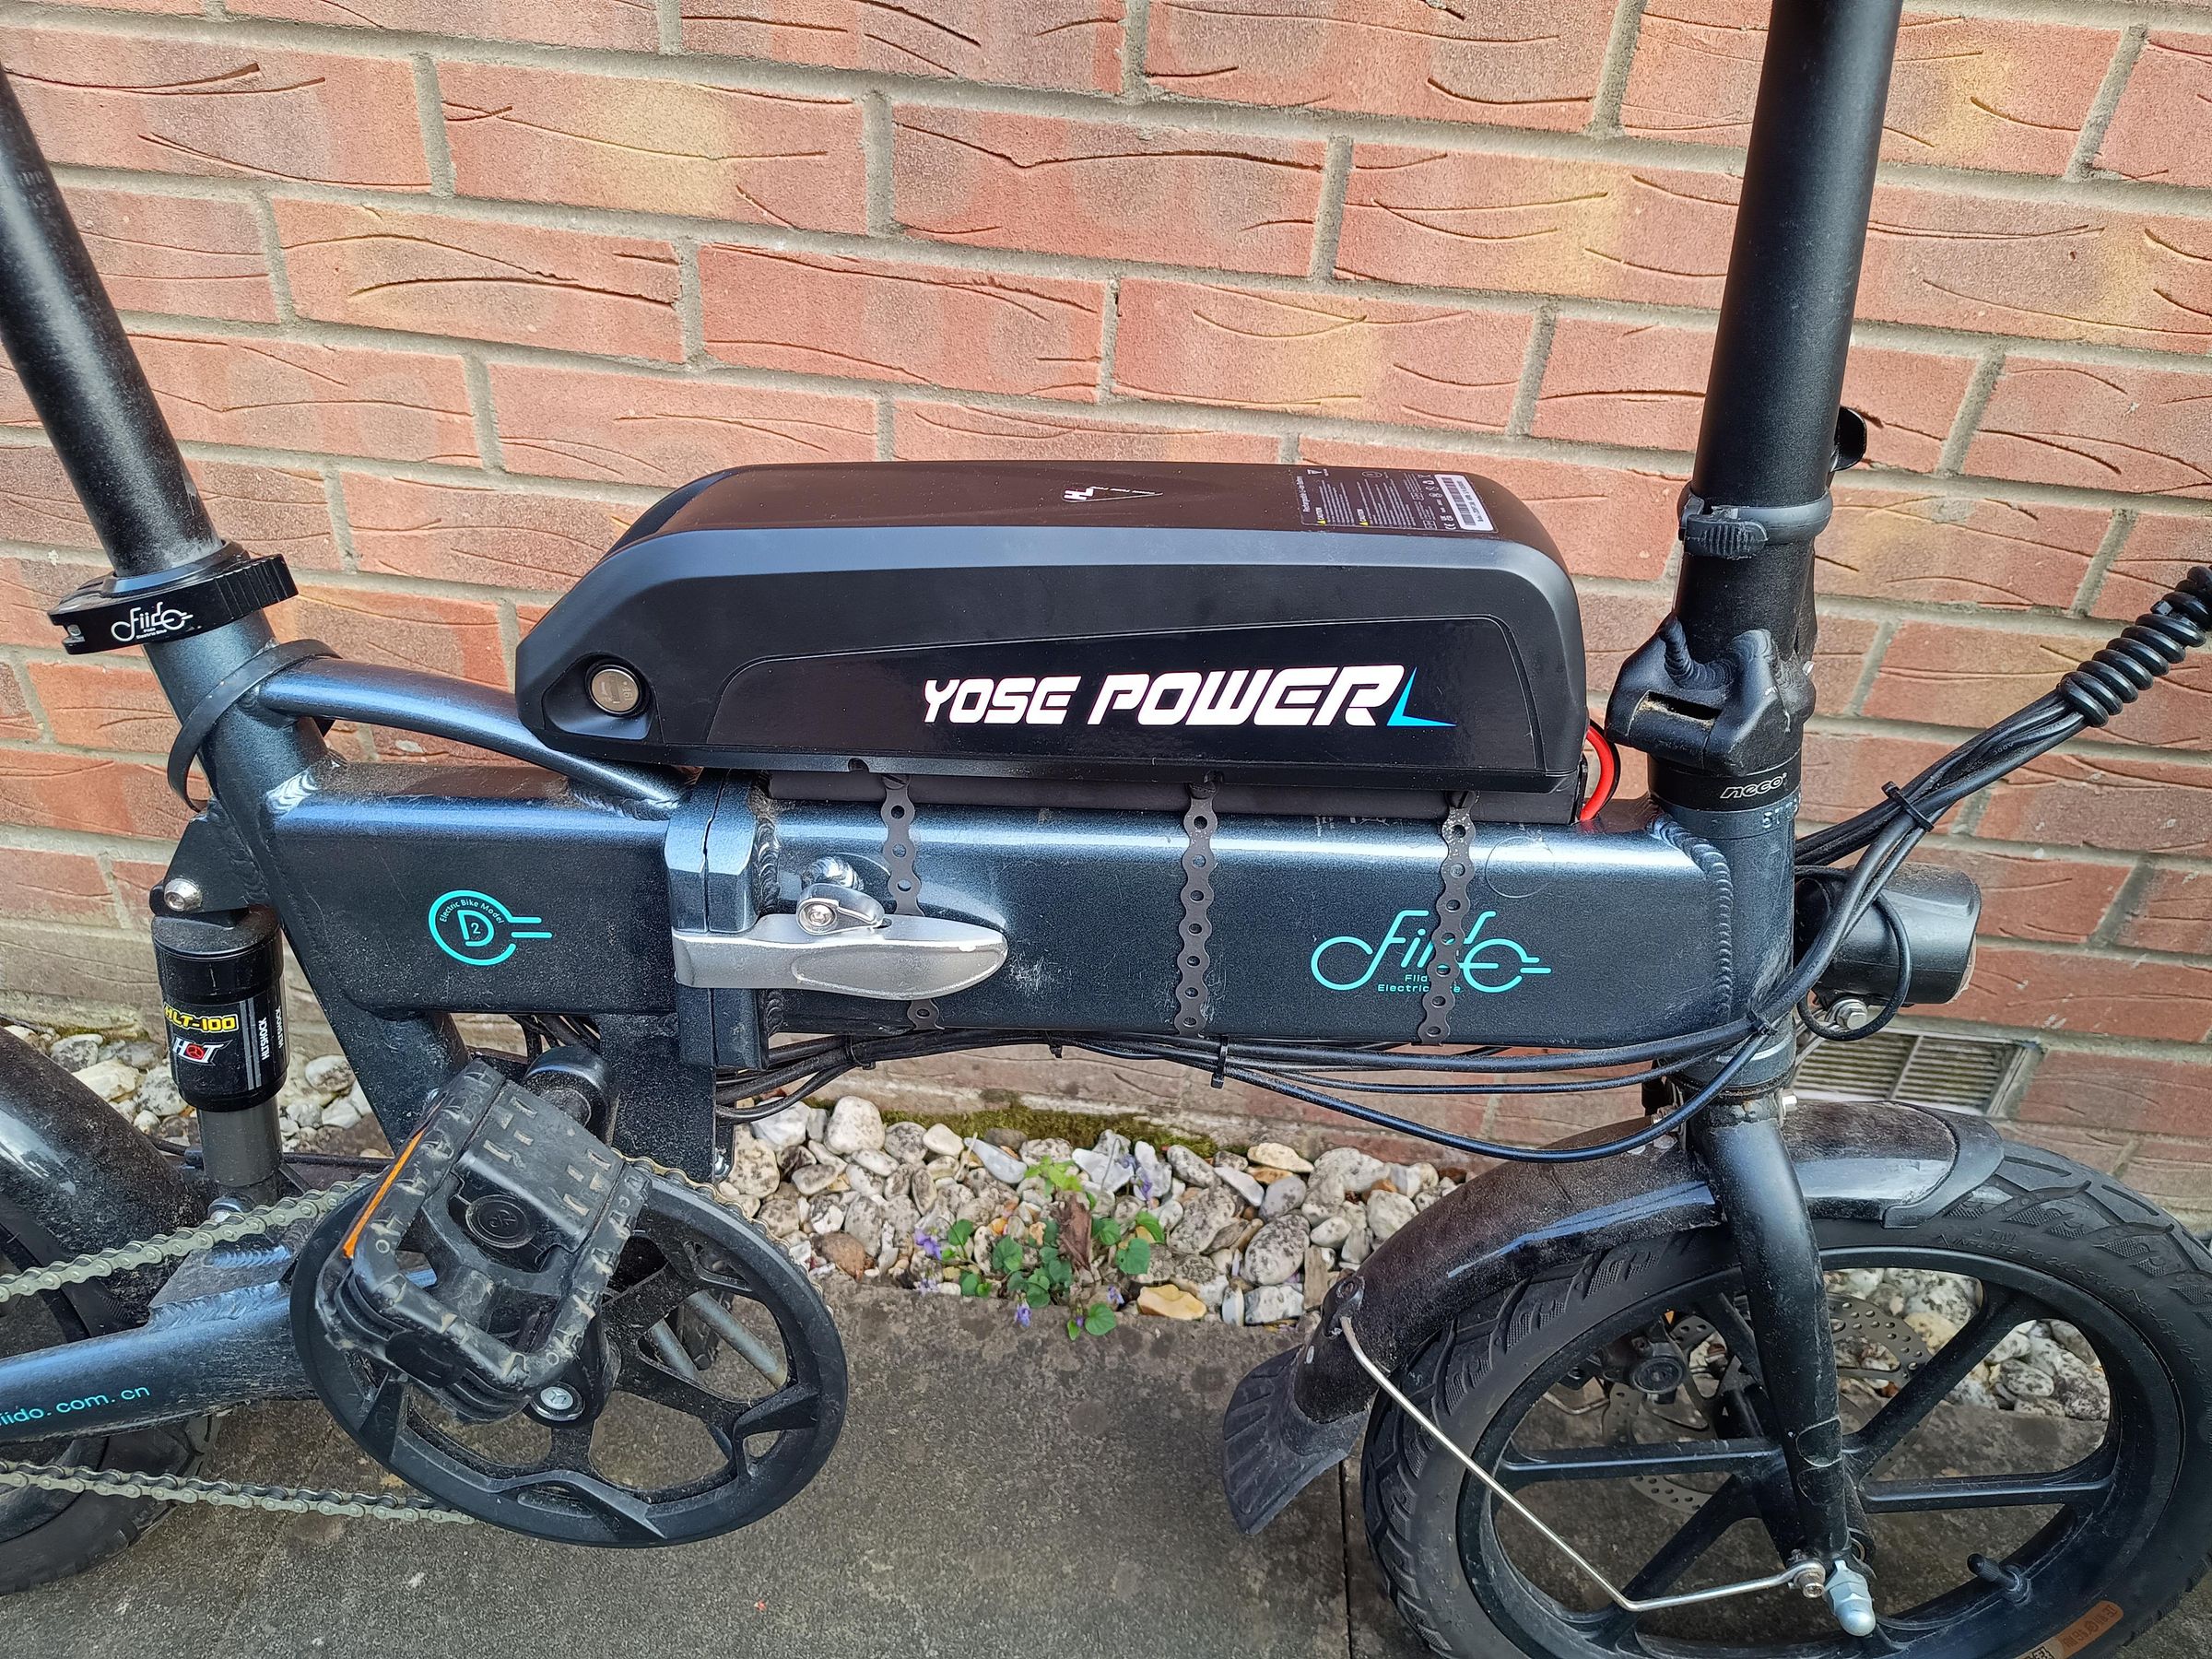
This Instructable concentrates on the task of removing the cell-pack from its casing. The cell-pack in the Yose battery is glued into to plastic outer-casing with silicon mastic and a sticky pad. I found that getting hold of the cell-pack in order to break the bond was really difficult (partly because I didn't know before-hand what I was dealing with) - hence this Instructable.
It was sold as a 36V13Ah HL-I Down Tube Lithium-ion E-bike Battery with 5 Gold-plated Round Plug
I had not had the battery pack for long (a couple of months) - I fitted it as an external battery on my Fiido D2 folding electric bike (see photo and another of my Instructables). It was excellent - until it stopped charging. The pack still powered the bike, no problem, but it didn't take any charge. The indicator on the charger was green (fully charged) but it was not charging. The voltage out from the charger was 42.0V which was exactly what it should be.
I'm not quite sure why the problem occurred; I've since been advised to connect the charger to the battery BEFORE plugging the charger into the mains. Perhaps it was this, maybe something else; having stripped the pack down, it looks really well produced. I'm writing this at June 2026 and if the problem happens again, I'll let you know here --->>>
I contacted Yose Power by email and asked whether I could unscrew the eight fixing screws without voiding the warrantee (despite the sticky label warning). Joey at Yose replied saying that it would be OK in my instance. He also gave me the address to return the battery for repair. I was impressed with their service.
Inside was the main fuse, which was intact (hence still powering the bike) but there was no evidence of anything else I could service.
I contacted the repair address and a very helpful guy called Richard (correctly) diagnosed the probable solution, as a blown charging fuse, which was buried just inside the cell-pack. (Both fuses are standard automobile fuses). He explained that I would have to un-glue the cell-pack from the casing. He was very knowledgeable and easy to talk to - a great guy.
The rest of this Instructable shows how I did it.
I've not had the battery for long, but I've been very impressed by the design, manufacture, power and range I get from it. Before I bought this battery, if I accelerated hard, or went up a hill, the bike's voltage indicator would dip down, showing that the voltage of the original cells was dipping - with this pack, it is rock-solid. Having two replaceable fuses is very sensible (even if ungluing the Cell-pack is really hard). Now that I've opened up the battery, it looks really well made and I'm pleased with the Samsung cells (which AI tells me) have the following specification:
"Samsung Model INR18650-25E
This is a very common pink 18650 cell used in power tools and battery packs.
It is a lithium-ion rechargeable battery with INR chemistry (lithium nickel–based oxide).
Specifications
Cell type: 18650 lithium-ion
Chemistry: INR (nickel-rich NCA/NCM blend)
Nominal voltage: 3.6 V
Maximum charge voltage: 4.20 V
Nominal capacity: 2500 mAh (2.5 Ah)
Typical energy: ~9 Wh
Continuous discharge rating: 20 A
Maximum discharge (short bursts): up to ~25 A (manufacturer-dependent conditions)
Standard charge current: ~1.25 A
Fast charge current: up to 4 A
Weight: ~45 g
Dimensions: ~18.3 mm × 65.0 mm"
Removing the Cell-pack From Its Housing
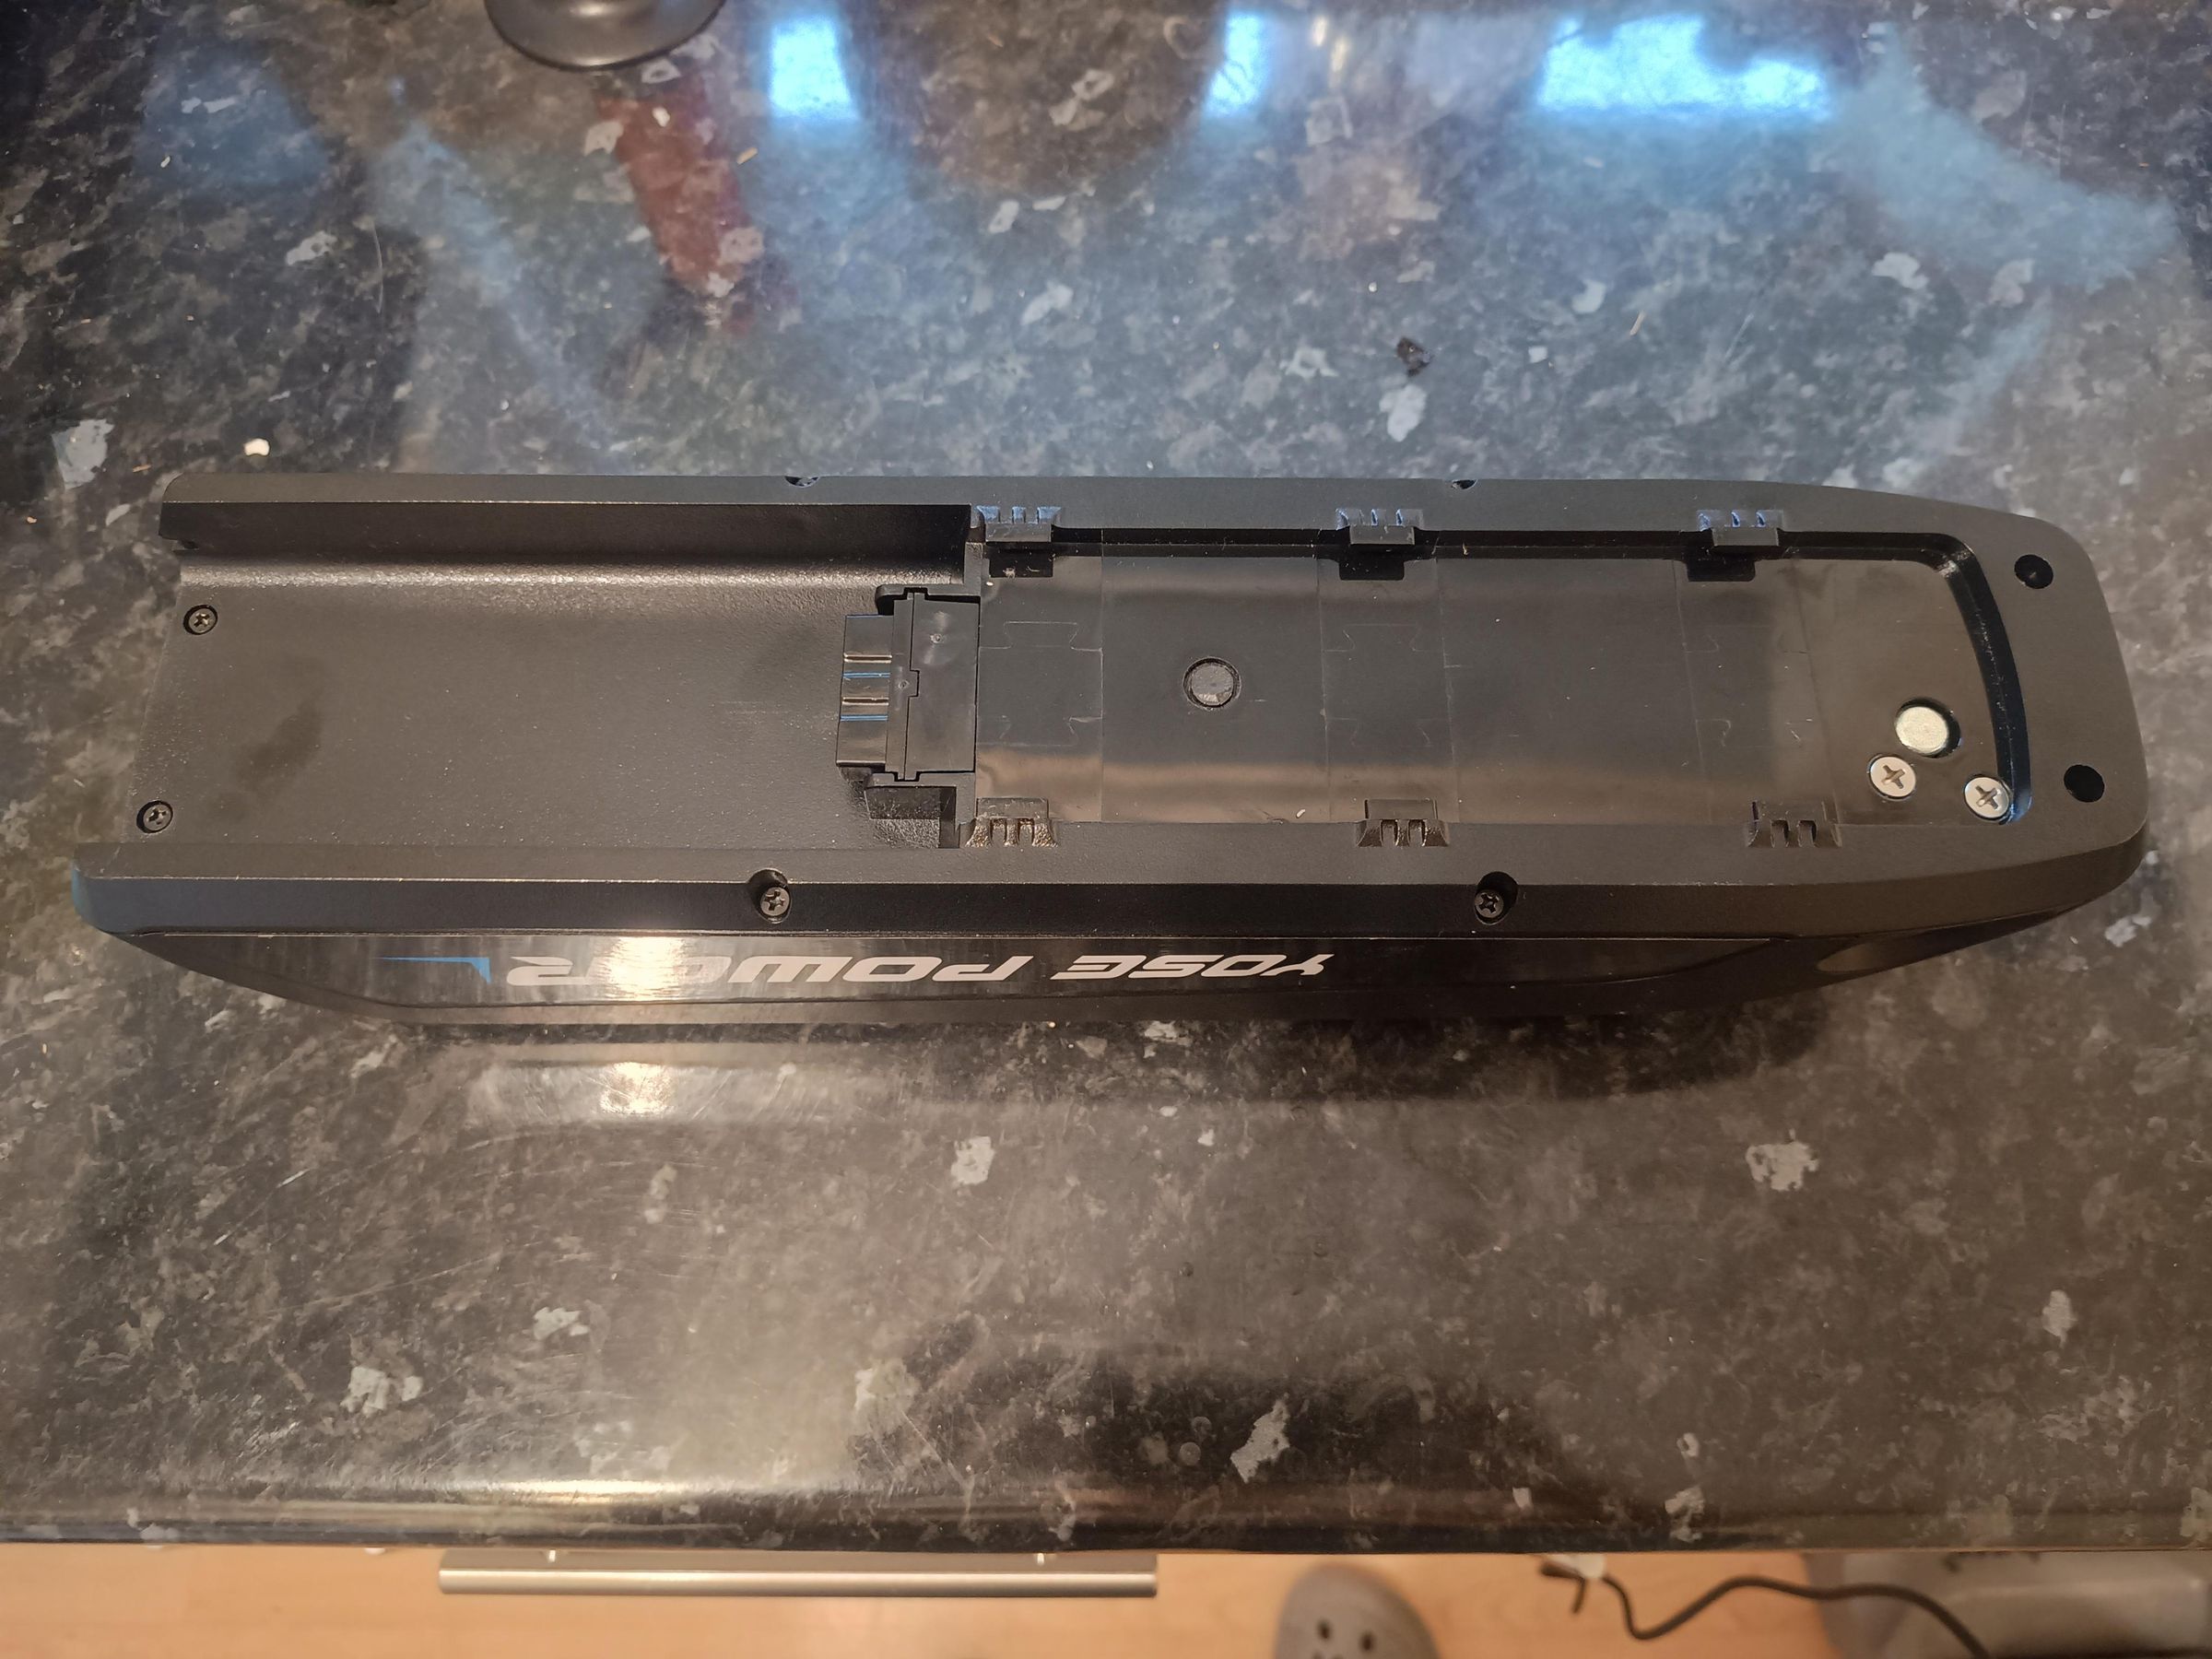
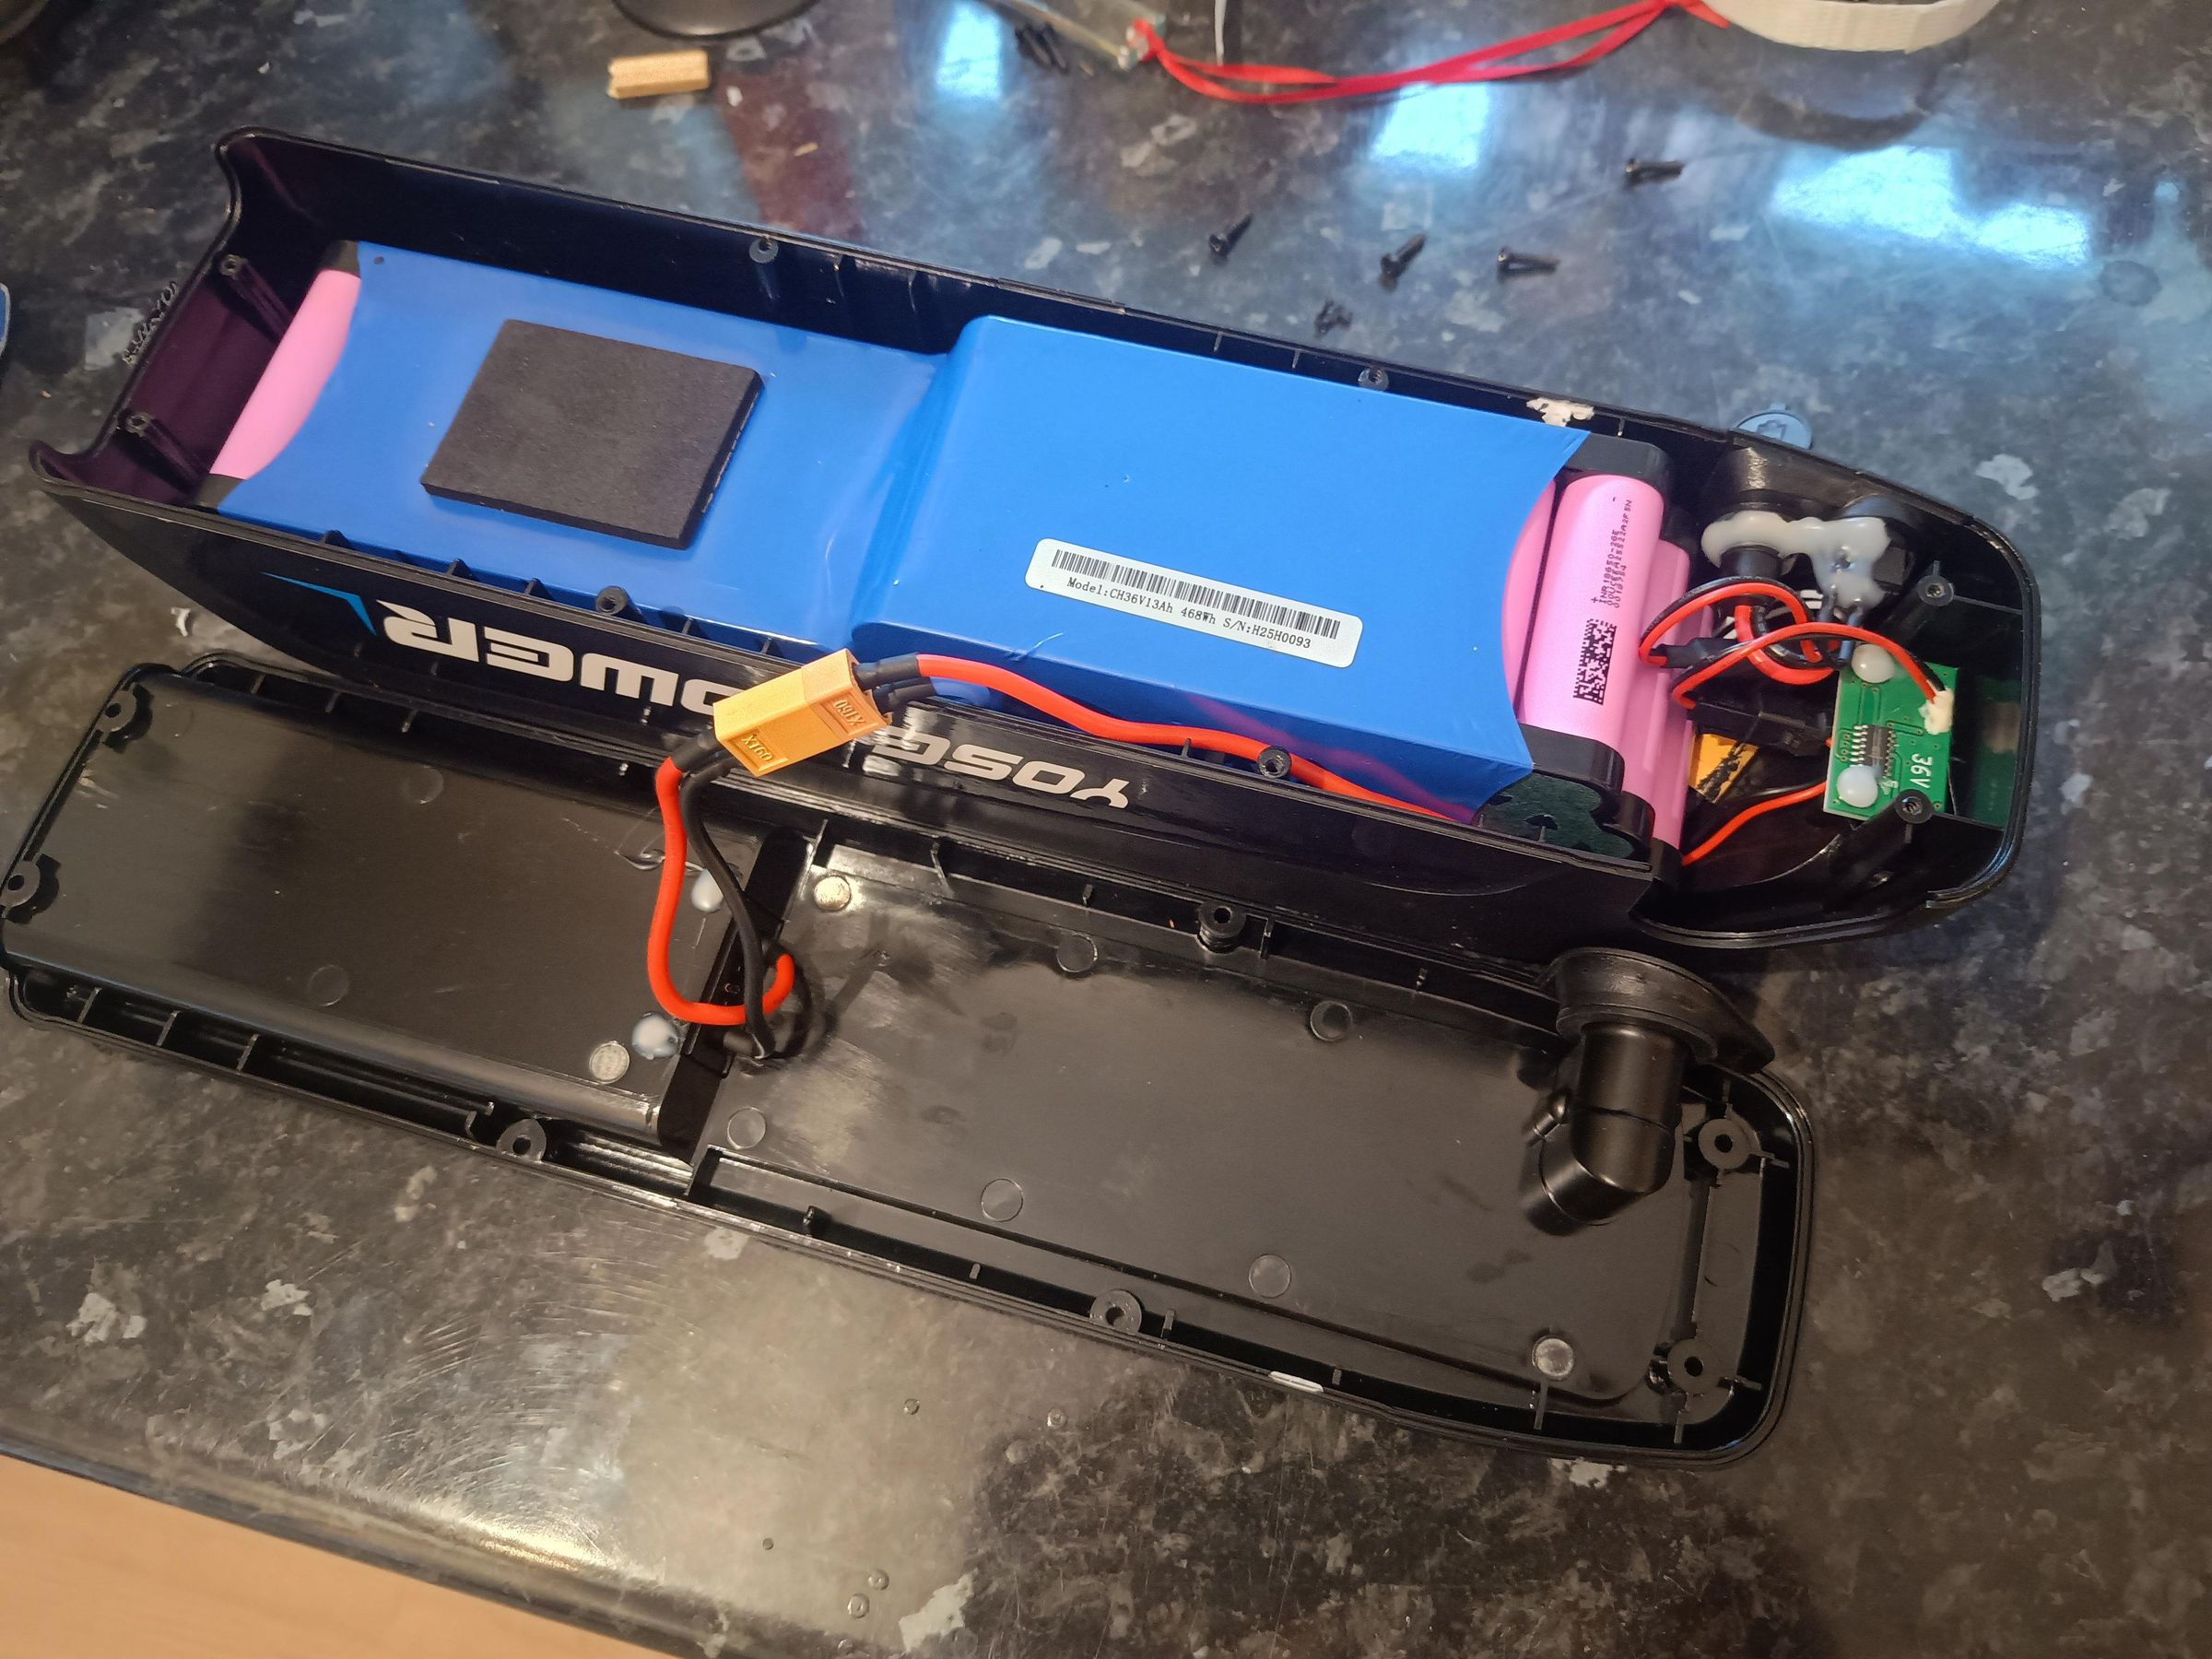
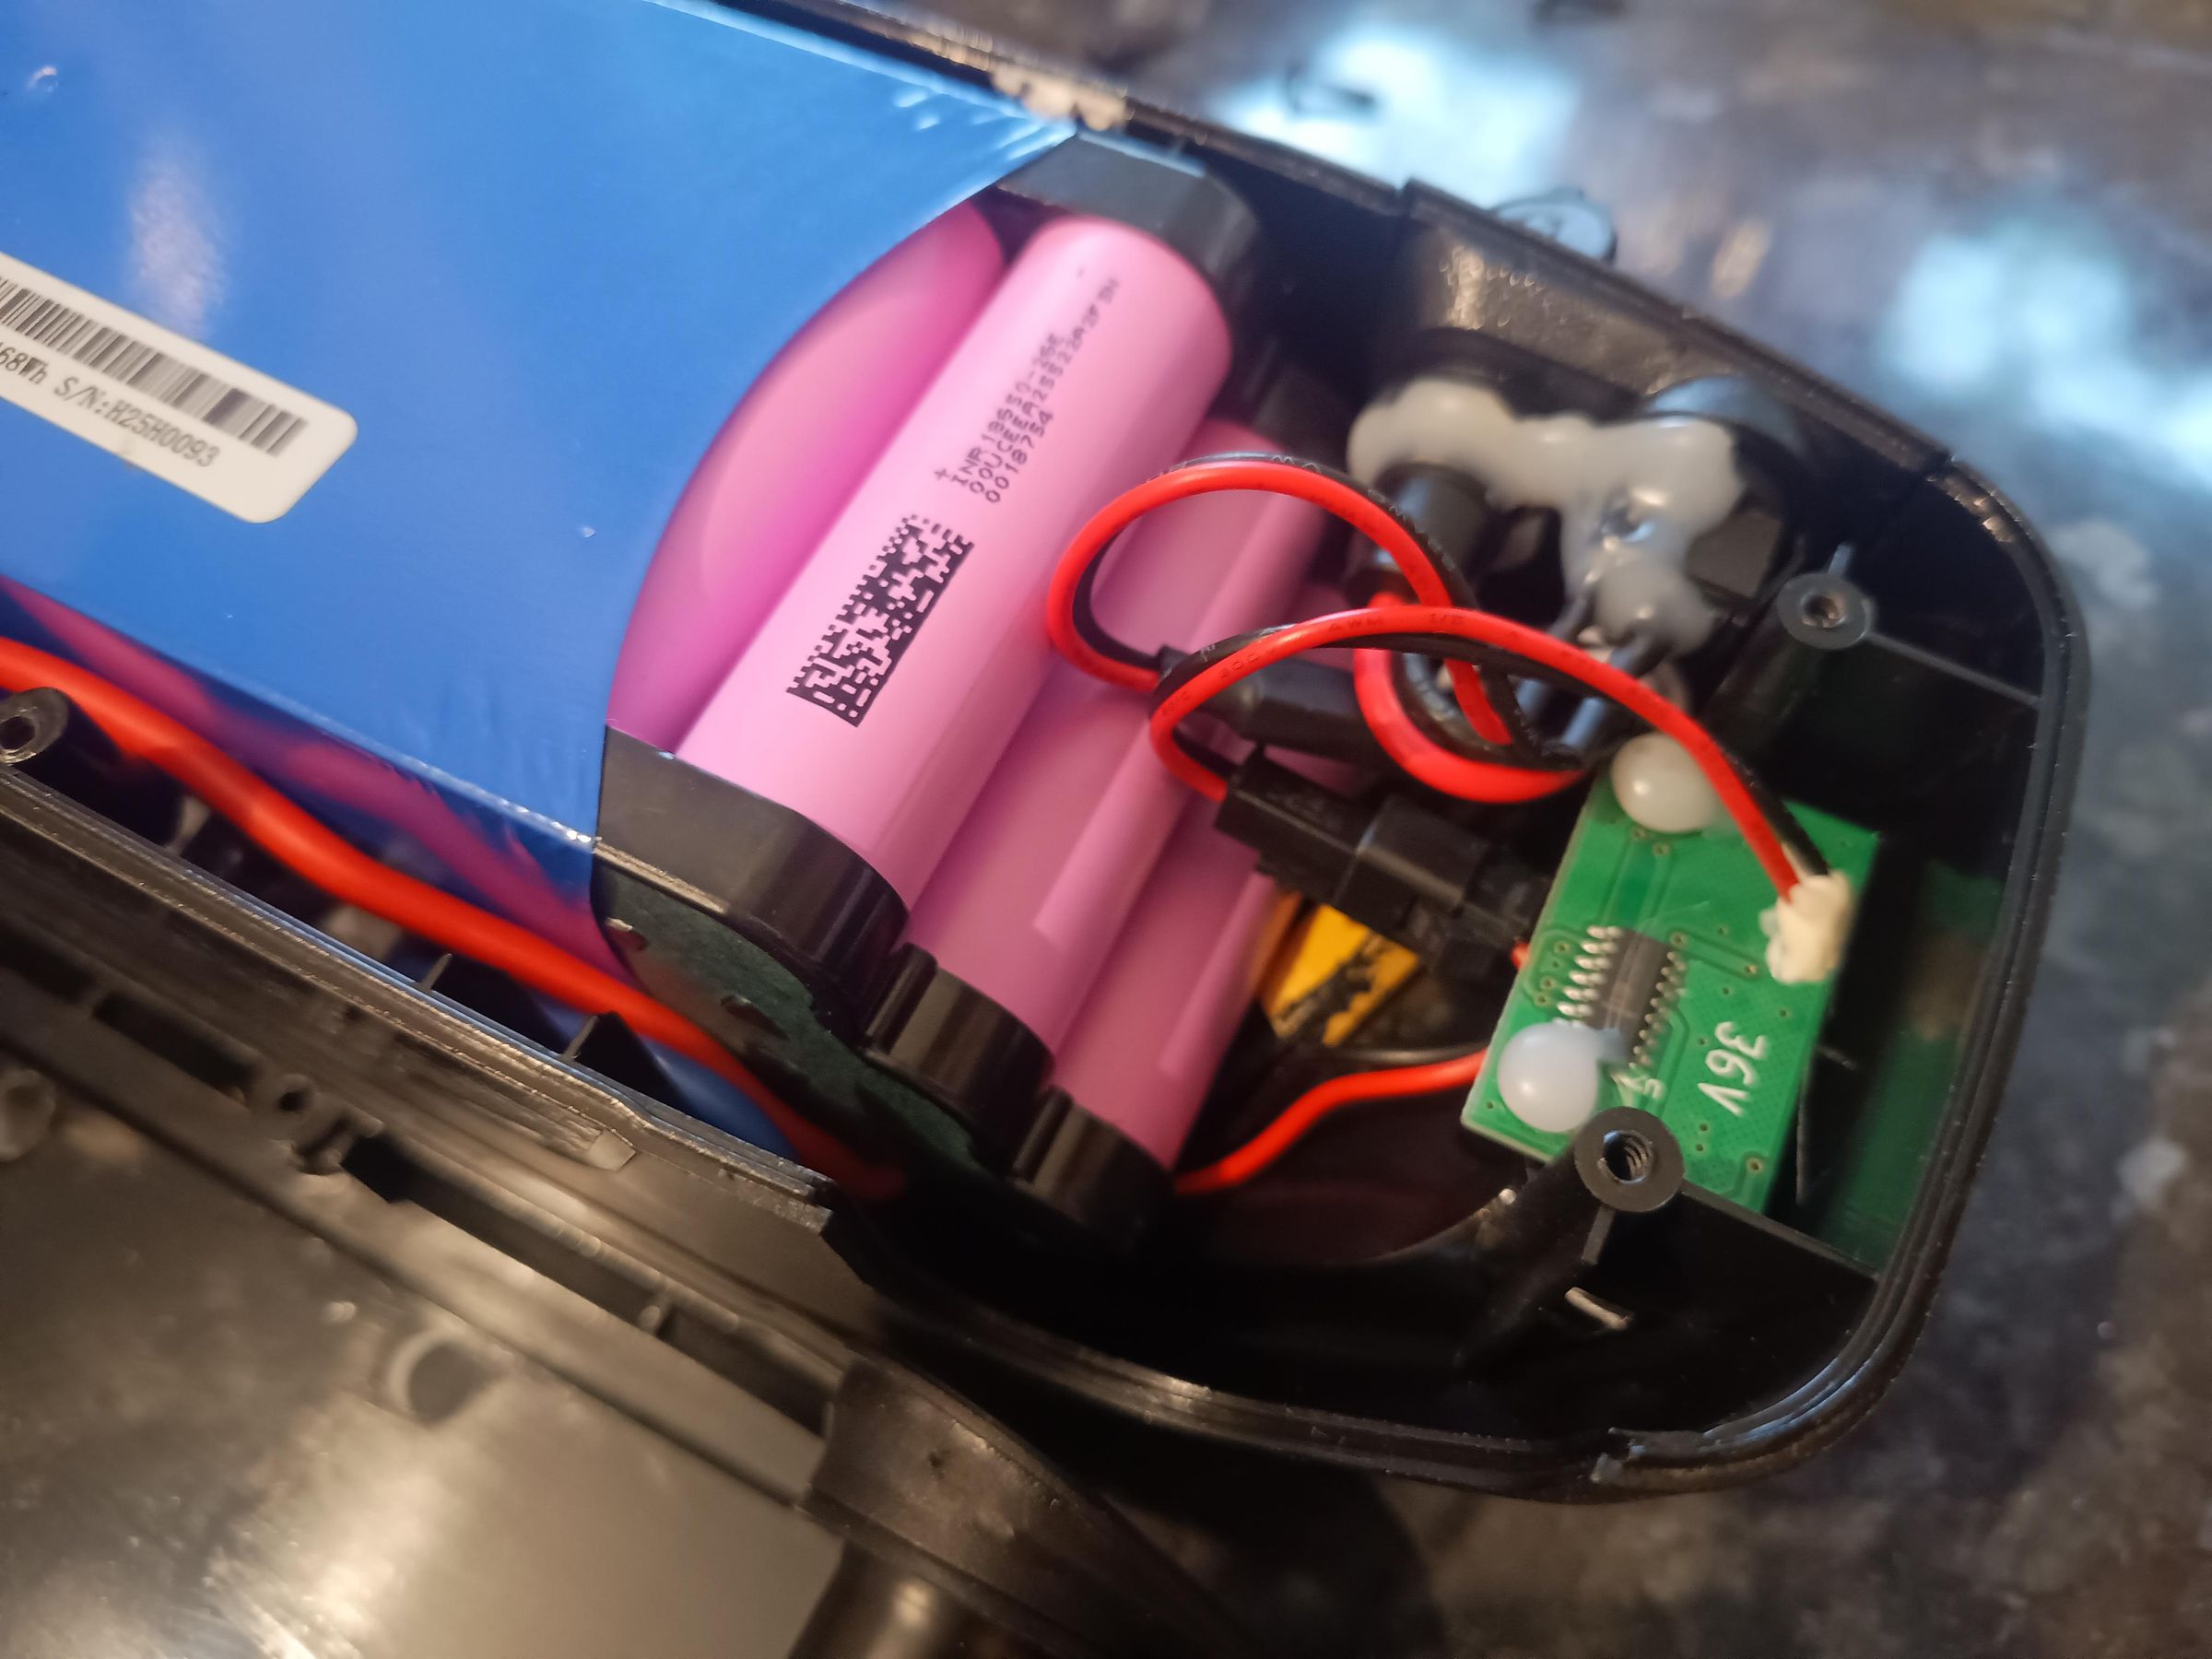
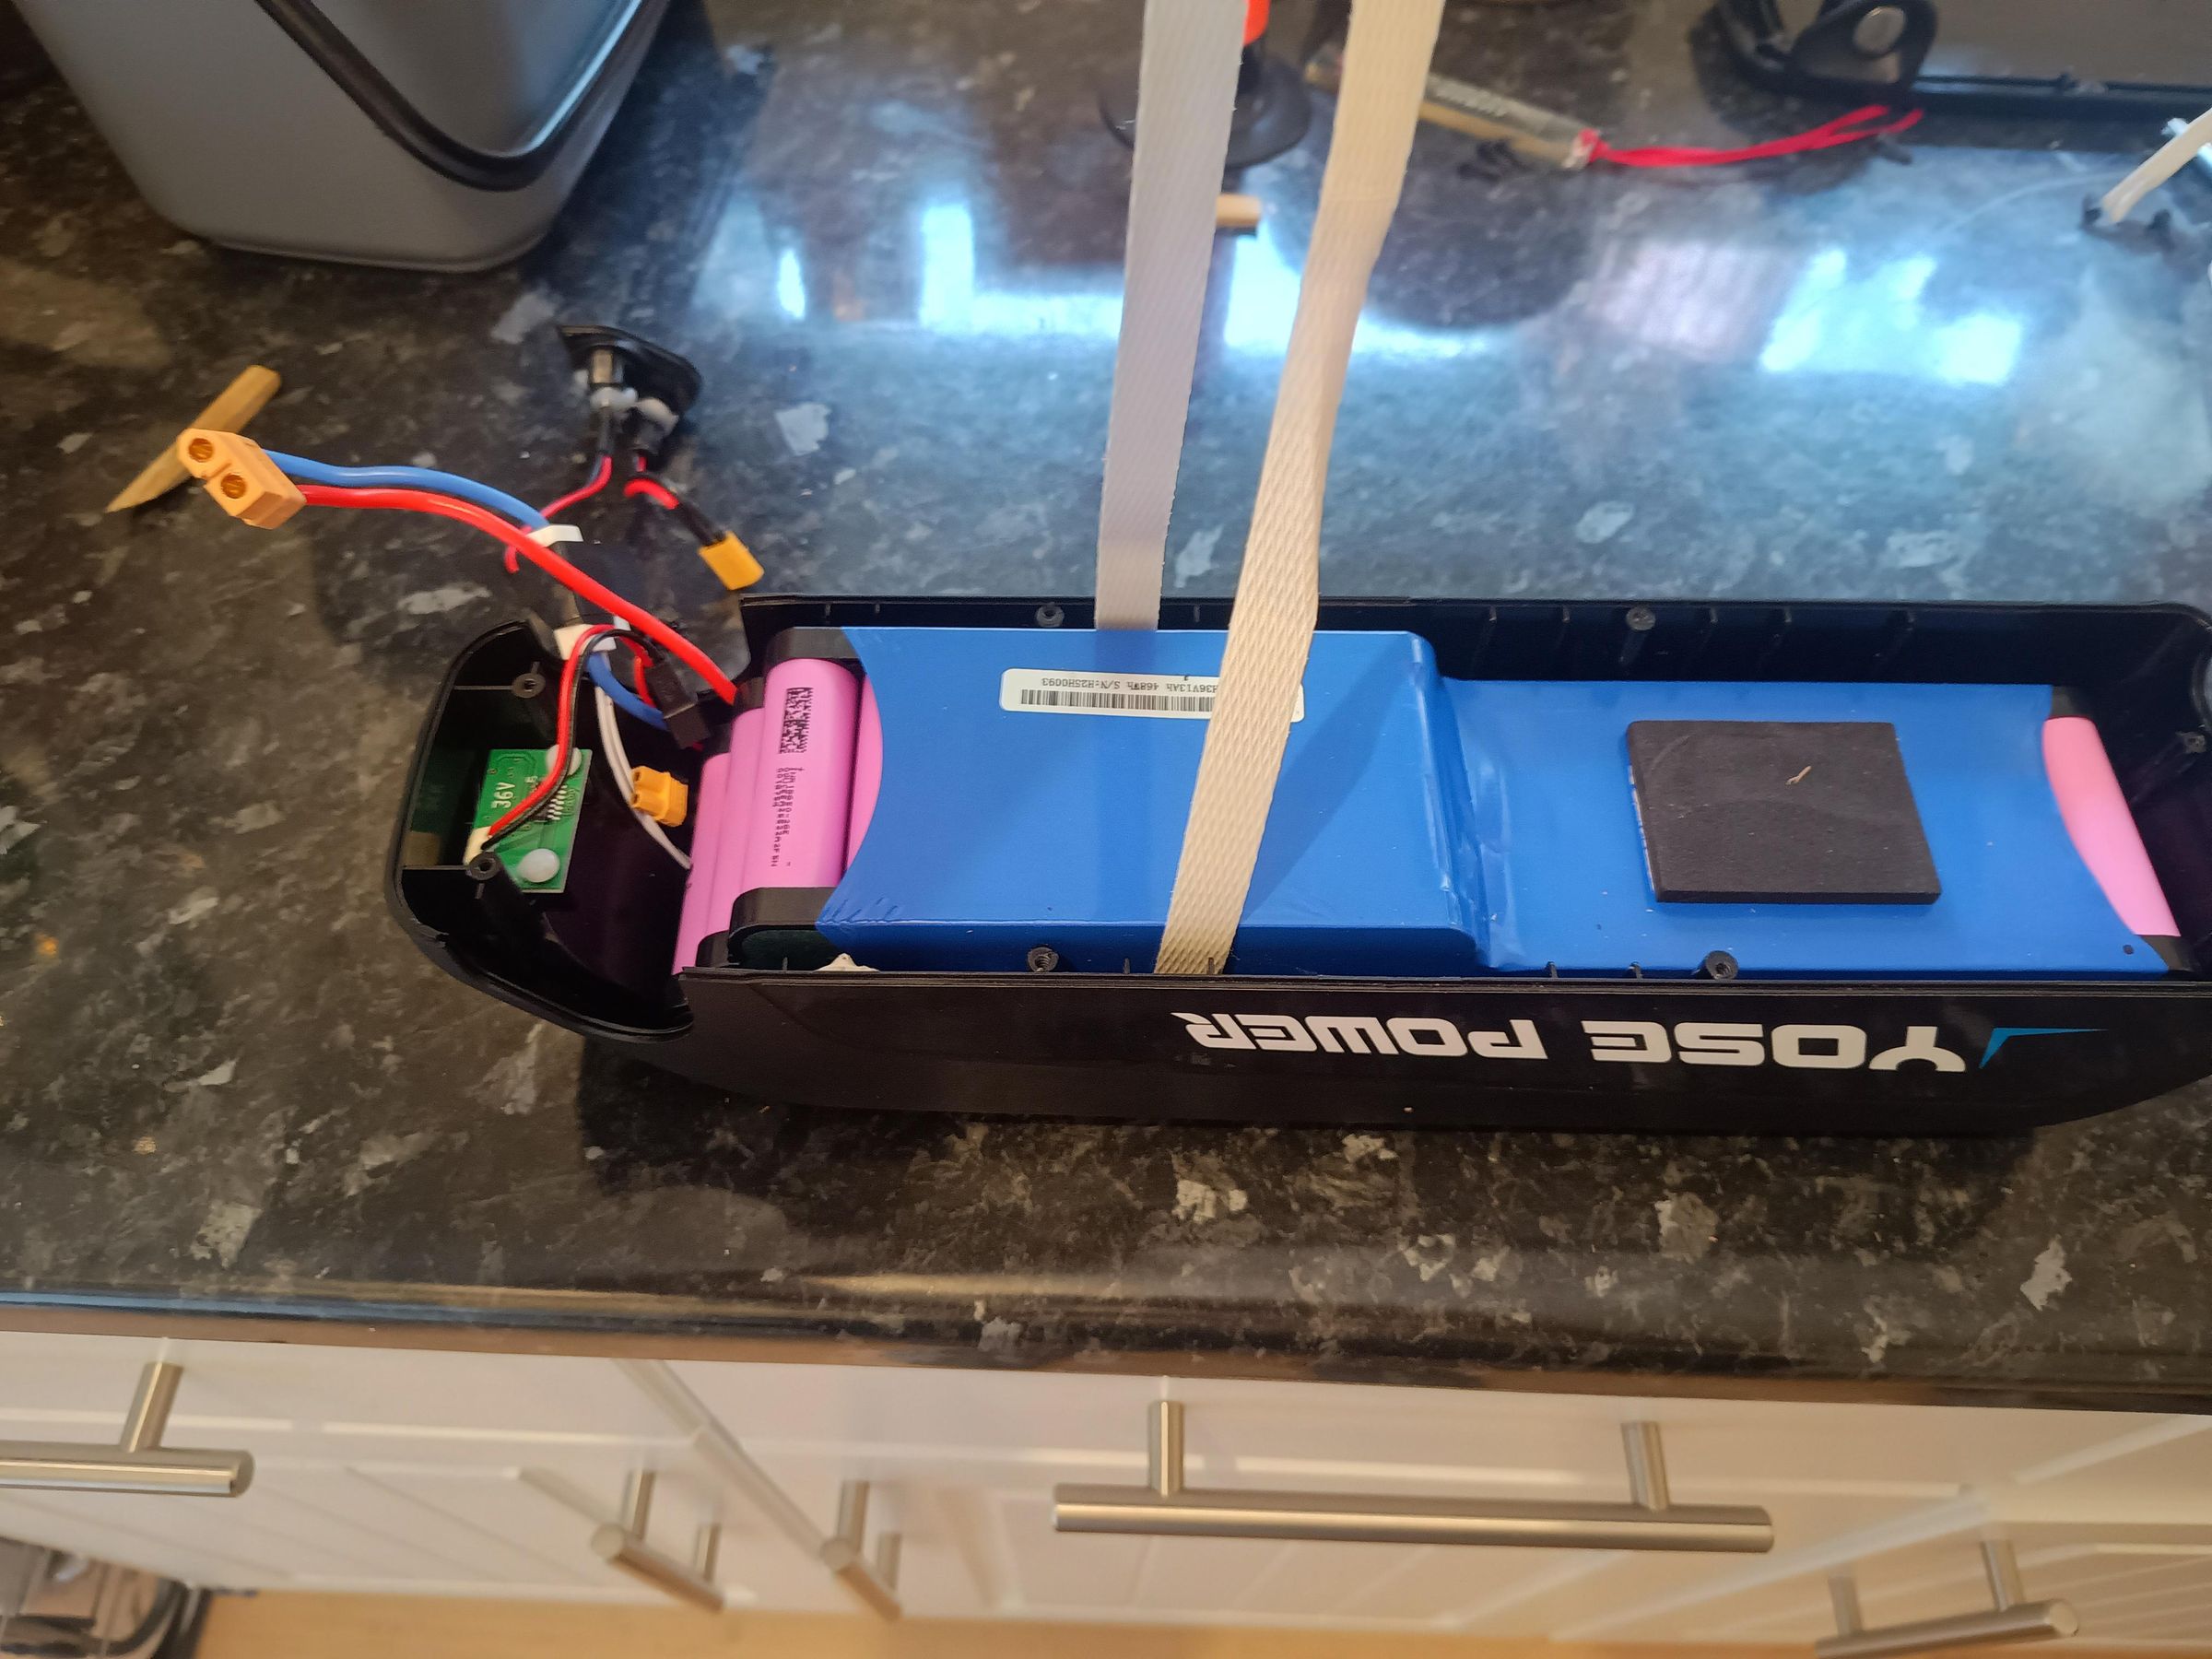
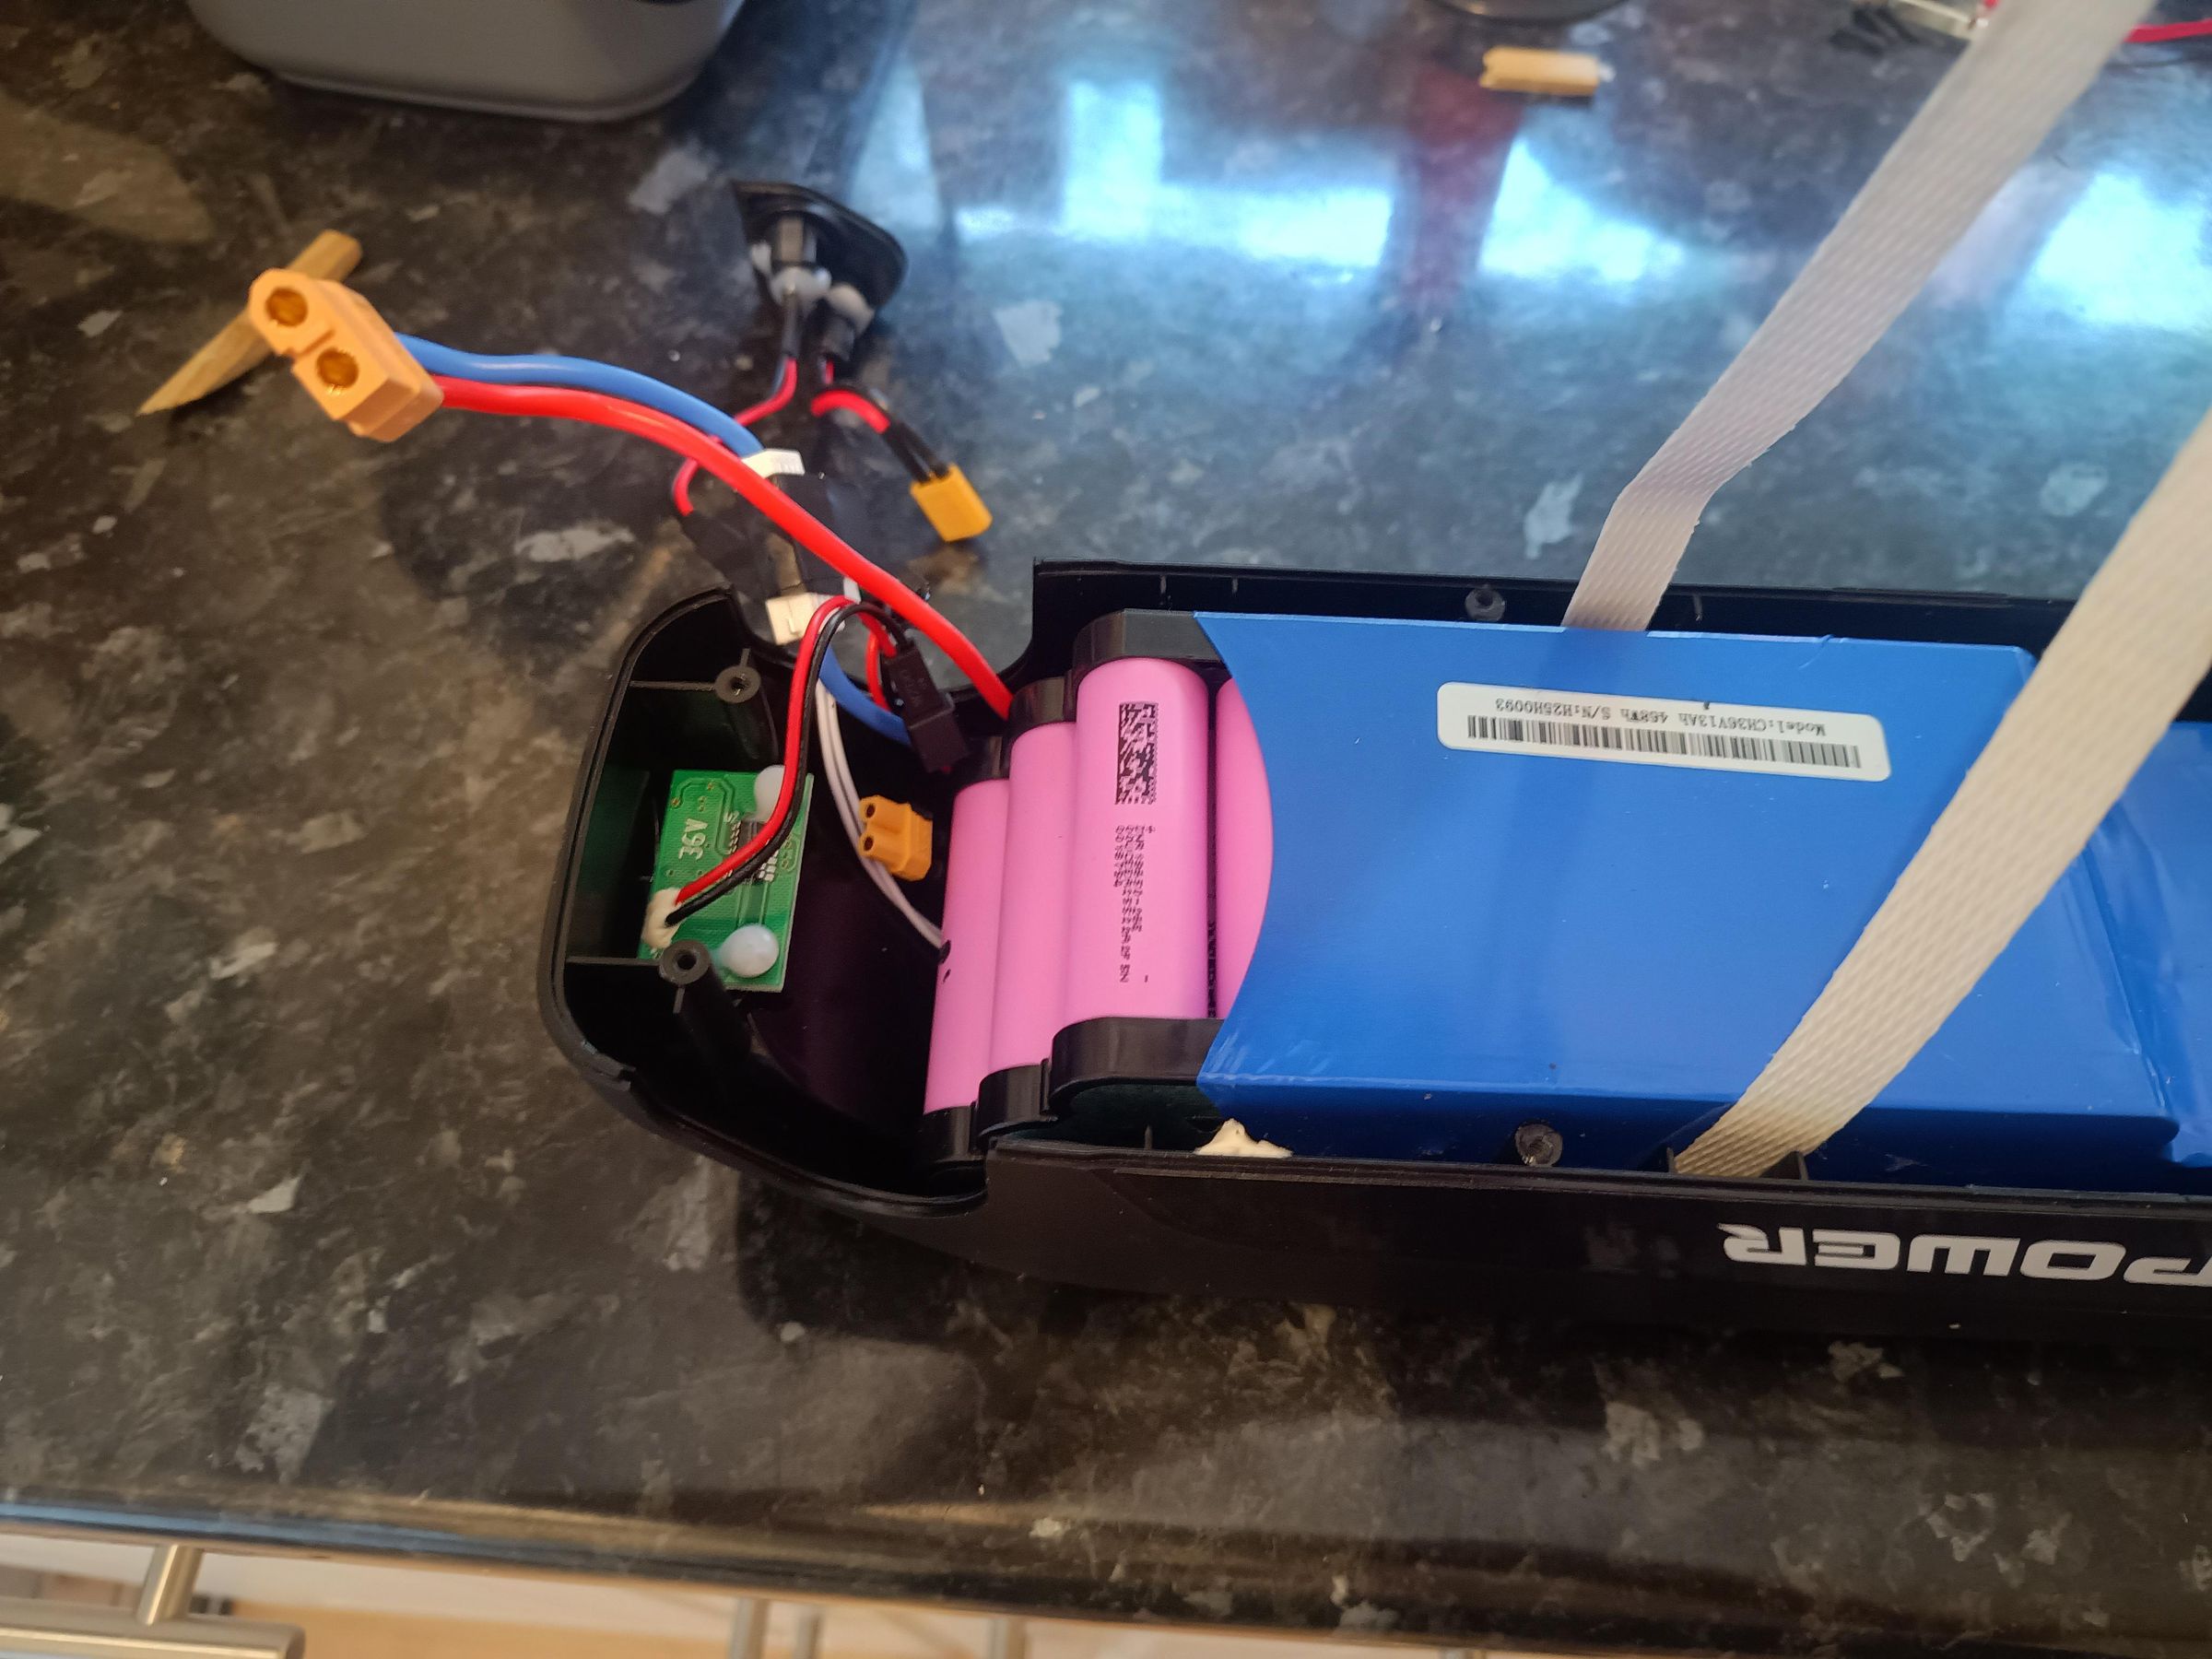
There are eight black screws to remove. Then the top pops off and the main connector can be pulled apart, so the top (bottom?) doesn't get in the way.
The main fuse is easily accessible - it is in the main blue lead and can just be seen in two of the photos - not particularly clearly - it is a white holder with black tape keeping the fuse in, and avoiding any of its metalwork touching anything it shouldn't!
The charging fuse is completely hidden from view and could not be accessed without removing the cell-pack.
Replacing the main fuse would be trivial.
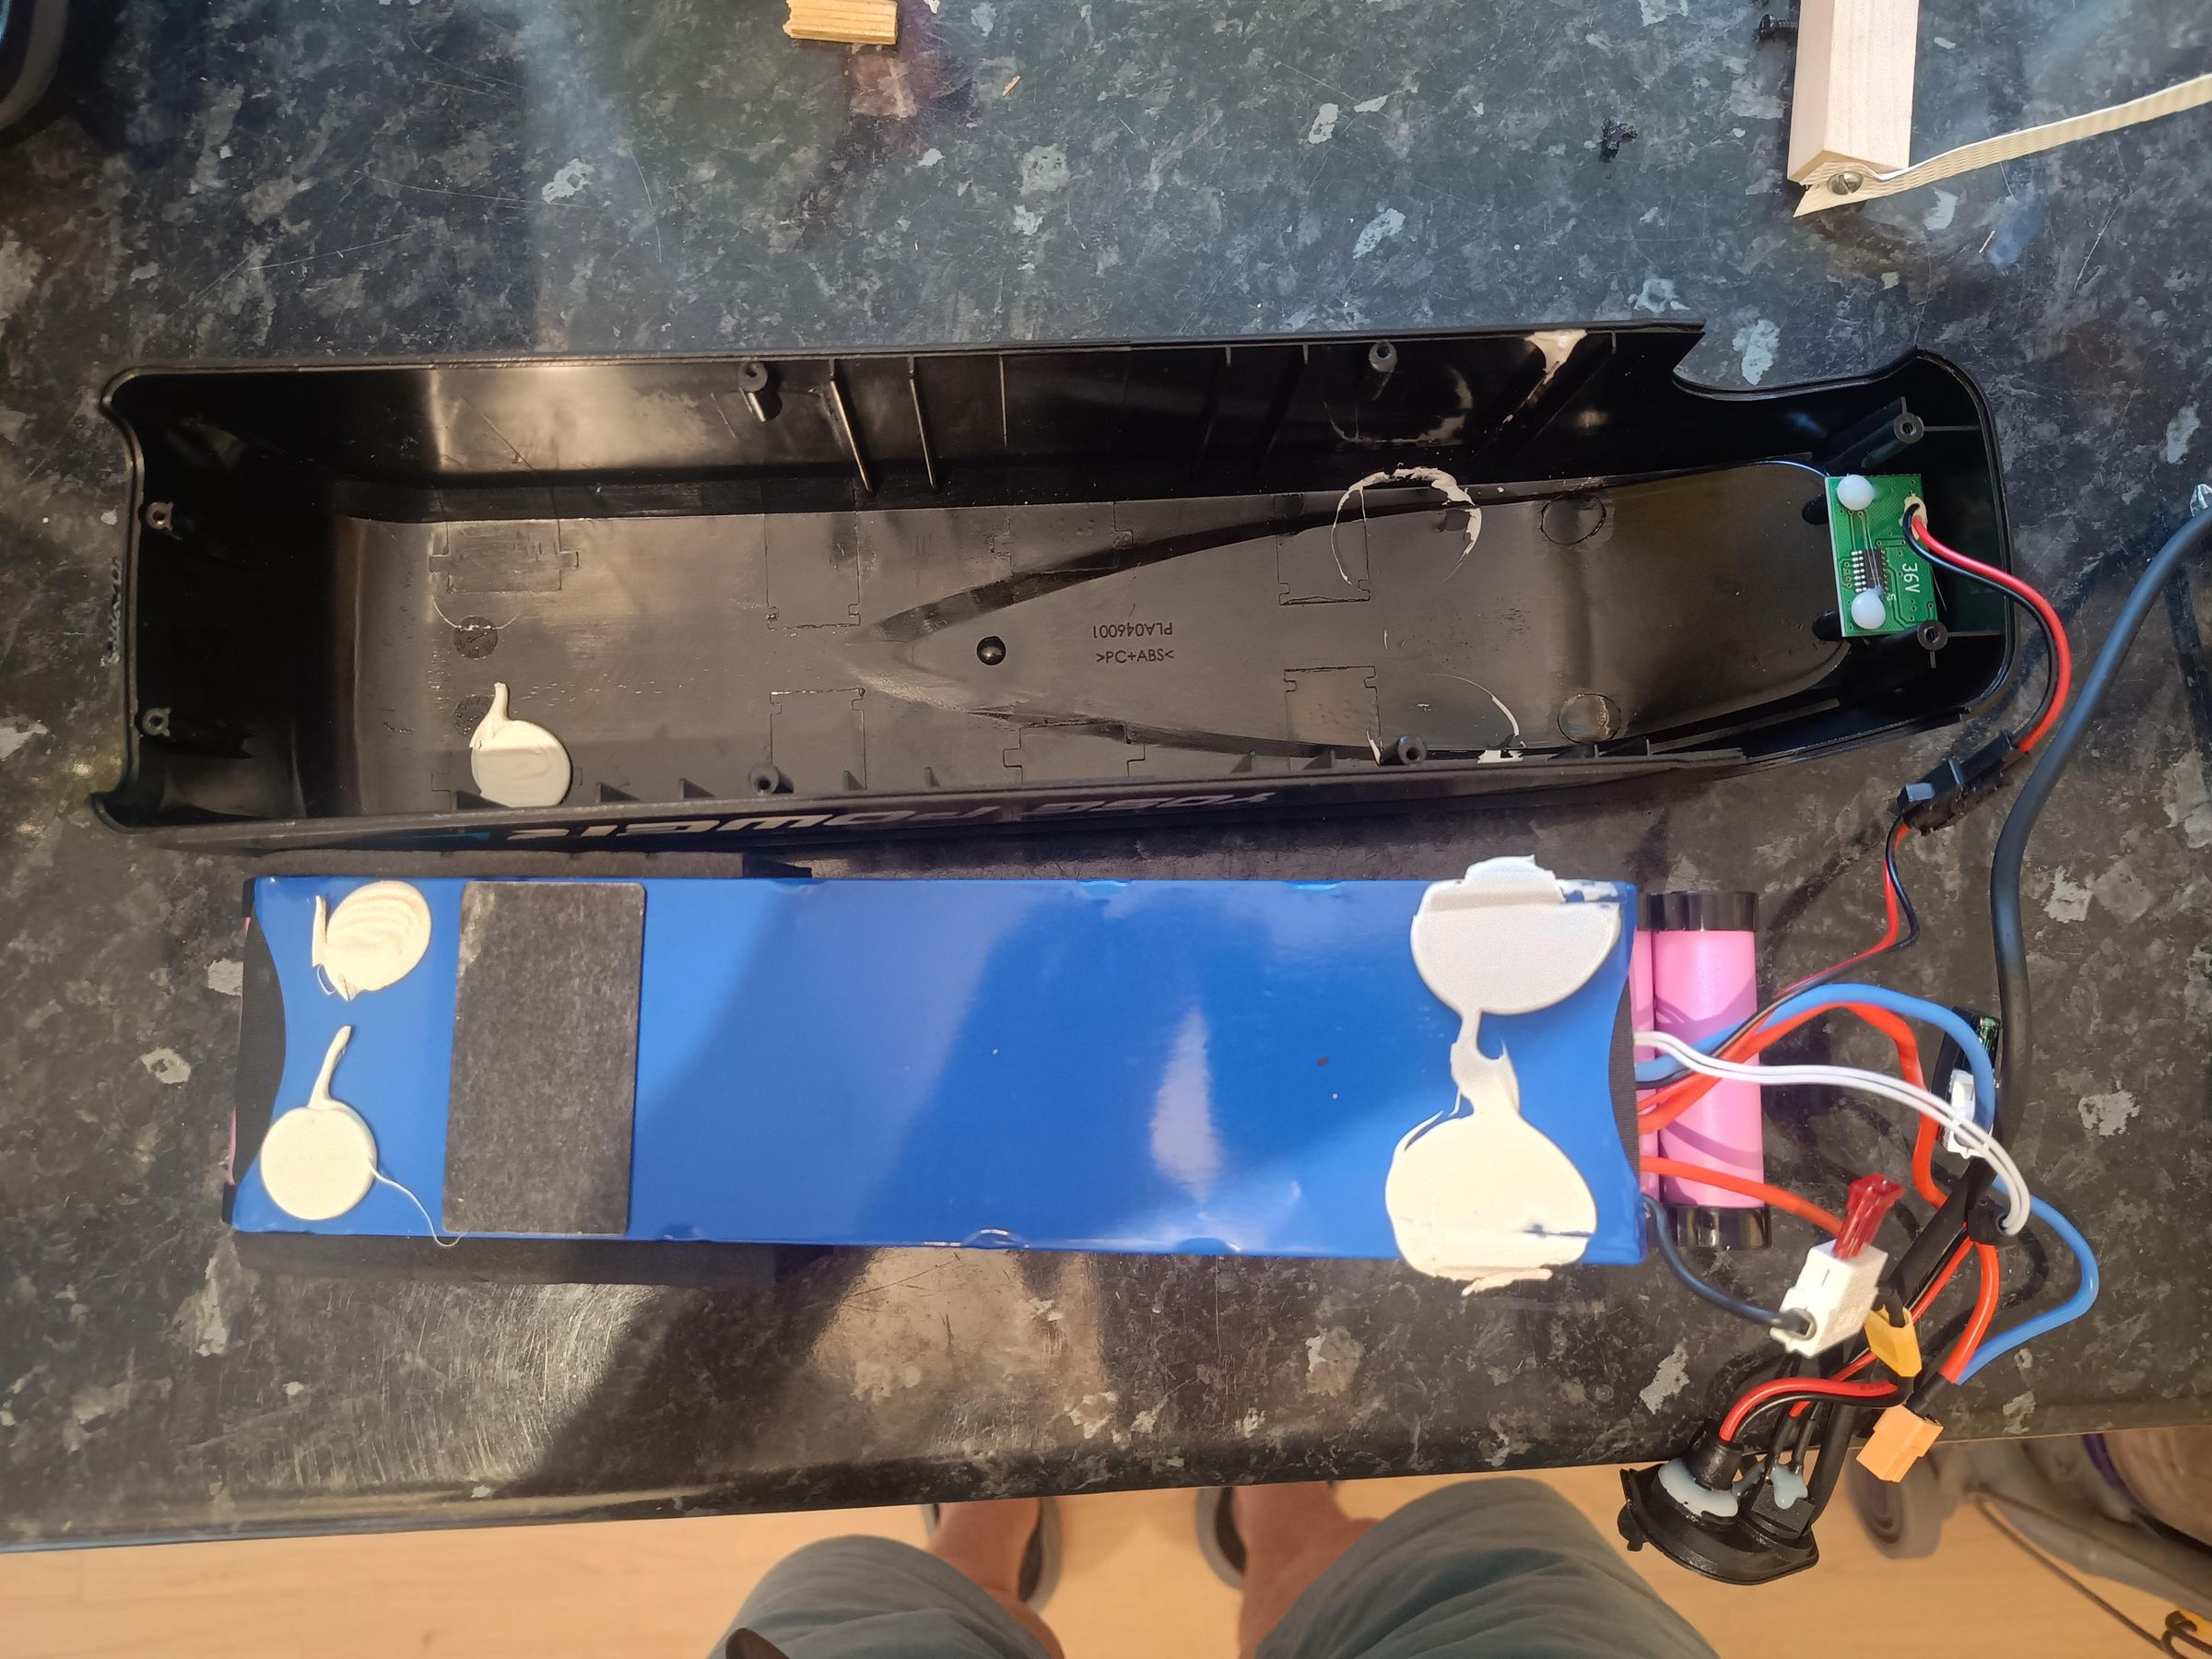
I tried everything to get the cell pack out of the casing, with little success. It was really well glued in (which is probably in its favour; there is no way it will move around in the housing when in use, and start to get mechanically damaged).
I avoided ANY metal tools - screwdrivers, etc would be a real no-no. If you punctured one of the cells, or even deformed one, the result could be a catastrophic thermal runaway with toxic fumes and exploding cells.
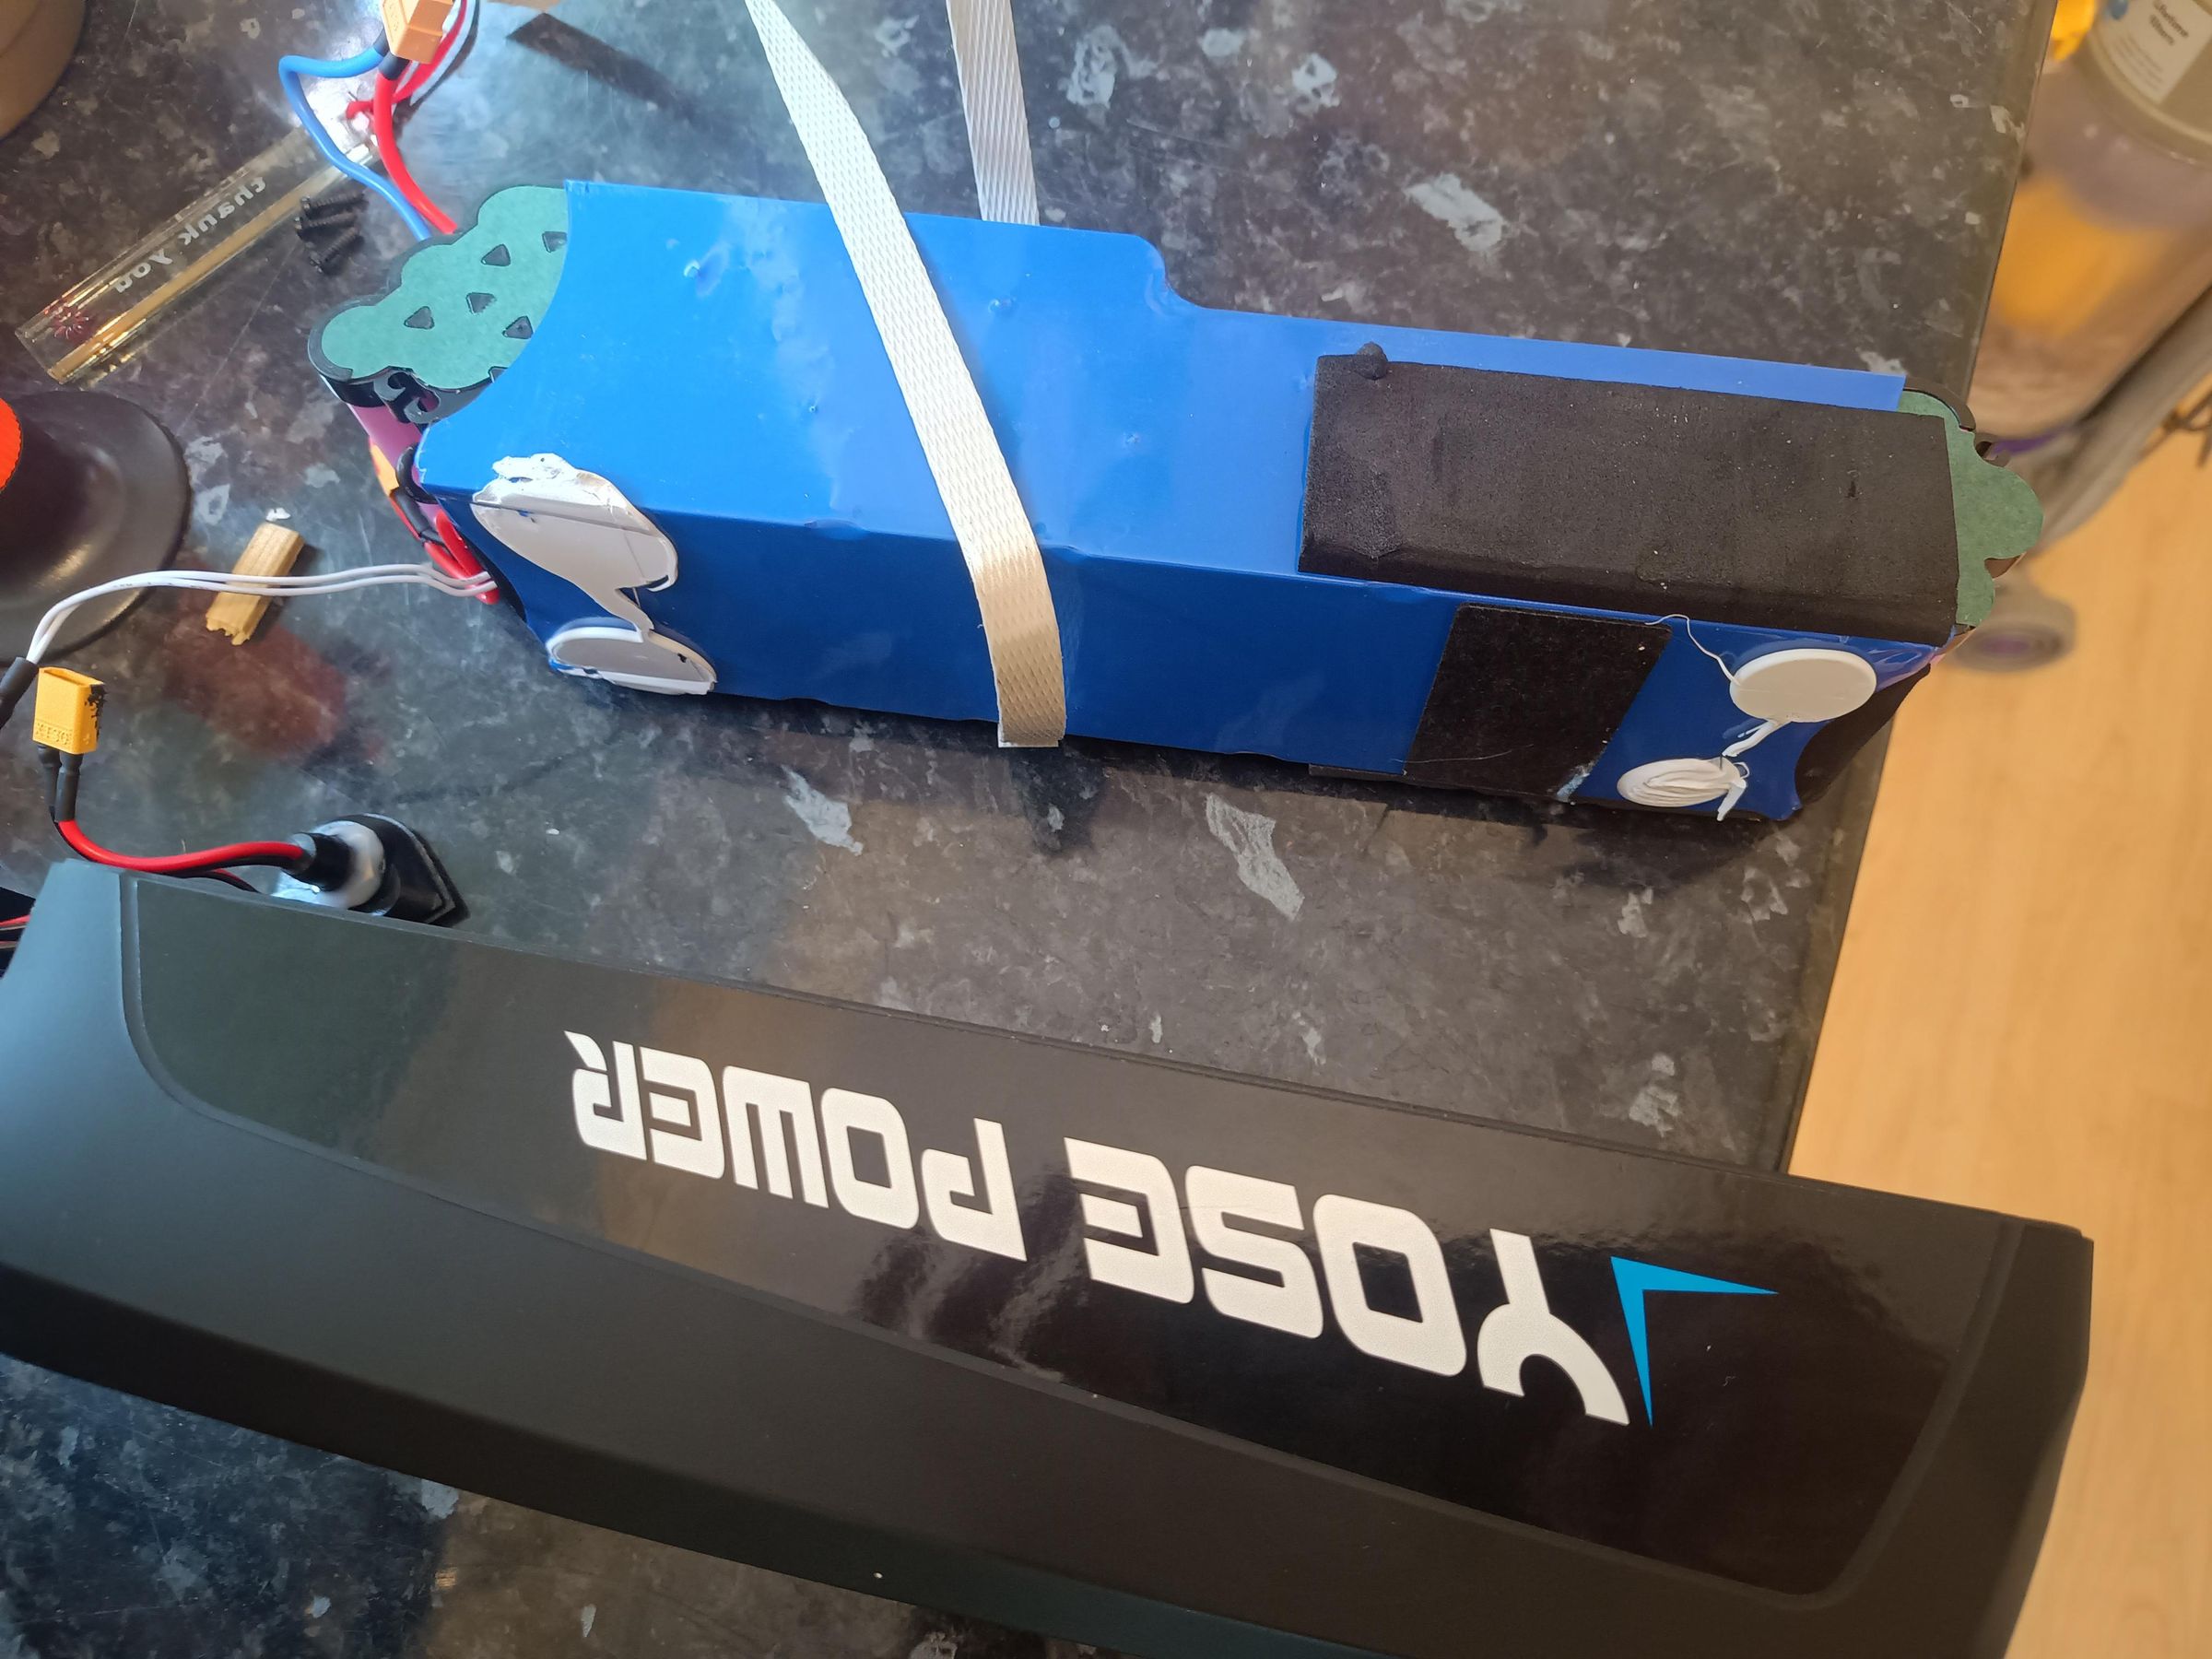
Some cell-packs have the BMS printed circuit board and wires exposed on the (hidden) underside of the cell-pack. I was not sure what was there, which gave me more nerves - in fact, as can be seen, there is nothing much to get damaged underneath the cell-pack.
My final successful strategy involved the plastic packing strips which I had cut off the original packing. I was able to slide one of them down the side of the housing, it obligingly slid across underneath the cell-pack and up the other side. At last, I could apply a good force by holding the plastic housing and pulling hard on the packing strip. If you didn't have the packing strips, I guess you could fiddle something under and around, so that you could pull some parachute cord or similar under the cell-pack - it needs to be pretty strong and 'soft', ie probably not a piece of wire!
As can be seen from the photos, I had to pick the right spot to thread the packing strip underneath - there wasn't much choice, due to the glue and rubber padding. I had to use quite a bit of force to break the glue bonds.
Replacing the Charging Fuse
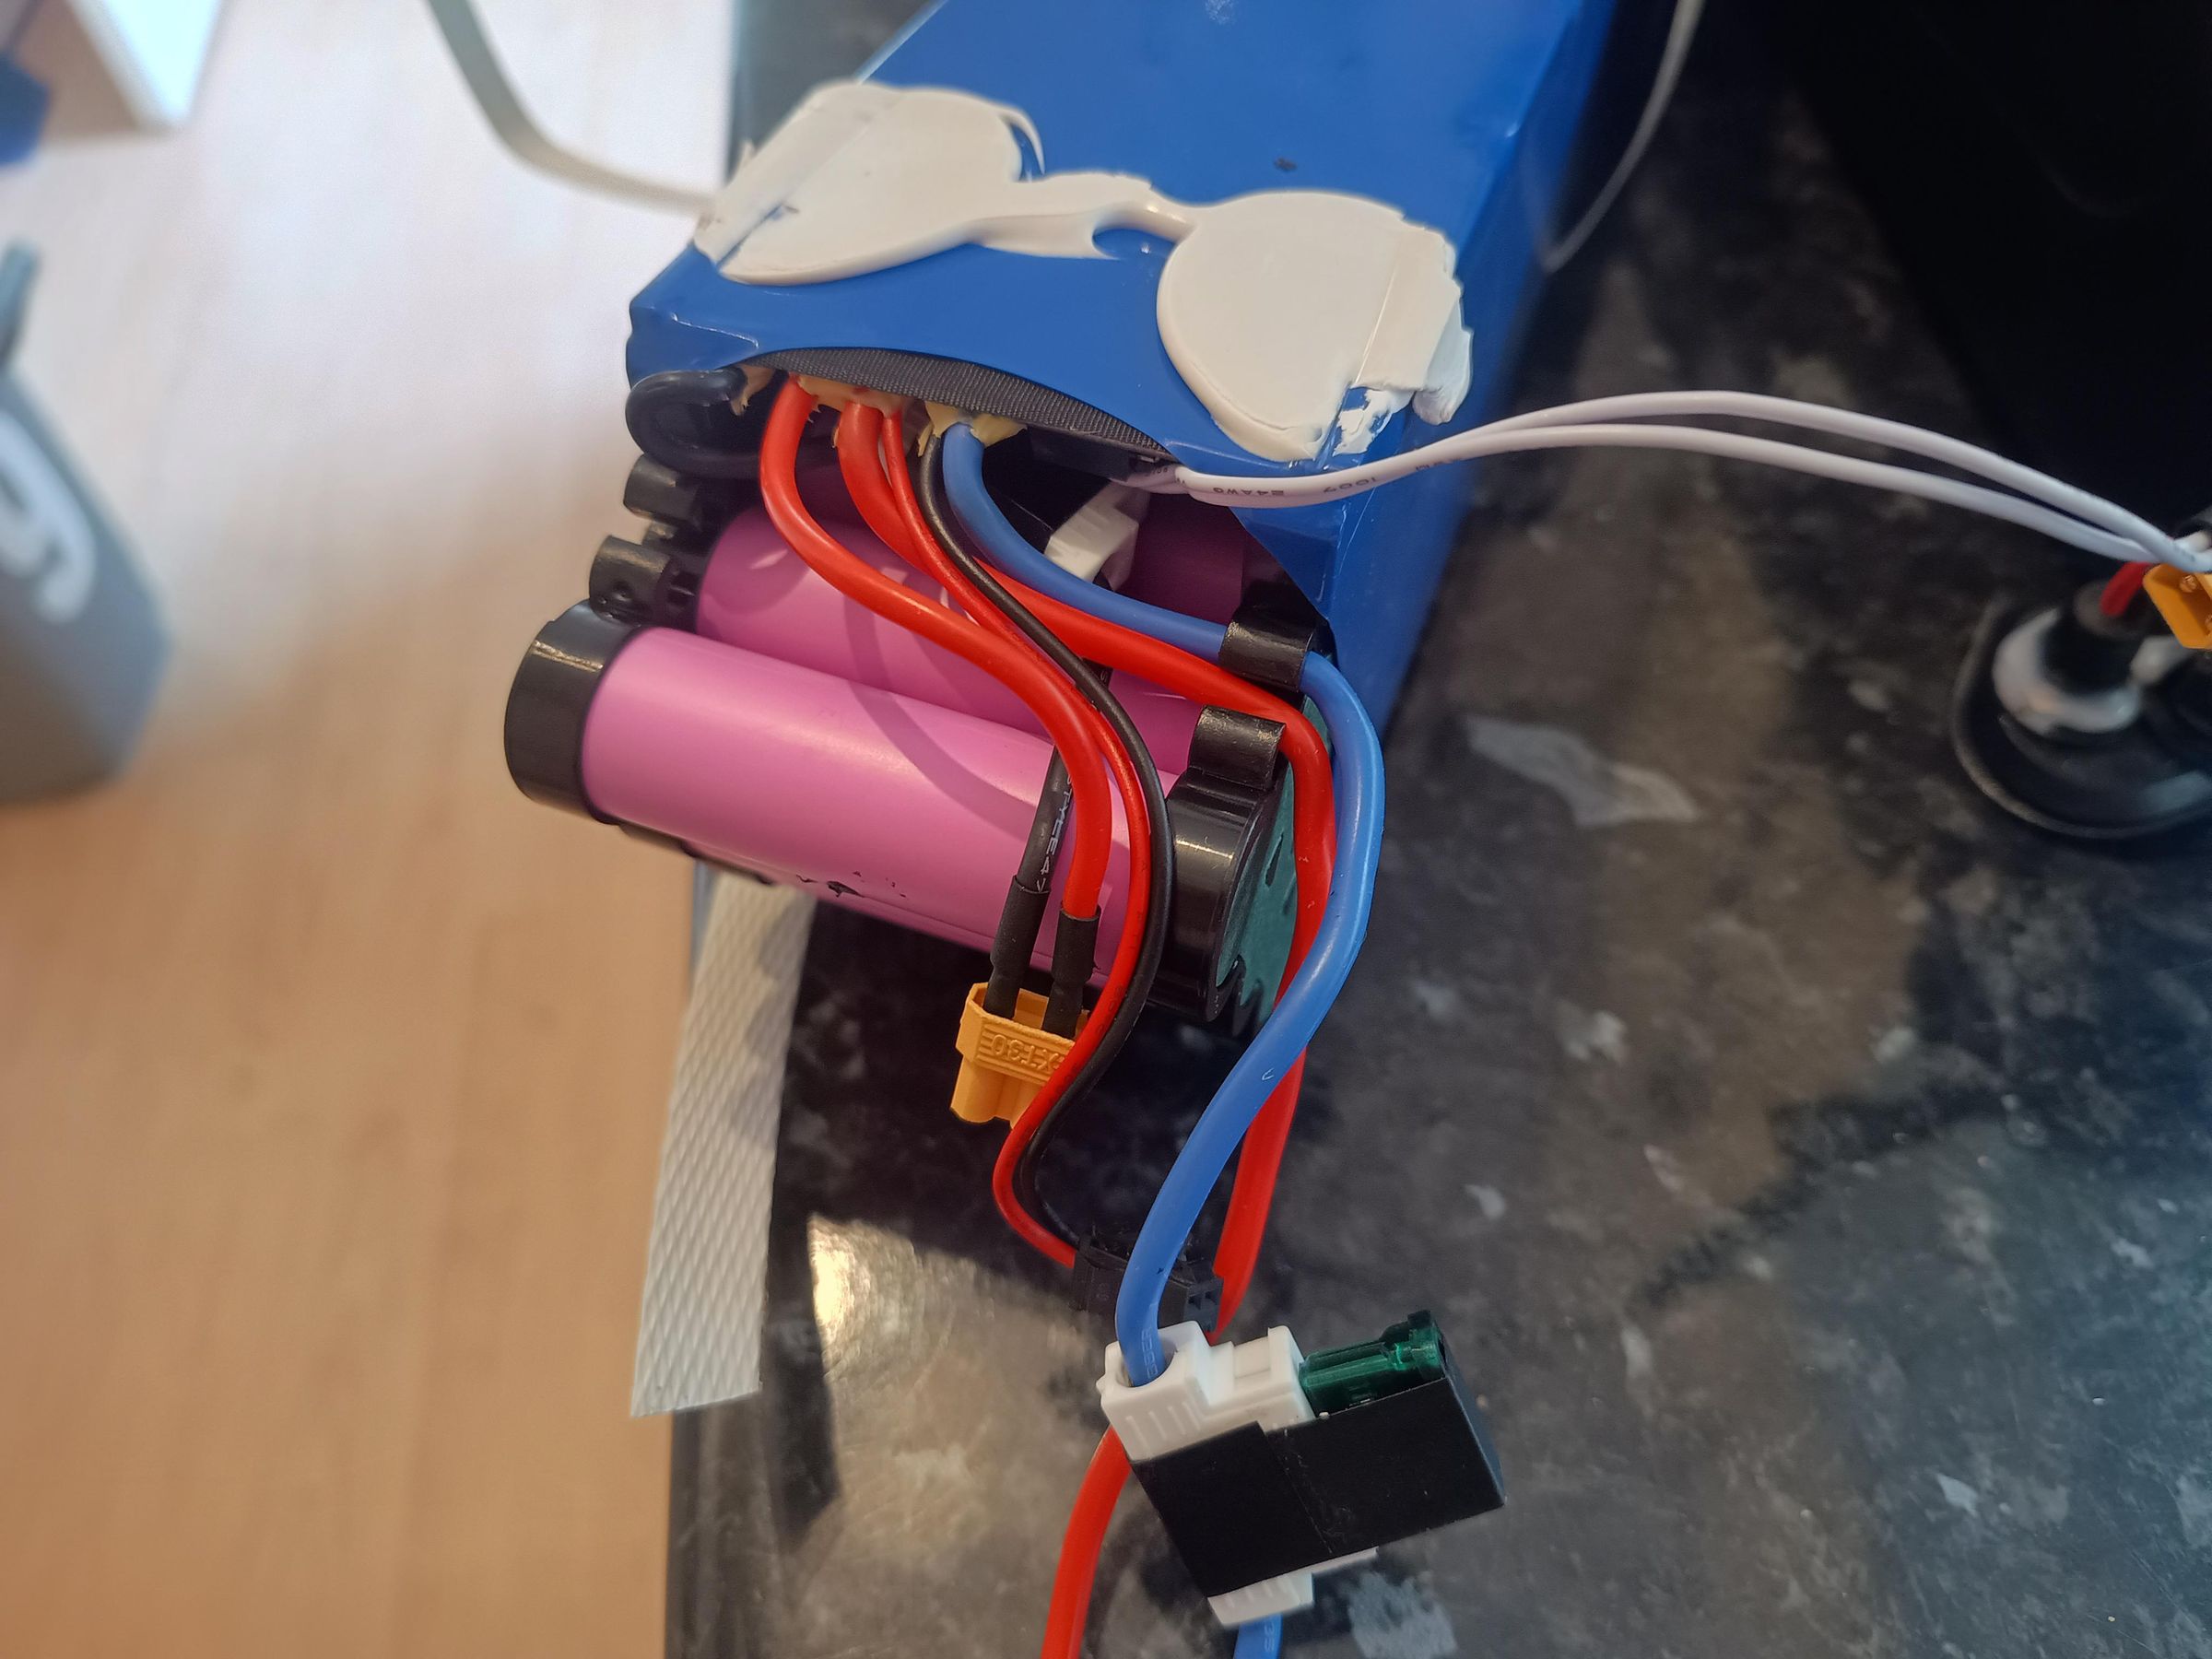
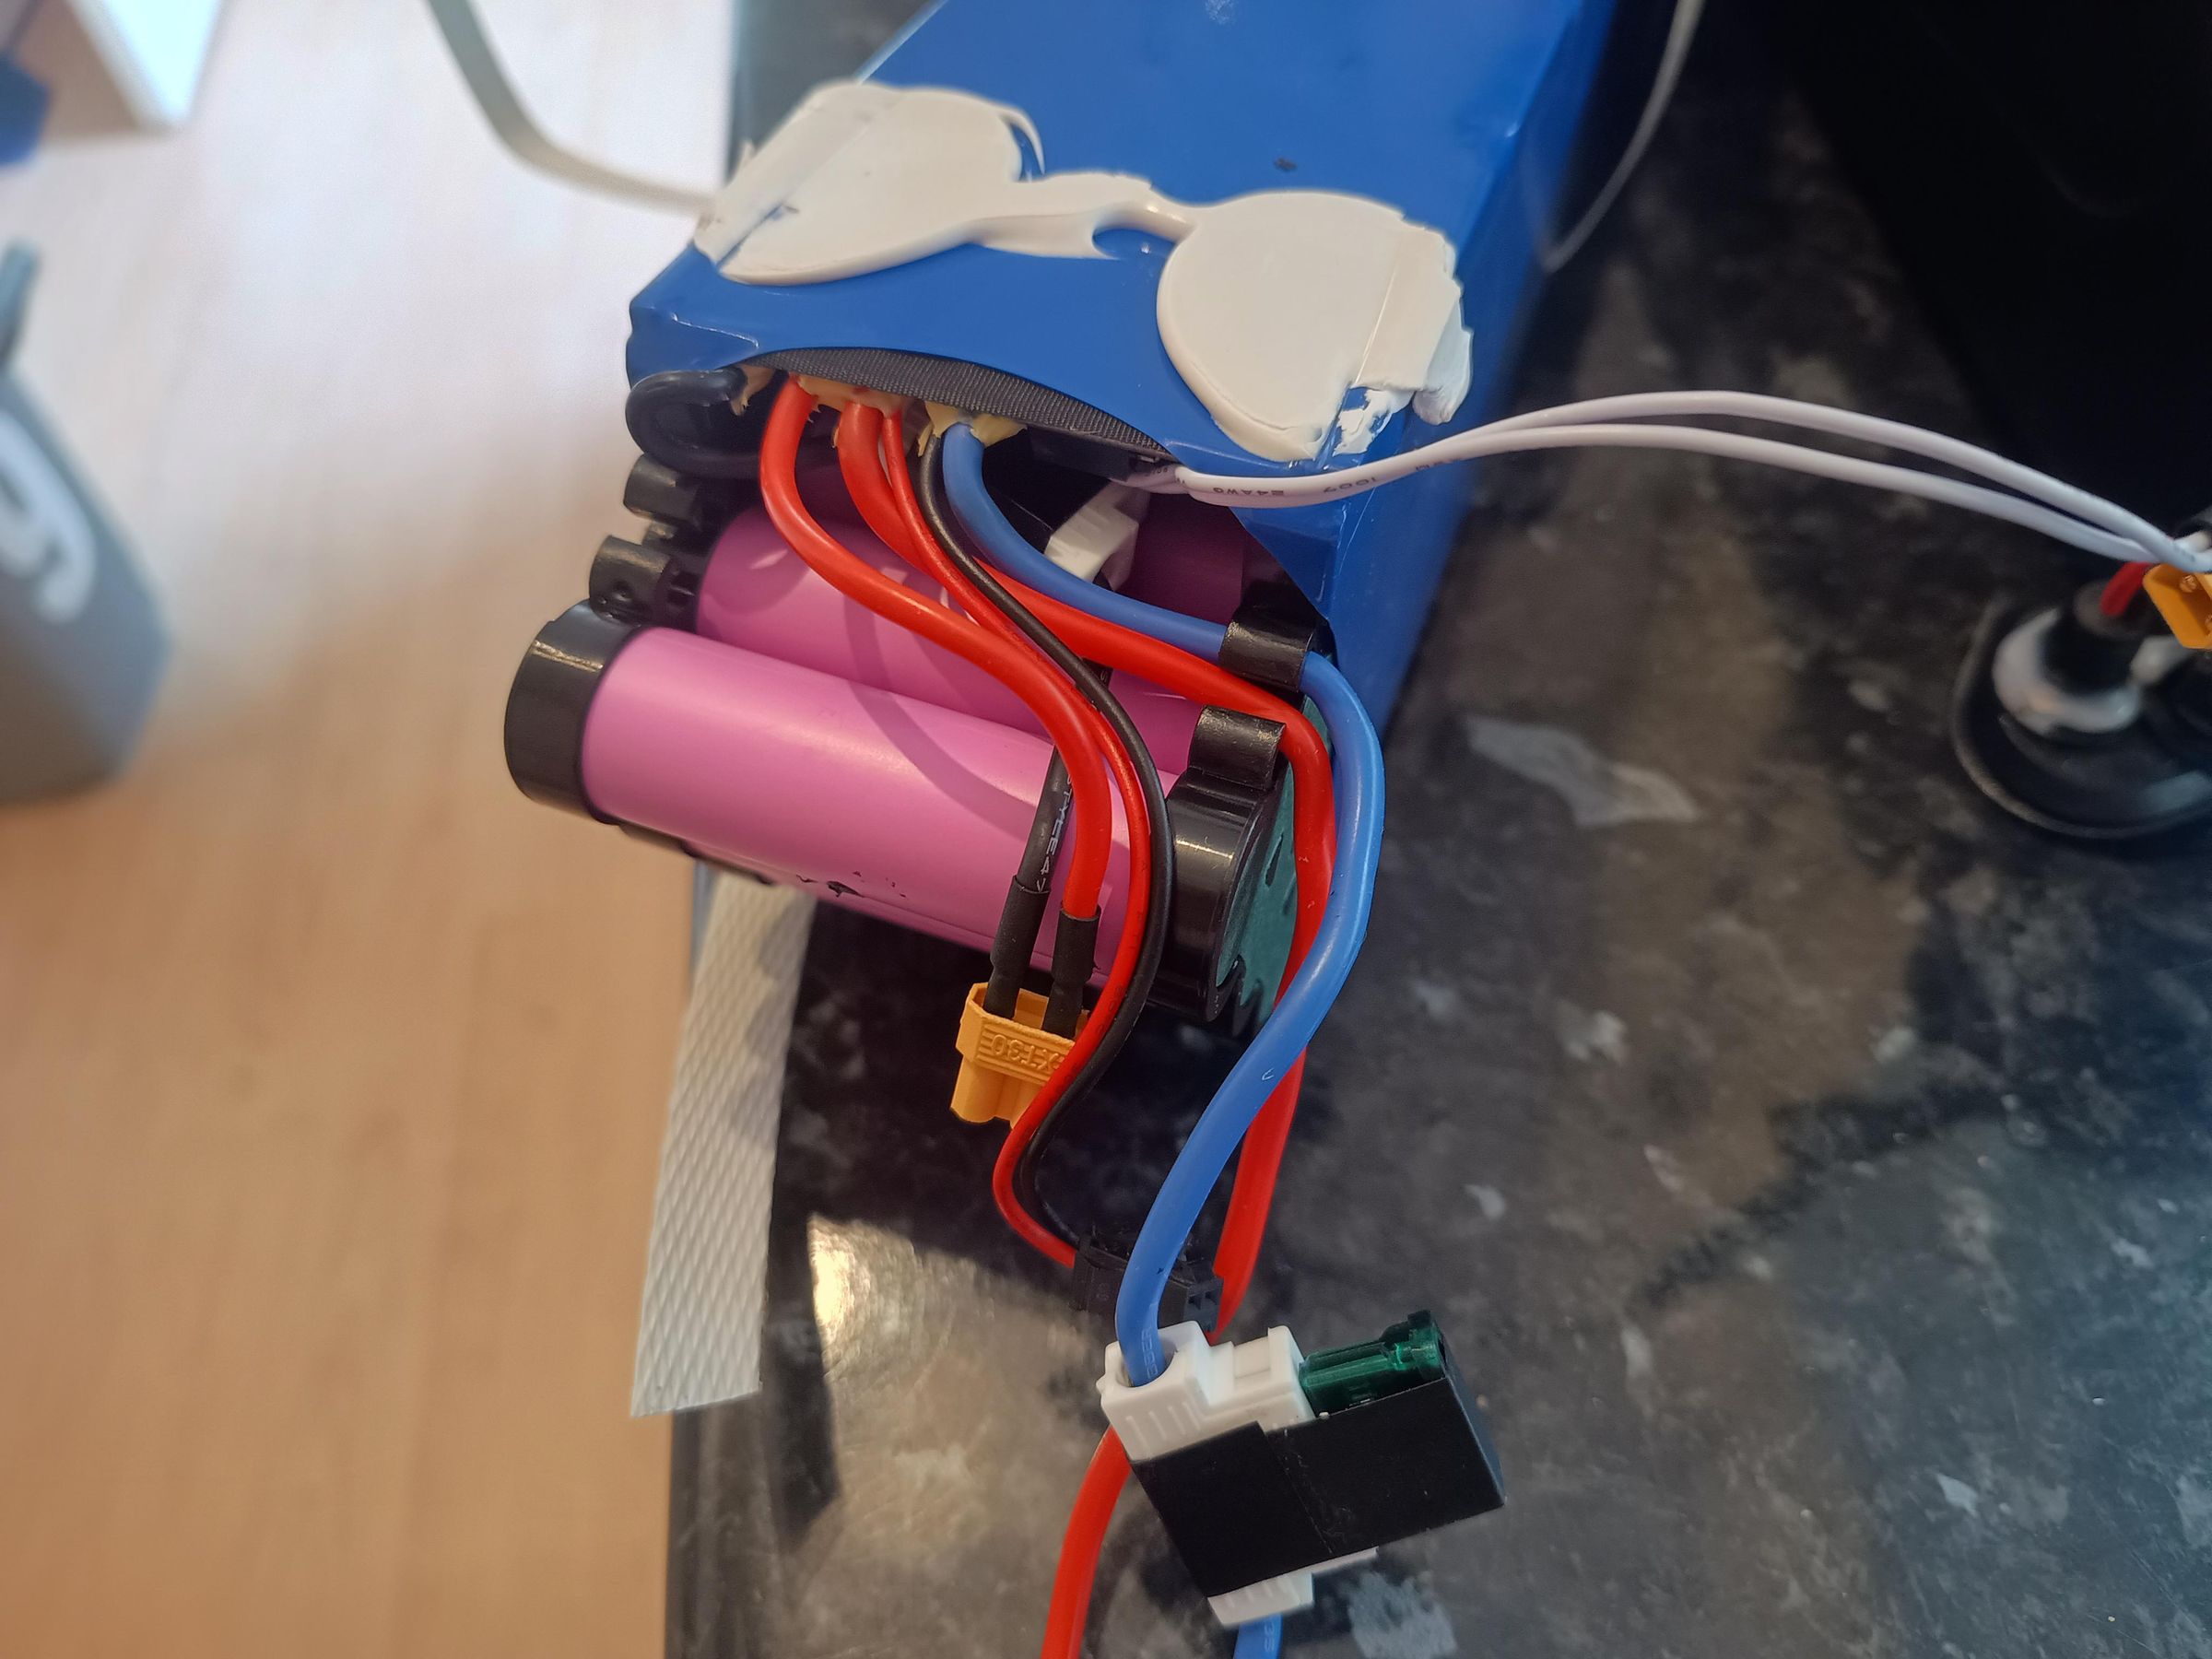
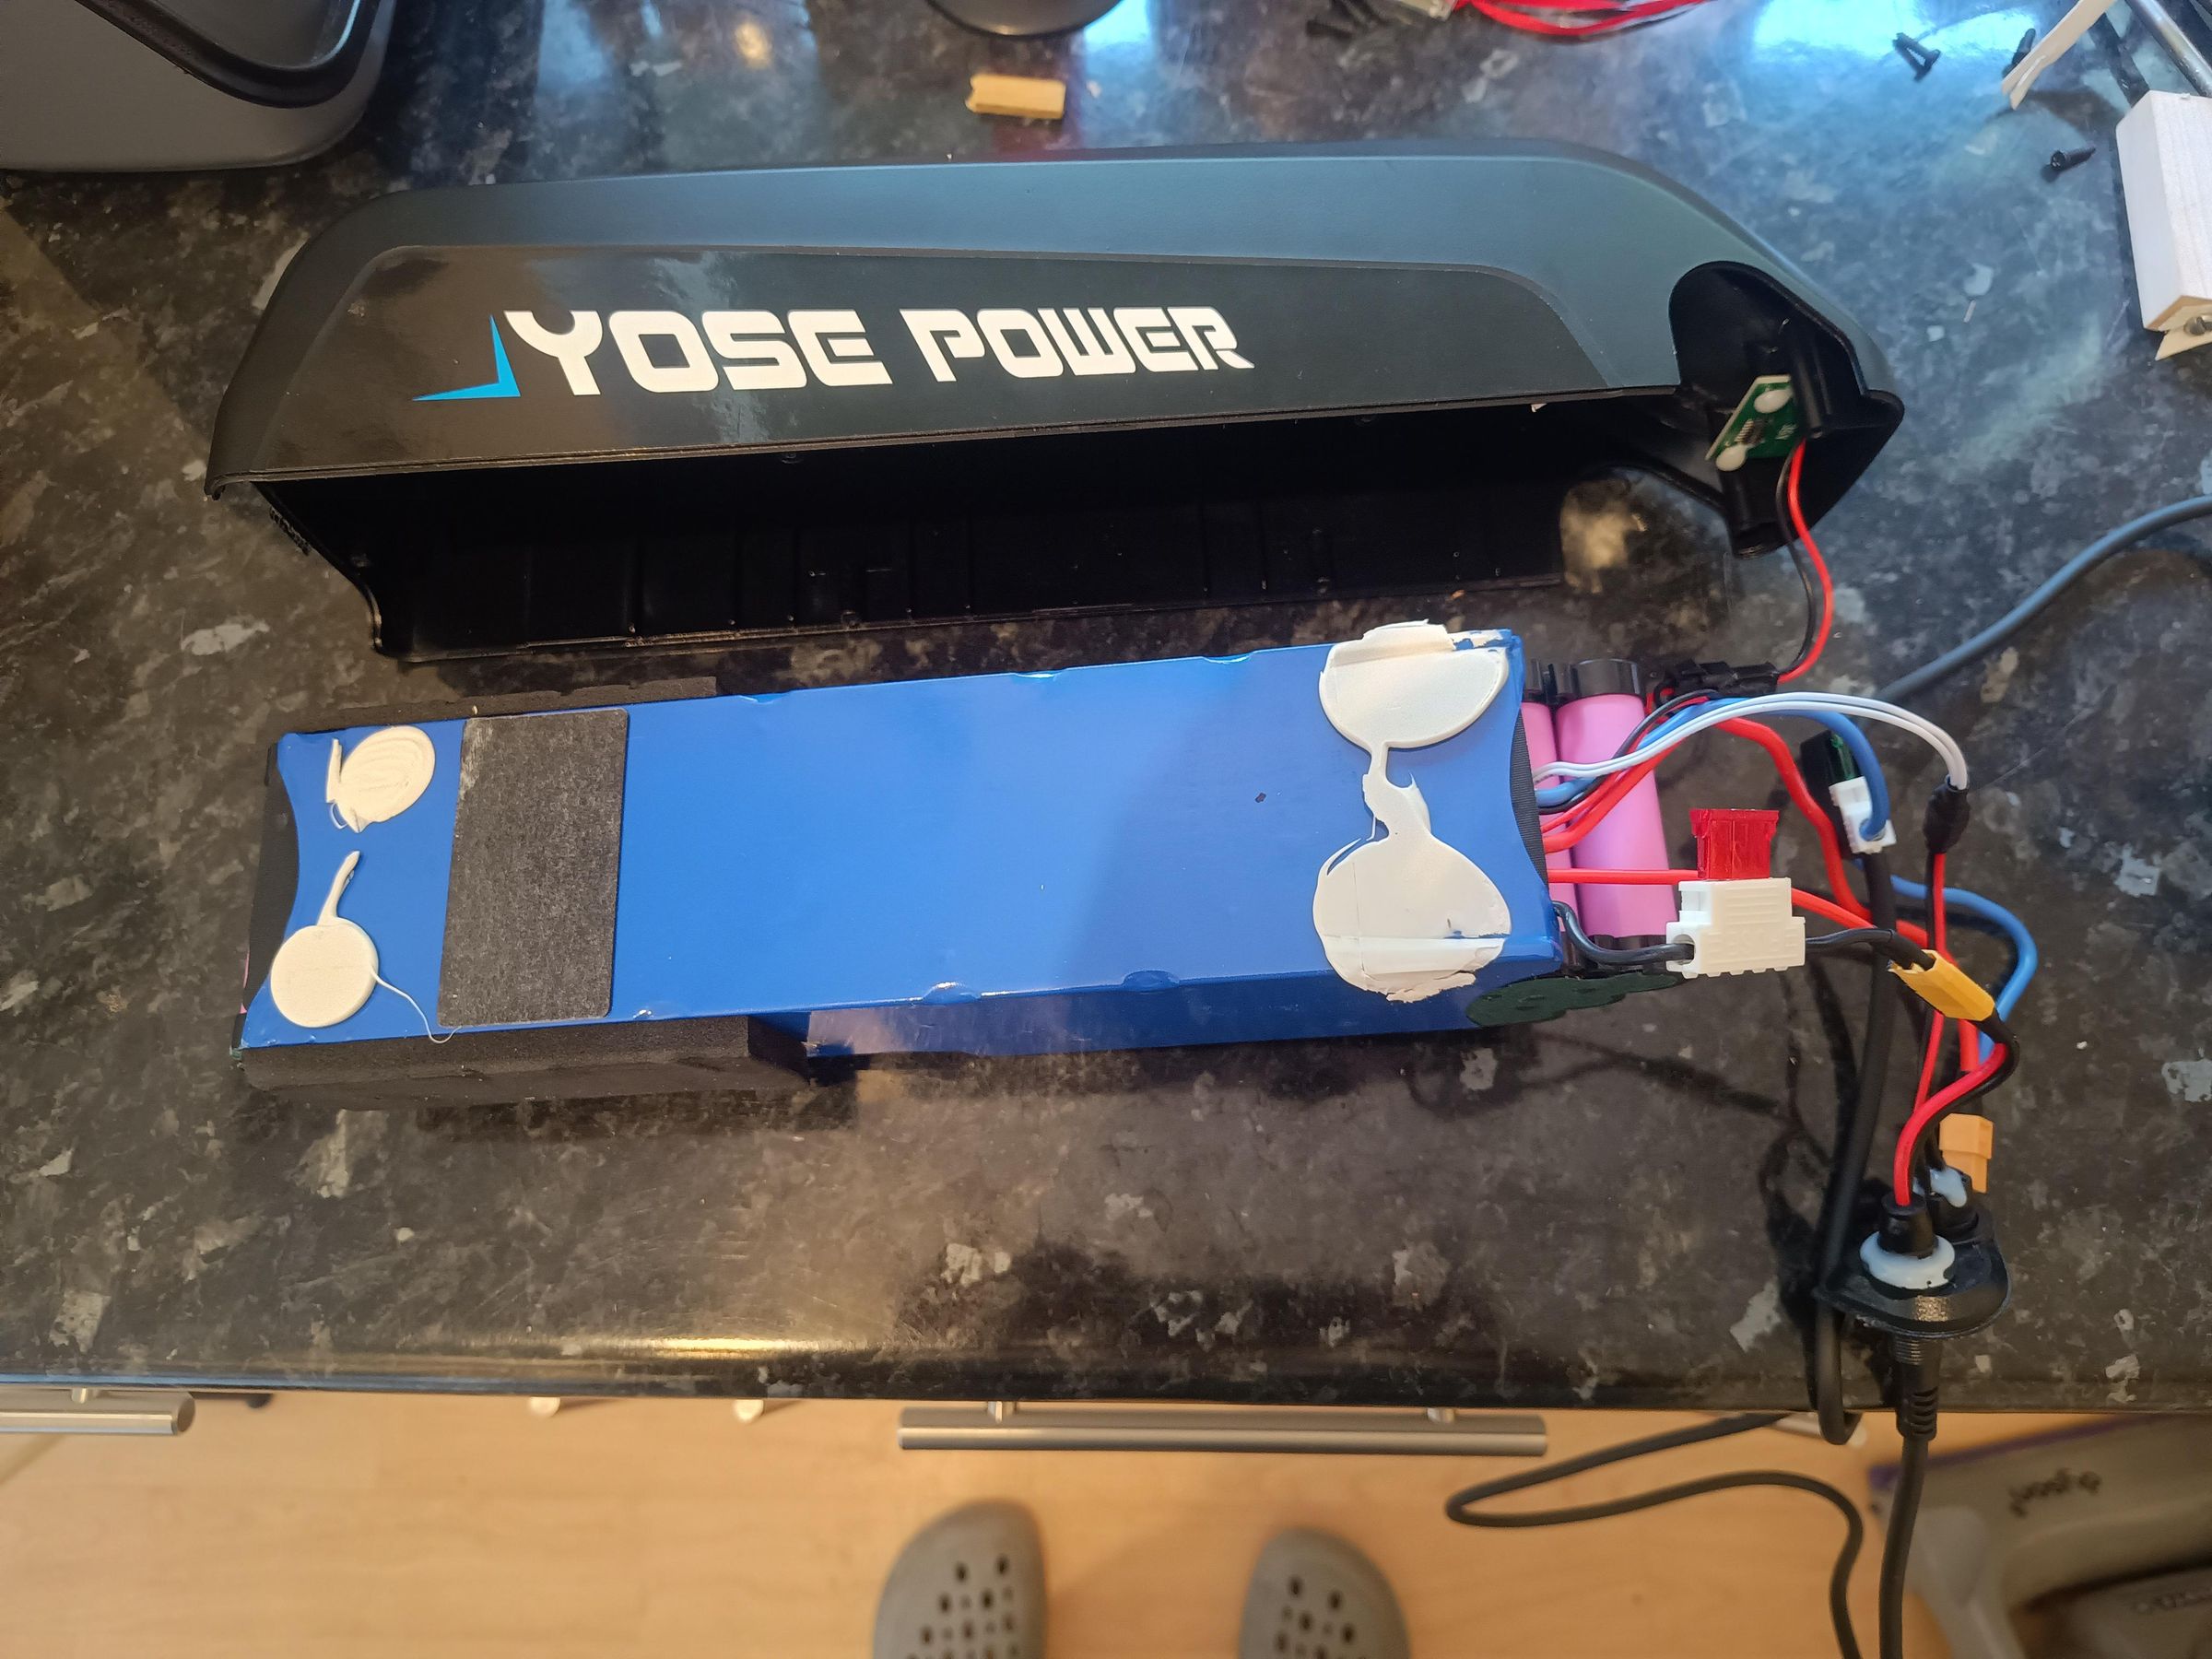
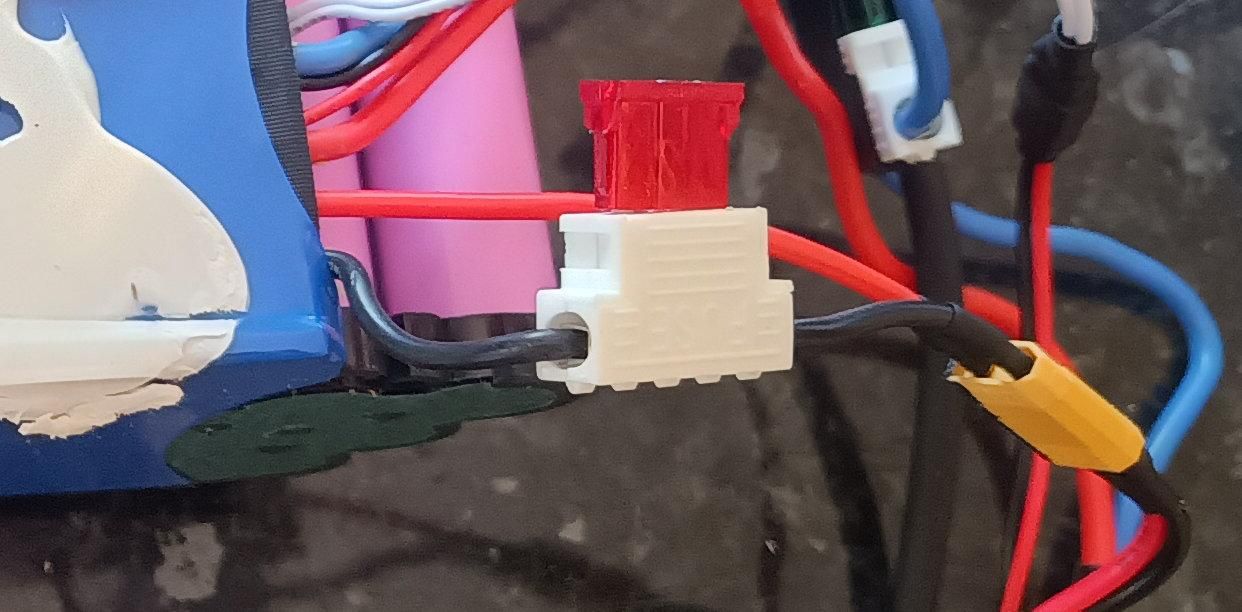
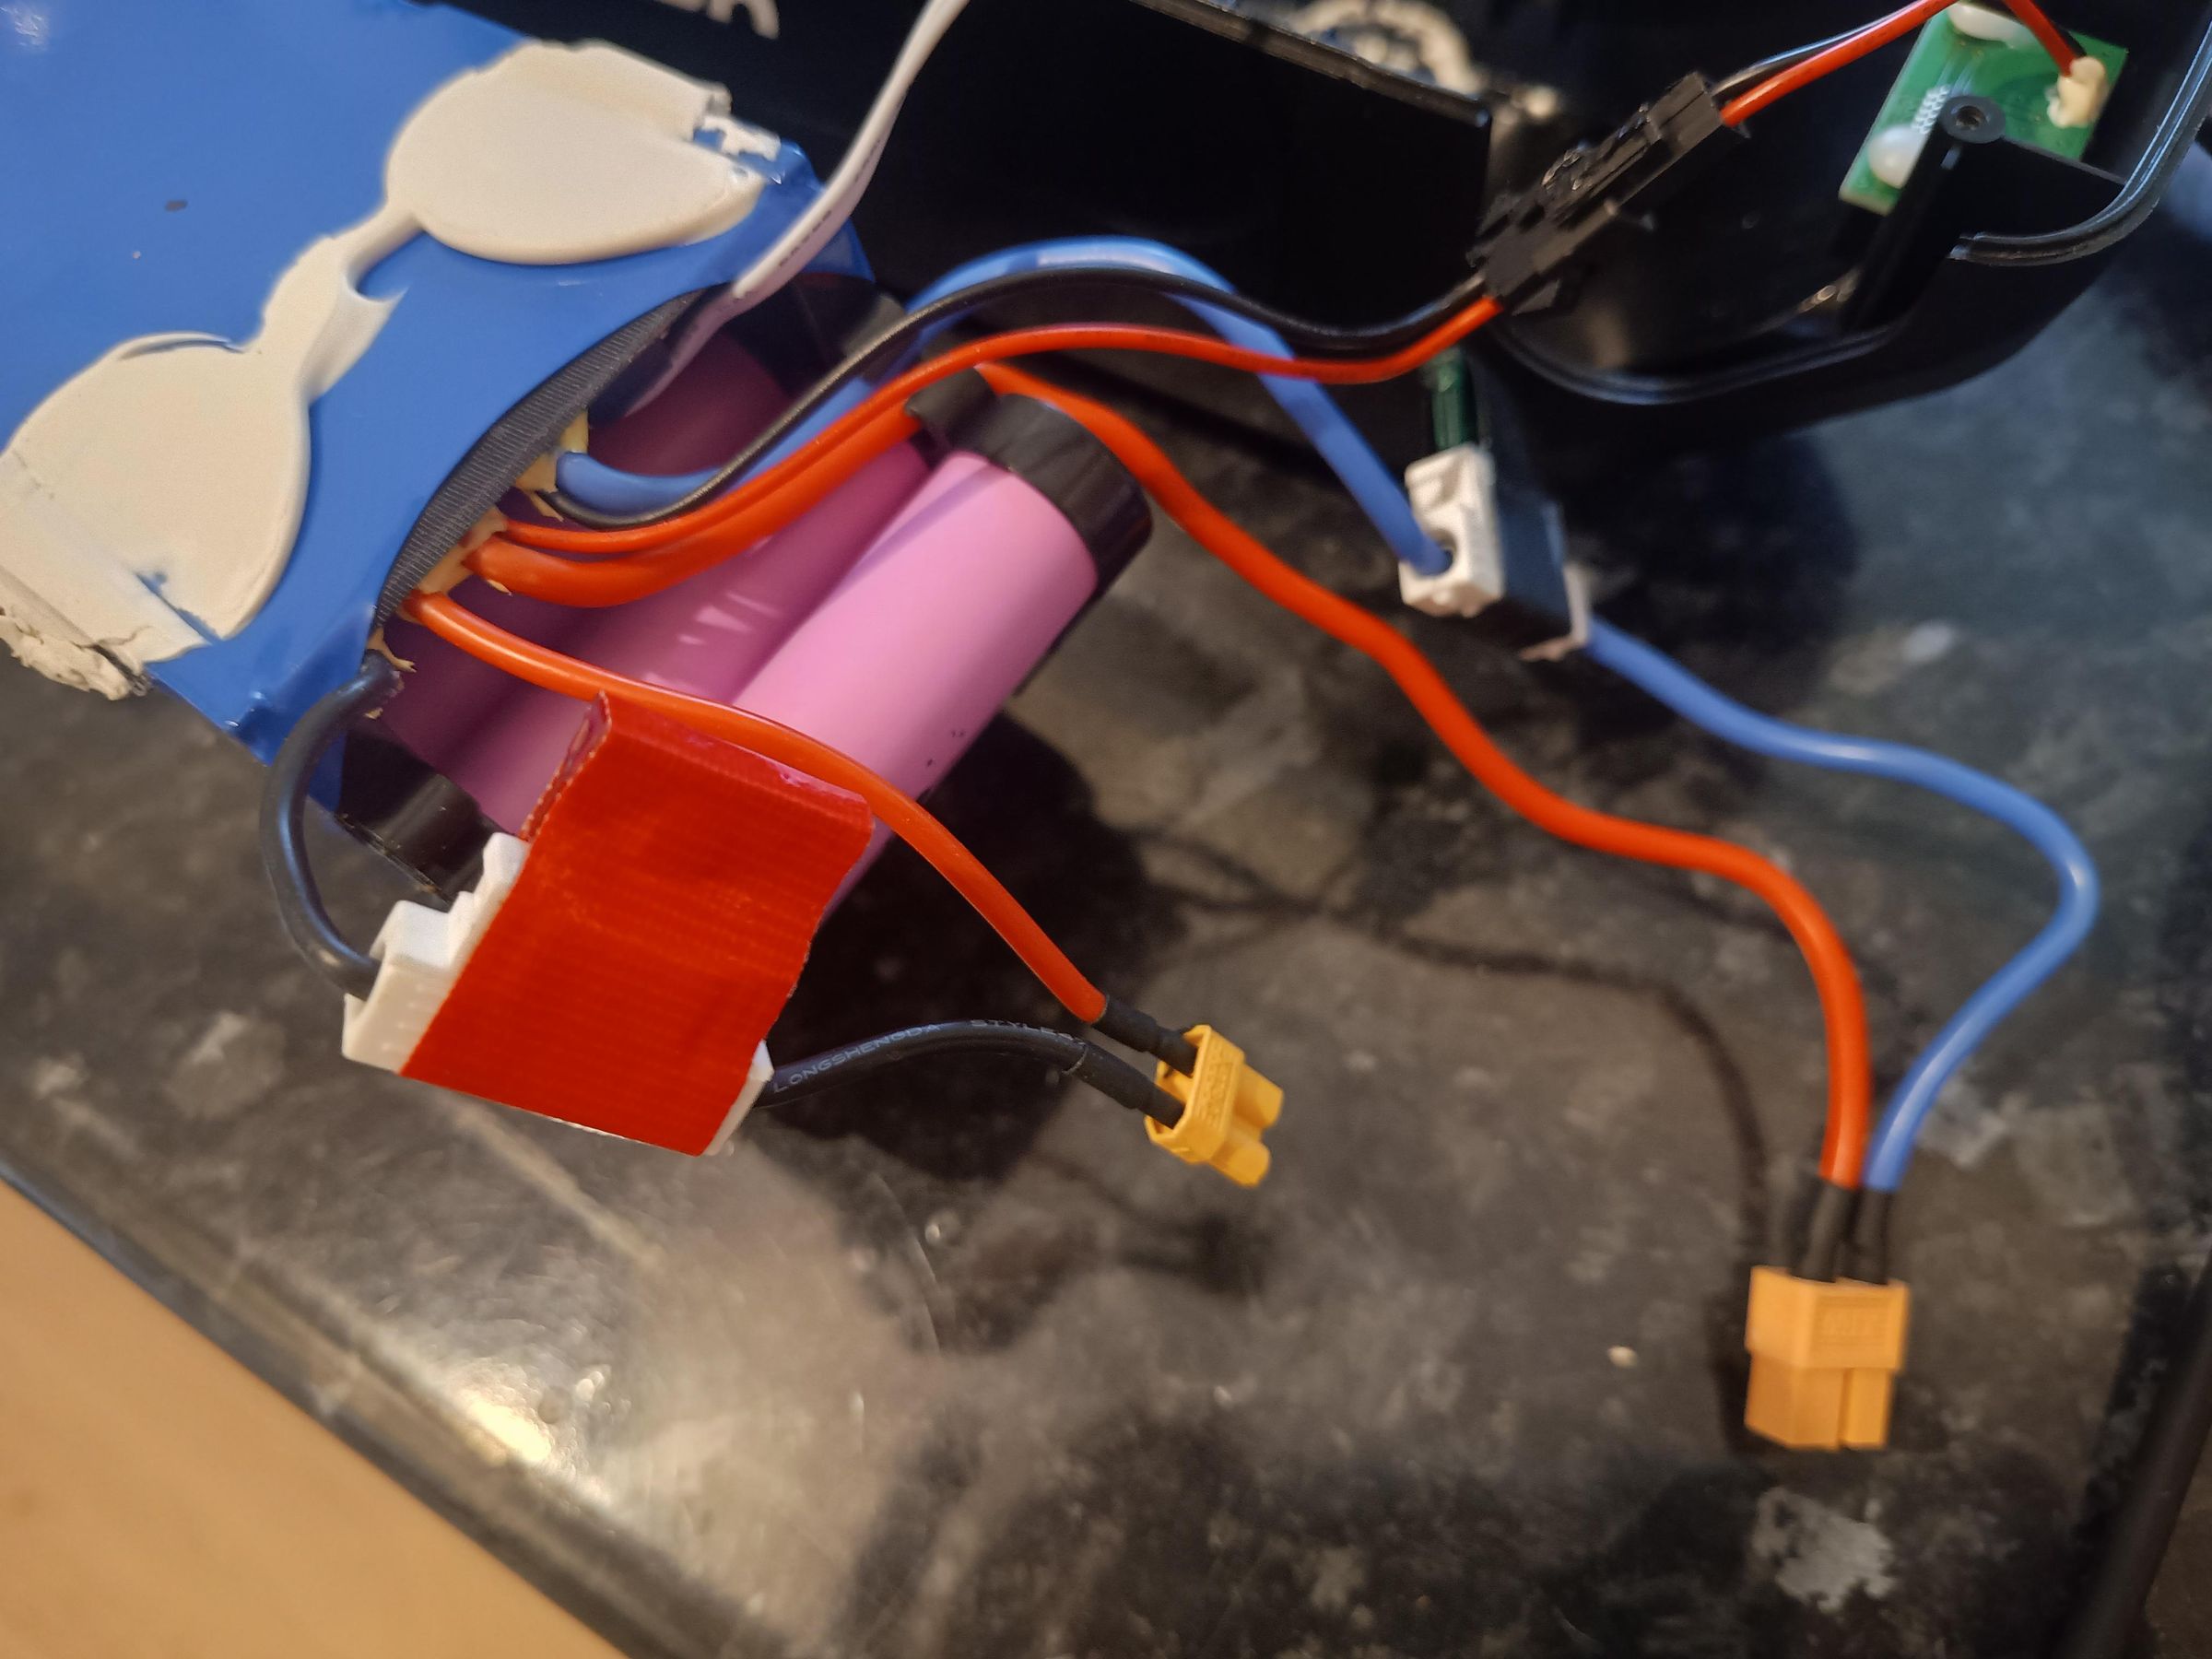
The first photo shows how the wires were positioned before I did anything. The main power fuse is clearly visible in the thick blue lead, but the charging fuse (a 10A automotive fuse) is tucked away inside barely visible.
Pulling the wires out from inside the cell-pack reveals the charging fuse (which was covered in black tape before I took the photo). It is a red automotive fuse plugged into a white socket - see the close-up. I replaced the fuse and re-covered the fuse in red tape (there is some metalwork on the fuse which could touch something else; I think the tape is mainly there to stop that happening, rather than to hold the fuse in).
Finishing the Repair
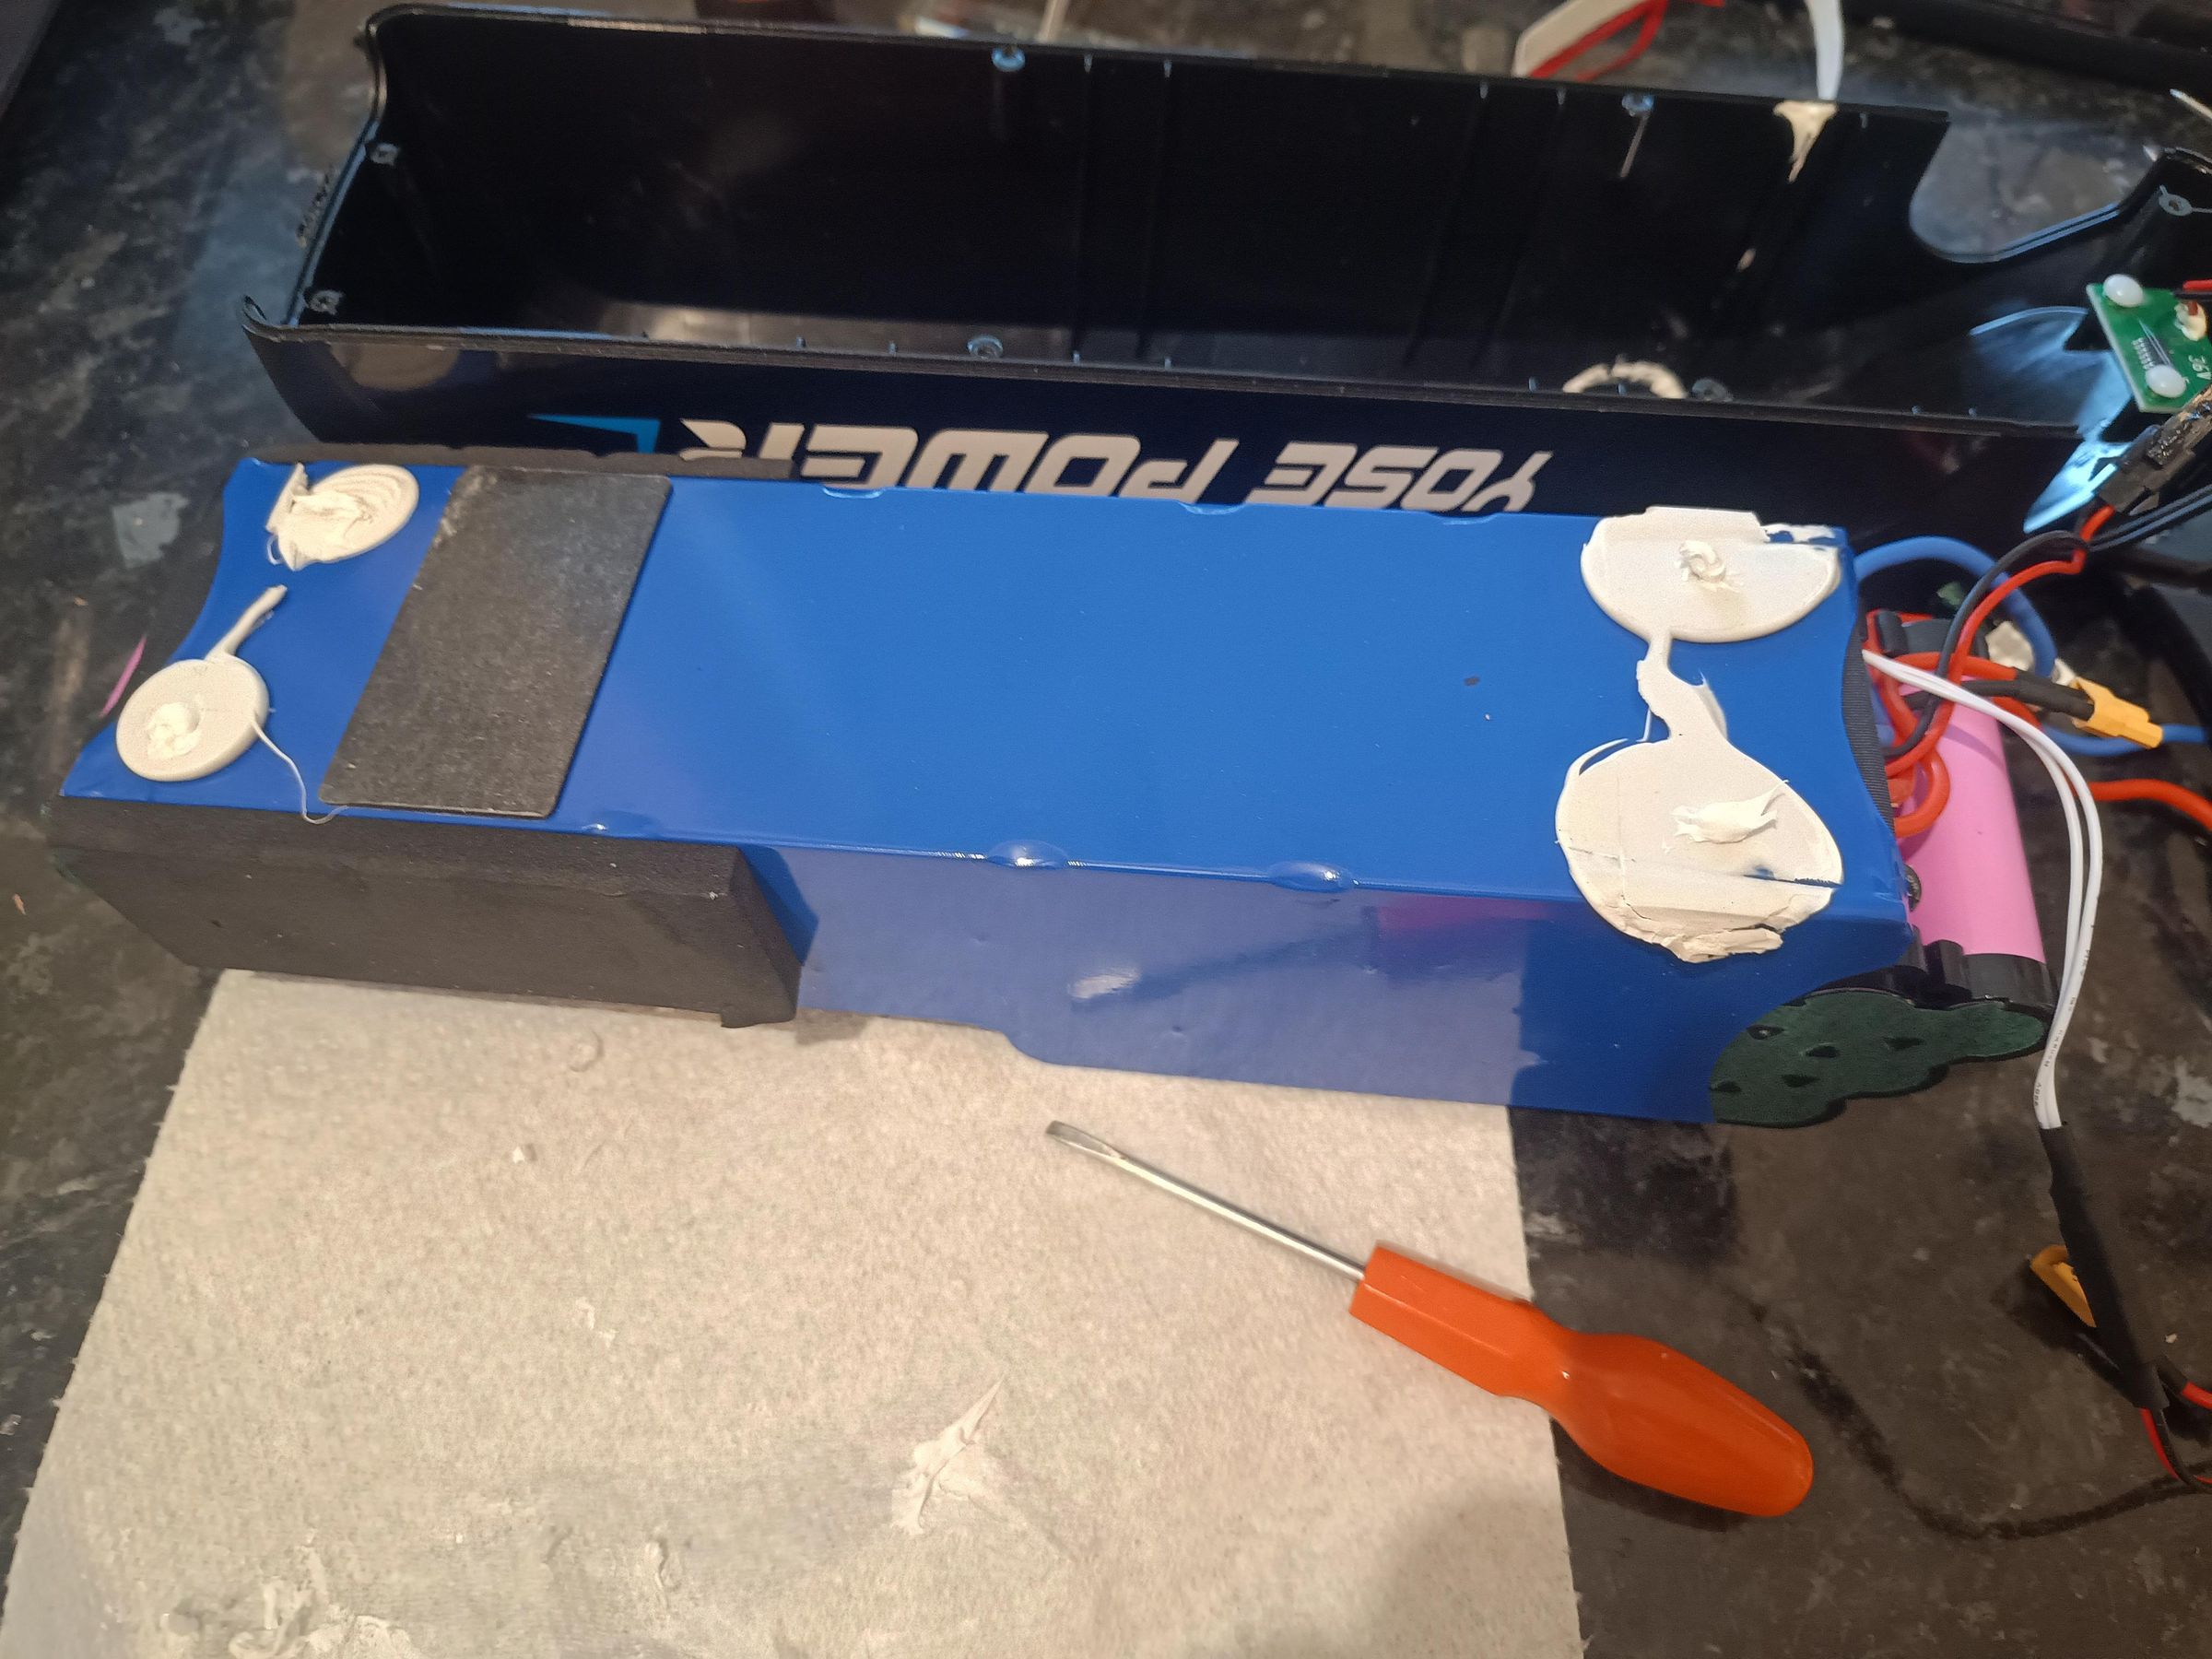
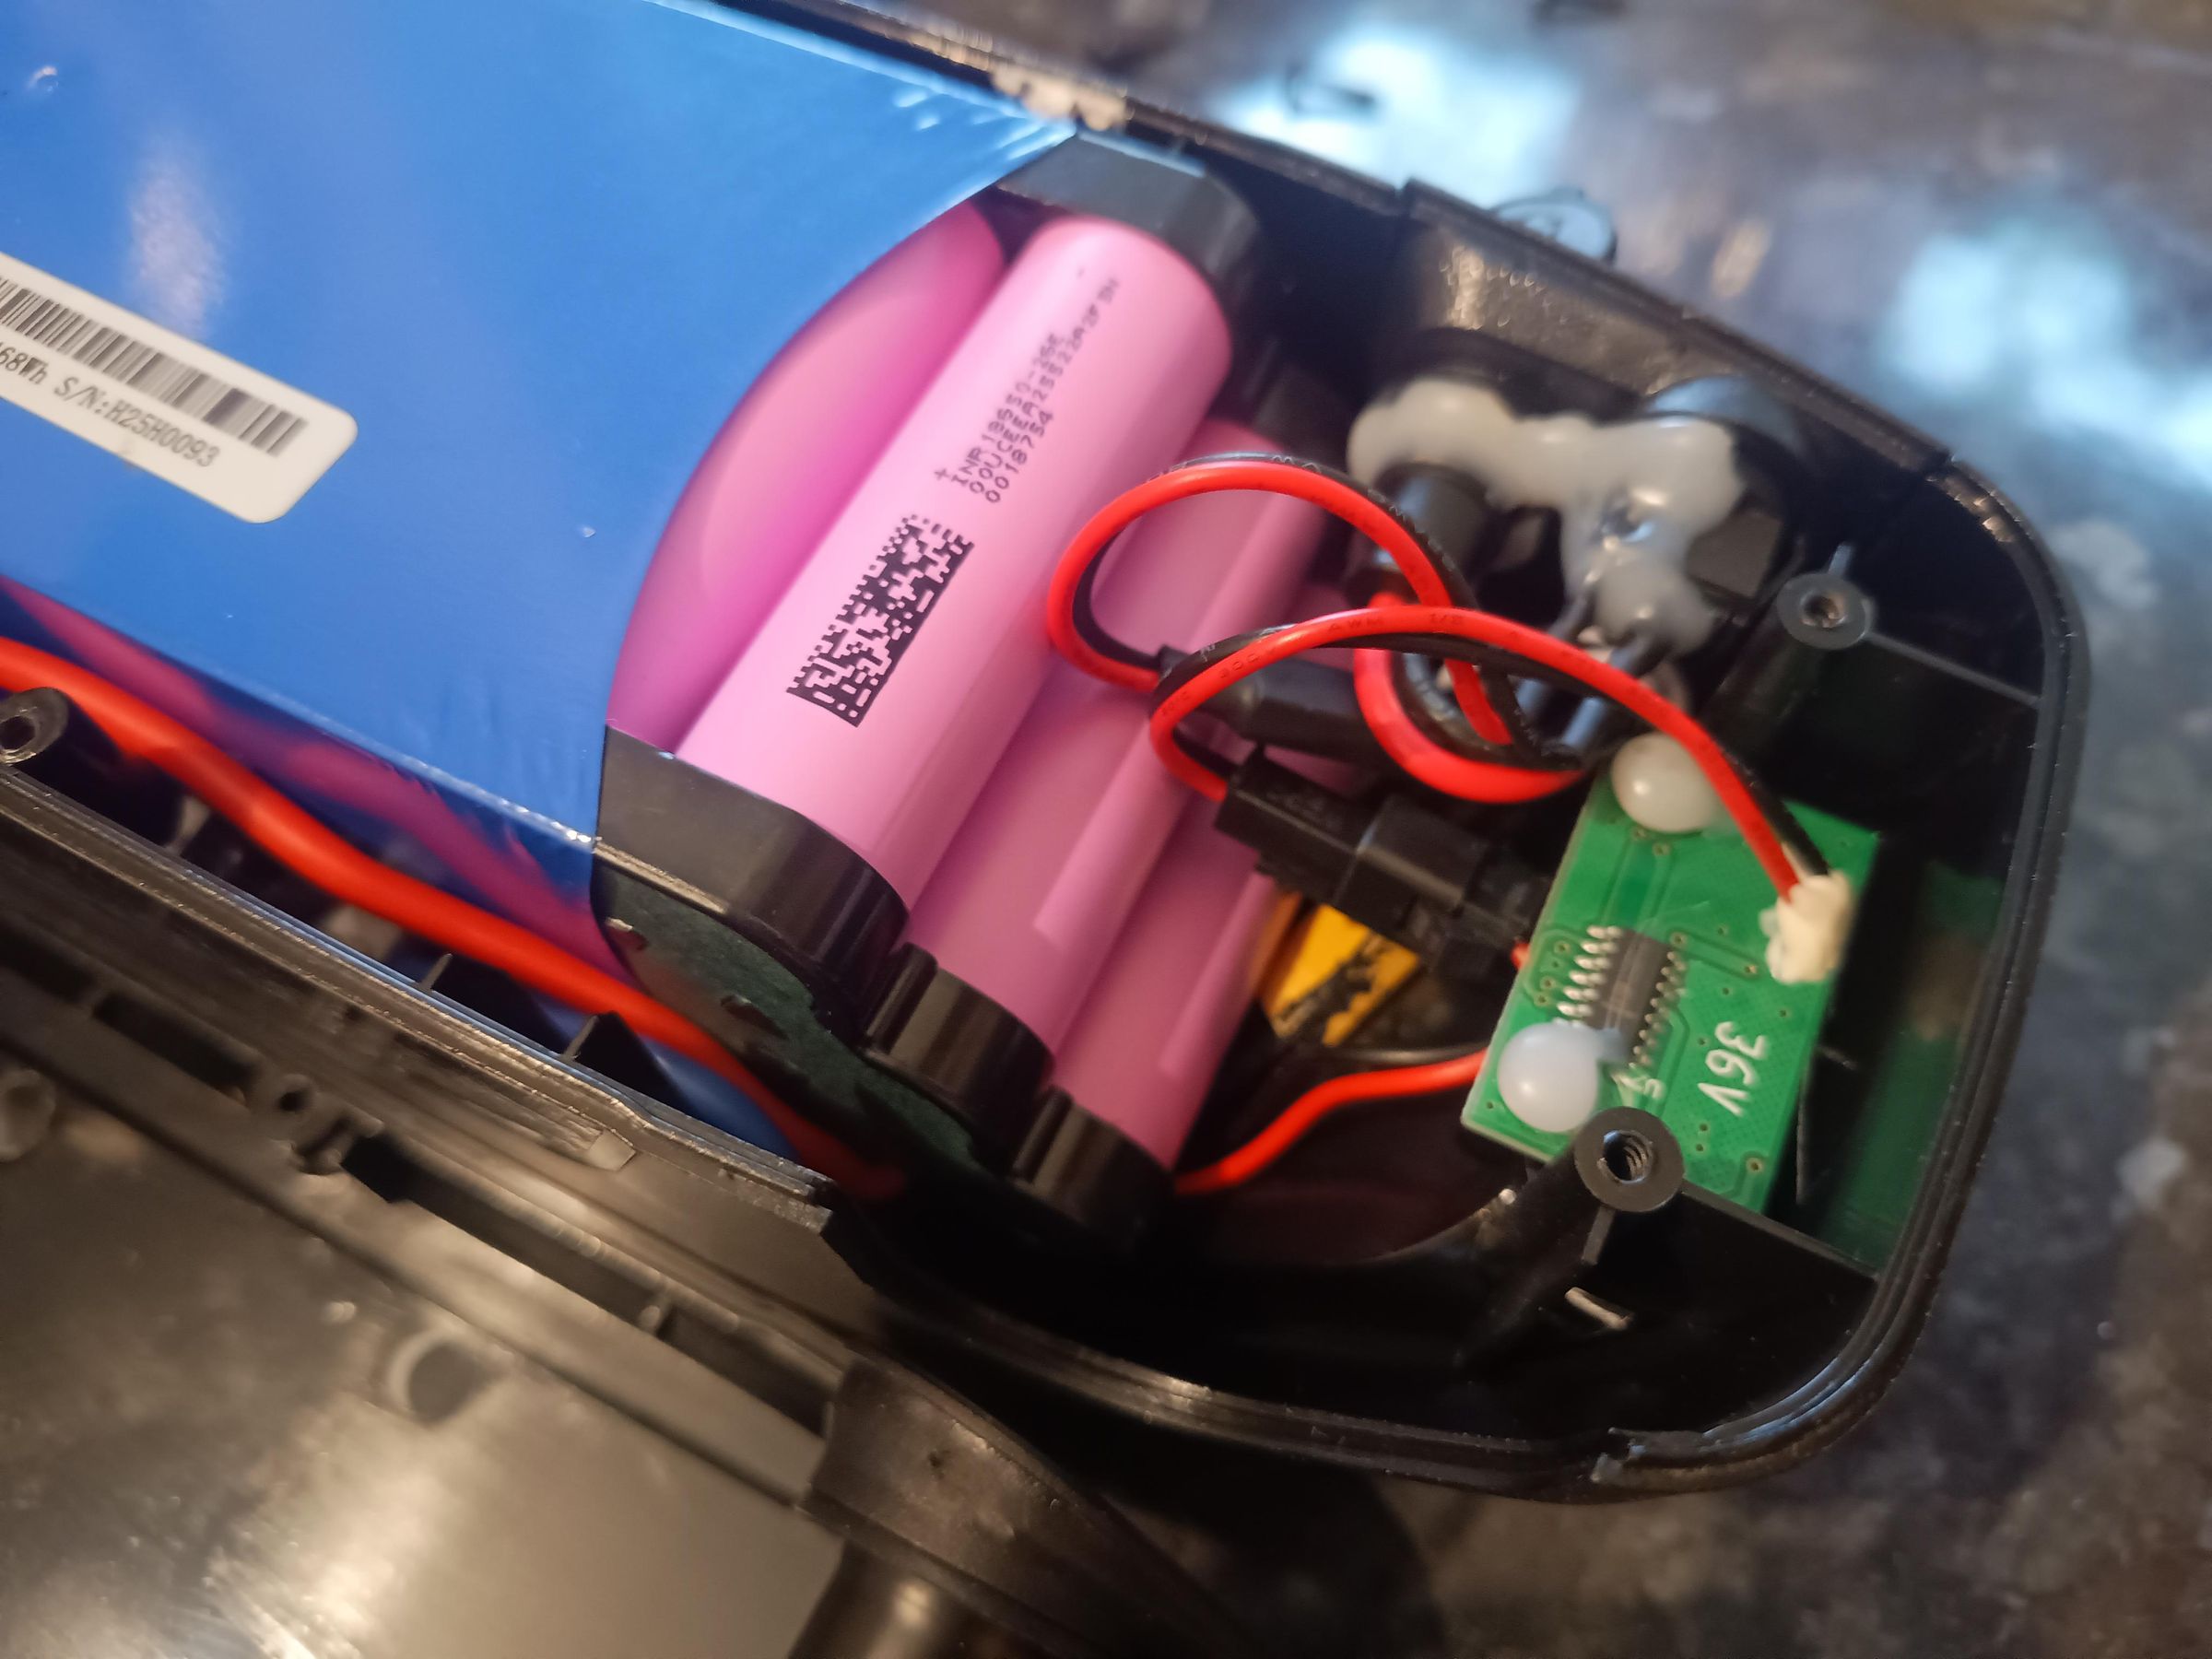
I put a small drop of silicon sealant on each of the original sealant blobs, then replaced the cell-pack, making sure that there was space for the mechanical lock to fit in by the side of the wires.
It was a little fiddly aligning the two cut-out panels (the one surrounding the lock and the other surrounding the switch and charging port) so that they fitted perfectly into their respective slotted-housing. I failed at first and couldn't screw the lid on properly.
Before assembly, I connected the charger up and kept a close eye on the charging progress - frequently checking the temperature of the cells (cold) and the temperature of the charger (hot). I guess that there might be a chance of a problem rearing it's head at this stage, so I would advise being careful - Lithium cells need full respect.
To be honest, the whole process was easy - except for breaking the glue-bonds!
I'm impressed by the Yose power battery, their efficient service and the helpfulness of their repair man (Richard). There are so many rip-off merchants, I really feel that I 'struck lucky' with Yose. Thank you.
Needless to say, I paid in full for the battery myself (£149 in April 2026) and have not received any reward from them or anyone else for writing this - it is SO rare to get good service nowadays, they need congratulating.